Getting Started with Mobile Angular UI

AngularJS is one of the many buzz frameworks in mobile and web development. We’ll create an app using Mobile Angular UI, a framework to develop HTML 5 mobile apps that combines AngularJS with Bootstrap. It provides essential mobile components missing in Bootstrap 3 such as switches and overlays etc. It has no dependency on jQuery but instead relies on libraries such as fastclick.js and overthrow.js to achieve a better mobile experience.
Key Takeaways
- Mobile Angular UI is a framework for developing HTML 5 mobile apps, combining AngularJS with Bootstrap and providing essential mobile components missing in Bootstrap 3, such as switches and overlays. It does not depend on jQuery but uses libraries like fastclick.js and overthrow.js for a better mobile experience.
- The tutorial demonstrates the development of a responsive mobile application using Mobile Angular UI, starting with the creation of a home screen and progressing to the user home page. The tutorial expects basic knowledge of AngularJS and Bootstrap from the reader.
- The tutorial explains how to create an app using Firebase as the backend, including user authentication and redirection to a user home page upon successful sign-in. It also covers the implementation of a sign-up interface and logout functionality.
- The next tutorial promises to further develop the application by adding a SignUp interface for adding items to a bucket list and integrating Ladda into the app. It also plans to explore other components provided by Mobile Angular UI.
Getting Started
A demo of the app we’ll be creating is available on Heroku. The username is sam@sam.com and password is sam. Source code is available on GitHub.
In this tutorial, we’ll see how to develop a responsive mobile application using Mobile Angular UI. This tutorial expects the reader to have a basic knowledge of AngularJS and Bootstrap.
Download and install Mobile Angular UI as shown below:
cd mcasimir-mobile-angular-ui-90b1528
npm install
grunt
The version number in the folder path above may vary.
Point your browser to http://localhost:3000/ and you should see a demo of Mobile Angular UI.
Creating a home screen
Let’s take a look inside the Mobile Angular UI folder that we downloaded. Files related to the sample demo are inside the demo folder. In addition to the html and css files, we have a demo.js file. If we open up demo.js we can see the AngularJS code.
If this file seems a little complicated, don’t worry. We’ll try to create our own little app from scratch and decipher what is inside demo.js at the same time.
To get started, create a folder called BucketApp inside the mcasimir-mobile-angular-ui-90b1528 folder. Create an html file called index.html. Add in the flowing code:
<!DOCTYPE html>
<html>
<head>
    <meta charset="utf-8" />
    <base href="/BucketApp/" />
    <title>Bucket App</title>
    <meta http-equiv="X-UA-Compatible" content="IE=edge,chrome=1" />
    <meta name="apple-mobile-web-app-capable" content="yes" />
    <meta name="viewport" content="user-scalable=no, initial-scale=1.0, maximum-scale=1.0, minimal-ui" />
    <meta name="apple-mobile-web-app-status-bar-style" content="yes" />
    <link rel="shortcut icon" href="/favicon.png" type="image/x-icon" />
    <link rel="stylesheet" href="/dist/css/mobile-angular-ui-hover.min.css" />
    <link rel="stylesheet" href="/dist/css/mobile-angular-ui-base.min.css" />
    <link rel="stylesheet" href="/dist/css/mobile-angular-ui-desktop.min.css" />
    <script src="//ajax.googleapis.com/ajax/libs/angularjs/1.2.15/angular.min.js"></script>
    <script src="//ajax.googleapis.com/ajax/libs/angularjs/1.2.15/angular-route.min.js"></script>
    <script src="//ajax.googleapis.com/ajax/libs/angularjs/1.2.15/angular-touch.min.js"></script>
    <script src="/dist/js/mobile-angular-ui.min.js"></script>
    <script src="BucketApp.js"></script>
</head>
<body ng-app="AngularUIBucketApp">
 // App Data will be here shortly :)
</body>
</html>
Take note of the ng-app directive in the body. Next create BucketApp.js which is already included in index.html. Add this code:
var app = angular.module('AngularUIBucketApp', [
    "ngRoute",
    "ngTouch",
    "mobile-angular-ui"
]);
app.config(function($routeProvider, $locationProvider) {
    $routeProvider.when('/', {
        templateUrl: "signIn.html"
    });
});
We have established two things in the code above. First, we have registered the mobile-angular-ui module. We have declared the root route for our app as signIn.html. Create signIn.html and leave it blank for the time being. In index.html place the following code inside the body tags which will serve as the basic template.
<div class="app">
    <div class="navbar navbar-app navbar-absolute-top">
        <div class="navbar-brand navbar-brand-center" yield-to="title">
            <span>Bucket List App</span>
        </div>
        <div class="btn-group pull-right" yield-to="navbarAction">
            <div class="btn btn-navbar">
                <i class="fa fa-plus"></i> New
            </div>
        </div>
    </div>
    <div class="navbar navbar-app navbar-absolute-bottom">
        <div class="btn-group justified">
            <a href="#" class="btn btn-navbar btn-icon-only"><i class="fa fa-home fa-navbar"></i></a>
            <a href="#" class="btn btn-navbar btn-icon-only"><i class="fa fa-list fa-navbar"></i></a>
        </div>
    </div>
    <div class="app-body">
        <ng-view class="app-content"></ng-view>
    </div>
</div>
In the above code most of the code is self explanatory. The last div may cause some confusion. It contains a ngView directive which renders the templates of the current route into index.html.
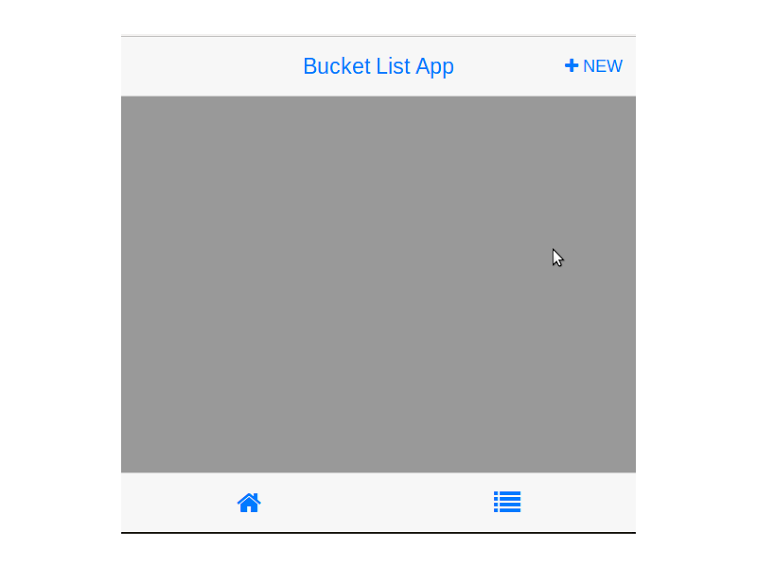
Restart the server, point your browser to http://localhost:3000/BucketApp/ and you should see the basic app template. Here is how it should look:
Next, inside our basic template we need to include a sign-in form. Open up signIn.html and include the following html :
<div class="scrollable">
    <div class="scrollable-content section">
        <form action="" id="" ng-submit="signin()">
            <div bs-panel title="">
                <input bs-form-control type="text" ng-model="user.username" label="" label-class="col-xs-3 col-sm-2 col-lg-1" class="col-xs-10 col-sm-11 col-lg-12" placeholder="Username" />
                <input bs-form-control type="password" ng-model="user.password" label="" label-class="col-xs-3 col-sm-2 col-lg-1" class="col-xs-10 col-sm-11 col-lg-12" placeholder="Password" />
                <button type="submit" id="btnSignIn" class="btn btn-primary" data-style="expand-right">
                    Sign In
                </button>
            </div>
        </form>
    </div>
</div>
A few things to note are the ngSubmit and ngModel directives in the html code. We have to bind the username and password input to $scope. On a form submit it validates the user and calls the signIn function. Let’s define it in BucketApp.js as shown below:
app.controller('MainController', ['$scope',
    function($scope) {
        // Initialized the user object
        $scope.user = {
            username: "",
            password: ""
        };
        // Sign In auth function
        $scope.signin = function() {
            var email = $scope.user.username;
            var password = $scope.user.password;
            if (email && password) {
                // Sign In Logic
            }
        }
    }
]);
Add the ngController directive to the body tag in index.html as shown below:
<body ng-app="AngularUIBucketApp" ng-controller="MainController">Before passing the username and password to the signin function, we need to check for empty values. We’ll make use of ngDisabled to enable/disable the SignIn button. Add the ng-disabled attribute to the SignIn button in signIn.html as shown below:
ng-disabled = "user.username==undefined||user.username=='' || user.password=='' || user.password==undefined"We’ll be using Firebase as our app’ backend. To use Firebase you first need to register for a free account. After registration, you’ll get a firebase url. In my case the firebase url is
https://burning-fire-1723.firebaseio.comInclude the following firebase scripts in index.html before BucketApp.js:
<script src="https://cdn.firebase.com/js/client/1.0.18/firebase.js"></script>
<script src="https://cdn.firebase.com/libs/angularfire/0.8.0/angularfire.min.js"></script>
<script src="https://cdn.firebase.com/js/simple-login/1.6.2/firebase-simple-login.js"></script>
We’ll be implementing a simple login using an email id and password. Include the firebase module in the application by replacing the code at the top of BucketApp.js with the below:
var app = angular.module('AngularUIBucketApp', [
    "ngRoute",
    "ngTouch",
    "mobile-angular-ui",
    "firebase"
]);
Next inject $firebaseSimpleLogin into our controller and define the firebase authentication object. Replace our current controller code in BucketApp.js with the below:
app.controller('MainController', ['$scope','$firebaseSimpleLogin',
    function($scope,$firebaseSimpleLogin) {
        // Init Firebase
        var ref = new Firebase("https://burning-fire-1723.firebaseio.com");
        var auth = $firebaseSimpleLogin(ref);
        // Initialized the user object
        $scope.user = {
            username: "",
            password: ""
        };
        // Sign In auth function
        $scope.signin = function() {
            var email = $scope.user.username;
            var password = $scope.user.password;
            if (email && password) {
                // Sign In Logic
            }
        }
    }
]);
We’ll need to enable the Simple Login from Firebase to use this functionality. Login to firebase and select the Simple Login tab from the left side. From the listed tabs select Email & Password and check enabled. Add a new user with an email id and password.
Firebase provides a method called login which we’ll use for authentication. Change the signin function to the below:
$scope.signin = function() {
    var email = $scope.user.username;
    var password = $scope.user.password;
    if (email && password) {
        // Sign In Logic
        auth.$login('password', {
                email: email,
                password: password
            })
            .then(function(user) {
                // On success callback
                console.log('Username and password found');
            }, function(error) {
                // On failure callback
                console.log('Username and password not found');
            });
    }
}
Restart the server, point your browser to http://localhost:3000/BucketApp and you should see the sign-in page as shown below:
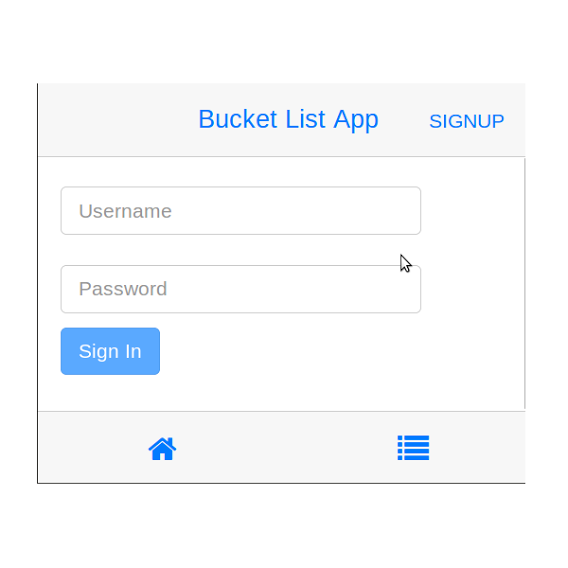
Try to sign-in using the credentials of the user you added in firebase. If all goes well you should see the success message in your browser console.
Creating the User Home page
Create a new html file called userHome.html with following code:
<div class="container">
    <div class="jumbotron">
        <h1>Welcome !!</h1>
        <p class="lead"><i>{{userEmailId}}</i> Here is your Dashboard</p>
    </div>
</div>
Add the userHome.html page to the app.config in BucketApp.js as shown below:
$routeProvider.when('/userHome', {
    templateUrl: 'userHome.html'
});
When a user successfully signs in they will be redirected to /userHome. Change the controller code to inject the $location service as shown below:
app.controller('MainController', ['$scope','$firebaseSimpleLogin','$location',
    function($scope,$firebaseSimpleLogin,$location) {
In the signin success callback, we need to set $scope.userEmailId from the returned user object and then redirect to /userHome. Here is the newly added code:
console.log('Username and password found');
$scope.userEmailId = user.email;
$location.path('/userHome');
Restart the server and try to sign-in. On successful a sign-in you will be redirected to /userHome with a welcome message as shown below:

Next open up index.html and replace the following div
<div class="btn-group pull-right" yield-to="navbarAction">
    <div class="btn btn-navbar">
        <i class="fa fa-plus"></i> New
    </div>
</div>
with:
<div class="btn-group pull-right" yield-to="navbarAction">
    <div class="btn btn-navbar">
        <i class="fa"></i><a ng-click="showSignUp()" ng-hide="loggedIn" class="btn">SignUp</a><a ng-click="logout()" ng-show="loggedIn" class="btn">Logout</a>
    </div>
</div>
When a guest user loads the app, it will show a SignUp link in the top right corner and when a user logs in, it will show a Logout link.
We have used the ngHide and ngShow directives to toggle the display. Now when a user signs in, we’ll set the $scope.loggedIn to true and vice versa.
Add the following code to the $scope.signin function’s success callback:
$scope.loggedIn = true;Also, define the logout and showSignUp function as shown below:
$scope.logout = function() {
    $scope.loggedIn = false;   // to toggle display of SignUp/Logout
    $scope.user = {            // re init the user object
        username: "",
        password: ""
    };
    $location.path('/');       // redirect to home page after logout
}
$scope.showSignUp = function() {
    $scope.user = {            // re init the user object
        username: "",
        password: ""
    };
    $location.path('/signUp'); // redirect to SignUp page
}
Restart the server and point your browser to http://localhost:3000/BucketApp/ and try signing in.
Conclusion
In this tutorial, we focused on how to get started with developing a mobile web application using Mobile AngularUI. In the next tutorial, we’ll take this further by implementing a SignUp interface to add items to our bucket list and integrate the awesome Ladda into our app. We’ll also play with some other components offered by Mobile Angular UI.
Frequently Asked Questions (FAQs) about Mobile Angular UI
What are the key differences between Mobile Angular UI and other mobile development frameworks?
Mobile Angular UI is a mobile UI framework just like Sencha Touch or jQuery Mobile. However, it stands out due to its simplicity and the fact that it leverages AngularJS and Bootstrap. It provides essential mobile components that are missing in Bootstrap 3, such as sidebars, scrollable areas, absolute positioned top and bottom navbars that don’t bounce on scroll. It doesn’t have any dependency on jQuery or Bootstrap’s JavaScript. It’s light and fast, and it uses AngularJS directives and CSS3 transitions to provide a smoother experience.
How can I get started with Mobile Angular UI?
To get started with Mobile Angular UI, you need to have Node.js and npm installed on your computer. Once you have these, you can install Mobile Angular UI globally using npm. After installation, you can create a new Mobile Angular UI project using the Mobile Angular UI CLI. The project structure will be created automatically and you can start developing your mobile app.
Can I use Mobile Angular UI for developing desktop applications?
Yes, you can use Mobile Angular UI for developing desktop applications. Mobile Angular UI provides a desktop version of all its main components. You can use these components to create a responsive application that works well on both desktop and mobile devices.
What are the main components of Mobile Angular UI?
Mobile Angular UI provides several components to help you build your mobile app. These include sidebars, scrollable areas, navbars, switches, overlays, scrollables, and more. All these components are designed to be mobile-friendly and provide a smooth user experience.
How can I customize the look and feel of my Mobile Angular UI app?
Mobile Angular UI uses LESS for its stylesheets. You can easily customize the look and feel of your app by overriding the default variables in the LESS files. You can also add your own styles to the stylesheets to further customize your app.
Can I use AngularJS directives in my Mobile Angular UI app?
Yes, you can use AngularJS directives in your Mobile Angular UI app. Mobile Angular UI is built on top of AngularJS and Bootstrap, so you can use any AngularJS directives, services, filters, and modules in your app.
How can I handle user input in my Mobile Angular UI app?
You can handle user input in your Mobile Angular UI app using AngularJS forms and ngModel. You can use ngModel to bind input fields to properties on your scope, and you can use AngularJS form validation to validate user input.
How can I test my Mobile Angular UI app?
You can test your Mobile Angular UI app using any JavaScript testing framework that supports AngularJS. You can use unit tests to test your controllers, services, and filters, and you can use end-to-end tests to test your app as a whole.
Can I use third-party AngularJS modules in my Mobile Angular UI app?
Yes, you can use third-party AngularJS modules in your Mobile Angular UI app. You can install them using npm or bower and include them in your app’s dependencies.
How can I deploy my Mobile Angular UI app?
You can deploy your Mobile Angular UI app like any other static website. You can use any web server that can serve static files, or you can use a cloud hosting service like AWS or Google Cloud.
Jay is a Software Engineer and Writer. He blogs occasionally at Code Handbook and Tech Illumination.

Published in
·App Development·Design·JavaScript·Mobile·Mobile Web Development·Tools & Libraries·July 24, 2014