
Key Takeaways
- Prototyping with Figma is a process that involves turning static mockups into dynamic, interactive prototypes. This process is crucial in helping developers understand the design’s user flow, functionality, and feel.
- The steps involved in creating a Figma prototype include creating a horizontally scrollable frame, creating an artboard transition, creating a retreat function to return to previous artboards, and creating complex timed animations. Each step involves specific settings and interactions to ensure smooth transitions and animations.
- Figma prototypes are interactive and can be shared with others for preview and feedback collection. This feature enhances collaboration and allows for improvements to be made based on the feedback received. Figma also supports more complex animations through plugins like LottieFiles.
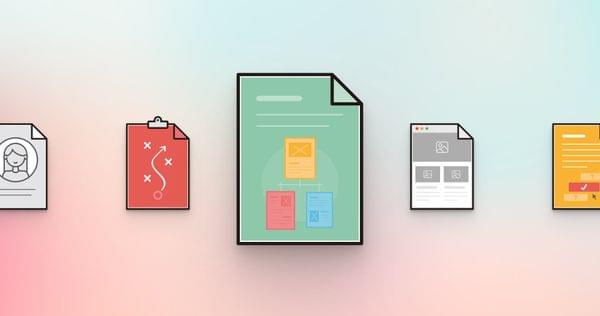
Prototyping is the process of turning a static mockup into an interactive and dynamic mockup (better known as a prototype). Bringing a static mockup to life is without doubt one of the most — if not the most — exciting step in the design workflow.
It’s also super important that developers understand the design’s user flow, and how it should feel and function. What better way to do that than by using Figma, the best design tool in the world according to the 2020 Design Tools Survey?
Prototyping with Figma is easy and enjoyable once you know how it works. Start off by duplicating this static mockup (click on Series of Interactions and then Duplicate to my drafts), and then throughout the tutorial we’ll add more and more functional fidelity. Your local copy should look like this:
Note: I’m assuming that you have at least a small amount of experience with modern UI design tools such as Figma or Sketch.
Step 1: Create a Horizontally Scrollable Frame
Let’s start with Artboard 1, making the selection of cards that overflow the viewport horizontally scrollable. This is one example of how we can make our mockups dynamic without having to create what Figma calls “Connections”. Connections direct us to new Artboards, but that’s not what we’ll be doing in Step 1.
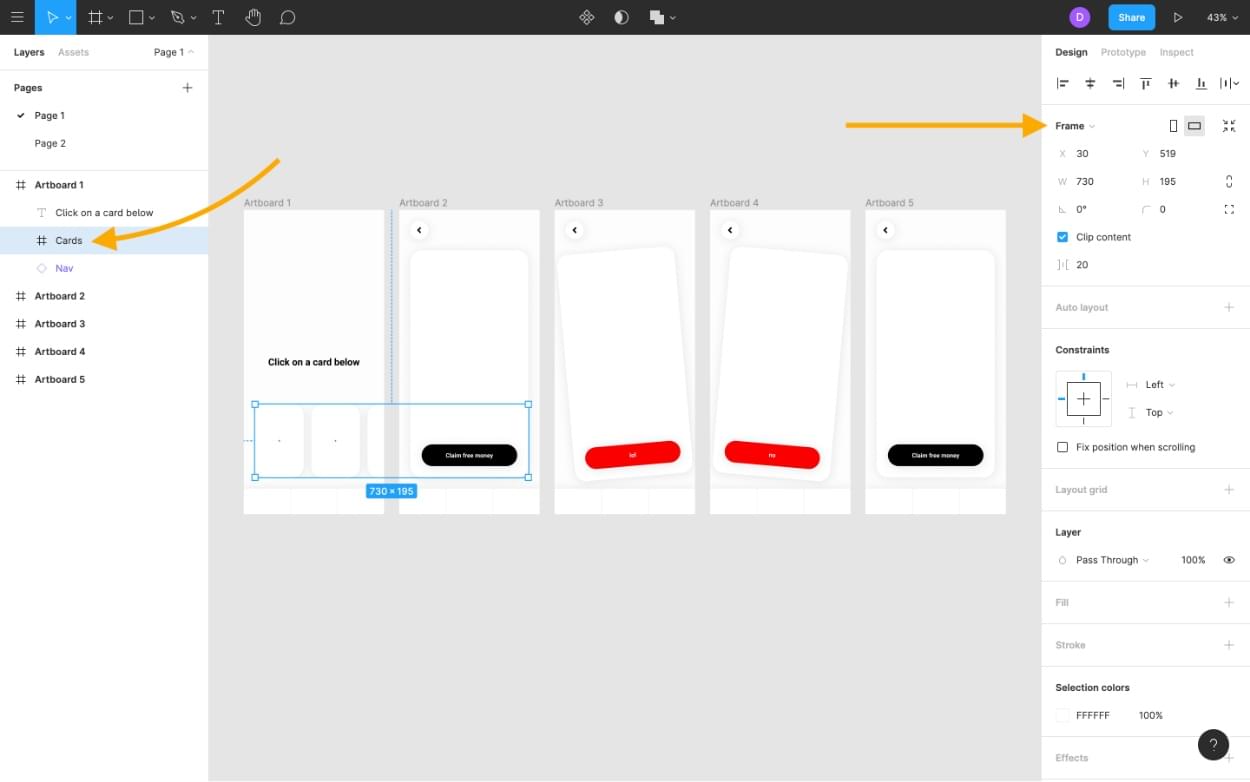
Start by selecting Cards from the Layers Panel (left sidebar), and then from the Design Panel (right sidebar this time) change the Group option to Frame using the dropdown.
I won’t dive into this too much, but the main difference between a Group and a Frame is that Groups wrap their children tightly, whereas Frames can be any size. This means that:
- grouped children scale with the Group, whereas Framed children are a little more stubborn (a feature, not a bug)
- framed children become aligned relative to their Frame, whereas Grouped children are still relative to their Artboard
- frames can have overflowing content that can be scrolled horizontally or vertically (this is what we’ll be attempting)
Wait, does this mean that Artboards are actually Frames? Indeed: what other UI design tools call Artboards, Figma calls Frames. This is likely because, in Figma, Frames can be nested within other Frames, which is slightly different from what Artboards do in other tools like Sketch, Adobe XD, and so on.
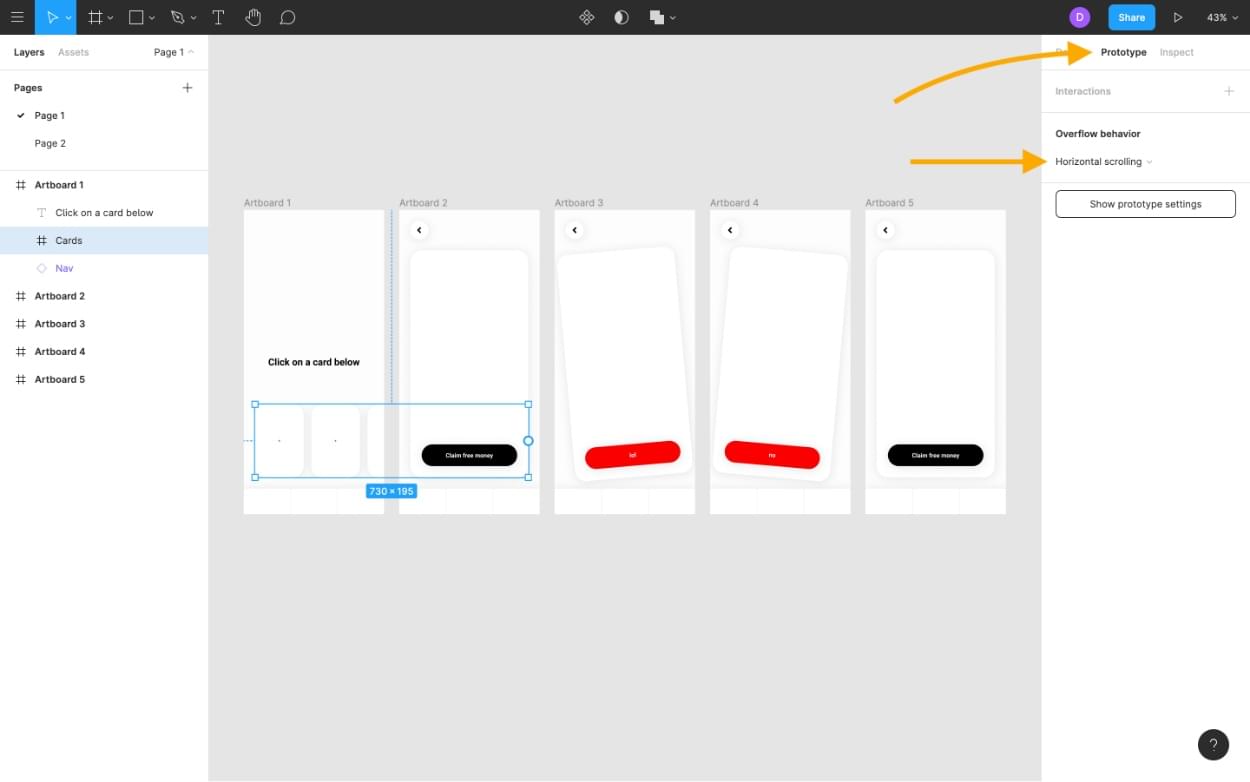
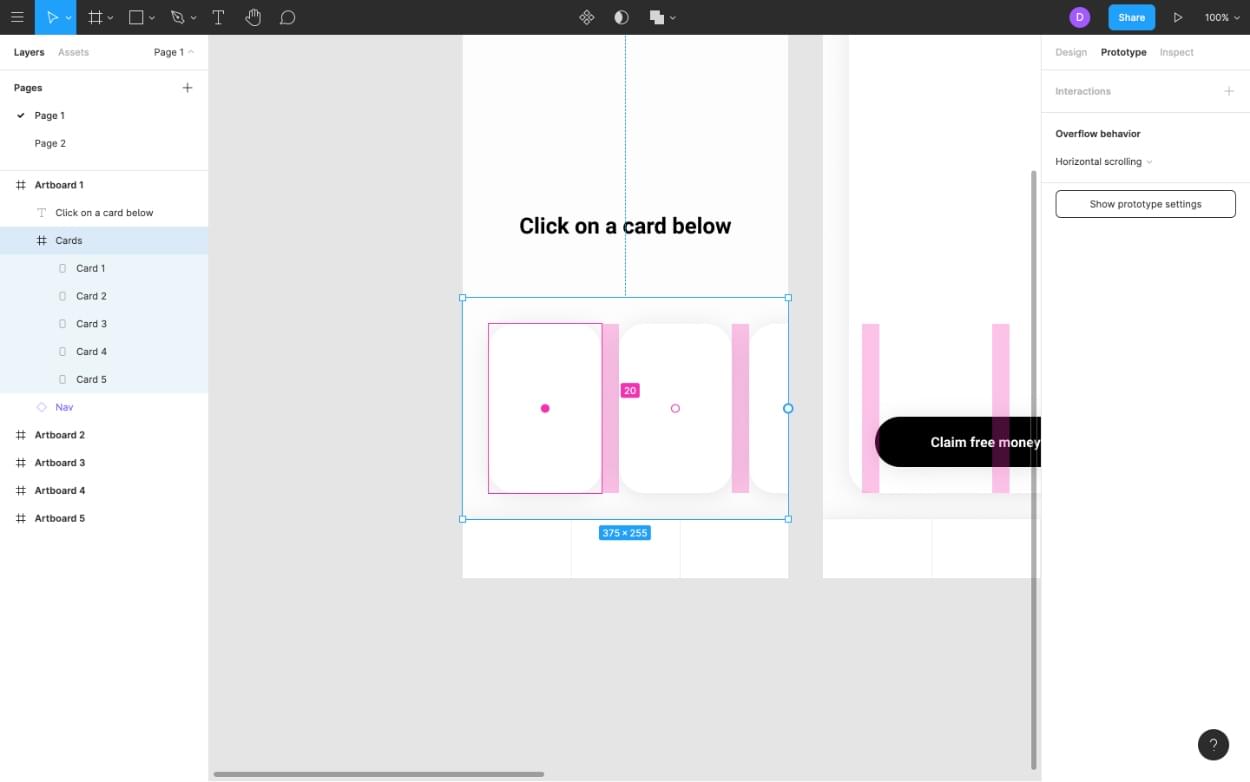
Switch to Prototype mode (⌥ + 9) where the Overflow behavior setting will now be available, and then change the dropdown option from No scrolling to Horizontal scrolling.
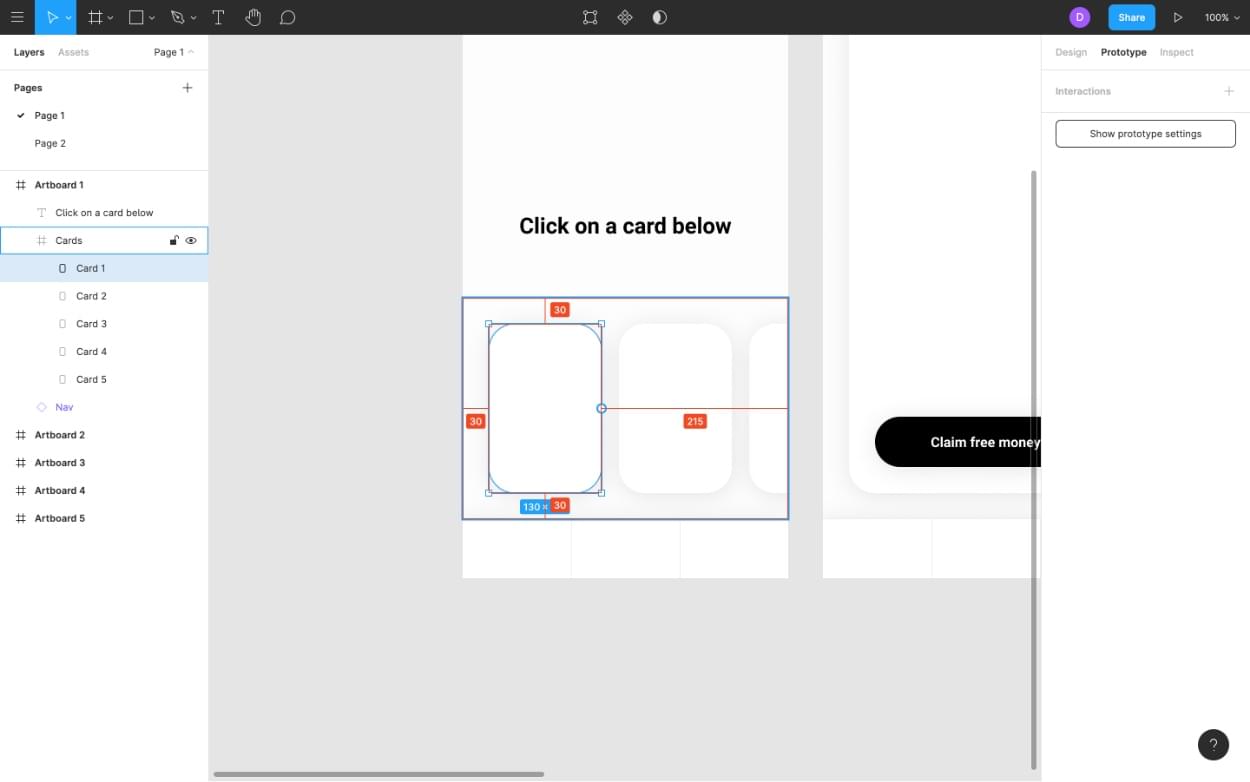
Now, you’ll notice that the shadows are oddly cut off by the newly converted Frame, but this is actually standard behavior for overflowing content, and it can be fixed relatively easily.
Since the shadow’s blur variable is 30 and Frames can be any size, we’ll need to resize the Frame to allow for an extra 30 spacing around its edges. It should be easy enough to Resize (shift + ⌘ + ↑↓←→) and Nudge (shift + ↑↓←→) the objects accordingly.
By the way, you might notice (if you click on the Frame) that the cards and their spacing can be rearranged quite easily. This isn’t relevant to the tutorial specifically, but still awesome.
Step 2: Create An Artboard Transition
For this next step, let’s try an interaction that connects one Artboard to another Artboard, otherwise known as a “Connection”.
Select the Cards frame (yes, the entire frame, since it doesn’t really matter which card ends up being tapped right now). Then, assuming that you’re still in Prototype mode, drag the Connector (that is, the bordered circle that shows a + when hovered) into Artboard 2. These Artboards are now connected.
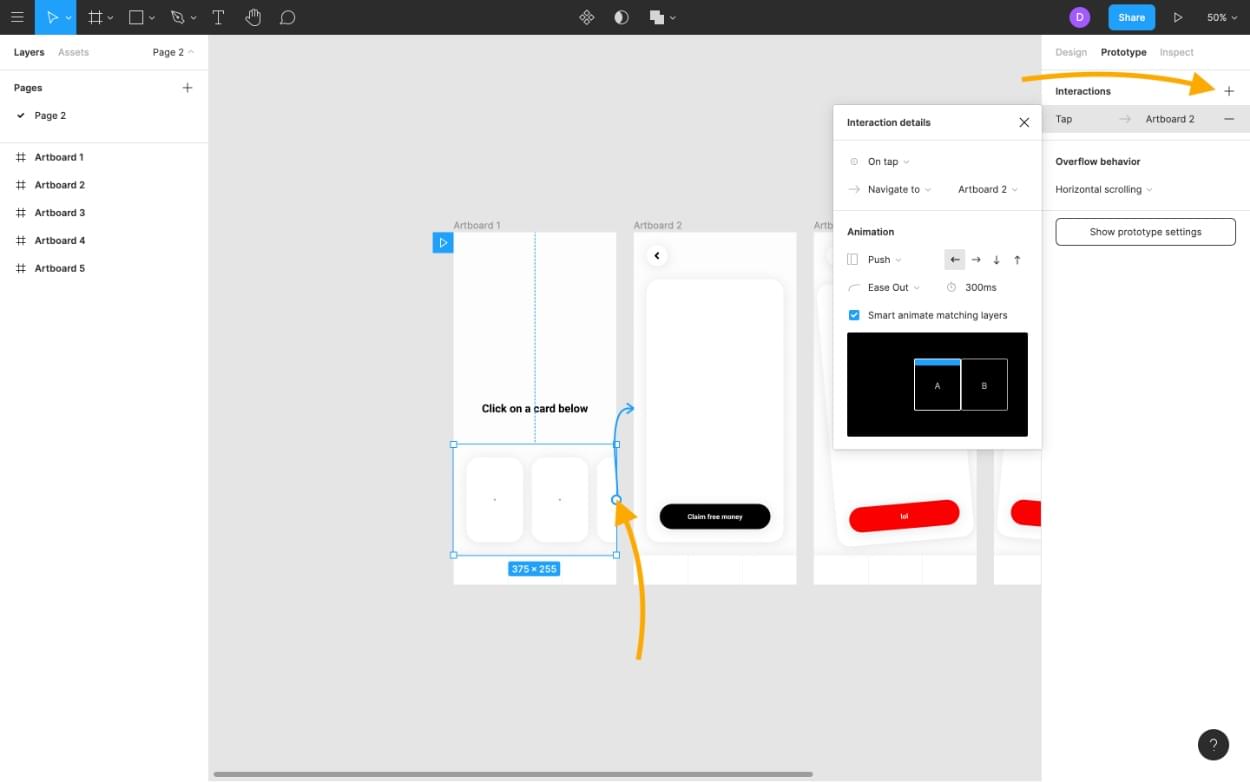
After dropping the Connector onto Artboard 2, the Connection settings (which should now be revealed), should look like this:
- Interaction details
- “On tap” (the interaction will be triggered by tapping)
- “Navigate to” / “Artboard 2” (tapping will cause the user to navigate to Artboard 2)
- Animation
- “Push” / “←” (“Artboard 2” will push itself onto the screen from the right)
- “Ease Out” / “300ms” (over the course of 300ms, the animation will start off fast and slow down towards the end)
- Check the “Smart animate matching layers” checkbox (common elements such as the back button and the navigation will not animate if left unchanged)
Want to see what we’ve done so far in action? Click the “Present” button (i.e. the play icon) in the top-right corner. If you’re using Figma in a web browser, this opens a new tab.
Tip: hit R to reload the prototype.
Step 3: Retreat!
Before we move forward and dive into more complex Connections, let’s make sure that we can return to Artboard 1 (or whatever Artboard we came from). Create another Connection, this time originating from the back button(s) with the following settings:
- Interaction details
- “On tap”
- “Back”

Animation settings won’t be available this time, since the options are fixed. Specifically, the transition will animate in reverse. For instance, if we transitioned into the Artboard with “Push ←” then we’ll transition back out with “Push →”.
Step 4: Create a (Relatively) Complex Timed Animation
During this next and final step, we’ll create a singular animation that actually spans across several Artboards and individually animates several objects rather than the entire Artboard. Specifically, we’ll rotate the expanded card to the left upon the click of a button, and then set up a timer to rotate it to the right before returning to its original state.
Essentially, a swinging animation.
Select the Button object on Artboard 2 and establish a Connector that connects to Artboard 3. Use these settings:
- Interaction details
- “On tap”
- “Navigate to” / “Artboard 3”
- Animation
- “Smart animate”
- “Ease Out” / “300ms”

Note: as we’ve chosen “Smart animate” as the animation type, layers that exist in both Artboards but are visually different will transition smoothly, but only if the relevant layer structure and layer names remain consistent. If they don’t remain consistent, Figma will fail to understand that the layers are one and the same, and they won’t animate correctly.
From the “Design” Panel, you should see that I’ve made the button’s background #FF0000 and rotated the card to the left.
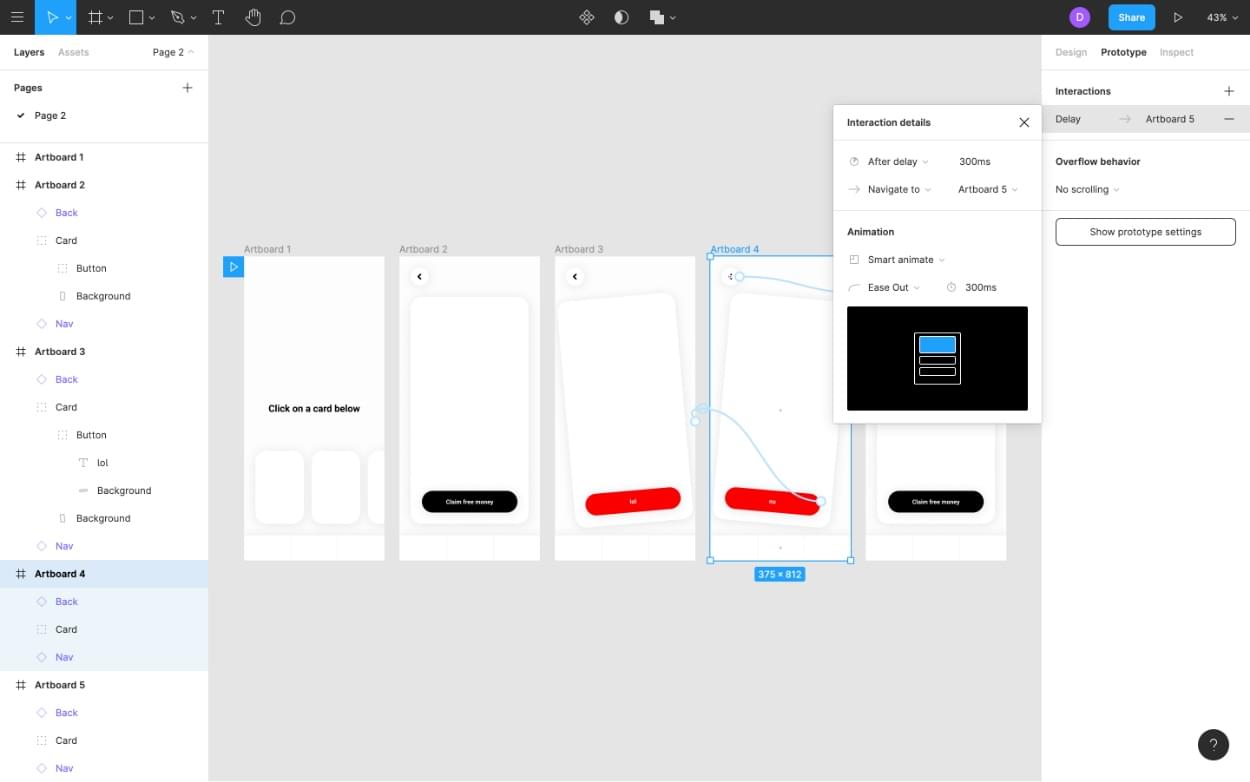
But how do we then rotate it to the right after the 300ms “rotate left animation” has run its course? Well, that’s where timed animations are needed. Repeat the steps above, this time connecting Artboard 3 to Artboard 4 with “After delay” / “300ms” being the only difference. To complete the interaction, repeat once more connecting Artboard 4 to Artboard 5.
This is how we run animations consecutively. In our case, the initial tap interaction activated a “rotate left animation” and then the following animations happened automatically on a timer.
Prototyping with Figma is Fun, Right?
We’ve now reached the end of this tutorial. The Figma file shouldn’t really look any different (besides a few a visible Connectors when using Prototype mode). However, it should function very differently in Present mode. If you didn’t follow along with the tutorial, check out the “Dynamic” version, where you can test the final result.
Pretty cool, right?
While there are certainly styles of animations and types of interactions with more complexity that we could visualize, what we’ve looked at here should cover about 99% of what you’ll need to know. When it comes to interactions, simple is better anyway!
For animations that require more complexity, there’s a neat Figma Plugin called LottieFiles that’s definitely worth checking out.
And for more on Figma, you can also read about wireframing with Figma.
FAQs About Figma Prototypes
A Figma prototype is an interactive representation of a design created using Figma, a collaborative design tool. It allows designers to showcase and test the functionality of their designs, providing a more dynamic and user-focused experience.
To create a prototype in Figma, design your screens or frames, then use the “Prototype” mode to link these frames together, defining interactions, transitions, and animations to simulate the user experience.
Yes, Figma allows you to preview your prototype directly within the Figma editor. Simply enter the prototype mode and click the “Present” button to experience your design interactively.
You can share your Figma prototype by generating a shareable link. Go to the “Share” menu, adjust sharing settings, and copy the link. Anyone with the link can view and interact with your prototype.
Yes, Figma supports comments on both designs and prototypes. Share your prototype link, and viewers can leave comments directly on specific elements or areas of your design, facilitating collaboration and feedback collection.