

Key Takeaways
- The article provides a detailed guide on how to use an ASP form to add data to an XML file, retrieve the data, and display it in a table format. The data includes user’s name, age, gender, and postal code.
- The author suggests dividing the ASP page into two parts for easier understanding and management: one part for the form and the second part for the ASP code that saves the data.
- The guide includes a step-by-step process on how to retrieve data from the form, save it to an XML file, and display it using XSL. The process involves creating variables, checking for errors, saving data to the XML file, and finally displaying the data.
- The article also emphasizes the versatility of XSL, a language that transforms XML into HTML, which can be used to give web forms a professional look and better structure. It also mentions other features of XSL like sorting, filtering, and working with variables and conditions.
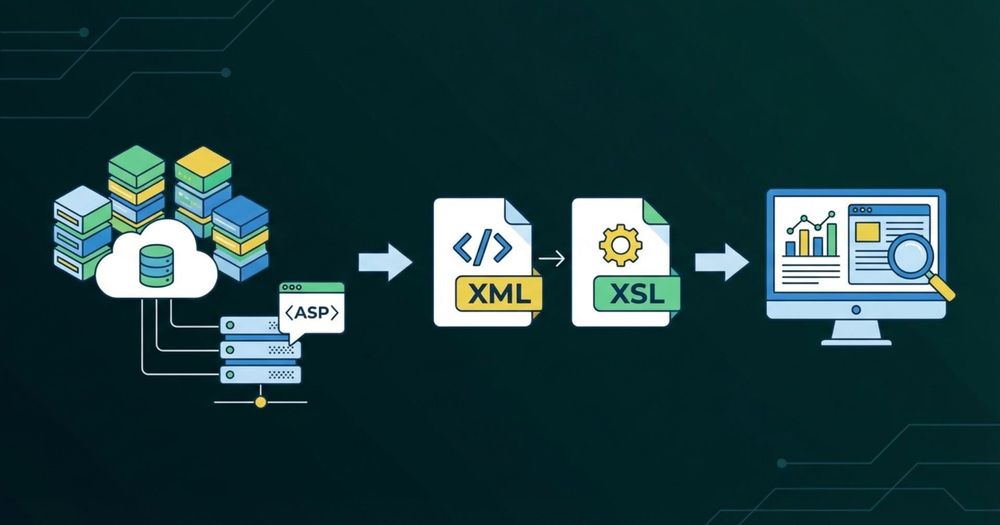
Storing and displaying data is an essential task if you work with applications. Regardless of whether you work with desktop applications or Web applications, the save and display processes are nearly always required.
In this article, I’ll show how you can easily use an ASP form to add data to a XML file, how to retrieve this data, and how to display it in a well-formed table.
We’ll create an example ASP page, in which the user will be able to enter his name, age, gender and a postal code. This data will be stored in a XML file, and displayed using XSL. The example ASP page and the resulting table will look like this:

Some programmers like to mix their asp and html code, but I wouldn’t recommend it. I’ve always found it helpful to divide the ASP page in two parts wherever possible, and I’d suggest you to do the same.
Here’s the structure of my ASP page:
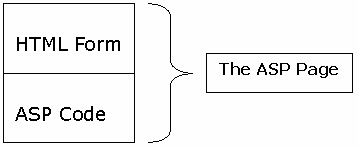
The first part contains a simple form, and the second part contains the ASP code that will do the saving for us. For a better understanding, let’s start by looking at the form.
The Form
You can create a simple form with any controls you like. In addition to the controls you include, we also need a submit button, and a reset button.
In this example, I’ve created a simple form called frmPerson, which contains three text fields and a drop down field. We’ll use the post method to process the data entered into this form.
<form action="VerifyPerson.asp" method="post" name="frmPerson"

id="frmPerson">

<INPUT name=Name>

<INPUT name=Age>

<SELECT style="WIDTH: 154px" name=Gender>

  <OPTION value=Male selected>Male</OPTION>

  <OPTION value=Female>Female</OPTION>

</SELECT>

<INPUT name=Postalcode>

<INPUT type=submit value=Submit name=submit><INPUT type=reset value=Reset

name=reset>

</form>
It’s very important to give a variable name to each tag that which will hold data. For example, the name text field <INPUT name=Name> contains the variable Name. In order to retrieve the data from the form, we’ll use this and other variables in the next ASP paragraph. To get familiar with ASP and XML, I suggest you download the examples and go over them.
Ok, that’s first part of the ASP page done. The second part will be even easier!
The ASP Code
Now, I’ll show you in 7 easy steps how to retrieve the data from the form, and save it data to a XML file.
1. The first step is, of course, to check whether the user has pressed the submit button or not! For this we will use the JScript function, count.
var submit = Request.Form("submit").Count;

if( submit > 0 ){

  // The user has pressed the submit button

  // So the code to save the data will take place here.

}

else {

  // We could also place our form in this part of code, which

must be written in Jscript, though this isn't recommended.

}
2. Now we need to retrieve the data from the form, and store it in appropriate variables. To retrieve the data we’ll use the Request.Form("variable_name"); function.
So let’s create 4 variables, and retrieve the required data:
var name = Request.Form("Name");

var age = Request.Form("Age");

var gender = Request.Form("Gender");

var pcode = Request.Form("PostalCode");
3. The third step is to check whether the user has entered any data into the form. To do this, we simply check whether the variables in step 2 are empty.
var error = "";

if ( name == "" )

  error = "Name ";

if ( age == "" )

  error += "Age ";

if ( pcode == "")

  error += "PostalCode ";
4. In step 3, we saved the results in var error. Now we need to check, if “error” contains any data. If it does, then we know we’ve found an error, and we’ll display it as such. If error is empty, then we’ll move on to the saving procedure.
if(error!=""){

  //We have found an error, so display this to the user!

  Response.Write("Please enter the following data:<br>");

  Response.Write(<b>);

  Response.Write(error);

  Response.Write("</b>");

}

else{

  //Everything is fine, so let's start to save the data.

}
5. Now that we’ve performed the necessary checks, we can save the data.
For this, we’ll load the Person.xml file into an XML document. Then, we’ll load the current node list to get the current root node, using the function xmlDoc.getElementsByTagName.
Once this is done, we’ll need to create the required nodes. This can be achieved with the function xmlDoc.createElement("AnyNodeName"). Finally, we’ll need to save to the appropriate XML variables, the data that was entered into the form. Here’s the code you’ll need:
.

.

.

else{

  // Load the required xml file

  var xmlDoc=Server.CreateObject("MICROSOFT.FreeThreadedXMLDOM");

  xmlDoc.async="false";

  xmlDoc.load(Server.MapPath("Person.xml"));


  // Get the current root

  var nodeList = xmlDoc.getElementsByTagName("PersonList");

  if(nodeList.length > 0){

    var parentNode = nodeList(0) ;


    // Create the required nodes

    var personNode = xmlDoc.createElement("Person");

    var nameNode = xmlDoc.createElement("Name");

    var ageNode = xmlDoc.createElement("Age");

    var genderNode = xmlDoc.createElement("Gender");

    var pcodeNode = xmlDoc.createElement("PostalCode");


    // Assign the variables, which we have retrieved in

    step 2 to the xml variables

    nameNode.text = name;

    ageNode.text = age;

    genderNode.text= gender;

    pcodeNode.text = pcode;

    .

    .

    .
6. Two steps left! First, we’ll append the created nodes to the parent node. This can be done with the function parentNode.appendChild("personNode");
    .

    .

    .

    parentNode.appendChild(personNode);

    personNode.appendChild(nameNode);

    personNode.appendChild(ageNode);

    personNode.appendChild(genderNode);

    personNode.appendChild(pcodeNode);

    .

    .

    .
7. And finally, we’ll save the nodes to the XML file, using the function xmlDoc.save(Server.MapPath("Person.xml"));
    // 7) Now save the nodes to the file

    xmlDoc.save(Server.MapPath("Person.xml"));
Display the Data Using XSL
So far, we’ve seen how to save the data our site users have submitted through our form. But how do we display it? We’ll use ASP and XSL to display the data.
The first thing we’ll need to do is load the XML file, and this can be easily achieved with an XML parser. The XML parser from Microsoft is available with Internet Explorer 5.0.
After you’ve loaded the XML file in the document object, you can retrieve the XML data with the help of a DOM object. First, we must load the XSL file:
      // This part is used to display the data

      var objXMLDoc = Server.CreateObject("MICROSOFT.FreeThreadedXMLDOM");

      objXMLDoc.async = false;

      objXMLDoc.load(Server.MapPath("person.xml"));


      var xsl=Server.CreateObject("MICROSOFT.FreeThreadedXMLDOM");

      xsl.async = false;

      xsl.load(Server.MapPath("person.xsl"));
Now we’ve loaded both files, each into its own DOM object. Next, we need to create a query that will select the nodes for us. Of course, we could select specific nodes, but for now, we’ll just select the root node, in which case, all other nodes will be selected automatically.
        var xmlQuery="//Person";

        var docHeadlines=objXMLDoc.documentElement.selectNodes(xmlQuery);
Next we need simply to iterate through the nodes to display each stored item.
        var numNodes;

numNodes=docHeadlines.length;


        var nn;

        for(var i=0;i<numNodes;i++){

          nn = docHeadlines.nextNode();

          Response.Write(nn.transformNode(xsl));

        }
Now you know how to load the XSL file into the DOM object. But what does a XSL file look like? And what else can XSL do for you?
XSL is a language that transforms XML into HTML. Of course you can also use simple HTML and ASP to display the data, but to give the Web form a professional look, and a better structure, you’ll need to use XSL.
However, XSL can offer you much more than we’ve explored here. For instance, it can provide features like sorting and filtering. In a simple ASP site, you can also use XSL to work with variables and conditions, as well as loops. Of course I can’t cover this all in this article, but you should be aware of just what XSL has to offer.
Now, here’s the XSL file we built:
      <xsl:stylesheet xmlns:xsl="https://www.w3.org/1999/XSL

/Transform" version="1.0">

      <xsl:template match="Person">

      <tr>

      <td><font face="verdana" size="2">

<xsl:value-of select="Name"/></font></td>

      <td><font face="verdana" size="2">

<xsl:value-of select="Age"/></font></td>

      <td><font face="verdana" size="2">

<xsl:value-of select="Gender"/></font></td>

      <td><font face="verdana" size="2">

<xsl:value-of select="PostalCode"/></font></td>

      </tr>

    </xsl:template>

  </xsl:stylesheet>
In the first line, we use the <xsl:stylesheet> element to tell the document that it’s an XSL stylesheet. Then, we tell XSL which element of the XML file it must start with, using <xsl:template match="Person">
We’ve selected the Person element, as this is the most important. All data below that will be selected automatically.
Finally, to display the value of the XML elements, we simply implement the <xsl:value-of-select="element name"/> tag, which retrieves the value of the element.
Conclusion
That’s it ! Now you have created a fully functional system which can save, read and display data from a form. You have learned the advantages of ASP,XML and XSL. To practice a little bit more, I suggest you to modify the ASP page to create your own address book.
Download the example files used in this tutorial, and happy programming!
Frequently Asked Questions (FAQs) about Displaying Data with ASP and XML/XSL
How can I store my connection string for classic ASP?
Storing your connection string for classic ASP can be done in a few ways. One common method is to store it in an include file that is referenced in your ASP pages. This file should be stored in a directory that is not directly accessible from the web for security reasons. You can then use the Server.MapPath method to reference this file in your ASP pages. This method allows you to change the connection string in one place and have it updated across all your pages.
Can I use classic ASP include virtual in ASP.NET page?
Yes, you can use classic ASP include virtual in an ASP.NET page. However, it’s important to note that the include directive is processed by the ASP engine before the ASP.NET engine. This means that any ASP.NET code within the included file will not be processed. To include ASP.NET code, you should use the User Control (.ascx) or Master Page (.master) features of ASP.NET.
What is the System.Web.UI.WebControls.Xml class in .NET?
The System.Web.UI.WebControls.Xml class in .NET is a server control that allows you to display XML data on a web page. You can use this control to bind to an XML file or a string containing XML data. You can also apply an XSL transformation to the XML data using the TransformSource or Transform property.
How does the pricing for Azure Virtual Desktop work?
Azure Virtual Desktop is a Microsoft service that allows you to run virtual desktops in the cloud. The pricing for this service is based on the resources you use, such as the number of virtual machines and the amount of storage. You can choose to pay as you go, or you can reserve resources in advance for a lower cost.
How can I display data from an XML file in ASP using XSL?
To display data from an XML file in ASP using XSL, you first need to load the XML file into an XMLDOM object. You can then load the XSL file into another XMLDOM object. You can then use the transformNode method of the XMLDOM object to apply the XSL transformation to the XML data. The result can then be output to the web page.
How can I handle errors when displaying data with ASP and XML/XSL?
Error handling in ASP can be done using the On Error Resume Next statement. This statement allows the script to continue running even if an error occurs. You can then use the Err object to check if an error has occurred and handle it accordingly.
Can I use ASP to display data from a database?
Yes, you can use ASP to display data from a database. You can use the ADODB.Connection and ADODB.Recordset objects to connect to a database and retrieve data. You can then output this data to a web page using the Response.Write method.
How can I improve the performance of my ASP pages?
There are several ways to improve the performance of your ASP pages. One way is to use server-side includes sparingly, as they can slow down your pages. Another way is to use the Response.Buffer property to buffer the output of your pages, which can reduce the number of trips to the server.
Can I use ASP with other programming languages?
Yes, you can use ASP with other programming languages. ASP is a scripting language that is used to create dynamic web pages. You can use it with other programming languages such as JavaScript, VBScript, and C#.
How can I secure my ASP pages?
Securing your ASP pages can be done in several ways. One way is to use SSL to encrypt the data that is sent between the client and the server. Another way is to use form validation to prevent SQL injection attacks. You can also use session variables to track user authentication and restrict access to certain pages.