Design a Classy Last-Minute Christmas Card in Minutes

Key Takeaways
- Designing your own personalized Christmas card can be done quickly using Photoshop and a bit of creativity, offering a unique and personal alternative to store-bought cards.
- A typical size for a Christmas card is 5″ x 7″ folded, meaning the paper should start at 10″ x 14″. The card can be designed in RGB color mode, but should be changed to CMYK for the final print. A resolution of 300ppi is recommended for a crisp, high-quality print.
- The card design can include a personal or stock photo, custom shapes, and a personalized message. The design process involves creating a new Photoshop document, laying out guides, placing and adjusting the image, creating a background, and adding text and other elements. The inside of the card can be kept simple with a short message and space for a handwritten note.
Christmas will be here in a matter of hours, and if you haven’t sent out your holiday cards yet, you’re in quite a bind. Finding the right card from the store can be a real challenge, especially in a time crunch. You want it to be personal, you want it to match your personality and style, and you want it to look good. You may get a faster and better result designing your own card. Using Photoshop, and a little creativity, you can create a wonderful, personalized Christmas card that your friends and family will love in just a few minutes.
Before you start designing your card, you need to consider what type of card that you are going to create in the first place. You can create a simple one-page, front and back card, or you could create a bi-fold card. If you create a bi-fold card, you are still essentially creating a front and back card, but it will be divided along the center, with one side being the outside of the card and the other side being the inside of the card. Typical sizes for Christmas cards are 4″ x 8″ flat, which are long and thin, 5″ x 7″ flat, or 5″ x 7″ folded, meaning that the paper you start with should be 10″ x 14″. We will cover how to make a 5″ x 7″ folded Christmas card.
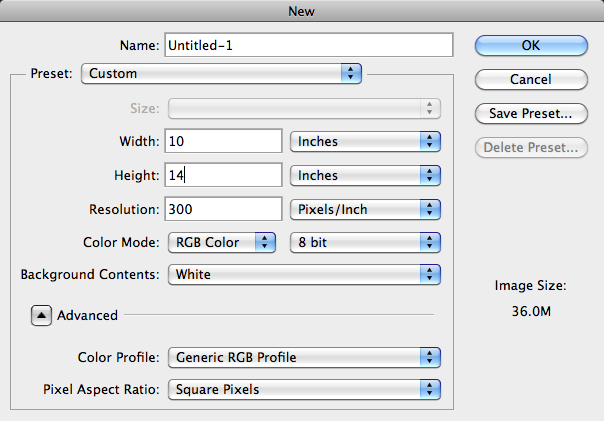
Create a new Photoshop Document, making the size 14″ tall by 10″ wide. We will fold this along the center of its height, giving us a landscape Christmas card that folds at the top. Set the resolution to 300ppi, because we will be printing the card, so the images need to be crisp for printing purposes. If we design our card at 72ppi, then our image will look pixelated or blurry when printed. You can start your design in RGB color mode, but remember to change it to CMYK when you are finished editing your card.
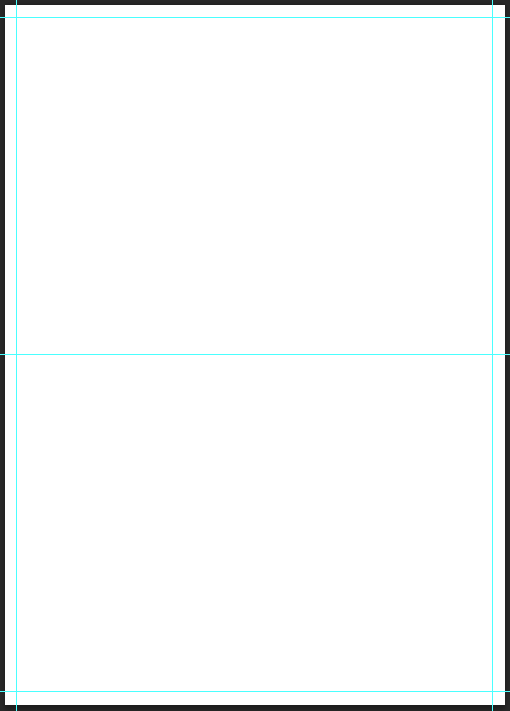
You may want to lay out some guides, just to help you remember the boundaries of the card and where you can place images and text. For printing purposes, it is a good rule to leave a 1/8 of an inch of space around the edge of any printed surface. This will ensure that you leave enough room for all of your printed areas to show up without any content being cut off. Below, you can see how I set up my guides. You can hit Command + “R” to show or hide your rulers, and you can right-click on the ruler lines themselves, which will bring up a menu where you can choose your unit of measure. I changed mine from pixels to inches. I set up the guides at 1/8 of an inch around the border, and set a guide in the center to mark the fold line of the card.
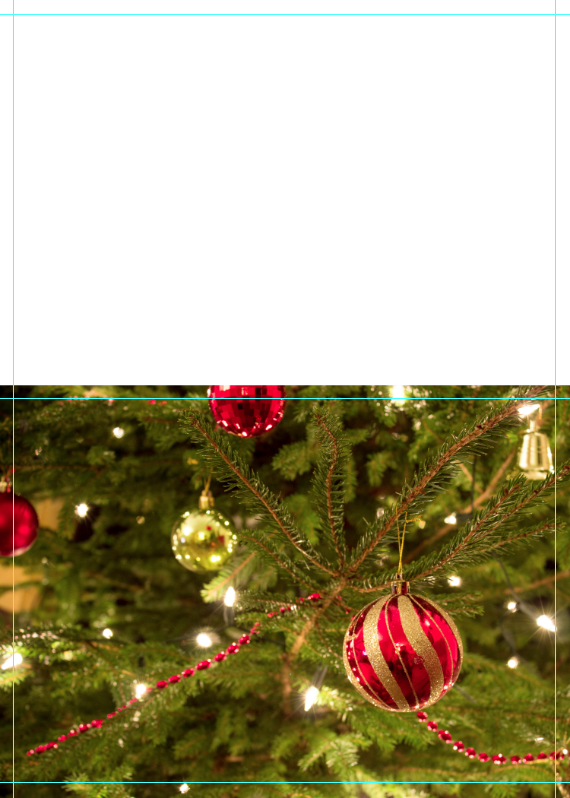
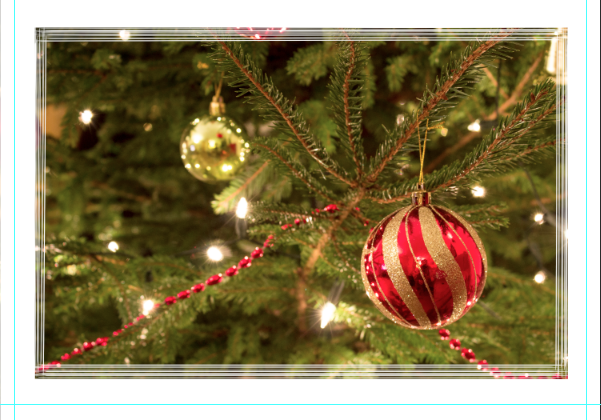
Looking at the example above, the bottom half will be the front of the card, and the top half will be the back side. Now we can start bringing in our images and building our Christmas card design. For an image, you can take your own family photo, or you can find a nice stock photo from the web. I found the image below, which you can download from here. Place this image into your Christmas card working file.

When placing the image in your file, you can scale the image up or down. Make it fit closely to the edges of the card. It is okay if it overlaps or isn’t a perfect fit, because we will be adding a layer mask to the the image.
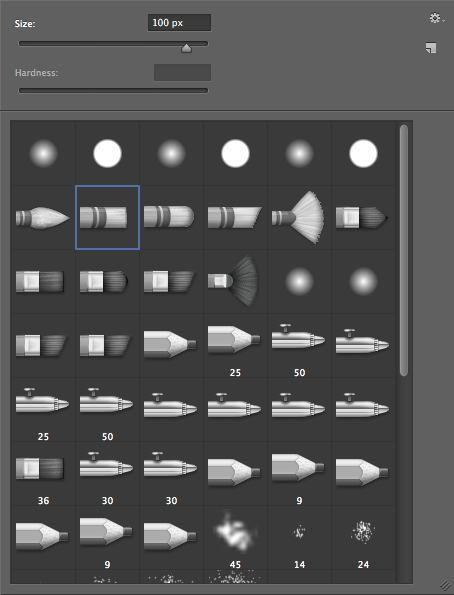
Click the layer mask icon in the layers panel, and add a border around our image via our layer mask. This is a much nicer look than just a straight edge photo. On the mask, select the brush tool and under the default brush settings select the round blunt medium stiff brush set to 100px in size. Place your cursor over the top left corner of the image and while holding shift, click the top-right, the bottom-right, the bottom-left, and the top-left corner to create a striped mask border around the image. Since ribbon goes with the theme of Christmas, this effect will work nicely.
Next, we will create a background behind our card. Select a rich red, which you can sample from the ornament. The red that I chose was #c20000. Select the background layer and hit Alt/Option + Delete to fill it with the deep red color that we selected. Next, we will create a pattern for our background. Create a new document roughly 300px wide and tall. Select the Custom Shape Tool and choose the “Floral Ornament 2” shape. Hold shift so that it maintains its proportions when you drag it out. Make sure to fill the whole canvas.

Right-click on the shape layer and choose “Rasterize Layer.” Then, go to “Edit” > “Define pattern.” Name the pattern something that you will recognize. Close this document and go back to your card document. Create a new layer above the red background layer, hit Shift + Delete, and choose “Pattern” as your fill option. Select the ornament pattern that you just created. The pattern will fill the entire layer. Set the opacity to 30%.
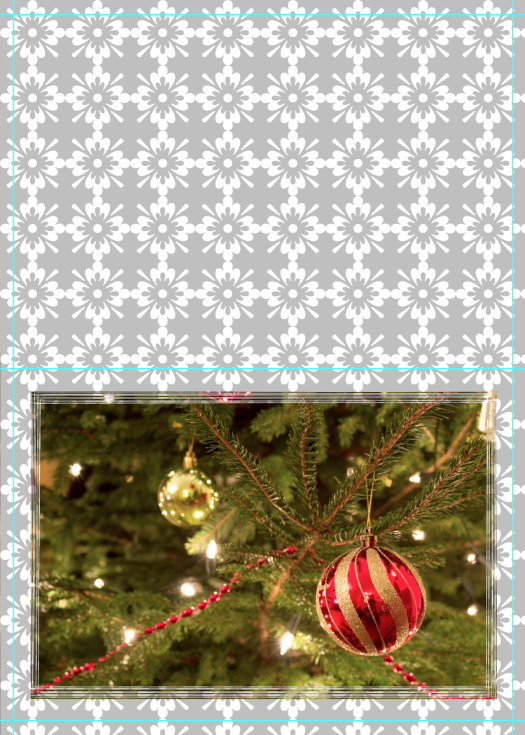
Bringing back the red layer underneath, change the blend mode of the pattern layer to “subtract.” next we will type our message on the front of the card. A nice script typeface is a good choice for your card. I chose Scriptina Pro and set it to 104pt. Set the color to white, then double-click the type layer to bring up the layer styles. Choose “Drop Shadow,” and set the distance to 0px, the spread to 36px, and the size to 50px. This will create a subtle shadow area behind the type, giving the background additional contrast against the type, making it easier to read.


Next, we will create the inside of our card. Keeping with the same orientation, create a new document that is the same size — 10 inches by 14 inches at 300ppi. Lay out the same guides as before, so you will know where the margins and the fold areas are located. The inside of the card will be fairly simple. We will use a simple shape, a short message, and plenty of space to write your own personal message to your card recipients.
Select the custom shape tool and select the holly shape. Drag the holly shape onto the top half of the card. fill the shape with a rich red like the one found on the cover. Center the shape horizontally.

Next, we will type a short message, such as “Happy Holidays.” I am still using the Scriptina Pro typeface. Center it under the holly and make it a dark green (#032e00). Make sure it stays in the top half of the card.

Next, we will add an element to the bottom half of the card. We will make it subtle, so that there is plenty of room to write a personal message by hand. Choose the custom shape tool and select “Snowflake 1.” Set the color to the same red as the holly. Drag out a snowflake shape that is a little less than two inches. Then hit Command/Ctrl + “J” to duplicate the layer. Hit Command/Ctrl + “T” to transform the snowflake and while holding shift, scale the snowflake down to roughly 1/3 of the size of the larger one. Select the original snowflake layer and set the opacity to 30%.

Conclusion
With your own photo (or a stock image) and a few custom shapes, you can create a classy Christmas card just in time for the holidays. Creating your own Christmas card will add a personal touch to the holiday festivities. You can create a set of cards for a large group of people, or you can create personalized cards for each friend and family member. Happy Holidays!
Frequently Asked Questions (FAQs) About Designing Christmas Cards
What are the standard sizes for Christmas cards?
Christmas cards come in a variety of sizes, but the most common ones are 5″ x 7″, 4″ x 6″, and 5″ x 5″. The size you choose depends on your design and the amount of content you want to include. Larger cards provide more space for photos and messages, while smaller cards are more economical and easier to mail.
How can I design a Christmas card in Photoshop?
Designing a Christmas card in Photoshop involves several steps. First, you need to create a new document with the desired card size. Then, you can add a background image or color, insert photos, and create text layers for your message. You can also use Photoshop’s tools and filters to enhance your images and add creative effects.
Can I print my own Christmas cards?
Yes, you can print your own Christmas cards. After designing your card, you can print it on cardstock using a high-quality printer. Make sure to adjust your printer settings for the best results. Alternatively, you can use a professional printing service for a more polished look.
What type of paper is best for printing Christmas cards?
The best type of paper for printing Christmas cards is cardstock. It’s thick and sturdy, making it ideal for cards. You can choose from different finishes, such as matte, glossy, or textured, depending on your design and preference.
How can I make my Christmas card stand out?
To make your Christmas card stand out, focus on creating a unique design that reflects your personal style. Use high-quality photos, choose a distinctive color scheme, and include a heartfelt message. You can also add embellishments like glitter or ribbon for a festive touch.
What should I write in my Christmas card?
What you write in your Christmas card depends on the recipient. For close friends and family, you might share personal updates or memories. For acquaintances or business contacts, a simple holiday greeting or wish for the new year is appropriate. Remember to keep your message sincere and heartfelt.
Can I design a Christmas card without any design skills?
Yes, you can design a Christmas card without any design skills. There are many online tools and templates available that make the process easy and fun. You can customize these templates with your own photos and text to create a personalized card.
How much does it cost to print Christmas cards?
The cost to print Christmas cards varies depending on several factors, including the size of the card, the type of paper used, and the number of cards you’re printing. Using a professional printing service can be more expensive, but it often results in higher quality cards.
Can I design a Christmas card on my phone?
Yes, you can design a Christmas card on your phone. There are several mobile apps available that offer card design features. These apps allow you to add photos, text, and other elements to create a custom card. Once your design is complete, you can save it to your phone or share it digitally.
How long does it take to design a Christmas card?
The time it takes to design a Christmas card depends on the complexity of your design and your familiarity with the design software. If you’re using a template or an online tool, you might be able to create a card in a few minutes. If you’re creating a custom design in a program like Photoshop, it could take several hours.
James George is a professional web developer and graphic designer. James is an expert in design, and a professional web developer, with a special interest in WordPress. Founder of Design Crawl, James has been a professional designer since 2005.

Published in
·Canvas & SVG·Design·Design & UX·HTML & CSS·JavaScript·Tools & Libraries·February 15, 2015