How To Create A Tapered Line Brush In Illustrator
 We’re going to take a look at how to make a simple art brush in Illustrator. A tapered line can give a lovely effect on illustrations and they’re easy to make.
1. Create a new Illustrator document.
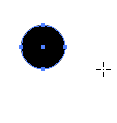
2. Using the Ellipse tool ![]() , draw out a small circle, any colour you like. Make sure that the circle does NOT have a stroke colour. Hold down the Shift key as you drag out to get a perfect circle.
, draw out a small circle, any colour you like. Make sure that the circle does NOT have a stroke colour. Hold down the Shift key as you drag out to get a perfect circle.
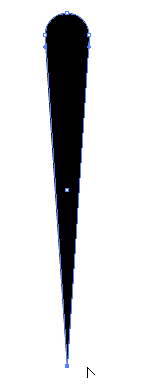
3. Using the Direct Selection tool ![]() , click on the bottom anchor point of the circle and drag it down to create a longer tapered shape, like the one you can see below.
, click on the bottom anchor point of the circle and drag it down to create a longer tapered shape, like the one you can see below.

Optional Step. If you would like a very pointed, tapered brush, then select the Convert tool ![]() (Shift + C), it’s hidden under the pen tool. Click once on the bottom anchor point that you dragged out. This converts the point from being a curve to a straight point, giving you a much sharper point.
(Shift + C), it’s hidden under the pen tool. Click once on the bottom anchor point that you dragged out. This converts the point from being a curve to a straight point, giving you a much sharper point.
4. Open the Brushes Palette (press F5 or choose Window > Brushes).
5. Click on the New Brush icon at the bottom of the palette. This opens up the new Brush dialog box.
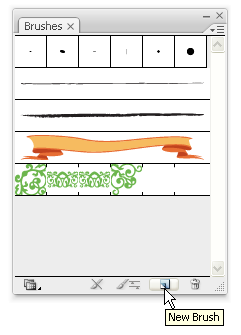
Choose New Art Brush and then click OK.
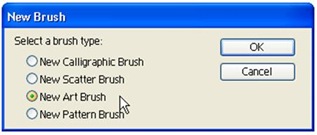
6. The option for you new brush open. There are only a few settings we need to think about here, and then we’re finished.
a) Set the brush direction to up.
b) Set the Colorization Method to Hue Shift. That just means you can make your brush stroke any colour you want when you’re using it.
c) Give your brush a name.
Click OK.
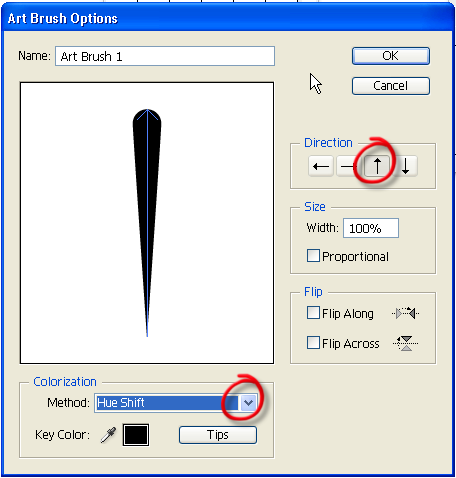
7. You should now see your new brush in your Brushes palette, ready to use.
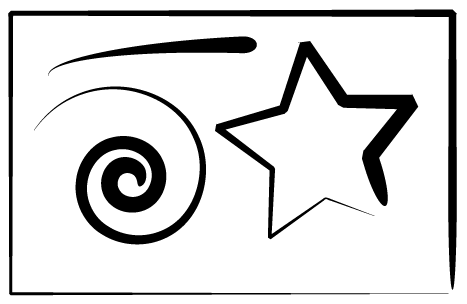
8. Remember that you can apply brush strokes to any path, not just paths drawn with the brush tool. So you drag out a star shape, scribble with pencil, or draw a curve with the arc tool and then just click on the brush stroke in the Brushes palette and voila!
9. Once you’re happy with your brush, you need to save it. Click on the folder icon at the bottom of the Brushes palette and choose Save Brush Library. (Note: I’m using CS3 here. On previous versions just click on the Arrow icon at the top right of the palette to open the drop down menu, and choose Save Brush Library).
Give it a name and choose Save.
The next time you want to use it, go to the Brushes Palette again, click on the folders icon at the bottom and choose Open Brush Library.
You can make lots of interesting tapered brushes in the same way. Simply vary the shape you draw out to begin with. Instead of a circle, try a triangle or a simple leaf shape. Here’s a few others I made using the same steps.

If you’re new to Illustrator and would like to learn more about the drawing tools, check out the series I wrote earlier this year.
- Illustrator Drawing Tools, Part 5: Pen Tool – Curves
- Drawing In Illustrator, Part 4: Pen Tool – Straight Lines
- Drawing In Illustrator, Part 3: The Pencil Tool
- Drawing In Illustrator, Part 2: The Shape Tools
- Drawing In Illustrator, Part 1: The Line Tools
Frequently Asked Questions on Creating Tapered Lines in Illustrator
What are the basic steps to create a tapered line in Illustrator?
To create a tapered line in Illustrator, you first need to create a new document. Then, select the brush tool from the toolbar. In the brush panel, click on the ‘New Brush’ button and select ‘Calligraphic Brush’. In the options that appear, adjust the angle, roundness, and size to your preference. The size should be set to ‘Pressure’ if you’re using a graphics tablet. Draw your line and you’ll see it has a taper effect.
How can I adjust the thickness of my tapered line?
The thickness of your tapered line can be adjusted by changing the stroke weight. You can find this option in the ‘Stroke’ panel. Increasing the stroke weight will make your line thicker, while decreasing it will make your line thinner.
Can I save my tapered line as a custom brush?
Yes, you can save your tapered line as a custom brush. After creating your line, go to the ‘Brushes’ panel and click on the ‘New Brush’ button. Select ‘Art Brush’ from the options and click ‘OK’. In the ‘Art Brush Options’ dialog box, you can name your brush and adjust the settings as needed. Click ‘OK’ to save your brush.
Why is my tapered line not appearing as expected?
If your tapered line is not appearing as expected, it could be due to a few reasons. One common issue is that the stroke weight is too low. Try increasing the stroke weight in the ‘Stroke’ panel. Another issue could be that the brush settings are not correct. Check your brush options and make sure they are set correctly.
How can I create a tapered line with a specific color?
To create a tapered line with a specific color, first select the line you’ve drawn. Then, go to the ‘Color’ panel and choose your desired color. You can also use the ‘Eyedropper’ tool to pick a color from another object in your document.
Can I create a tapered line without a graphics tablet?
Yes, you can create a tapered line without a graphics tablet. When setting up your brush, instead of setting the size to ‘Pressure’, set it to ‘Fixed’. This will create a uniform taper along your line.
How can I create a double-tapered line?
To create a double-tapered line, you need to use the ‘Width Tool’. Draw your line, then select the ‘Width Tool’ from the toolbar. Click and drag on your line to adjust the width. You can create a double taper by adjusting the width at both ends of your line.
Can I use the tapered line technique to create other shapes?
Yes, you can use the tapered line technique to create other shapes. By adjusting the brush settings and stroke weight, you can create a variety of different shapes with a taper effect.
How can I create a tapered line with a gradient?
To create a tapered line with a gradient, first create your line. Then, go to the ‘Gradient’ panel and choose your desired gradient. Apply the gradient to the stroke of your line.
Can I apply the tapered line effect to text?
Yes, you can apply the tapered line effect to text. First, create your text using the ‘Type’ tool. Then, with your text selected, go to the ‘Brushes’ panel and apply your tapered line brush to the stroke of your text.
Jennifer Farley is a designer, illustrator and design instructor based in Ireland. She writes about design and illustration on her blog at Laughing Lion Design.

Published in
·Accessibility·Community·Computer science·Debugging·Design·Design & UX·Programming·Software·Software·Software Development·Web·January 28, 2015

