

Continuing our series on drawing tools in Illustrator (previously we looked at the Illustrator Line tools), today we’re going to look at the Shape tools. Although the shape tools appear very basic, they can be used together to form more complex shapes. The tools allow you to quickly and easily draw rectangles, ellipses, polygons, stars and even a flare.

Drawing A Rectangle
1. Select the Rectangle tool ![]() in the toolbox (or press M on the keyboard)
in the toolbox (or press M on the keyboard)
2. Click and drag the mouse on the artboard.
3.To draw a perfect square, hold down the Shift key.
Press Option (Mac) or Alt (Windows) as you click and drag your mouse to define the rectangle using the click point as its center point.
Press Shift + Option (Mac) or Shift + Alt (Windows) to draw a square with the initial point as the centre of the square.
The alternative to drawing a freehand rectangle is to use the Rectangle tool dialog box.
Select the Rectangle tool in the toolbox and then click once on the artboard. The dialog box will open.
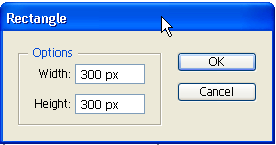
Enter a width and height in the dialog, and click OK to generate a precisely sized rectangle.
Drawing A Rounded Rectangle
1. Select the Rounded Rectangle tool ![]() from the toolbox.
from the toolbox.
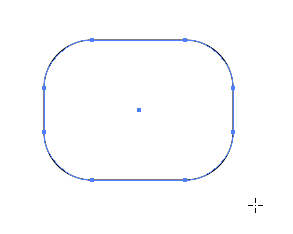
2. Click and drag out the rectangle to the size you want. You can change the angle, or how “roundy” the corners are, by hitting the Up or Down arrows while keeping the mouse button held down. Hitting the Up arrow makes the corners more rounded, hitting the Down arrow makes the corners more square.
You can also use the Rounded Rectangle dialog box to precisely set the size of the rectangle and the angle on the corners. To do this, select the Rounded Rectangle tool and click once on the artboard to bring up the dialog box.
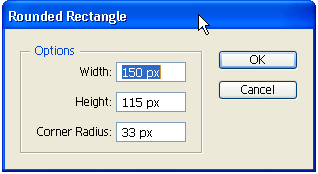
Clicking OK in the dialog generates a rectangle with the dimensions and radius you defined at the point on the artboard that you clicked with the Rounded Rectangle tool. Subsequent rounded rectangles will have the same setup until you redefine the radius in the Rounded Rectangle tool dialog.
Drawing An Ellipse
1. Select the Ellipse tool ![]() from the toolbox (or hit L as a shortcut).
from the toolbox (or hit L as a shortcut).
2. Click and drag diagonally until the ellipse is the size you want.
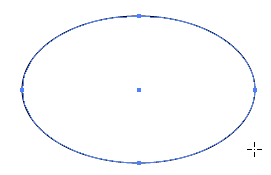
3. Hold down the Shift key to constrain the Ellipse to a perfect circle.
Hold down Option (Mac) or Alt (Windows) to draw the ellipse from the centre out.
To precisely set up your ellipse, use the dialog box.
Select the Ellipse tool from the toolbox and click once on the artboard. The dialog box opens up.
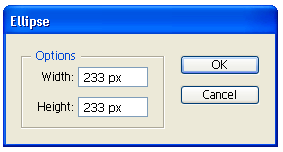
Click where you want the top-left corner of the ellipse’s bounding box to be. Specify a width and height for the ellipse, and click OK.
Drawing A Polygon
Polygons in Illustrator can have between 3 and 1000 sides. Here’s how to draw one;
1. Select the Polygon tool ![]() .
.
2. Drag until the polygon is the desired size. To rotate the polygon, just drag the pointer in an arc. Press the Up Arrow and Down Arrow keys to add and remove sides from the polygon. It might sound silly, but don’t forget that if you want a triangle, you’ll draw a polygon with three sides. (There’s no specific triangle tool).
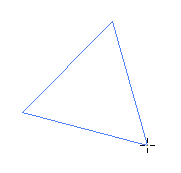
3. Press the Shift key as you draw a polygon to fix the rotation angle so that the base is parallel with the edge of the artboard. You can’t rotate polygons as you draw if you use the Shift key.
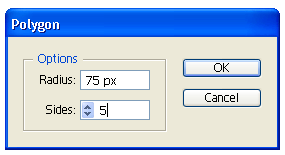
As with all the other tools, if you want to be very precise, use the polygon dialog box.
1. Select the Polygon tool from the toolbox.
2. Click once on the artboard where you want the center of the polygon to be. Specify a radius and number of sides for the polygon, and click OK.
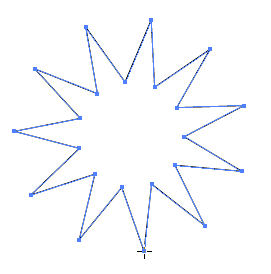
Drawing Stars
You can control how many points and how pointy they are, even when you’re freehand drawing.
1. Select the Star tool ![]() from the toolbox.
from the toolbox.
2. Click and drag out until the star is the size you require.
3. Press the Up Arrow and Down Arrows on the keyboard to add and remove points from the star.
4. Hold down Cmd (Mac) or Ctrl (Windows) whilst dragging to increase the pointy-ness of the star.
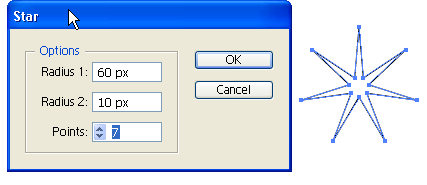
Alternatively, bring up the Star dialog box by clicking once on the artboard. You can adjust the ratio between Radius 1 and Radius 2, causing a change in how pointed the star is.
You can create a sharply pointed star by defining a Radius 2 value that is much less than the value of Radius 1.
So those are the practicalities of drawing shapes in a freehand method or by using the tool’s dialog box to take full control over how the shape will appear. As I said, they may not be overly exciting by themselves but they are vital building blogs for creating more complex shapes. We’ll look at some practical examples later in the week.
Are you new to Illustrator? Have you been using these tools for drawing? What have you found to be your biggest stumbling block in Illustrator so far?
Related Reading:
Frequently Asked Questions about Drawing in Illustrator
How can I draw a perfect circle in Illustrator?
Drawing a perfect circle in Illustrator is quite simple. First, select the Ellipse Tool from the toolbar. Click anywhere on your artboard, hold and drag to create an ellipse. To make a perfect circle, hold down the Shift key while dragging. This will constrain the proportions and create a circle instead of an ellipse. You can adjust the size and position of the circle by selecting it with the Selection Tool and dragging the bounding box handles.
Can I draw arcs and pie shapes in Illustrator?
Yes, Illustrator allows you to draw arcs and pie shapes. To draw an arc, select the Arc Tool from the toolbar. Click and drag on the artboard to create an arc. You can adjust the curvature of the arc by dragging the handles. To create a pie shape, first draw a circle using the Ellipse Tool. Then, select the Scissors Tool and click on the circle path to create cut points. Delete the unwanted segment to create a pie shape.
How can I use the Shape Tools in Illustrator?
The Shape Tools in Illustrator include the Rectangle Tool, Rounded Rectangle Tool, Ellipse Tool, Polygon Tool, Star Tool, and Flare Tool. These tools allow you to create different geometric shapes. To use a Shape Tool, select it from the toolbar and click and drag on the artboard to create a shape. You can adjust the size, position, and orientation of the shape using the Selection Tool.
Can I draw freehand in Illustrator?
Yes, Illustrator allows you to draw freehand using the Pencil Tool. This tool lets you create paths with a freehand feel. To draw with the Pencil Tool, select it from the toolbar and click and drag on the artboard. You can adjust the smoothness of the path by double-clicking the Pencil Tool icon and adjusting the Smoothness slider in the Pencil Tool Options dialog box.
How can I fill shapes with color in Illustrator?
To fill a shape with color in Illustrator, first select the shape using the Selection Tool. Then, click the Fill box in the toolbar and choose a color from the Color Picker. You can also use the Swatches panel to apply predefined colors, gradients, and patterns.
Can I draw 3D shapes in Illustrator?
Yes, Illustrator has a 3D effect that allows you to transform 2D shapes into 3D objects. To apply the 3D effect, first draw a shape using one of the Shape Tools. Then, go to Effect > 3D and choose an option from the submenu. In the 3D Options dialog box, you can adjust the rotation, perspective, and lighting of the 3D object.
How can I draw straight lines in Illustrator?
To draw straight lines in Illustrator, use the Line Segment Tool. Select it from the toolbar, click on the artboard where you want the line to start, and drag to where you want the line to end. Hold down the Shift key while dragging to constrain the line to 45-degree angles.
Can I use Illustrator to create complex shapes?
Yes, Illustrator has several tools and features that allow you to create complex shapes. The Pathfinder panel lets you combine multiple shapes into one, subtract one shape from another, intersect shapes, and more. The Shape Builder Tool allows you to merge and subtract overlapping shapes by simply dragging across them.
How can I draw curves in Illustrator?
To draw curves in Illustrator, use the Pen Tool. Click on the artboard to create the first anchor point, then click again where you want the curve to end. Before releasing the mouse button on the second click, drag to create the curve. The direction and distance you drag determine the shape and steepness of the curve.
Can I edit shapes after drawing them in Illustrator?
Yes, Illustrator allows you to edit shapes after drawing them. With the Direct Selection Tool, you can select individual anchor points and adjust their position. The Pen Tool lets you add or delete anchor points. The Convert Anchor Point Tool allows you to change smooth points to corner points and vice versa.

