
Photos and images are a great way to reinforce messages, break up copy on your website, and help make it more engaging for your visitors.
You’ve probably used the ‘Add Media’ function in WordPress to add images to your pages and posts. However, what if you’d like to display more than one photo in a grid of thumbnails?
There are lots of plugins available that provide gallery functionality in WordPress, however, did you know that WordPress has it’s own default Gallery option available?
In this quick tip, I’ll take you through the steps showing you how to add an image gallery in WordPress, with the added bonus of a lightbox popup so people can also easily browse through full size versions of your images.
How to Use the ‘Create Gallery’ Feature in the WordPress Media Uploader
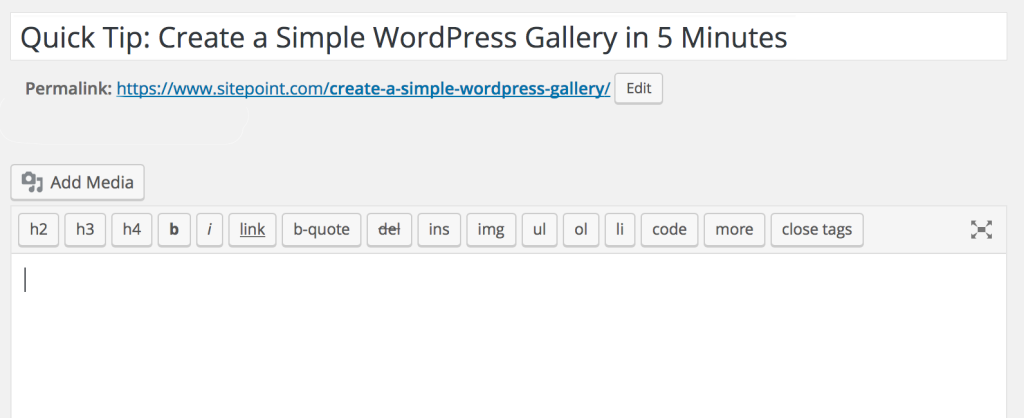
1. Log into the WordPress dashboard. Open the page or post that you’d like to insert the gallery on.
2. Place your cursor in the text editor where you’d like to insert the gallery and click ‘Add Media’.
3. Click on the ‘Create Gallery’ option on the left hand navigation.
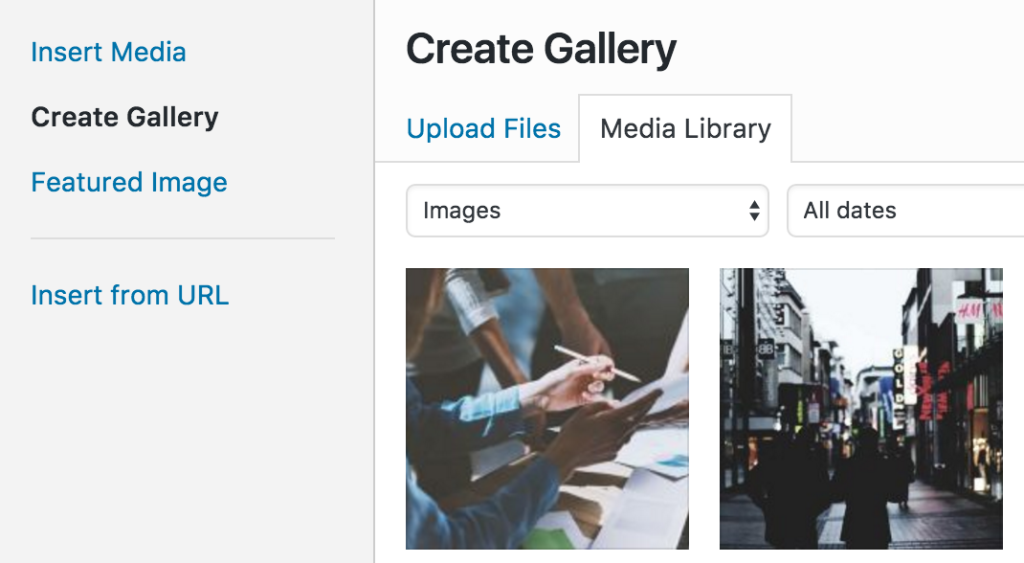
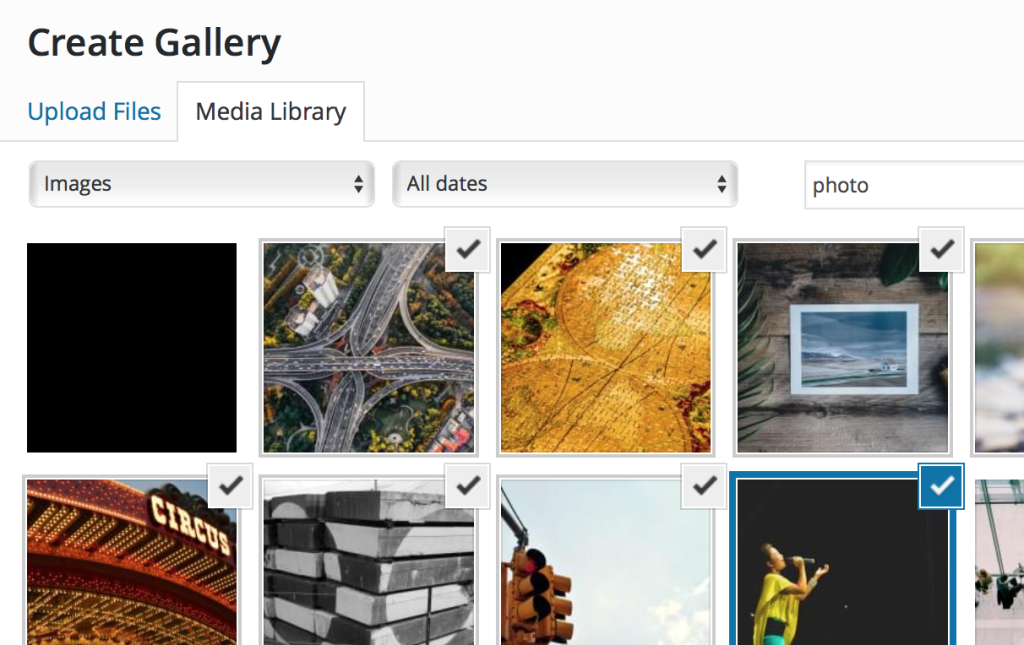
4. You can now choose to either ‘Upload Files’ to the Media Library or select images you have previously uploaded. Then select ‘Create Gallery’.
5. You can easily reorder your images by clicking to drag and drop them into place.
6. Next you can choose how you’d like to ‘link to’ the images. The option of ‘none’ means they won’t be clickable. Otherwise you can choose to link through to the ‘attachment page’ or ‘media file’.
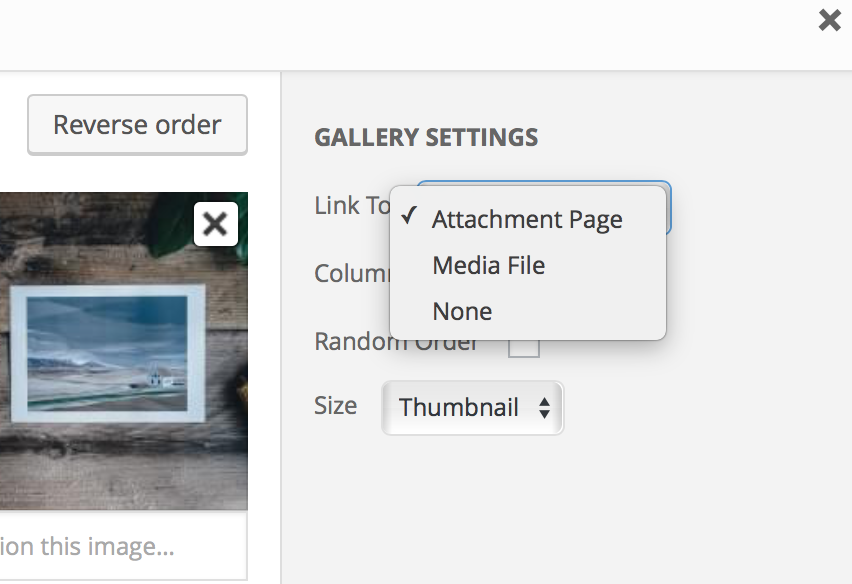
7. Select the ‘Columns’ drop down box and select the number of columns you’d like your images to be displayed across.
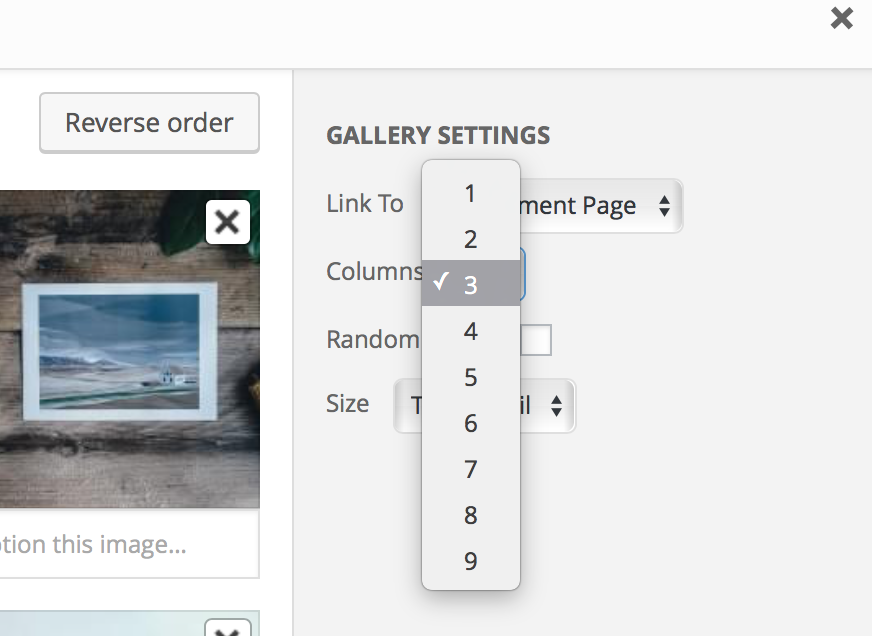
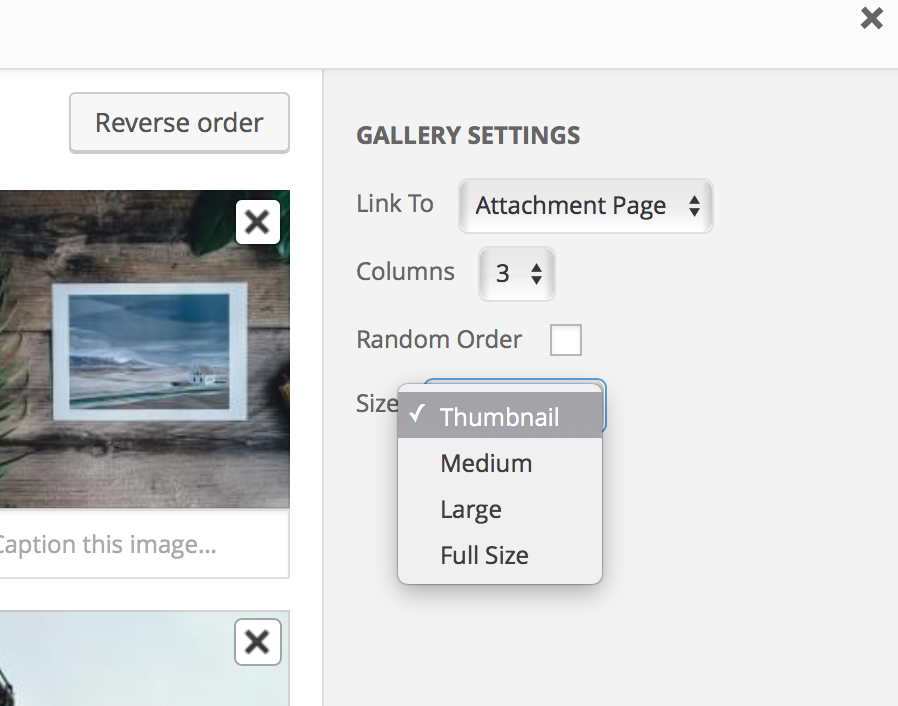
8. Select the ‘Size’ drop down to specify the size of the images you’d like to use.
9. Add a title, alt text for each photo. You can also choose to add a caption, which will be displayed beneath the image.
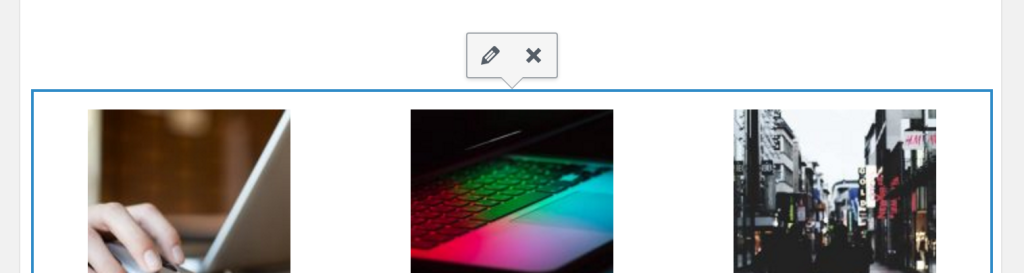
10. Your image gallery will then be inserted where your cursor was placed. To edit the gallery, click in the gallery area surrounding the photos and click on the edit (pencil) icon. To remove a gallery simply click on the ‘X’.
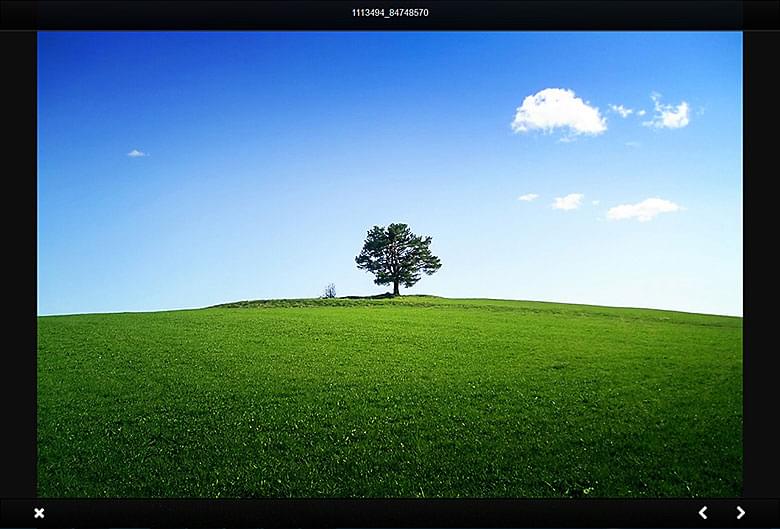
11. When you hit ‘save draft’ and ‘preview’ you should see an example like this:


11. To extend further upon the default WordPress gallery you can install a plugin such as Responsive Lightbox by dFactory so that when you click on a thumbnail, the image will be opened in a responsive slider.
Conclusion
So there you have it, a simple WordPress image gallery in 5 minutes. For more information on the WordPress Gallery, check out the WordPress Codex.
If you have any WordPress gallery plugins you like to use or recommend, please be sure to share it in the comments below.
Frequently Asked Questions (FAQs) about Creating a Simple WordPress Gallery
What are the best plugins for creating a WordPress gallery?
There are several plugins available for creating a WordPress gallery. Some of the most popular ones include Envira Gallery, NextGEN Gallery, and FooGallery. Each of these plugins offers a variety of features such as drag-and-drop builders, responsive design, and social media integration. The choice of plugin largely depends on your specific needs and preferences.
How can I create a responsive image gallery in WordPress?
Creating a responsive image gallery in WordPress is quite straightforward. Most gallery plugins offer this feature. When creating your gallery, ensure that the ‘responsive’ option is selected. This ensures that your gallery adjusts to fit different screen sizes, providing an optimal viewing experience for all users.
Can I add captions to my images in the WordPress gallery?
Yes, you can add captions to your images in the WordPress gallery. When uploading an image, you’ll see a field labeled ‘Caption’. Here, you can enter the text that you want to appear beneath the image. This is a great way to provide additional context or information about each image.
How can I organize my images in the WordPress gallery?
Organizing your images in the WordPress gallery can be done in several ways. You can create separate galleries for different categories of images. Additionally, some plugins offer tagging and sorting features, allowing you to group related images together.
Can I customize the appearance of my WordPress gallery?
Absolutely! Most WordPress gallery plugins offer a range of customization options. You can choose from different layout styles, adjust the size and spacing of your images, select a color scheme, and more. This allows you to create a gallery that perfectly matches the look and feel of your website.
How can I optimize my WordPress gallery for SEO?
Optimizing your WordPress gallery for SEO involves several steps. Firstly, ensure that your images are properly named and tagged. Secondly, use alt text for each image, which helps search engines understand what the image is about. Lastly, consider using a plugin that offers SEO features, such as automatic sitemap generation.
Can I protect my images in the WordPress gallery from being downloaded?
Yes, there are several ways to protect your images in the WordPress gallery from being downloaded. Some plugins offer right-click protection, which prevents users from right-clicking on an image and saving it. Additionally, you can add a watermark to your images, which discourages unauthorized use.
How can I add social sharing buttons to my WordPress gallery?
Adding social sharing buttons to your WordPress gallery is a great way to encourage visitors to share your images. Many gallery plugins offer this feature. Simply select the social networks you want to include, and the buttons will appear beneath each image in your gallery.
Can I create a slideshow with my WordPress gallery?
Yes, creating a slideshow with your WordPress gallery is possible. Many gallery plugins offer a slideshow feature. You can set the transition speed, choose whether or not to include navigation arrows, and more.
How can I troubleshoot issues with my WordPress gallery?
If you’re experiencing issues with your WordPress gallery, there are several steps you can take. Firstly, ensure that your plugin is up-to-date. Secondly, try deactivating and reactivating the plugin. If the issue persists, consider reaching out to the plugin’s support team for assistance.