

This article is part of a series created in partnership with SiteGround. Thank you for supporting the partners who make SitePoint possible.
Key Takeaways
- DeployHQ is a platform that simplifies and automates the process of deploying code from repositories to servers, saving time and energy for web developers, particularly those in small companies or independent developers who don’t have all their testing and builds automated yet.
- The platform offers flexibility, allowing for automatic deployments every time changes are committed to a particular branch, or manual triggering of deployments when needed. This ensures convenience and automation without compromising important safeguards like code review or schedule updates.
- Setting up DeployHQ involves creating a new project and connecting it to your repository, configuring your server in DeployHQ, and setting up your deployment configuration. It supports a wide range of repository and server types, and can be used to deploy to multiple servers, making it a versatile tool for developers.
The Problem: Deploying Code
So you have your projects in GitHub, whatever they are — an app you’re working on with a small team, a small business brochure site, an ecommerce platform. You’ve decided to version control them, but you still have little in the way of automated processes in place, and you’re still having to update each of your environments — staging, production, whatever you have — by hand, with FTP. Or you’ve got them pulling down Git changes from a branch.
This pain is only multiplied if you’re deploying to other development or staging servers too, or you have a load-balanced production machine that needs multiple simultaneous deployments. What you really need is an automated process here, that can either automatically deploy when changes to code are made, or can be ready to do so at the push of a button.
The Solution: DeployHQ
DeployHQ can be the link between your Git repository and your servers and do your deployments for you. You can make those deployments automatic (every time you commit to your staging branch, DeployHQ automatically deploys those changes to your Staging server). You can also trigger deployments manually (deploying to Production server from the production branch requires you to push the button yourself). This flexibility allows for a maximum of convenience and automaton without taking important safeguards away, like a review of code merged into production, or the schedule by which you update your production website.
DeployHQ seems especially good for a small company or developer who doesn’t have all of their testing, builds, CI, etc automated yet into cohesive processes, and is really looking for a way to push code to various environments with as little friction as possible.
Getting Started with DeployHQ
When you sign up for your DeployHQ account, you’ll login and arrive at the welcome screen.

Then, you’ll need to follow a few steps in order to get your deployments up and running!
1. Preparation
In the below examples of configuration, GitHub will be used as the version control system. So, head over to GitHub, and if you don’t already have a project in mind, create a repository. The repository, ideally, will have multiple branches (i.e. “staging”, “production”) just to help demonstrate the functionality available at DeployHQ. Both staging and production branches of a test repository will be used in this demonstration. You can leave this open in a tab, as you’ll need to come back.
2. Create a New DeployHQ Project
Right from the welcome screen, hit the “Create a new project” button.

You’ll need to give the project a name, and choose the version control system that you’re using. For this example, we’re using GitHub. Then, hit “Create Project”! You’ll see a progress screen, and then, if all goes well, you’ll get a screen that requires you to login (or if already logged in, authorize the app) to access your repository.
Once you’ve authorized DeployHQ to access your GitHub, you’ll be taken to a screen which shows the organizations you’re connected to (and your personal repositories) with a list of those repositories. Pick one to link your project to, and once this is done, DeployHQ will ask you to provide server information.
3. Adding a Server
To add a server, you’ll give it an internal name, then pick the protocol with which you’d like to access the server, such as SSH/SFTP.
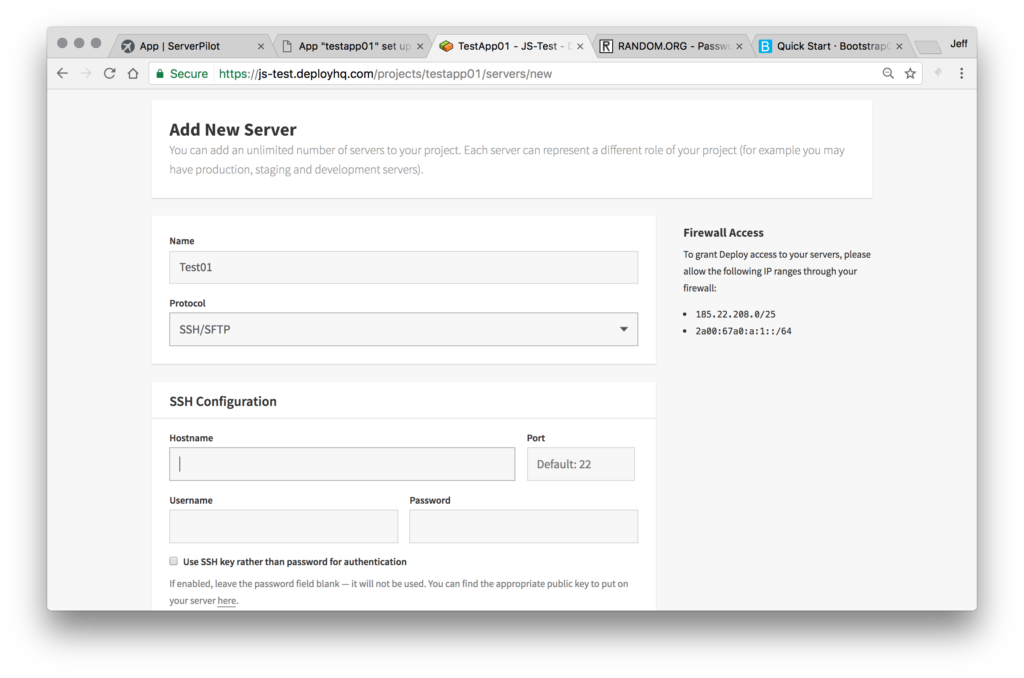
Once you’ve made a choice, more options will open up, where you can fill out information about your website hosting, details like the server’s IP and credentials, the path from the FTP root to get to your website files, etc.
If you have enough active servers on DeployHQ that you need to group them, you’ll be able to choose a group for this server. You’ll also want to choose which branch of the repository the project is linked to you’ll want to deploy from. Picking staging will mean that when code is committed to the staging branch in GitHub, DeployHQ will be picking that up and able to deploy using it.
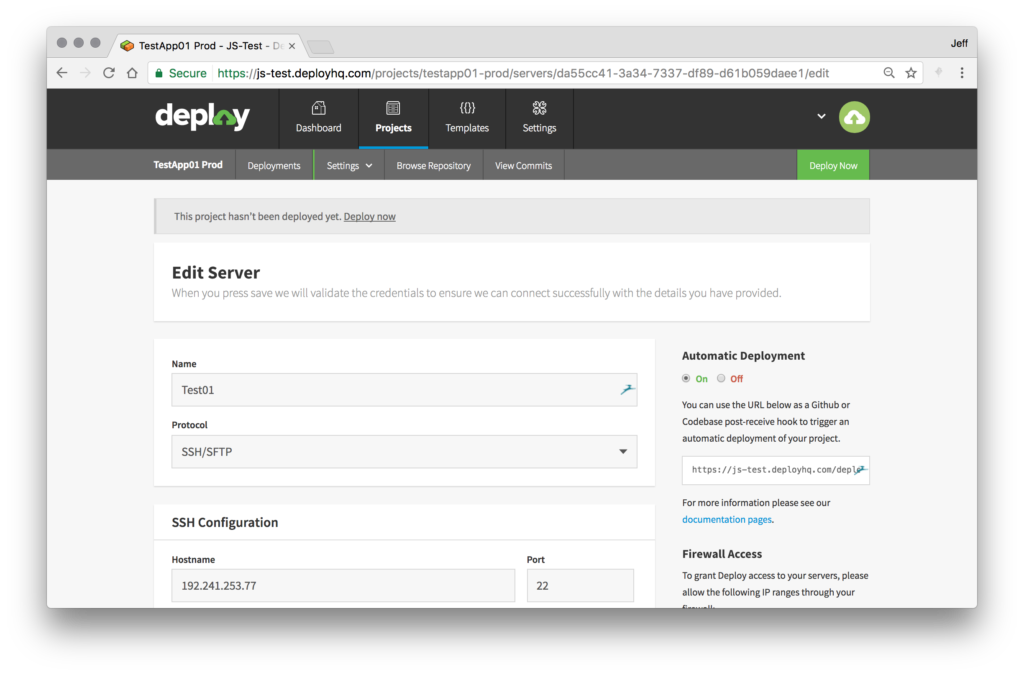
4. Deployment
Now that you’ve added your server, click the edit button to edit the server in DeployHQ. You’ll see here both the settings you’ve already chosen for the server, as well as a few more, particularly along the right sidebar.
Manual Deployment
There may be things that you don’t want entirely automatically deployed. For example, your production branch might need to be vetted or go through a final test run before you push it live, or you may have to do so on a schedule. No problem. Simply toggle off automatic deployments for this server in the settings menu on the right.
Then, after pushing some code to the appropriate GitHub branch, you’ll be able to zip over to your DeployHQ project and deploy it manually with just a click or two!
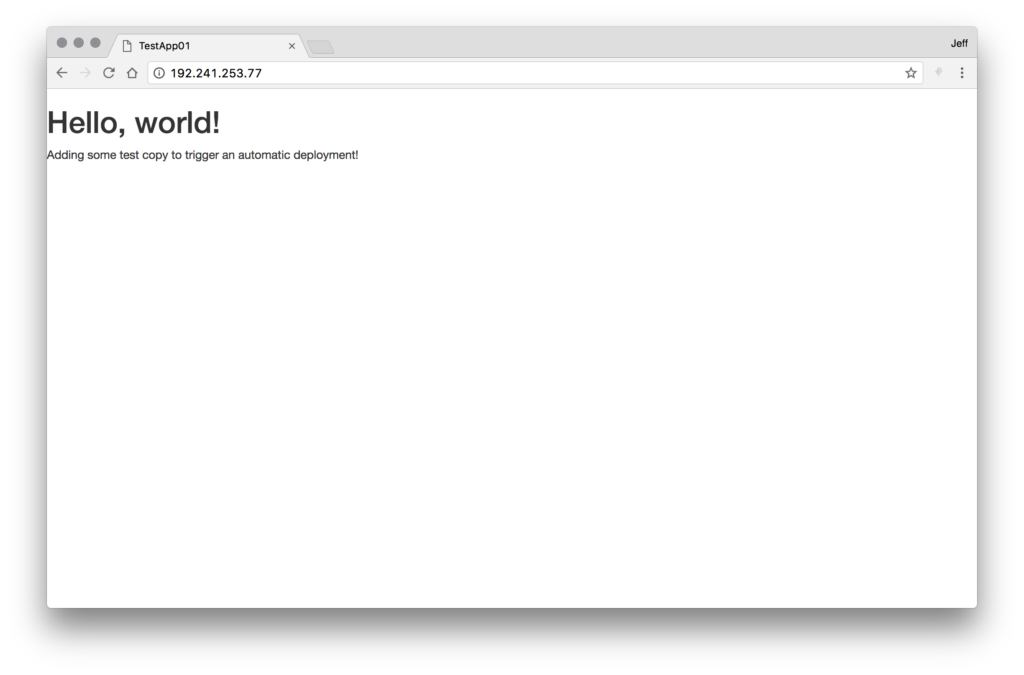
This test site started out with nothing in it. After initializing the GitHub with a starter index.html and then hitting “deploy” on DeployHQ, here’s what we have:

Automatic Deployment
On the other hand, maybe you want your staging environment to just automatically push changes to the server as soon as you make them in GitHub. Head over and look at that server edit screen, at the right side panel. You’ll see the “Automatic Deployment” option — toggle that on. You’ll also want to copy the URL below it. In the same area, you’ll see that DeployHQ has documentation about automatic deployments to assist if you run into any snags.
Now, pop back over to your GitHub repository and go to the repository’s settings, and Webhooks. Add a new Webhook, chose the URL encoded type, and use the copied URL from your DeployHQ server settings as the URL, and save it. This means that every time commits are pushed to the repository, GitHub will send a payload to DeployHQ. DeployHQ, in turn, will check to see if it’s the correct branch, and if so, queue up and enact a deployment, since you have automatic deployments on.
Excellent! Let’s try it out. Head back to GitHub and update your index.html file (or a different file if need be). Commit the change, and then take a look at your website.
DeployHQ has pushed it out there automatically without you even needing to do anything. Great stuff!
Conclusions
DeployHQ definitely isn’t the route to go for large organizations with their own complex needs that surpass this application. But for many, many web developers, services like DeployHQ will save time and energy. Match them up with an amazing host that provides proper SSH or SFTP connection ability, like our partner, SiteGround, and you’re ready to get deploying!
Frequently Asked Questions about Using DeployHQ to Automate Deployments
What is DeployHQ and how does it work?
DeployHQ is a platform that simplifies the process of deploying code from your repositories to your servers. It works by connecting to your repository, pulling the latest changes, and then deploying them to your server. You can configure it to deploy automatically whenever you push changes to your repository, or you can manually trigger a deployment. DeployHQ supports a wide range of repository and server types, making it a versatile tool for developers.
How do I set up DeployHQ for my project?
Setting up DeployHQ for your project involves a few steps. First, you need to create a new project in DeployHQ and connect it to your repository. Then, you need to configure your server in DeployHQ, specifying the server type, hostname, and deployment path. Finally, you need to set up your deployment configuration, specifying which files and directories should be deployed and how they should be processed.
Can I use DeployHQ with my existing repository?
Yes, DeployHQ is designed to work with existing repositories. It supports a wide range of repository types, including Git, Mercurial, and Subversion. You can connect DeployHQ to your repository by providing the repository URL and your access credentials.
How do I automate deployments with DeployHQ?
DeployHQ offers several ways to automate deployments. You can configure it to deploy automatically whenever you push changes to your repository. You can also set up scheduled deployments, which will deploy your code at specified times. Additionally, you can use DeployHQ’s API to trigger deployments from your own scripts or applications.
What types of servers does DeployHQ support?
DeployHQ supports a wide range of server types, including FTP, SFTP, SSH, and Amazon S3. You can specify the server type when you configure your server in DeployHQ. You can also specify the hostname, port, username, and password for your server.
Can I use DeployHQ to deploy to multiple servers?
Yes, DeployHQ allows you to deploy to multiple servers. You can add multiple servers to your project in DeployHQ, and you can specify different deployment configurations for each server. This makes it easy to manage deployments to different environments, such as staging and production.
How do I manage my deployments in DeployHQ?
DeployHQ provides a web-based interface where you can manage your deployments. You can view the status of your deployments, trigger manual deployments, and configure automatic deployments. You can also view a log of all your deployments, which can be helpful for troubleshooting.
Can I roll back a deployment in DeployHQ?
Yes, DeployHQ allows you to roll back a deployment. You can do this by selecting the deployment you want to roll back in the DeployHQ interface, and then clicking the “Rollback” button. This will revert your server to the state it was in before the deployment.
How secure is DeployHQ?
DeployHQ takes security seriously. It uses secure protocols to connect to your repository and your servers, and it encrypts your access credentials. Additionally, DeployHQ does not store your code; it only pulls the latest changes from your repository when it performs a deployment.
What kind of support does DeployHQ offer?
DeployHQ offers comprehensive support for its users. They provide a detailed documentation that covers all aspects of using the platform. They also offer email support, and they have a community forum where users can ask questions and share tips.