


Key Takeaways
- Utilize React Native and Async PHP to create a robust multi-factor authentication system that incorporates fingerprint scanning, enhancing security beyond traditional SMS or notification-based methods.
- Implement the React Native framework to develop iOS applications with the capability to compile front-end technologies into native mobile apps, while an async PHP server handles backend processes including fingerprint scan requests.
- Install and integrate the `react-native-touch-id` library in your React Native project to enable fingerprint authentication functionality, ensuring to handle simulator limitations and real device testing effectively.
- Develop an asynchronous server using Aerys in PHP to manage incoming fingerprint scan requests, and utilize web sockets to communicate these requests between the mobile application and the server.
- Explore the potential of expanding this setup to include real-time fingerprint authentication in transaction processes, potentially integrating with systems like programmable credit cards for enhanced security and user verification.
This article was peer reviewed by Adedayo Adeniyi. Thanks to all of SitePoint’s peer reviewers for making SitePoint content the best it can be!
We live in interesting times. A short while ago, a company called OfferZen announced a new, programmable credit card. It’s been a long time since I was this excited to get my hands on a piece of tech. My mind has been brimming with ideas ever since.
So, I decided to write about one of them!
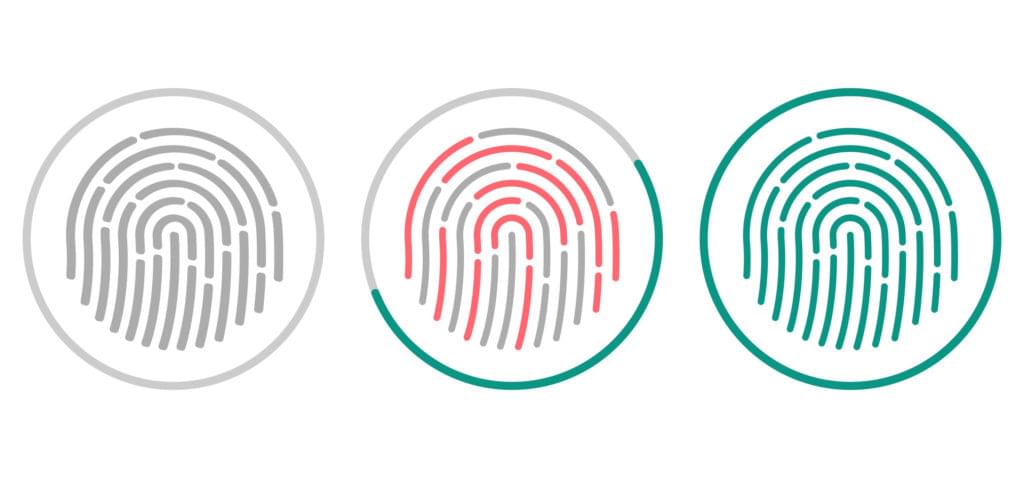
I’m going to describe the process of building custom multi-factor authentication for all transactions. I don’t want to do the usual (and boring on its own) SMS or push notification one-time-password stuff. I want to build a fingerprint scanner right into my phone.
In this tutorial, we’re going to look at how to set up a simple iOS app using React Native. We will also set up an asynchronous HTTP server, with a web socket connection to the app.
We will follow this up by adding fingerprint scanning capabilities to the app, and asking for these fingerprint scans from the HTTP server. Then we will build an endpoint through which GET requests can request a fingerprint scan and wait for one to occur.
There’s a lot to cover, so I’ve chosen to leave the programming of the credit card for another tutorial. This tutorial will be useful on its own, but even better alongside the next one!
You can find the code for this tutorial here and here. I’ve tested it with PHP
7.1and the latest version of Google Chrome.
What is React Native?
If you’ve been building websites for a while, then you’ve probably heard the name React. It’s an interface builder library (among other things). It introduces many new and interesting ideas to the world of front-end development. One of them is that interfaces are easier to build when you think of them one discrete component at a time. Kind of like how one “eats an elephant one bite at a time“.
React Native takes these ideas one step further, by providing a build chain to compile front-end technologies (like HTML, Javascript, and CSS) to native iOS and Android applications.
Yes, you can build an Android version of this tutorial’s examples. Unfortunately, I only have time to focus on iOS, and you’ll probably have to source the Android-specific third-party libraries (for fingerprint scanning, specifically) yourself.
With React Native, it’s possible to write code very similar to what you’d find in a web project, and have it work flawlessly for most smartphone users. So why are we talking about it in the PHP channel? As you’ll see, this platform is so accommodating that a modest amount of Javascript knowledge is enough to build something useful. We don’t need to know Java or Objective-C or Swift!
Getting Started with React Native
I’m not going to explain the steps to install React Native on every platform. There are already excellent docs for how to do this. For the purposes of this exercise, you’ll need to install XCode, NodeJS, and the react-native command-line tool.
If you have the time and/or desire to get the Android emulator going, the same docs will suffice.
The docs include steps to create a new project and run it in the simulator. There’s no point continuing beyond this point if you can’t get the new application to run. If that’s the case, talk to me on Twitter or in the comments.
Installing TouchID
It’s tempting to think that React Native only installs a generalized Javascript API to use, but that’s not the case. One of its best features (in my opinion) is the powerful native module support.
In the case of fingerprint scanning, there is no native Javascript API. But there are a plethora of native modules which provide one. I googled “react native ios fingerprint” and the first match appears to work wonderfully:
yarn add react-native-touch-id
react-native link
You’ll need to quit the simulator and re-run
react-native run-iosbefore the new app will have access to the native module.
The default index.ios.js file is a bit messy, but it is mostly sufficient to try TouchID. After a bit of tidying up, it should look similar to this:
import React, { Component } from "react";
import { AppRegistry } from "react-native"
import TouchID  from "react-native-touch-id"

class Fingerprints extends Component {
  componentDidMount() {
    TouchID.authenticate("Trying TouchID")
      .then(success => {
        alert("Success")
      })
      .catch(error => {
        alert("Failure")
      })
  }

  render() {
    return null
  }
}

AppRegistry.registerComponent("Fingerprints", () => Fingerprints)
This is from
index.ios.js, in the app project
If you’re unsure about the general structure of this, it’s probably a good time to brush up on React development. There are plenty of great courses on the subject, ours included.
Aside from the React Native boilerplate, we’re importing the TouchID library we installed. We’ve added a componentDidMount method, which is called automatically as this component is rendered. Inside it, we’ve added a call to TouchID.authenticate.
By default, this will automatically fail. The simulator is set to not have enrolled fingerprints by default. When you open the app with this new code, you should see the failure message.
To change this, go to “Hardware” menu and select “Touch ID” → “Toggle Enrolled State”. Once you refresh (which you can do with ⌘ + R), you should see the prompt to scan your fingerprint. Since the simulator doesn’t have a way to physically do this, head back to the same “Touch ID” menu, and select “Matching Touch”. You should then see the success message.
I found this fascinating to play around with! You can open the
ios/Fingerprints.xcodeprojin XCode, and run it on a connected iPhone to see real scans. Just remember to renameFingerprintsto the name of your React Native application.
Creating a Server
On it’s own, this isn’t yet useful. We can simulate a fingerprint scan, but it’s happening automatically and not when needed. We should create a server, so that fingerprints can be requested.
My favorite kind of PHP server is an async PHP server. I’ve written about this many times before, so feel free to check out more detailed explanations on the topic: Game Development with ReactJS and PHP and Procedurally Generated Game Terrain with ReactJS, PHP, and Websockets.
I’ll not go too deeply into what things are doing, but feel free to dive into the code for this tutorial to learn about things I don’t mention here.
To begin with, let’s install Aerys. Our composer.json file could look something like:
{
  "scripts": {
    "dev": "vendor/bin/aerys -d -c loader.php",
    "prod": "vendor/bin/aerys -c loader.php"
  },
  "require": {
    "amphp/aerys": "dev-amp_v2",
    "pre/kitchen-sink": "^0.1.0"
  },
  "autoload": {
    "psr-4": {
      "App\\": "app"
    }
  },
  "config": {
    "process-timeout": 0
  },
  "minimum-stability": "dev",
  "prefer-stable": true
}
This is from
composer.jsonin the server project
We can also set up a placeholder for requesting scans, along with an HTTP GET route to get to it:
namespace App\Action;

use Aerys\Request;
use Aerys\Response;

class ScanAction
{
  public function __invoke(Request $request, Response $response)
  {
    $response->end("requesting a scan...");
  }
}
This is from
app/Action/ScanAction.prein the server project
use Aerys\Router;
use App\Action\ScanAction;

return (Router $router) => {
  $router->route(
    "GET", "/scan", new ScanAction
  );
};
This is from
routes/web.prein the server project
And we can start the server up with a server config file and pre-processor loader script:
$port = 8080;

$host = new Aerys\Host();
$host->expose("*", $port);

$host->use($router = Aerys\router());

$web = process .."/routes/web.pre";
$web($router);

exec("echo 'http://127.0.0.1:{$port}' | pbcopy");
This is from
config.prein the server project
return Pre\processAndRequire(__DIR__ . "/config.pre");
This is from
loader.phpin the server project
loader.php applies preprocessor macros and requires config.pre. config.pre creates a new async Aerys server, and loads the routes file. The routes file registers a GET route to the ScanAction class.
If you’re wondering whether some of this syntax is standard PHP: it’s not. Those are the preprocessor macros I mentioned, and they do neat things like convert
.."/routes/web.pre"to__DIR__ . "/routes/web.pre". Just look at files likeconfig.phpandroutes/web.phpto see the valid PHP syntax that is generated…
Now when we go to http://127.0.0.1:8080/scan, we should see the message “requesting a scan…”. This is good. Let’s add web sockets to our server:
namespace App\Socket;

use Aerys\Request;
use Aerys\Response;
use Aerys\Websocket;
use Aerys\Websocket\Endpoint;
use Aerys\Websocket\Message;

class FingerprintSocket implements Websocket
{
  private $endpoint;
  private $connections = [];

  public function onStart(Endpoint $endpoint)
  {
    $this->endpoint = $endpoint;
  }

  public function onHandshake(Request $request,
    Response $response)
  {
    // $origin = $request->getHeader("origin");
    //
    // if ($origin !== "http://127.0.0.1:8080") {
    //   $response->setStatus(403);
    //   $response->end("origin not allowed");
    //   return null;
    // }

    $info = $request->getConnectionInfo();

    return $info["client_addr"];
  }

  public function onOpen(int $clientId, $address)
  {
    $this->connections[$clientId] = $address;
  }

  public function onData(int $clientId, Message $message)
  {
    $body = yield $message;

    yield $this->endpoint->send(
      $payload, $clientId
    );
  }

  public function onClose(int $clientId,
    int $code, string $reason)
  {
    unset($this->connections[$clientId]);
  }

  public function onStop()
  {
    // nothing to see here...
  }
}
This is from
app/Socket/FingerprintSocket.prein the server project
use Aerys\Router;
use App\Action\ScanAction;
use App\Socket\FingerprintSocket;

return (Router $router) => {
  $router->route(
    "GET", "/scan", new ScanAction
  );

  $router->route(
    "GET", "/ws", Aerys\websocket(new FingerprintSocket)
  );
};
This is from
routes/web.prein the server project
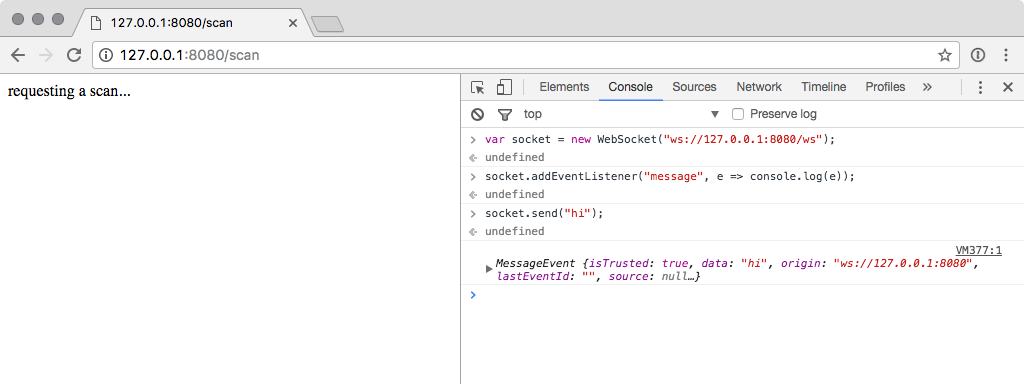
We’ve just registered a new route which will respond to web socket connections and echo messages back. Using the Chrome developer console, in that same /scan endpoint, we can test this out:
Connecting to React Native
Since we can echo messages back through a web socket, it’s probably a good time to try connecting from our app. React Native ships with web socket support, so we can add similar code to the same componentDidMount method:
componentDidMount() {
  // TouchID.authenticate("Trying TouchID")
  //   .then(success => {
  //     alert("Success")
  //   })
  //   .catch(error => {
  //     alert("Failure")
  //   })

  const socket = new WebSocket("ws://127.0.0.1:8080/ws")
  socket.addEventListener("message", e => console.log(e.data))
  socket.addEventListener("open", e => socket.send("hi"))
}
This is from
index.ios.jsin the app project
To see these console messages, you’ll need to enable remote debugging.
How to Enable Remote Debugging
Press ⌘ + D and select “Debug Remote JS”. This will open a new Chrome tab. Open the developer tools pane of this new tab, then refresh the app. This should lead to seeing “hi” in the console, as it is echoed back from the server.
Requesting Fingerprints
Let’s customize the React Native code to listen for requests to scan fingerprints:
componentDidMount() {
  const socket = new WebSocket("ws://127.0.0.1:8080/ws")

  socket.addEventListener("message", (e) => {
    const data = JSON.parse(e.data)

    if (data.type === "scan") {
      TouchID.authenticate("Trying TouchID")
        .then(success => {
          // alert("Success")

          socket.send(JSON.stringify({
            "type": "success",
            "data": success,
            "promise": data.promise
          }))
        })
        .catch(error => {
          // alert("Failure")

          socket.send(JSON.stringify({
            "type": "error",
            "data": error,
            "promise": data.promise
          }))
        })
    }
  })

  // socket.addEventListener("open", e => socket.send("hi"))
}
This is from
index.ios.jsin the app project
When a message arrives, we parse it into JSON. If the type is scan, we request a fingerprint scan. Whether the fingerprint scan completes successfully or not, we send a serialized JSON object with details about the event.
We also need to adjust the server to deal with this new kind of message:
use Aerys\Router;
use App\Action\ScanAction;
use App\Socket\FingerprintSocket;

$socket = new FingerprintSocket;

return (Router $router) => {
  $router->route(
    "GET", "/scan", new ScanAction($socket)
  );

  $router->route(
    "GET", "/ws", Aerys\websocket($socket)
  );
};
This is from
routes/web.prein the server project
We provide a reference to the socket class to the action class. This means we can call methods on the socket class in response to HTTP requests:
namespace App\Action;

use Aerys\Request;
use Aerys\Response;
use App\Socket\FingerprintSocket;

class ScanAction
{
  private $socket;

  public function __construct(FingerprintSocket $socket)
  {
    $this->socket = $socket;
  }

  public function __invoke(Request $request, Response $response)
  {
    try {
      yield $this->socket->requestScan();
      $response->end("success!");
    } catch ($e) {
      $response->end("failure!");
    }
  }
}
This is from
app/Action/ScanAction.prein the server project
When the /scan route is called, we request a new fingerprint scan from the socket class. This is a delayed action (because the app must prompt and wait for the scan), so we can expect to use promises:
private $id = 0;
private $promises = [];

public async function requestScan()
{
  $deferred = new Deferred;
  $this->promises["_{$this->id}"] = $deferred;

  $body = json_encode([
    "type" => "scan",
    "promise" => "_{$this->id}"
  ]);

  $this->id += 1;
  $this->endpoint->broadcast($body);

  return $deferred->promise();
}

public function onData(int $clientId, Message $message)
{
  $body = yield $message;
  $data = json_decode($body);

  $promise = $this->promises[$data->promise];

  if ($data->type === "success") {
    $promise->resolve($data->data);
  } else {
    $promise->fail(
      new \Exception($data->data->message)
    );
  }

  unset($this->promises["_{$this->id}"]);

  // yield $this->endpoint->send(
  //   $body, $clientId
  // );
}
This is from
app/Socket/FingerprintSocket.prein the server project
The requestScan method is asynchronous. It returns a Deferred object (which acts like a promise, with resolve and fail methods). We store a reference to the deferred object, and broadcast its identity (and a request to scan) to all connected web socket clients.
We return the deferred reference, so that the action will wait until it is resolved (thanks to the yield keyword). Then, we listen for success or fail messages from the app. We find the related deferred object, and resolve or fail it appropriately.
At that point, the action’s yield statement resolves and we can respond, either successfully or not. Here’s what it looks like, all put together:

Summary
Given how little JavaScript we needed to write, and how cool the interactivity between iOS and the async PHP server is, I think this has been a huge success. We’ve created a way to request fingerprint scans via a simple HTTP GET request. That’s huge on its own, but now think about how we could integrate this during a credit card authorization step!
More on this in a follow-up – until then, please let us know what you think in the comments section below!
Frequently Asked Questions (FAQs) on Scanning Fingerprints with Async PHP and React Native
How can I implement fingerprint scanning in my React Native application?
Implementing fingerprint scanning in a React Native application involves using specific libraries such as the react-native-fingerprint-scanner. This library provides a simple and consistent API to request the user’s fingerprint or face ID authentication. You can install it using npm or yarn, and then import it into your project. After that, you can use its methods like isSensorAvailable() to check if the device has a fingerprint sensor and authenticate() to request the user’s fingerprint.
How can I handle errors during fingerprint scanning in React Native?
Error handling is crucial in any application. In the context of fingerprint scanning, you might encounter errors like the sensor not being available or the user failing to authenticate. The react-native-fingerprint-scanner library provides a FingerprintScannerError object that you can use to catch and handle these errors. It contains properties like name, message, and biometric that give you detailed information about the error.
Can I use PHP for fingerprint scanning?
PHP is a server-side language, and it doesn’t directly interact with hardware devices like a fingerprint scanner. However, you can use PHP in conjunction with a client-side language like JavaScript (or a framework like React Native) that interacts with the scanner. The PHP part would typically handle tasks like receiving the scanned data from the client, processing it, and interacting with the database.
How does browser fingerprinting work in PHP?
Browser fingerprinting is a technique used to identify unique users based on their browser and system information. In PHP, you can use the $_SERVER superglobal to access this information. It contains details like the user’s IP address, browser details, operating system, and more. By combining these details, you can create a unique identifier or “fingerprint” for each user.
What is biometric authentication in web development?
Biometric authentication in web development refers to the use of unique biological characteristics like fingerprints, face ID, or iris patterns to authenticate users. It provides a higher level of security compared to traditional methods like passwords. In the context of web development, biometric authentication typically involves using JavaScript APIs to interact with the device’s biometric sensors.
How can I use FingerprintJS Pro in my React Native application?
FingerprintJS Pro is a service that provides browser fingerprinting and fraud detection capabilities. To use it in a React Native application, you would typically send a request from your app to your server, and then your server would interact with the FingerprintJS Pro API. The API returns a visitorID that you can use to identify unique users.
How secure is fingerprint scanning in applications?
Fingerprint scanning is generally considered secure because fingerprints are unique to each individual. However, the level of security also depends on how the scanned data is handled. It’s important to encrypt the data during transmission and storage, and to use secure methods for comparing fingerprints.
Can I use fingerprint scanning for multi-factor authentication?
Yes, fingerprint scanning can be used as part of a multi-factor authentication strategy. In this case, the user would be required to provide a fingerprint scan in addition to another form of authentication, like a password or a one-time code. This provides an extra layer of security.
How can I test the fingerprint scanning feature in my application?
Testing the fingerprint scanning feature can be challenging because it involves hardware devices. However, you can use emulators or physical devices with a fingerprint sensor for testing. Some libraries also provide methods for simulating success or failure of the fingerprint scan.
What are the best practices for implementing fingerprint scanning in applications?
Some best practices for implementing fingerprint scanning include providing clear instructions to the user, handling errors gracefully, providing an alternative method of authentication, and ensuring the security of the scanned data. It’s also important to respect the user’s privacy and to comply with relevant laws and regulations.

