How To Manipulate Images With The Photoshop Clone Stamp Tool
 2. Select the Clone Stamp tool (
 3. On the tool options bar, open the Brush pop-up palette and select a medium-sized brush with a medium soft edge. For this example, I set the brush diameter to 200 pixels and the hardness to 50%. It’s a good idea to use a soft edge brush, otherwise you will see a very hard line where the cloning takes place.
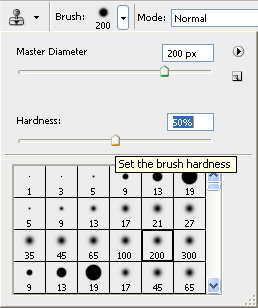 4. Then, make sure that the Aligned option is selected.
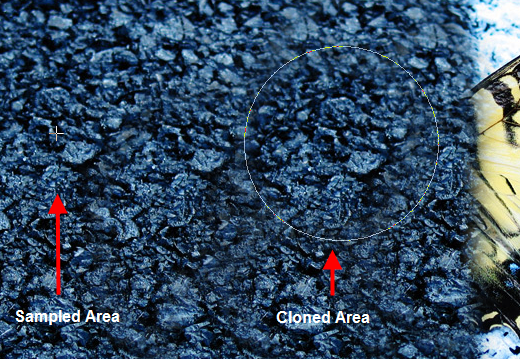 6. Click and drag the Clone Stamp tool over a small area of the butterfly’s wing. As you drag the wing will start to disappear as it is replaced with the pixels you’re sampling from another part of the image. The crosshairs that appear to the right of the Clone Stamp tool indicate the source area of the image that you are replicating as you drag.
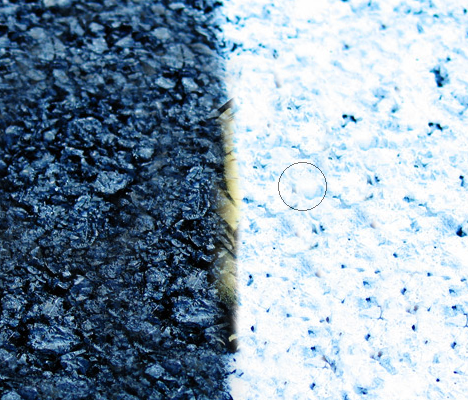 7. Release the mouse button and move the pointer to another part of the butterfly wing. The crosshairs maintain the same spatial relationship to the Clone Stamp tool pointer that they had when you made the first stroke. This is because you set the Aligned option when you were setting up your brush.
8. You can reset your sample area anytime by holding down the Alt (Windows) or Option (Mac) key and clicking once. You will need to do this several times to completely remove the butterfly, and don’t forget to resize your brush as you go. Keep cloning until you have removed the side of the butterfly on the dark side of the tar macadam.
9. Reset your sample point and work on the white side until you have cloned “out” the other side of the butterfly. To finish the area where the butterfly sat, take samples above and below.
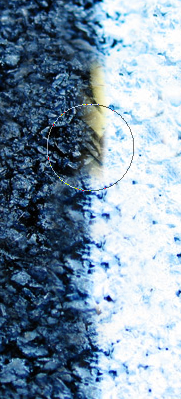 And that’s it. Don’t be afraid to keep resampling as you work through your cloning. If you do a lot of cloning, you’ll find using the shortcuts become second nature very quickly.
 Is the Clone Stamp Tool an important part of your workflow?
Frequently Asked Questions about Photoshop’s Clone Stamp Tool
How can I use the Clone Stamp Tool to replace a specific part of an image?
The Clone Stamp Tool in Photoshop is a powerful tool that allows you to copy a portion of an image and paste it onto another part of the same image or a different image. To replace a specific part of an image, first, select the Clone Stamp Tool from the toolbar. Then, while holding down the Alt key (Option key on Mac), click on the part of the image you want to clone. This sets the source point. Next, release the Alt key and click on the part of the image you want to replace. The cloned part will be pasted onto the selected area.
What are some practical uses of the Clone Stamp Tool in Photoshop?
The Clone Stamp Tool is incredibly versatile and can be used for a variety of tasks in Photoshop. It’s commonly used for retouching photos, such as removing blemishes or unwanted objects. It can also be used for creative purposes, like duplicating elements in a photo or creating unique patterns and textures.
How can I control the hardness and size of the Clone Stamp Tool?
The hardness and size of the Clone Stamp Tool can be adjusted in the options bar at the top of the screen when the tool is selected. The size slider adjusts the diameter of the brush, while the hardness slider controls the sharpness of the brush edges. A lower hardness value will result in softer, more feathered edges, while a higher value will produce harder, more defined edges.
Can I use the Clone Stamp Tool on multiple layers?
Yes, the Clone Stamp Tool can be used across multiple layers. To do this, select the Clone Stamp Tool and in the options bar, check the box that says “Sample All Layers”. This allows the tool to clone information from all the visible layers.
How can I improve my precision when using the Clone Stamp Tool?
To improve precision when using the Clone Stamp Tool, you can zoom in on the area you’re working on. This allows you to see the details more clearly and make more accurate selections. Additionally, using a smaller brush size can also help with precision.
Can I change the opacity of the Clone Stamp Tool?
Yes, the opacity of the Clone Stamp Tool can be adjusted in the options bar. A lower opacity will make the cloned area more transparent, allowing the original image to show through. A higher opacity will make the cloned area more opaque.
What is the difference between the Clone Stamp Tool and the Healing Brush Tool?
While both tools are used for retouching images, they work in different ways. The Clone Stamp Tool directly copies and pastes pixels from one area to another. The Healing Brush Tool, on the other hand, blends the texture, lighting, and shading of the sampled pixels with the color and tone of the target area.
Can I use the Clone Stamp Tool to clone from one image to another?
Yes, you can use the Clone Stamp Tool to clone from one image to another. To do this, open both images in Photoshop. Select the Clone Stamp Tool, hold down the Alt key and click on the area you want to clone in the source image. Then, go to the target image and click on the area where you want to paste the cloned area.
How can I reset the Clone Stamp Tool?
To reset the Clone Stamp Tool, go to the options bar and click on the icon that looks like a curved arrow. This will reset all the settings for the tool to their default values.
What should I do if the Clone Stamp Tool is not working?
If the Clone Stamp Tool is not working, make sure you have a source point selected. You can do this by holding down the Alt key and clicking on the area you want to clone. If the tool is still not working, try resetting it or check if you have the correct layer selected.
Jennifer Farley is a designer, illustrator and design instructor based in Ireland. She writes about design and illustration on her blog at Laughing Lion Design.


