
If you’re intimidated, exhausted or irritated by Gulp, Grunt, NPM, Yeoman, and all the other NodeJS tools that aim to help but often do the opposite, a good asset management workflow is possible in PHP, and this tutorial aims to prove it. In this article, we’ll go through a NodeJS-free PHP front end asset management setup.

Key Takeaways
- The tutorial outlines a PHP front-end asset management setup without the need for NodeJS tools like Gulp, Grunt, NPM, and Yeoman.
- The setup uses BowerPHP for installing assets, markstory/mini-asset for minification, and Robo for resource tracking and executing a rebuild when a change is detected. Slim 3 is used as a base app, but its specific functionalities are not utilized.
- The asset management process involves installing Bootstrap and Bootstrap-social via BowerPHP, configuring mini-asset with an .ini file to create a compiled CSS file, and using Robo to automate the recompilation of CSS files whenever changes are made.
- The tutorial demonstrates that NodeJS is not necessary for asset management in PHP projects, and that the use of BowerPHP, mini-asset, and Robo can effectively handle tasks like installation, concatenation, minification, and resource tracking.
What we’ll be doing
We’ll be adding asset management into a Slim 3 project. We’ll be using Rob Allen’s Slim3 Skeleton as a base “app”, along with:
- BowerPHP instead of Bower for installing assets
- markstory/mini-asset for minification
- Robo for resource tracking (watching for changes) and executing a rebuild (minification) when a change is detected
Why mini-asset and not Munee or Assetic? Because it’s dead simple – configure with an .ini file, run, and it executes. No server alterations, no in-depth configuration, ready to go OOTB.
Note that Slim 3 is used here only as a base app, and doesn’t really matter in the whole picture – we won’t be using any of Slim’s particular functionality. As such, you can use any framework you want, or skip using a framework altogether. We’ll be using Homestead Improved as usual to set up a local dev environment.
Getting Started
git clone https://github.com/swader/homestead_improved hi_assets

cd hi_assets

bin/folderfix.sh

sed -i '' "s@Project@test@g" Homestead.yaml

vagrant up

vagrant ssh
The sed line is a shortcut to editing the Homestead.yaml file – it will replace the word Project with test, so our app can be in the test folder rather than Project. This is purely personal preference. If any of this is confusing, please see this introduction to Vagrant.
As soon as these commands execute, we should be able to get the No input file specified error when visiting homestead.app/ in the browser, provided we have homestead.app added to /etc/hosts on the host operating system, as per instructions.
Let’s set up the skeleton now.
cd Code

composer create-project -n -s dev akrabat/slim3-skeleton test

cd test
Simple enough. That should produce a screen not unlike this one:
Finally, let’s install the other prerequisites. BowerPHP isn’t in stable status yet, so we need to allow Composer to download beta packages. Open the global configuration file with:
composer global config -e
and add in the following statement:
"minimum-stability": "beta"
Now, we can install beta packages.
composer global require beelab/bowerphp codegyre/robo markstory/mini-asset natxet/CssMin --dev
Note that mini-asset will suggest installing some other packages, each specific to a context you might require. The CssMin package is one such addition – without it, mini-asset wouldn’t be able to handle CSS files. Refer to the suggestions list the installation procedure outputs for more filter packages you might need.
We now have all the prerequisites in place. Let’s start dealing with assets.
Asset Management
The bare bones Slim3 skeleton from Rob is a bit plain – no standardized stylesheets or front end frameworks attached (as it should be in any framework, in my opinion). Let’s change that.
Bootstrap via BowerPHP
Let’s add in Bootstrap, and just for kicks, Bootstrap-social – this will allow us to demonstrate the merging of various CSS files along with letting us use social network button styles in our front end.
cd ~Code/test

bowerphp install bootstrap

bowerphp install bootstrap-social
A bower_components folder should now be in the test folder, containing everything we requested. We could install the components into public and use them directly in our layout code (see app/templates/home.twig), but that’s horribly inefficient, if great for debugging styles. Let us instead produce the CSS we need in a filtered, concatenated and minified manner. This is where mini-asset comes in.
Mini-Asset
As per the documentation, mini-asset is configured via an .ini file. Let’s add the assets.ini file to the root of our project:
cachePath = public/css/build
paths[] = bower_components/*
filters[] = CssMinFilter

[app.css]
files[] = bootstrap/dist/css/bootstrap.min.css
files[] = font-awesome/css/font-awesome.css
files[] = bootstrap-social/bootstrap-social.css
files[] = public/css/style.css
As per the bootstrap-social docs, we need to include Bootstrap, FontAwesome, and Bootstrap-social in our HTML. That’s exactly what we did above by merging the different libraries.
cachePath tells mini-asset where to put our compiled CSS. Paths lists all the locations in which CSS files can be found. Filters lists all the additional packages used for processing the assets. In our case, it’s just the aforementioned CSSMin package.
The next section lists compiled CSS files, one by one, and the files they consist of.
If we now run mini-asset (and create the cachePath folder first, of course), we should get a compiled CSS file as output.
mkdir public/css/build

mini_asset build --config assets.ini
A final tweak we need to do is copy the fonts subfolder of font-awesome into public/css, because the paths in the compiled CSS are relative, and go up one folder to find the font. A compiled file placed in build won’t have the fonts one folder up, so we need to put them there:
cp -R bower_components/font-awesome/fonts public/css/
Now we can replace the style link in home.twig file with this one:
<link href='/css/build/app.css' rel='stylesheet' type='text/css'>
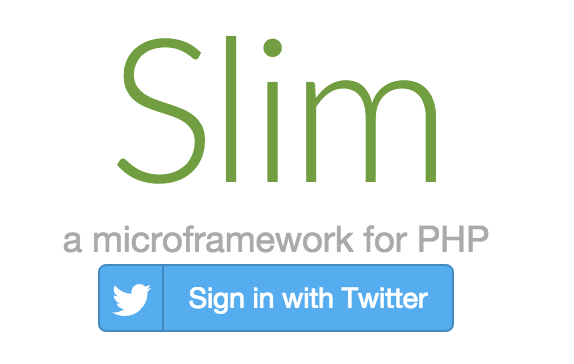
We can also throw in a social bootstrap button for good measure, just to make sure it works.
<a class="btn btn-small btn-social btn-twitter">

            <i class="fa fa-twitter"></i> Sign in with Twitter

        </a>
Robo
At this point, it’s easy enough to re-run the compilation every time one makes an important change to the style files, but why not automate things? Robo is here to help. There are other watchers out there, too, but Robo is such a robust and versatile task runner, it would be a shame not to use it. In fact, Robo has its own asset processing built in, but given that many might opt not to use Robo in the first place, this tutorial followed a more decoupled path. Feel free to use its asset pipeline if it feels better than mini-asset, though – the sky’s the limit!
To run, Robo needs a RoboFile.php in the working directory. Robo can create that file for us if we just run it in a folder where there is no such file:
> robo

  RoboFile.php not found in this dir

?    Should I create RoboFile here? (y/n)

 y

RoboFile.php created
The idea is to trigger a rebuild of the app.css file every time style.css in public/css changes – that’s the user’s custom stylesheet, and it’s where we’ll be putting our own styles to override or use the ones included before them (Bootstrap, etc.)
First, let’s set up a watcher and see if it triggers every time the file changes. This is done by defining a public method in RoboFile which houses the watching commands:
    public function build()

    {

        $this->taskWatch()

            ->monitor('public/css/style.css', function () {

                $this->say("style.css changed!");

            })->run();

    }
If we launch the watcher now and change the CSS file, Robo will alert us to it.
> robo build

 [Watch] Watching public/css/style.css for changes...

➜  style.css changed!
Now all that’s left is triggering a mini-asset rebuild on change. This is done with the _exec or taskExec command:
    public function build()

    {

        $this->taskWatch()

            ->monitor('public/css/style.css', function () {

                $this->say("Starting CSS rebuild");

                $this->_exec('mini_asset build --config assets.ini');

                $this->say("CSS rebuilt successfully!");

            })->run();

    }
And that’s all it took – re-running Robo, we now have an auto-rebuild file-watcher active which recompiles CSS files on every change.
> robo build

 [Watch] Watching public/css/style.css for changes...

➜  Starting CSS rebuild

 [Exec] Running mini_asset build --config assets.ini

.Complete

 [Exec] Done in 0.556s

➜  CSS rebuilt successfully!

➜  Starting CSS rebuild

 [Exec] Running mini_asset build --config assets.ini

.Complete

 [Exec] Done in 0.558s

➜  CSS rebuilt successfully!
Conclusion
In this tutorial, we looked at getting started with asset management (installation, concatenation, and minification) in PHP projects. We saw that NodeJS is unnecessary for this aspect of development and isn’t worth the extra trouble.
We used BowerPHP as a replacement for Bower, mini-asset to concat and minify, and Robo to watch for changes and trigger the minification task. With this knowledge, you should now be able to compile more complex assets, including LESS to CSS, JavaScript, and more.
Do you use a different approach? Let us know in the comments!
Frequently Asked Questions (FAQs) about PHP Front-End Workflow without Node.js
What is the significance of a PHP front-end workflow without Node.js?
The PHP front-end workflow without Node.js is significant because it allows developers to build and manage front-end applications without the need for Node.js, a popular JavaScript runtime. This can be particularly beneficial for developers who are more comfortable or experienced with PHP. It also provides an alternative for projects where Node.js may not be the best fit due to its resource-intensive nature or compatibility issues.
How can I run JavaScript without a browser or Node.js?
Running JavaScript without a browser or Node.js can be achieved using various JavaScript engines like Rhino, V8, or SpiderMonkey. These engines can interpret and execute JavaScript code outside a web browser. However, it’s important to note that these engines might not support all features provided by Node.js or browser environments.
Can modern JavaScript frameworks run without Node.js dependency?
Yes, some modern JavaScript frameworks can run without Node.js dependency. However, it’s important to note that many of these frameworks leverage Node.js for various tasks like package management, development server setup, and build processes. Therefore, while it’s possible to use these frameworks without Node.js, it might limit some of their functionalities.
What is Web3.php and how does it relate to a PHP front-end workflow without Node.js?
Web3.php is a PHP library for interacting with the Ethereum blockchain. It can be used in a PHP front-end workflow without Node.js to enable applications to interact with the Ethereum network. This can be particularly useful for decentralized applications (DApps) that require blockchain functionality.
How can I connect to Ethereum using PHP?
Connecting to Ethereum using PHP can be achieved using libraries like Web3.php. These libraries provide a set of functions that allow PHP applications to interact with the Ethereum network. This includes sending transactions, reading contract state, and listening for blockchain events.
Is it possible to use PHP for front-end development?
Traditionally, PHP is used for server-side scripting. However, with the right tools and libraries, it’s possible to use PHP for front-end development. This includes generating HTML, CSS, and JavaScript code, as well as managing assets and dependencies.
What are the benefits of using PHP for front-end development?
Using PHP for front-end development can have several benefits. For developers who are already familiar with PHP, it can reduce the learning curve associated with new languages or technologies. PHP also has a large and active community, which means there are plenty of resources and libraries available to help with front-end development.
What are the drawbacks of using PHP for front-end development?
While PHP can be used for front-end development, it’s not typically the first choice for this purpose. PHP is primarily a server-side language, and using it for front-end development can lead to performance issues. Additionally, PHP doesn’t have the same level of support for modern front-end technologies as languages like JavaScript.
Can I use PHP instead of Node.js for my project?
Whether you can use PHP instead of Node.js for your project depends on the specific requirements of your project. Both PHP and Node.js have their strengths and weaknesses, and the best choice will depend on factors like the complexity of your project, the skills of your development team, and the specific technologies you need to use.
What are some alternatives to Node.js for front-end development?
There are several alternatives to Node.js for front-end development. These include traditional languages like PHP, Python, and Ruby, as well as newer technologies like Deno and WebAssembly. The best choice will depend on the specific requirements of your project and the skills of your development team.