Photoshop is surely the most popular software for designers, but its lesser-known cousin Illustrator has merits of its own. Every designer should learn Illustrator, especially if you already have it as part of your Adobe Creative Suite. Adobe recently added some impressive new features to Illustrator CS6, making it an even more powerful and intuitive design tool. So, today I am going to show you how to create a gorgeous retro TV in Adobe Illustrator through an easy step-by-step process. Hopefully, you will learn few handy tips for creating vectors in Illustrator.
Resources:
Grunge Texture
Cardboard Texture
Before we start, let’s have a look at our final result.

Step 1
Create a new document in Illustrator with a 600px width and a 700px height. Make sure to select RGB color mode.
Step 2
Firstly, we’ll make the basic frame for the TV set. So, select the “Rounded Rectangle Tool” to draw a rectangle as shown below. Use a lighter green fill color and a darker green 3pt stroke for this rectangle. Color values are displayed within the image below. Now, click on the ring shaped target on this rectangle layer to select it, and then select the “Direct Selection Tool” (A). Now, click on the individual anchor points and reposition them to give the shape as shown below.

Step 3
Next, duplicate the rectangle layer; change its fill color and stroke to “none.” After that, place this duplicated layer below the original layer and drag it a bit to the right and downward using the “Selection Tool” (V).
Step 4
Now, duplicate the original rectangle layer and decrease its size using “Selection Tool” (V). After that, apply the given gradient shown below using the “Gradient Tool” (G). Make sure to change Stroke to “none.” Once you are done, select this smaller rectangle layer and go to “Effect” > “Stylize” > “Inner Glow.” Use the values provided below.

Step 5
Select the “Pen Tool” to draw the shape to form the top edge of the retro TV. Apply the following gradient on it; keep a 3pt stroke.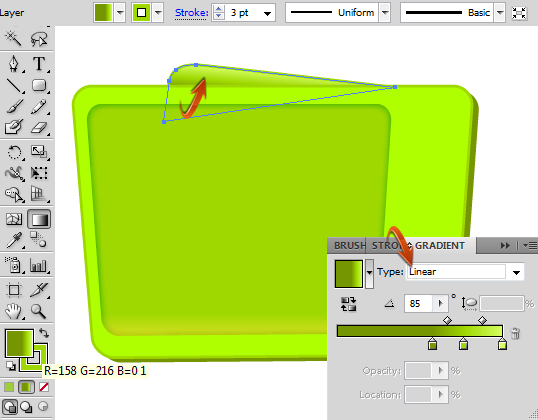
Step 6
Duplicate the original rectangle layer, and place this layer above the rest. Decrease its size to form a nice screen shape. Change its fill color to “none” and create a 2pt Stroke.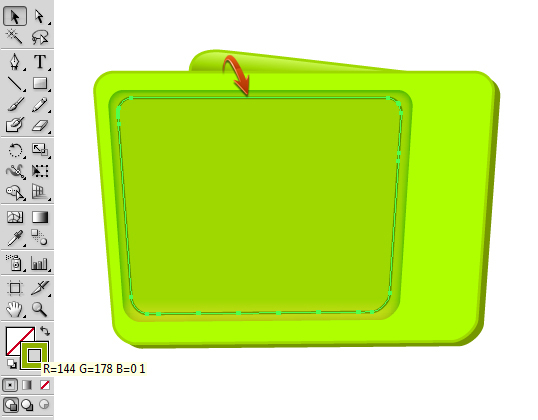
Step 7
Now, to form TV screen, we’ll create stripes of different colors using the “Rectangle Tool.” After that, select all of the colorful rectangle layers by pressing the shift key, and combine them into a single new layer. You can find the option of “Collect in New Layer” by clicking on the square at the top right corner of the layers panel.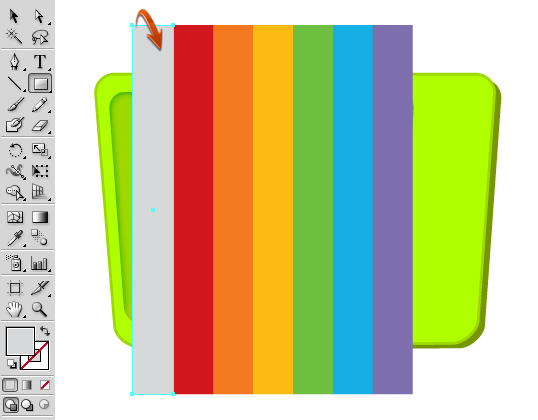
Step 8
Now, select both the colorful stripes layer and the screen stroke layer by pressing and holding the shift key. After that, select the “Shape Builder Tool.” Apply the tool to the parts of stripes that are outside of the screen and press the alt key. You’ll notice a negative sign with the arrow by pressing alt key; click this to delete the unwanted parts.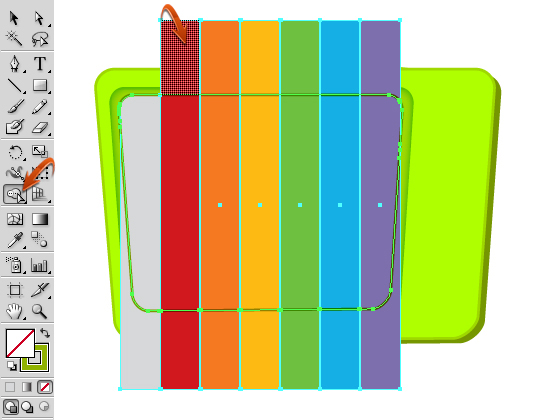

Step 9
Next, select the colorful stripes layer and go to “Effect” > “Stylize” > “Inner Glow.” Use the settings provided below.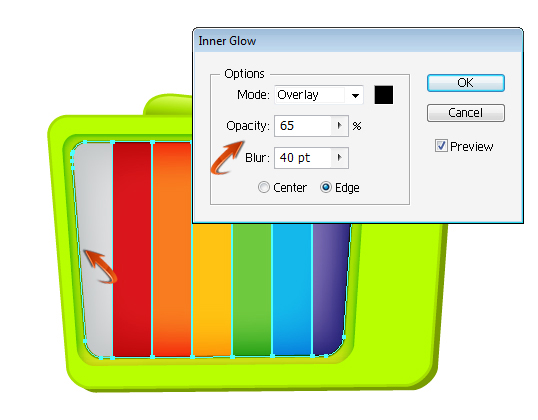
Step 10
Select the “Pen Tool” and use a white fill color to create a highlight over the screen. Then, change the blending mode of this layer to “Soft Light.”
Step 11
Create another highlight with a yellow fill color; change its blending mode to “Soft Light” as well.
Step 12
Now, to make a power button, select the “Ellipse tool” and apply the given gradient shown below.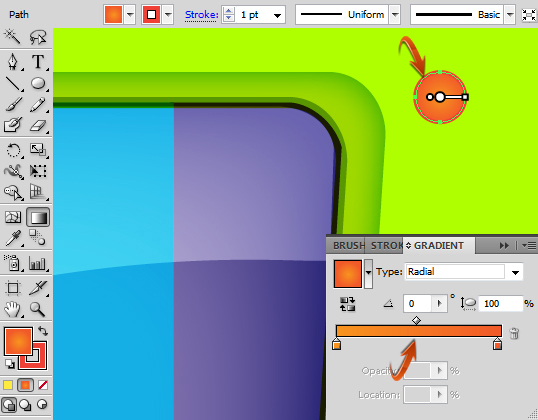 Duplicate this ellipse; change its fill color to gray and its stroke to “none.” Place this copy below the original ellipse and drag it to the left and downward a bit.

Step 13
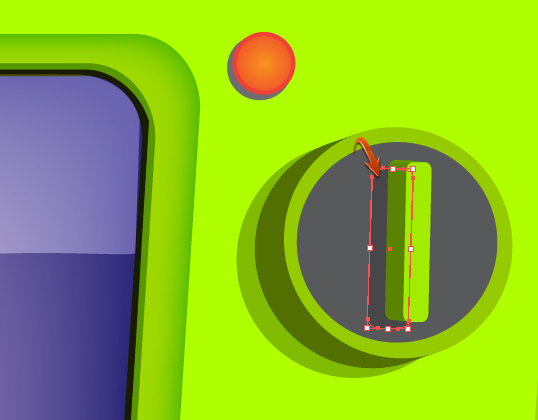
Next, to make channel selector button, create 4 circles in different colors using the “Ellipse Tool” and arrange them as below. Reduce the opacity of the last circle layer to 70% to form a shadow.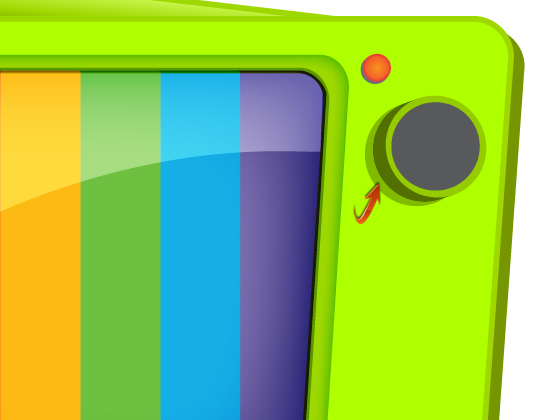 Now, create a small rectangle using the “Rounded Rectangle Tool.” After that, go to “Effect” > “3D” > “Extrude and Bevel,” and use the given settings to give it a 3D appearance.
 Form another rounded rectangle in gray shade, place this layer below the 3D tuner, and reduce its opacity to 70%.
Step 14
Next, we’ll make markings on the switch. Make a small rectangle using a white color, and go to “Effect” > “Distort and Transform” > “Transform.” Apply the following settings. Now, click on the markings layer and go to “Effect” > “Stylize” > “Drop shadow.” Use the settings shown below.

Step 15
Now, combine all of the layers forming this switch into a new layer, and then duplicate this layer to form another switch. You can change the angle of the tuner through Extrude and Bevel settings.
Step 16
To form the speaker, make a thin horizontal rectangle, rotate it a bit using the “Selection Tool” (V) and go to “Effect” > “Distort and Transform” > “Transform.” Use the following settings.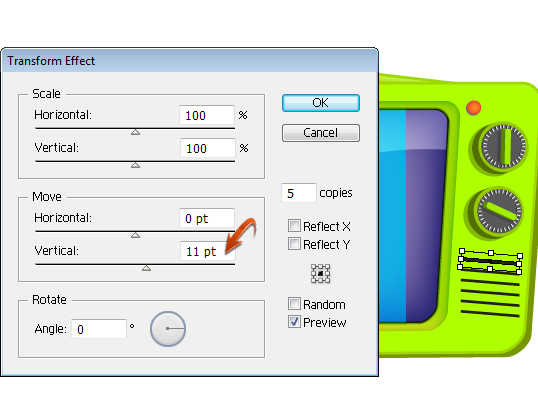
Step 17
To form an antenna, make two rectangles and an ellipse. Arrange them as shown below. Apply following gradients on these rectangles and the ellipse.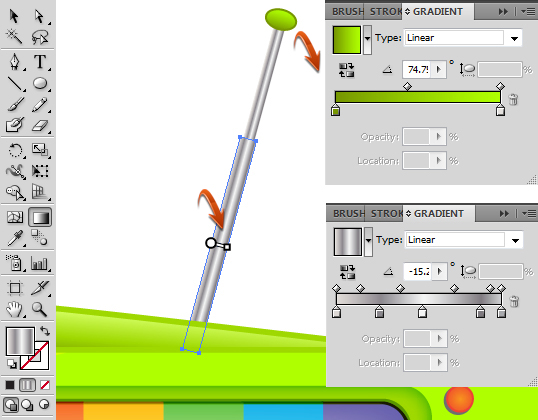 Duplicate the antenna layers to form a second antenna. Arrange it at a different angle.

Step 18
Form the TV footstand below the base using the “Rounded Rectangle Tool” and apply the following gradient to it. Duplicate the footstand layer to form the second foot.

Step 19
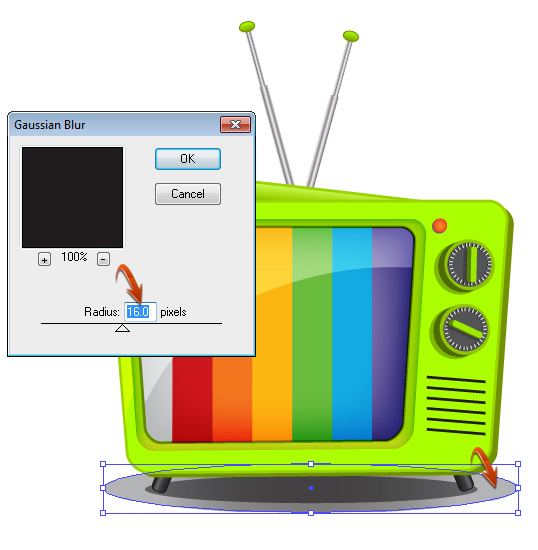
Now, to create shadow for the retro TV, make an ellipse in a dark gray color. Change its blending mode to “Multiply” and reduce its opacity to 60%. Duplicate the shadow layer, increase its size using the “Selection Tool” (V). After that, go to “Effect” > “Blur” > “Gaussian blur.” Use the following values for the Gaussian blur.

Step 20
Our retro TV vector is all done. You can use any background for this. I’ll be using a grungy texture as a background. Open the “Grunge texture” resource mentioned at the beginning of the tutorial, and copy and paste it into your document below the rest of the layers.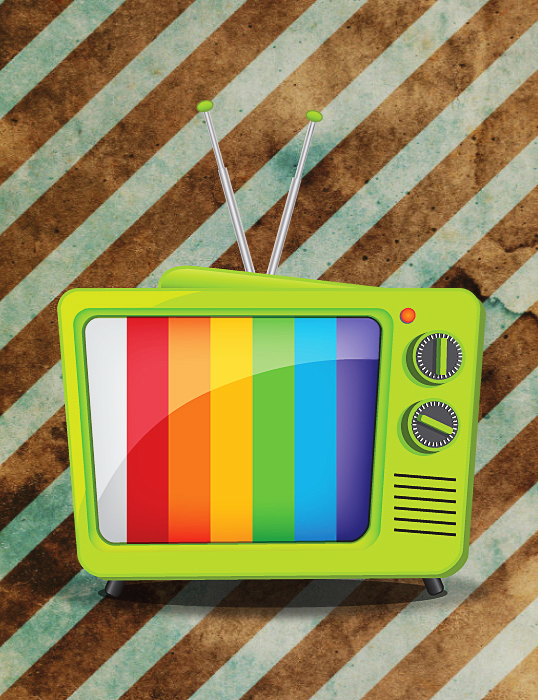
Step 21
You can add some text if you want. Select the “Type Tool,” and type in your desired text. Use the following colors for fill, and use a stroke of 1pt. Now, duplicate the text layer and change its fill color to black. Place it below the original text layer and drag it to the right and downward a bit, as shown below.

Step 22
Open the cardboard texture, and copy and paste it onto a new layer above the rest of the layers. Change the blending mode of this layer to “Overlay” and reduce its opacity to 65%.
 Our vectorized retro TV is complete. I hope you honed your Illustrator skills and learned something useful as well. Do share your thoughts. Have fun!
Frequently Asked Questions about Creating a Retro TV in Illustrator
How can I duplicate a layer in Illustrator while creating a retro TV?
Duplicating a layer in Illustrator is a simple process. First, select the layer you want to duplicate in the Layers panel. Then, click on the Options icon (three lines) in the top right corner of the panel. From the dropdown menu, select ‘Duplicate [layer name]’. This will create an exact copy of your selected layer, which you can then modify as needed.
Can I create a retro TV in Illustrator without using the Pen tool?
Yes, you can create a retro TV in Illustrator without using the Pen tool. You can use the Rectangle tool to create the basic shape of the TV, and then use the Direct Selection tool to modify the corners and create a more rounded shape. The Ellipse tool can be used to create the screen and knobs of the TV.
How can I add texture to my retro TV in Illustrator?
Adding texture to your retro TV can give it a more realistic and vintage look. You can do this by using the Grain effect. First, create a new layer and fill it with a solid color. Then, go to Effect > Texture > Grain. Adjust the intensity and contrast until you achieve the desired effect.
How can I create a 3D effect for my retro TV in Illustrator?
You can create a 3D effect in Illustrator by using the 3D Extrude & Bevel effect. First, select the object you want to give a 3D effect to. Then, go to Effect > 3D > Extrude & Bevel. Adjust the perspective and depth until you achieve the desired 3D effect.
Can I animate my retro TV in Illustrator?
While Illustrator is primarily a vector graphics editor and not an animation software, you can create simple animations using the Blend tool. However, for more complex animations, you might want to consider using a dedicated animation software like Adobe After Effects.
How can I create a glowing effect for the screen of my retro TV in Illustrator?
You can create a glowing effect in Illustrator by using the Outer Glow effect. First, select the object you want to glow. Then, go to Effect > Stylize > Outer Glow. Adjust the opacity, blur, and color until you achieve the desired glowing effect.
How can I create a shadow for my retro TV in Illustrator?
You can create a shadow in Illustrator by using the Drop Shadow effect. First, select the object you want to create a shadow for. Then, go to Effect > Stylize > Drop Shadow. Adjust the opacity, X offset, Y offset, and blur until you achieve the desired shadow effect.
Can I use Illustrator to create other vintage objects besides a retro TV?
Yes, Illustrator is a versatile tool that can be used to create a wide variety of objects, vintage or otherwise. You can use the same techniques you used to create a retro TV to create other vintage objects like radios, cameras, and typewriters.
How can I save my retro TV as a vector file in Illustrator?
To save your retro TV as a vector file in Illustrator, go to File > Save As. In the Save As dialog box, choose where you want to save your file and enter a name for it. Then, from the Format dropdown menu, select a vector format like AI (Adobe Illustrator) or SVG (Scalable Vector Graphics).
Can I use my retro TV design in other Adobe applications?
Yes, you can use your retro TV design in other Adobe applications. If you save your design as an AI or SVG file, you can import it into applications like Adobe Photoshop or Adobe After Effects for further editing or animation.
 Anum Khan
Anum is Web and Graphic designer. Addicted to Photoshop and crazy for pixel perfection. She is also an active blogger, sharing her passions, skills and creative details on her blog Websoulz. She loves to connect with the community, sharing the latest design gossips and rolling her eyes on boring trends.


