How To Design an Effective Company Mascot

Key Takeaways
- Mascots are becoming a popular way to humanize brands and foster a friendly relationship with customers. They can increase a company’s visibility and make it more memorable, even for smaller businesses.
- When designing a company mascot, it’s crucial to consider the brand’s identity, target audience, and the mascot’s purpose. The mascot should reflect the brand’s values, personality, and mission, and be able to engage the target audience effectively.
- Mascots can be used effectively in marketing strategies in various ways, such as in advertising campaigns, social media posts, and product packaging. They can help create a consistent brand image, increase brand recognition, and create a more personal connection with customers.
Step 1: Canvas Setup
Start by setting up your canvas, I’m working 1200 x 900 with the resolution set to 314.
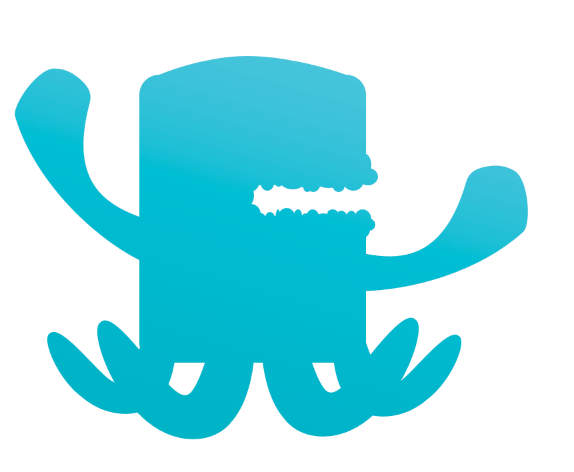
Step 2: Basic Shape
I always use basic shapes when creating my characters if I’m not using a sketch. To start creating the basic shape of your character, select the Pen Tool or press “P” on the keyboard. Once that is done, go to the top of your tool bar and select the “Rounded Rectangle Tool.”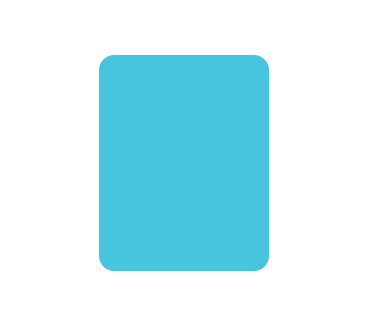
Step 3: Pen Tool Anchoring
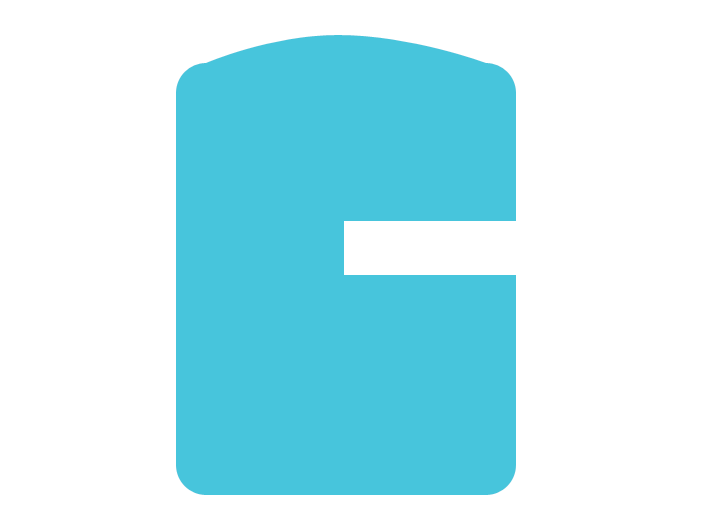
To give our character a more defined shape, we need to add a hump at the top of our characters head. To do this, click on your Pen Tool icon, hold your mouse there until your menu pops up, and select the “Add Anchor Point Tool.” Create an anchor at the top of your shape and drag the anchor up until you have a hump.

Step 4: Mouth Shape
To start creating our mouth, we need to first cut out a section of the blue. But, before we can do that, we need to rasterize our vector shape. Right-click on your layer and select “Rasterize Layer.”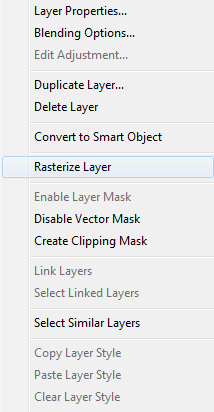 Take the Marquee Tool, making sure it is on default rectangle. Select a portion to cut out for the mouth and press delete. You can see what you should now have below.
Step 5: Lips
Now that we have our general mouth shape cut out, we can start working on building the lips. To do so simply take the Ellipse Tool (you can get to this the same way as you did the Rounded Rectangle Tool), and start making little circles around the perimeter of mouth cut out. Repeat this until the perimeter of the mouth is fully covered.

Step 6: Arms
I’m going to give this character long wavy arms, and in order to do that, I need to utilize not only the rounded rectangle tool, but also the warp tool. Start with making one slender rectangle that extends from the body. Next, go up to “Edit” > “Transform” > “Warp” and begin manipulating the arm until it’s bendy. Remember to press “Enter” after you get your arm bent the way that you want it to be.

Step 7: Duplicate and Rotate
Duplicate your arm so that you now have two of the same shape, and then rotate both arms so that the “fists” are turned upright.
Step 8: Legs
As you can see, the character I am building to be the mascot is a monster, so I want to keep with the monster-type theme and create legs that will be more like tentacles. To achieve this look, we are going to use the same method that we used to create the arms, but instead of using the rounded rectangle, I am going to use the ellipse.
Step 9: Rasterize
Now that we have the general shape of our character, we need to rasterize all of our vector shapes and merge them together. Make sure not to merge the background as well; to prevent this from happening, hide the background layer and make it visible again once the rasterizing is complete.Step 10: Gradient
Some people like to do their shading and detailing after they are done, but since we already have our basic shape completely drawn and merged as one layer, I want to add my gradient now. Right-click or double-click on your layer so that the Blending Options prompt appears. Select the box for “Gradient Overlay” and then click on the gradient so that a separate menu appears. Choose the color you used to create your character, and then click OK.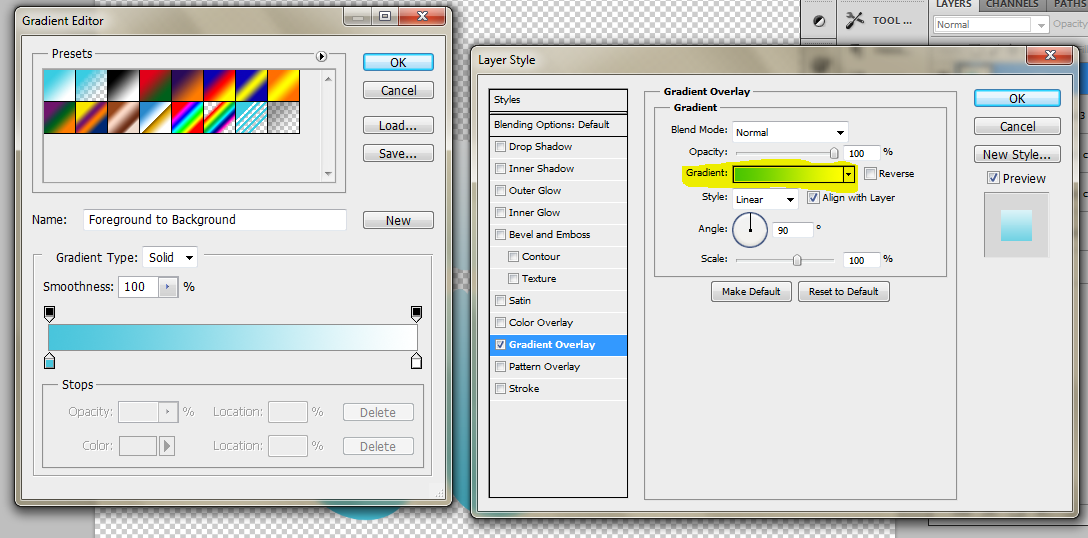 Change your blending mode to Multiply and then click OK.
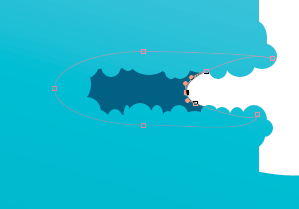
Step 11: Inside of Mouth
With the color #006084 selected, create an elliptical shape over the mouth. Once done, move this layer under the body layer so that it is behind everything. This is the start of the inside of our character’s mouth. Add an anchor as shown in Step 3 and pull the edge of the ellipse inwards so that you have sort of a curve.
Step 12: Finishing Mouth
Finish the inside of the mouth by creating the throat opening and the uvula by using the Pen Tool. Make sure you have the shape layer option turned on.
Step 13: Tentacles
Now, because the tentacles of our character base blend into each other I need make them look like separate entities. To do that, I am going to create a contrast under part with #ffe29e by repeating the method of using a vector shape and warp tool to get the shape I want. Apply this technique to all of the legs so that you have something that looks like the image below. Note that in order to do the back legs, you will need to rasterize your vector shape and remove the parts that overlap the front two legs.

Step 14: Hands
We are going to do what we did for the tentacles for the “fists” of our characters using the same color that we used for the underside of the tentacles. Once again, using the ellipse and the warp tool, manipulate your ellipse until it fits the shape of the “fists.” Do this for both fists.
Step 15: Eyes
With #009dd1 create two ellipses for the eyes. Create two smaller ellipses using #026085 and apply them as shown below to add depth to the monster eyes.

Step 16: Tentacle Suckers
Create small ellipses around the under part of the tentacles; these are going to be your suckers.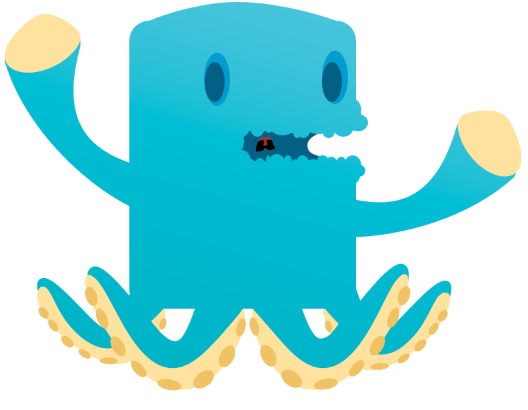 In order to make the suckers look less flat we are going to use the Blending Options. Select Inner Shadow, and change the color to #d49e29, and change the settings according to the image below.


Step 17: Hand Suckers
Repeat the same steps you did to create the suckers on the tentacle legs, but this time create only two large ellipses to place on the hands. Open the Blending Options menu and change the settings as shown below. This is what it should look like when you are finished:

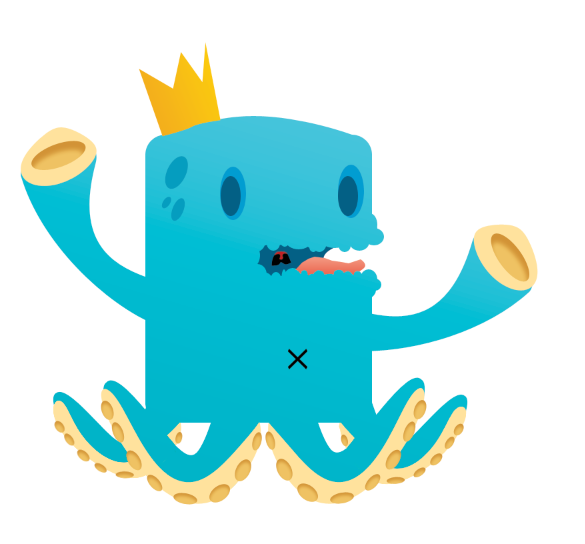
Step 18: Finish Details
Finish adding whatever other details and finishing touches that you want. I created some spots, added a tongue, placed a crown on the monster’s head, and added a bellybutton to get my final image.
Step 19: Add Your Character to Your Site

Conclusion
Creating characters for your website can be a fun and effective way to appeal to curious visitors. There are tons of ways to create them using various kinds of methods; I’ve only showed you one. If you ever find yourself designing a character for a business, here are a few of helpful tips. Utilize either the name or the service of the business when it comes to creating your mascot. Try sketching out various thumbnails until you get something you like. Don’t worry, you don’t have to stick with what you draw; this method is just a way to get your creative juices flowing. If you prefer using vector images, you can always convert your PSD into an .eps or .ai file if you have Illustrator, or you can design your character directly in Illustrator in lieu of Photoshop, the choice is yours. I hope you’ve learned some new techniques and will experiment on your own. If you have any questions or want to share your own characters I would love to see them. Happy character designing everyone! Do you have any character designs to show off? Do you think mascots are a fleeting fad or a more memorable, friendlier version of yesterday’s logos?Frequently Asked Questions about Designing an Effective Company Mascot
What are the key elements to consider when designing a company mascot?
When designing a company mascot, it’s crucial to consider elements such as the brand’s identity, target audience, and the mascot’s purpose. The mascot should reflect the brand’s values, personality, and mission. It should also appeal to the target audience and be able to engage them effectively. The purpose of the mascot, whether it’s for marketing, brand recognition, or customer engagement, should also guide its design.
How can I ensure my mascot design is unique and memorable?
To ensure your mascot design is unique and memorable, it’s important to incorporate distinctive features and characteristics. This could be through the use of unique colors, shapes, or features that are not commonly seen in other mascots. Additionally, the mascot’s personality and backstory can also contribute to its uniqueness and memorability.
How can I use my mascot effectively in my marketing strategy?
Mascots can be used effectively in marketing strategies in various ways. They can be used in advertising campaigns, social media posts, product packaging, and even at events. Mascots can help to create a consistent brand image and increase brand recognition. They can also help to engage customers and create a more personal connection with the brand.
What are some common mistakes to avoid when designing a company mascot?
Some common mistakes to avoid when designing a company mascot include not aligning the mascot with the brand’s identity, not considering the target audience, and not making the mascot distinctive or memorable. It’s also important to avoid making the mascot too complex or difficult to reproduce across different mediums.
How can I test the effectiveness of my mascot design?
The effectiveness of a mascot design can be tested through market research and customer feedback. This could involve conducting surveys or focus groups to gather feedback on the mascot’s design and its appeal to the target audience. The mascot’s effectiveness in achieving its purpose, such as increasing brand recognition or customer engagement, can also be measured through various marketing metrics.
How can I update or refresh my mascot design without losing its recognizability?
Updating or refreshing a mascot design can be done by making subtle changes that modernize the mascot while still maintaining its key features and characteristics. This could involve updating the mascot’s colors, shapes, or features, or even giving the mascot a new outfit or accessories. It’s important to ensure that the mascot remains recognizable to the audience despite these changes.
How can I incorporate my mascot into my brand’s storytelling?
Mascots can be incorporated into a brand’s storytelling by giving them a backstory and personality that aligns with the brand’s values and mission. The mascot can be used to tell stories about the brand, its products, or its customers. This can help to create a more personal connection with the audience and engage them in a more meaningful way.
How can I ensure my mascot appeals to a global audience?
To ensure a mascot appeals to a global audience, it’s important to consider cultural sensitivity and inclusivity in its design. The mascot should not include any elements that could be offensive or inappropriate in different cultures. It should also be designed in a way that is universally appealing and understandable to a diverse audience.
How can I protect my mascot design from being copied or used without permission?
Protecting a mascot design can be done through copyright or trademark registration. This provides legal protection against unauthorized use or copying of the mascot design. It’s also important to regularly monitor the market for any potential infringements and take action if necessary.
How can I use my mascot to engage with my audience on social media?
Mascots can be used to engage with audiences on social media in various ways. They can be used in posts, comments, and even in direct messages to create a more personal and engaging interaction with the audience. Mascots can also be used in social media campaigns or contests to increase engagement and interaction.
Gabrielle is a creative type who specializes in graphic design, animation and photography.


