They say that music is the food for soul, and alluding to music in your visual designs can evoke strong sentiments from those who view them. As a graphic designer, our ultimate tool is Photoshop, but Illustrator offers a whole new world of creative tools, especially when it comes to making vector shapes. Illustrator provides simplicity to the creation process and makes the objects flexible to alter according to our wishes. Those who rely heavily on Photoshop often underestimate the creative ease Illustrator provides. Only once you use it will you understand its scope in making illustrations, icons, and vectors unfettered by bitmaps or other constraints.
In this tutorial, I’ll show you how to create a record player in Illustrator. We’ll use the pen tool, the gradient tool, shape tools, and various other options within the effect menu to achieve our final outcome. So, let’s get started!
Final result: (Download the finished, layered design file.)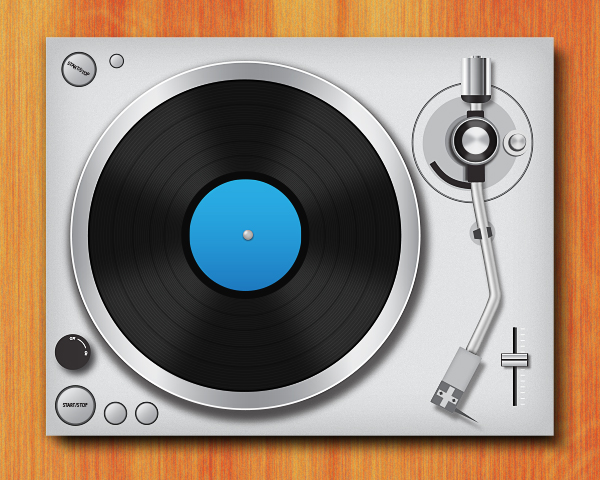
Step 1
Create a new document in Illustrator with a 600px width and a 500px height.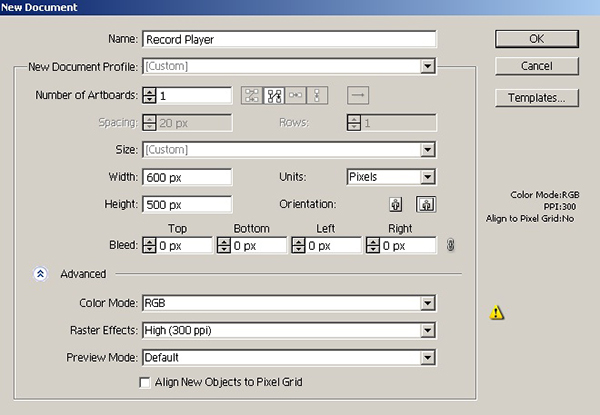
Step 2
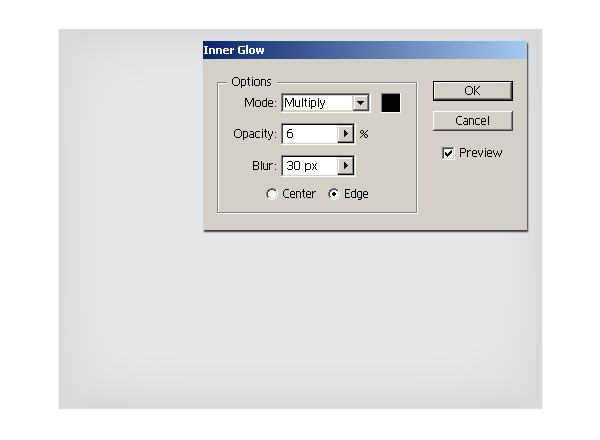
Pick a light gray fill color and select the rectangle tool to draw an adequate rectangle.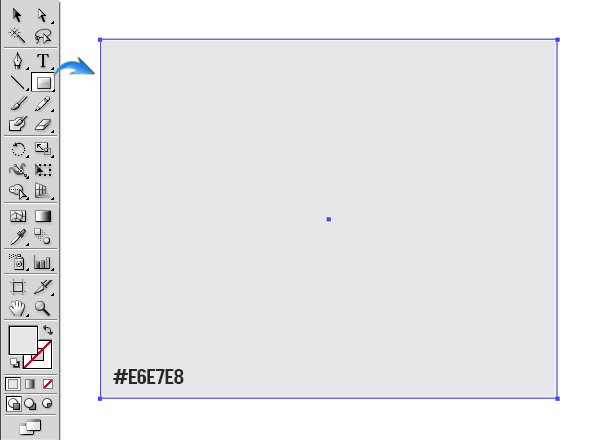 Select the rectangle layer by pressing the ring-shaped target present at the right side of respective layer and going to “Effect” > “Stylize” > “Inner Glow”. Apply the following settings here:
Step 3
Once again, select the rectangle and go to “Effect” > “Effect Gallery” > “Artistic” > “Film Grain”. Use the settings below to add grainy texture to the rectangle.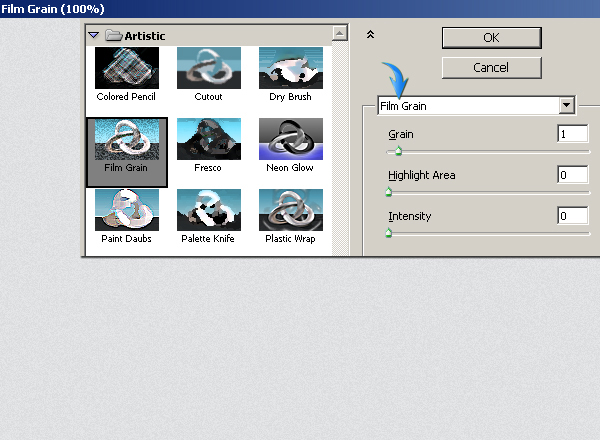
Step 4
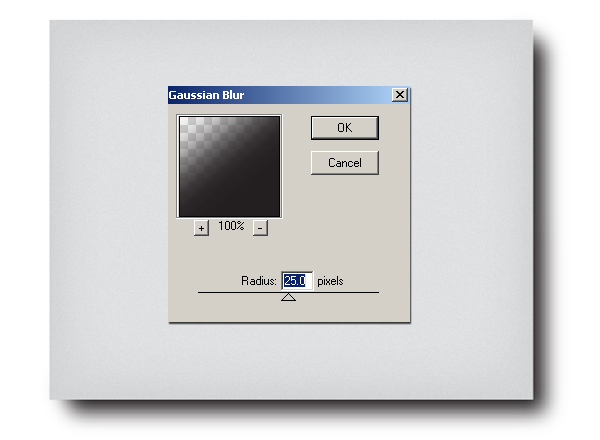
To create shadow, draw the shape with a black fill color using the pen tool on a layer just below the rectangle layer. Select this shape and go to “Effect” > “Blur” > “Gaussian Blur”. Apply the following settings here.
Step 5
Next, we’ll make the platter and record. Select the ellipse tool to draw a circle while holding down the “Shift” key. Give it a 1pt white stroke and apply the following gradient to it using the gradient tool.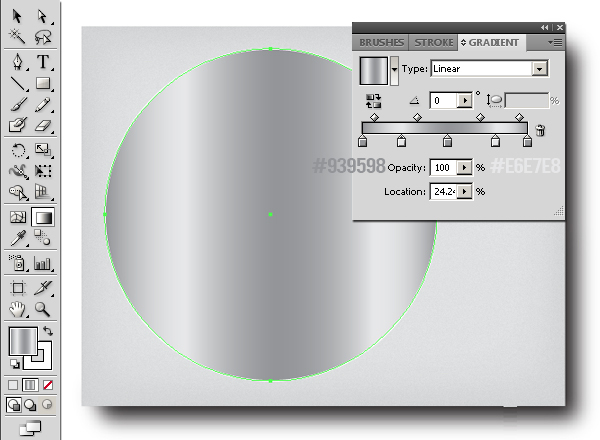 Draw another circle inside the previous using a dark gray fill color and a black stroke (1pt).

Step 6
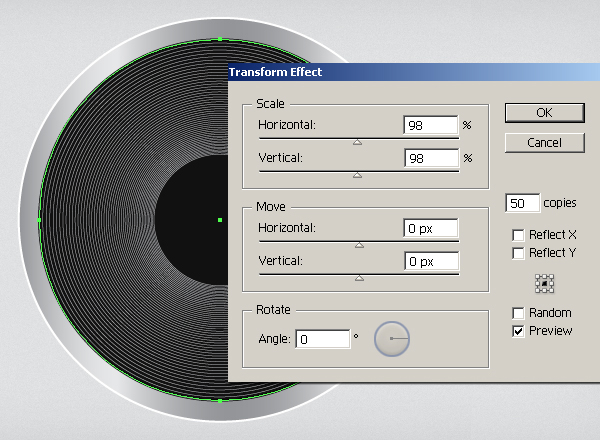
Now, set your fill color to none and pick a lighter gray stroke with 0.25pt weight from top options bar to draw a stroke just inside the black circle. Look below for clarity. Select this gray stroke and go to “Effect” > “Distort & Transform” > “Transform.” Apply the following settings here:
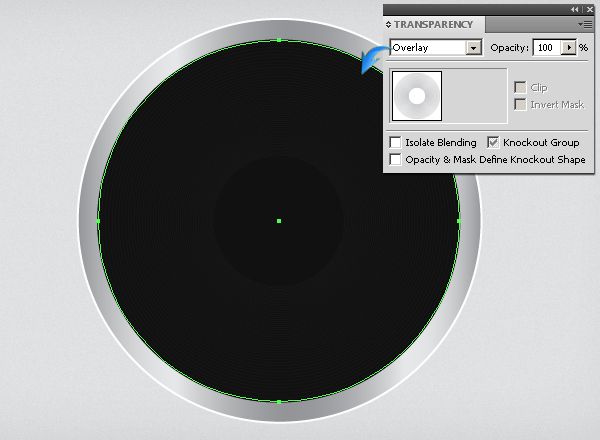
 Change the blending mode of this layer to “Overlay” within the transparency panel (Shift + Ctrl + F10).
Step 7
Draw another black circular stroke (1pt) just inside the black ellipse. Select it and go to “Effect” > “Distort & Transform” “Transform.” Apply the following values here. Once you are done, reduce the opacity of this layer to 25%.
Step 8
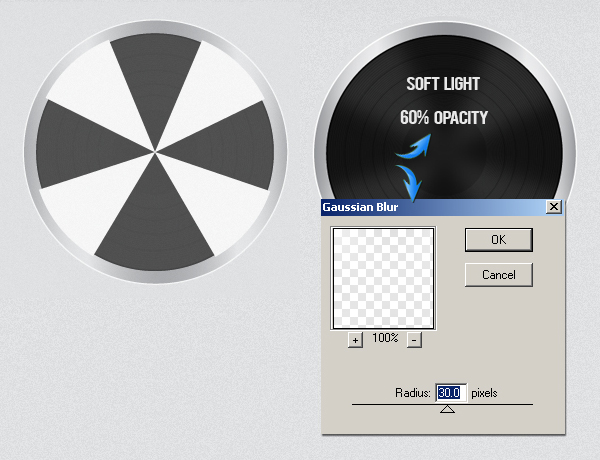
To make highlights over the record, draw a triangular shape with a white fill color using the pen tool. Duplicate the shape three times and position them as shown below with the help of the rotate tool (“R”). To confine these shapes to the record, draw a circle that’s the same size as the record above the triangles and set its fill and stroke to none. Now, select the four triangles and this new circle and go to “Object” > “Clipping Mask” > “Make.”
Step 9
Now, draw three circles over each other as shown below. Apply the following inner glow settings on the gray smaller circle. Make another white ellipse to create a highlight. Rotate it using selection tool (“V”) and apply a 2px Gaussian blur effect to it.
Step 10
To make shadow, draw a circle just above the base rectangle layer with a black fill color and apply a 9px Gaussian blur effect to it.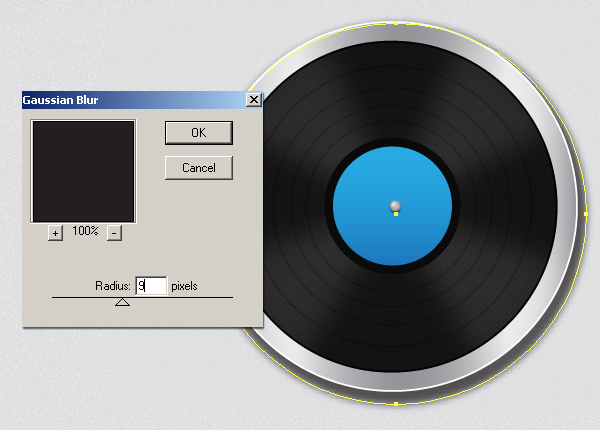
Step 11
Now, draw a 1pt circular stroke using the ellipse tool on the right side of the record. Draw an ellipse and shape inside the record as shown below.
Step 12
Draw a rectangle and apply a chrome gradient to it. You can find this gradient by following the path, “Window” > “Swatch Libraries” > “Gradients” > “Metals” and picking chrome gradient from the options. After that, duplicate this rectangle, decrease its size, and position it at the top of the original rectangle. Now, draw the shape shown below and apply a dark gray to light gray gradient to it.

Step 13
Next, draw four circles over each other and — to create highlights — make two dark gray triangles horizontally. Apply a 4px Gaussian blur effect to them. Change the blending mode of these triangles to “Multiply” and adjust them to 75% opacity. Now, make two lighter gray triangles vertically as shown below. Blur them and change their blending mode to “Screen” with 30% opacity. Make a small screw using the same techniques.

Step 14
Now, make the arm shown below using the pen tool and apply the following inner glow settings: To add shading over the arm, make a 1pt white stroke using the pen tool. Duplicate it, drag it a bit towards right, and change its stroke color to dark gray. After that, select both strokes and apply a 2px Gaussian blur effect to them.

Step 15
Make the following parts using the shape tool and the pen tool. Look below for clarity.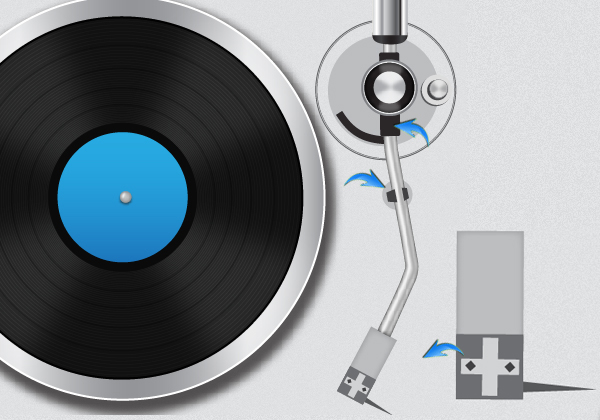
Step 16
Collect all the arm layers into a new layer, duplicate it, and place it below the original layer. Now, select your new layer and hit “Unite” shape mode in the pathfinder panel (Shift + Ctrl + F9). After that, apply a 4-5px Gaussian blur effect to it and adjust its opacity to 50%.
Step 17
Now, make an ellipse and rectangle with a gray fill color and unite them. Duplicate this new shape, decrease its size, and apply a 2px Gaussian blur effect.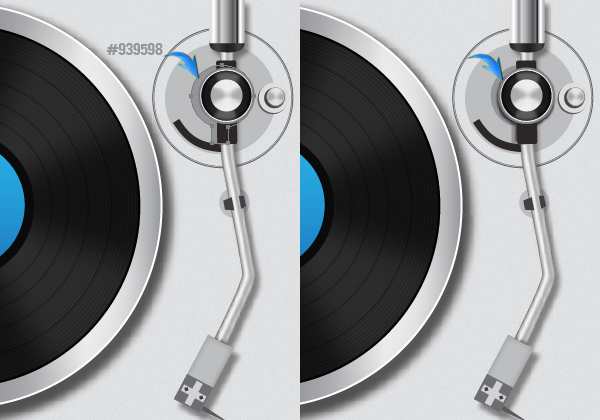
Step 18
Next, we’ll make the controller. Draw two vertical rectangles dark and light gray. After that, draw a 0.5pt small horizontal line using the pen or line tool, duplicate, and position these as shown below. Now, select the two white lines and go to “Object” > “Blend” > “Blend Options.” Choose 12 specified steps and hit “OK”. Now, go to “Object” > “Blend” > “Make.”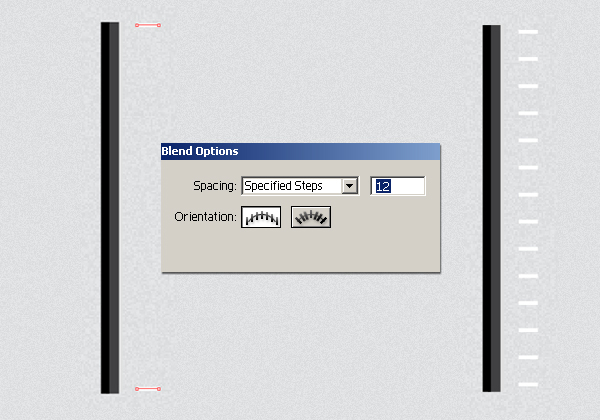
Step 19
Draw the following four rectangles and place them over each other to get the effect shown below. To make shadow, draw a rectangle below these and apply a 2.5px Gaussian blur effect to it.
Step 20
Lastly, we’ll add few buttons on the turntable. Make the following two types of buttons, duplicate them 3-4 times and position them as you like. You can also add some text over the buttons.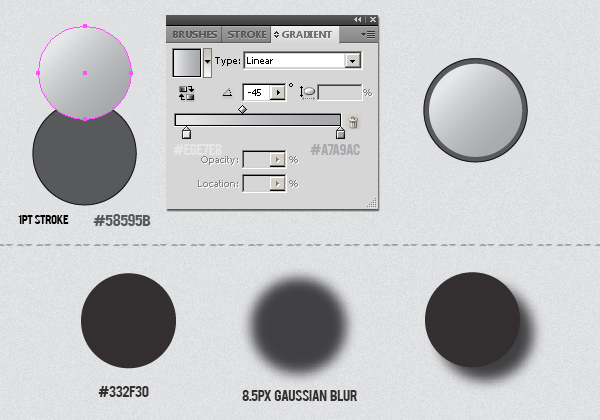 That’s it! I hope you enjoyed the tutorial and learned something useful. Do share your thoughts!
Frequently Asked Questions about Creating a Stunning Turntable in Illustrator
How can I add more realistic details to my turntable illustration in Illustrator?
To add more realistic details to your turntable illustration, you can use the gradient tool to create shadows and highlights. This tool can be found in the toolbar on the left side of the Illustrator interface. You can also use the pen tool to draw intricate details like the needle and the grooves on the record. Additionally, using the blend tool can help create a smooth transition between colors, adding depth and realism to your illustration.
Can I use Illustrator to create a vintage-style turntable?
Absolutely! Illustrator is a versatile tool that allows you to create illustrations in various styles. To create a vintage-style turntable, you can use muted color palettes and add textures to your illustration. You can also use the warp tool to distort your shapes slightly, giving them a hand-drawn, vintage feel.
How can I create a 3D effect on my turntable illustration in Illustrator?
Illustrator has a 3D effect feature that you can use to give your turntable illustration a three-dimensional look. To use this feature, select the shape you want to apply the 3D effect to, then go to Effect > 3D > Rotate or Extrude & Bevel. You can adjust the perspective and lighting to achieve the desired 3D effect.
What tools in Illustrator are best for creating a turntable illustration?
The pen tool, ellipse tool, and gradient tool are some of the most useful tools when creating a turntable illustration in Illustrator. The pen tool allows you to draw custom shapes, the ellipse tool is perfect for creating circular parts like the record and turntable platter, and the gradient tool helps add depth and realism to your illustration.
How can I add text to my turntable illustration in Illustrator?
To add text to your turntable illustration, use the text tool in Illustrator. This tool allows you to type directly onto your canvas. You can adjust the font, size, color, and alignment of your text using the options bar at the top of the screen.
Can I use Illustrator to create a turntable illustration for commercial use?
Yes, you can use Illustrator to create a turntable illustration for commercial use. However, you should ensure that your illustration does not infringe on any copyrights or trademarks. If you’re using reference images, make sure they are royalty-free or that you have permission to use them.
How can I save and export my turntable illustration in Illustrator?
To save your turntable illustration, go to File > Save. You can choose to save your file as an AI (Adobe Illustrator) file, which will preserve all your layers and allow you to edit your illustration later. To export your illustration for use in other applications, go to File > Export and choose the appropriate file format.
Can I create a turntable illustration in Illustrator if I’m a beginner?
Yes, Illustrator is a user-friendly software that is suitable for both beginners and professionals. There are many online tutorials and resources available that can help you learn how to use Illustrator and create a turntable illustration.
How can I add a background to my turntable illustration in Illustrator?
To add a background to your turntable illustration, you can use the rectangle tool to create a rectangle that covers the entire canvas. You can then fill this rectangle with a color or gradient using the fill tool.
Can I animate my turntable illustration in Illustrator?
While Illustrator does not have animation capabilities, you can create individual frames of your animation in Illustrator and then use a program like Adobe After Effects to animate them.
 Anum Khan
Anum is Web and Graphic designer. Addicted to Photoshop and crazy for pixel perfection. She is also an active blogger, sharing her passions, skills and creative details on her blog Websoulz. She loves to connect with the community, sharing the latest design gossips and rolling her eyes on boring trends.