The Ultimate Guide to Deploying PHP Apps in the Cloud
Table of Contents
- Introduction to Cloud Servers
- Heroku
- Make a small change
- Database, Caching & Cron Jobs
- Google Cloud
- Database, Caching & Cron Jobs
- IBM BlueMix
- Database, Caching & Cron Jobs
- Microsoft Azure
- Database, Caching & Cron Jobs
- Amazon Web Services
- Database, Caching and Cron Jobs
- Laravel Forge
- Envoyer
- Deployer
- Conclusion
- Comments
This post was first published on the Auth0 blog and republished here in full with their permission.
TL;DR: There is a popular mantra amongst developers that goes like this write, test and deploy. In this tutorial, I’ll show you how to deploy your PHP apps to different cloud server platforms such as Google Cloud, Microsoft Azure, Heroku, IBM Bluemix, and others.
Key Takeaways
- Deploying PHP apps in the cloud offers scalability, cost-effectiveness, improved performance, and better reliability, making it an advantageous option for businesses of all sizes.
- Platforms like Heroku, Google Cloud, IBM Bluemix, Microsoft Azure, and Amazon Web Services provide diverse environments for hosting PHP applications, each with specific features that cater to different development needs.
- Essential steps for deploying on Heroku include setting up a Heroku account, creating a .env file, configuring Auth0 settings, and using a Procfile to declare process types for the app’s startup.
- Google Cloud offers a flexible environment for PHP apps, allowing the use of various PHP extensions and deployment scripts, which can be managed through the gcloud command-line tool.
- IBM Bluemix utilizes Cloud Foundry for app deployment, enabling easy configuration, scaling, and management of apps with features like automatic buildpack detection and environment variable management through the Bluemix UI.
- Microsoft Azure and Amazon Web Services provide comprehensive tools for deployment, database integration, caching, and running cron jobs, supporting extensive customization and scalability for PHP applications.
Introduction to Cloud Servers
Cloud servers are basically virtual servers that run within a cloud computing environment. There are various benefits to hosting and deploying your applications in the cloud. They are:
- Economically efficient.
- You have the freedom to modify the server software to your needs.
- Cloud servers scale very well.
- Stability and security.
In fact, many companies have moved their infrastructure to the cloud in order to reduce cost and complexity. It’s a great option for small, mid-sized, and enterprise scale businesses. If you write a lot of tutorials and do POCs (Proof-of-concepts) like me, it’s also a great choice for you!
A generic PHP application involves the common LAMP (Linux, Apache, Mysql and PHP) stack.
- Linux: The operating system that runs the other software packages.
- Apache: The web server that runs the PHP code. A popular alternative software is Nginx.
- MySQL: The database. A popular alternative software is PostgreSQL.
- PHP: The server-side language for building the application.
For a crash course on LAMP / MAMP / WAMP, see this premium resource.
Now let’s cover how to deploy PHP applications to several cloud server platforms.
Heroku
Heroku is a cloud platform that helps you deploy and host your applications the modern way. It does all the heavy-lifting for you. Let’s quickly take a look at how to deploy and maintain a PHP application on heroku.
 PHP Heroku Architecture
If you don’t have an account, go ahead and create one on heroku.com. Then go ahead and install the heroku cli. Once you have that installed, clone this simple starwars PHP application.
Heroku runs your PHP app in a dyno, a smart container which provides a modern stack with your choice of web server (Apache or Nginx) and runtime (PHP or HHVM).
Make sure you follow these steps below:
- Create a
.envfile from.env.example. - You need to have an account with Auth0.
- Go to your Auth0 Dashboard and click the “create a new client” button.
- Name your new app and select “Regular Web Applications”.
- In the Settings for your new Auth0 client app, add
http://localhost:8000to the Allowed Callback URLs. - Copy out your client id, client secret, domain and callback url. Ensure you assign them to the right variables in your
.envfile.
We have a composer.json file which contains the list of packages that the application needs. Go ahead and run composer install on your local machine to install these packages. Not familiar with Composer? This video might help.
Go ahead and run the app. The app should be running like so:
 Landing page
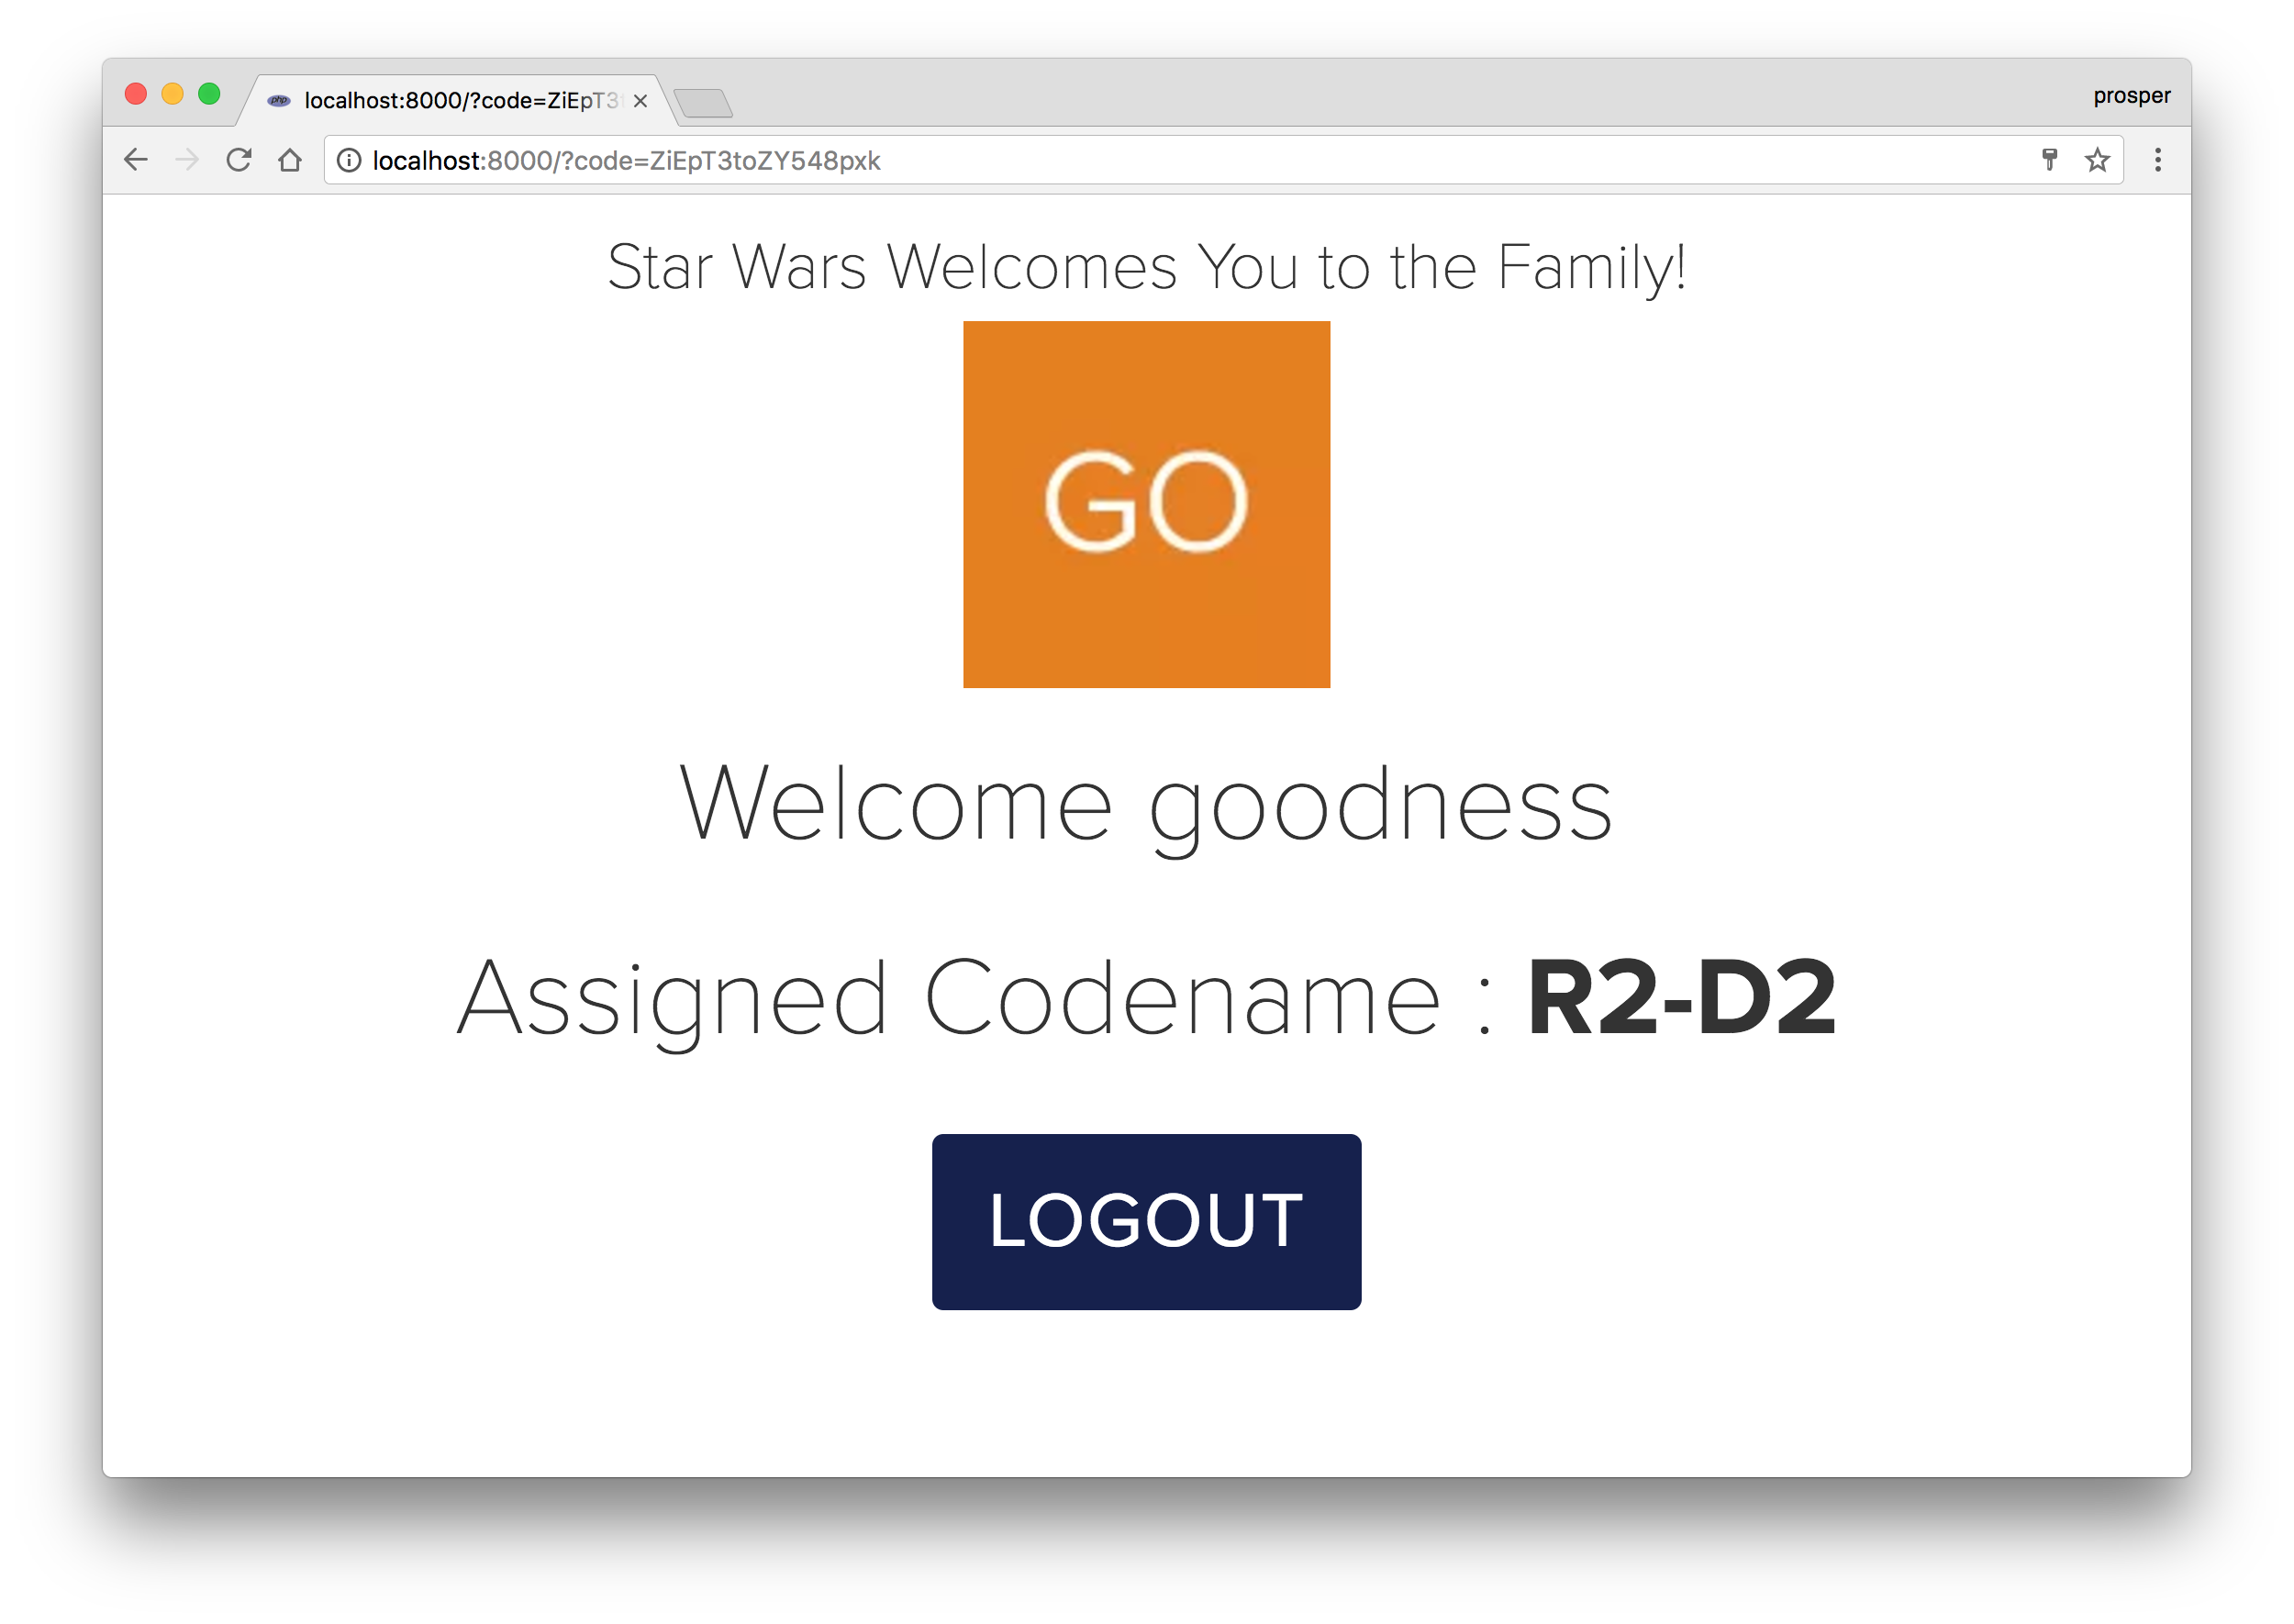 Logged In User
Awesome! Our app works locally. Time to deploy! The first thing we’ll do is to add a Procfile to the root directory of our app.
Create a new file called Procfile without any file extension and add this:
web: vendor/bin/heroku-php-apache2
A Procfile is a text file in the root directory of your application that defines process types and explicitly declares what command should be executed to start your app on heroku.
If you are interested in using Nginx as the web server, then the content of your Procfile would be:
web: vendor/bin/heroku-php-nginx
Now that you have added the Procfile, go ahead and upload the project to GitHub or Bitbucket. Mine is starwazapp.
Head over to dashboard.heroku.com/apps and create a new app like so:
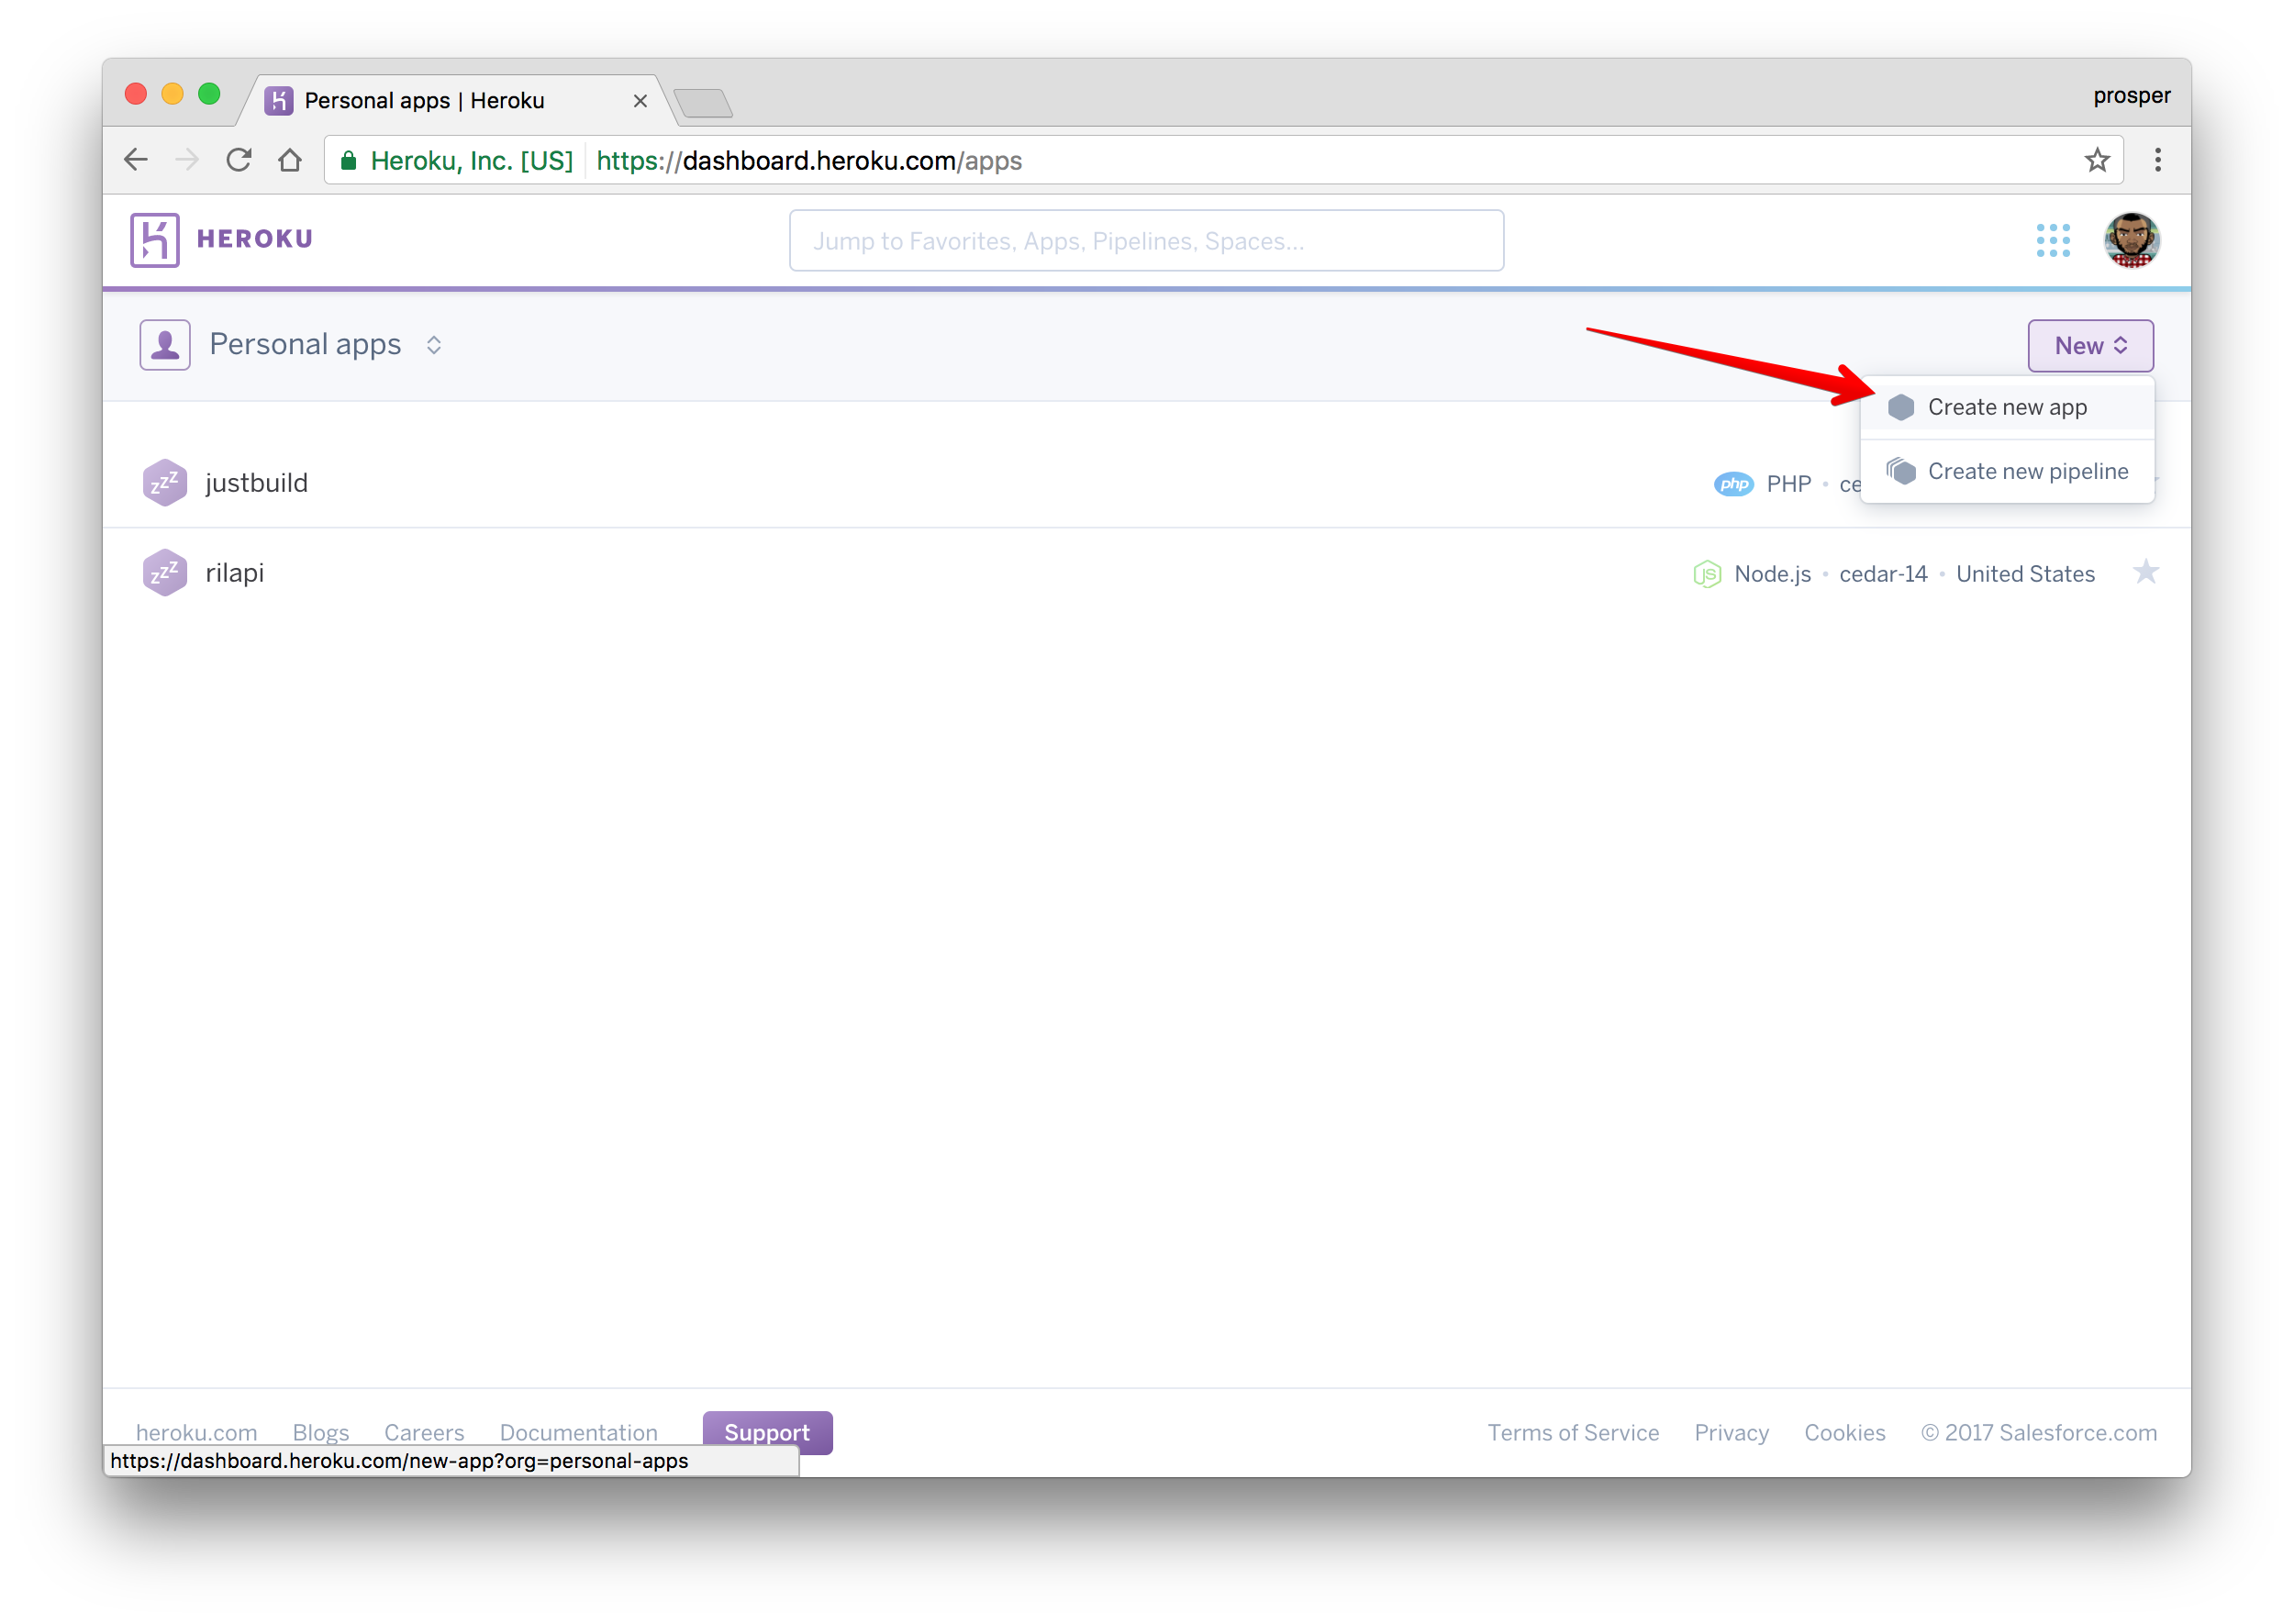 Create a new app from the dashboard
Give it a name like so:
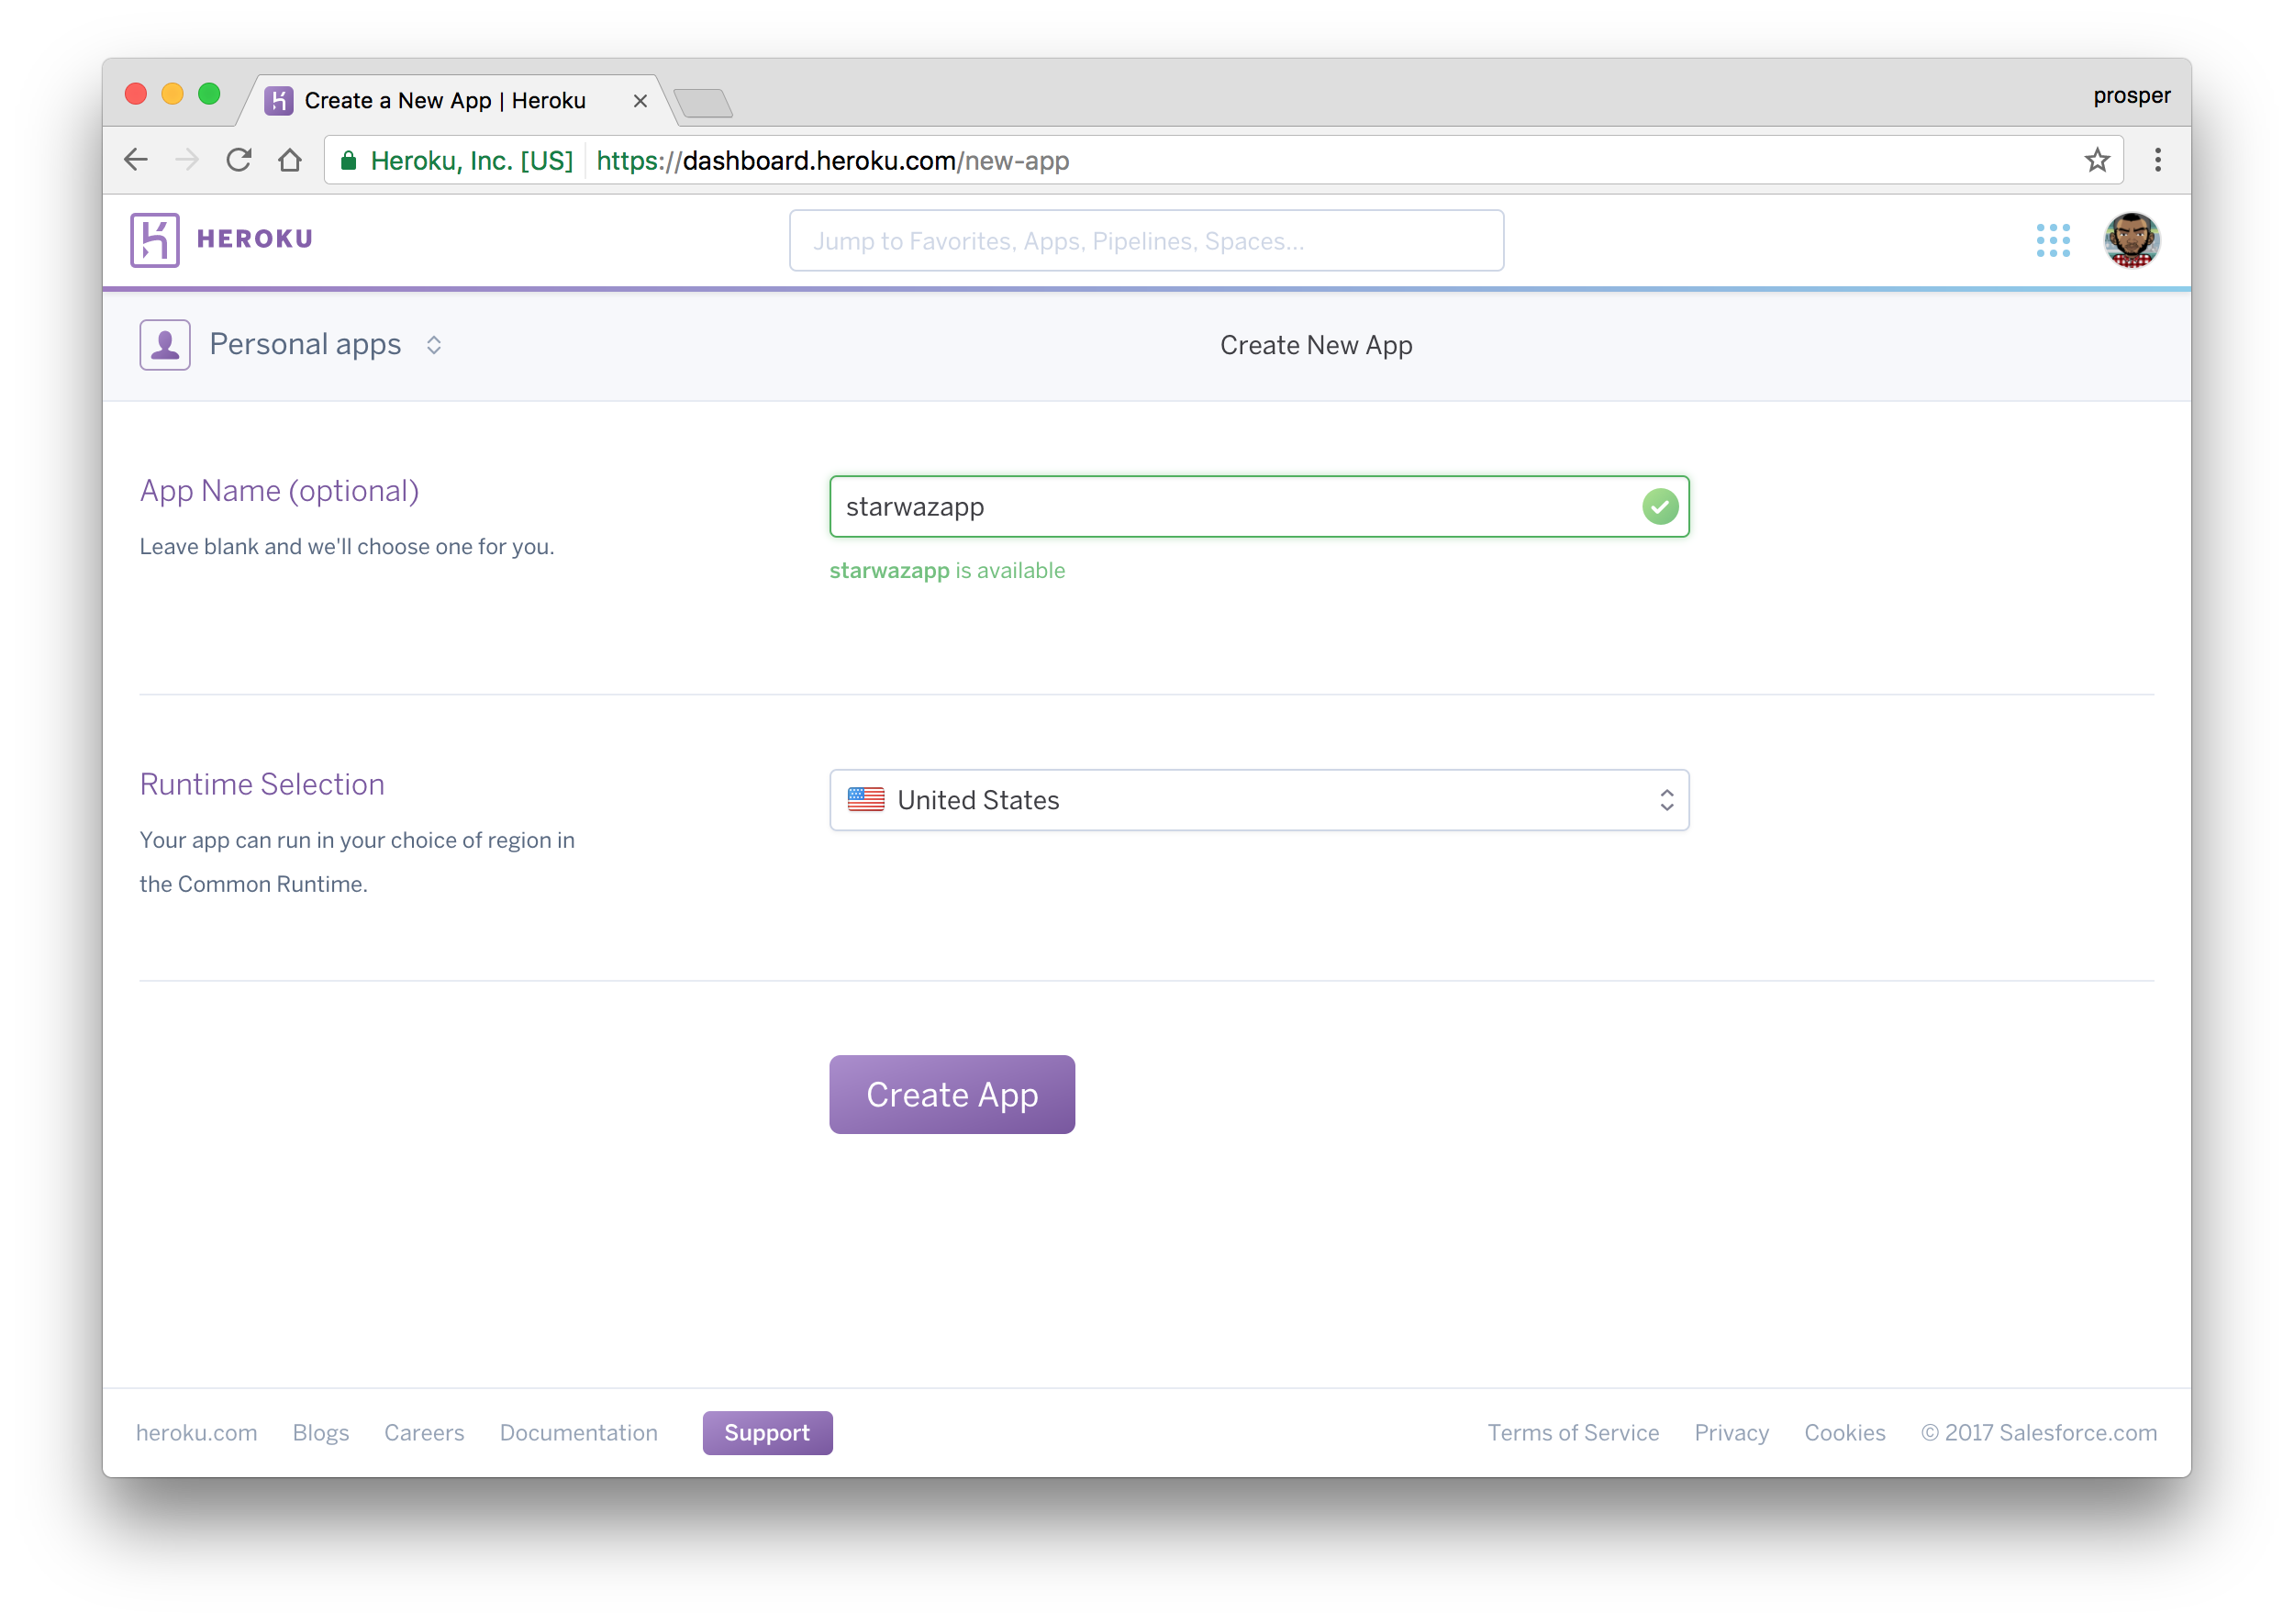 Give app a name
Choose a deployment method. In our case, we’ll use GitHub like so:
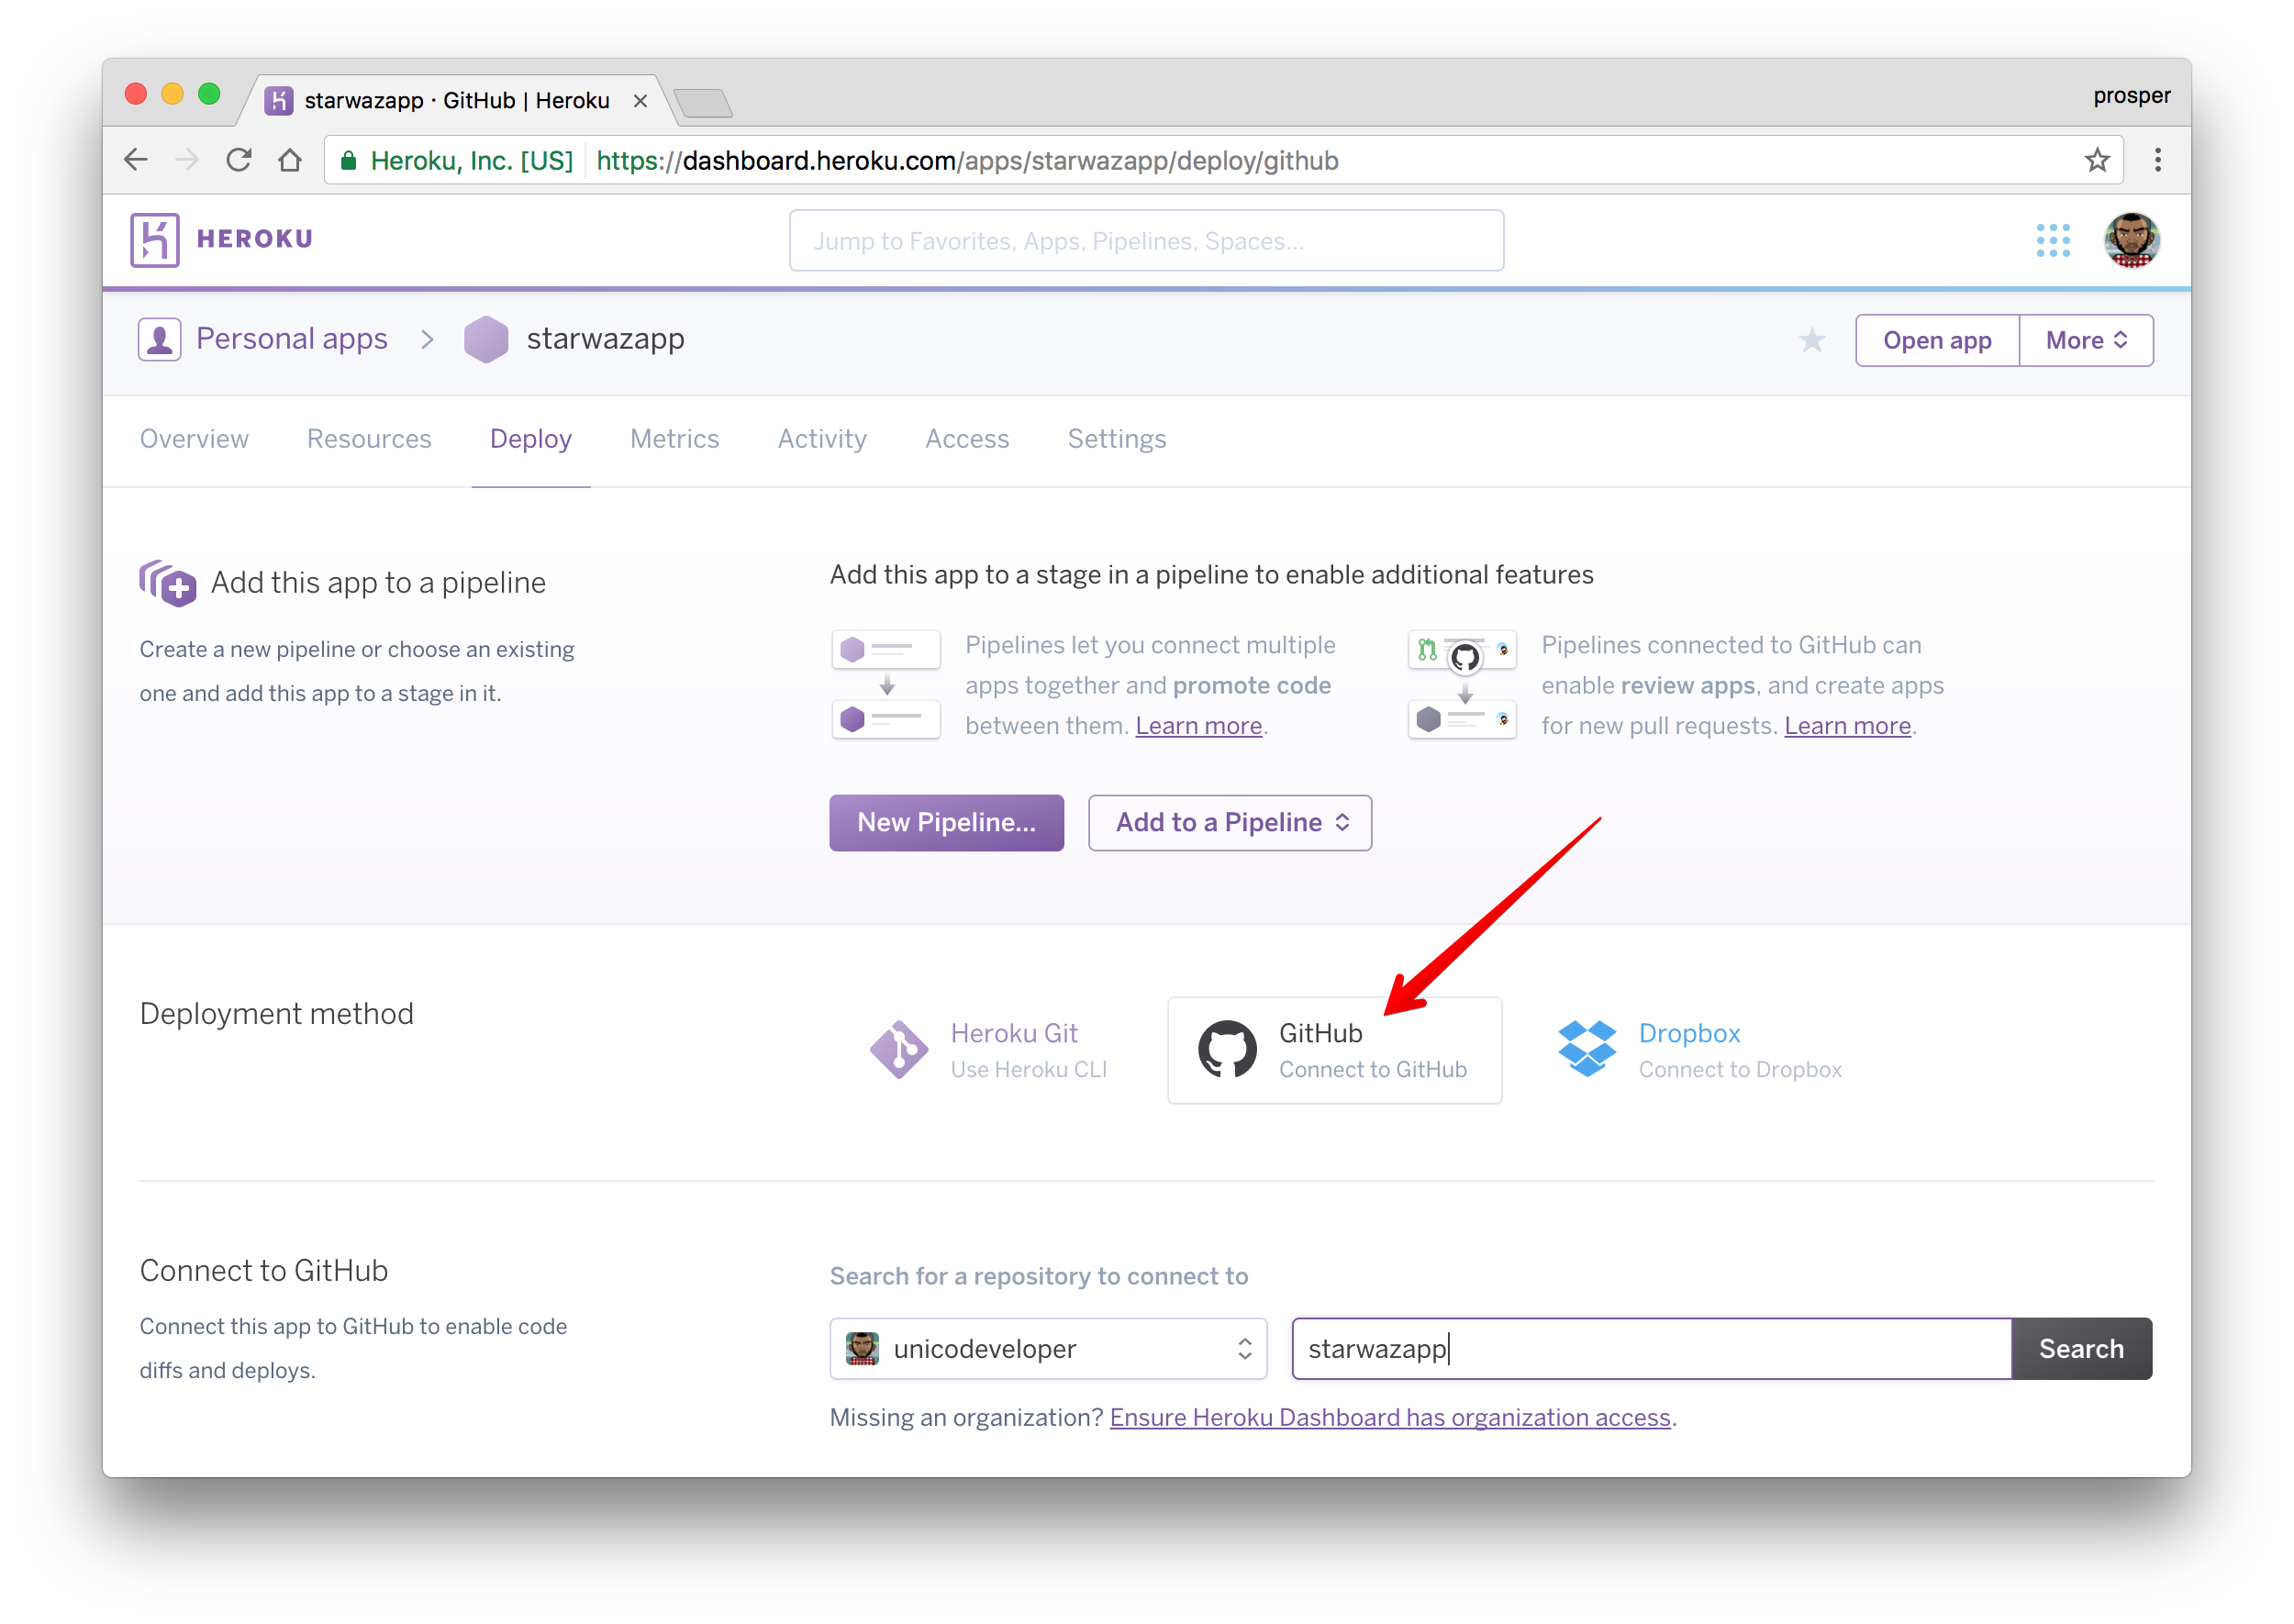 Connect to GitHub
The reason for choosing GitHub is to make the development and maintenance process very smooth. Developers can work on new features using the git workflow.
Now, type the name of the repo in the circled area and click Search. Heroku will search for your repo under your GitHub account and display it like so
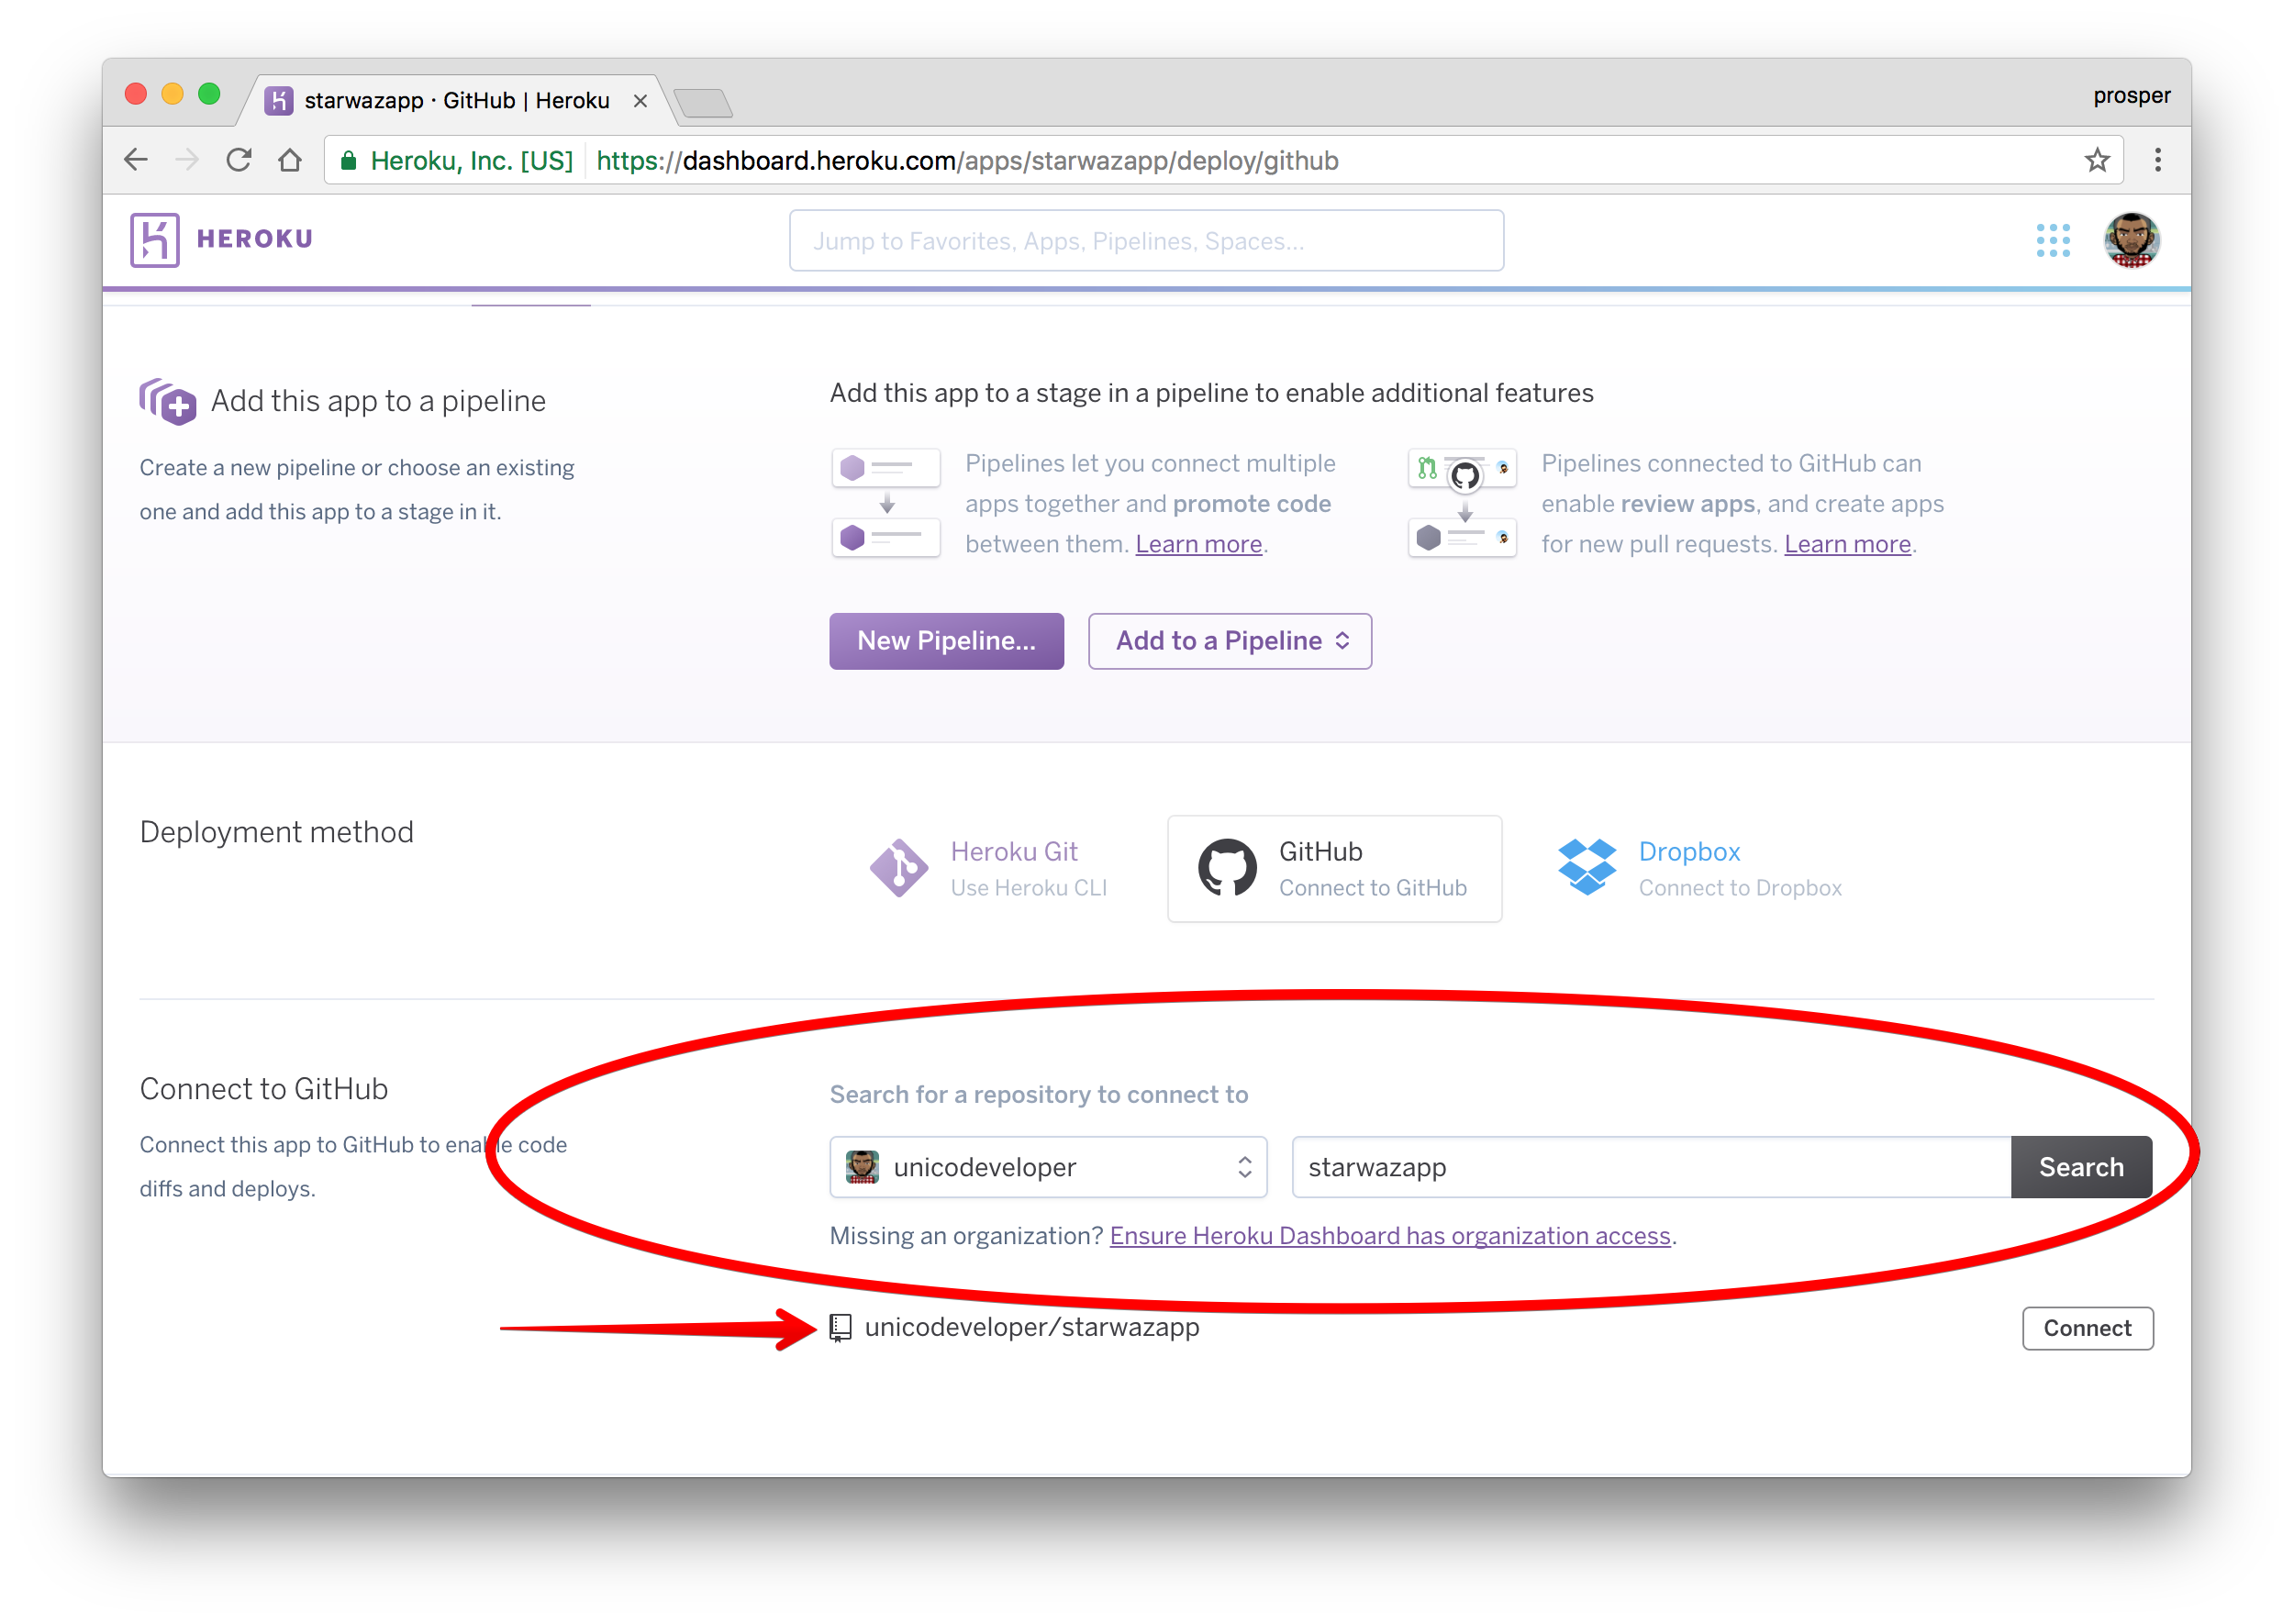 Search for repo
Click on connect like so
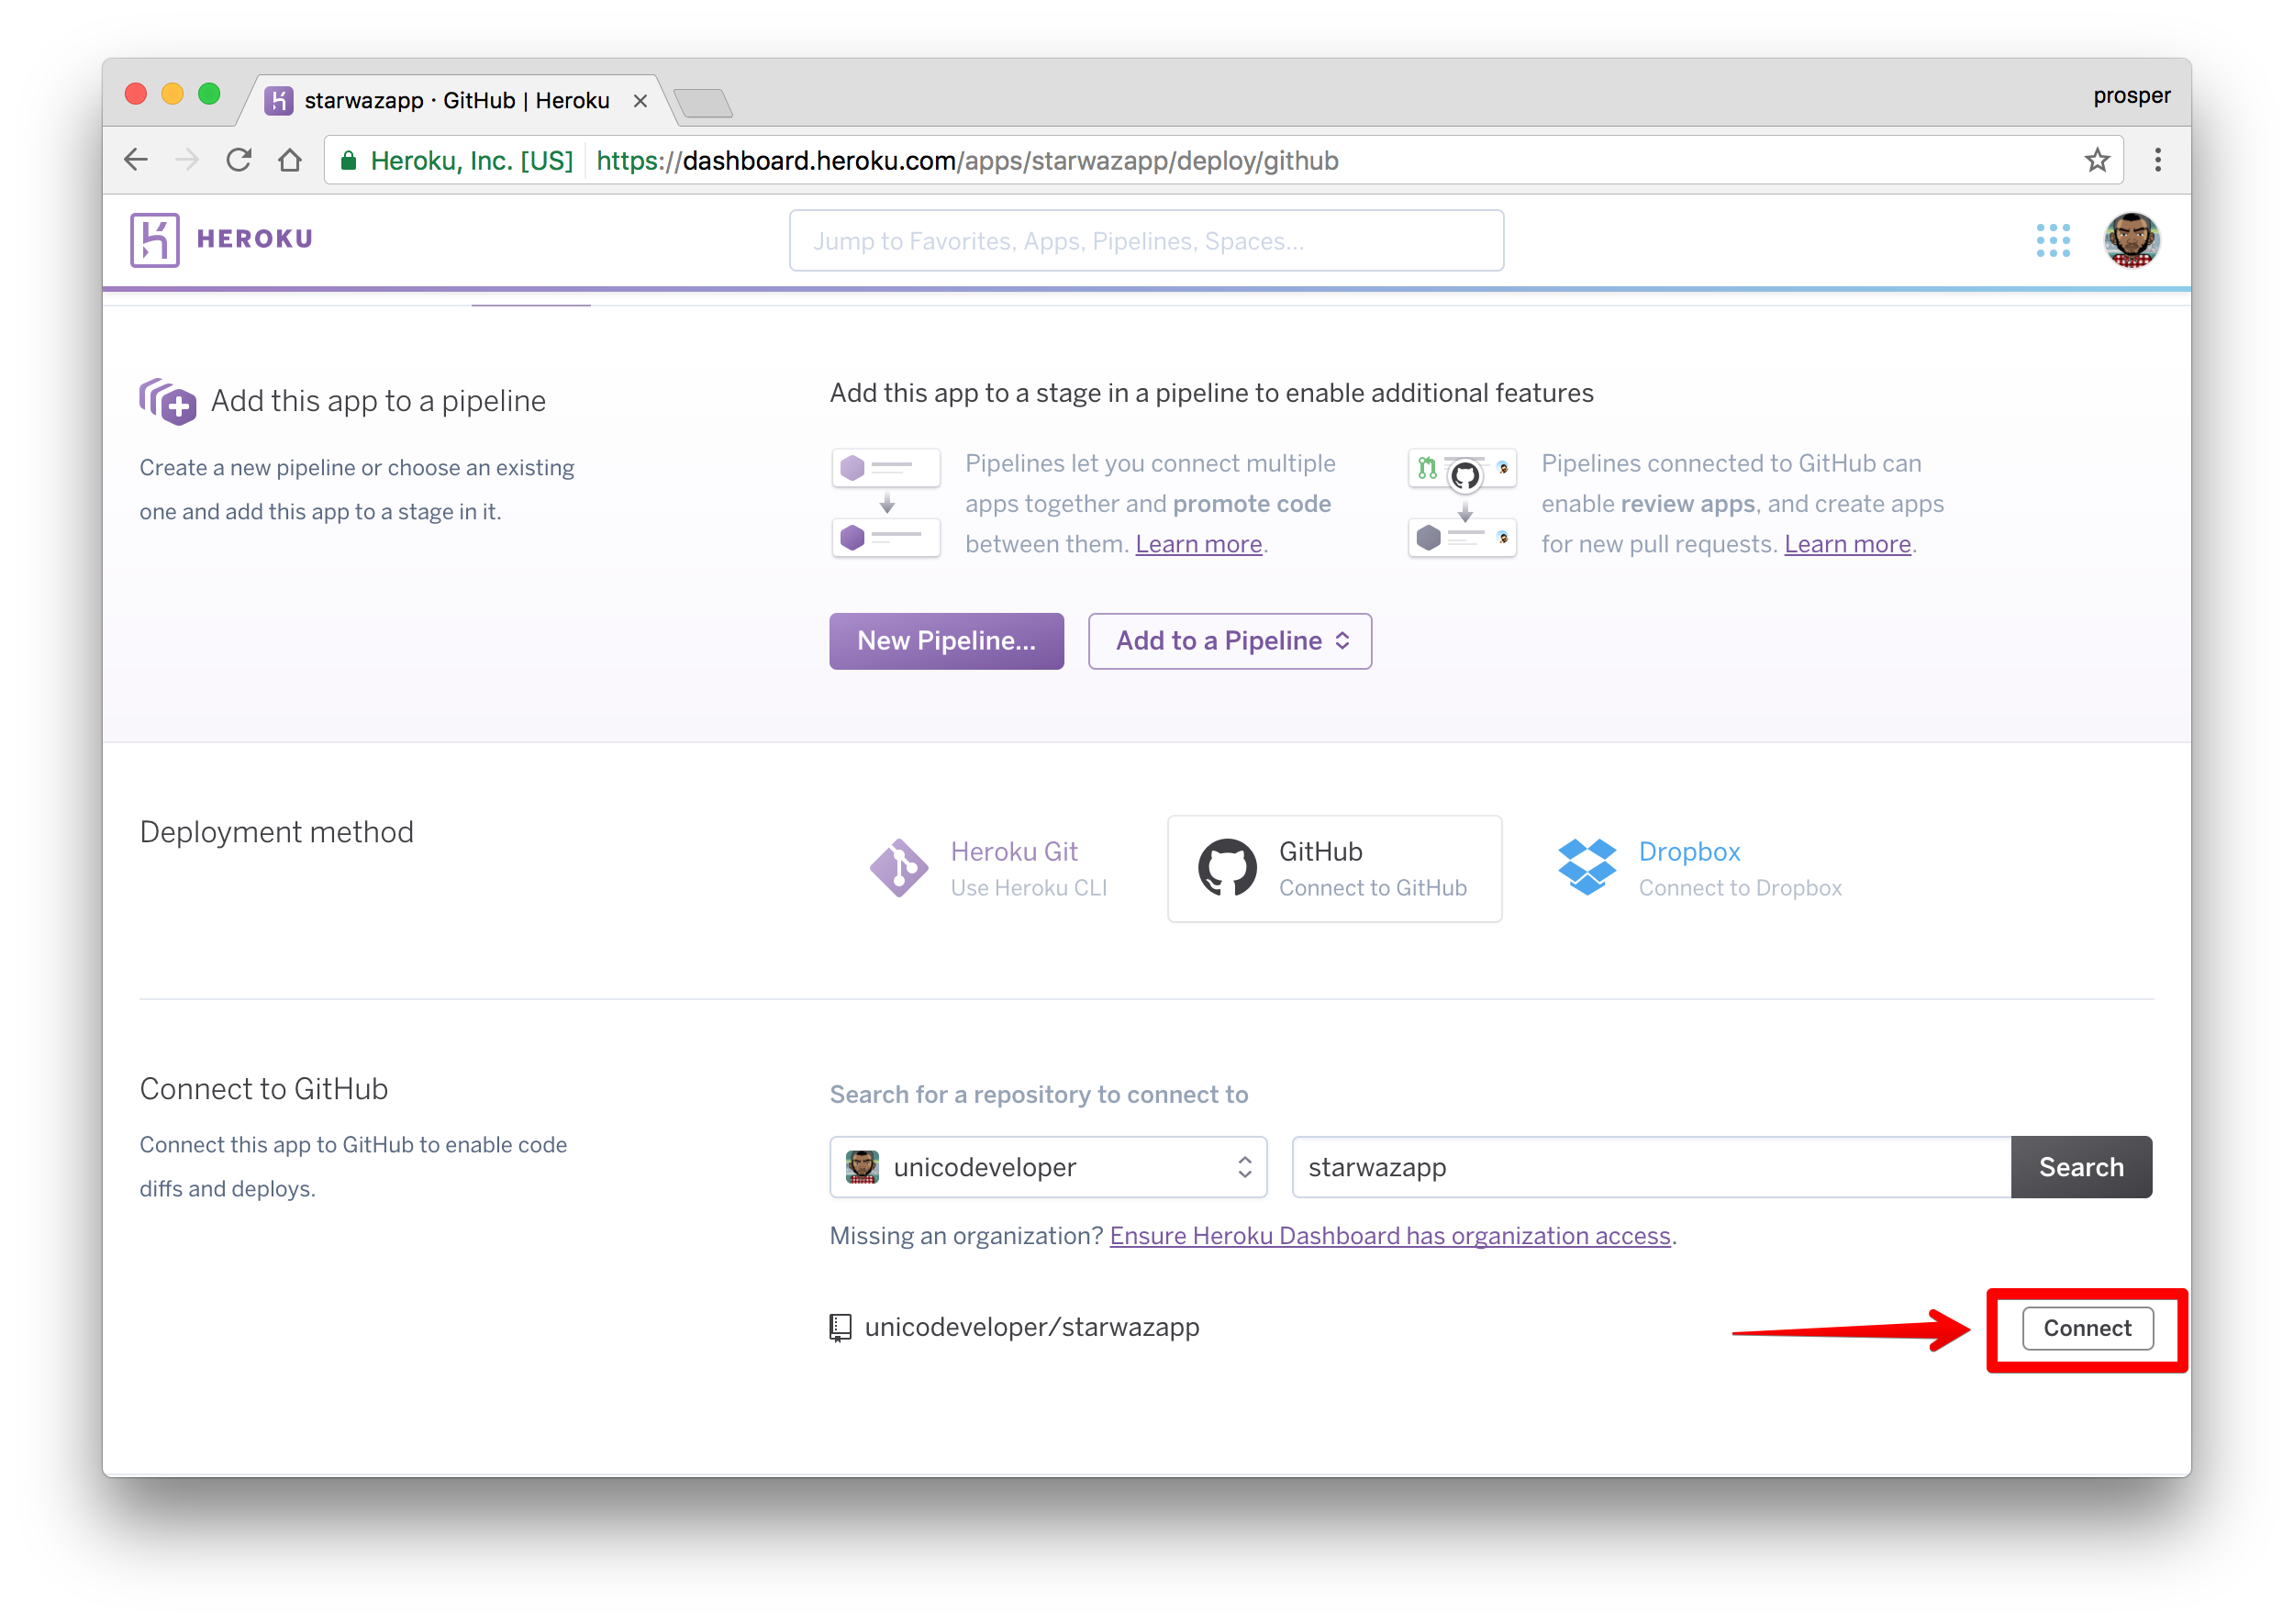 Click on the connect button
Heroku will connect the repo like so
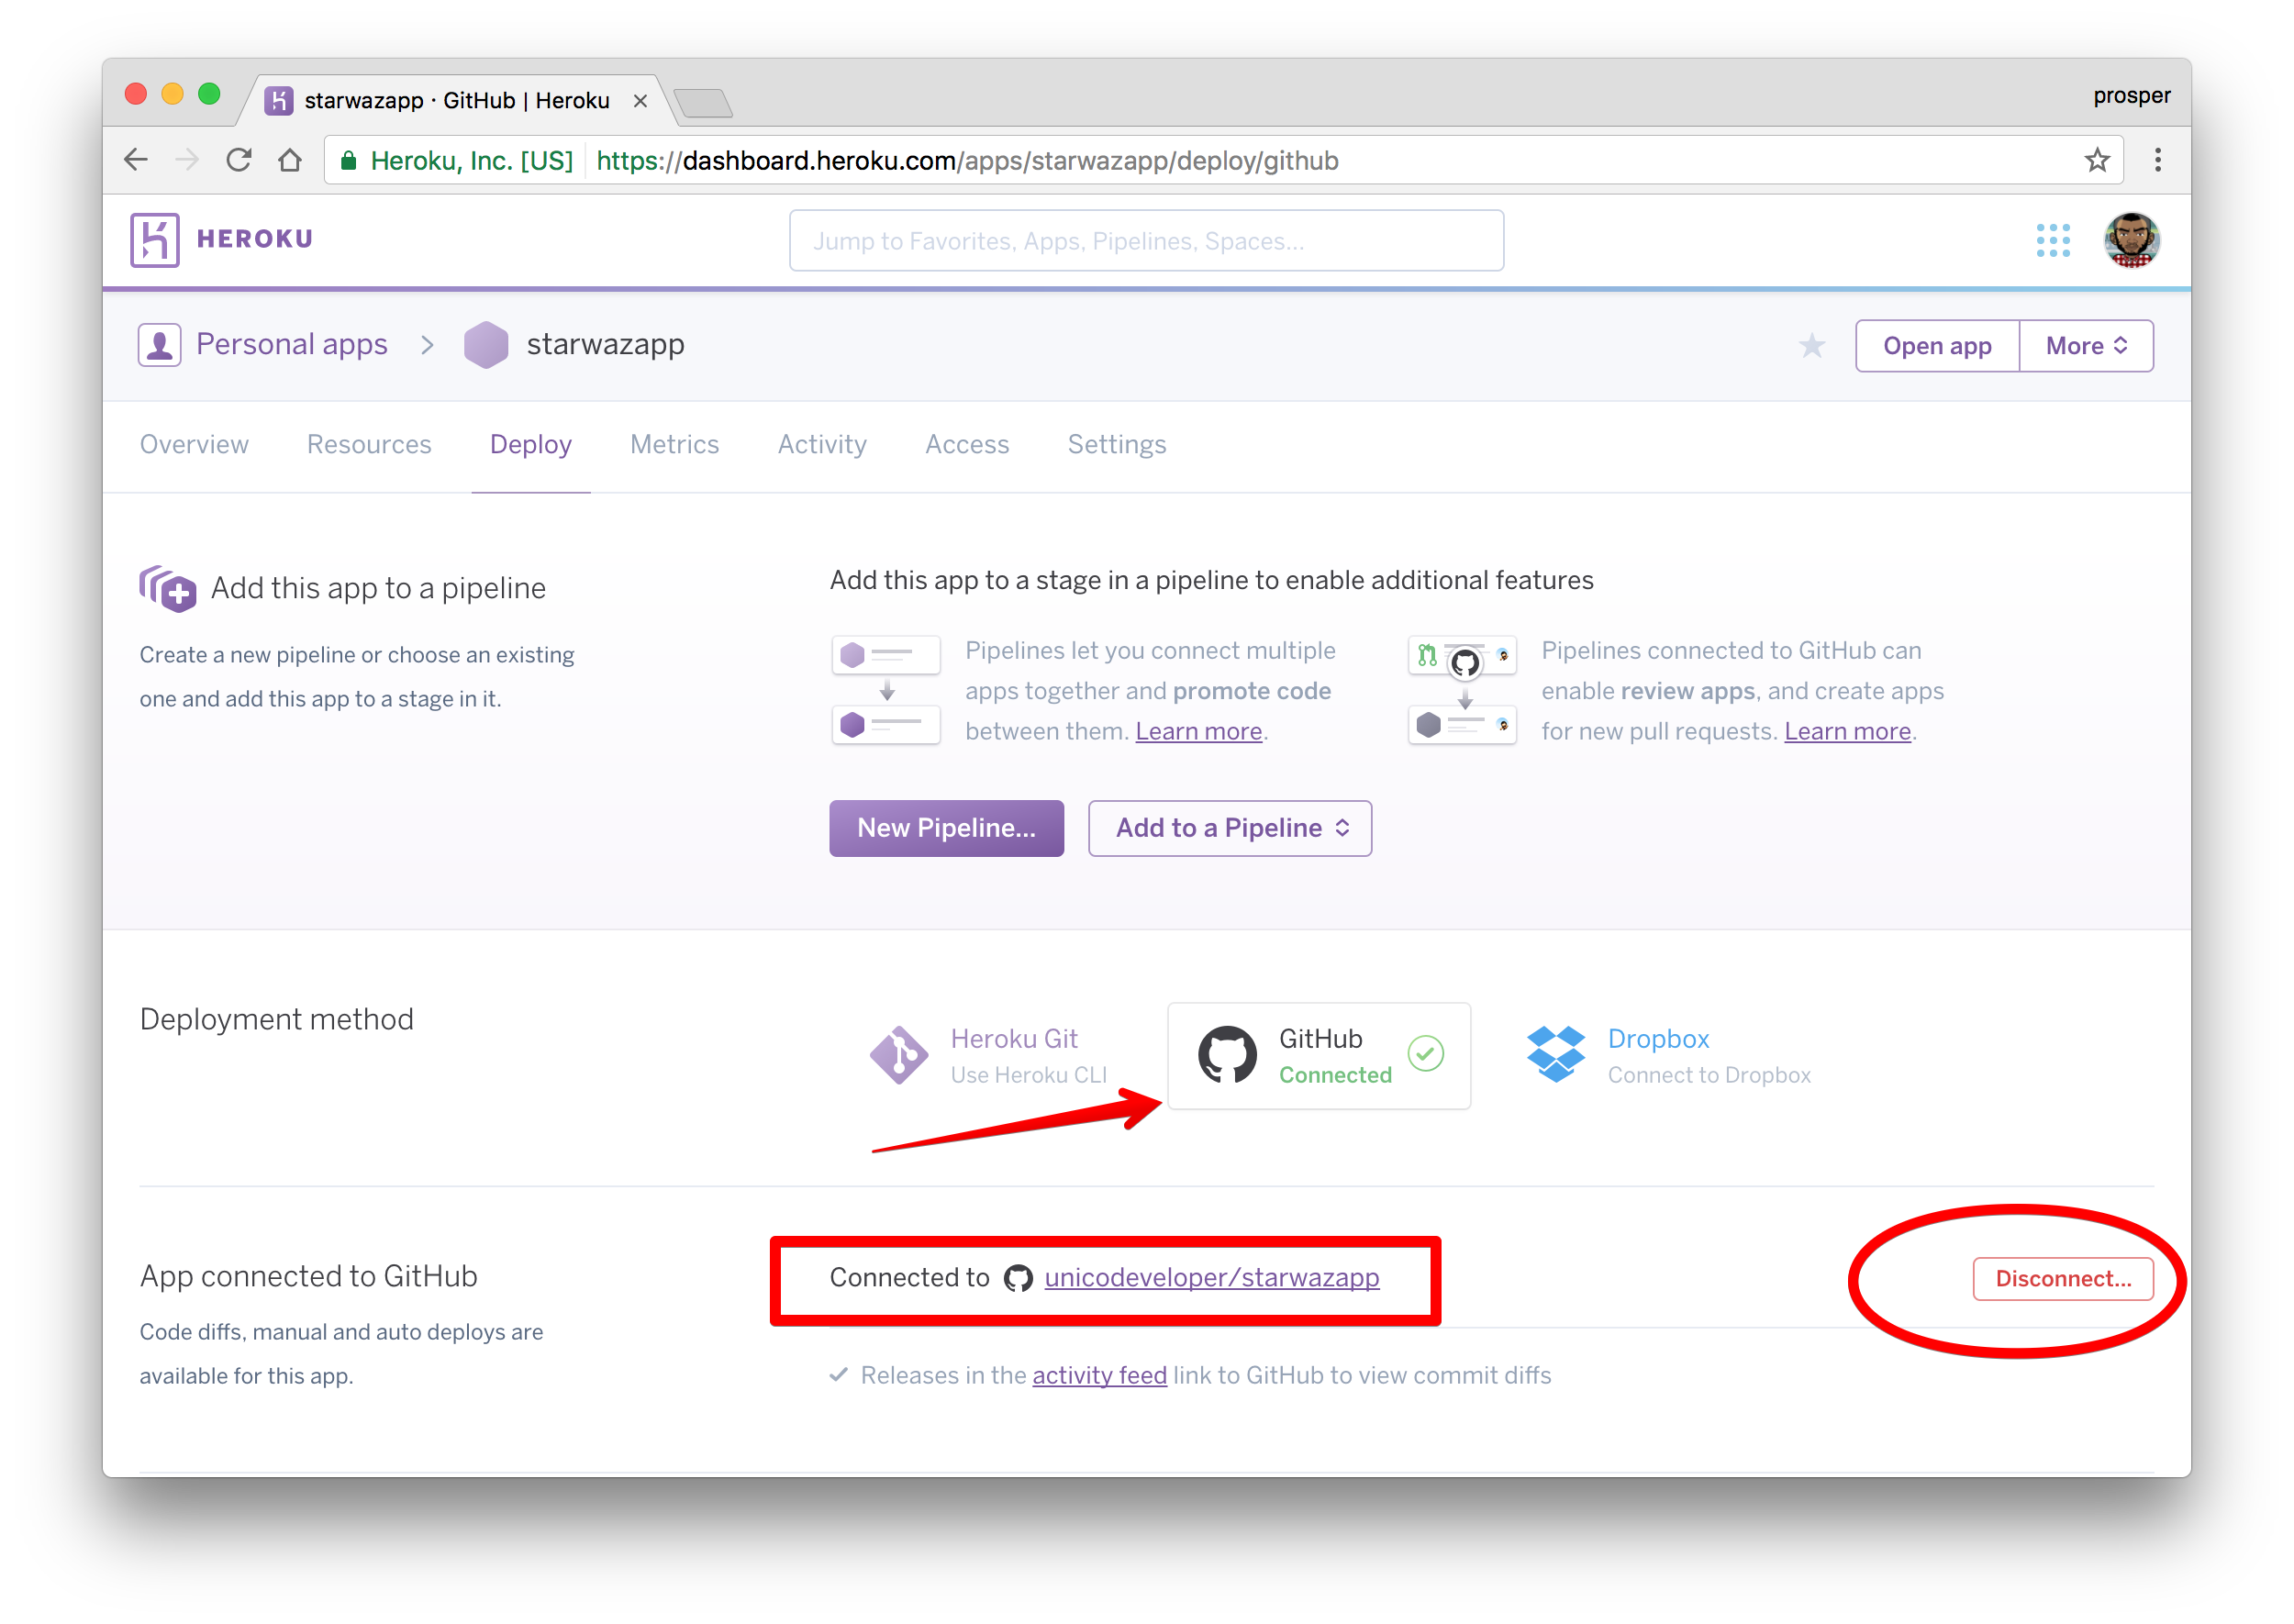 Connected Project
Scroll down a bit. This is the interesting part. Heroku allows you to enable automatic deploys with the push of a button. It also gives you an option to wait for your continuous integration process to pass before deploying to production. In a real world app, you’ll have a test suite for your codebase. A developers’ code runs against the test suite. If it passes, the code will be pushed to production.
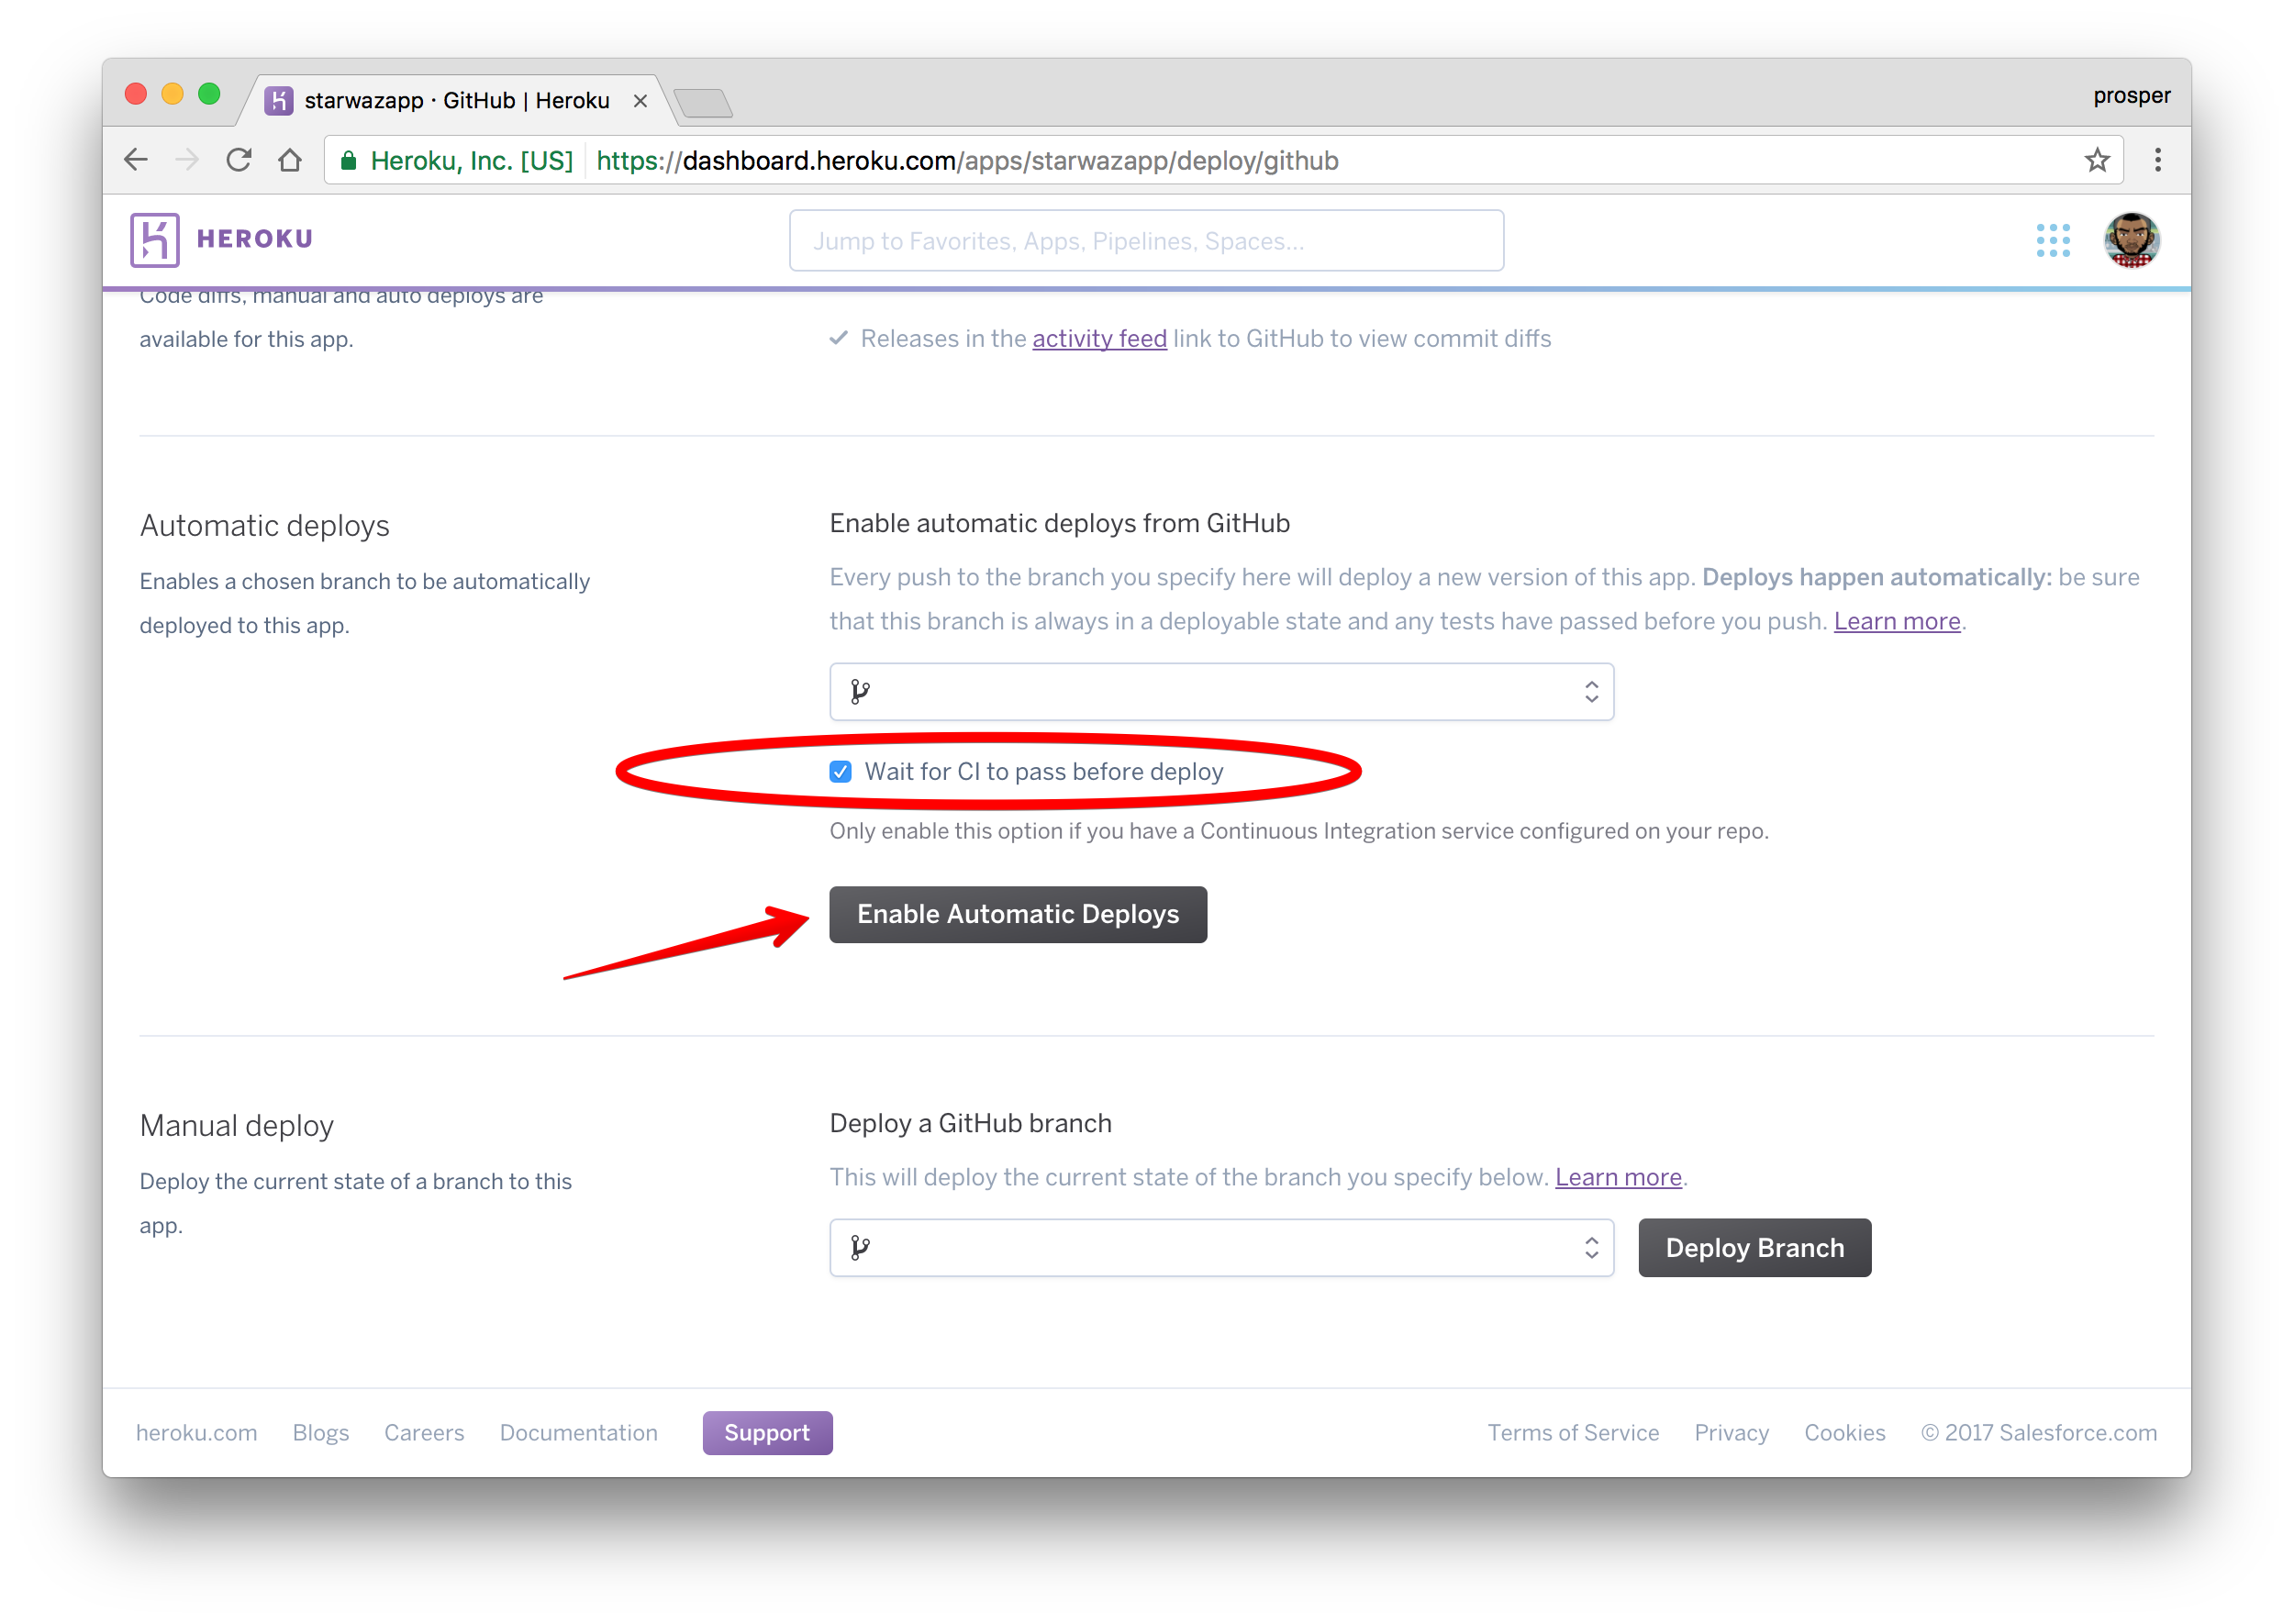
Click to enable automatic deploys. We don’t have any CI service, so we don’t need to enable that option. Now, let’s deploy the master branch.
Note: You can have other branches and specify which branch you want for production. In our case, the master branch is the production branch.
Click on the Deploy branch. Heroku will scan through your composer.lock file, install the necessary packages, and deploy!
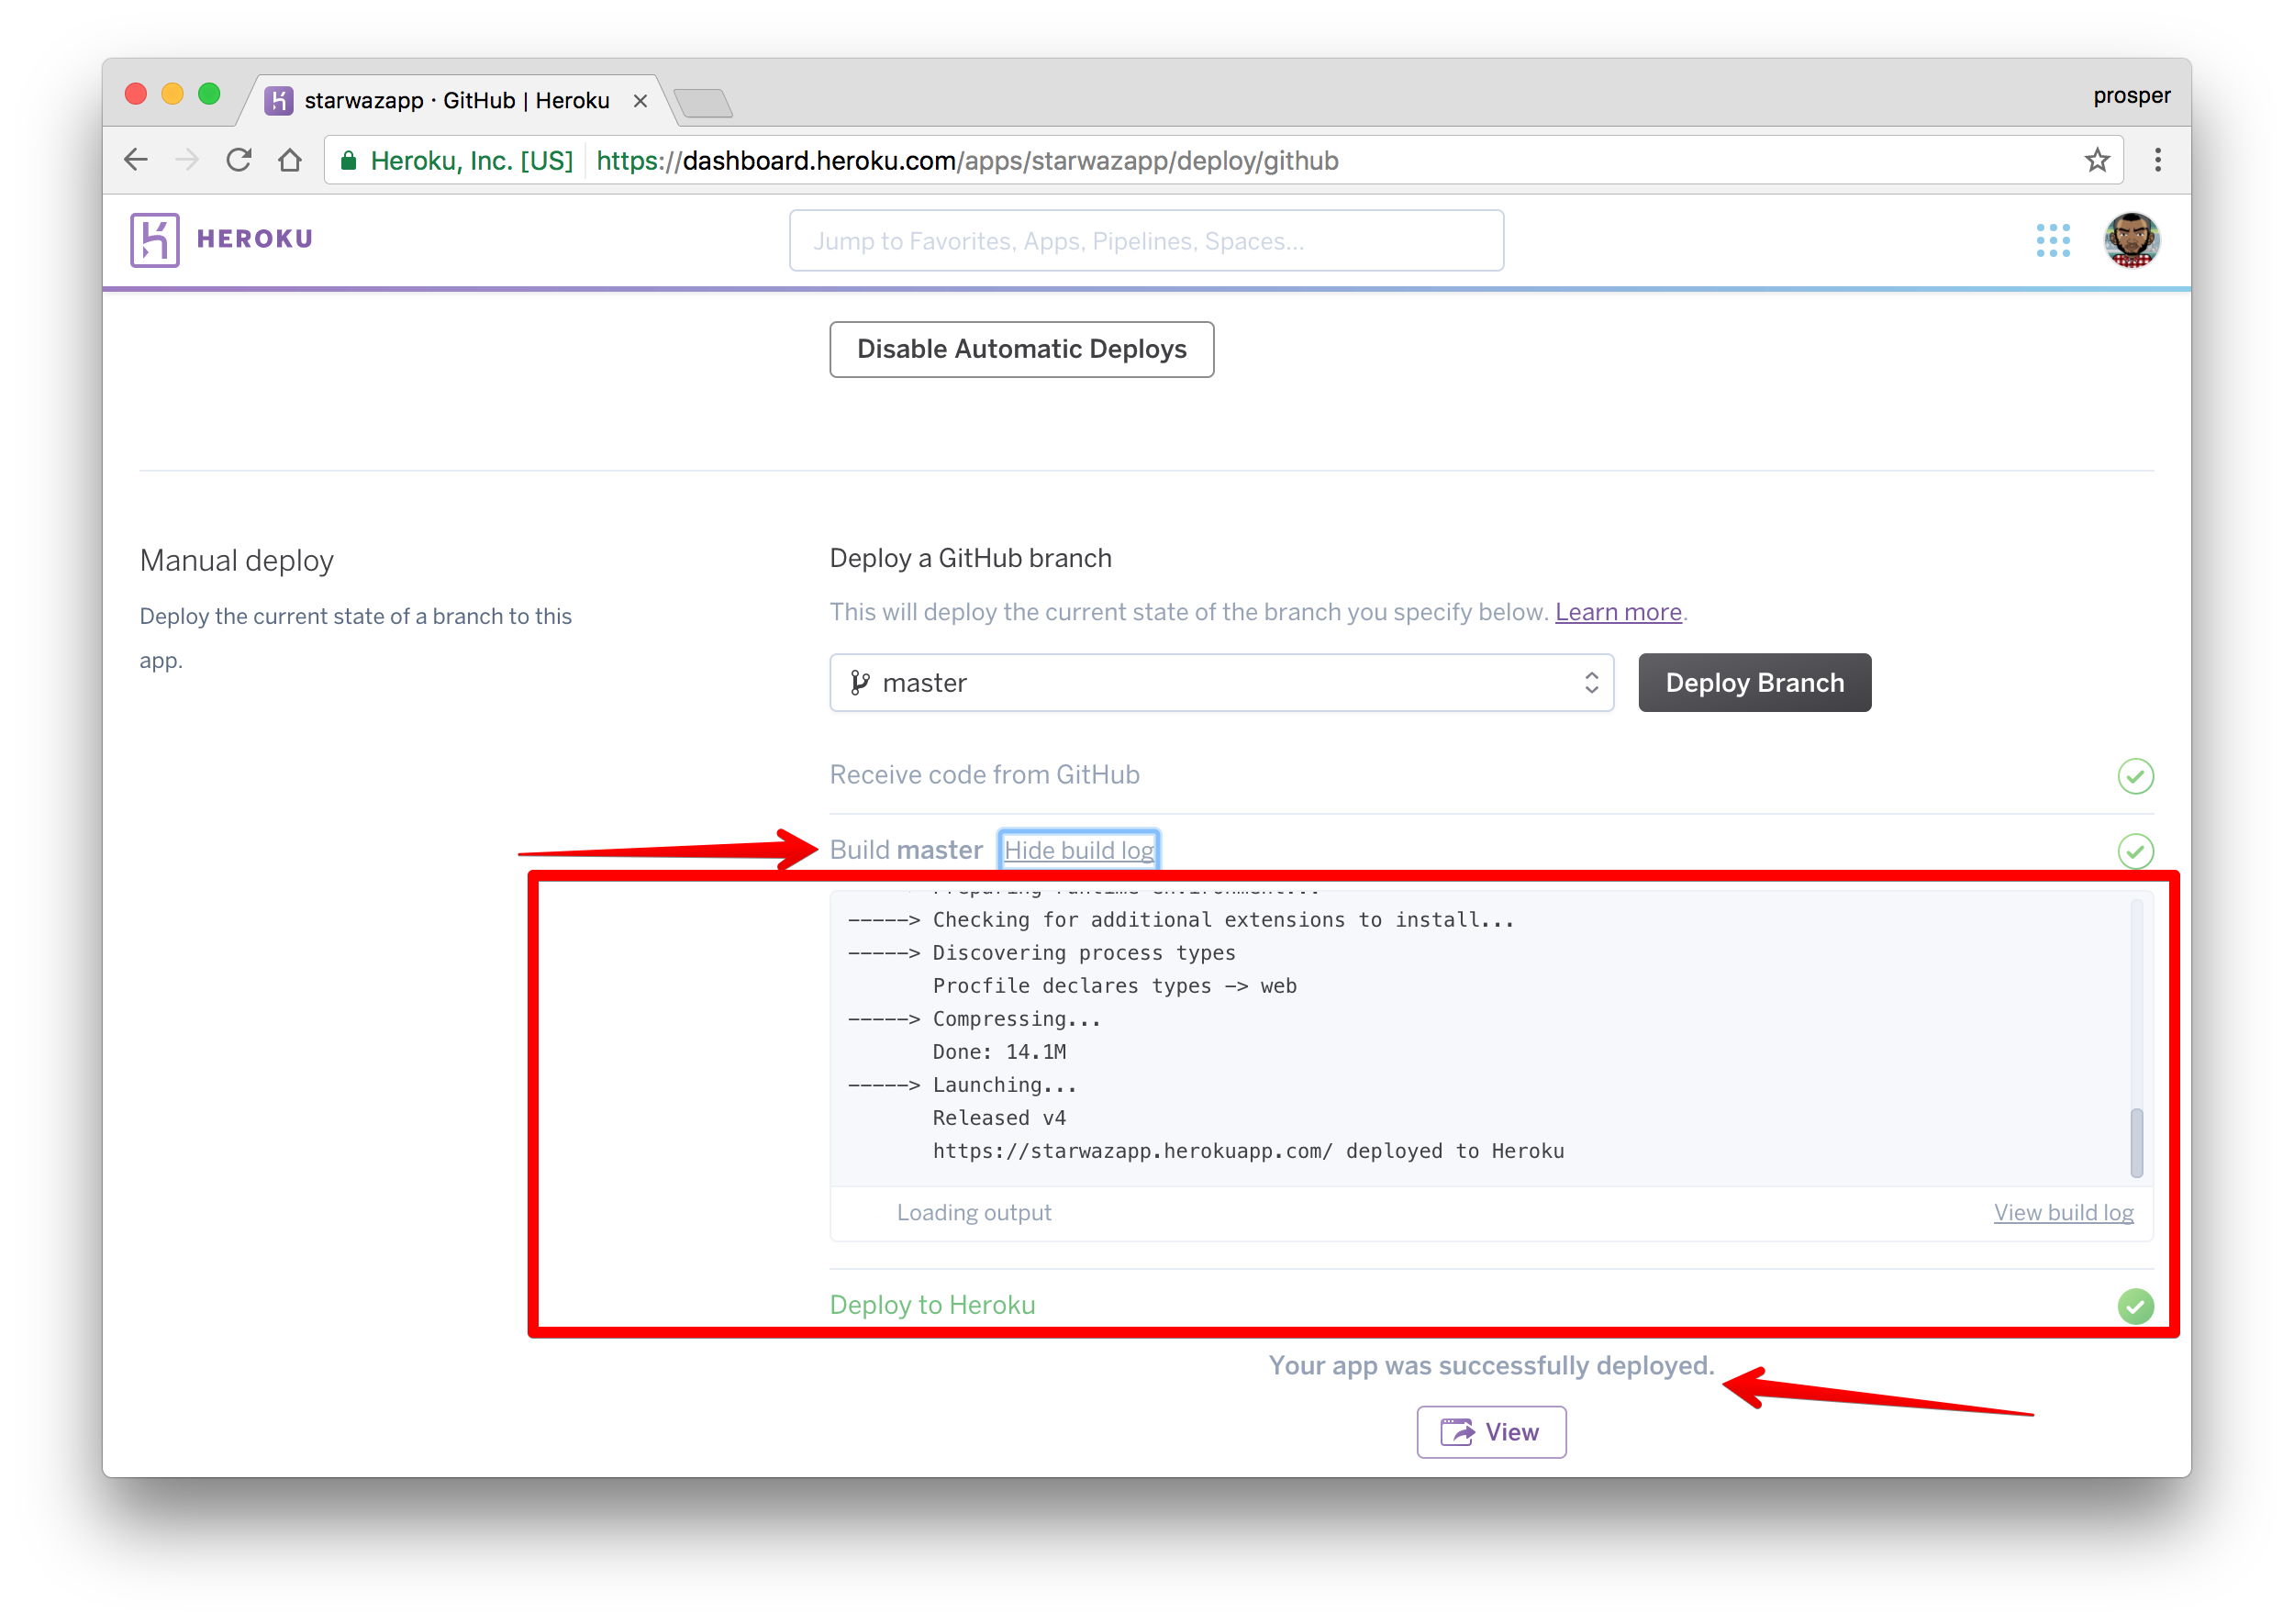 Deploy finally
Click the View button to check out your app.
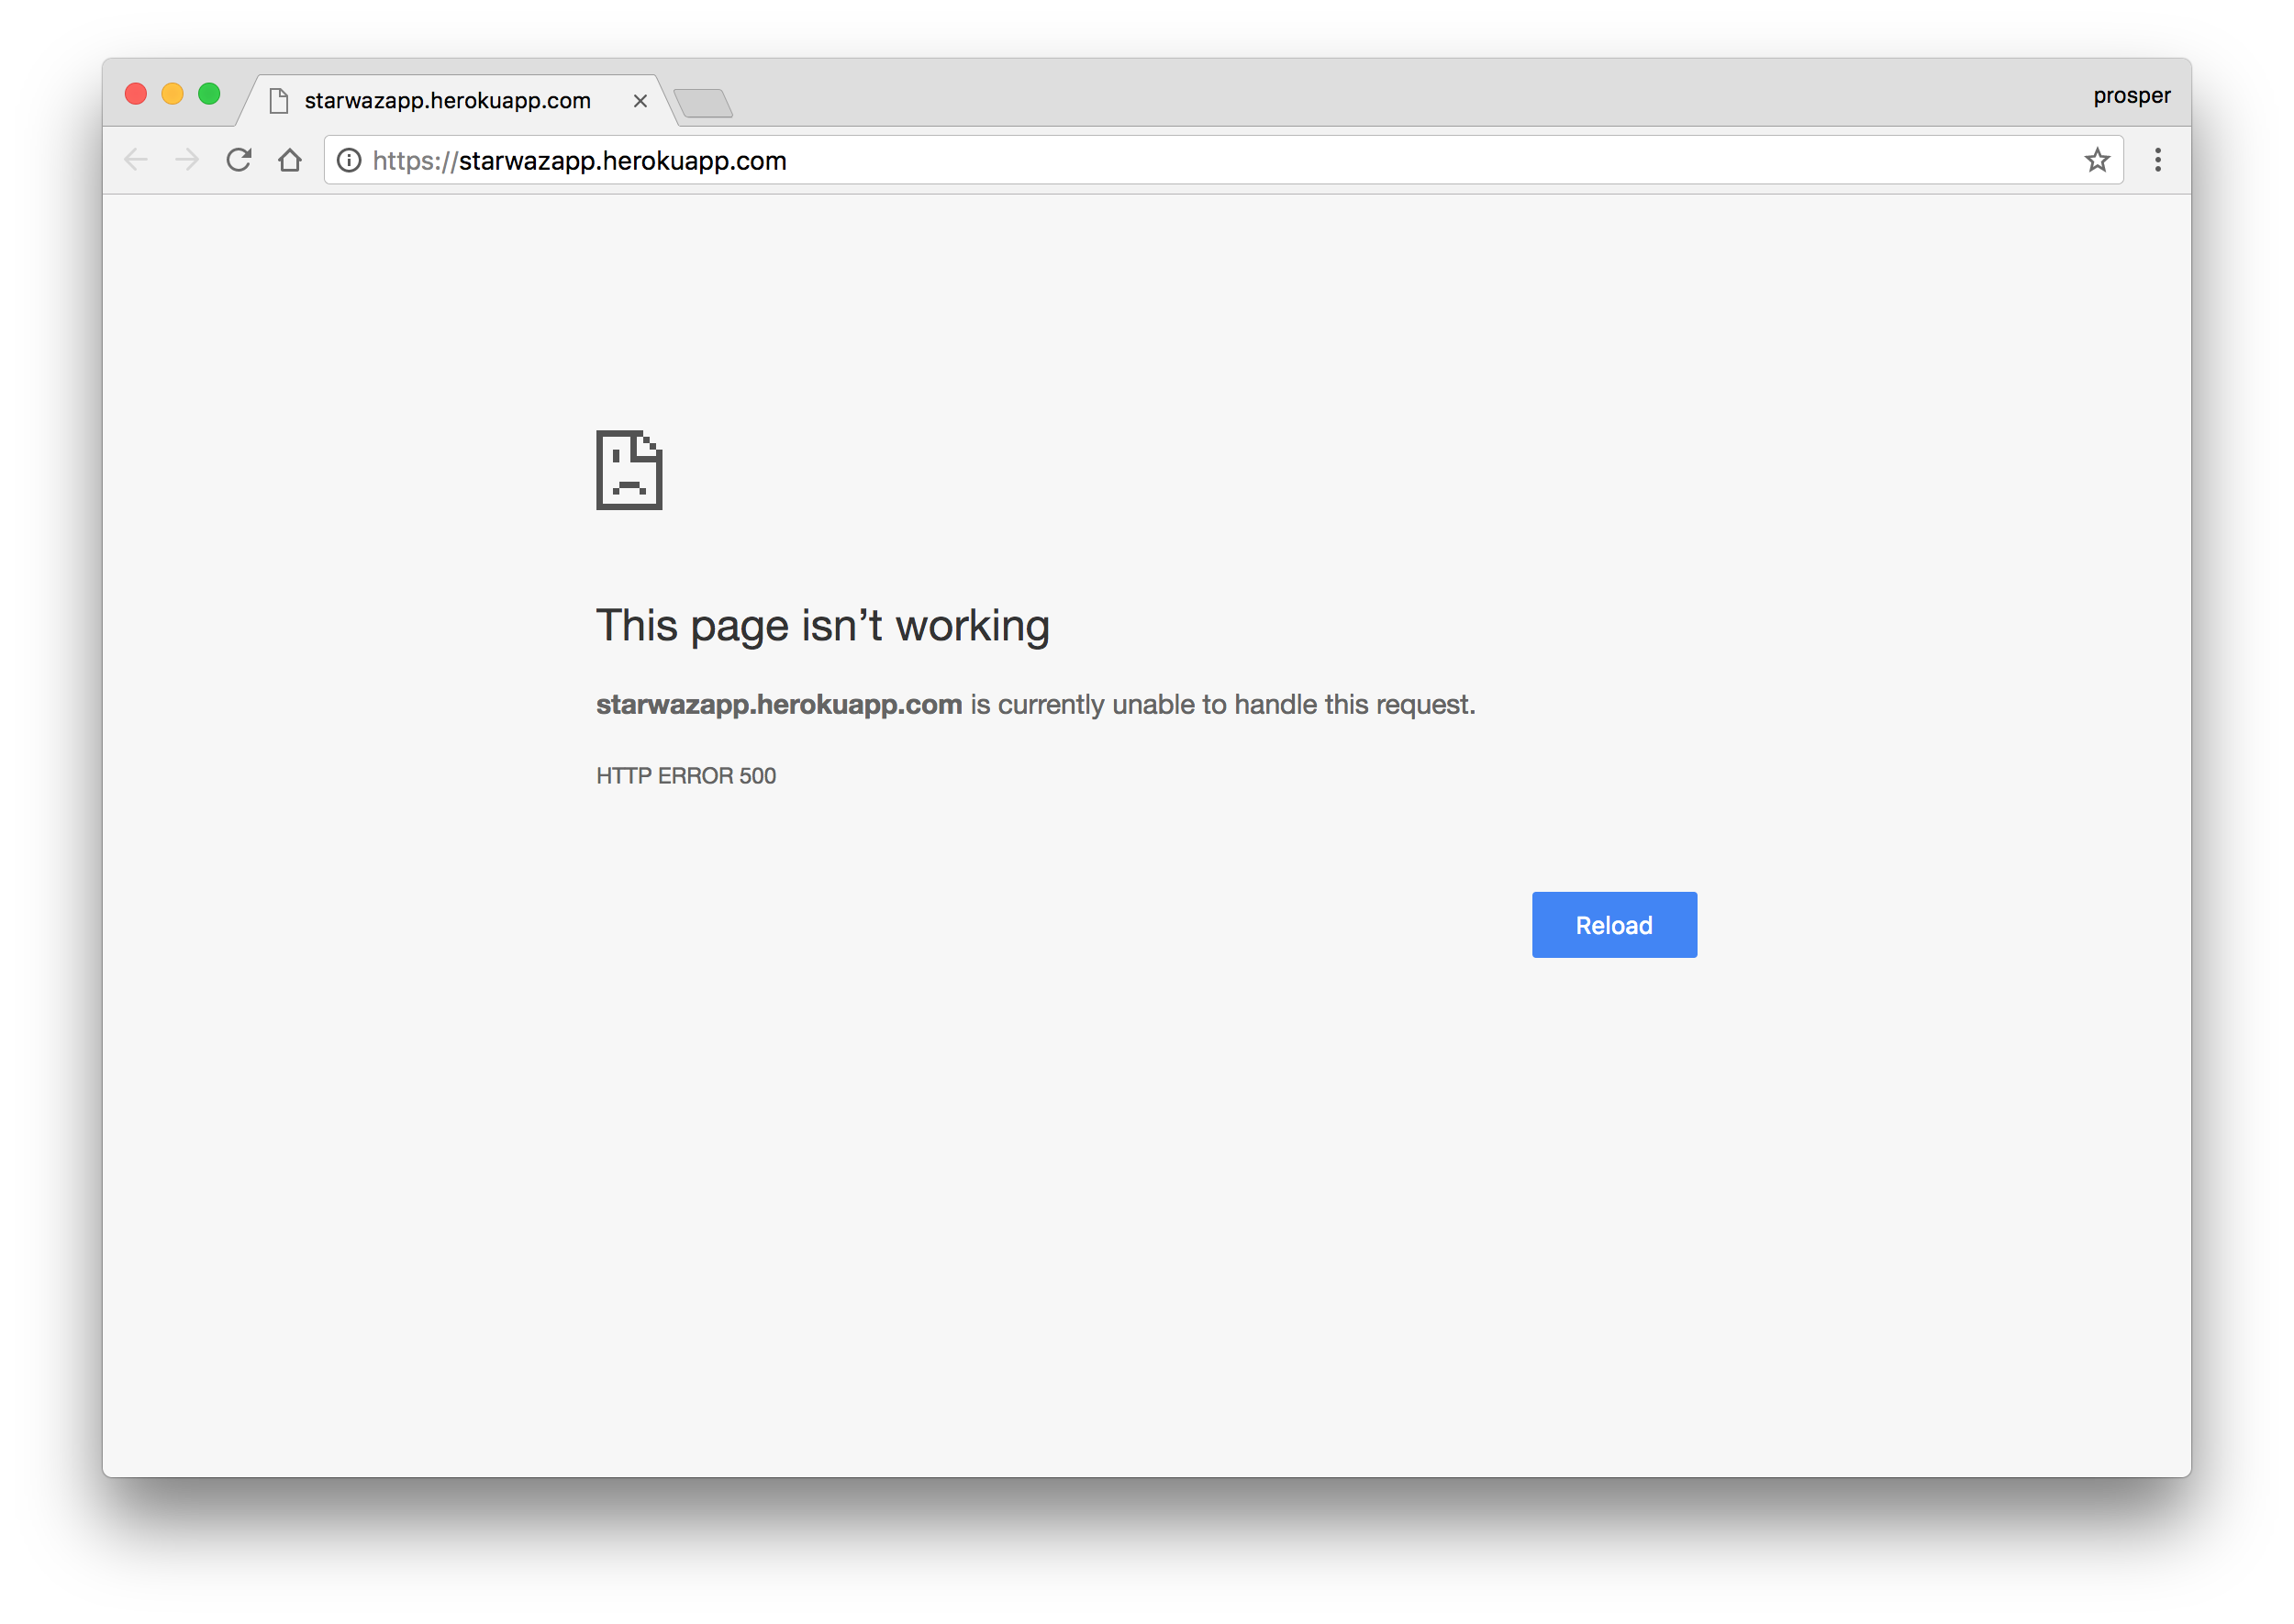 Error 500
Ooops! We are experiencing a 500 error. Aha, we haven’t set any environment variables yet. Locally, we had a .env file. On Heroku, there is no .env file, but there is a way to set environment variables. Go to Settings in your dashboard and add them as config variables like so:
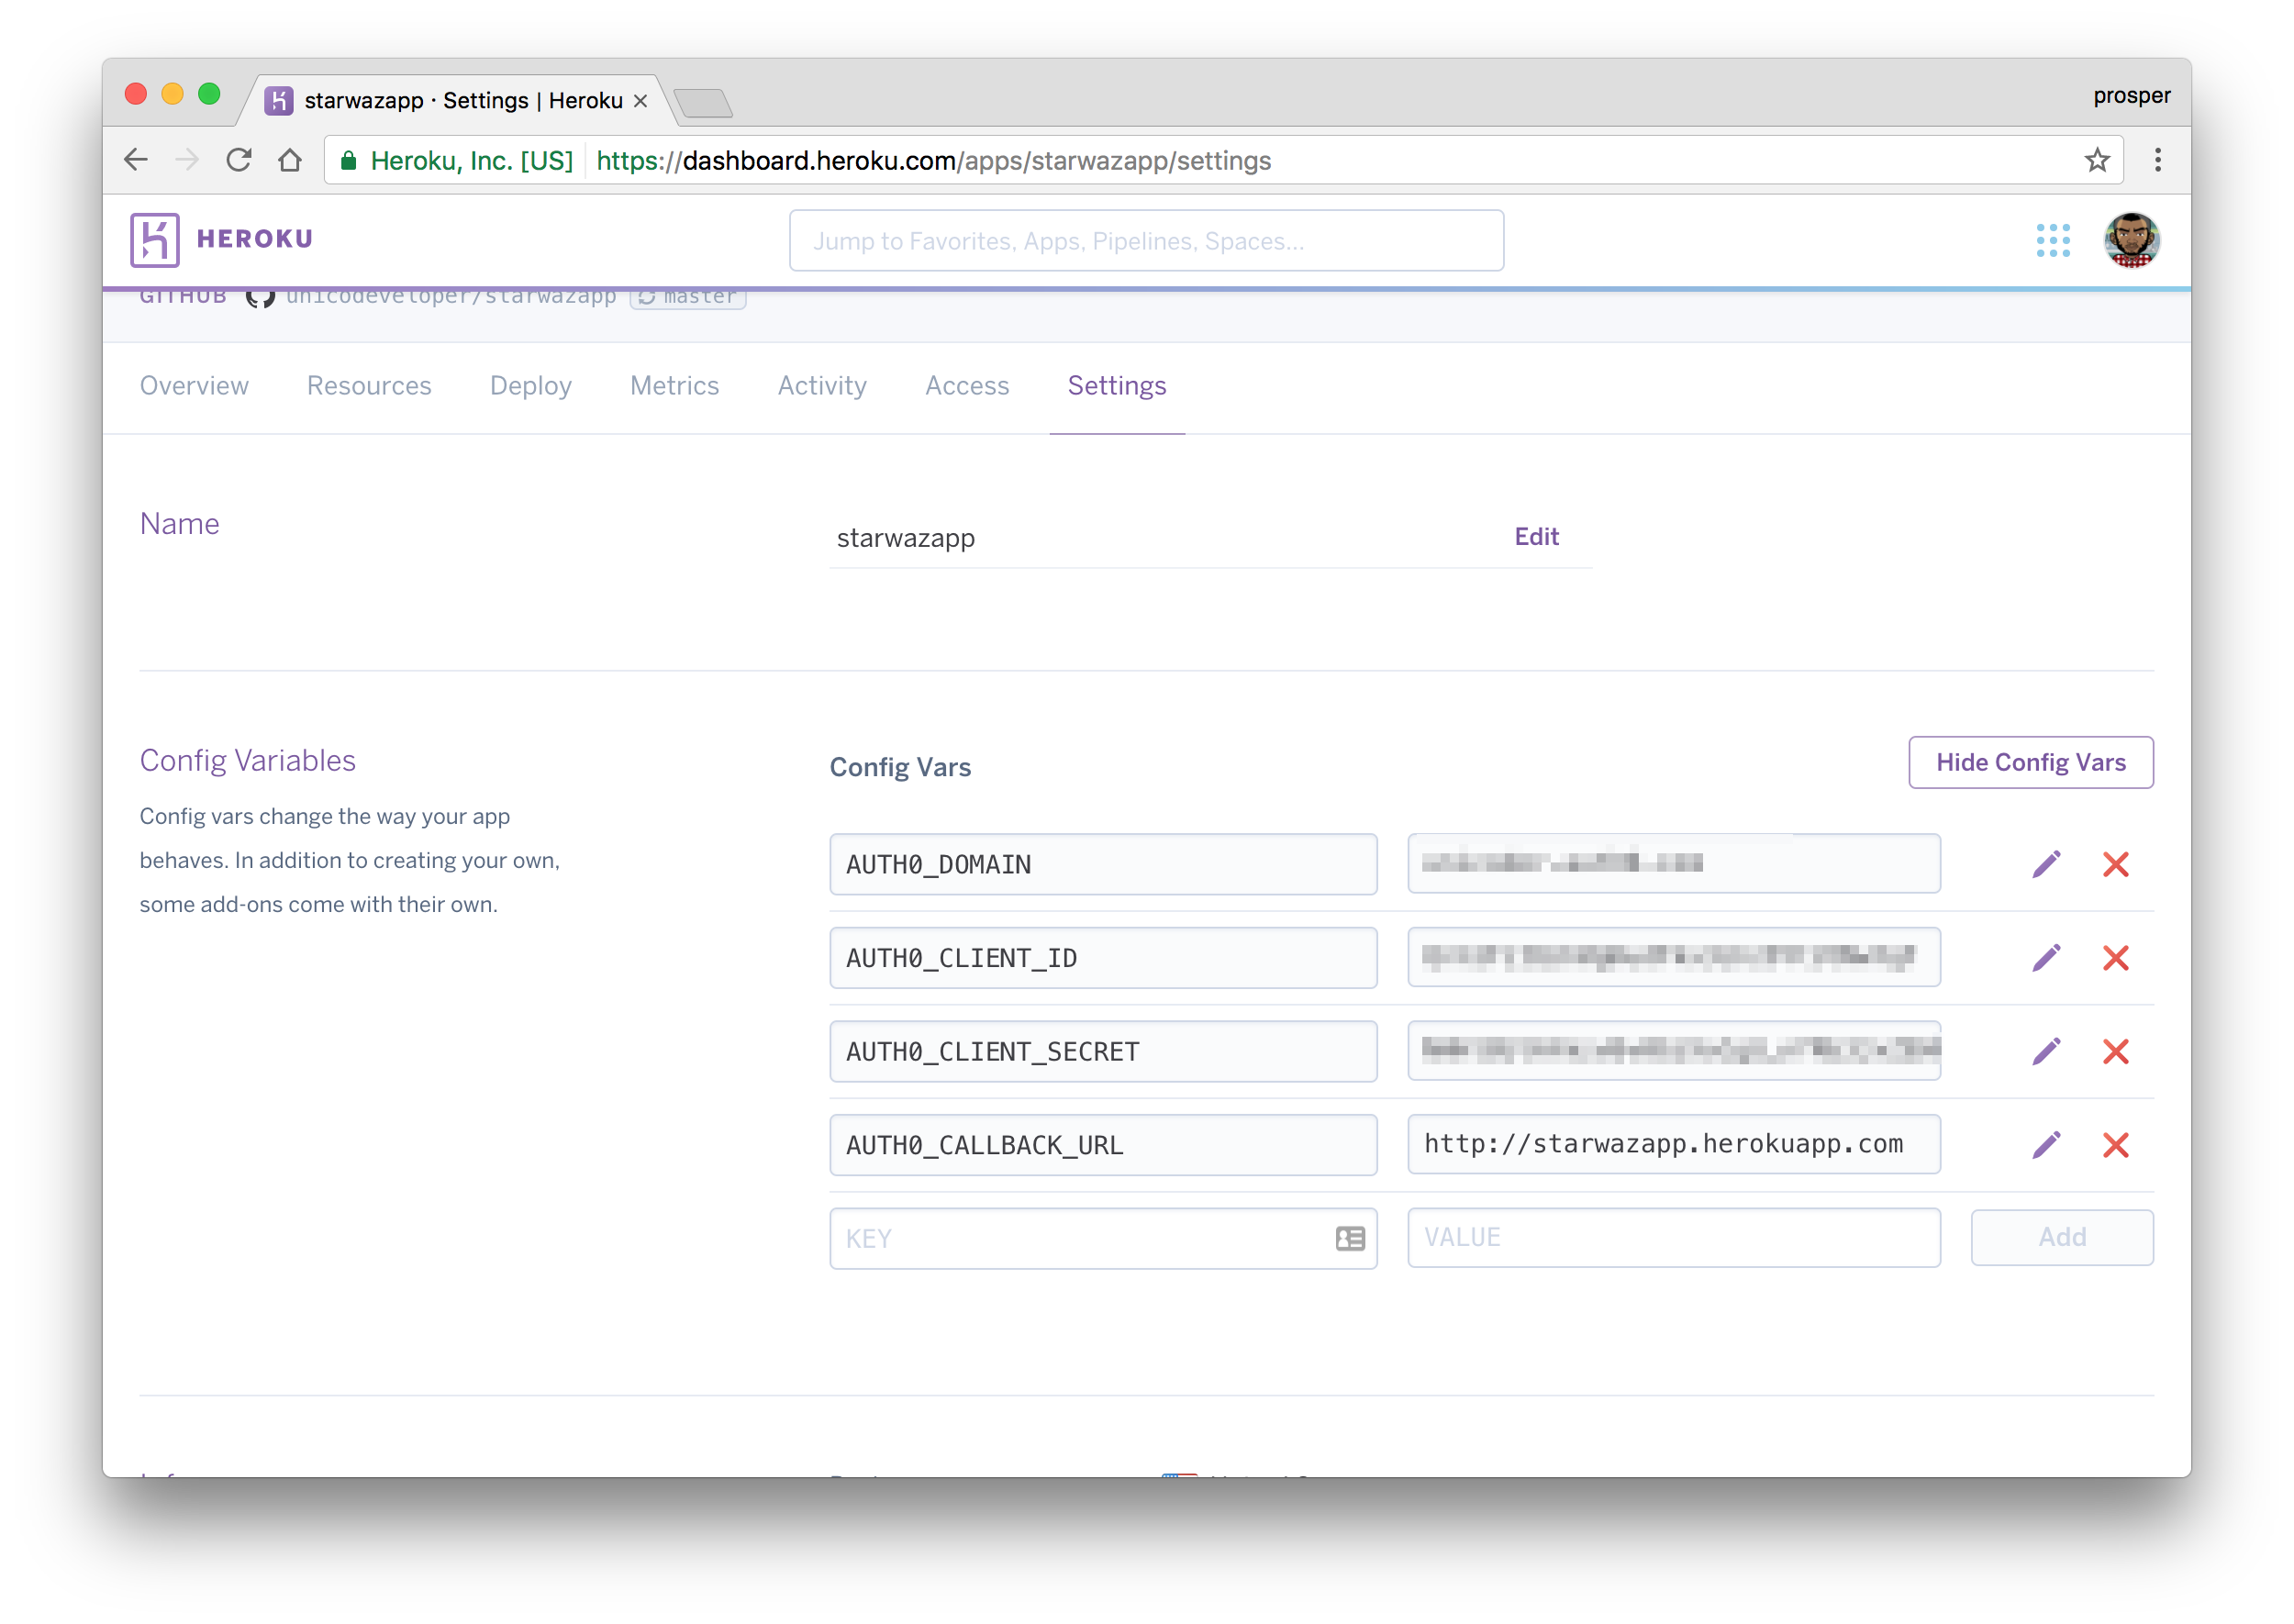
Oh, one more thing! The new callback url in my case is http://starwazapp.herokuapp.com. Make sure you add your new callback url to the Allowed Callback URLs in your Auth0 dashboard.
Your app should be live & working now!
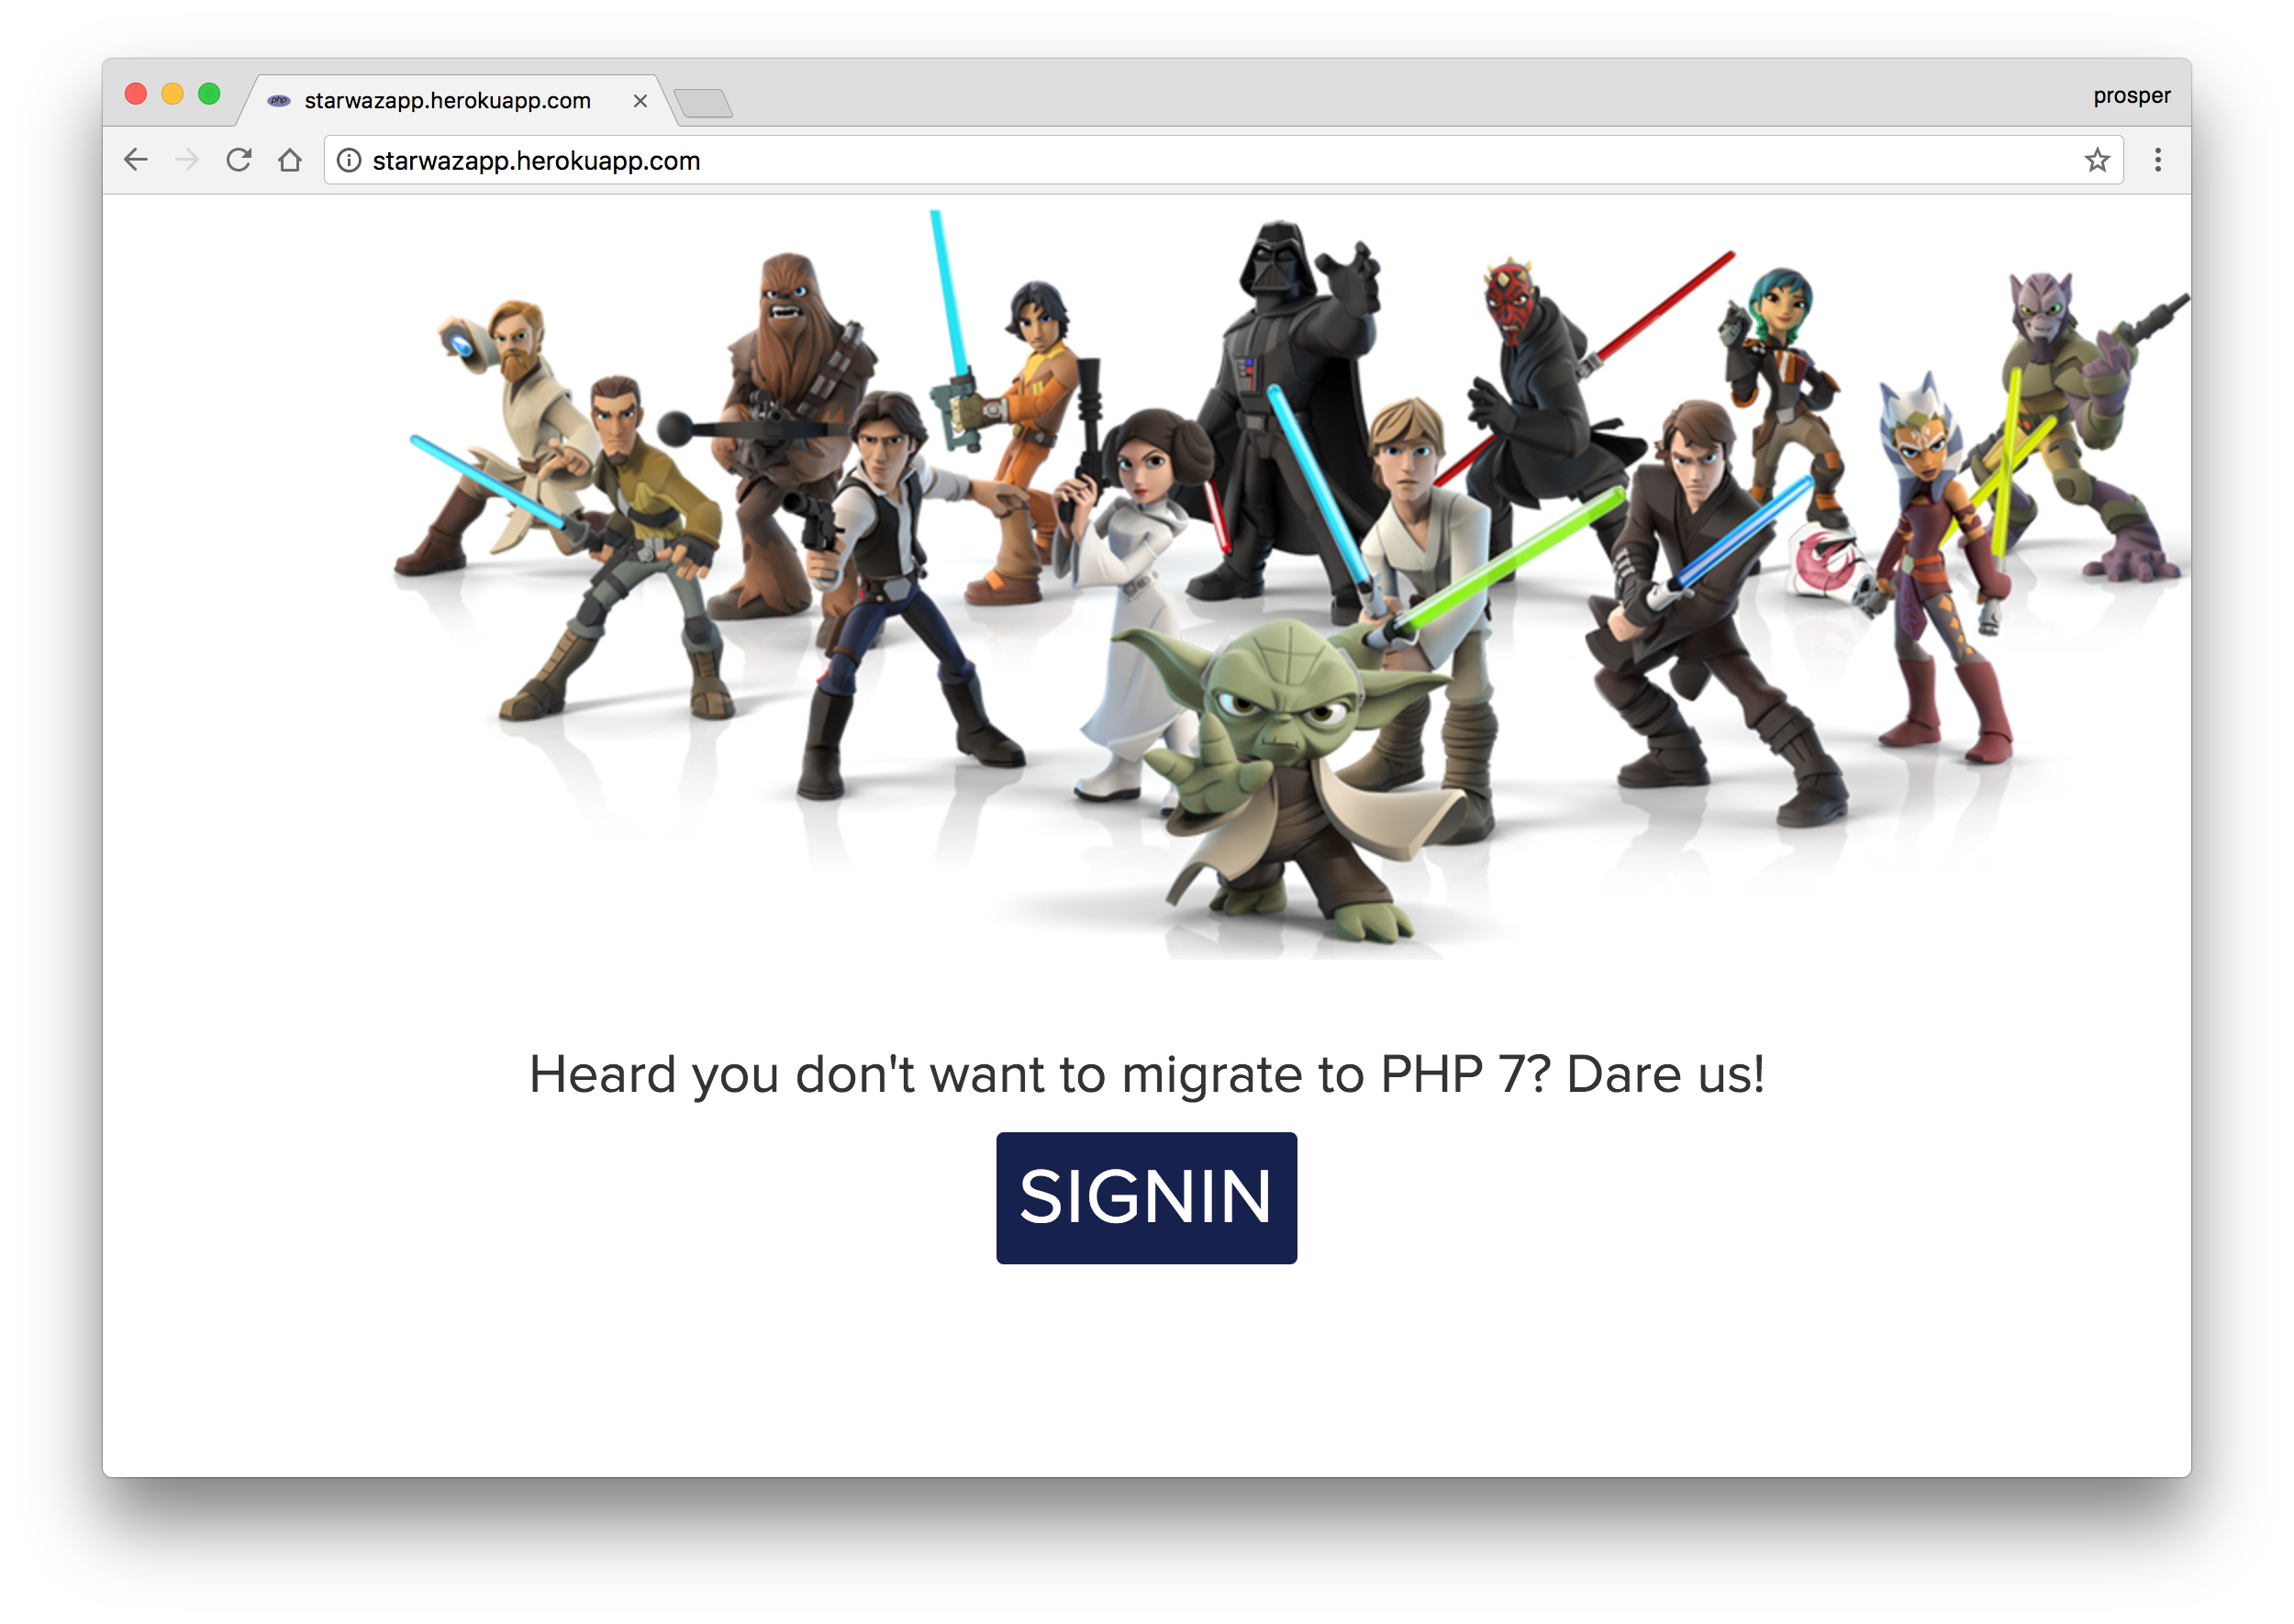 Live App
Make a small change
Let’s make a small change to our app and see how effortlessly it deploys it to production.
Open index.php and change the content of the <p> tag from Heard you don't want to migrate to PHP 7? Dare us! to Star Wars - The Awakening!. Commit and push to your master branch. Now, go to the Activity tab of your Heroku Dashboard and notice the build. Reload your app and you’ll see the difference.
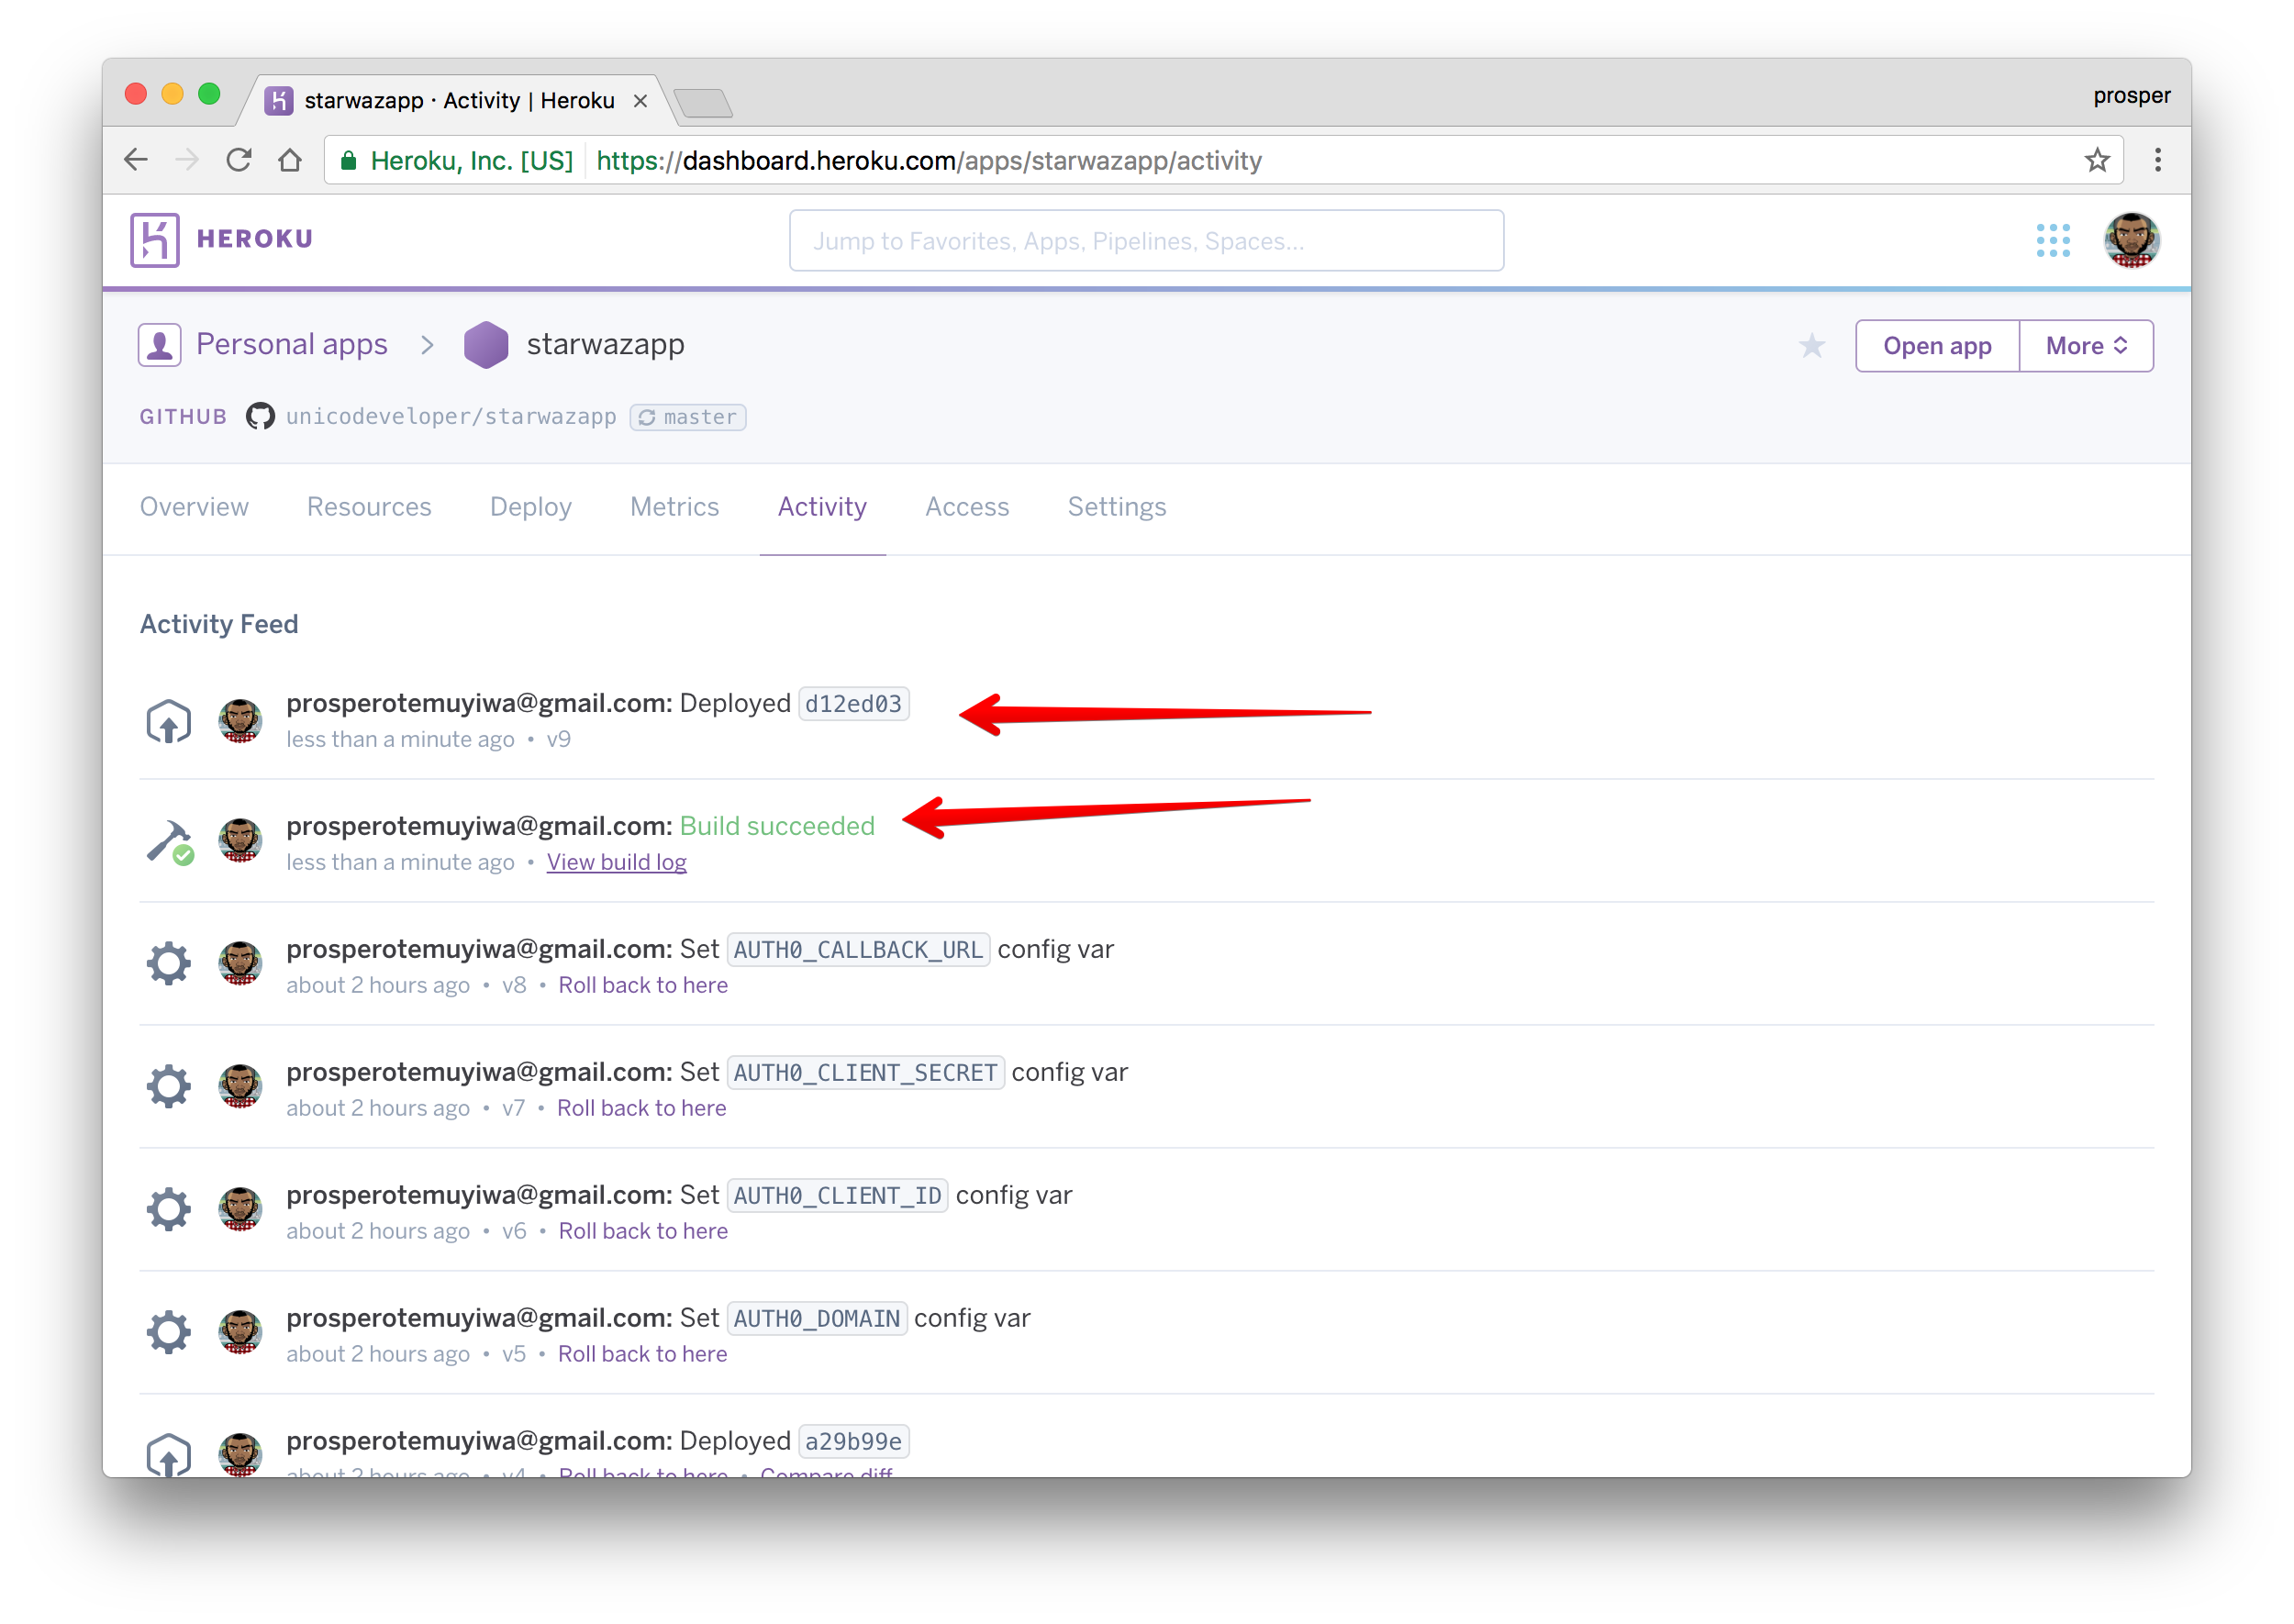 Build Succeeded
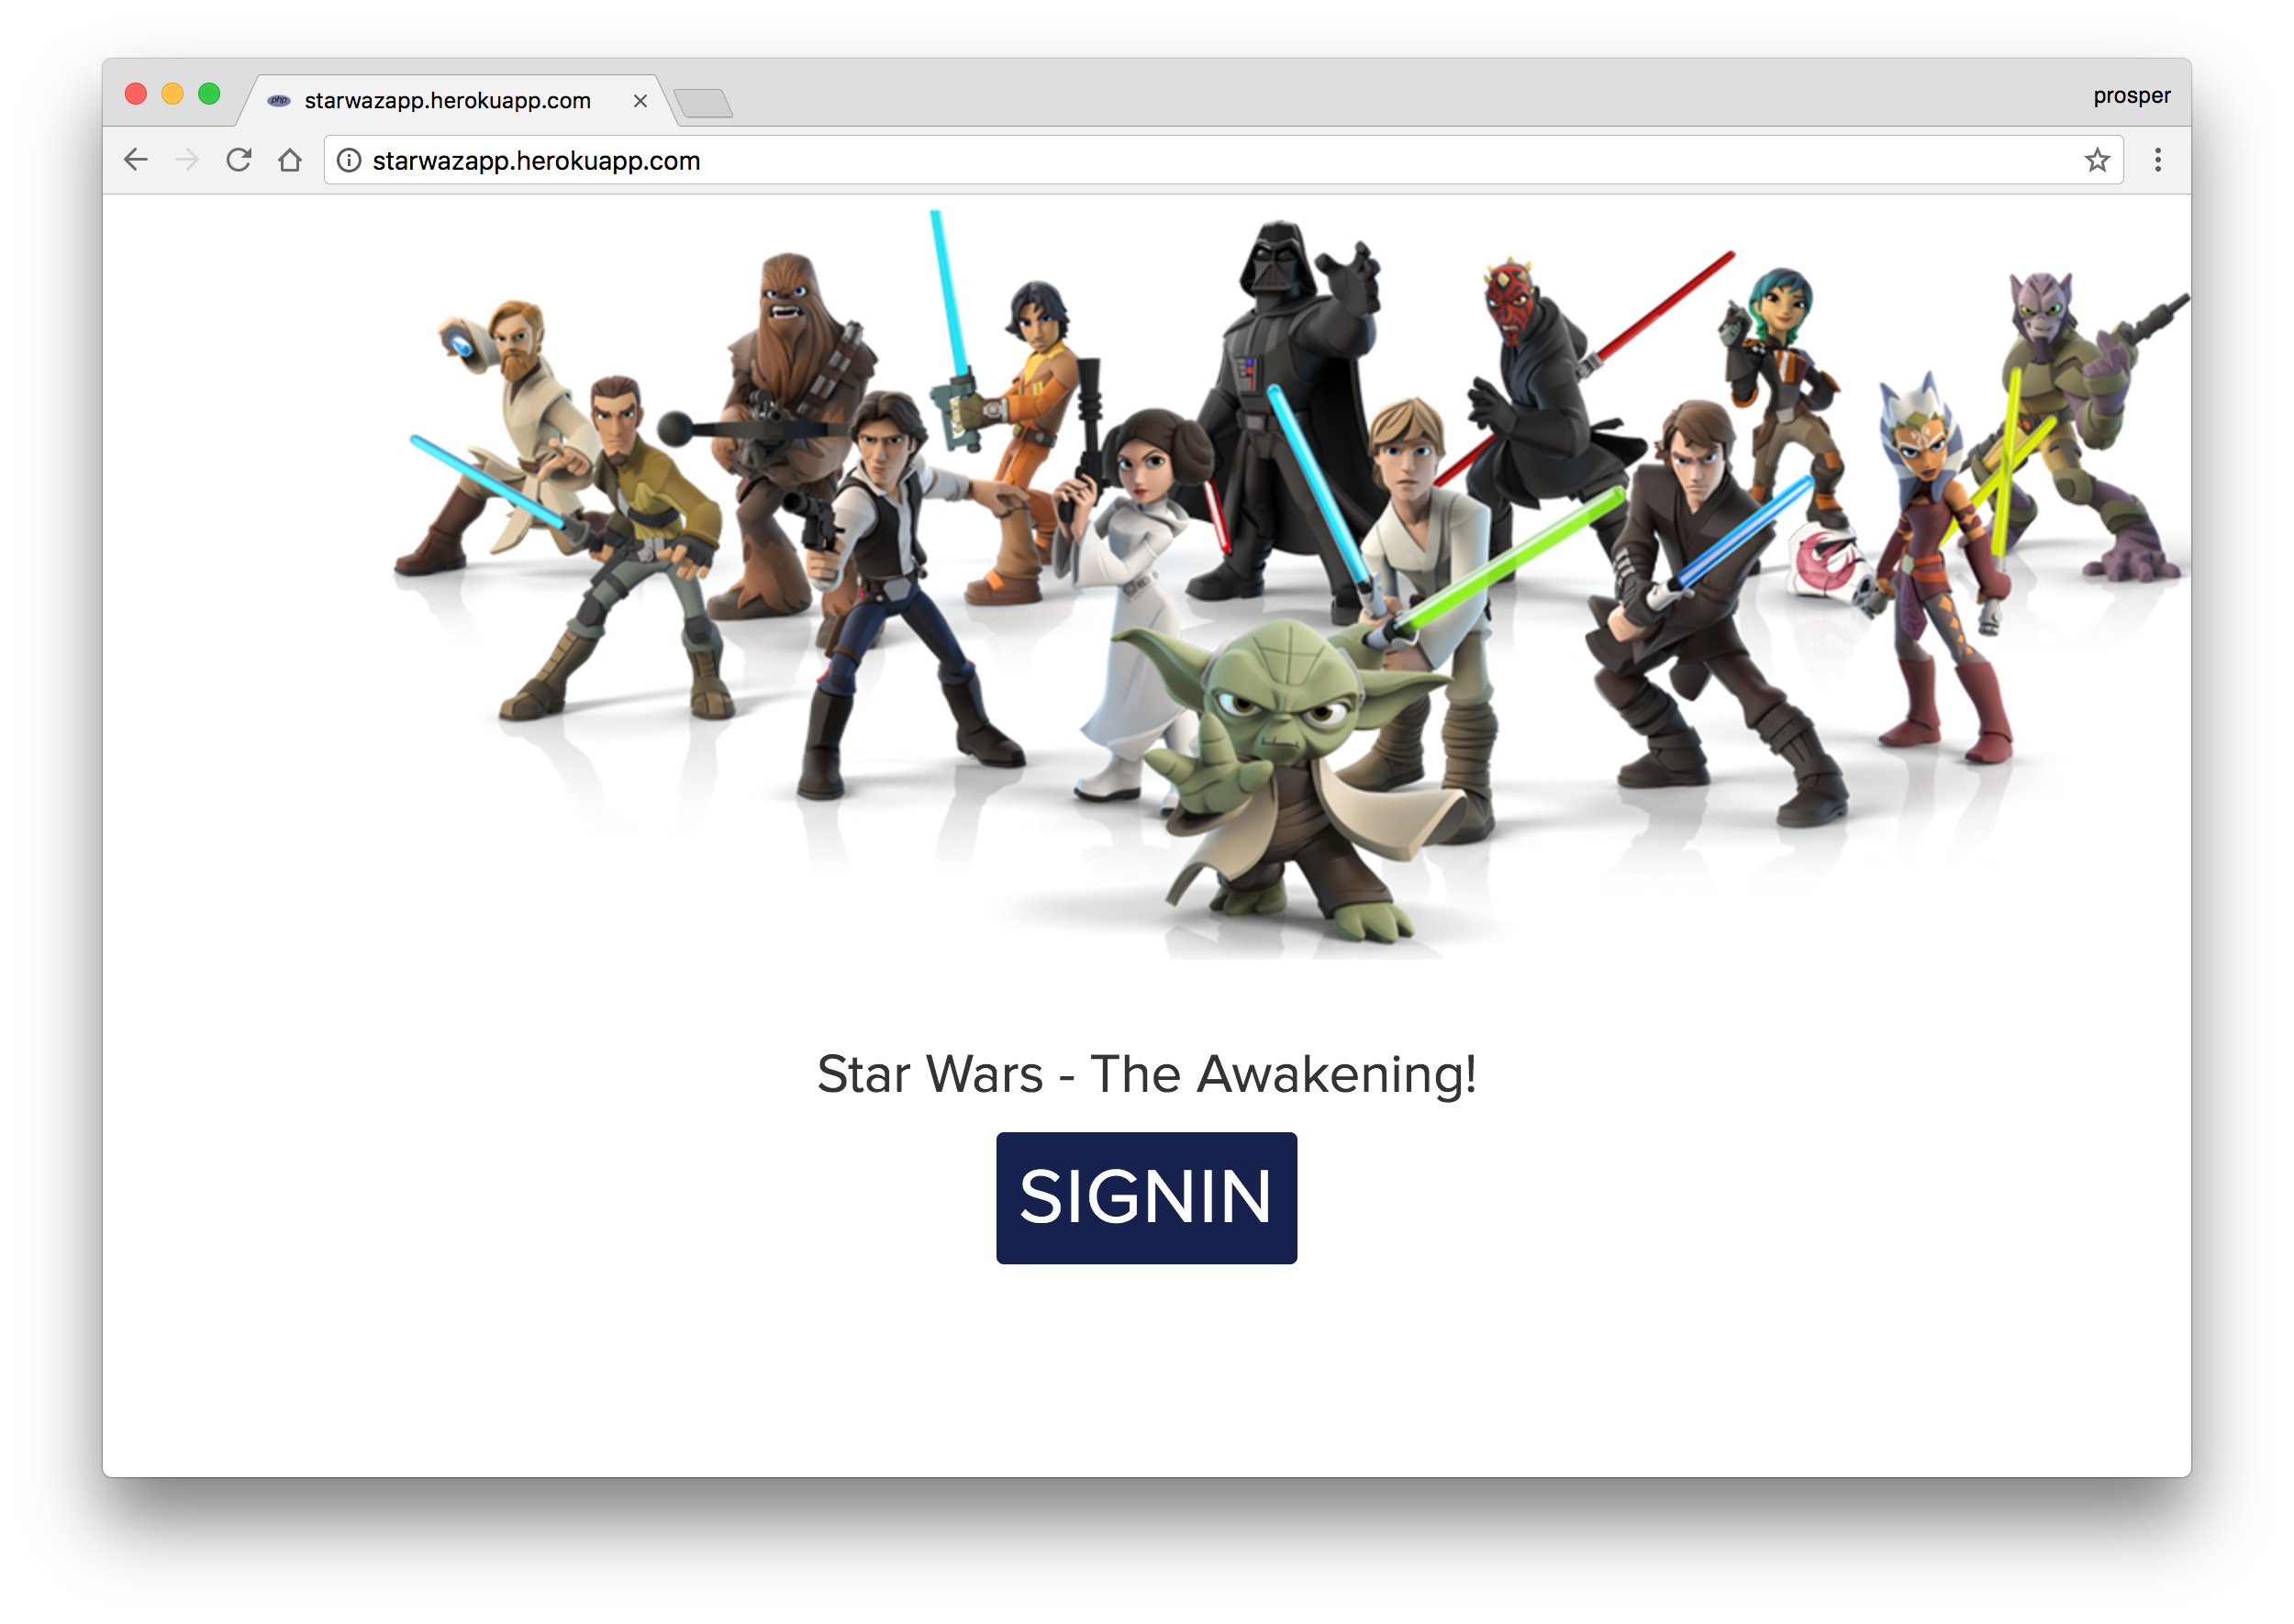 New version
Database, Caching & Cron Jobs
Let’s quickly talk about how to handle the database, caching, and cron jobs. On Heroku, you can use ClearDB and Postgres with PHP. Add ClearDB to your app like so:
heroku addons:create cleardb:ignite
This command provisions a new ClearDB database and returns the URL that the app will use to access it. All you need to do is add it to your app as an environment variable and parse it in your app’s config like so:
ClearDB is a powerful, fault tolerant database-as-a-service in the cloud for your MySQL powered applications.
<?php
$url = parse_url(getenv("CLEARDB_DATABASE_URL"));

$server = $url["host"];
$username = $url["user"];
$password = $url["pass"];
$db = substr($url["path"], 1);

$conn = new mysqli($server, $username, $password, $db);
?>
using mysqli
You can tweak that to suit the PDO style. Add Postgres to your app like so:
heroku addons:create heroku-postgresql:hobby-dev
Head over to the addons, and you’ll see other kinds of databases that you can use with your PHP app.
Heroku provides an array of addons for caching, from memcache, to fastly , to ironcache, and others. You can check out how to use memcache with PHP on Heroku here.
Finally, you can use the Heroku Scheduler for running jobs on your app at scheduled time intervals.
Google Cloud
The Google Cloud platform is a giant and trusted cloud platform that a lot of companies all over the world have adopted in deploying and hosting their apps. Your apps will be running on the same infrastructure that powers all of Google’s products. What other form of confidence do you need to assure you that your application will scale well enough to serve your thousands and millions of users easily?
Google Cloud offers different options for hosting PHP apps. The platform offers App Engine (Fully managed), Compute Engine (Scalable VMs) and Container Engine (Kubernetes Clusters).
In our case, we’ll use App Engine. It abstracts the infrastructure away. Let’s jump into deploying our famous Star Wars app to Google App Engine.
When using Google App Engine, you can choose the Standard or Flexible environment. The latter, like the name implies, allows you to install any PHP extension that works on Debian Linux, has a configurable Nginx web server, writable filesystem, latest PHP versions and allows you to run deployment scripts using composer.json.
We’ll use the flexible environment. Go ahead and create a new project. Click on Create, give the project a name, select the region you’d like to serve your app in, and enable billing.
Note: You won’t be charged without your permission.
Now, download the Google SDK and install the Google Cloud tools.
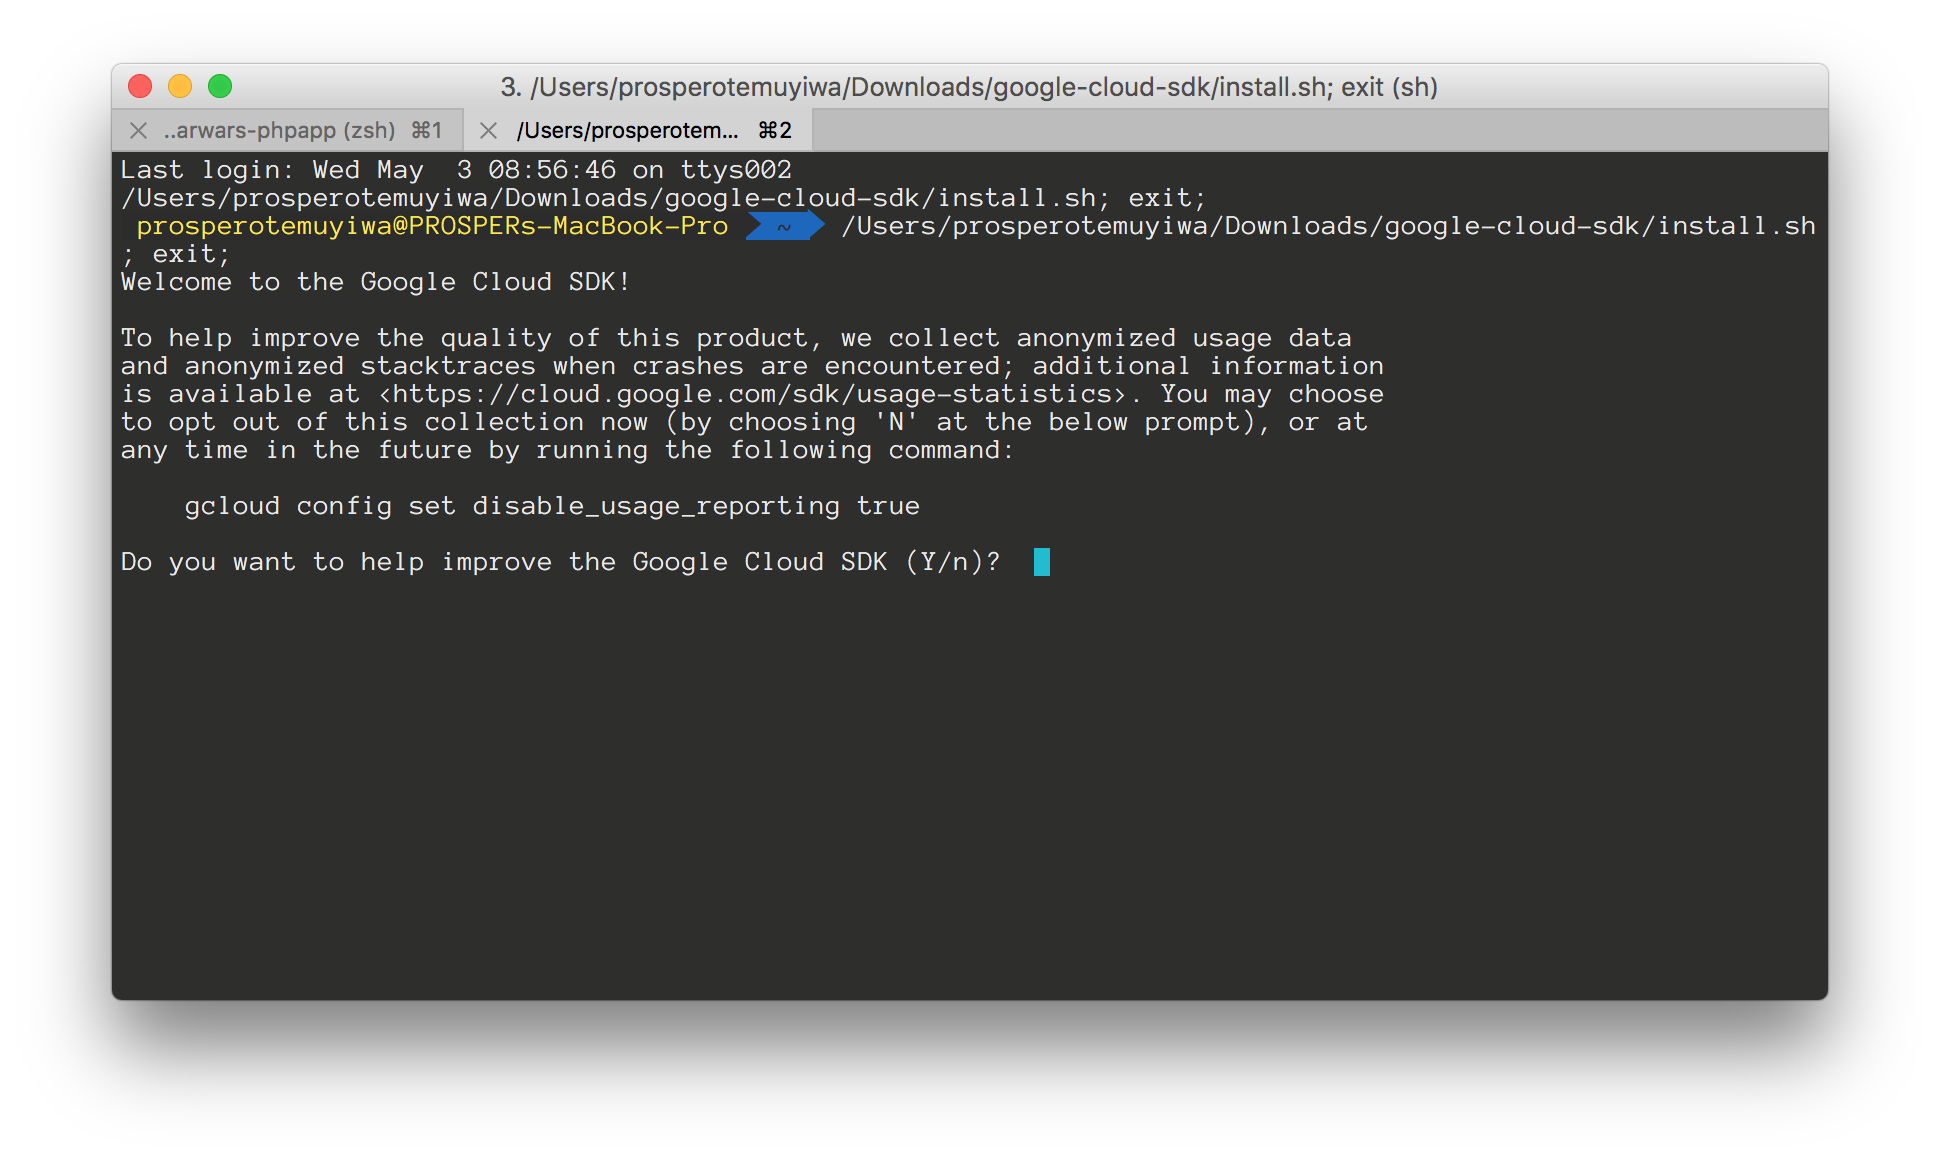 Installing Google SDK
 Running gcloud
Go ahead and create an app.yaml file in the root of our project like so:
app.yaml
runtime: php
env: flex
So, our .env file has been pushed to Google Cloud. An alternative to using that is to add the environment variables to the app.yaml file like so:
...
env_variables:
  # The values here will override those in ".env". This is useful for
  # production-specific configuration. However, feel free to set these
  # values in ".env" instead if you prefer.
  APP_LOG: errorlog
Now, deploy your application from your console by running gcloud app deploy.
Grab the URL, in my case it is https://starwars-166515.appspot.com/, and add to Allowed Origins(CORS) and Allowed Callback URLs in your Auth0 dashboard. Also add the URL to AUTH0_CALLBACK_URL in your .env file.
Run gcloud app deploy again to provision a new version of the app. Check out your app now. It should be live like so:
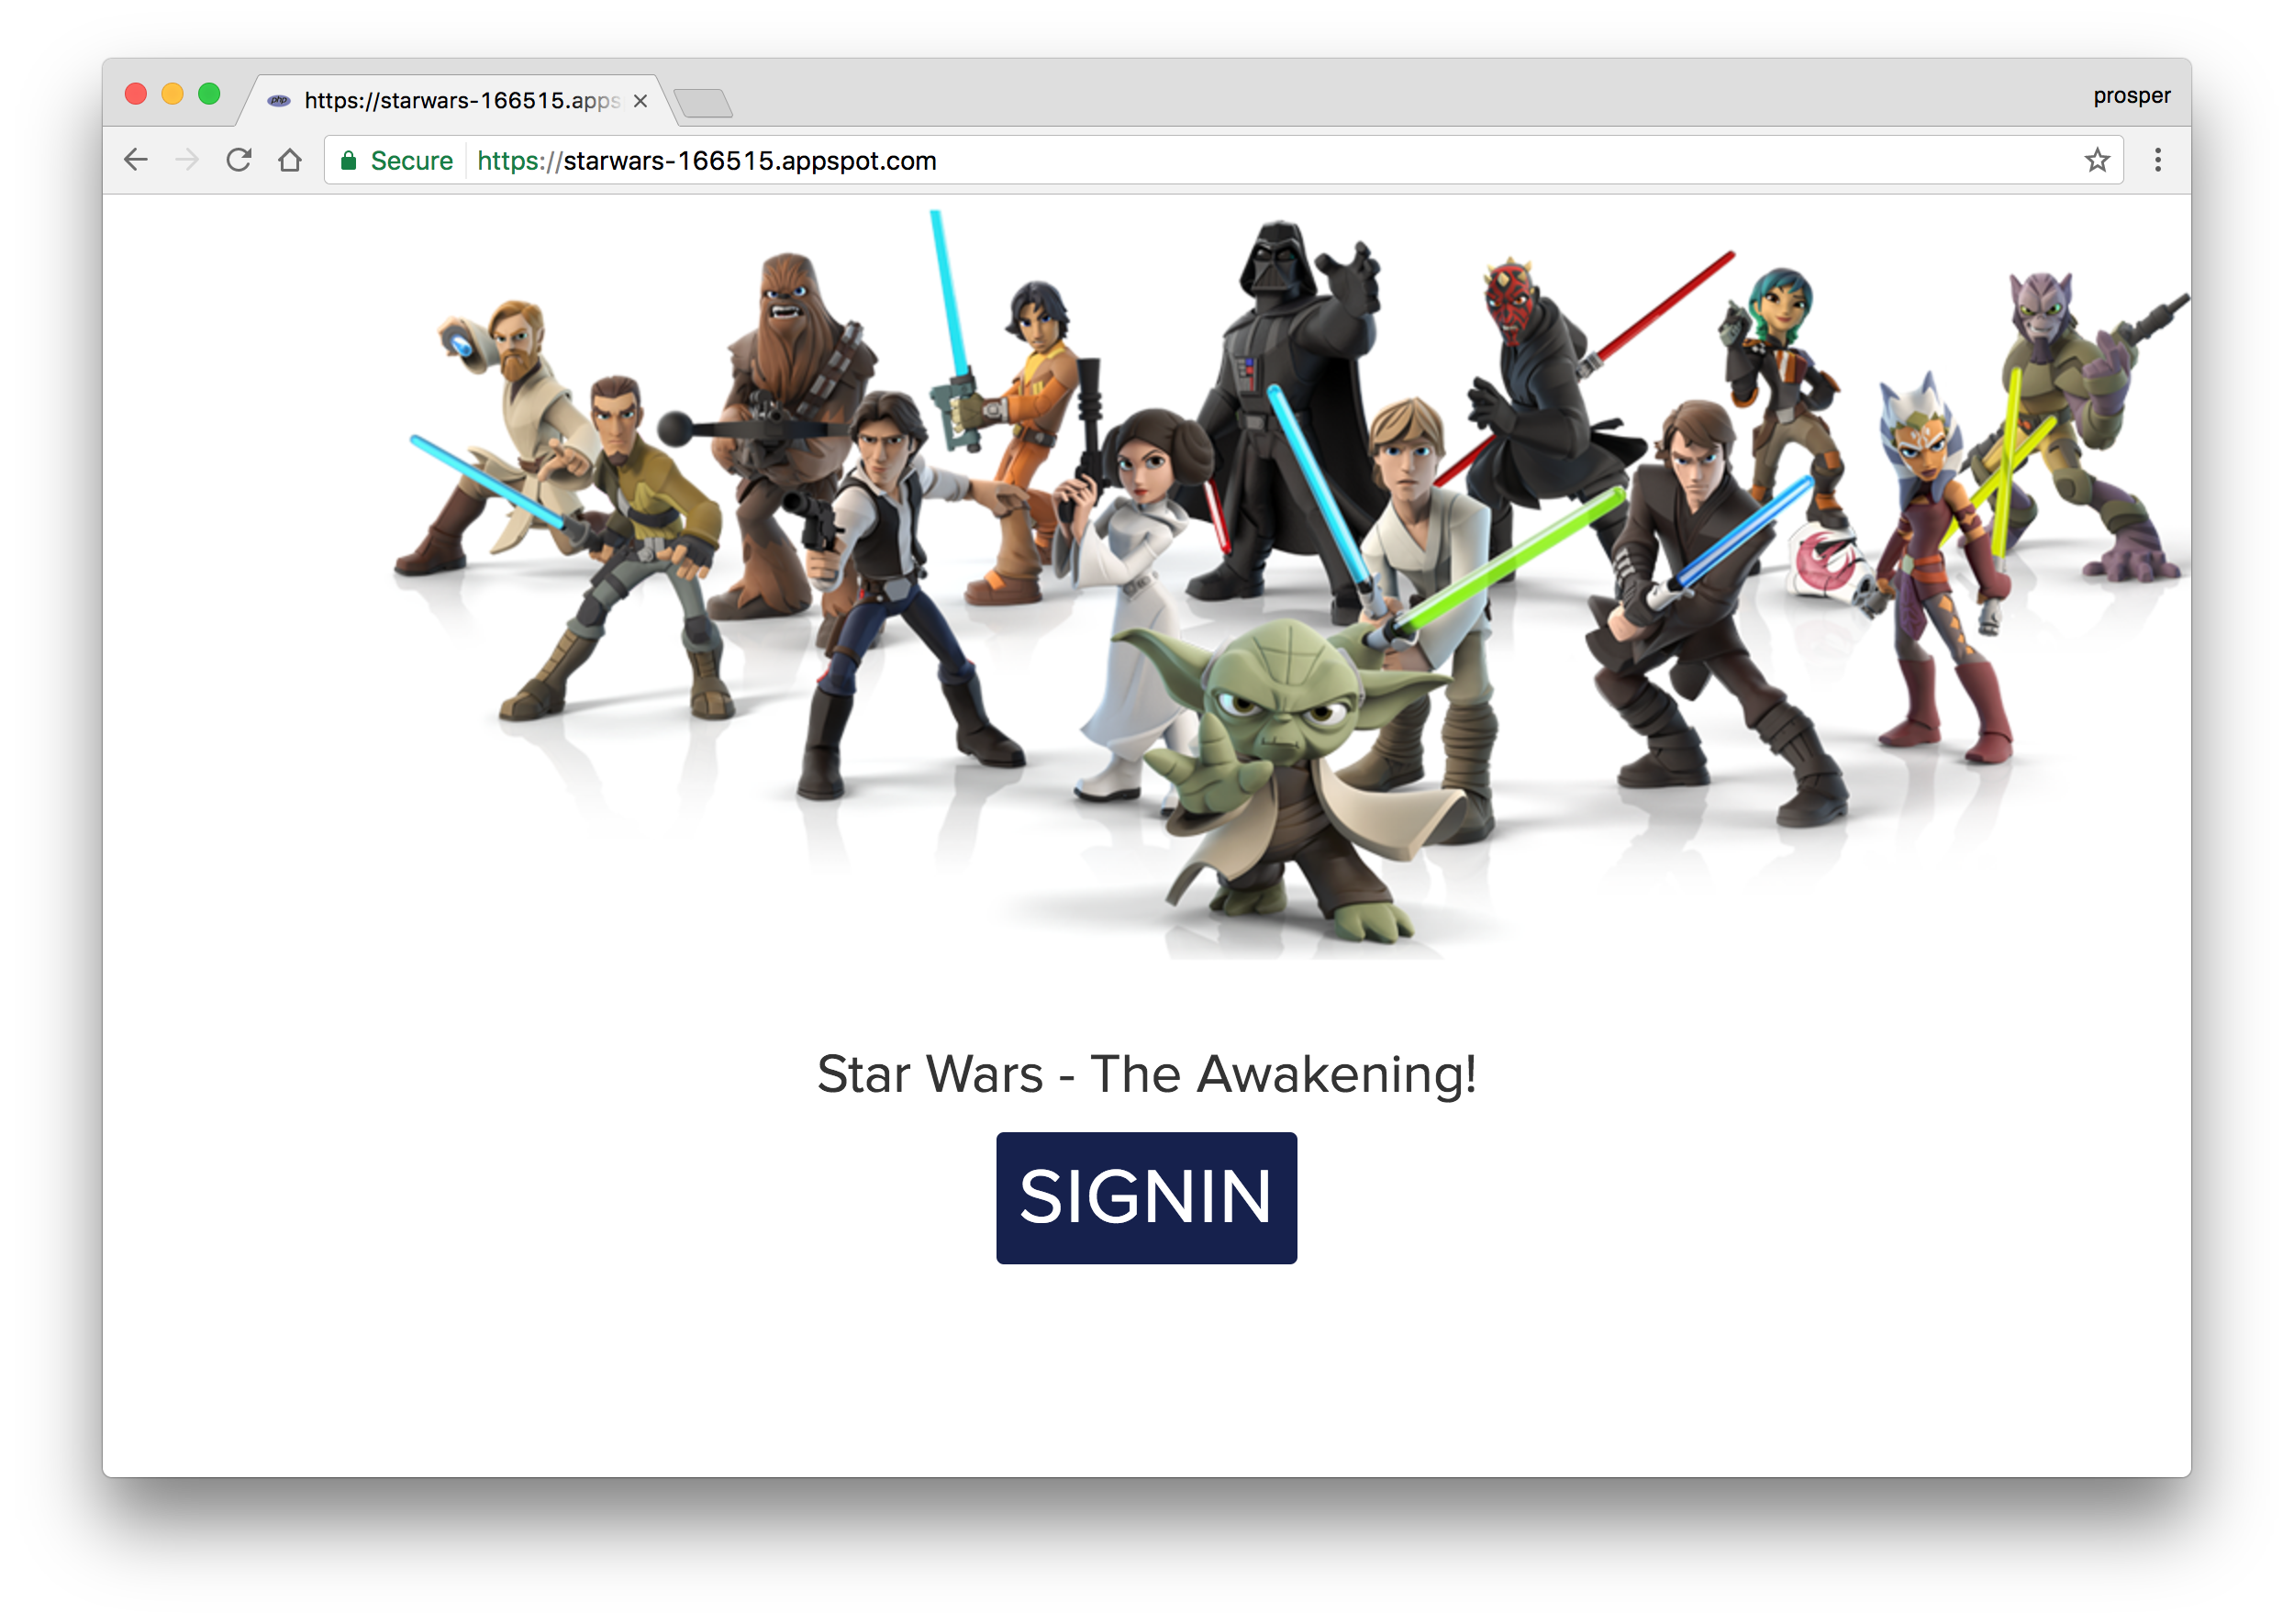 Live App
Database, Caching & Cron Jobs
Google Cloud provides a Cloud SQL Instance platform. Check out how to configure, connect and create MySQL instances for your app here.
You can also use phpMyAdmin on Google App Engine.
Google App Engine includes implementations of the standard Memcache and Memcached APIs. Check out how to use Memcache in your app on Google Cloud.
The App Engine Cron Service allows you to configure regularly scheduled tasks that operate at defined times or regular intervals. Check out how to schedule cron jobs and use task queues with PHP on Google Cloud.
It’s relatively easy to deploy Laravel, Symfony and WordPress apps to the Google Cloud Platform.
IBM BlueMix
IBM Bluemix allows you to easily configure, deploy and scale on a powerful, high performance global cloud infrastructure. Let’s jump into deploying our famous Star Wars app to IBM Bluemix.
Sign up on Bluemix like so:
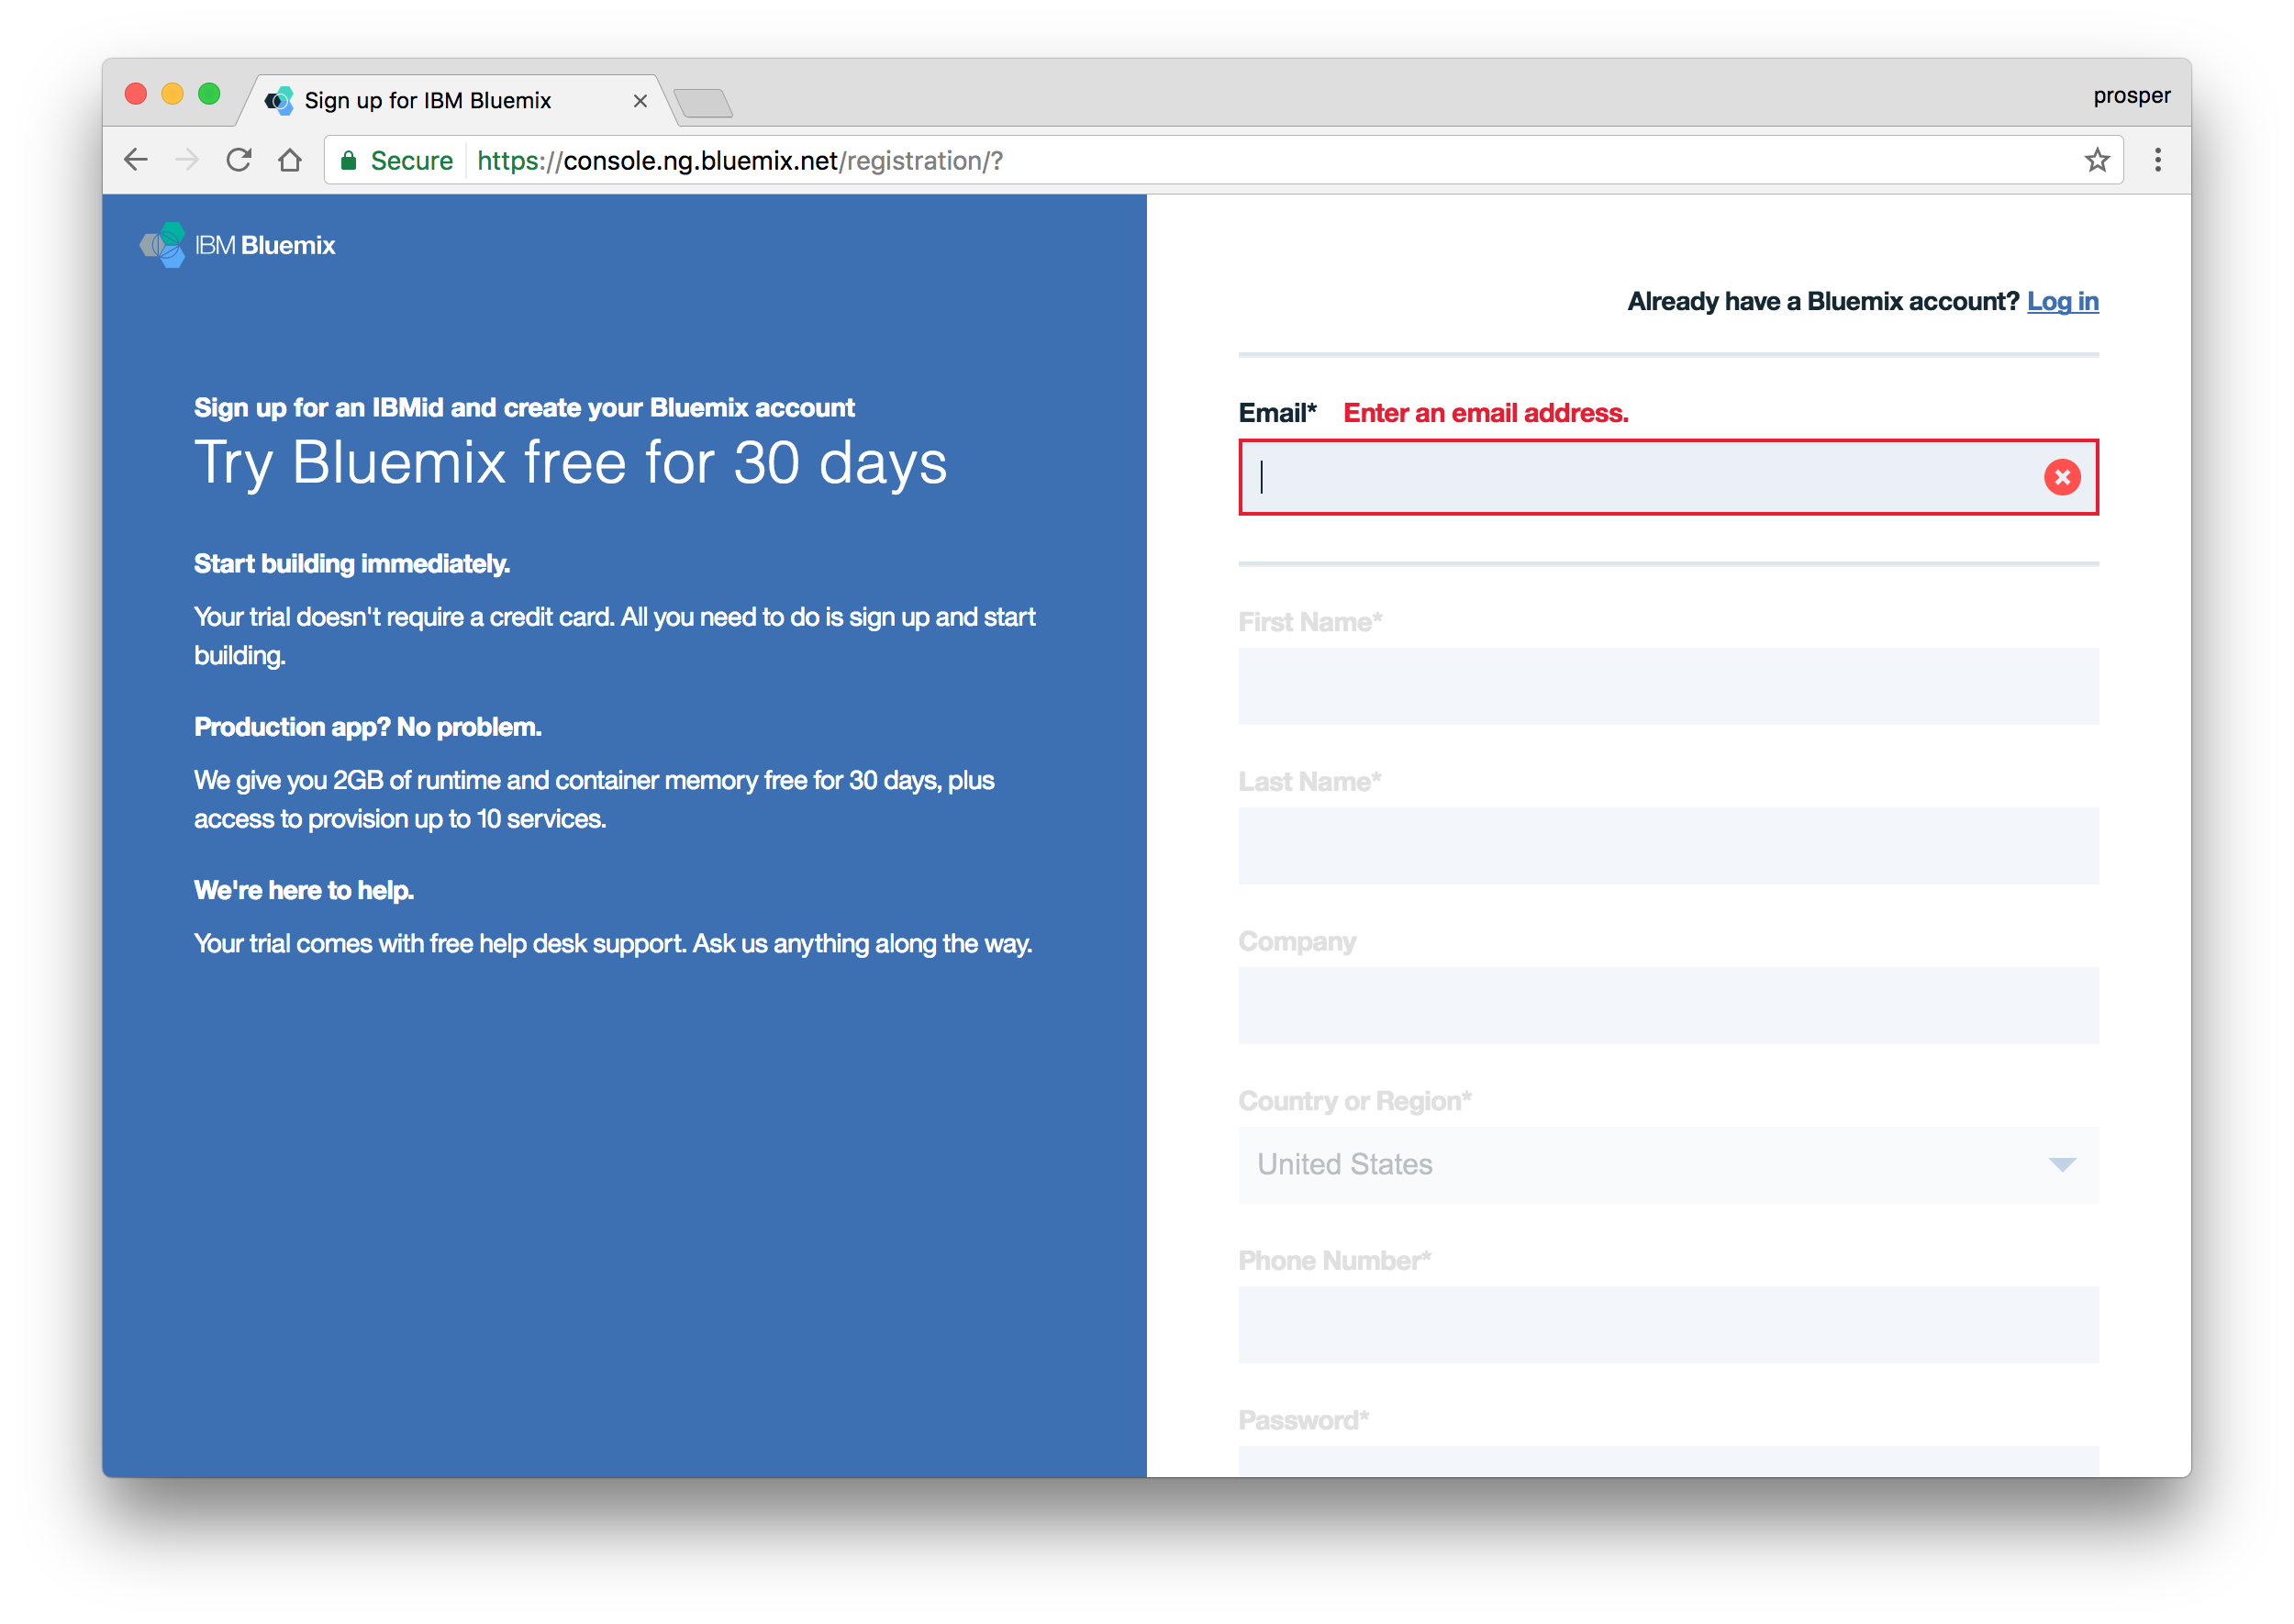 Signup on Bluemix
Note: The Bluemix platform offers a 30-day free trial so you have a chance to try deploying your own application before handing over your credit card details.
Go ahead and create an organization and space. I named my space prod.
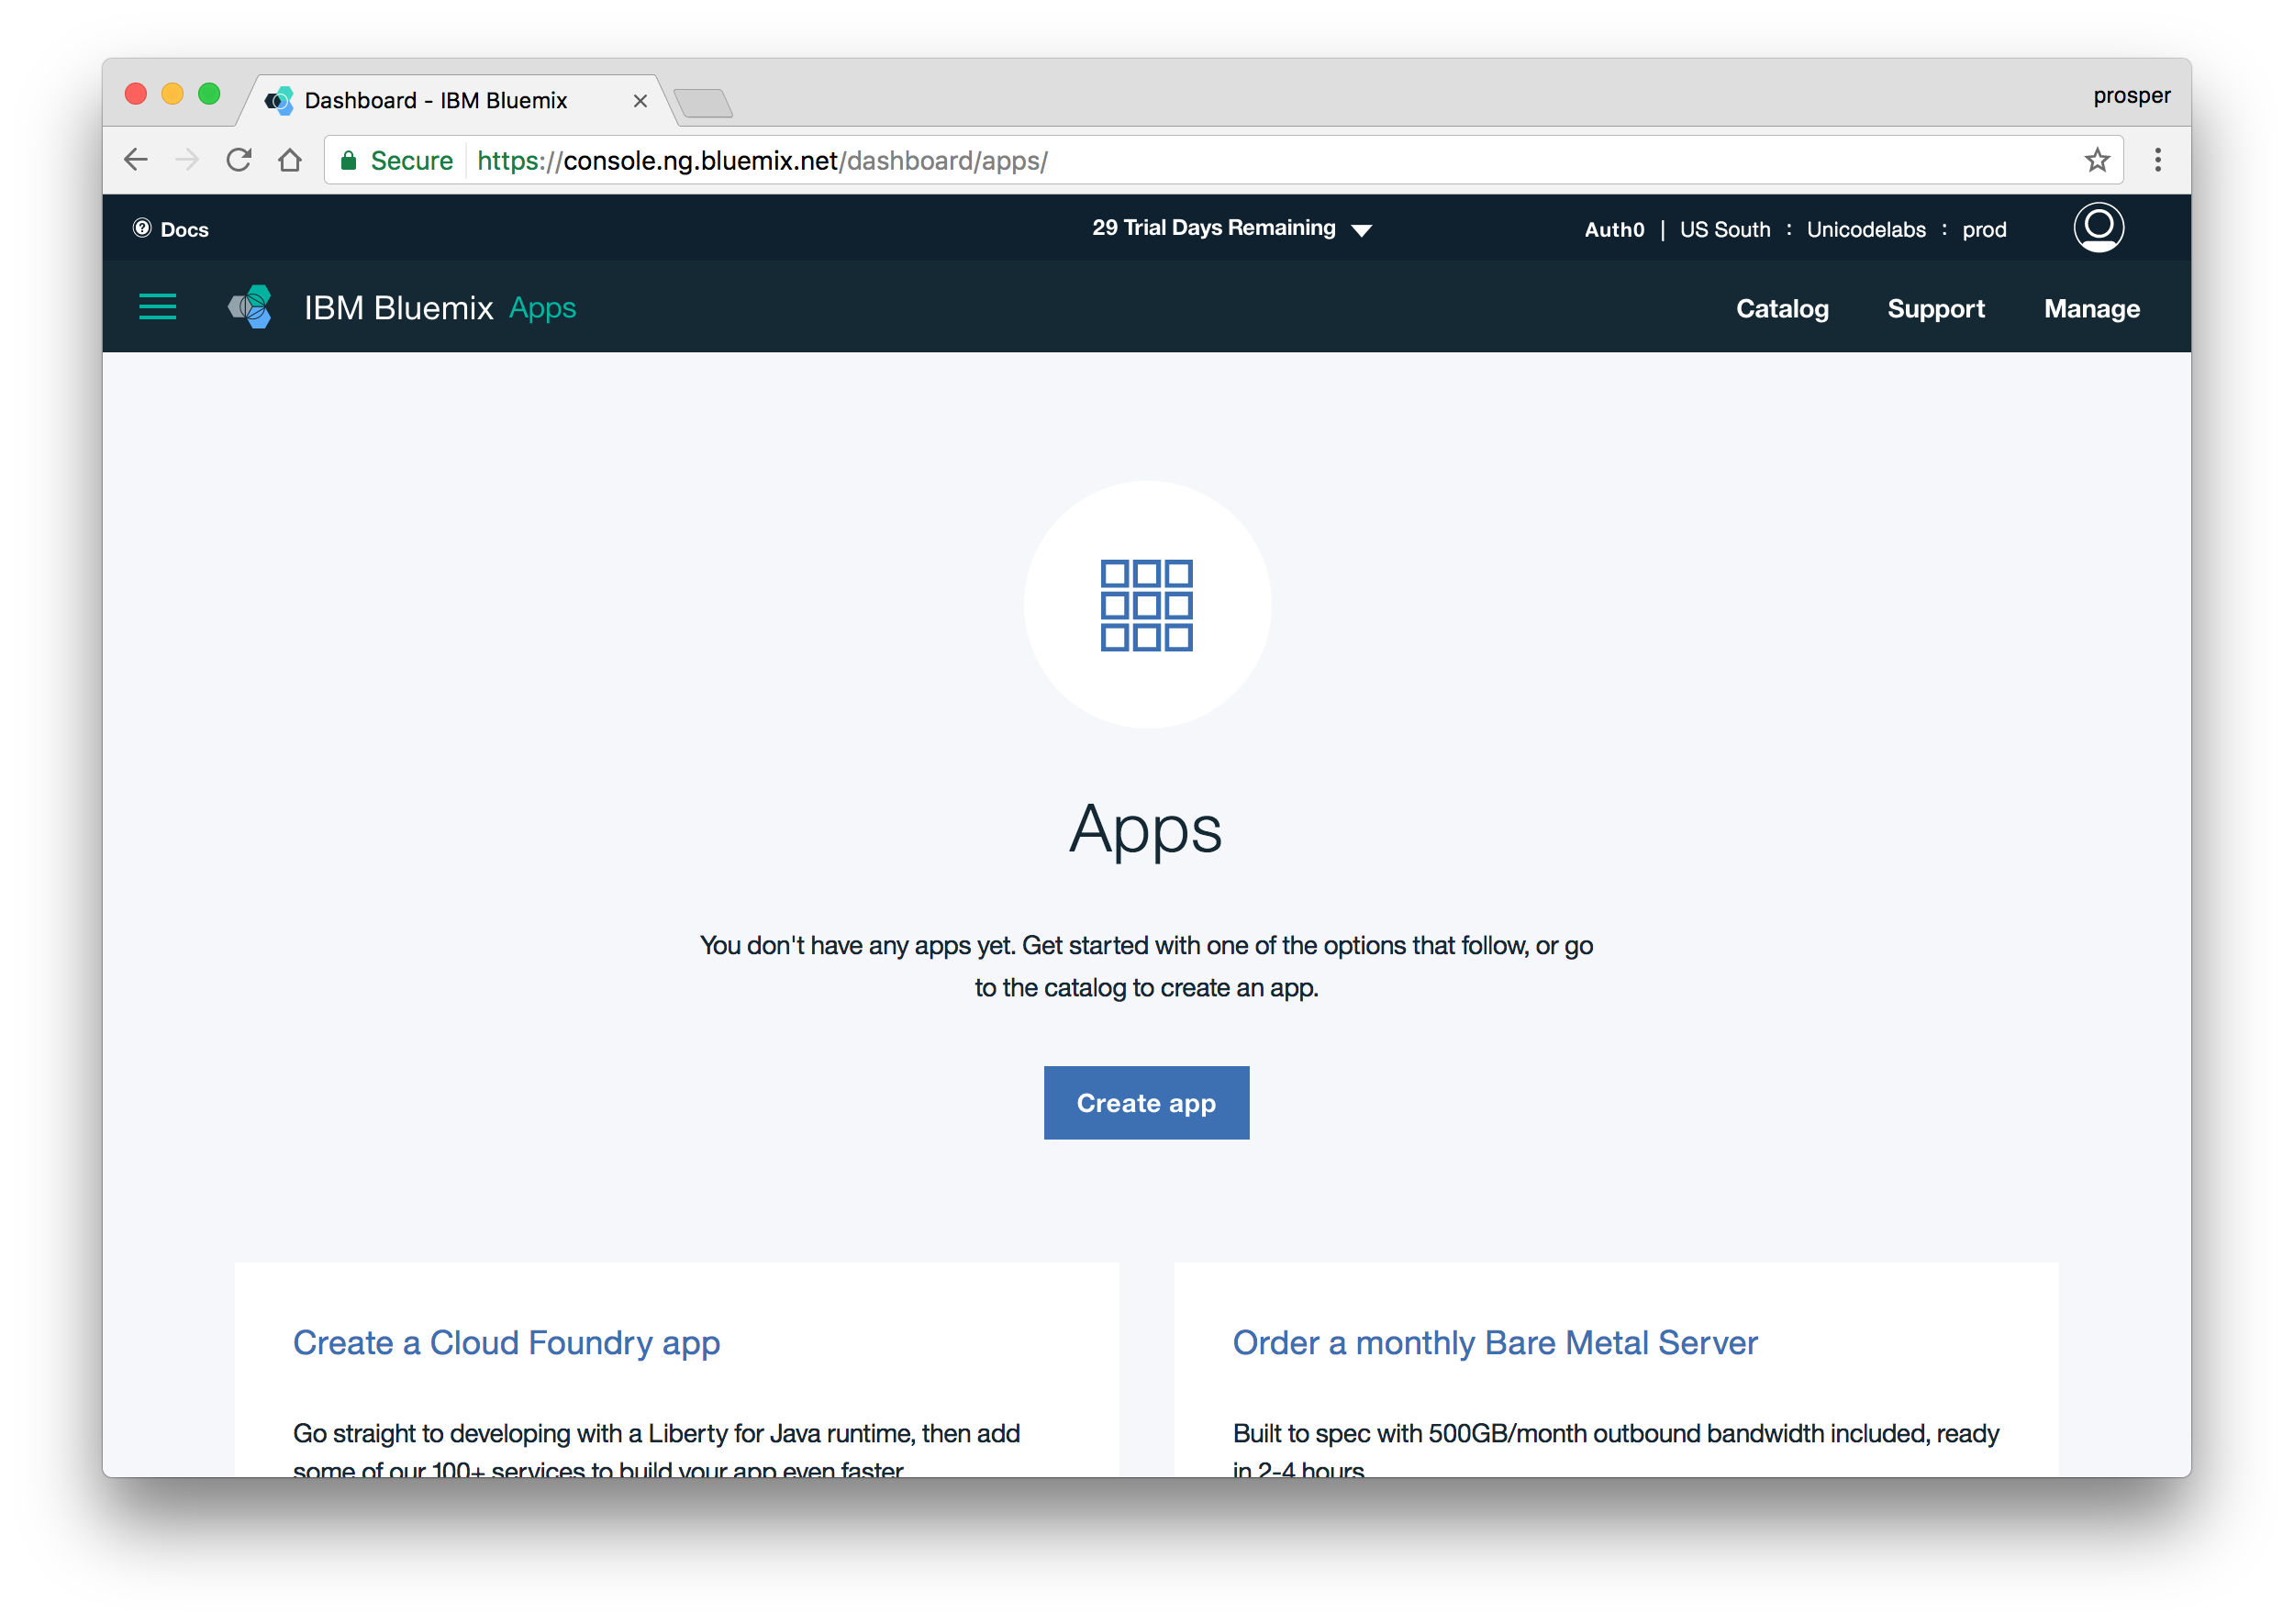
Now, go ahead and install the Cloud Foundry CLI. Once you have done that, log in from your terminal like so:
cf api https://api.ng.bluemix.net/
cf login
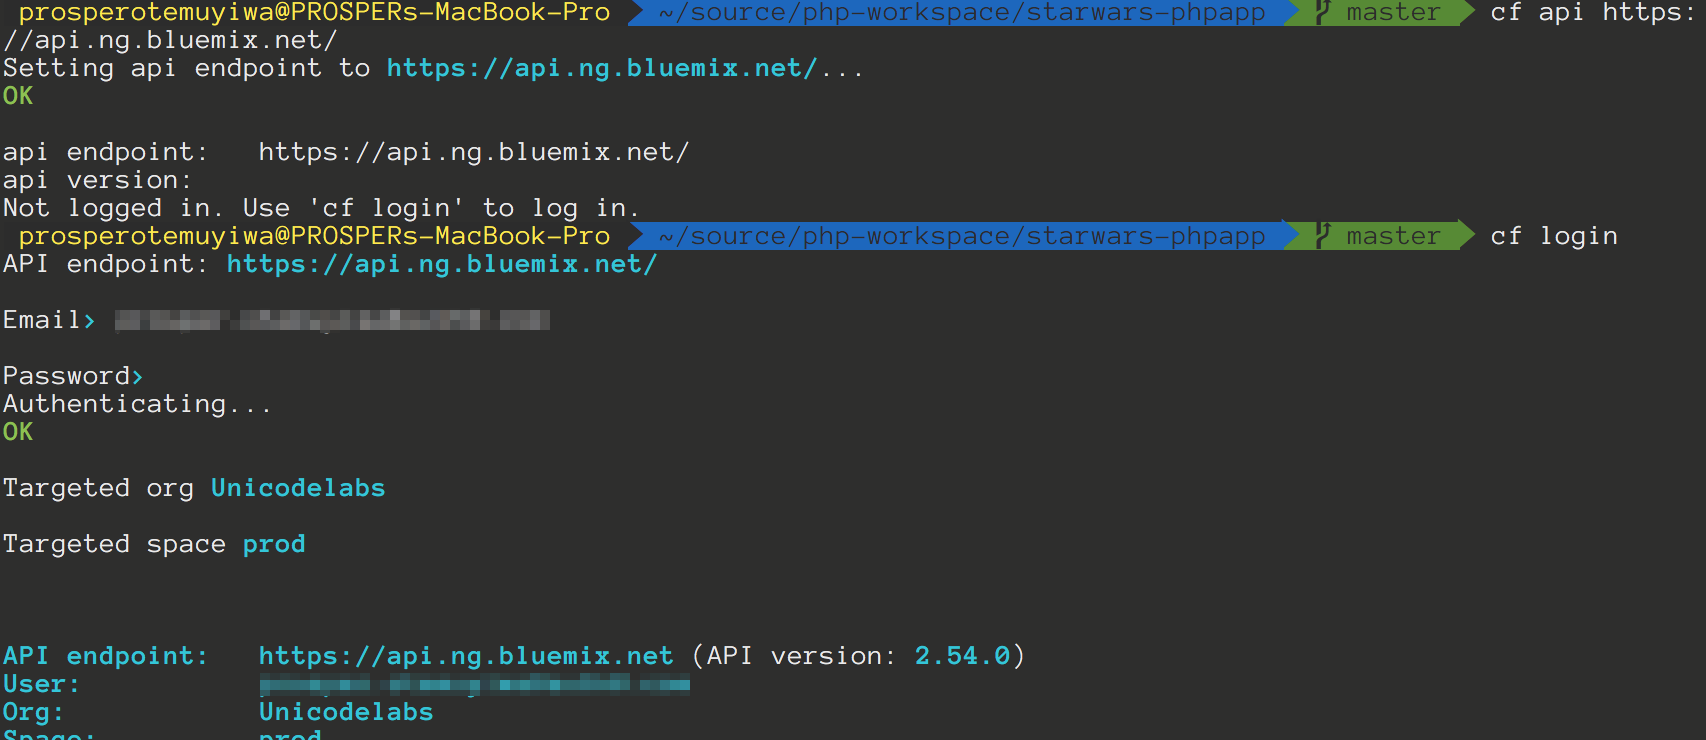 Log in to Bluemix
The next step is to create a manifest.yml file in the root directory of the app. The manifest.yml file includes basic information about your app, such as the name, how much memory to allocate for each instance, and the route. Our manifest file should look like this:
---
applications:
  - name: starwarsapp
    memory: 512M
    instances: 1
    host: starwarsapp
You can also explicitly specify the buildpack in the manifest file. Thankfully, Cloud Foundry automatically detects which buildpack is required when you push an app.
Buildpacks provide framework and runtime support for your applications. Buildpacks typically examine user-provided artefacts to determine what dependencies to download and how to configure applications to communicate with bound services.
Finally, deploy your app by running the following command like so:
cf push <yourapp>
<yourapp> has to be a unique name.
 Starting Deploy
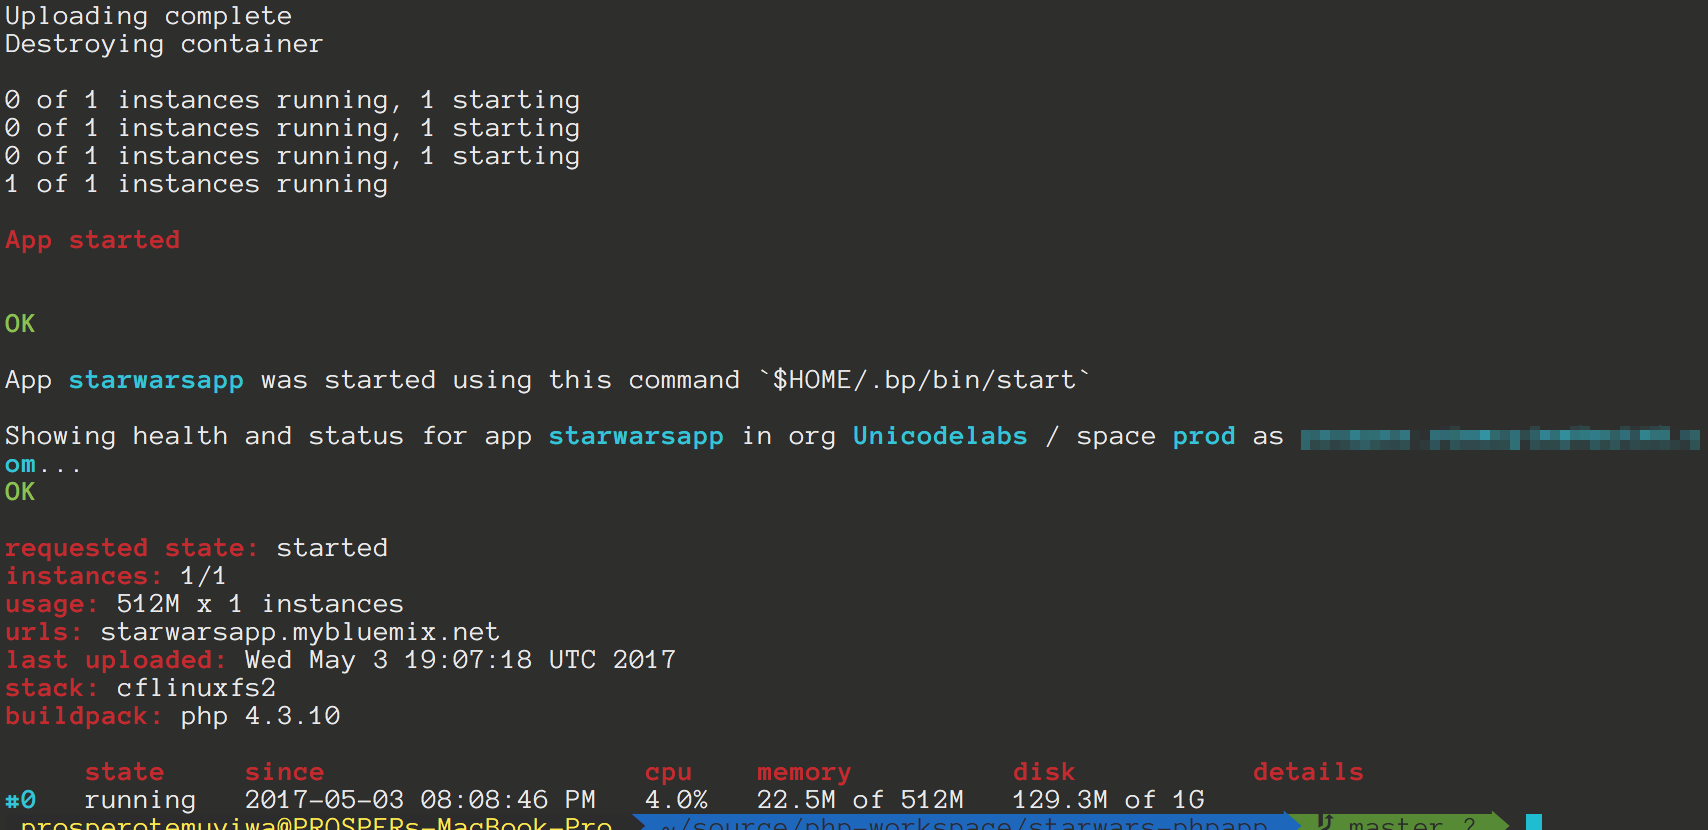 Ending Deploy
Try to run the app now. In my case, the url is starwarsapp.mybluemix.net. Oops, a 500 error. We haven’t loaded our environment variables yet. How do we do that with Bluemix?
You can either use the Cloud Foundry CLI or the Bluemix user interface to set environment variables. Let’s use the Bluemix user interface. So, follow the steps below:
Open the Bluemix dashboard.
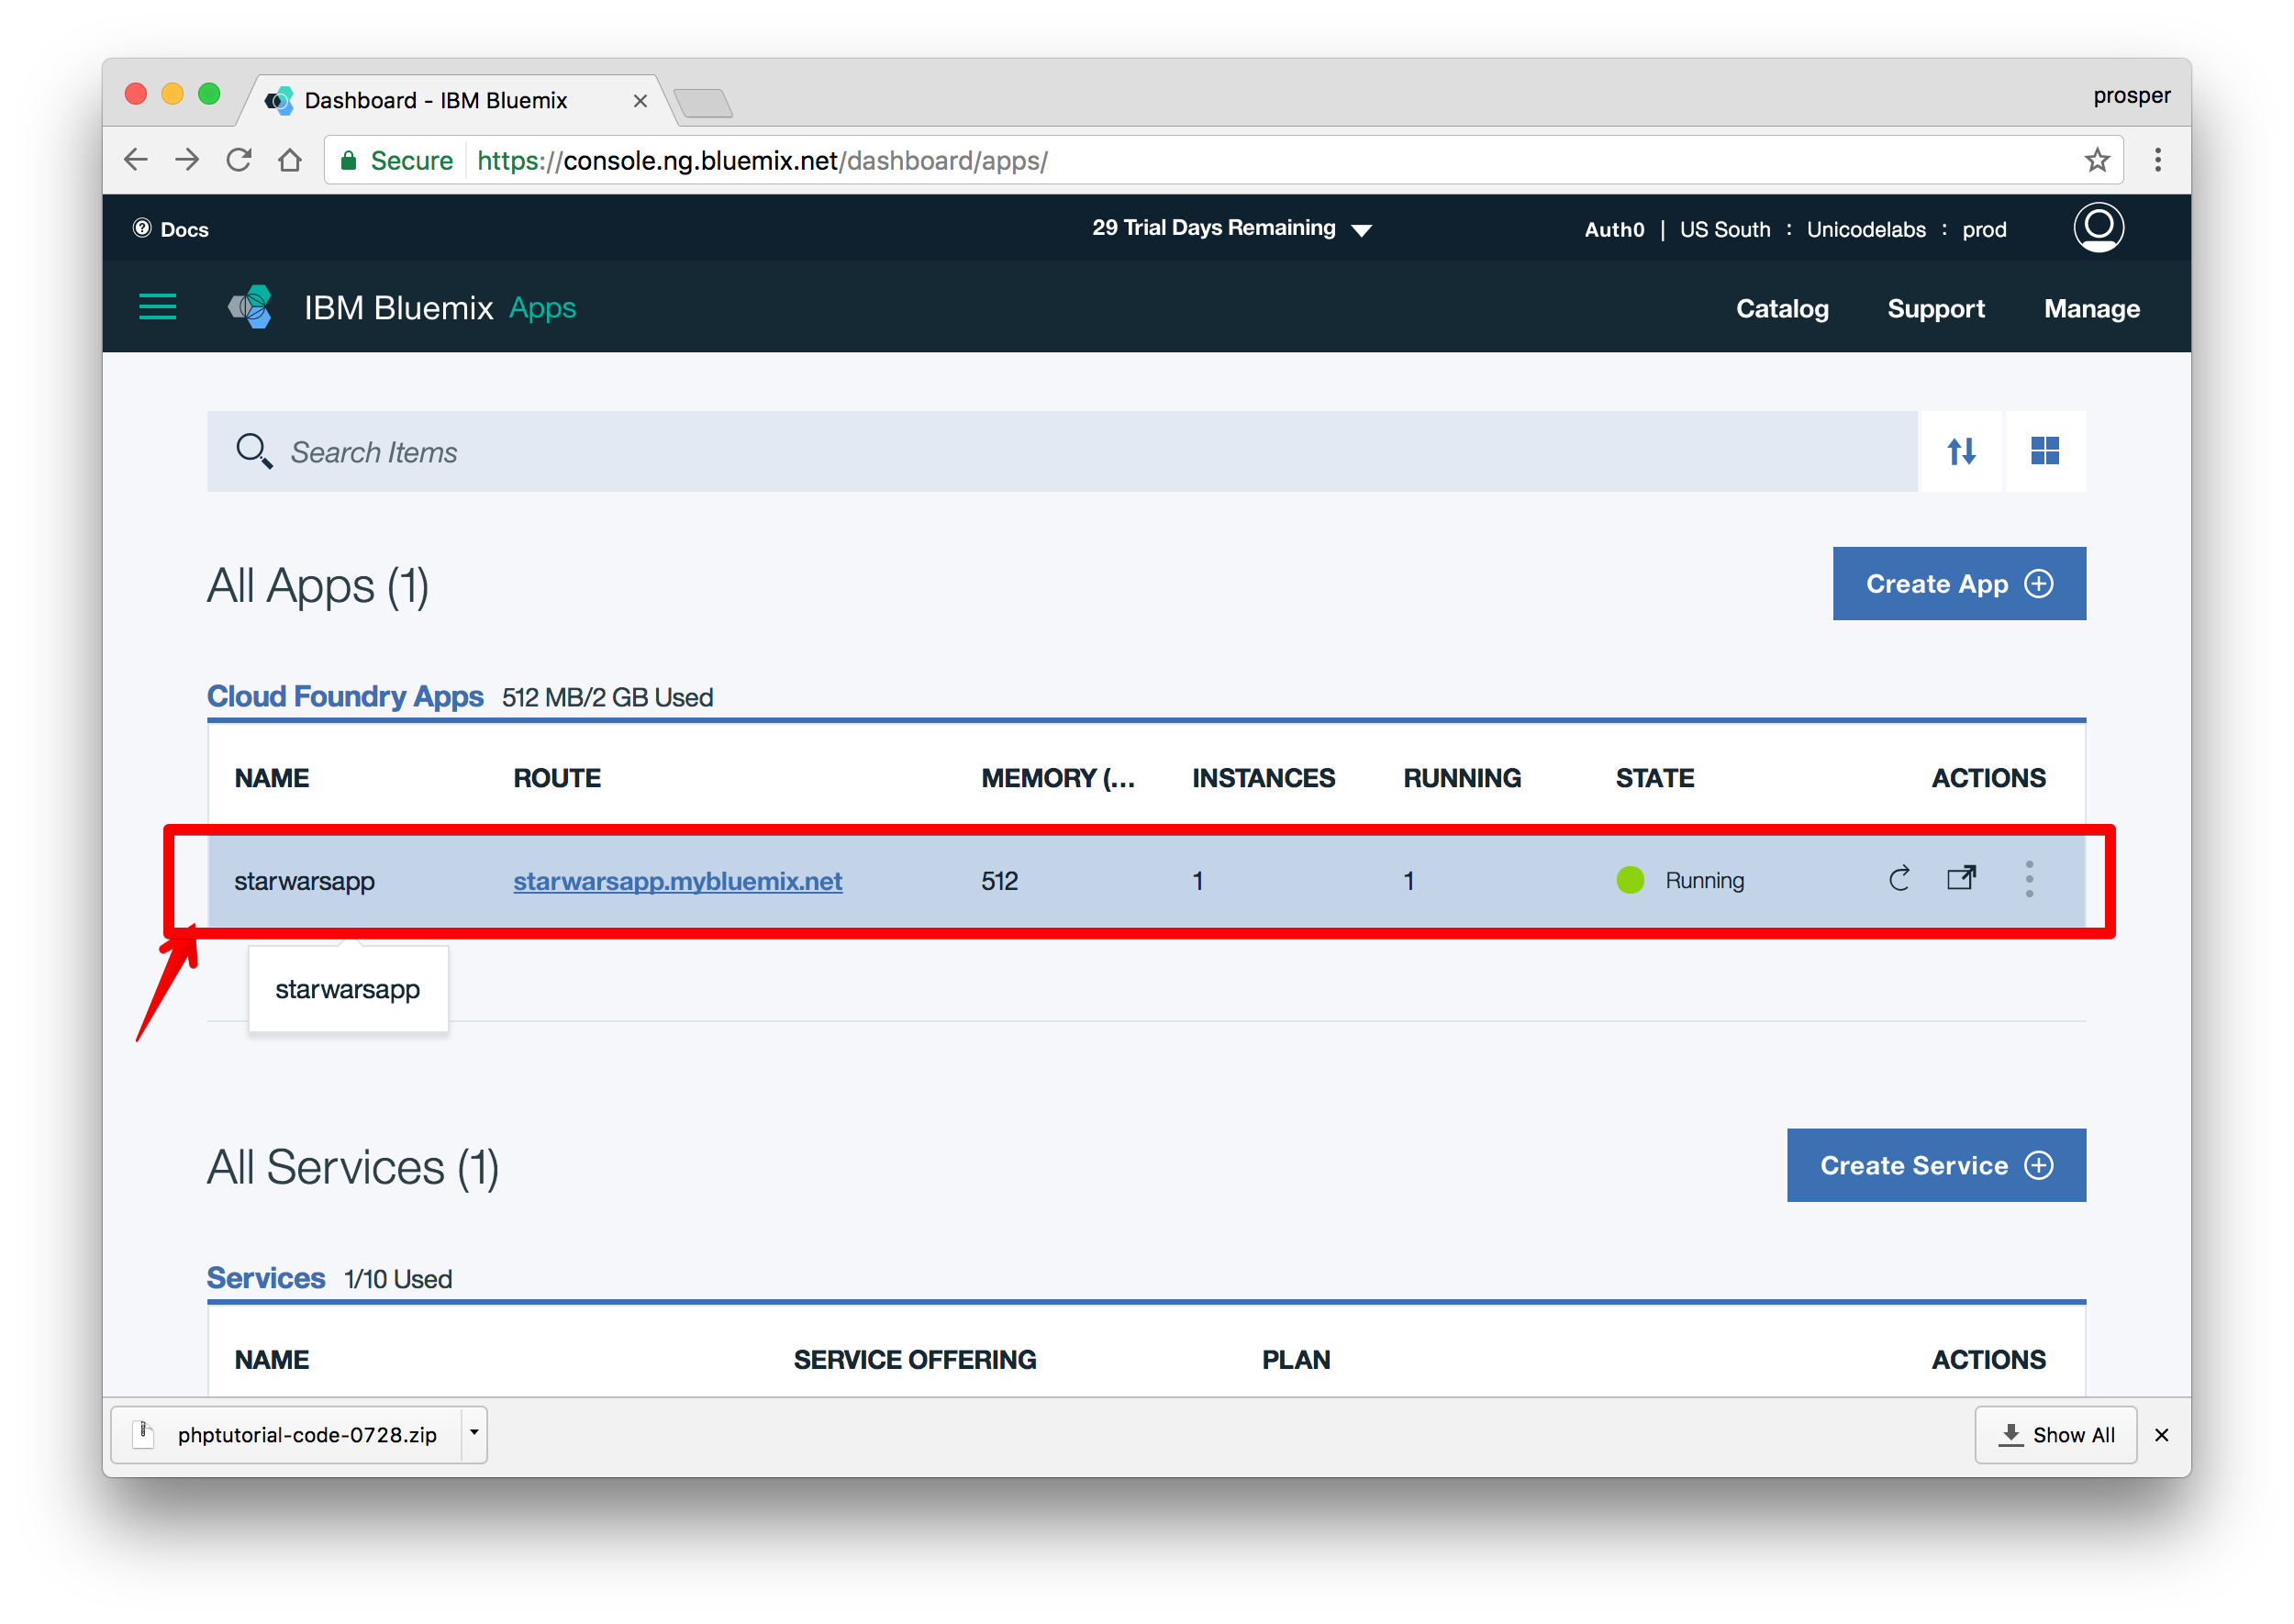
Click on the app. You’ll be redirected to another page with more details about the app.
Select Runtime from the left panel.
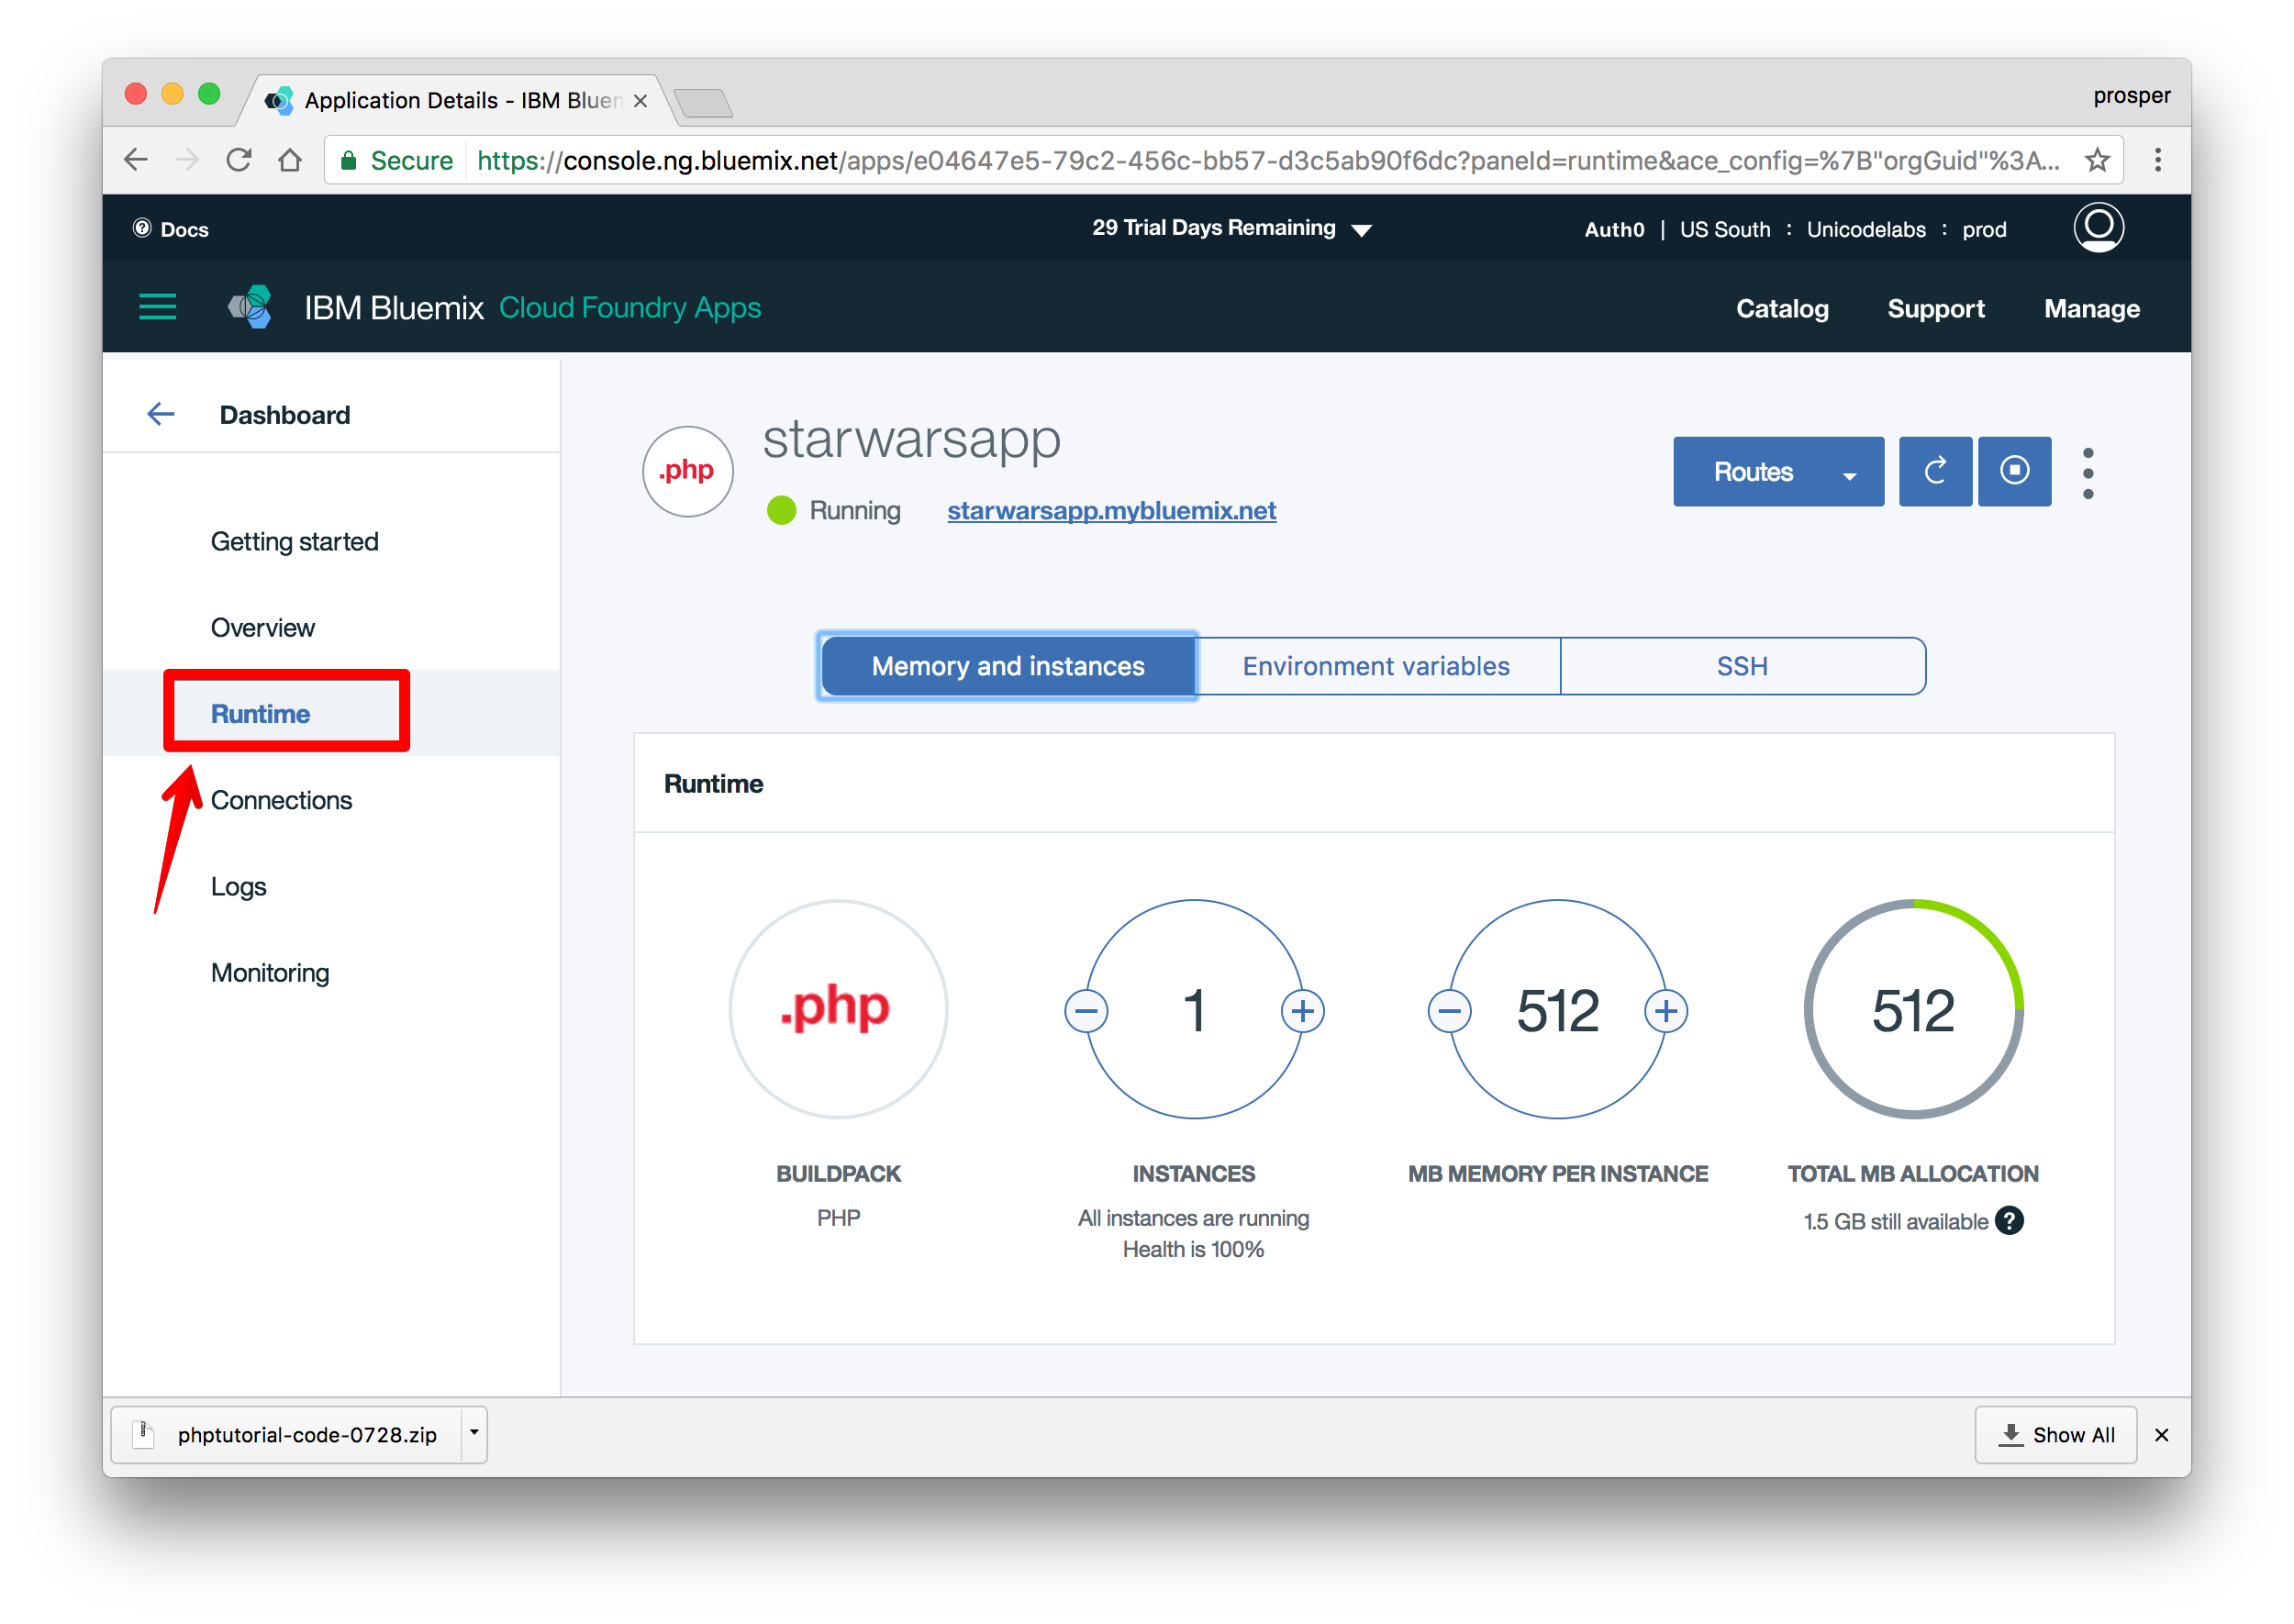
Now, click on Environment variables
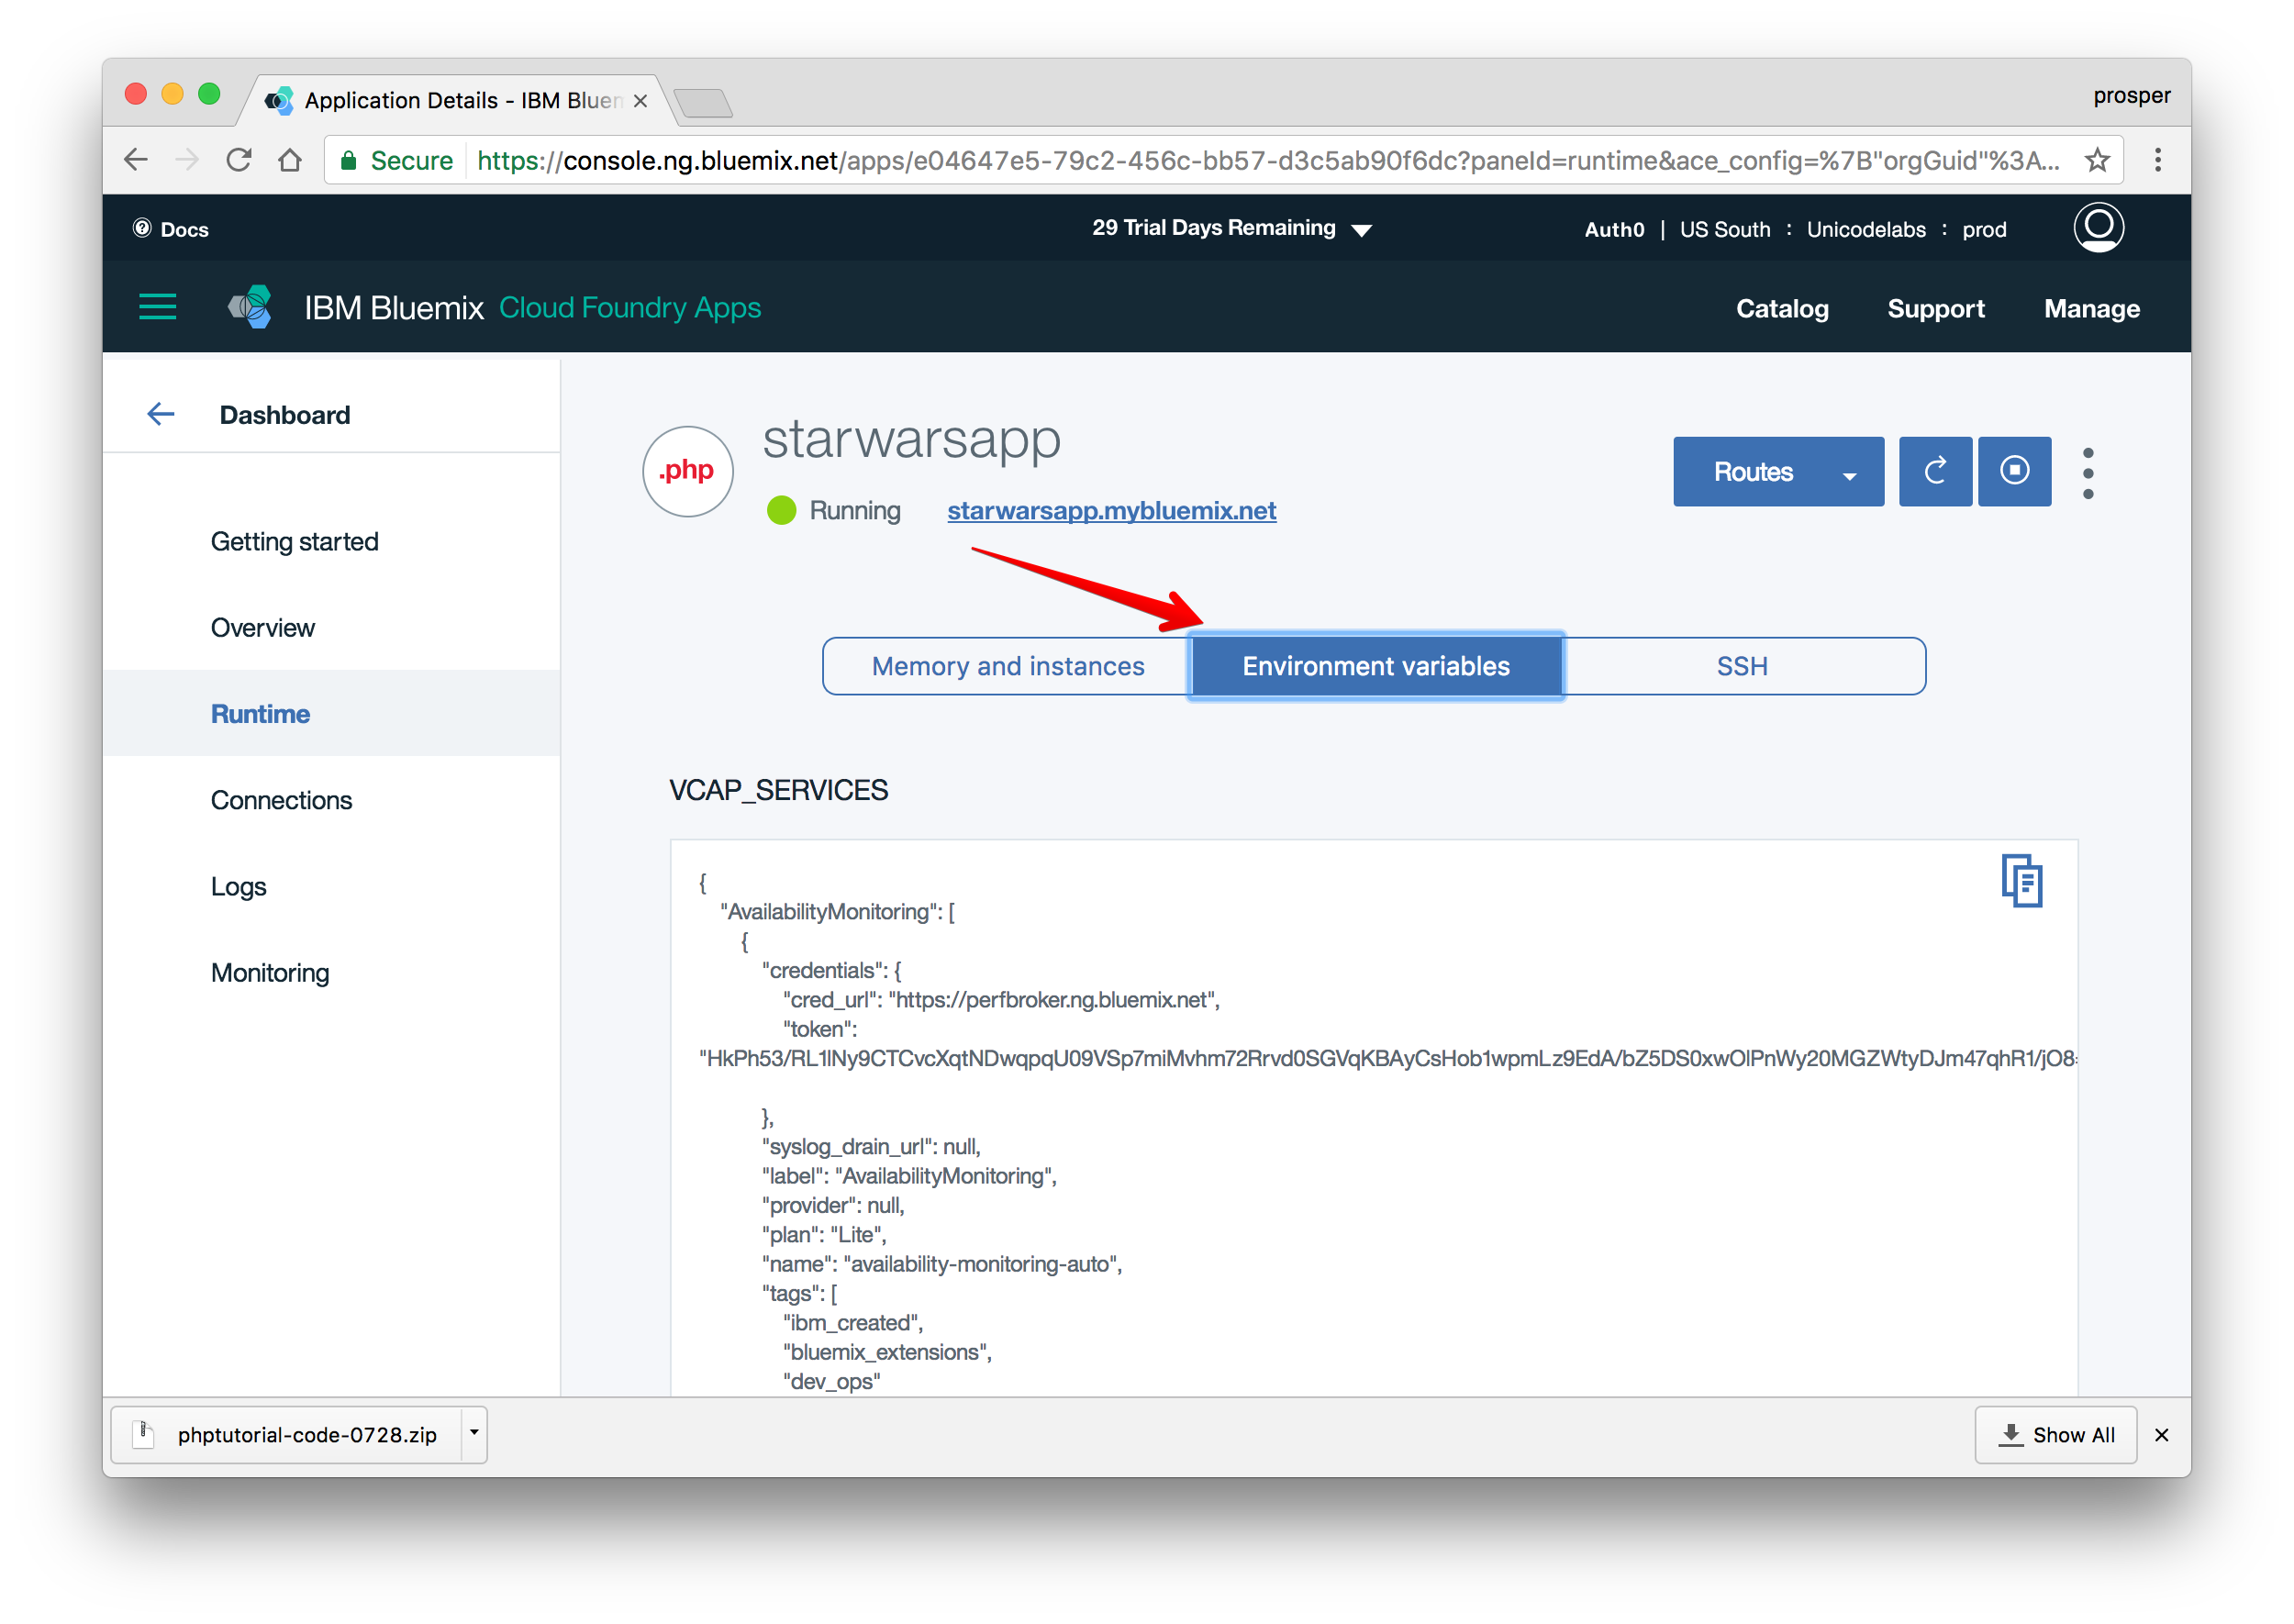
Scroll down and click the Add button to add the environment variables like so
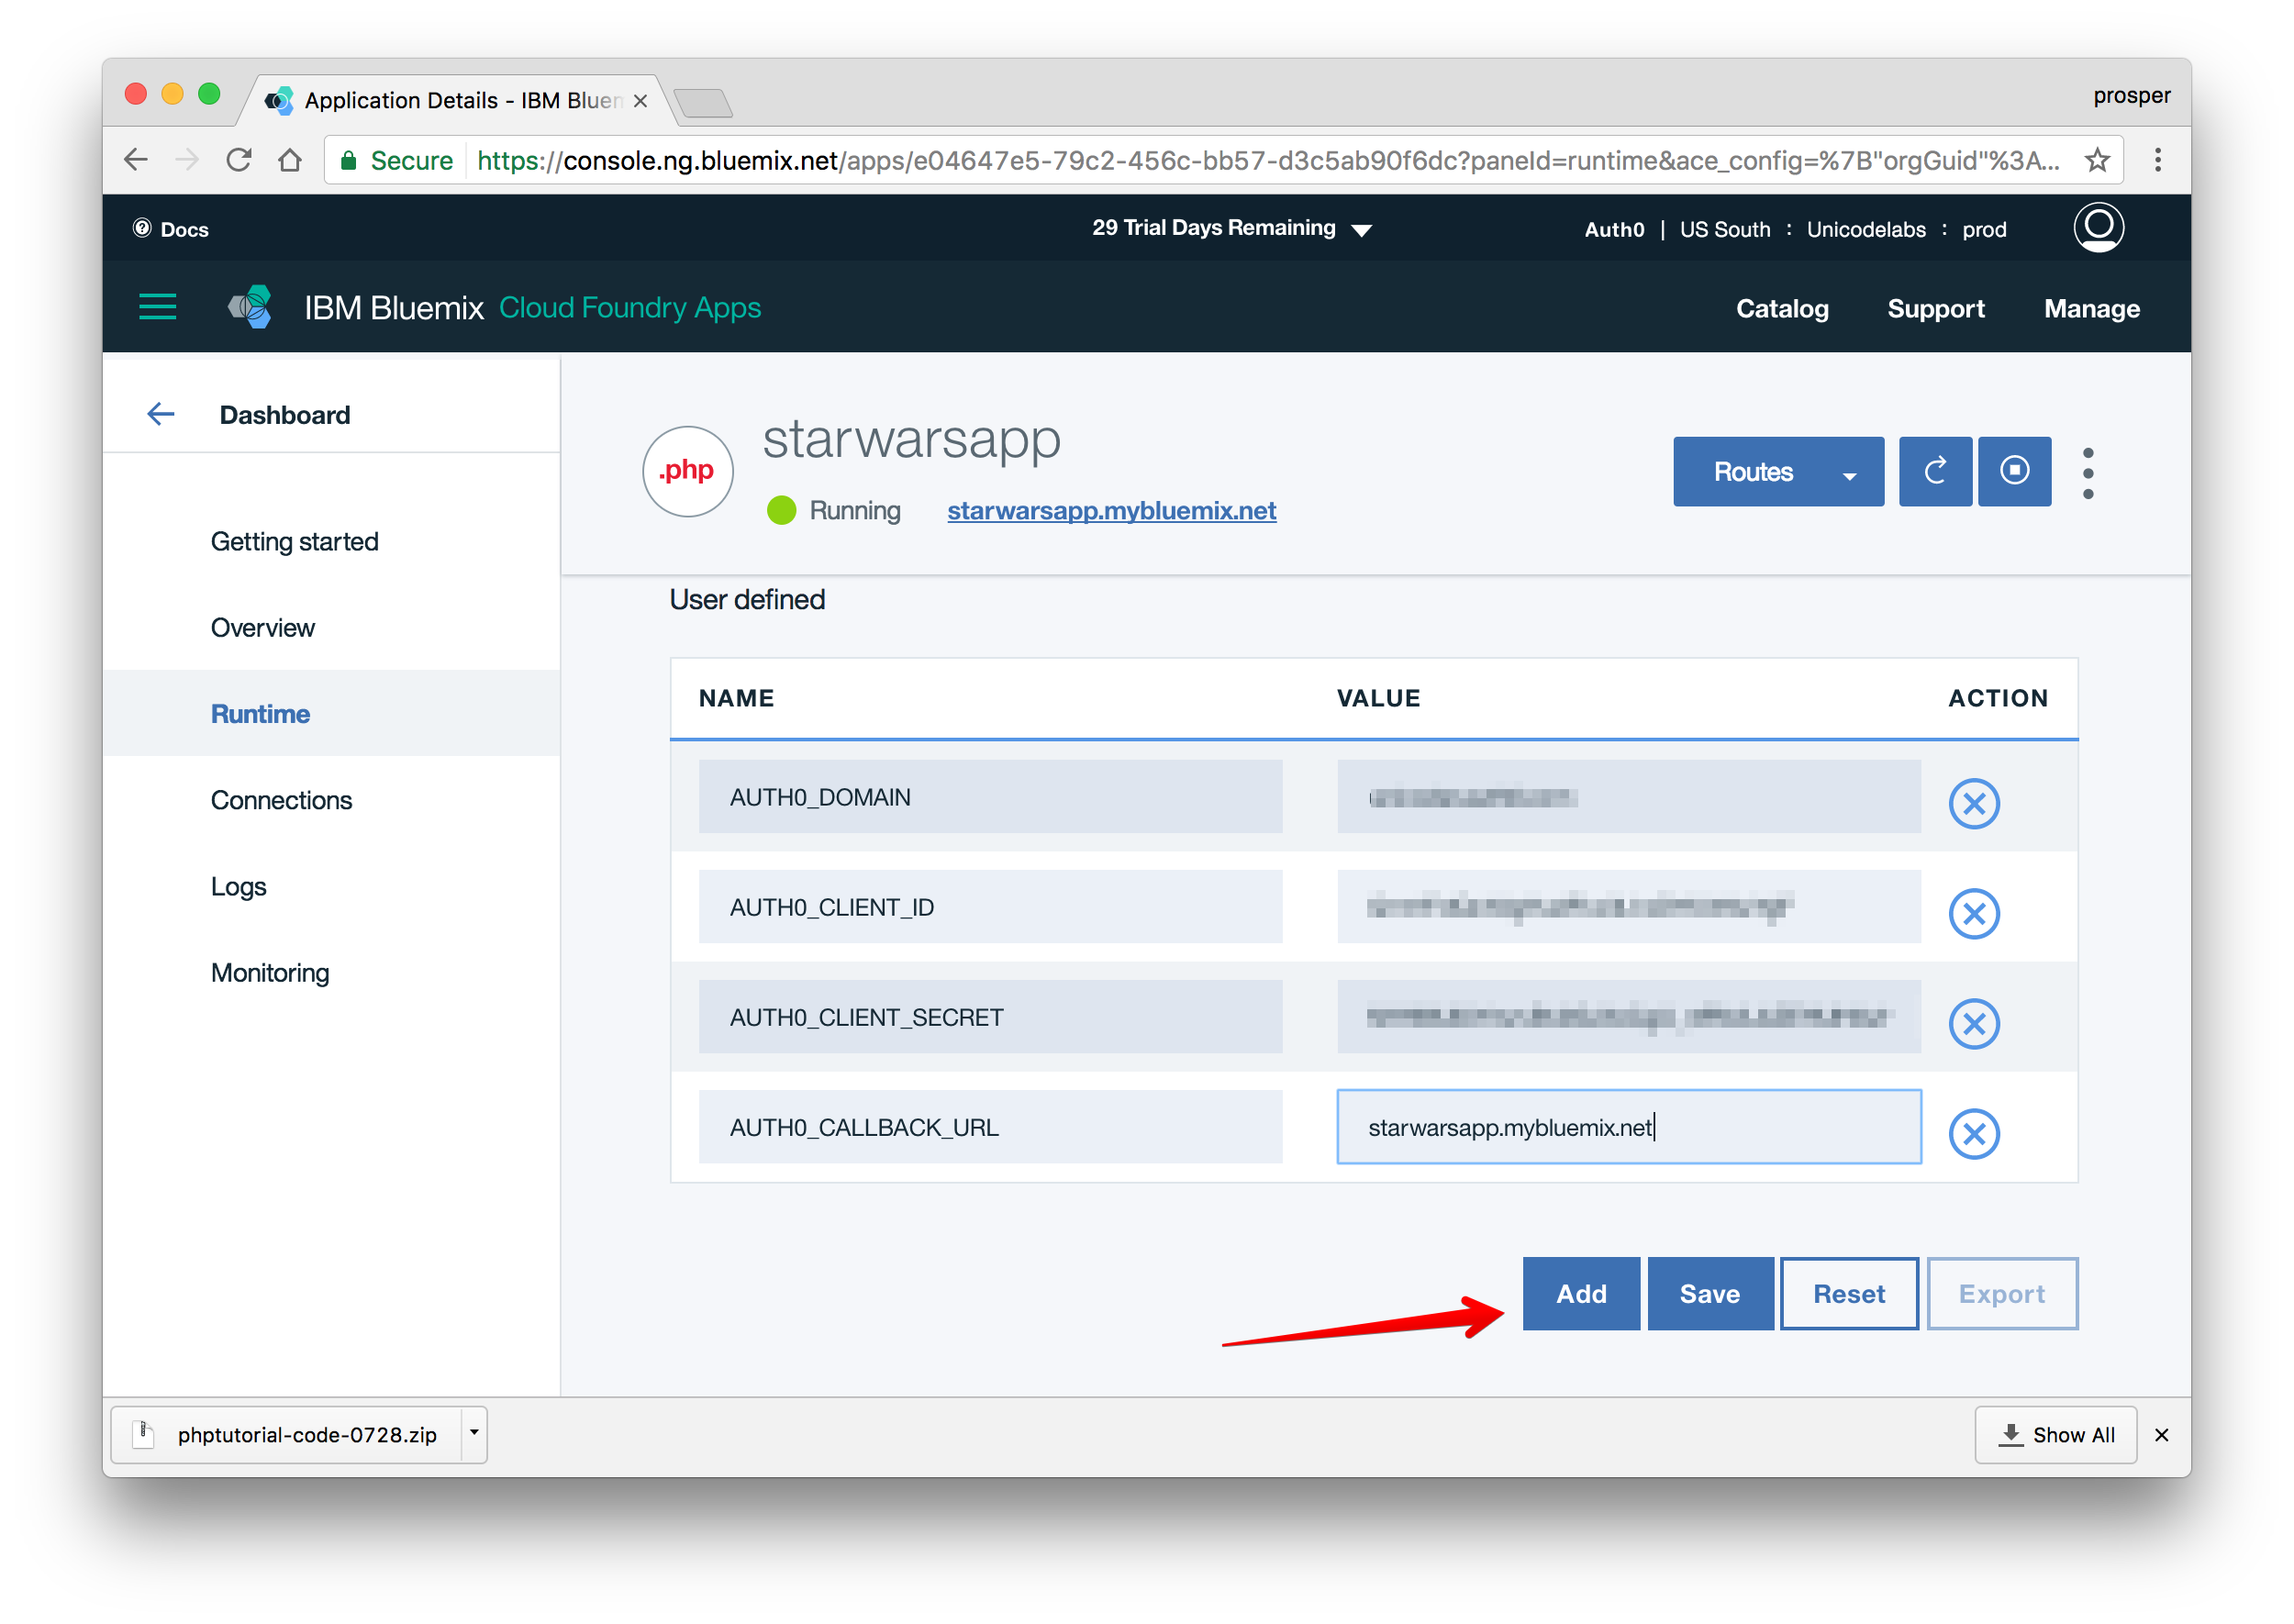
Click the
Savebutton. Once you do that, your app will restart automatically.
Now grab the URL, in my case it is https://starwarsapp.mybluemix.net/, and add it to Allowed Origins(CORS) and Allowed Callback URLs in your Auth0 dashboard.
Now check out your app – it should be live!
Database, Caching & Cron Jobs
Cloud Foundry provides the ability to create services. IBM Bluemix offers the Cloudant NoSQL database (the Bluemix name for CouchDB). You can use the cf tool to create database services like so:
cf create-service cloudantNoSQLDB Lite starwarsapp
IBM Bluemix also offers the ClearDB MySQL service. So, you can use the cf tool to create one like so:
cf create-service cleardb spark starwarsapp
They offer MongoDB, PostgreSQL, and RethinkDB.
You can always use the Cloud Foundry tool to check out a lot of things such as logs, environment variables, etc. like so:
cf logs --recent yourapp– Shows the logs of your app.cf env yourapp– Shows the environment variables associated with your app.cf marketplace– Shows all the services that Bluemix has to offer.
IBM Bluemix also offers Redis Cloud, a fully-managed cloud service for hosting and running your Redis dataset in BlueMix in a highly-available and scalable manner.
IBM Bluemix provides the Workload Scheduler service. This service allows you to integrate your application with the capability to schedule workflows. Far beyond cron, exploit job scheduling within and outside Bluemix. Easily create workflows in your application to run on a regular basis, at a specific time, on events (for example, when a file is deleted or updated), according to your needs. You can either use the Workload Scheduler User Interface or use the APIs.
Get started with Scheduling Jobs here.
Also, here is how to deploy your Laravel app on IBM Bluemix.
Microsoft Azure
Microsoft Azure is another massive cloud platform that allows you to scale your apps easily. Let’s get started with deploying our Star Wars app on Azure.
With Microsoft Azure, you can deploy via:
- FTP.
- Syncing with a cloud folder.
- Local Git.
- Cloud based source control service such as GitHub or Bitbucket.
In our case, we’ll set up deployment with Git.
First, create an account with Microsoft Azure.
 Dashboard
Click on New on the left panel.
Click See all just next to Marketplace.
Click Web + SQL, then go ahead and create.
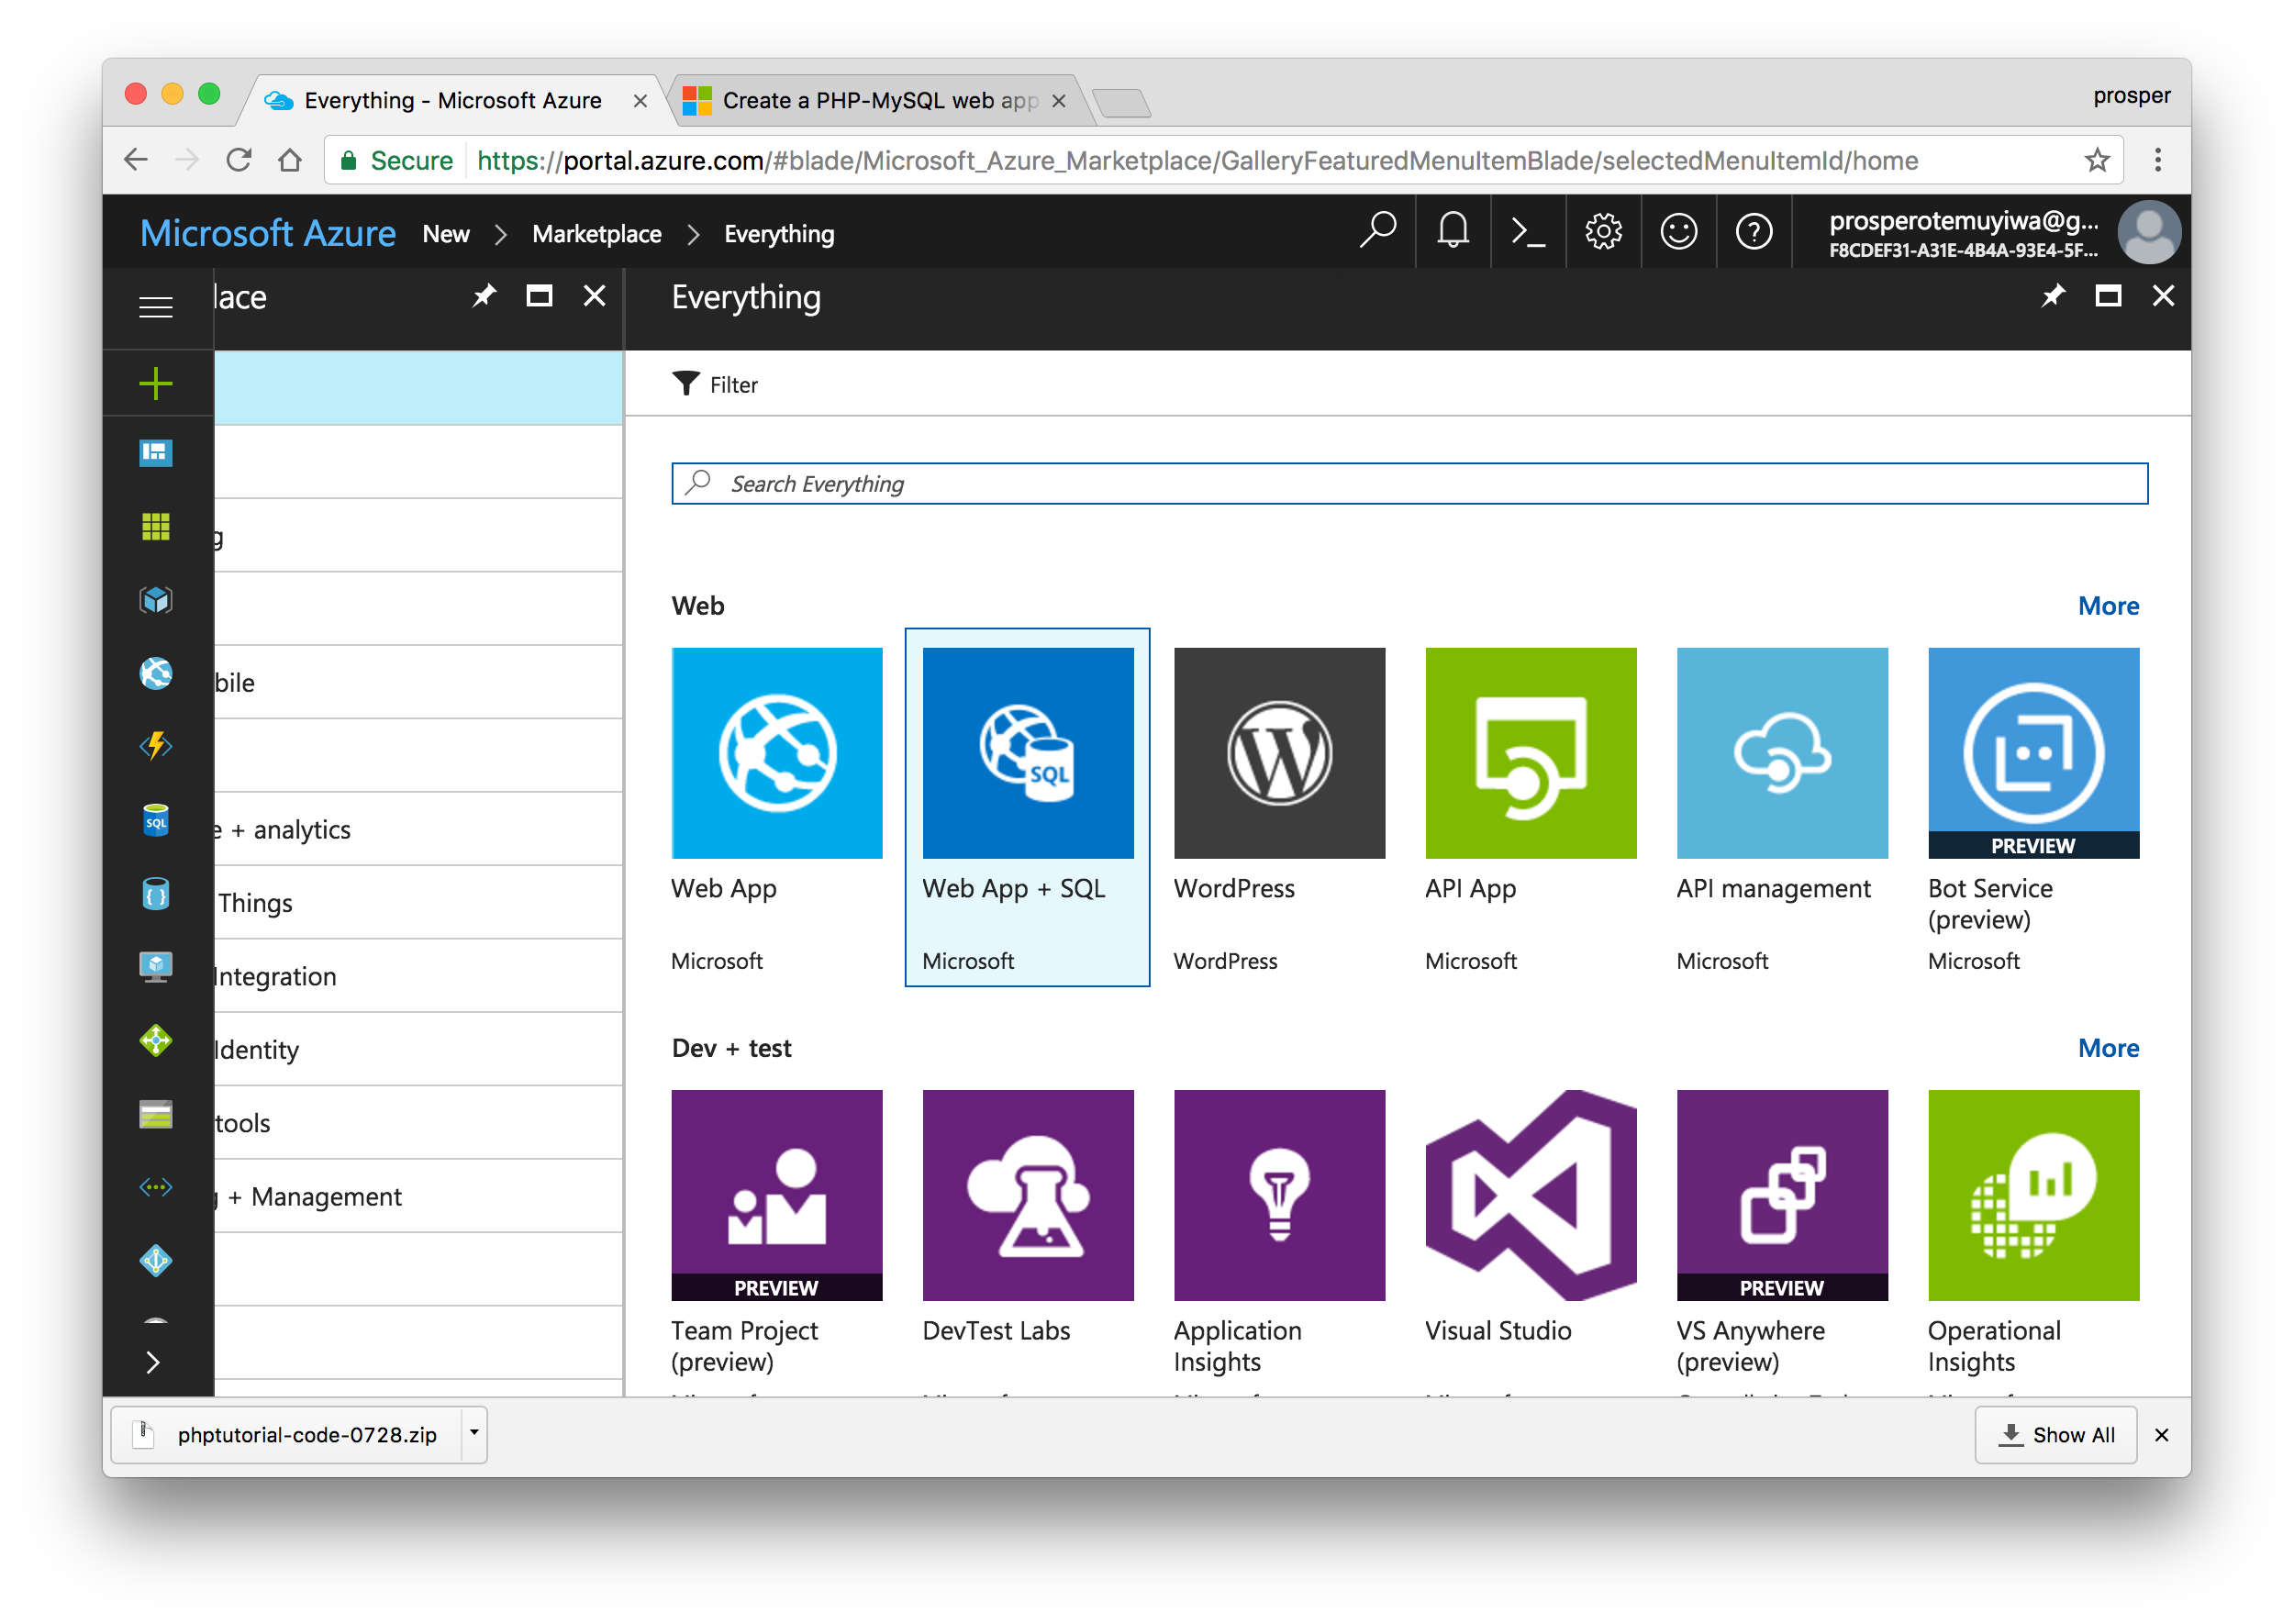
You’ll be prompted to select an offer for the type of subscription you are comfortable with. I chose Free Trial. With that, you’ll be given a $200 Azure Credit.
Give your app a name, then create an SQL database. Well, it’s not needed for our app but for some reason Azure forces you to create it.
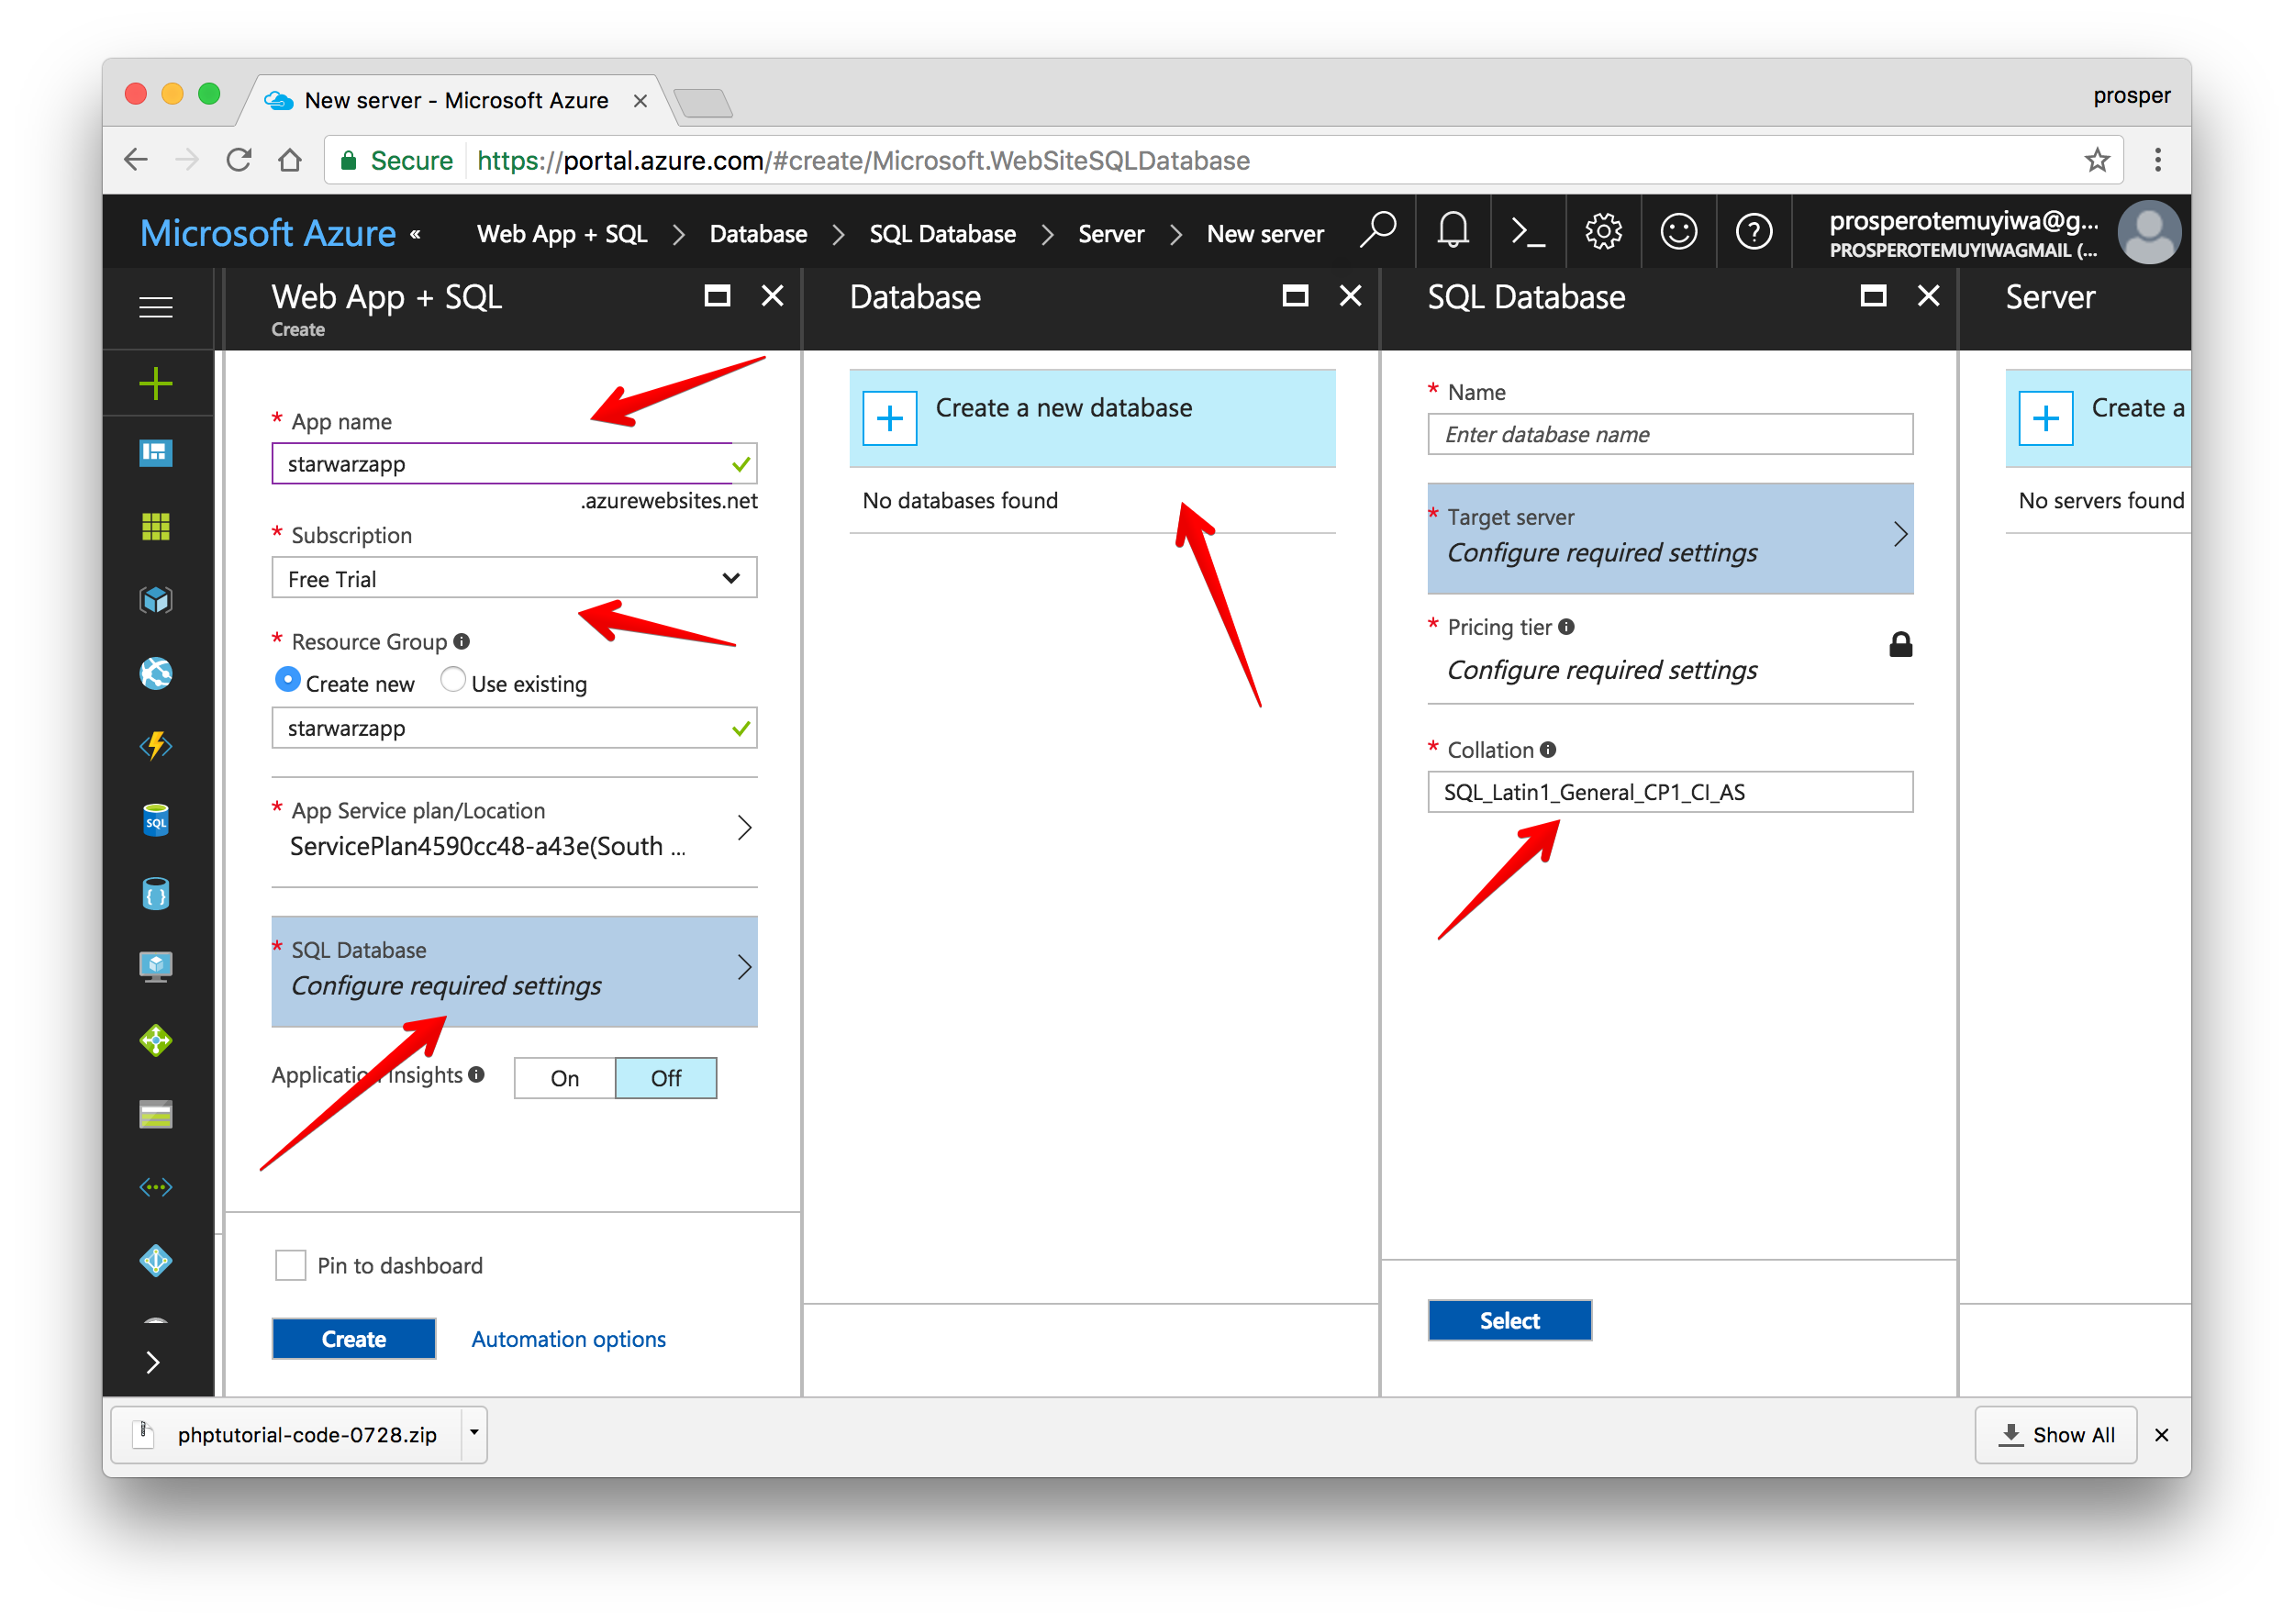 Create a new app
Now that our app has been created, click on App Services by the left panel to see your app.
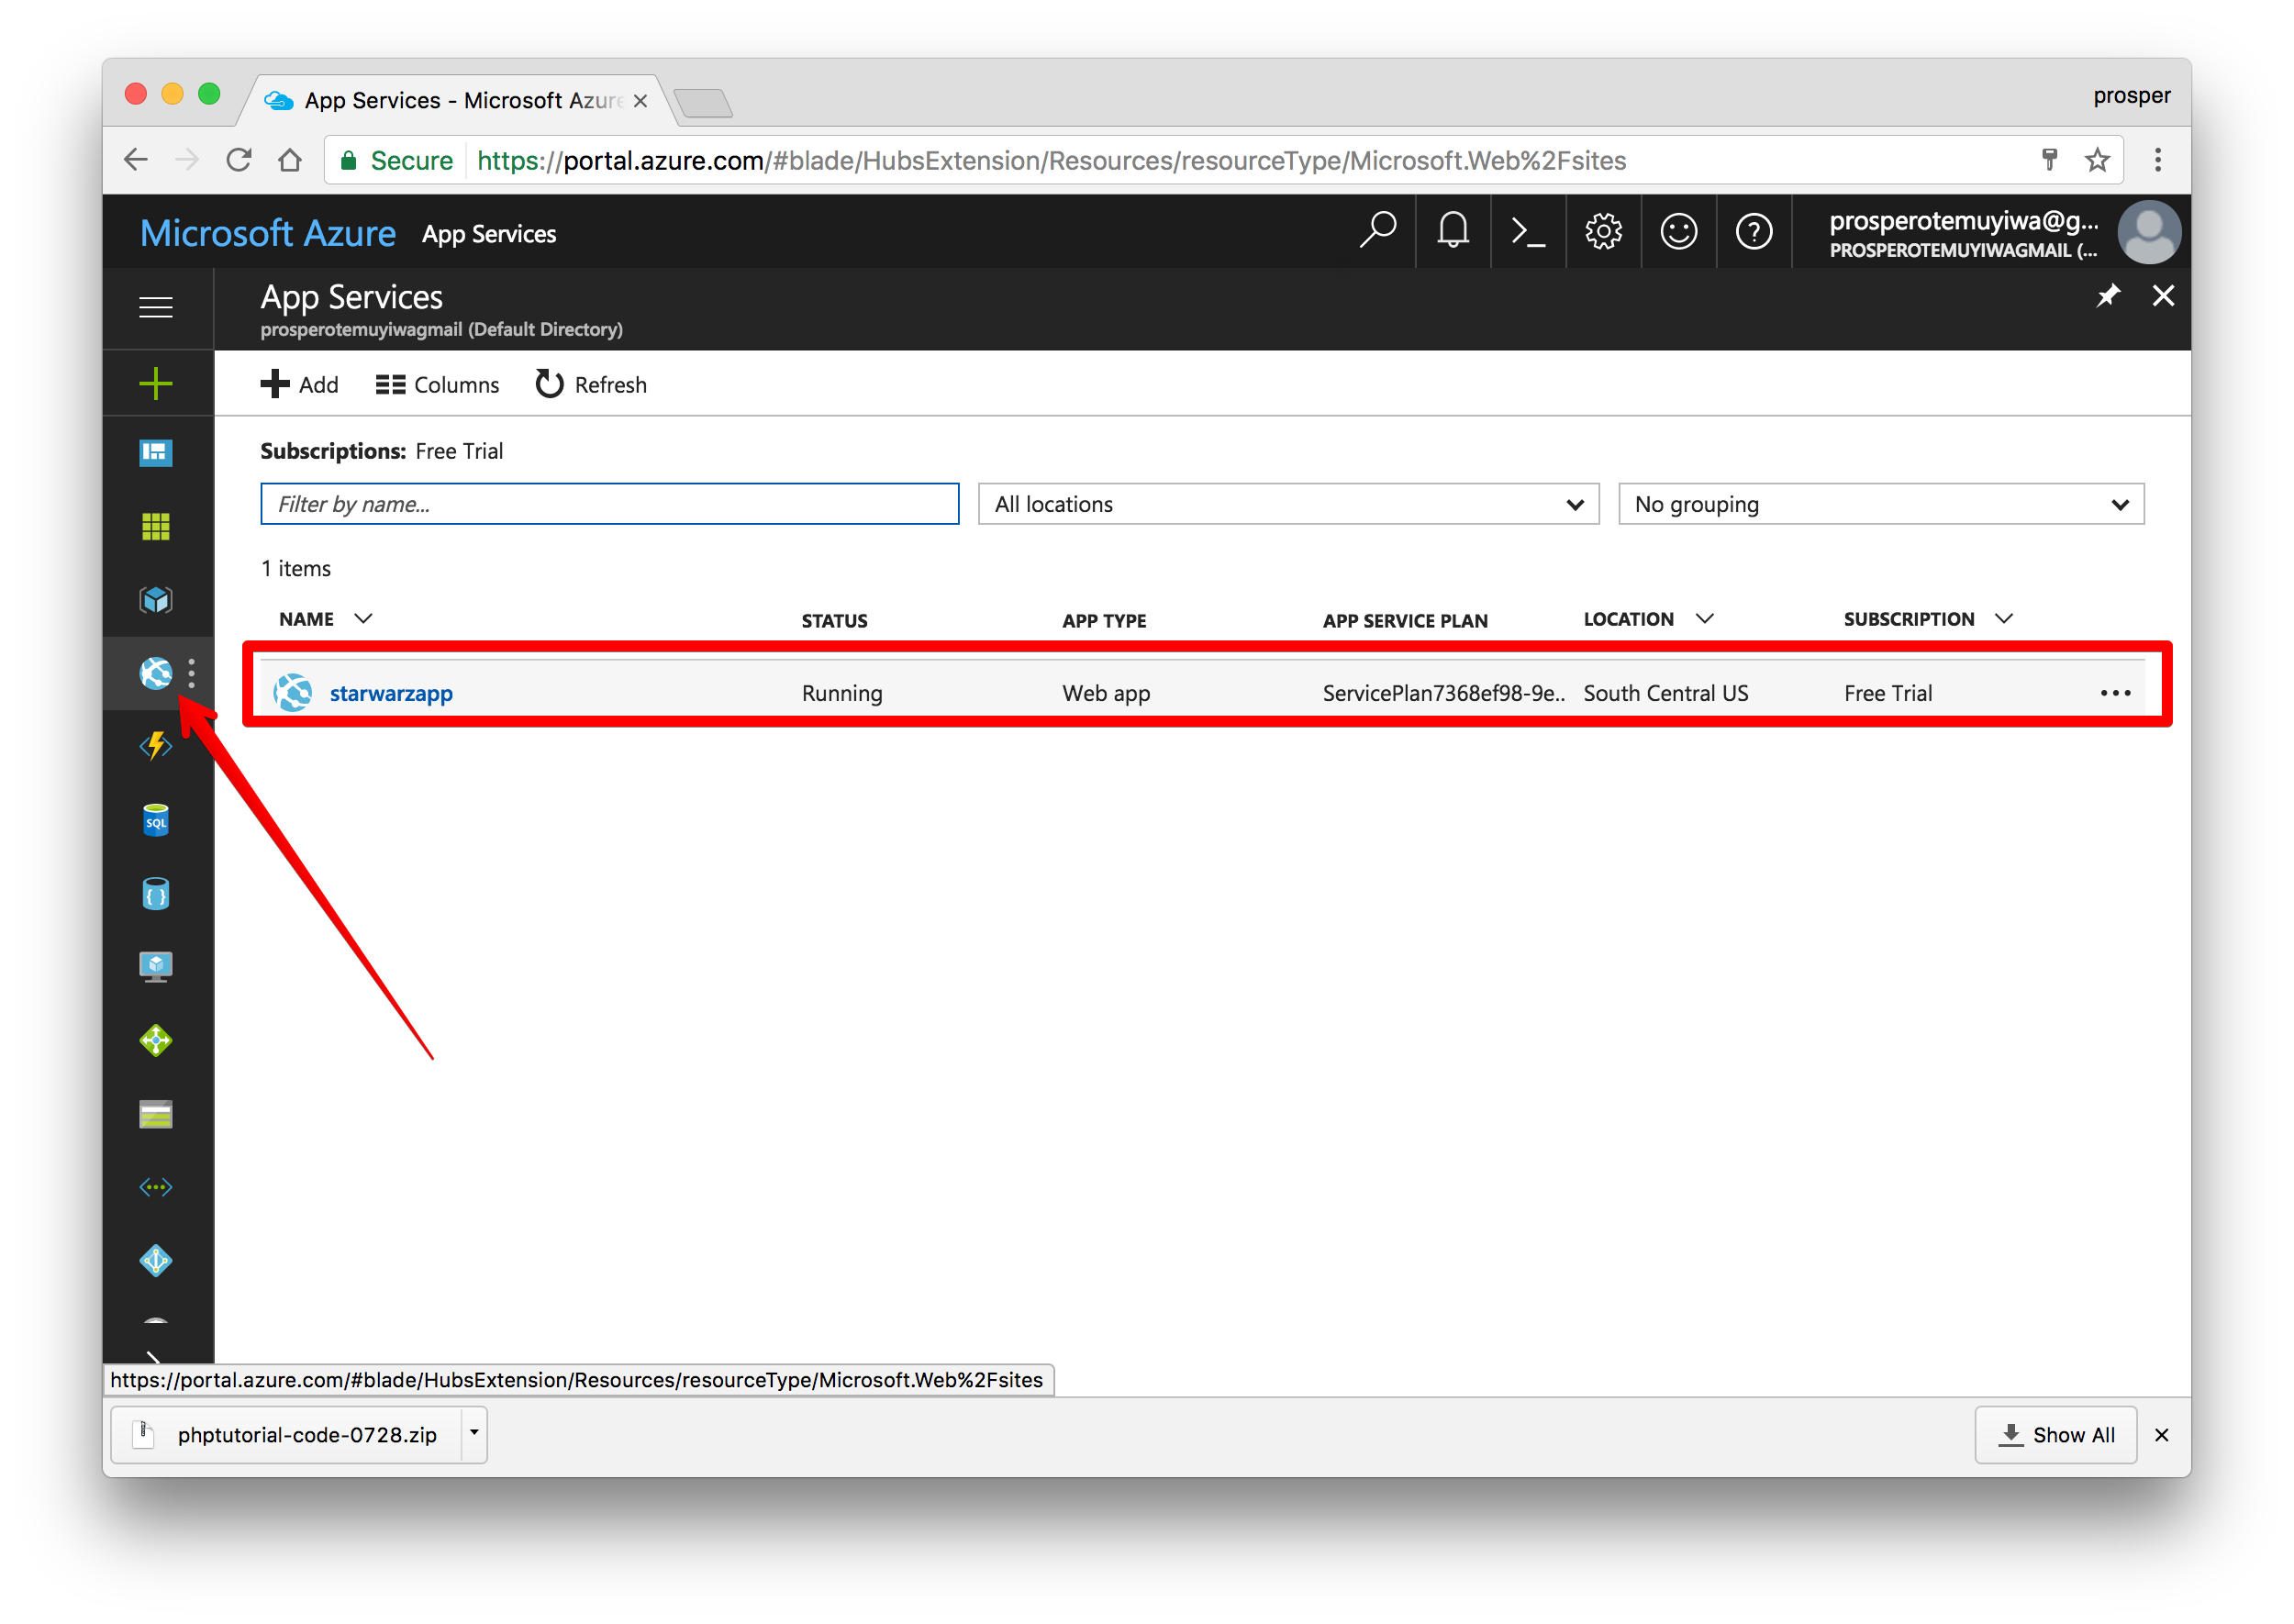 New app
Click on the app, choose Deployment options, then click on
GitHub.Authorize access to your repo, choose the project and branch. In my case, I have an
azurebranch. That’s the branch I’ll use for deploying my code to the Azure platform.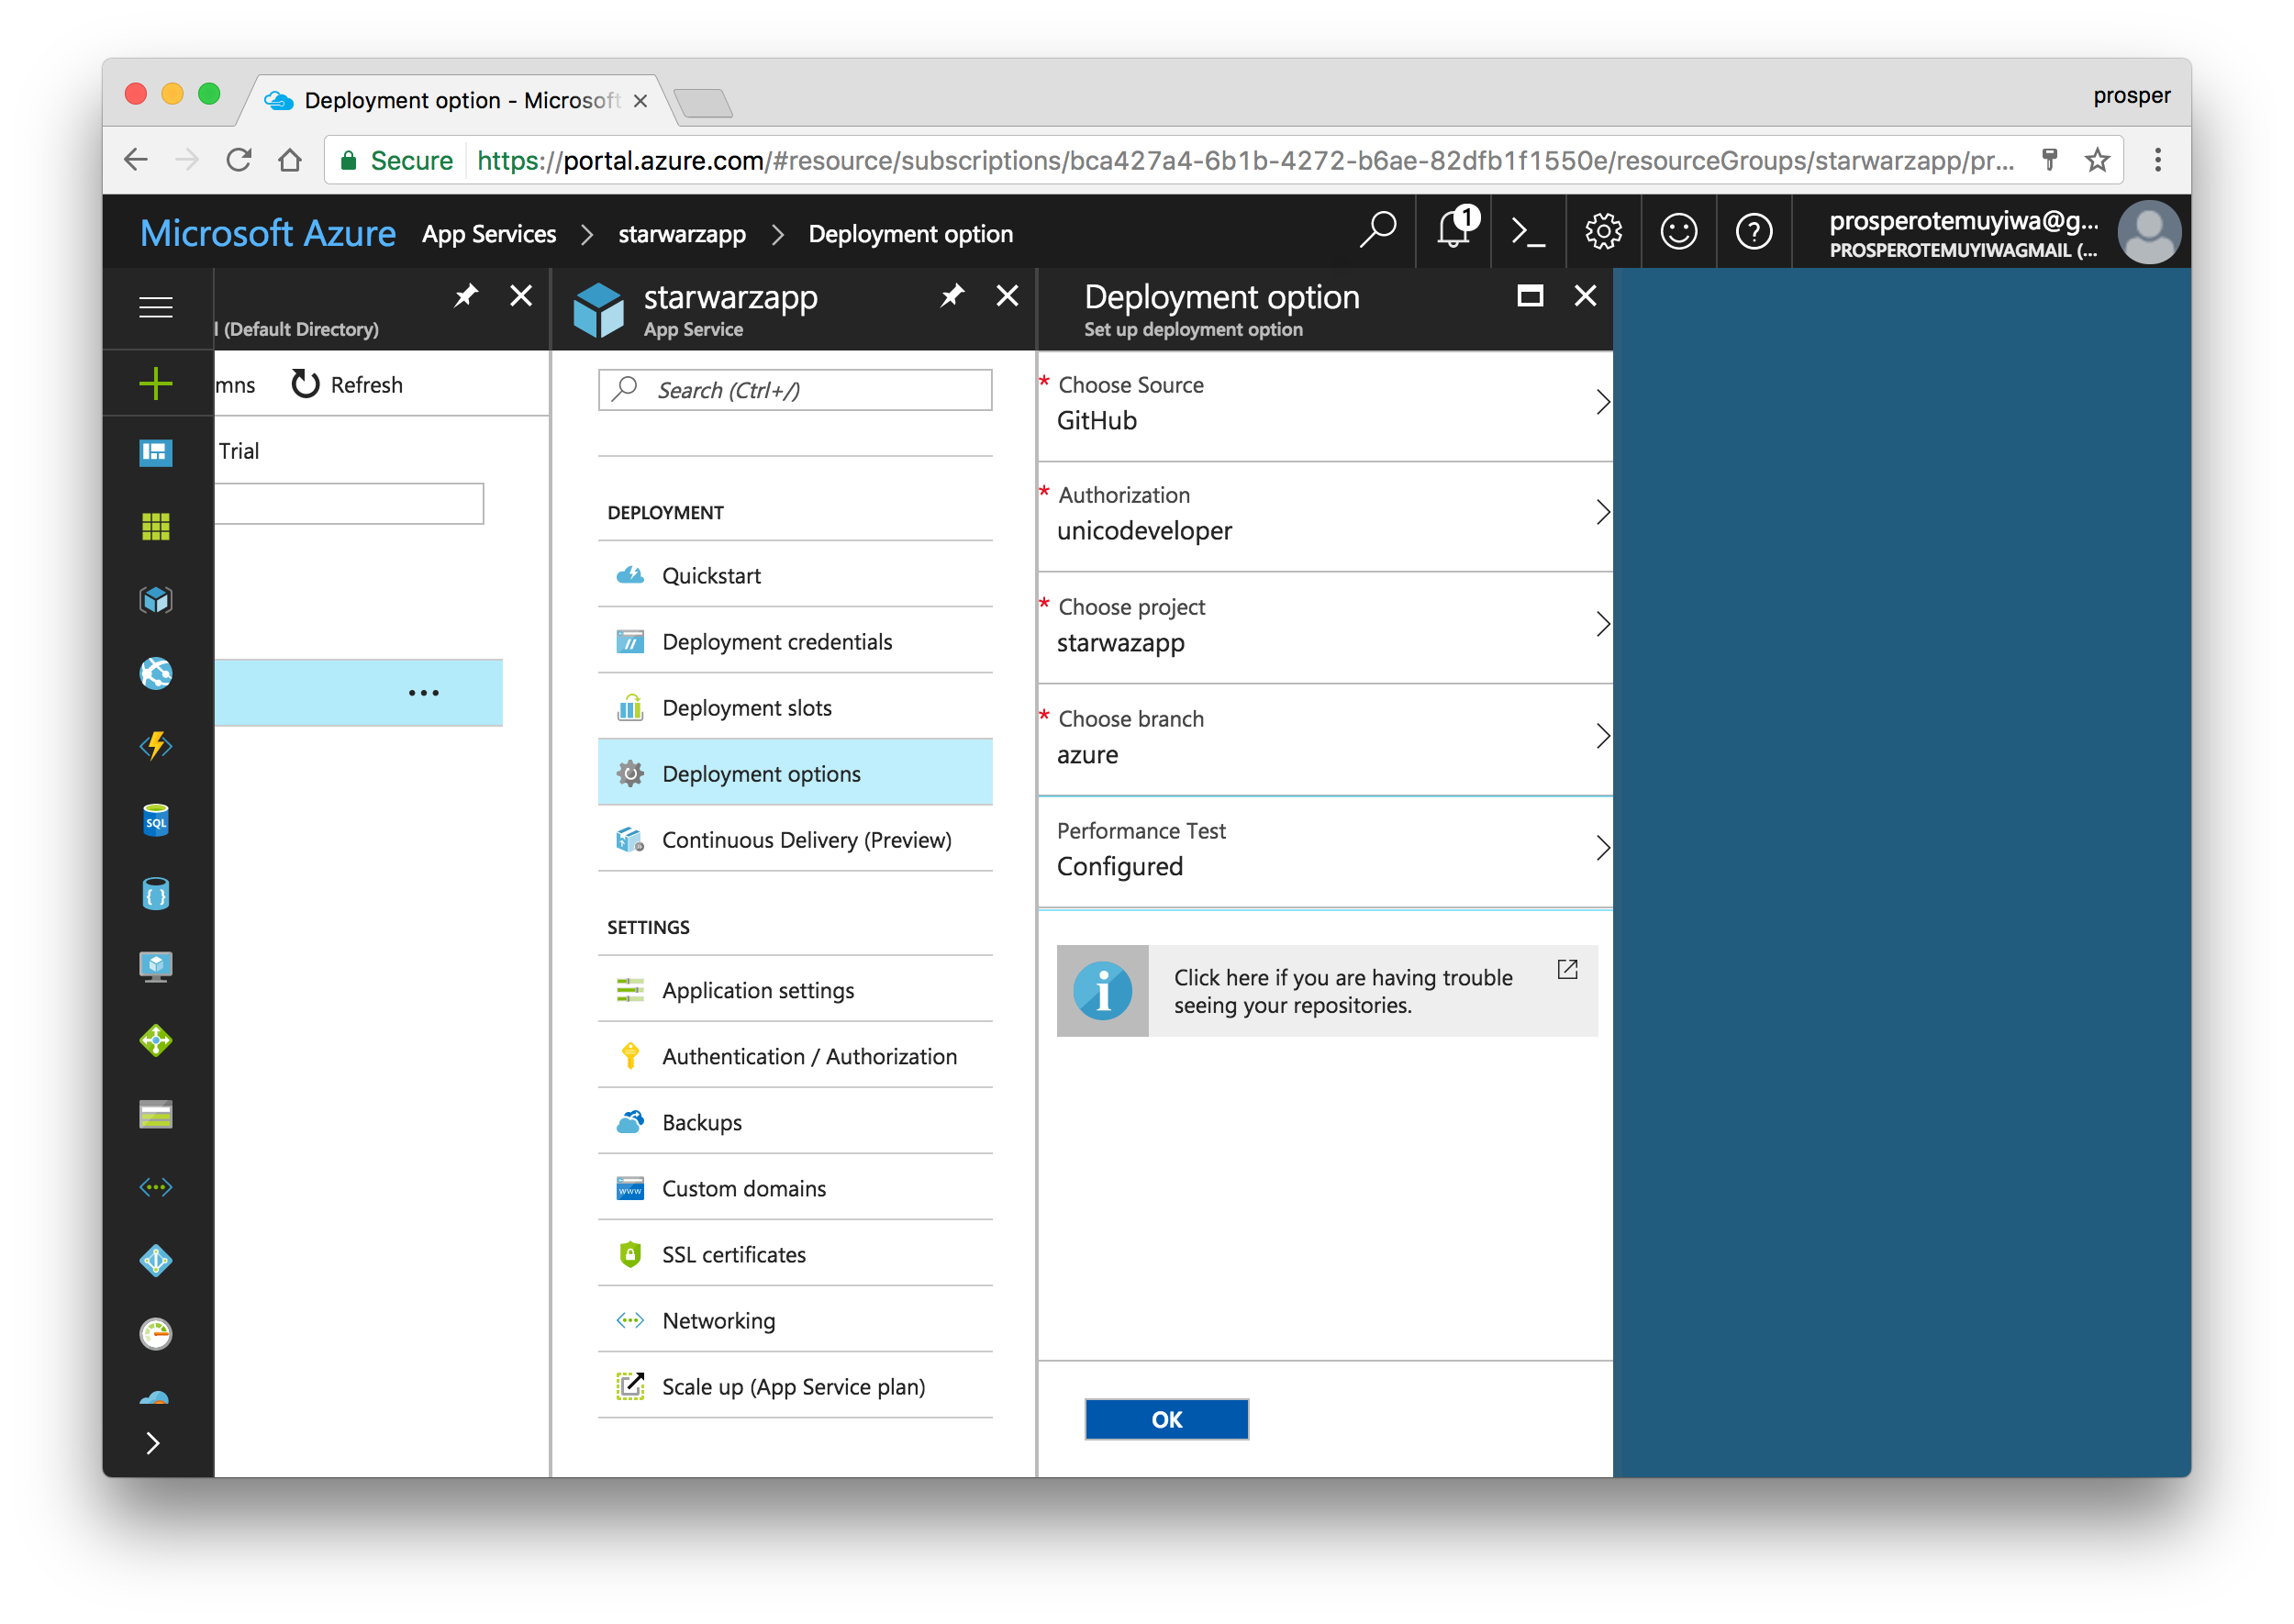
Check out the deployment notifications.
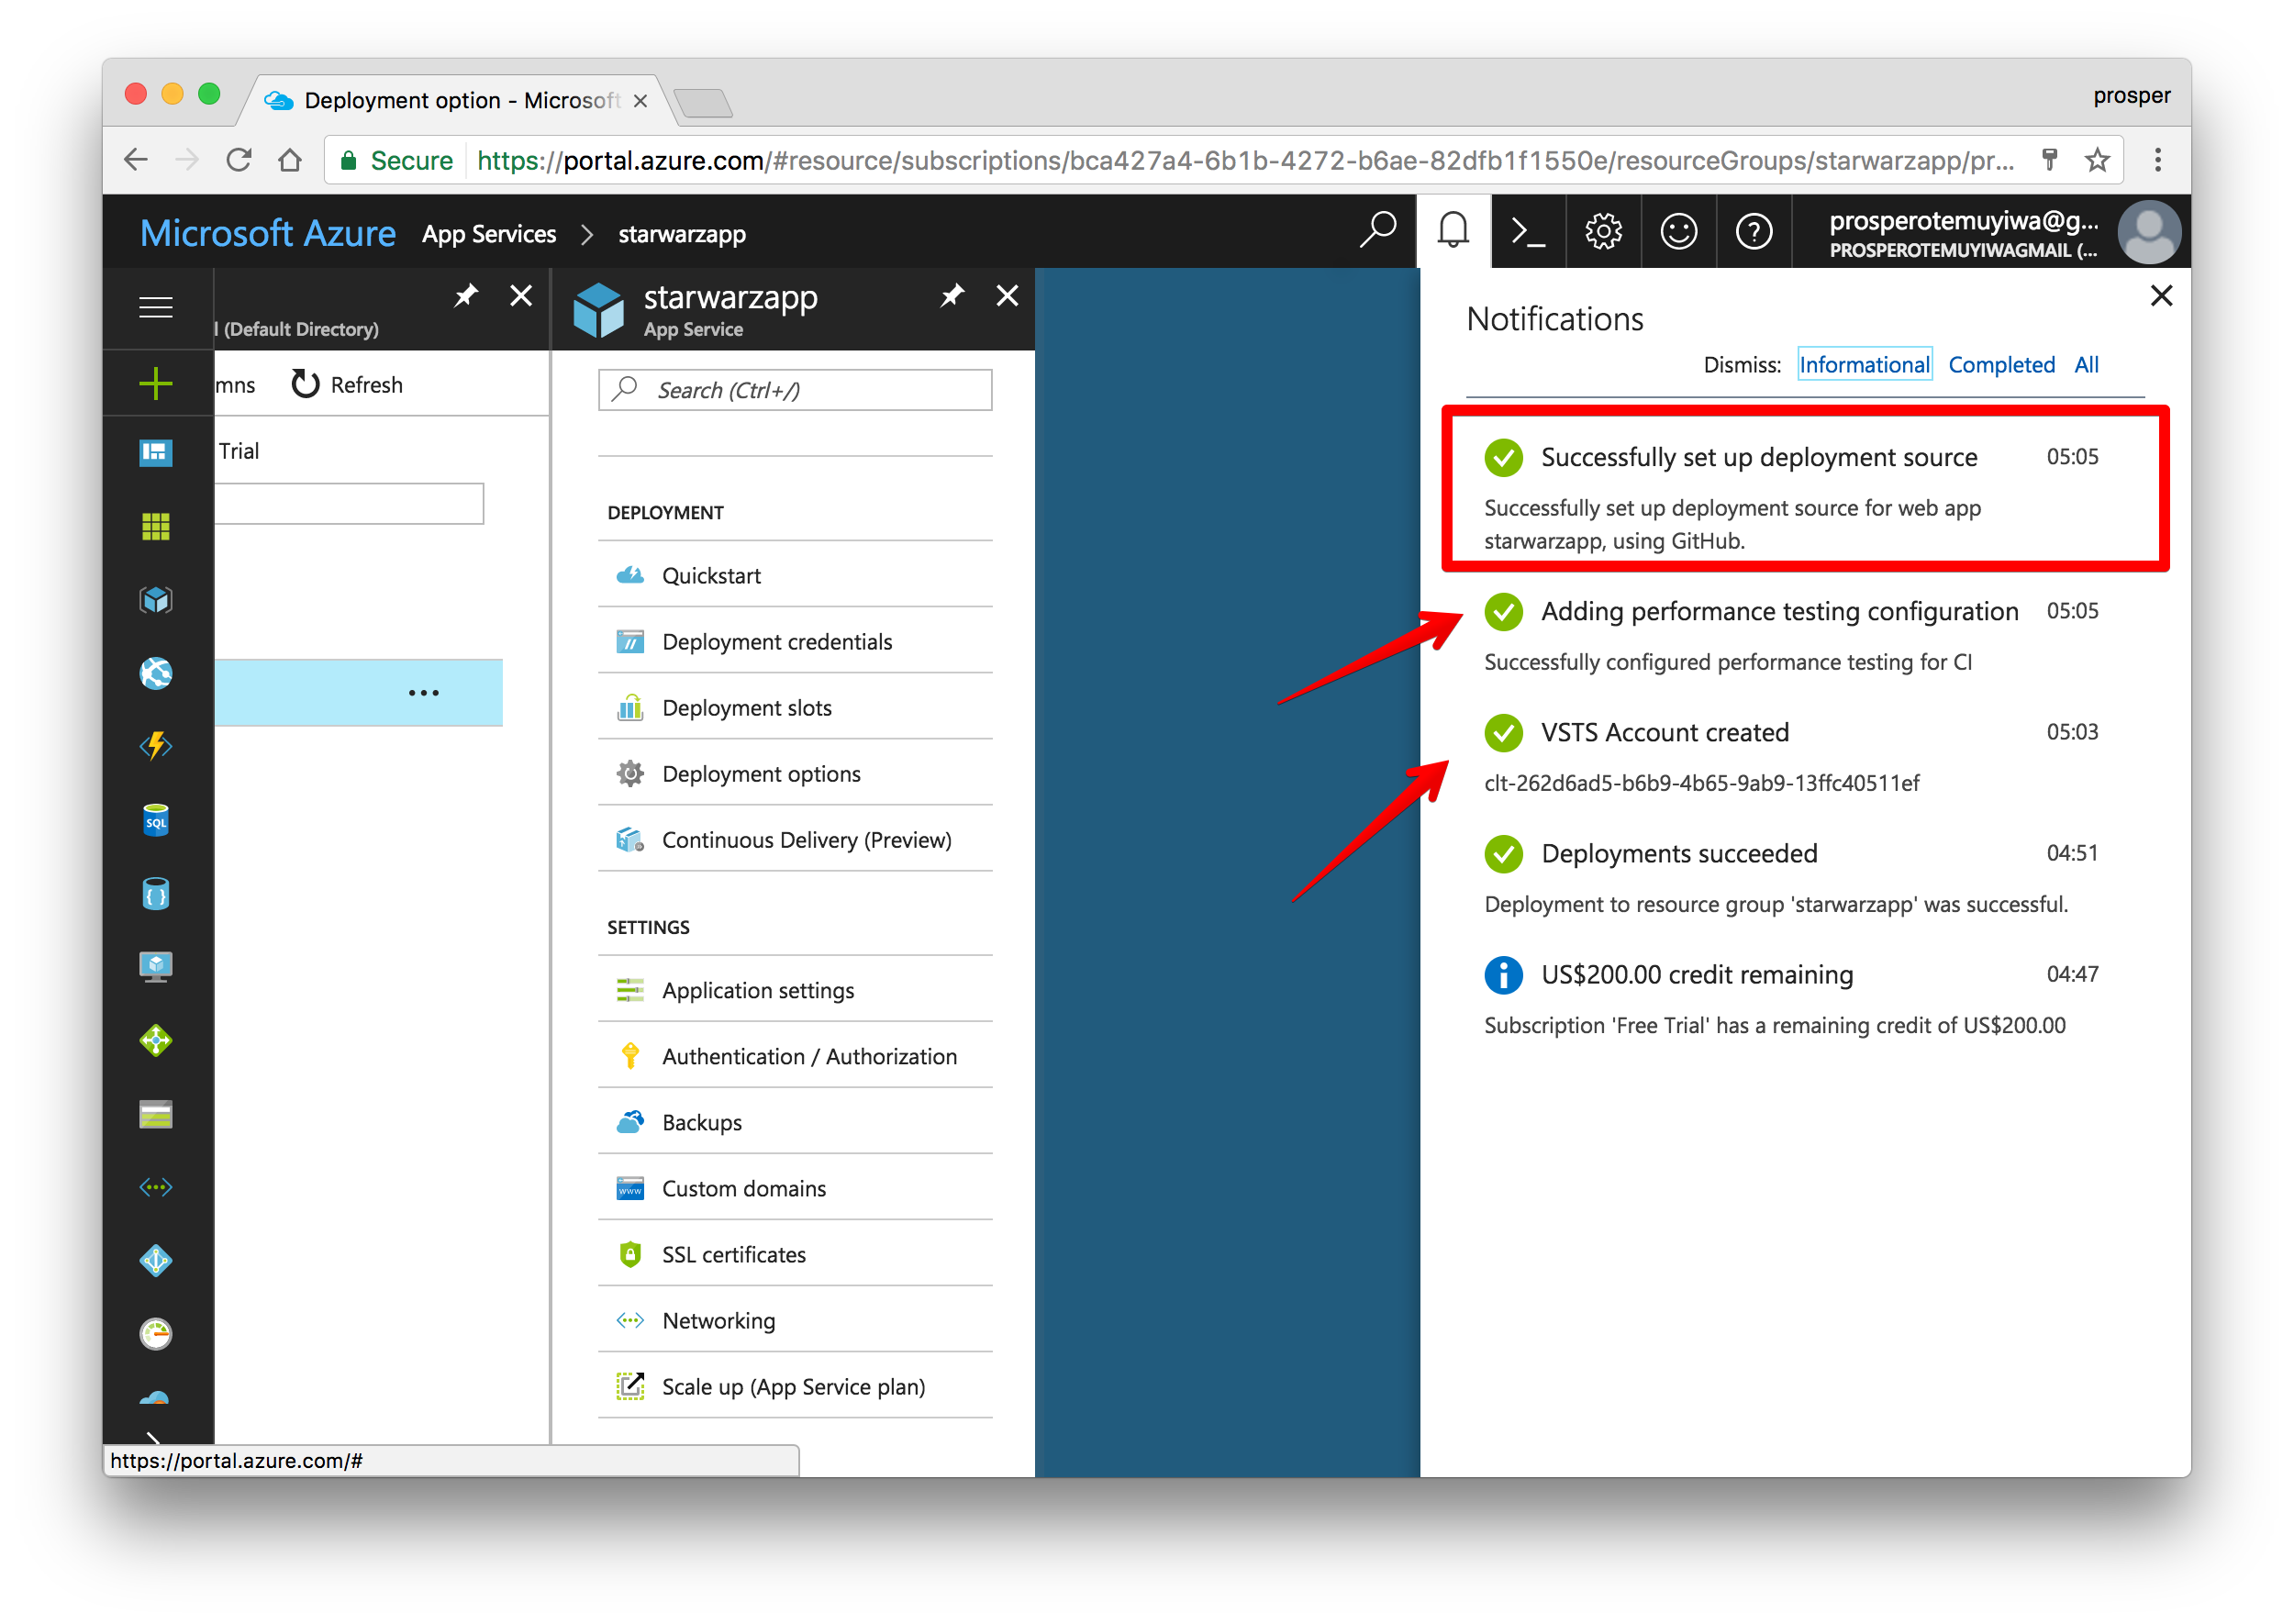
Now, browse to
http://[yoursitename].azurewebsites.net. In my case, it ishttp://starwarzapp.azurewebsites.net.Oops!, there is an HTTP 500 error. What’s happening? Okay, we need to set the environment variables again.
Go to your app in App Services, click on Application Settings, and then add the environment variables to the right.
Now grab the app URL, in my case it is http://starwarzapp.azurewebsites.net/ and add to Allowed Origins(CORS) and Allowed Callback URLs in your Auth0 dashboard.
By default, azure deployment doesn’t do anything with our
composer.jsonorcomposer.lockfile. So, no package is getting installed. Now go back to App Services, click on your app, then go to Development Tools and select Extension. Choose theComposerextension and agree to the legal conditions.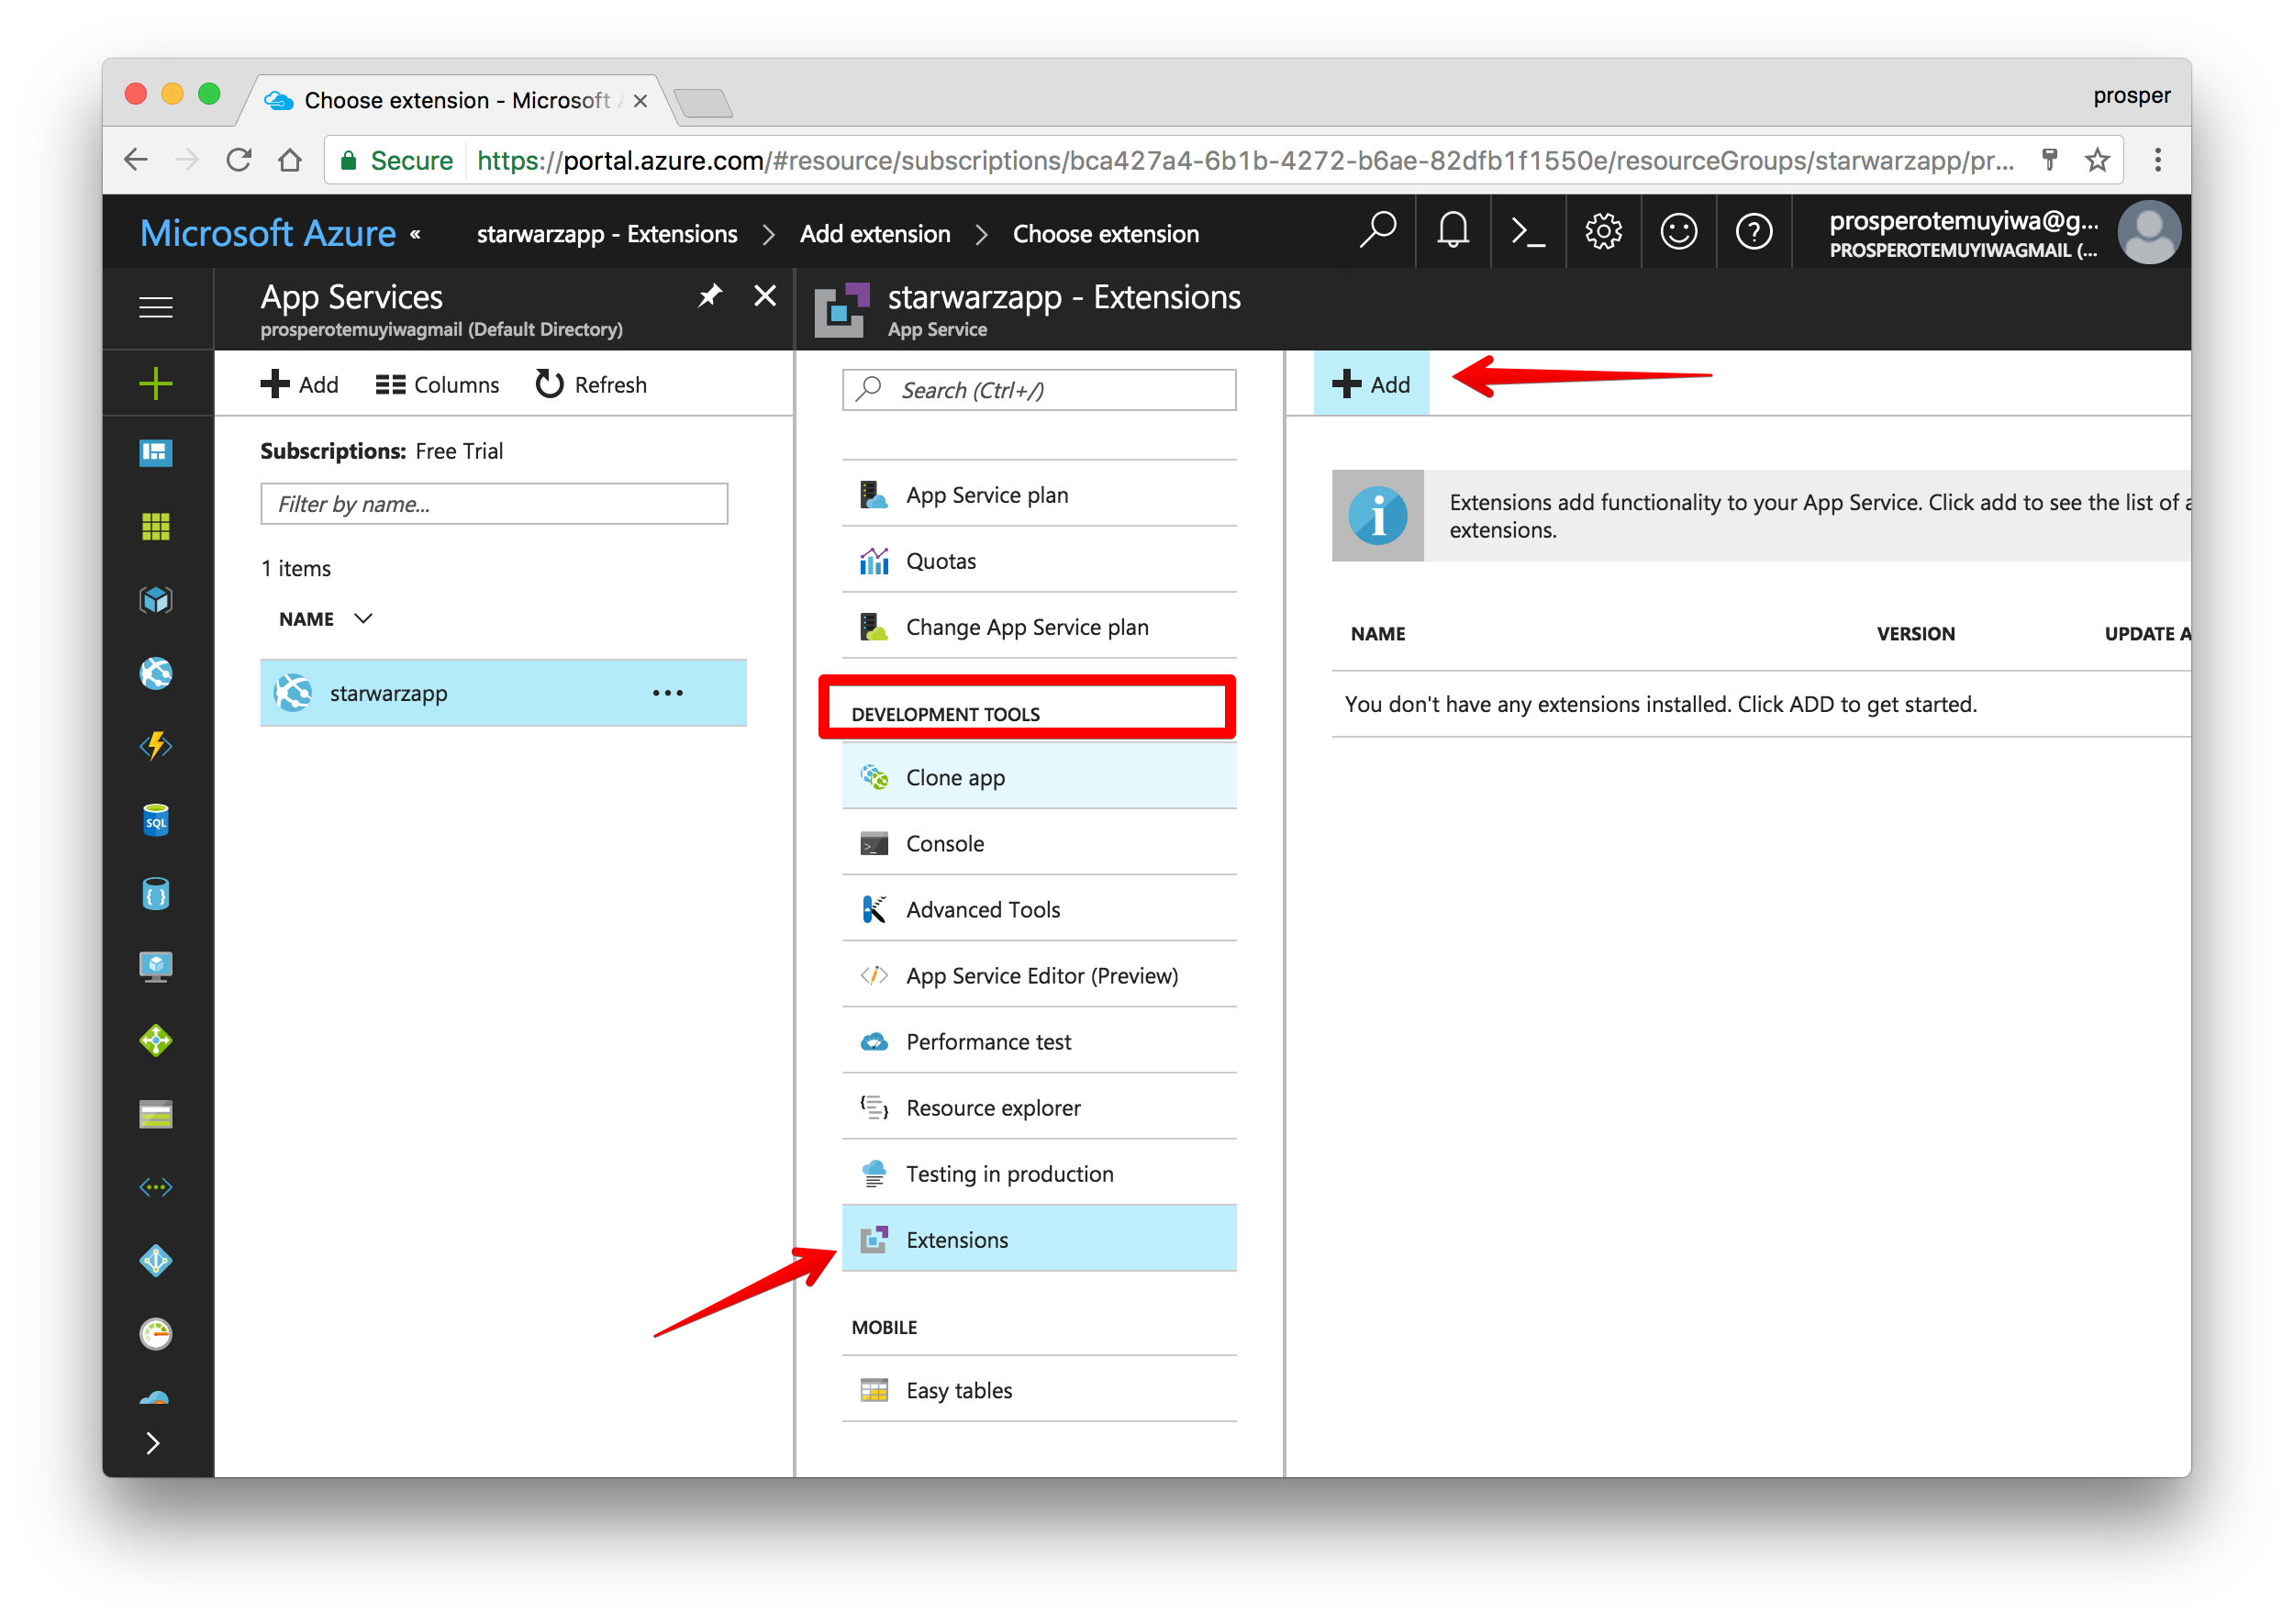
Now, make a little change to your app and push again to GitHub. You should see it deploying like so:
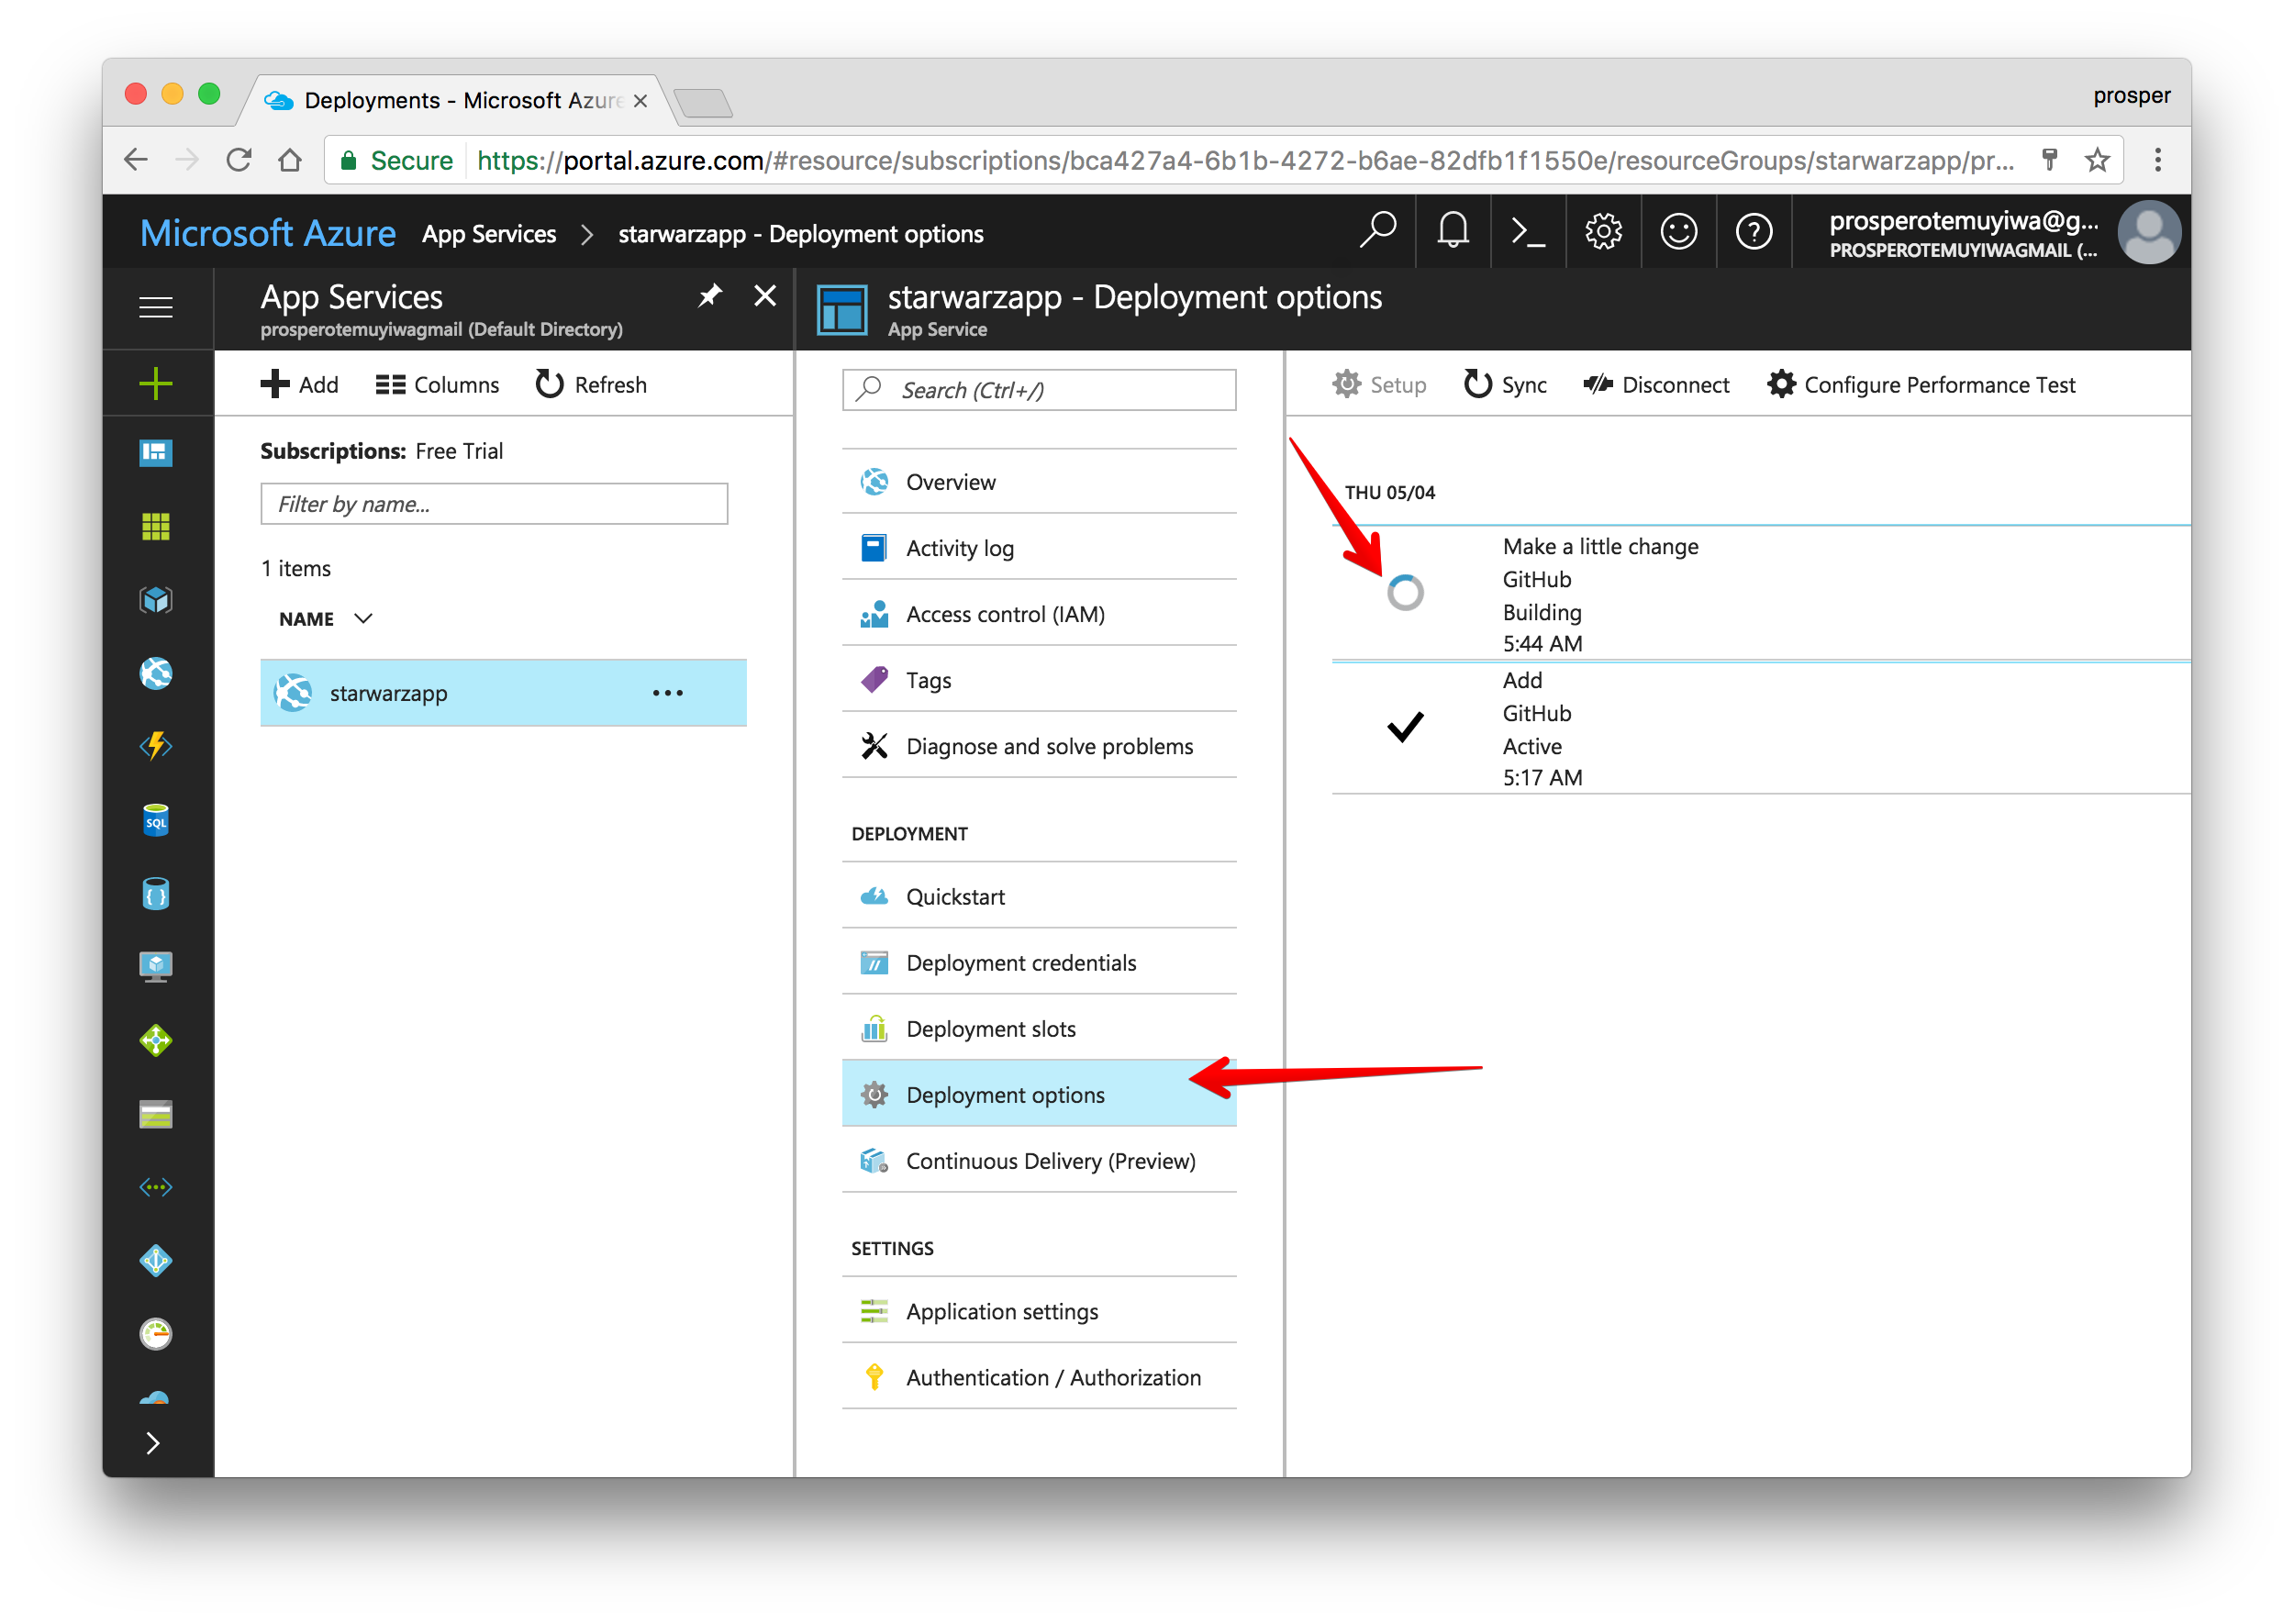
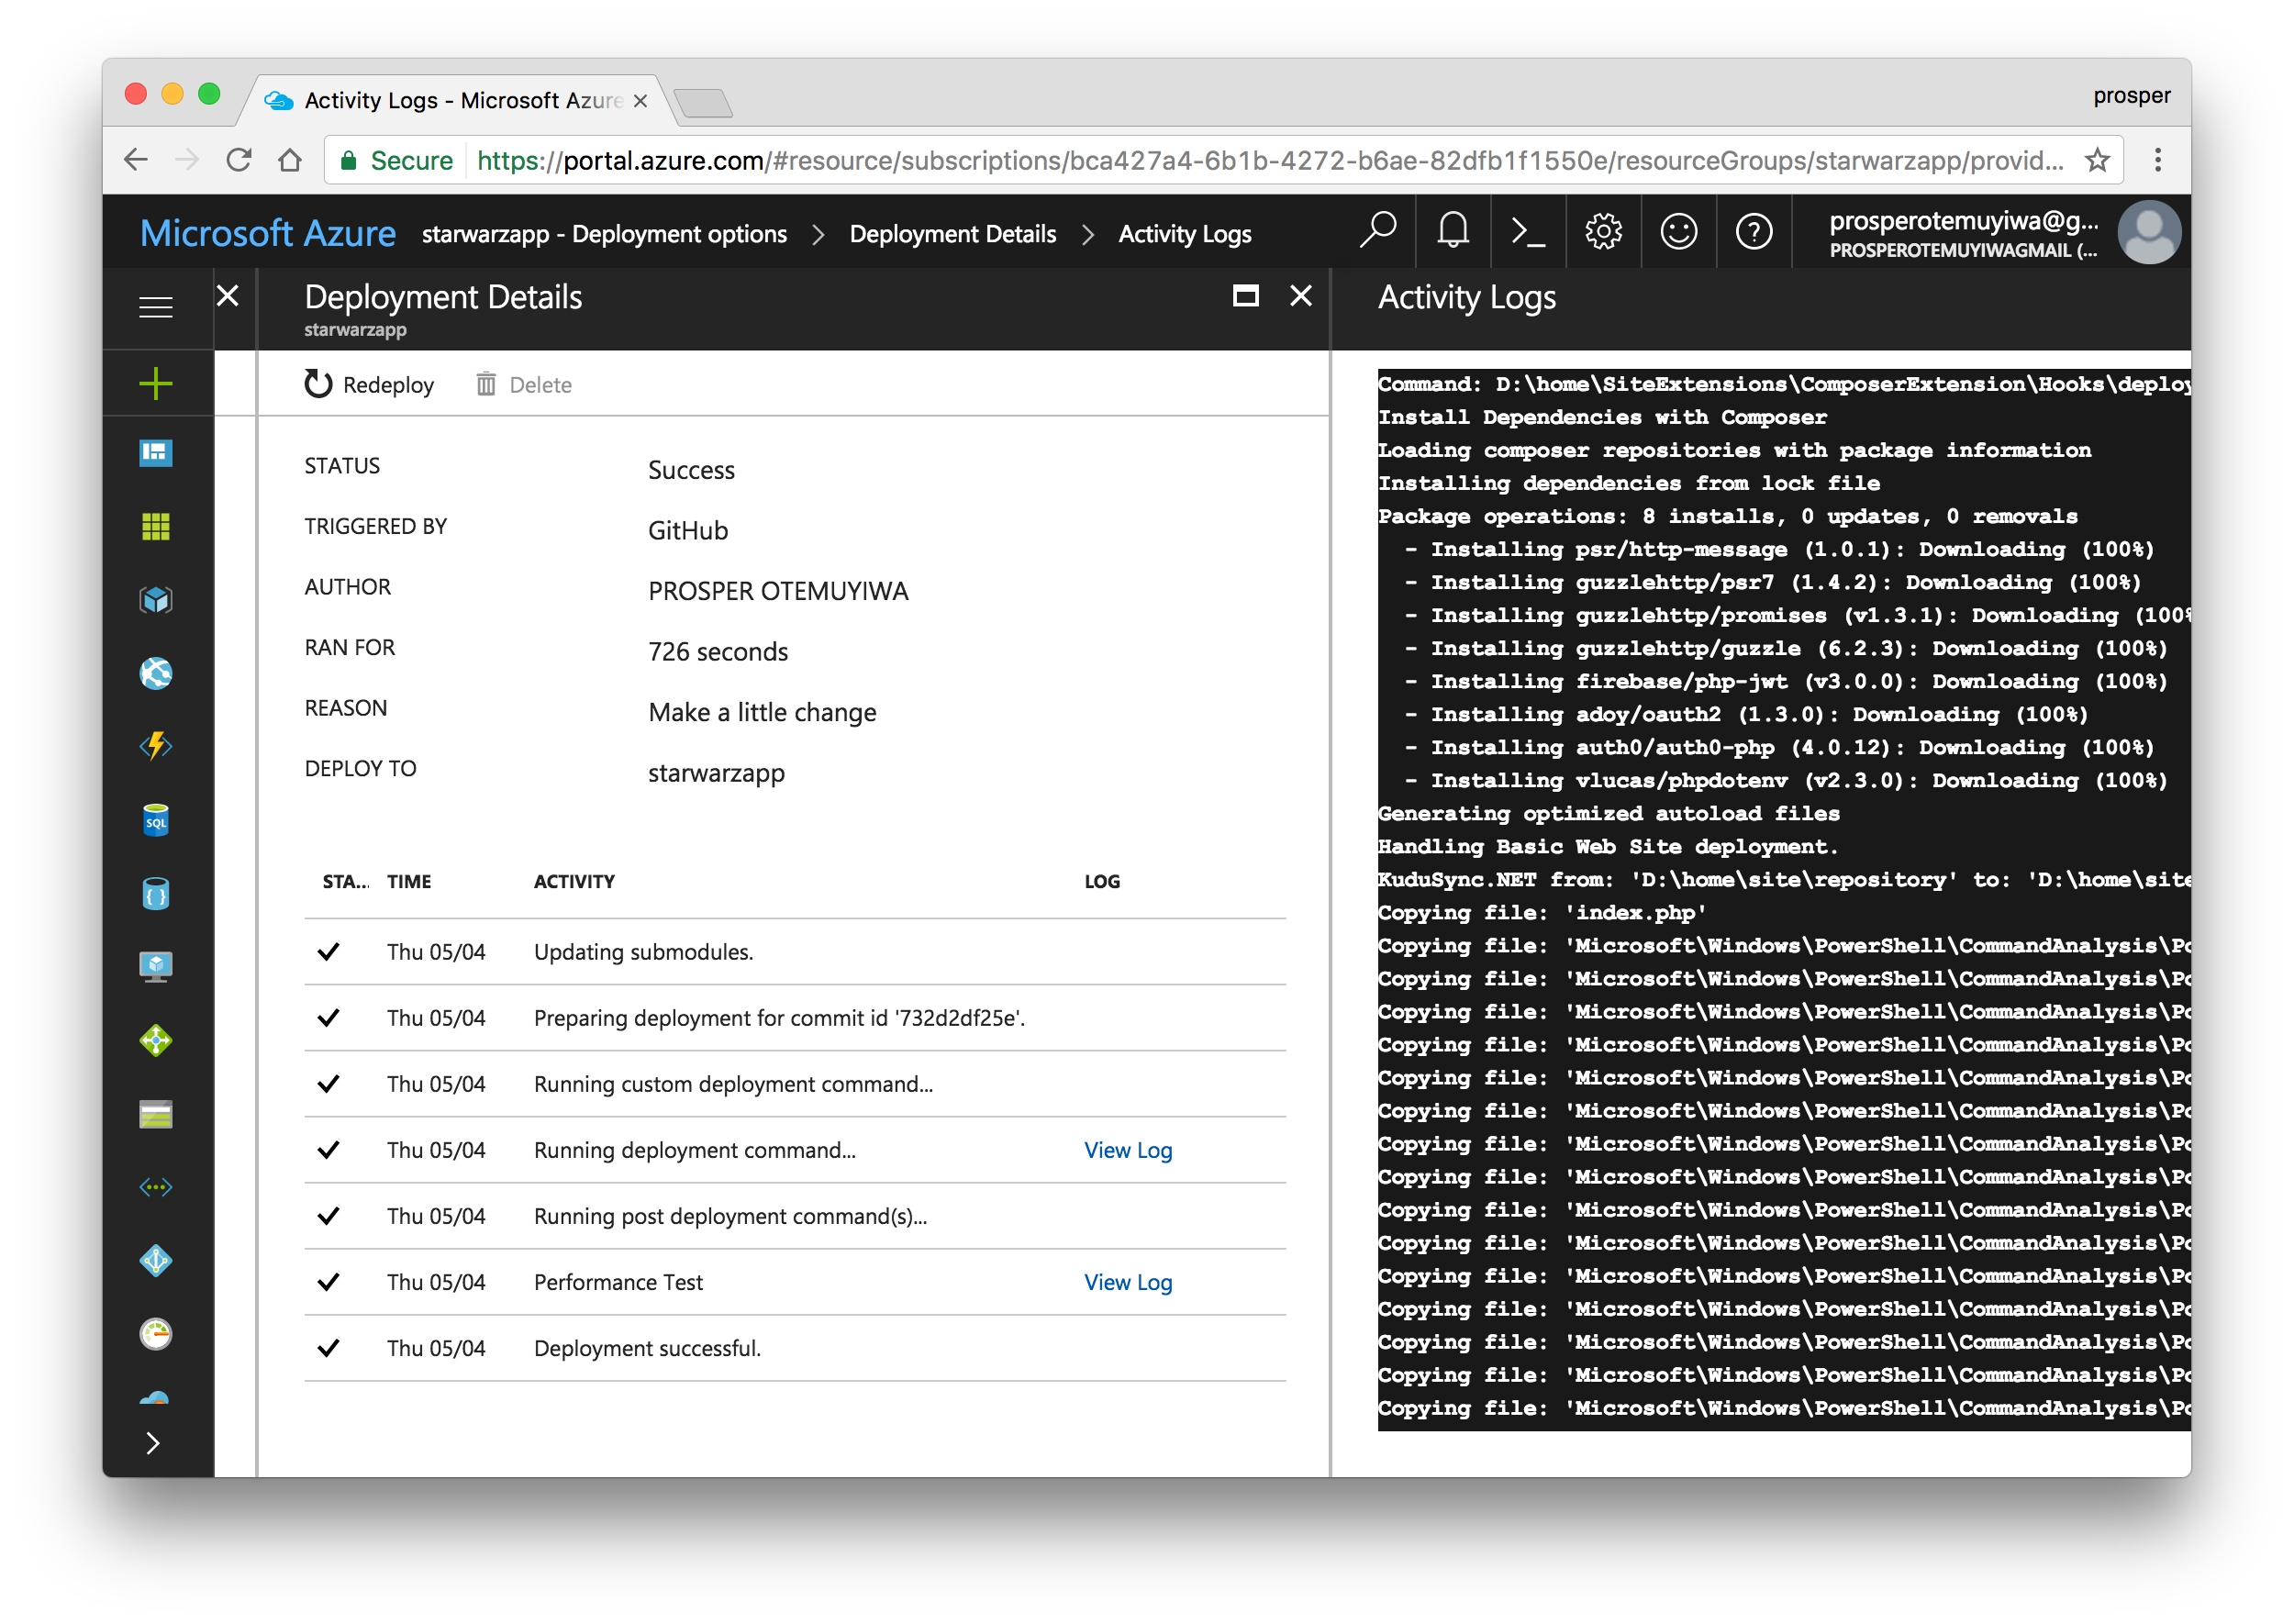
Now check out your app again. It should be live and working!

Database, Caching & Cron Jobs
Microsoft Azure offers Azure Redis Cache. It is based on the popular open source Redis cache. It’s easy to create and use like so:
- Click New > Data + Storage > Redis Cache.
- Enter the name of the cache, select the region and create it.
Check out the documentation on how to use it.
For scheduling and running tasks, Azure offers a Scheduler. It allows you to:
- Call services inside or outside of Azure.
- Run jobs on any schedule.
- Use Azure Storage queues for long-running or offline jobs.
- Invoke Azure Service Bus queues.
Check out how to create and manage jobs using the Scheduler.
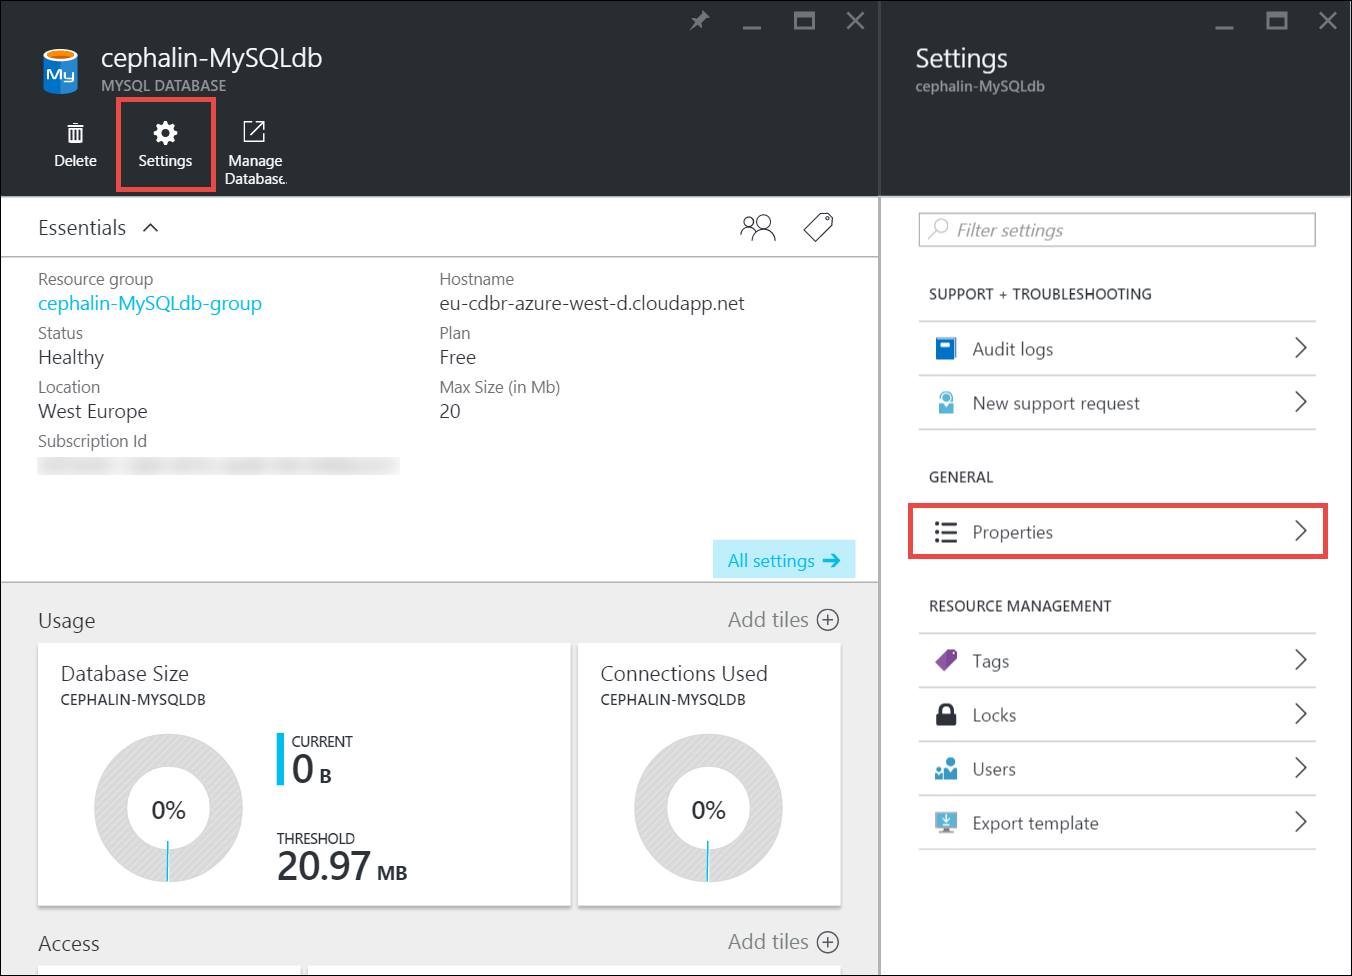
We already talked a little about setting up a database while we were deploying our app, but let’s quickly look at how to set up a MySQL database.
Log into the Azure Portal.
Click New in the left panel of the dashboard. Choose Data + Storage in the Marketplace, then select MySQL database.
Go ahead and configure your new MySQL database. Enter a name, choose your subscription, location and fill the required fields. Create!
Connect to the database.
Laravel developers can easily configure a MySQL database for their apps on Azure.
Amazon Web Services
More companies use AWS (Amazon Web Services) for storing all sorts of data ranging from images and mp3 files to videos than any other cloud platform. In fact, a lot of organizations like Uber, Spotify, or Salesforce use Amazon Web Services completely – for hosting, deployment, and infrastructure. AWS has a ton of developer products.
The service we’ll use for deploying our famous StarWars app is Amazon Elastic Beanstalk. Let’s get started.
- Sign up for an AWS account if you don’t have one.
- Head over to Elastic Beanstalk console.
- Create a new app.
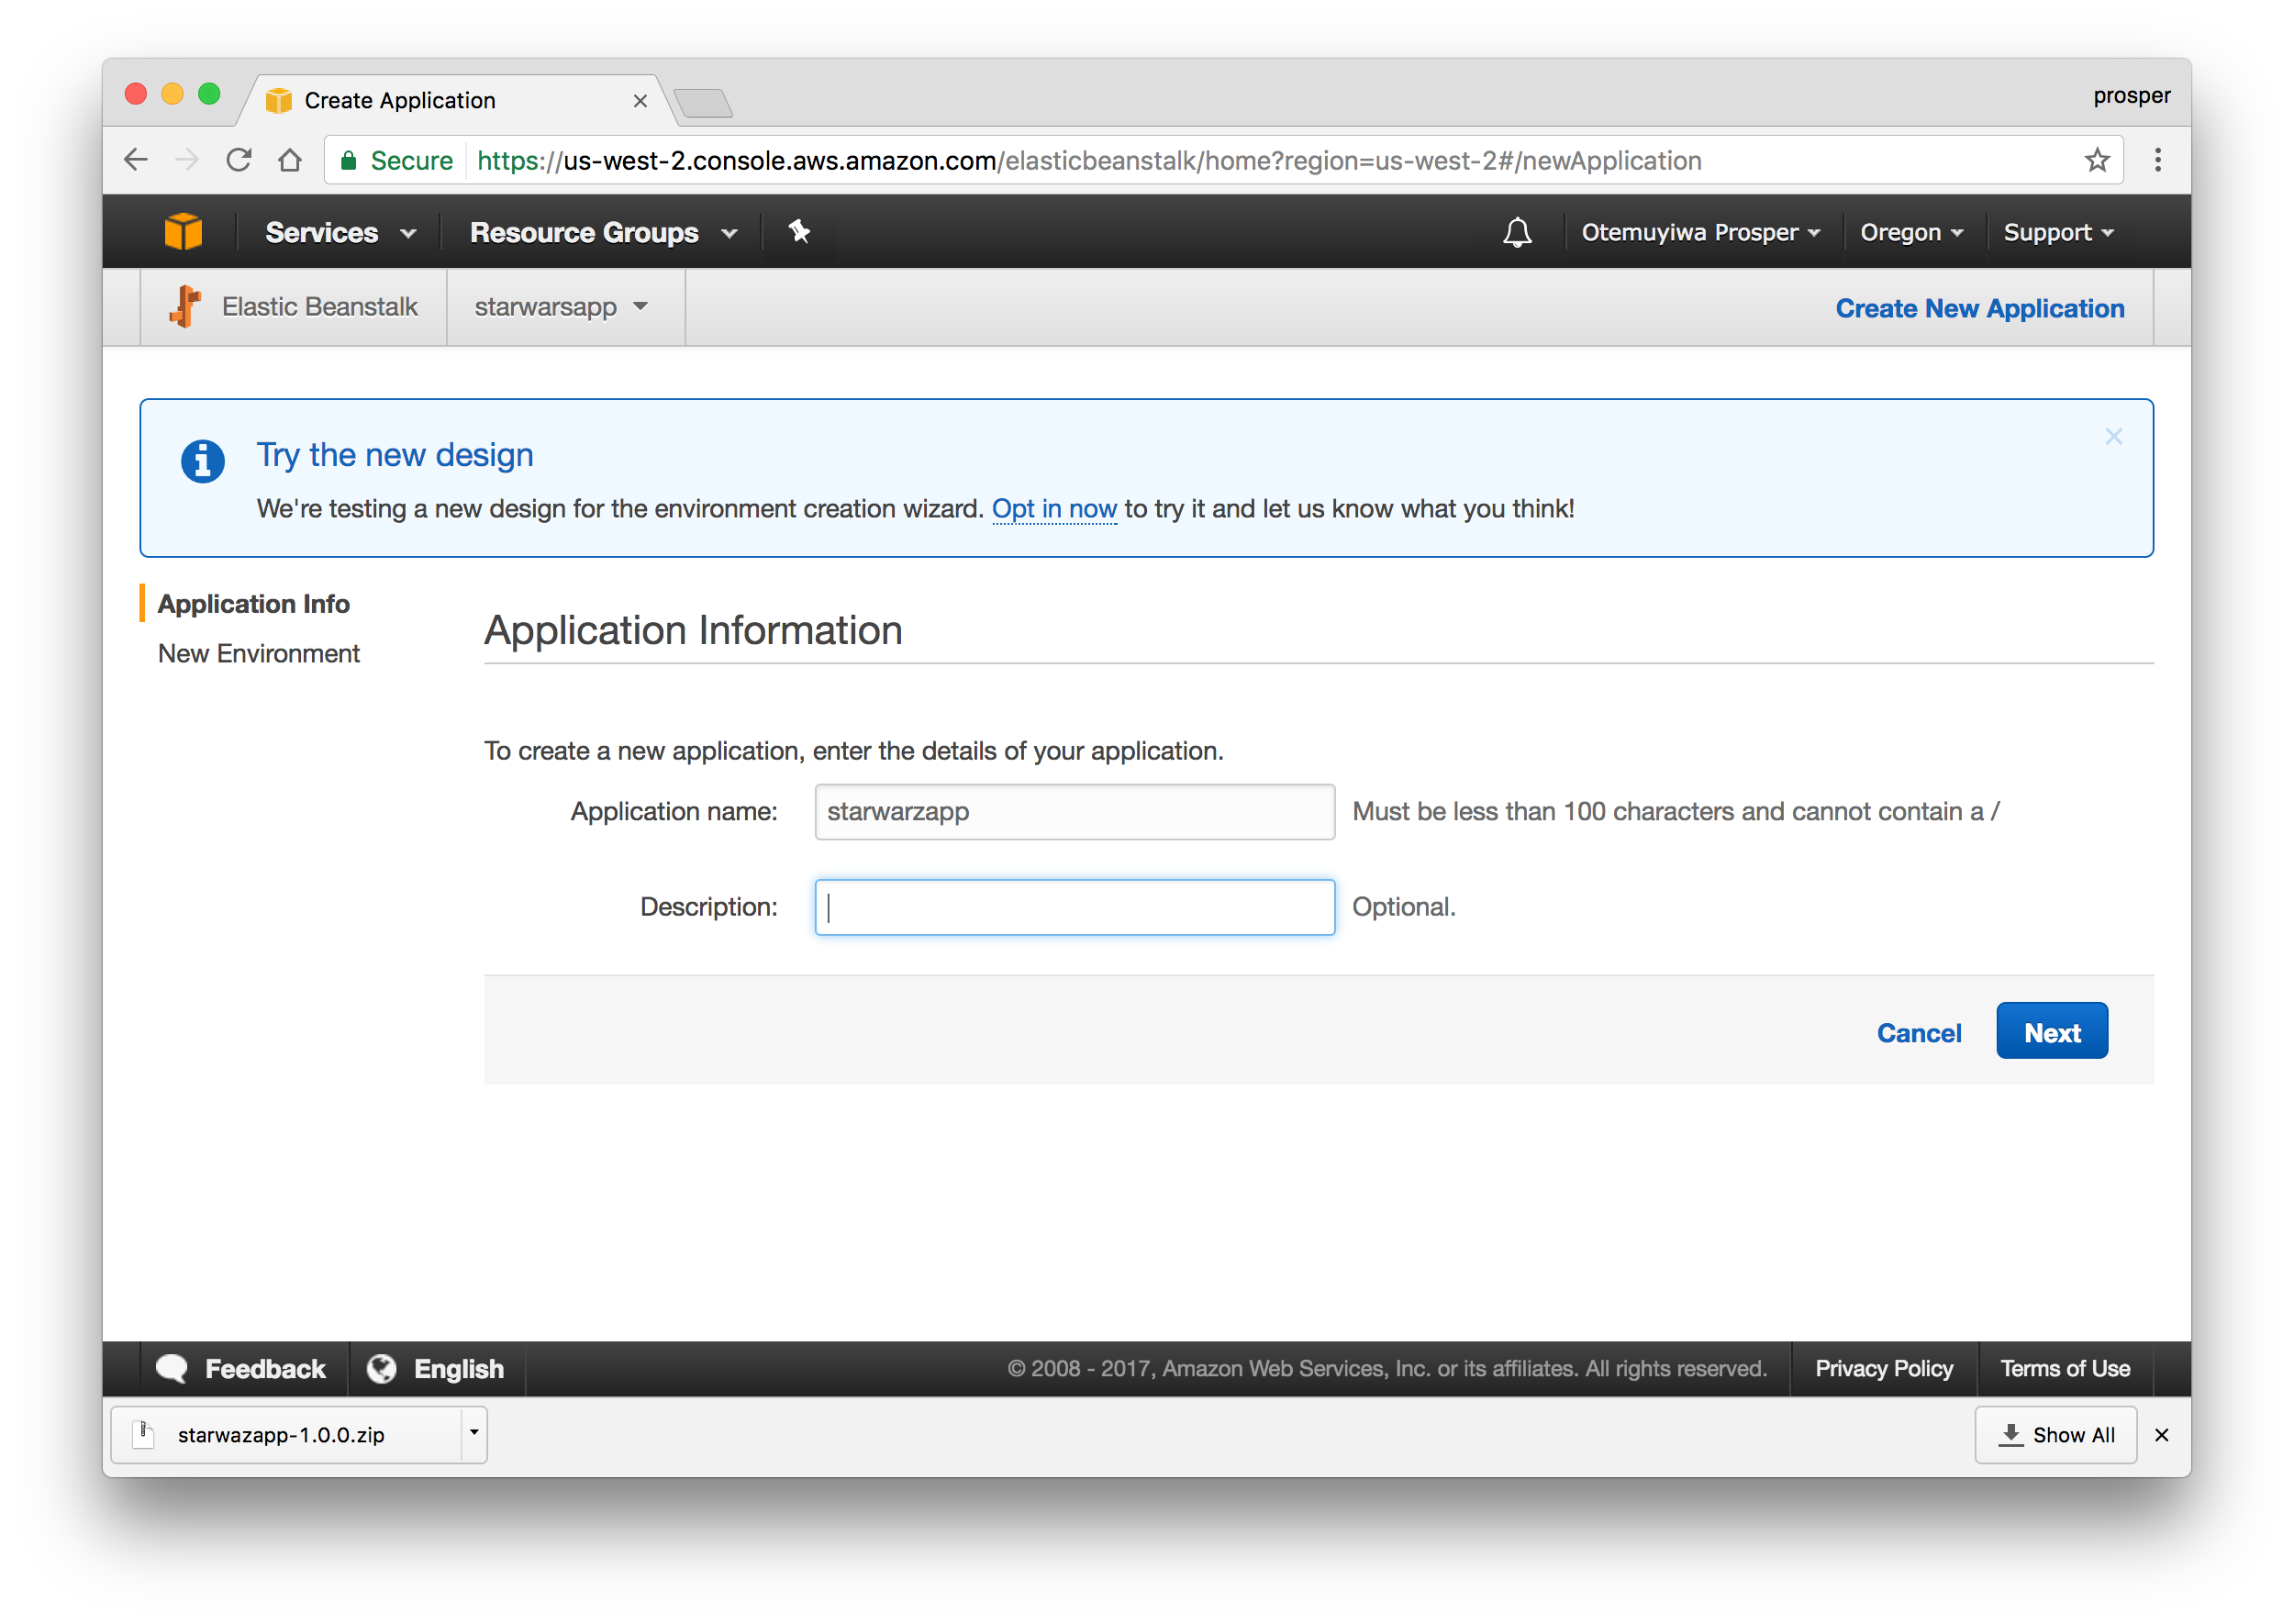
- Click on
create web server.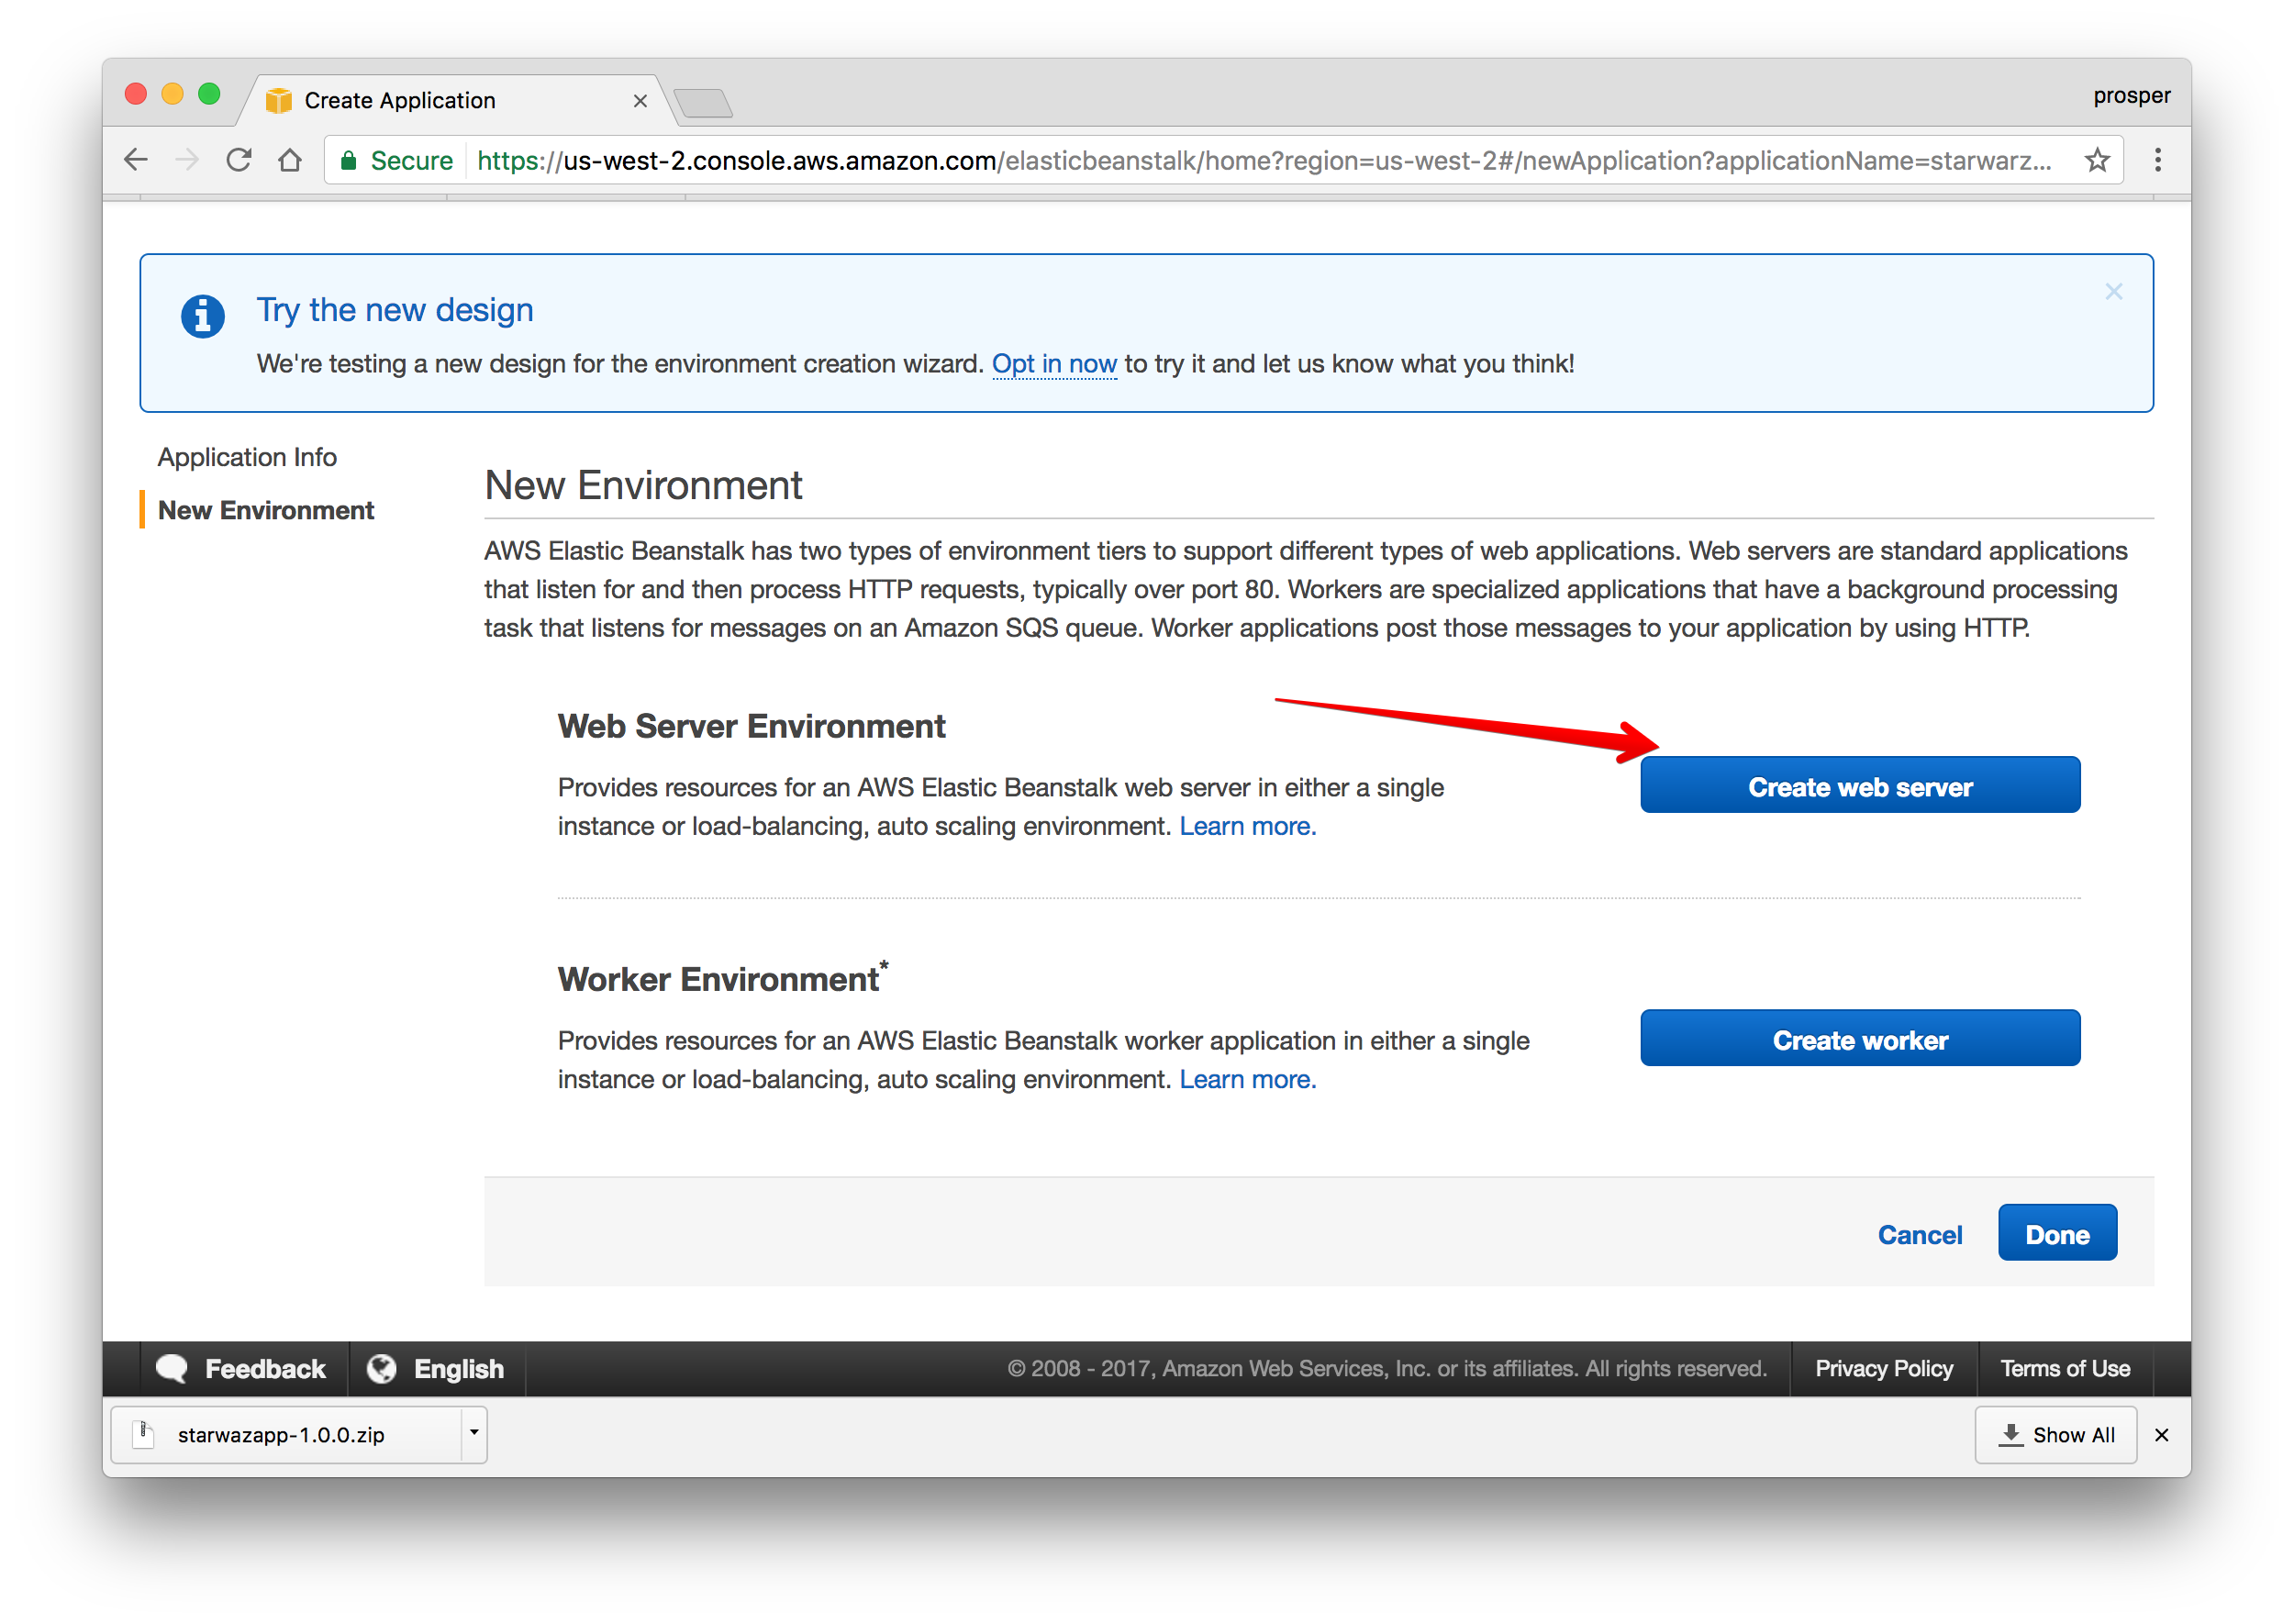
- Create the webserver environment.
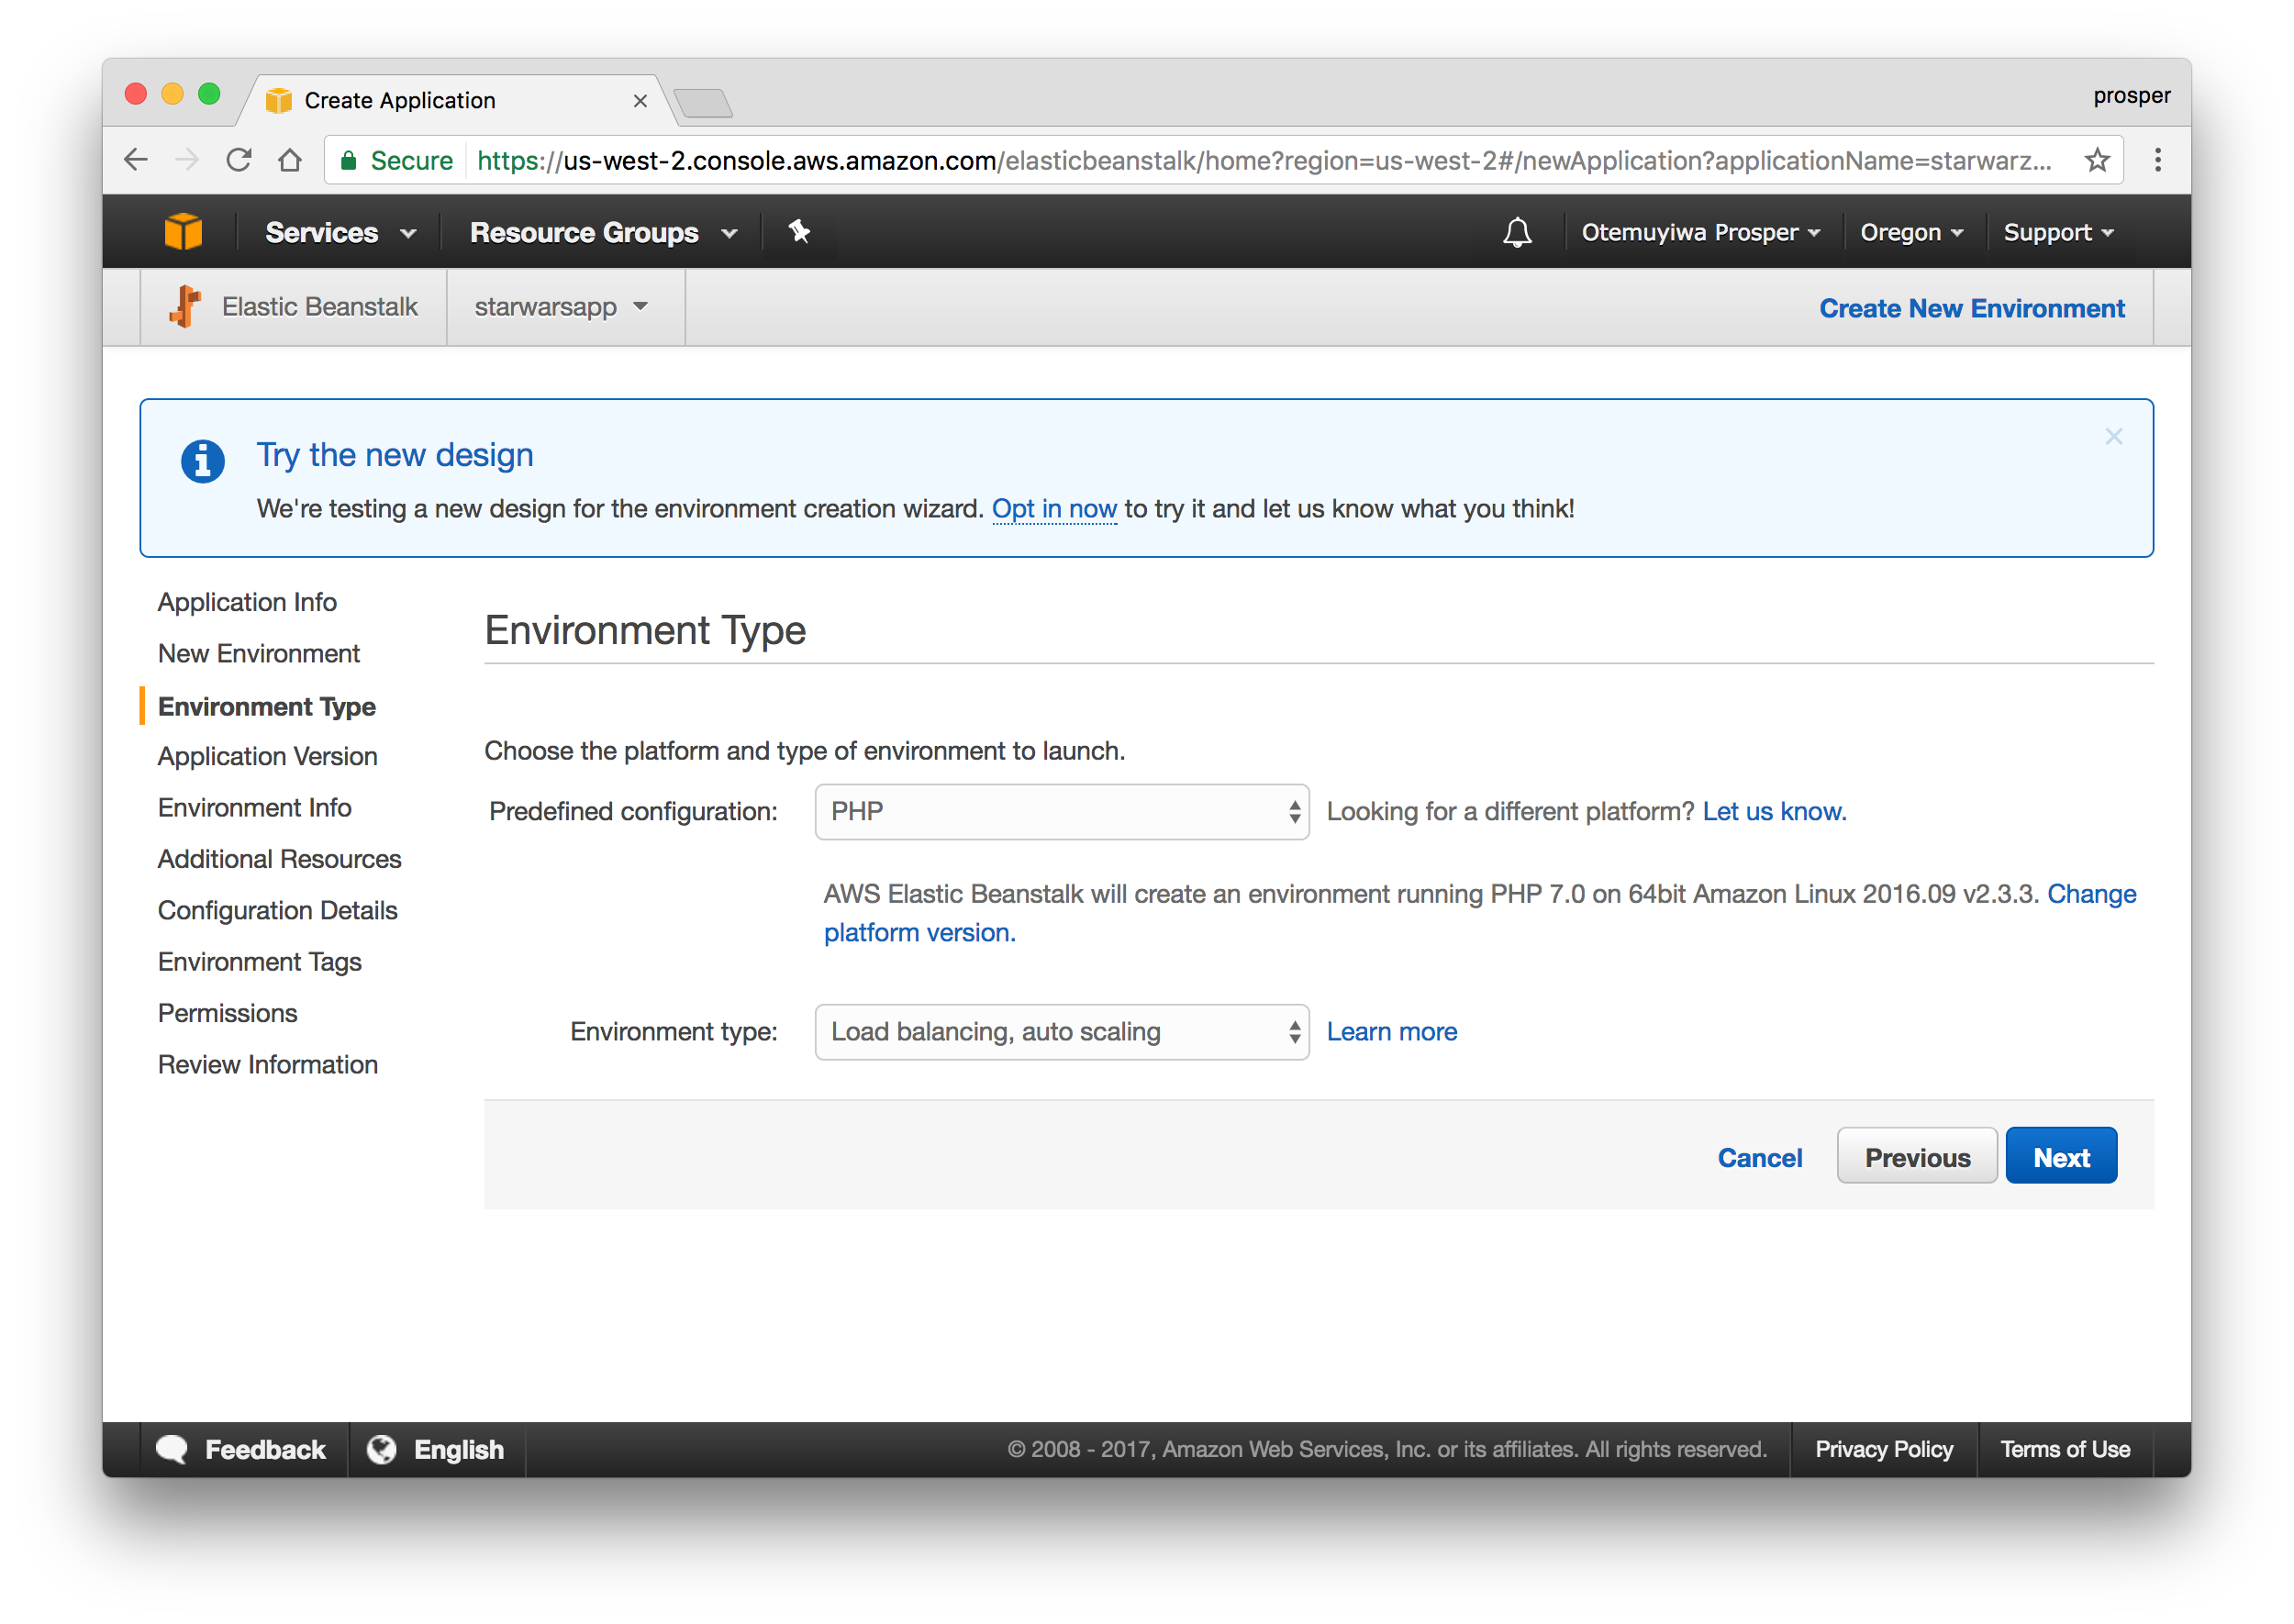
- Upload your code. Elastic Beanstalk requires that you upload a zip file of your codebase. You can manually zip it up, but I prefer to do that from my terminal like so:
zip ../starwarsapp.zip -r * .[^.]* - Now, upload it to AWS like so:
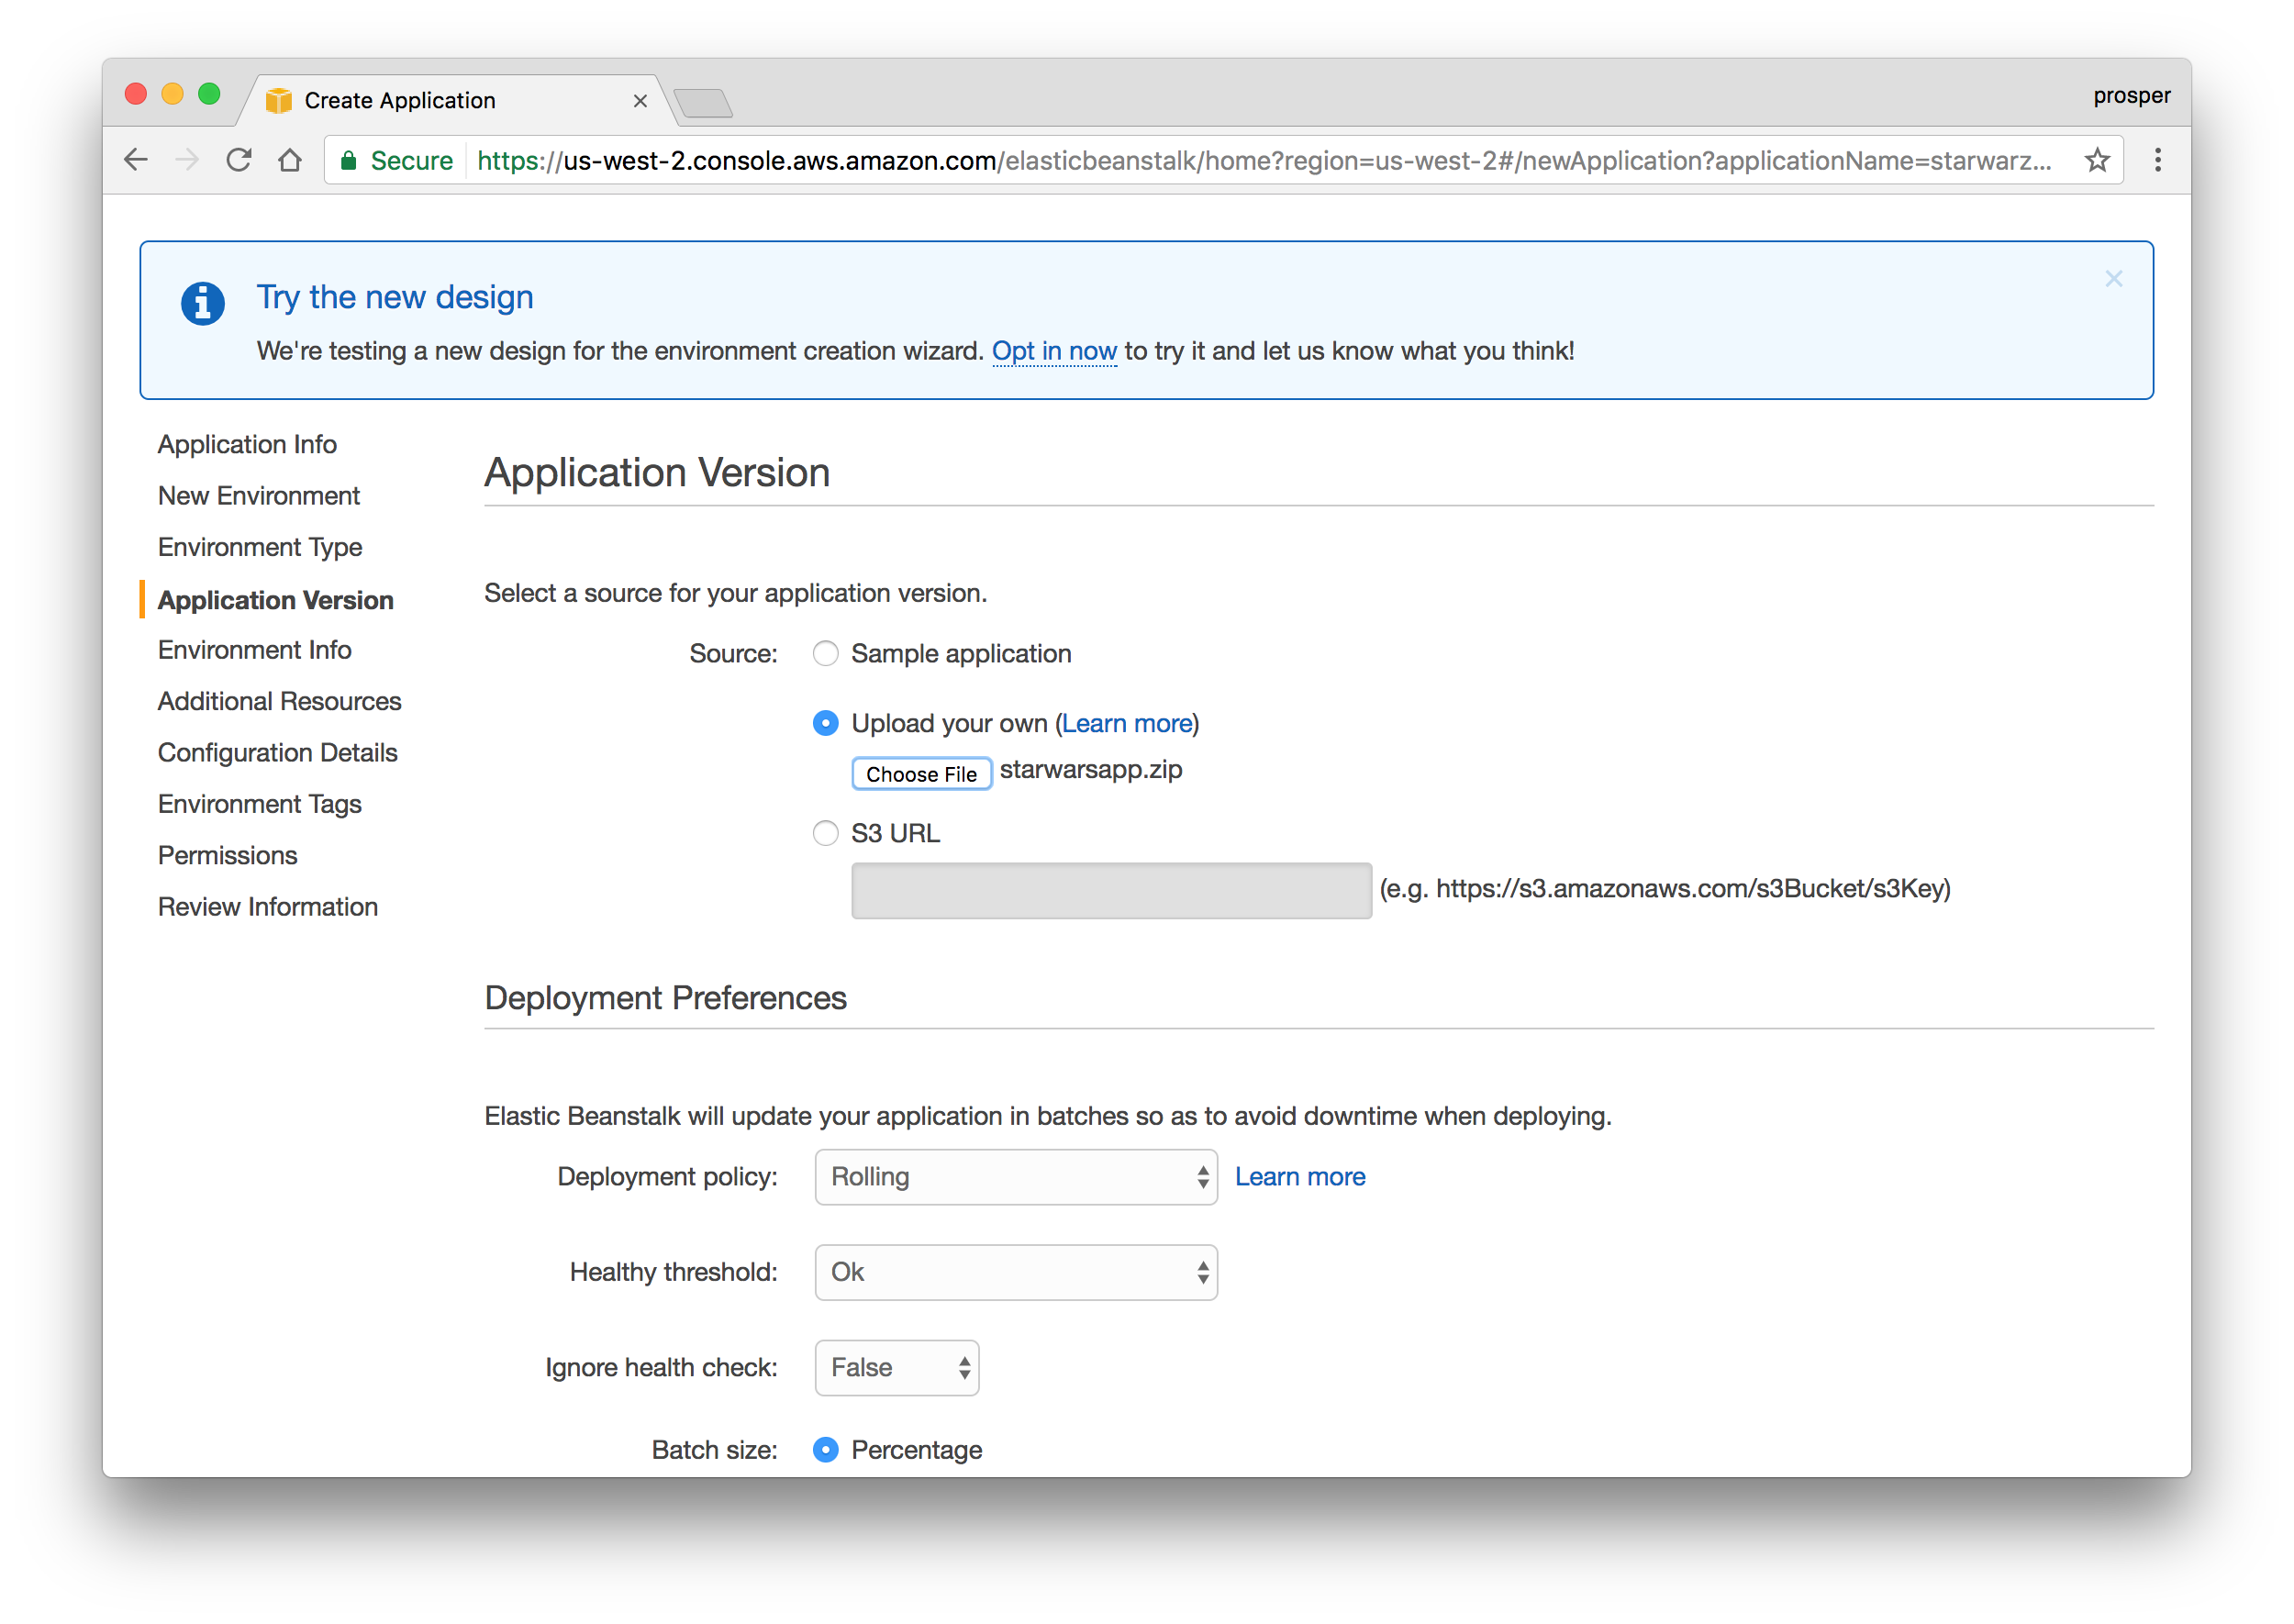
- Check availability for the app URL. Mine looks like this:
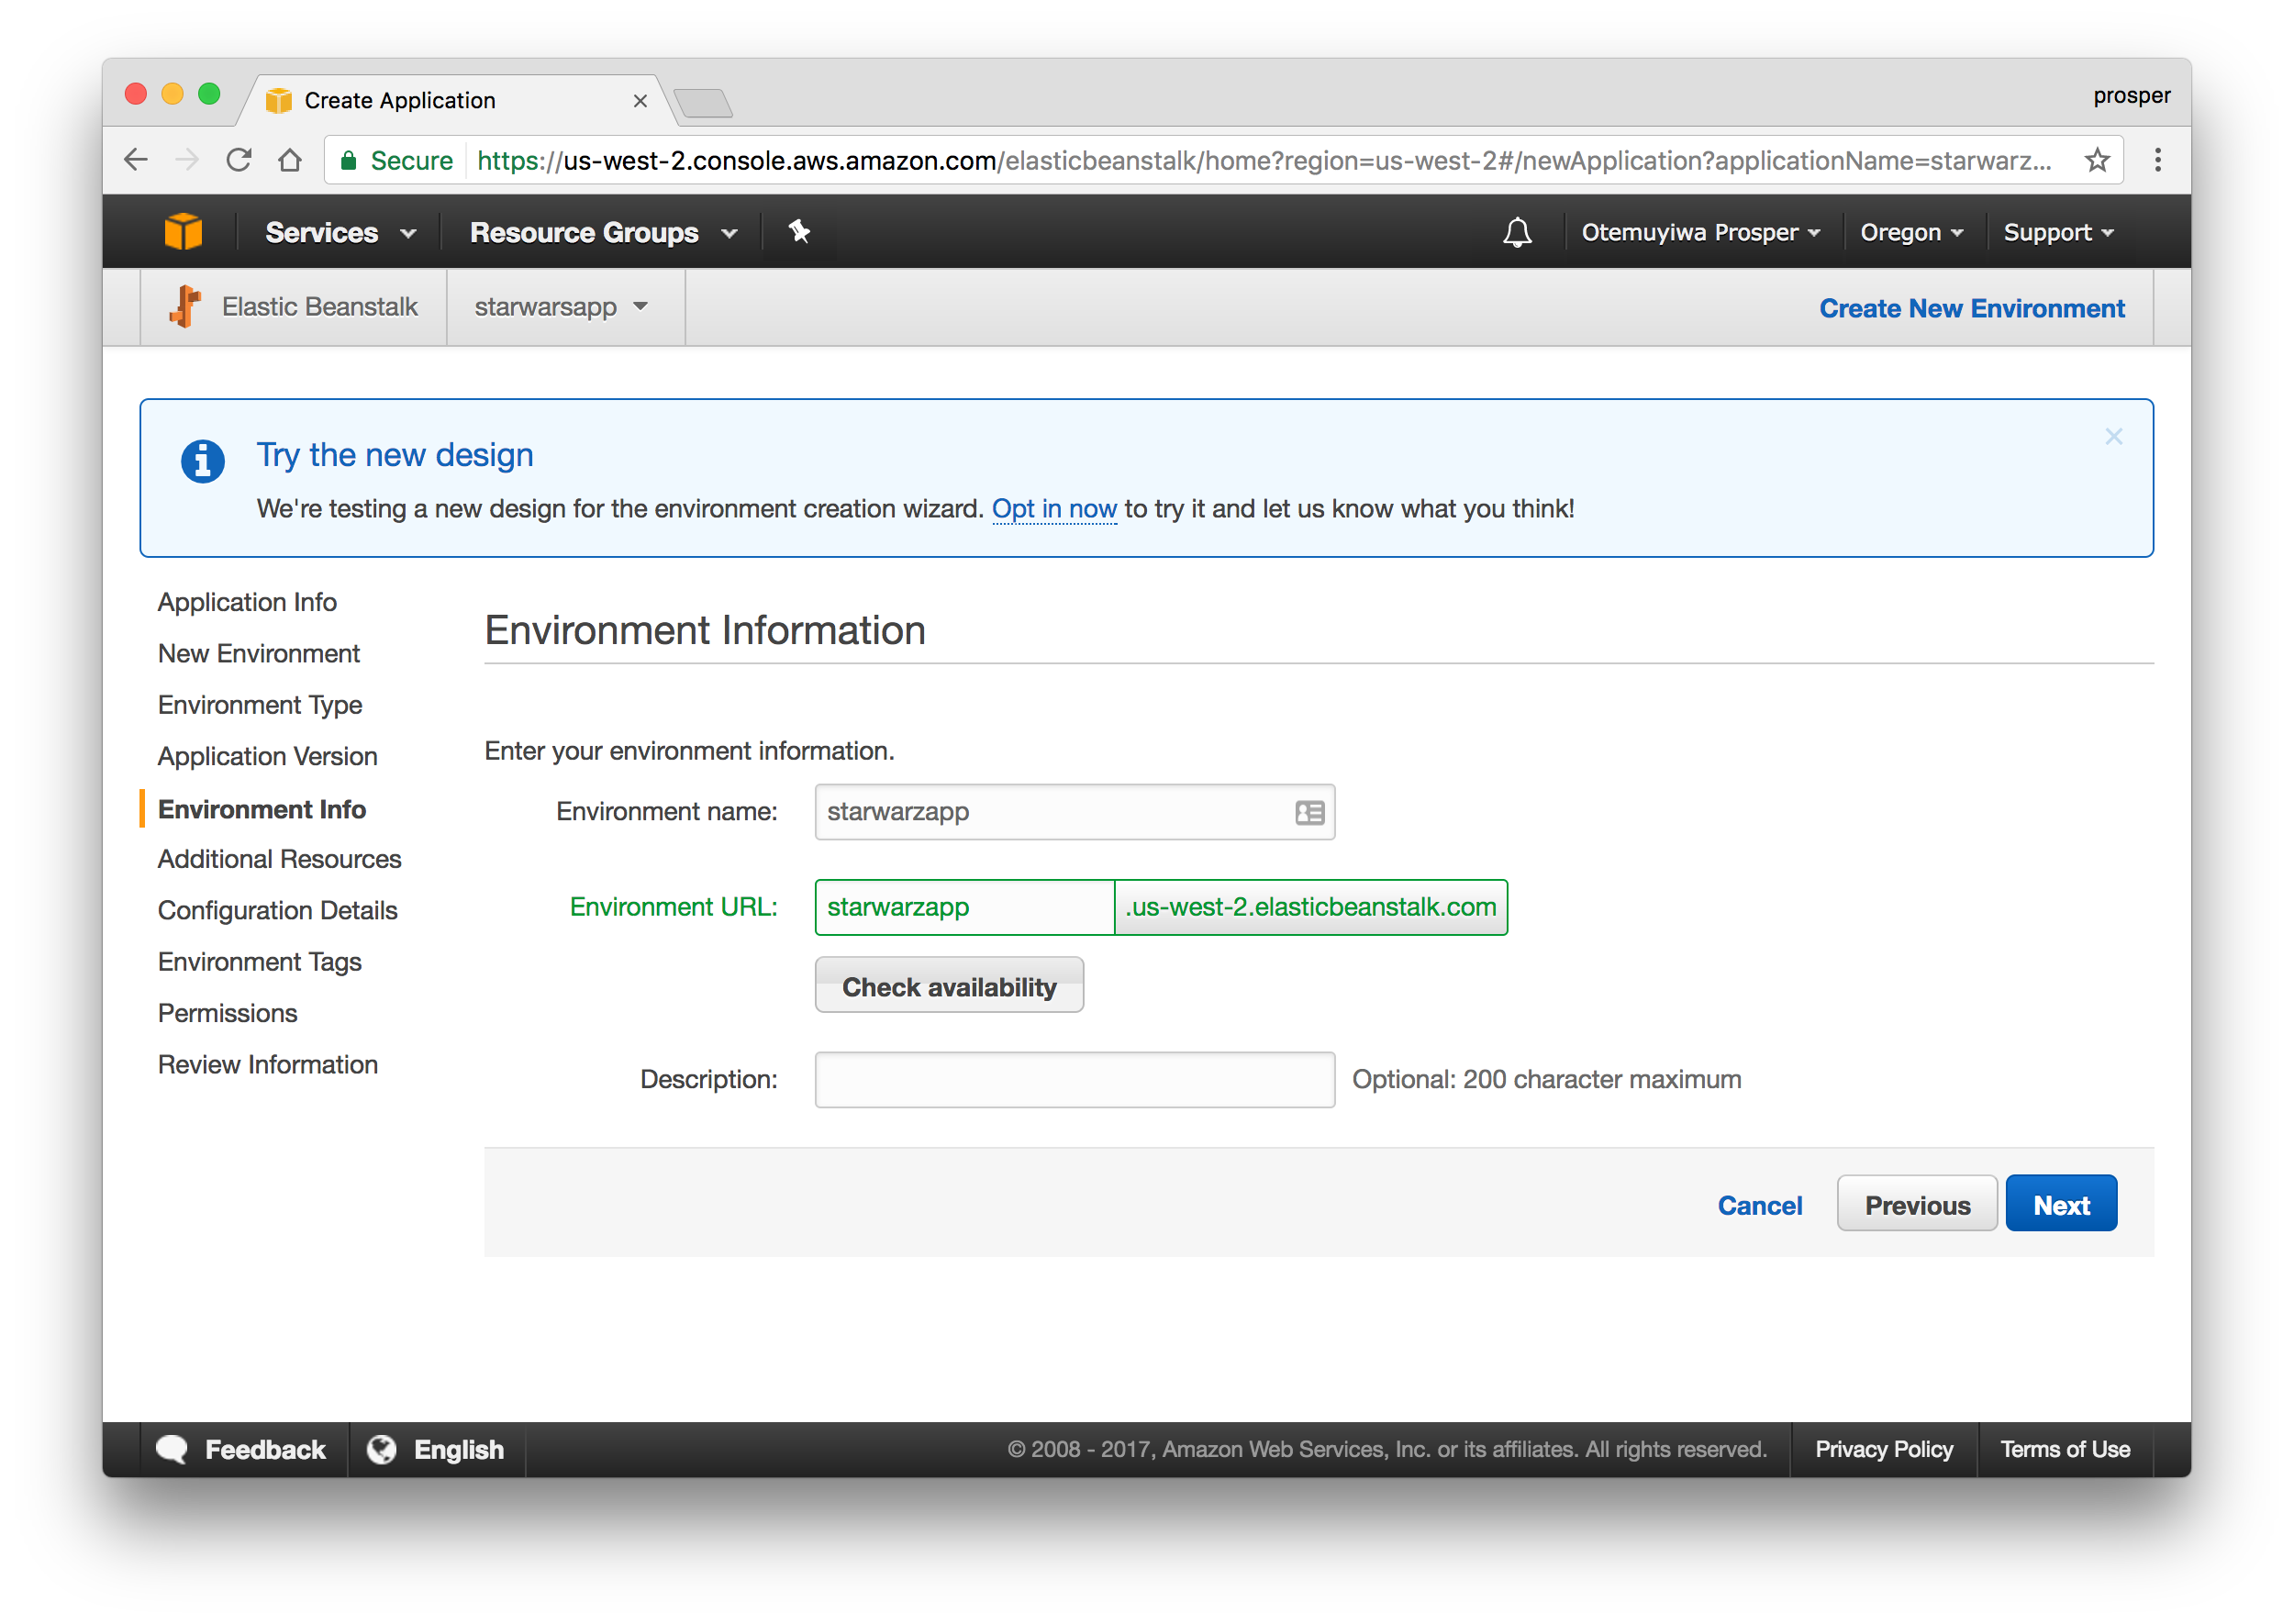
- The next page allows us to configure a database Instance. Our app doesn’t require one, so we can skip this.
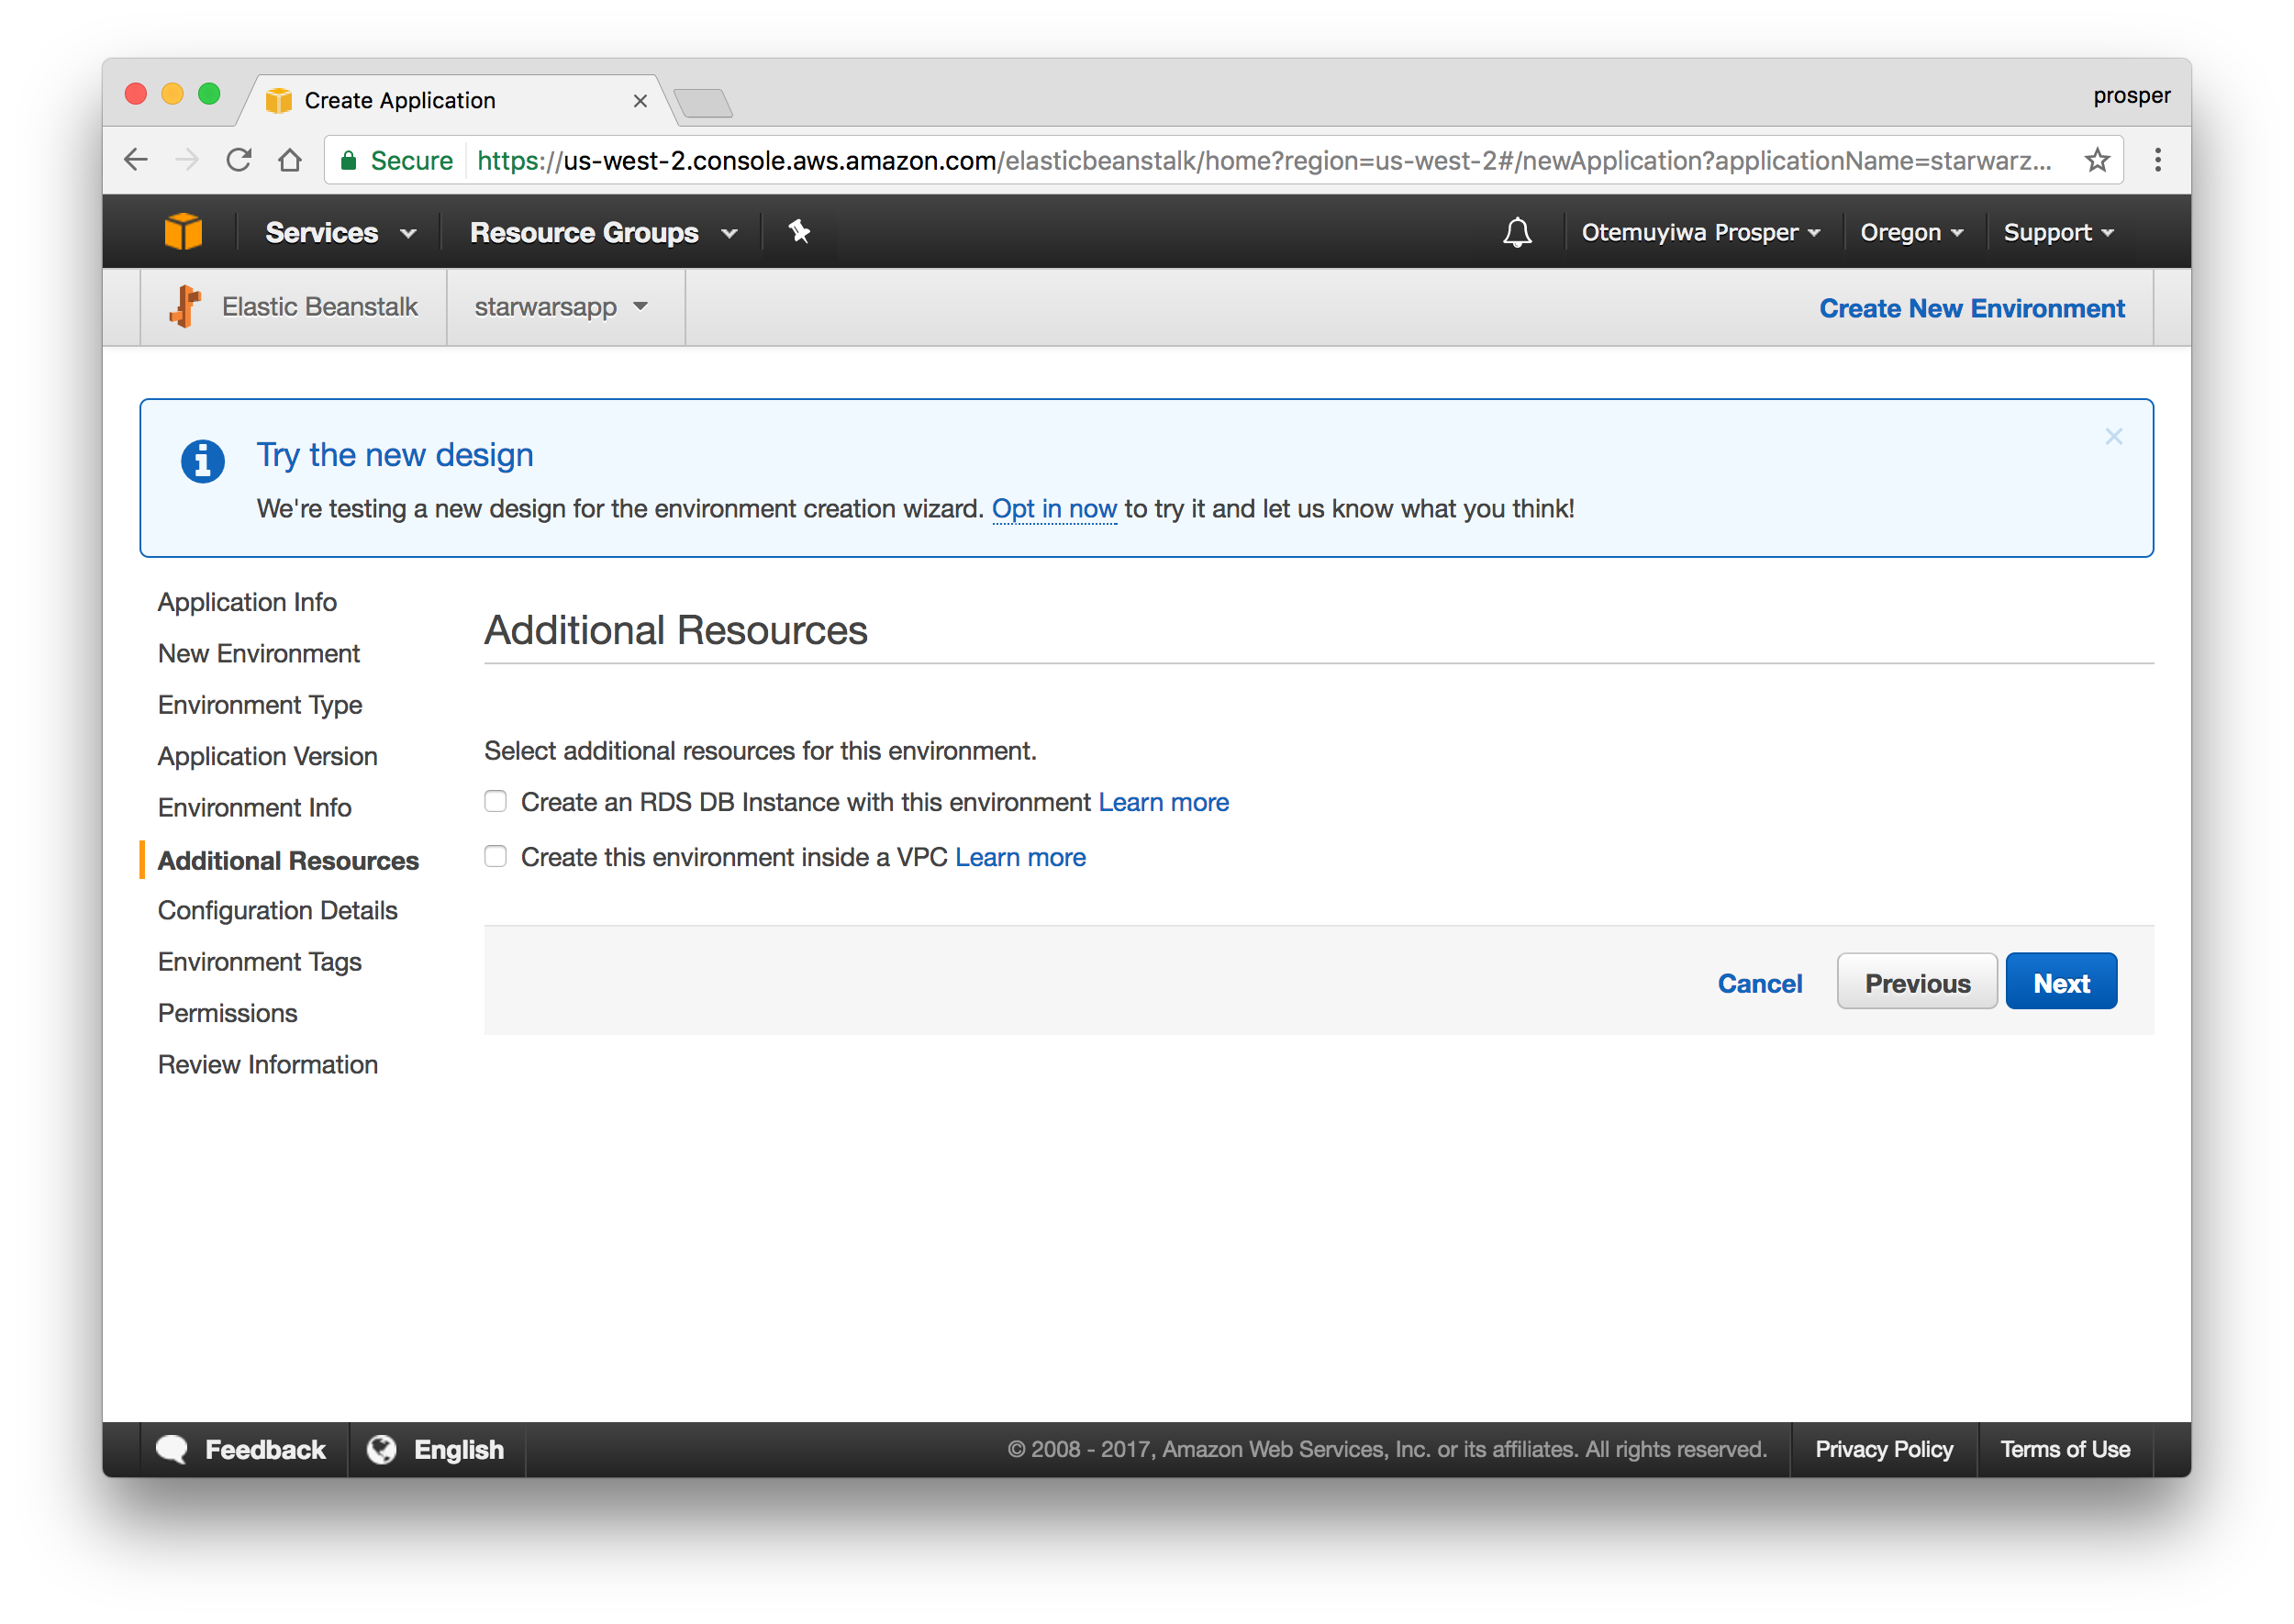
- This step allows us to modify our configuration details. The default one is okay for our app.
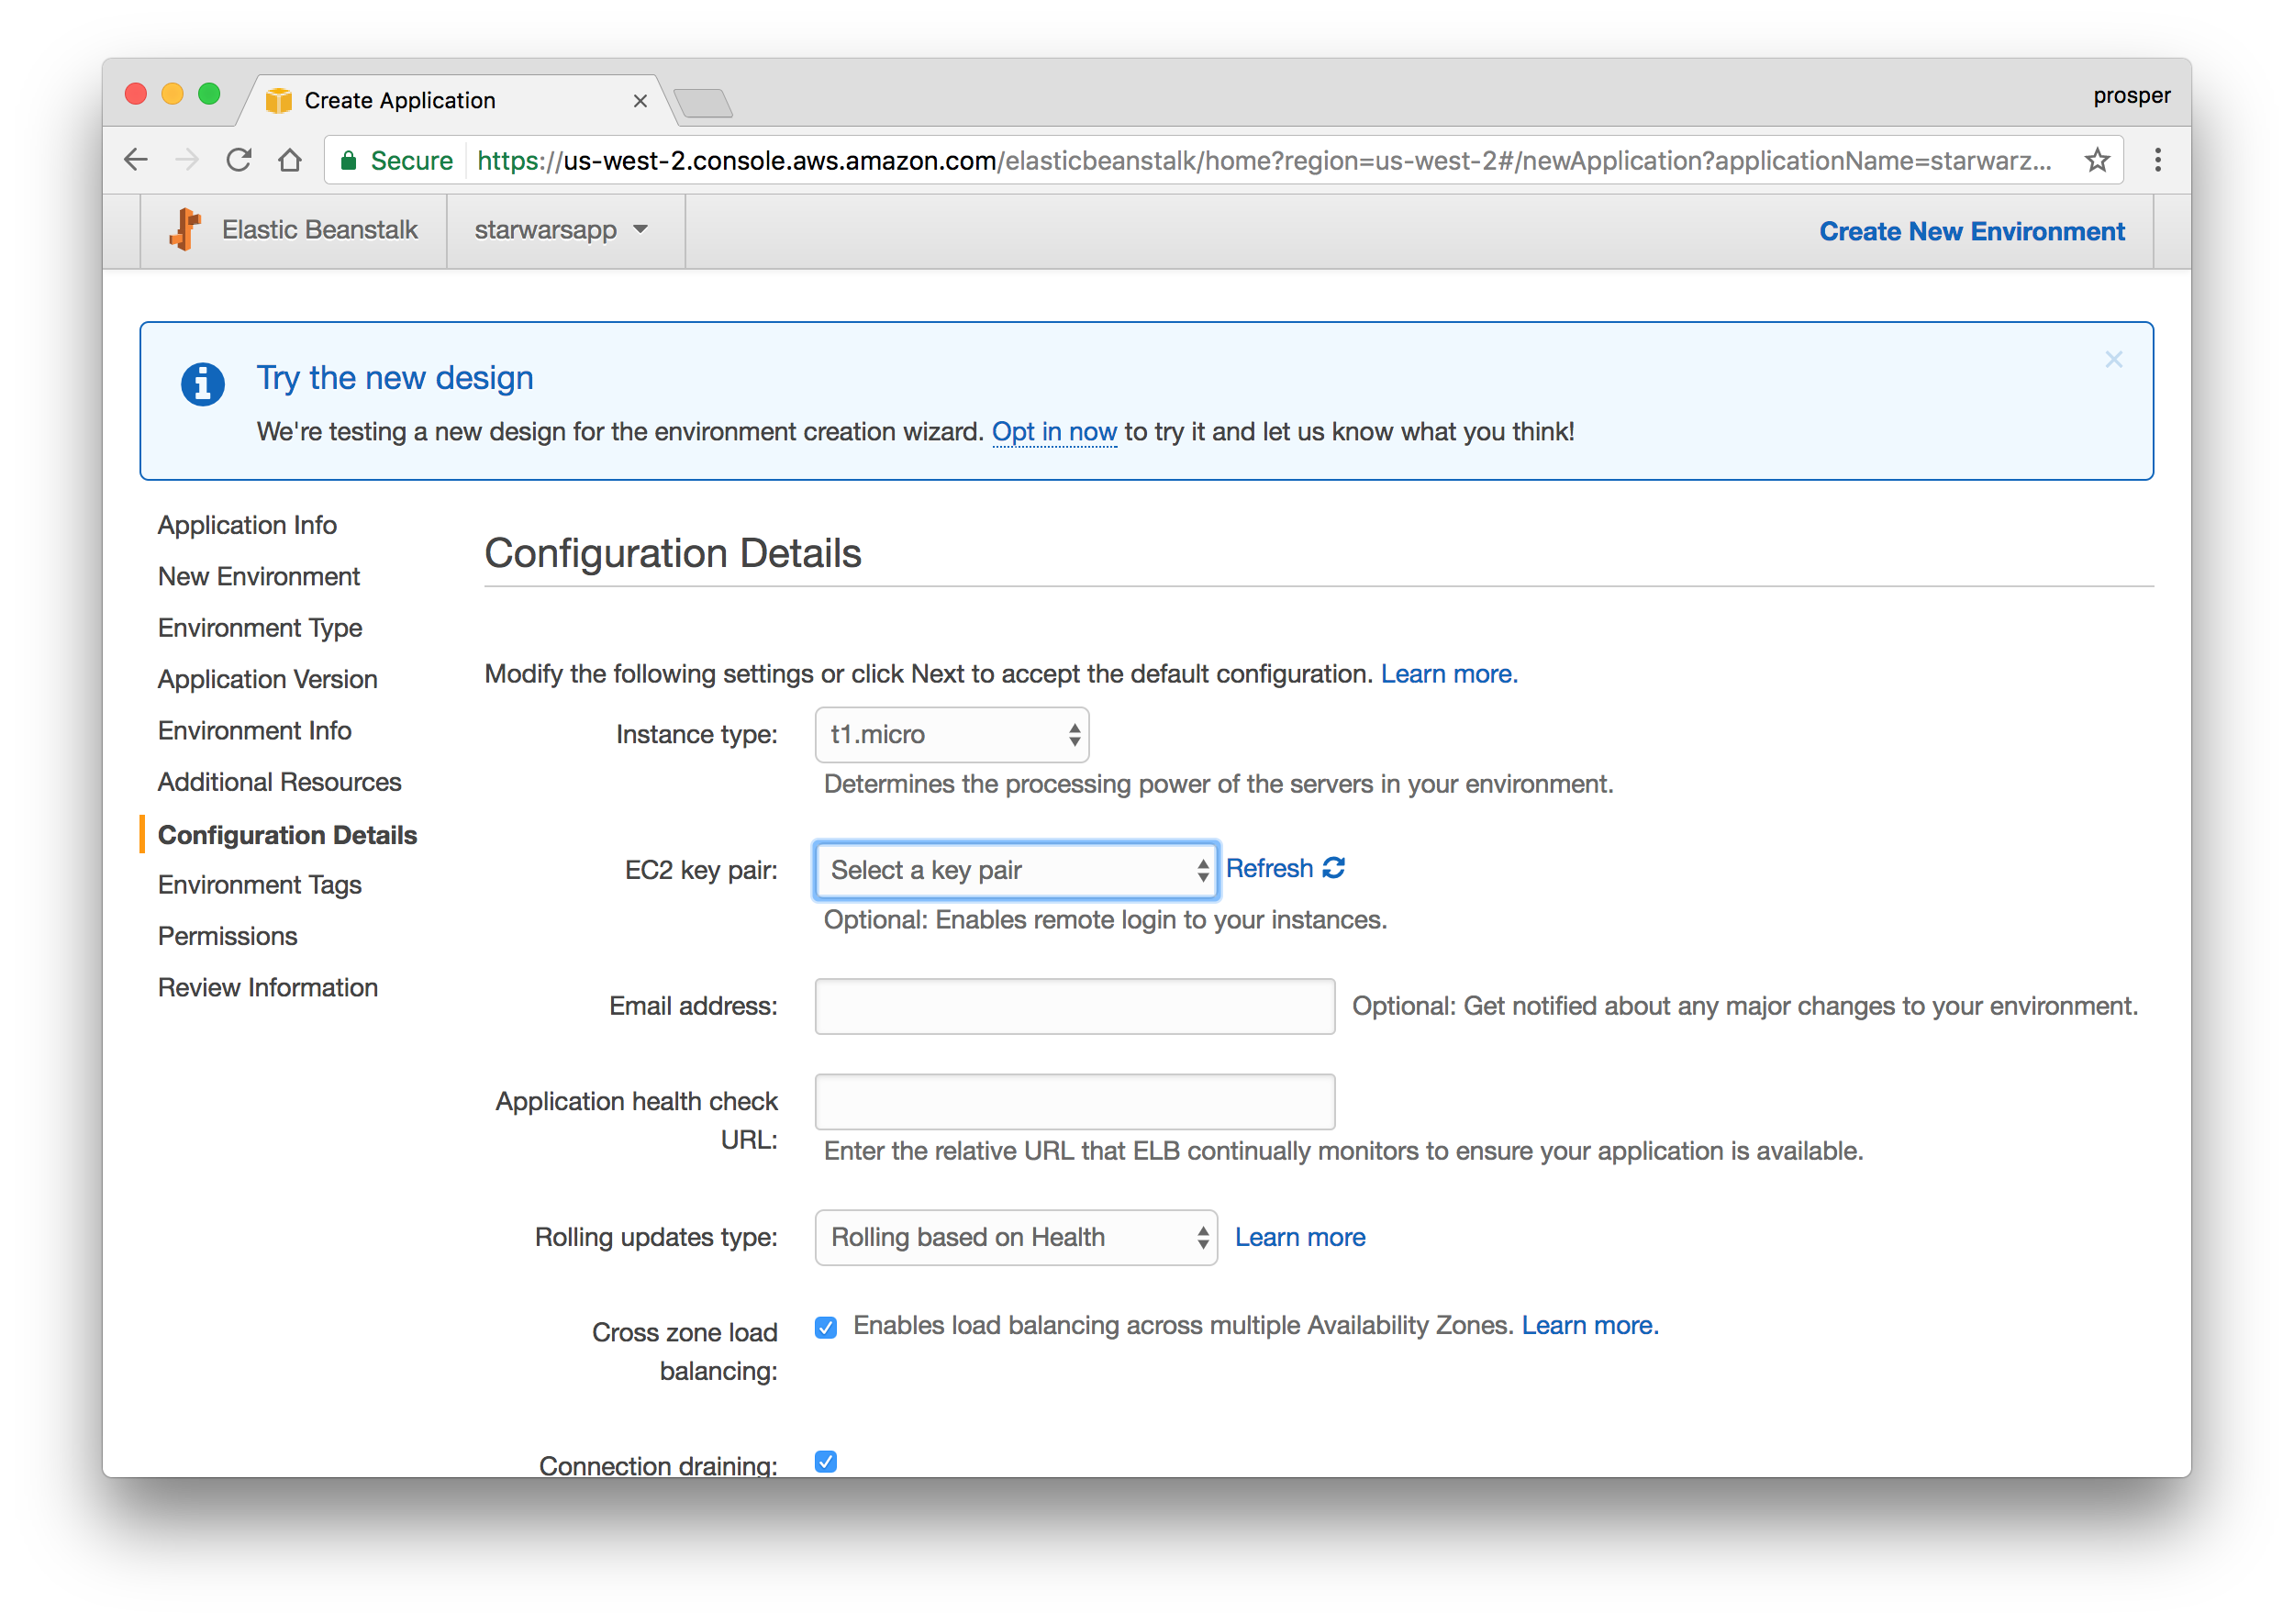
- Now, add your environment variables like so:
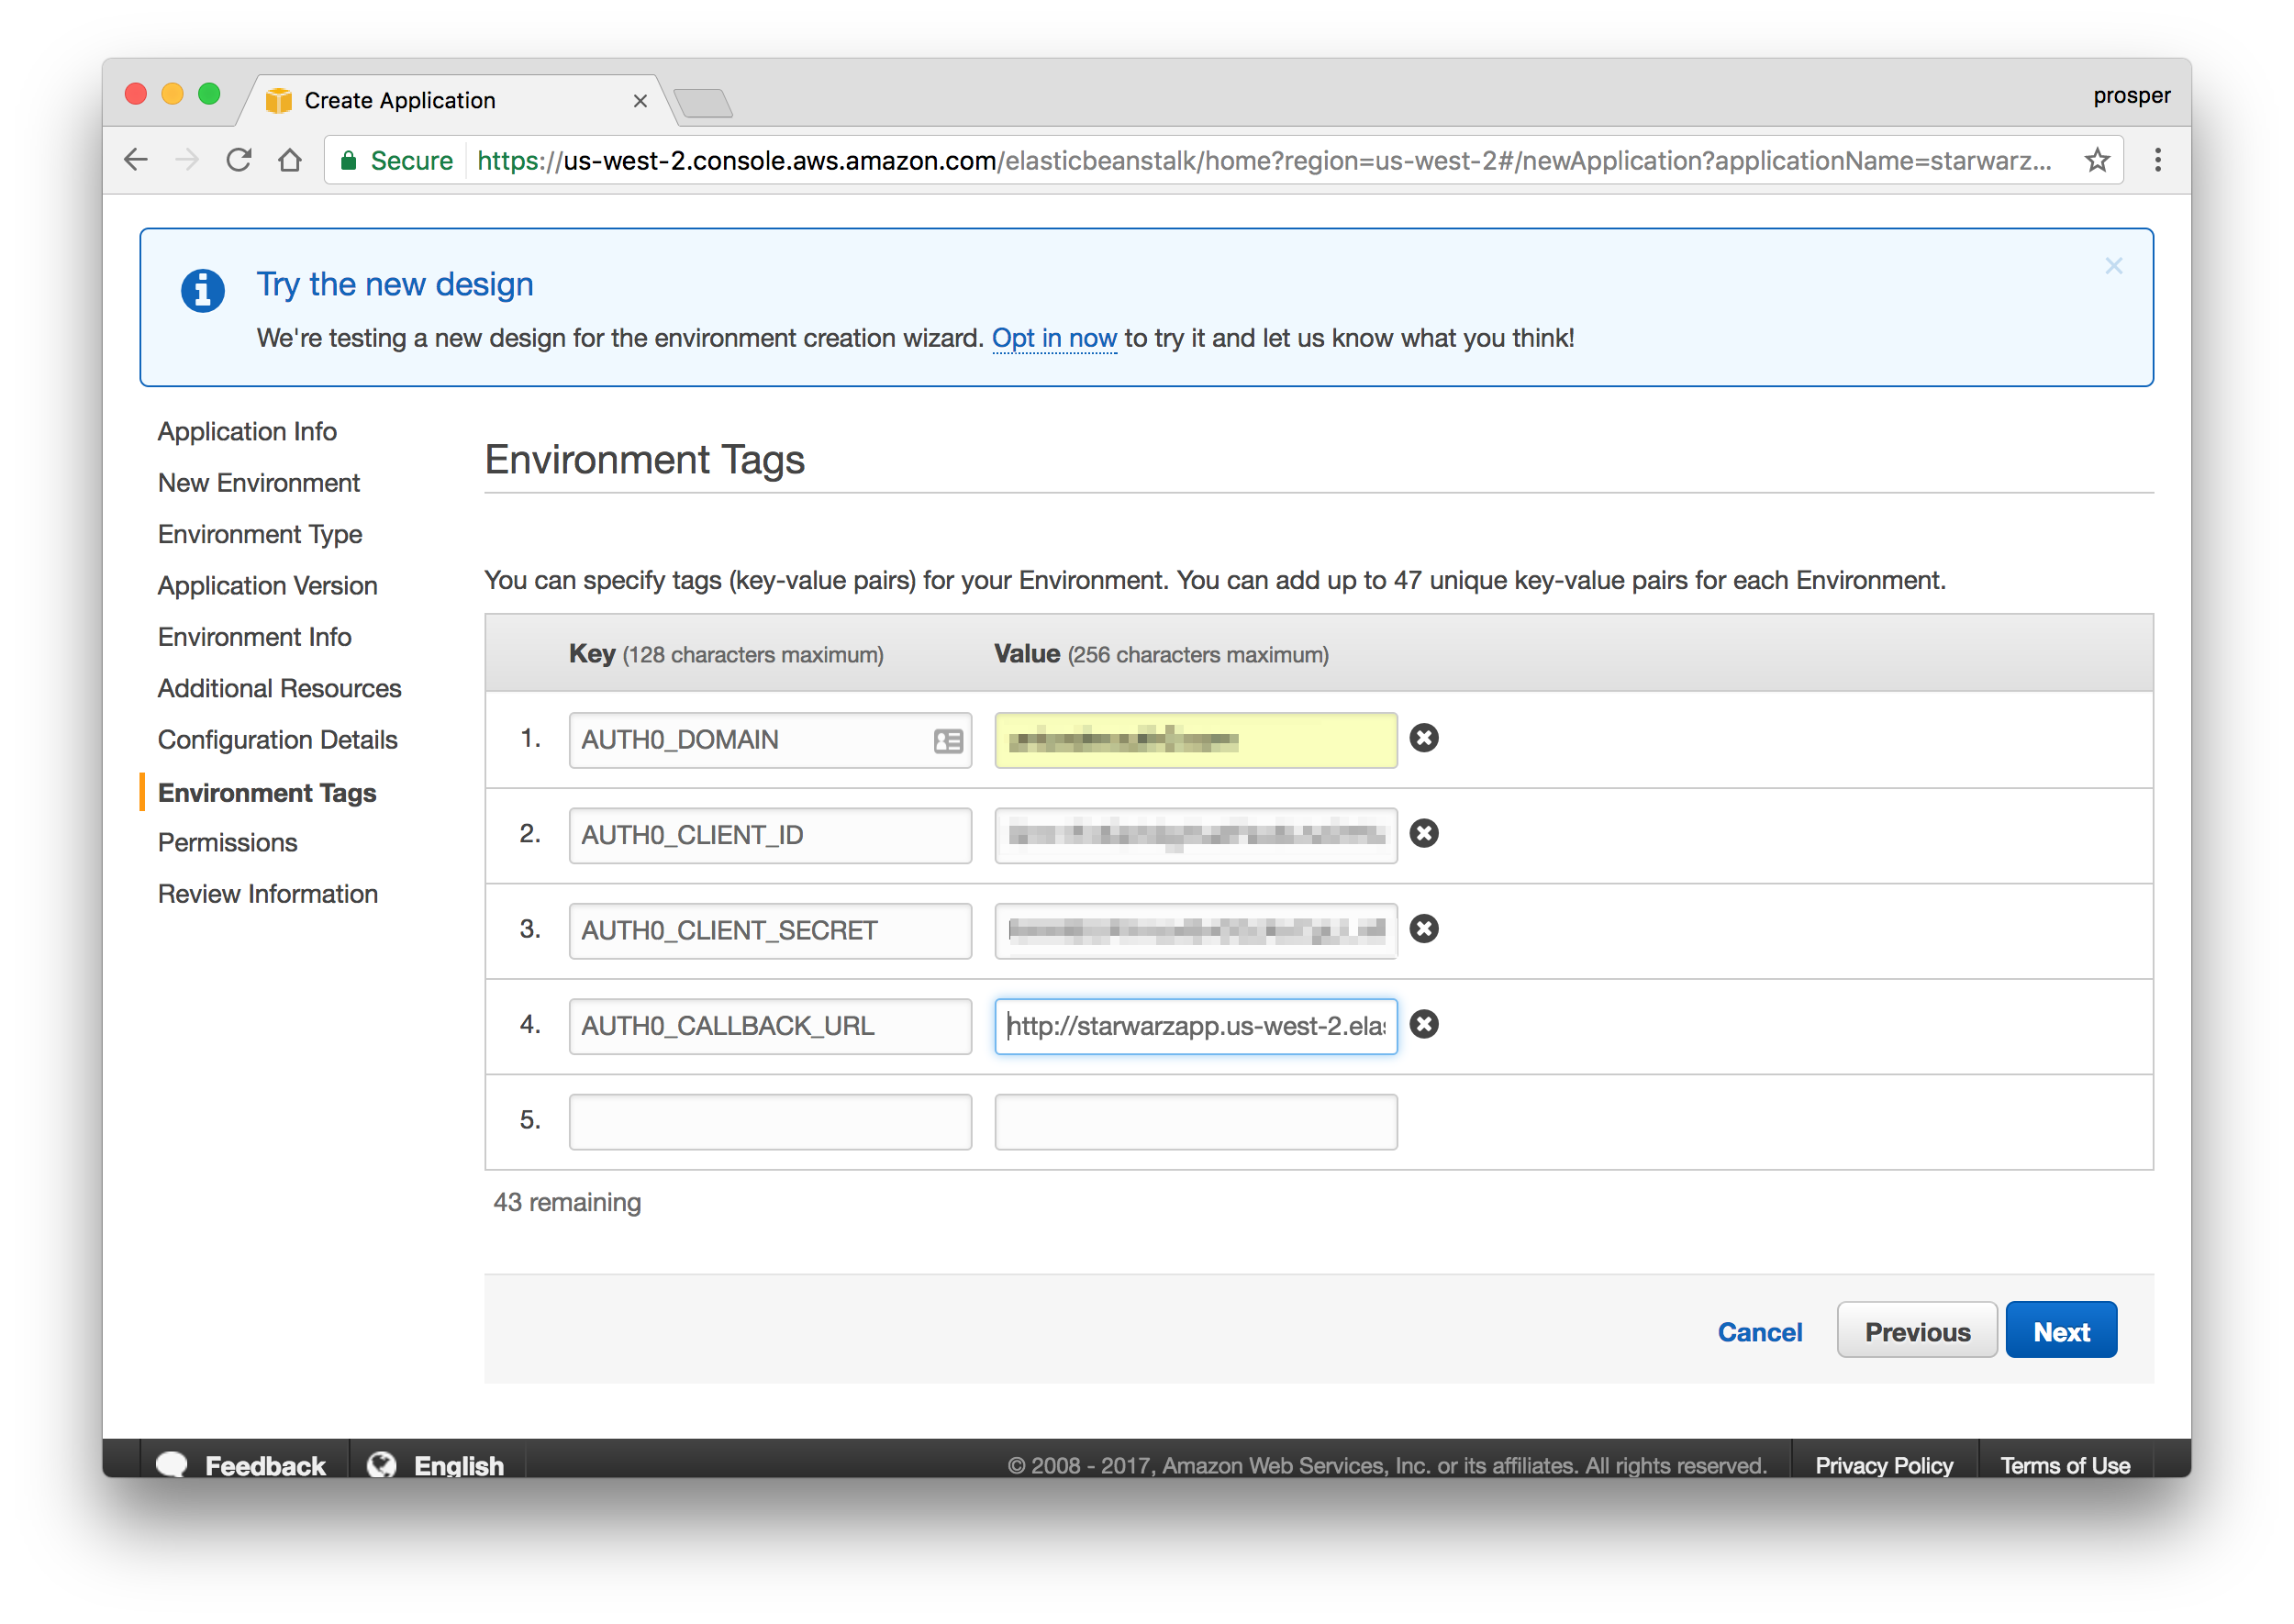
Now grab the URL, in my case it is http://starwarzapp.us-west-2.elasticbeanstalk.com and add to Allowed Origins(CORS) and Allowed Callback URLs in your Auth0 dashboard. Ensure that you add it as an environment variable in Elastic Beanstalk too.
- Add Permission like so:

- Review the information before launching.
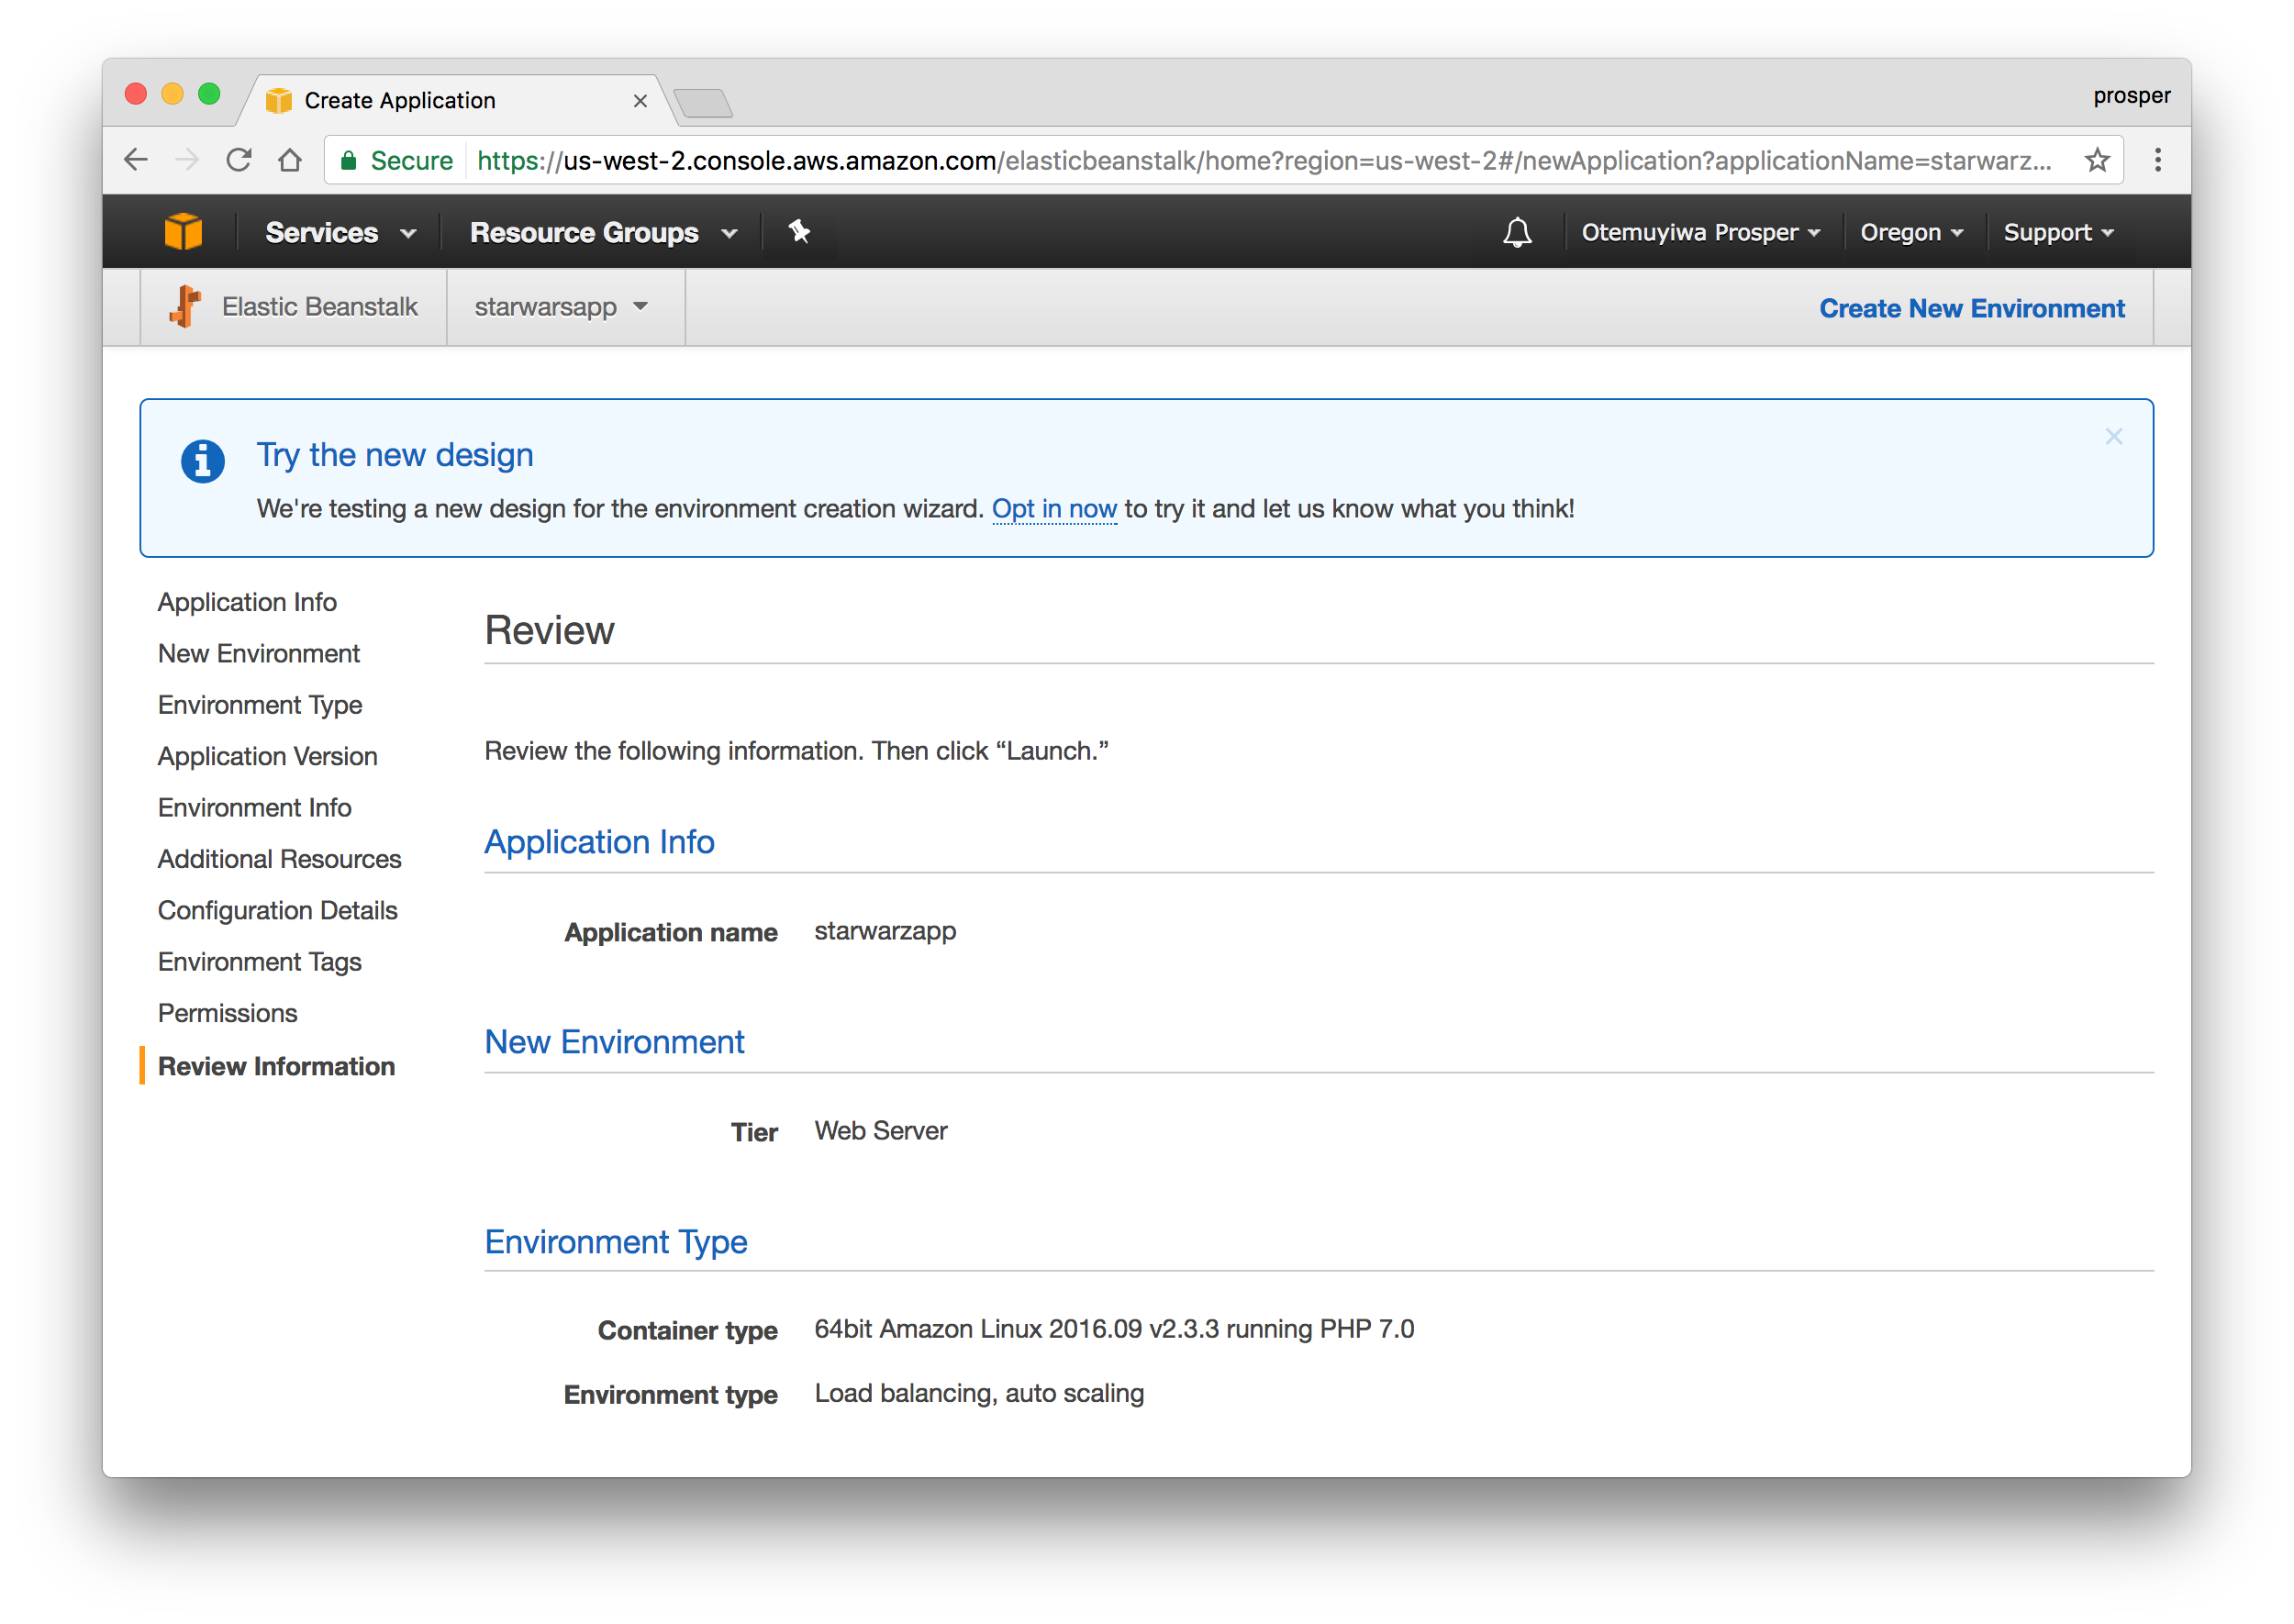
- Launch.
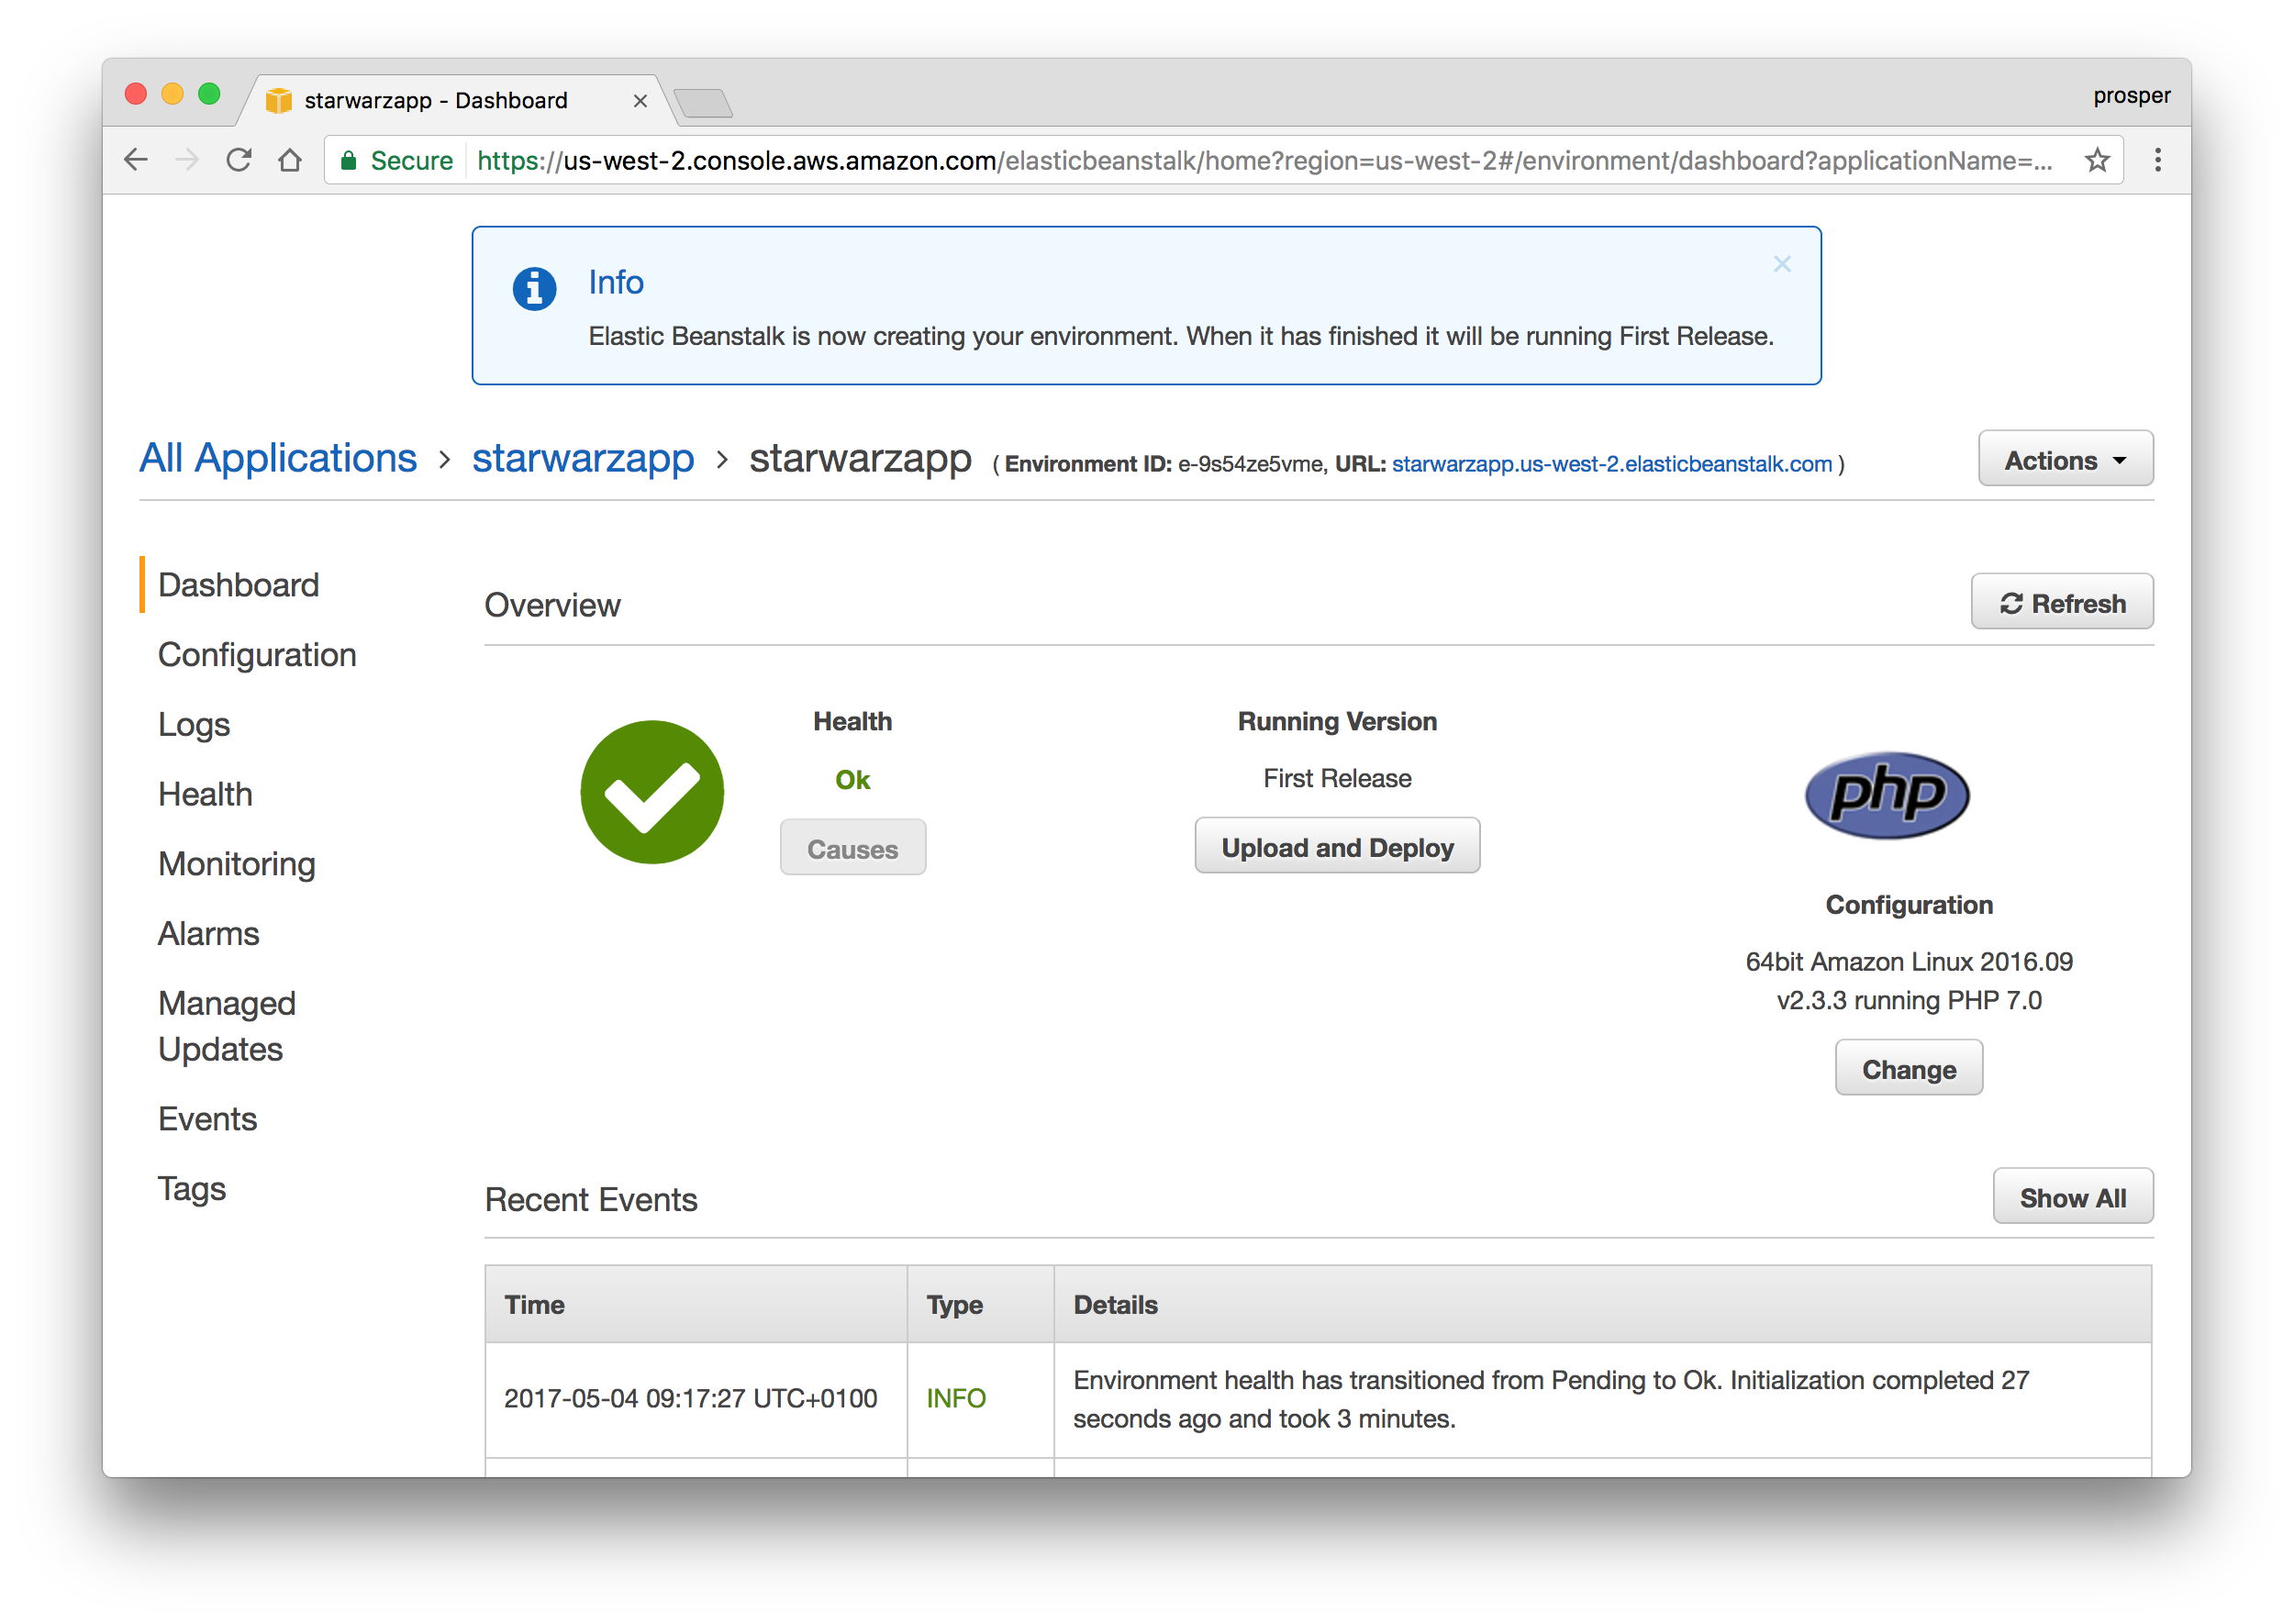
 Live app
Check out how to deploy:
- A Laravel app to Elastic Beanstalk.
- A CakePHP app to Elastic Beanstalk.
- A Symfony2 app to Elastic Beanstalk.
- A WordPress website to Elastic Beanstalk.
- A Drupal website to Elastic Beanstalk.
Database, Caching and Cron Jobs
You can use an Amazon Relational Database Service (Amazon RDS) DB instance to store data gathered and modified by your application. The database can be attached to your environment and managed by Elastic Beanstalk, or created and managed externally. Check out how to easily add a DB instance to your app.
For caching, Amazon Web Services offers ElastiCache. It is a web service that makes it easy to deploy, operate, and scale an in-memory data store or cache in the cloud. Amazon ElastiCache supports two open-source in-memory engines:
- Redis.
- Memcached.
Amazon ElastiCache automatically detects and replaces failed nodes, reducing the overhead associated with self-managed infrastructures and provides a resilient system that mitigates the risk of overloaded databases, which slow down websites and increase application load times. Through integration with Amazon CloudWatch, Amazon ElastiCache provides enhanced visibility into key performance metrics associated with your Redis or Memcached nodes.
Companies like AirBnb, Healthguru, PlaceIQ and Tokyo Data Network use ElastiCache for caching at multiple layers spanning HTML fragments, results of expensive DB queries, ephemeral session data, and search results.
Check out how to install the ElastiCache Cluster Client for PHP here.
Here is an excellent post on building a PHP visitor counter with ElastiCache and Elastic Beanstalk
You can set up a cron job on Elastic Beanstalk. Learn how to run cron jobs on Amazon Web Services(AWS) Elastic Beanstalk.
Laravel Forge
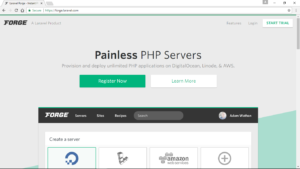
Laravel Forge , created by Taylor Otwell is a platform that helps you deploy and launch your application in minutes. It does the heavy-lifting for you. Forge takes care of provisioning your servers on popular cloud hosting providers such as Linode, Digital Ocean and AWS. It was initially built for Laravel apps, but now it has support for virtually any PHP application.
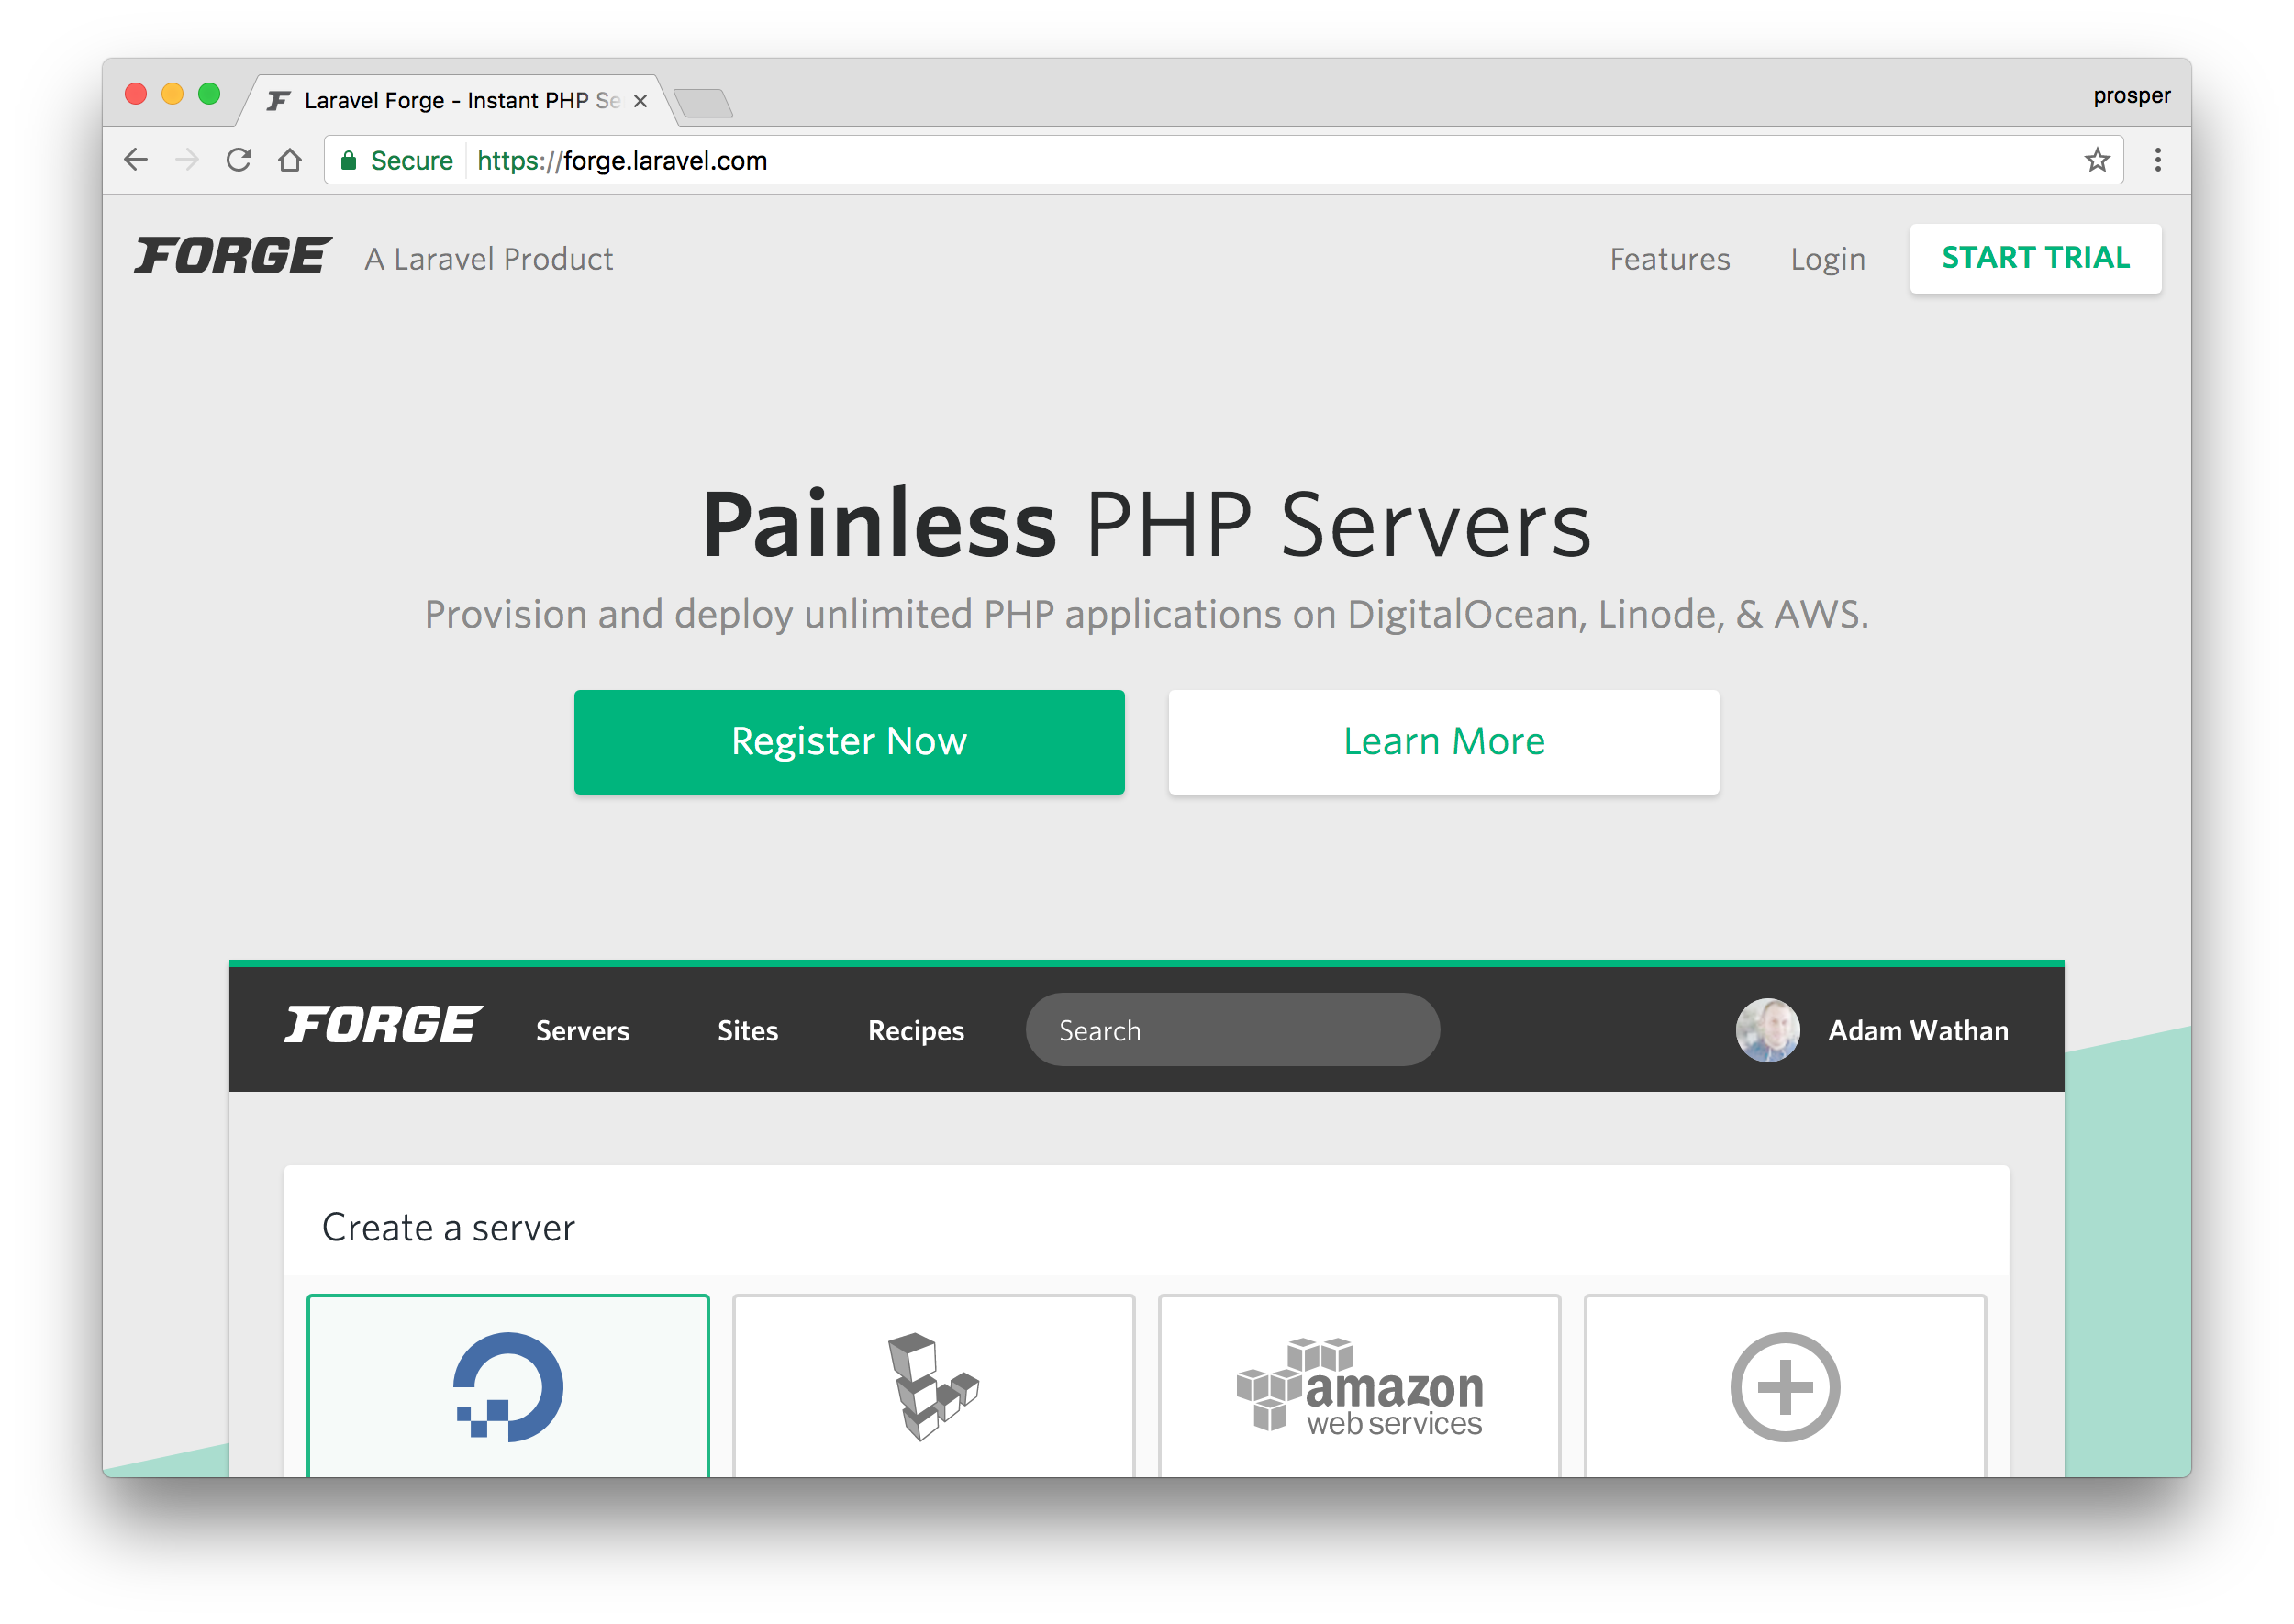 Laravel Forge
Laravel Forge allows you to easily do the following, apart from provisioning servers:
- It integrates with LetsEncrypt to generate Free SSL Certificates for your apps.
- Easily manage jobs and queues.
- Collaboration with your team by sharing your server’s management dashboard with co-workers.
Matt Stauffer has an amazing post on deploying your first Laravel app to Forge.
James Fairhurst also has a great guide on using Laravel Forge to setup an AWS Server.
The most popular educational PHP platform, laracasts.com has a series on server management with Forge.
And of course, we mention it in our Laravel course, and also cover it in in-depth tutorials like these.
Envoyer
Envoyer is a platform that allows zero downtime PHP deployment – it’s the SaaS version of Envoy. It allows you integrate with various services such as Gitlab, Slack, Bitbucket e.t.c.
With Envoyer, you can perform:
- Seamless Deployment rollbacks.
- Deploy to multiple servers.
- Monitor Cron Jobs.
- Perform Application Health Checks.
Deployer
Deployer is a deployment tool for PHP. It allows you to do the following:
- Run tasks in parallel.
- Atomic deploys.
- Rollbacks.
- Create deployment scripts in form of recipes.
It works with Laravel, Symfony, CakePHP, Yiiframework, Zend, FuelPHP, Drupal, WordPress, and Magento. Check out this excellent article on deploying PHP applications with Deployer.
Conclusion
There is no way we can cover all the different options available for deploying PHP applications. PHP is an enterprise language that has evolved over the years, thus calling for more efficient ways for deploying PHP apps from one’s local machine to production. Hopefully, this guide covers all your basic needs for deploying your PHP apps to all the major cloud providers. However, there is another resource I recommend for extensive knowledge in learning to deploy PHP applications.
How have you been handling your deployments? Please, let me know in the comments section below!
Frequently Asked Questions (FAQs) about Deploying PHP Apps in the Cloud
What are the benefits of deploying PHP apps in the cloud?
Deploying PHP apps in the cloud offers several benefits. Firstly, it provides scalability. As your application grows, you can easily adjust your resources to meet demand. Secondly, it offers cost-effectiveness. You only pay for the resources you use, which can be a significant saving compared to traditional hosting. Thirdly, cloud hosting provides better performance and speed. With data centers located worldwide, your application can be hosted closer to your users, reducing latency. Lastly, it offers better reliability and uptime, as your application is not dependent on a single server.
How can I choose the right cloud service for my PHP app?
Choosing the right cloud service for your PHP app depends on several factors. These include the specific needs of your application, your budget, and your technical expertise. Some cloud services offer more advanced features but may require more technical knowledge to use effectively. Others may be more user-friendly but may not offer the same level of customization or control. It’s important to research each option thoroughly and consider what features and services are most important for your specific needs.
What are the steps to deploy a PHP app on Google Cloud?
Deploying a PHP app on Google Cloud involves several steps. First, you need to create a Google Cloud account and set up a new project. Then, you need to install the Google Cloud SDK on your local machine. Next, you need to configure your app’s settings in the app.yaml file. After that, you can deploy your app using the gcloud app deploy command. Finally, you can view your app in the browser using the gcloud app browse command.
How can I ensure the security of my PHP app in the cloud?
Ensuring the security of your PHP app in the cloud involves several measures. These include using secure coding practices, regularly updating and patching your software, using encryption for data in transit and at rest, implementing strong access controls, and regularly monitoring and auditing your systems for any unusual activity.
What is the role of a PHP hosting platform like Cloudways?
A PHP hosting platform like Cloudways provides a managed environment for deploying and running your PHP apps in the cloud. It takes care of many of the technical aspects of cloud hosting, such as server setup, security, backups, and updates, allowing you to focus on developing your app. It also provides tools and features to help you optimize your app’s performance and scalability.
How can I migrate my existing PHP app to the cloud?
Migrating your existing PHP app to the cloud involves several steps. First, you need to choose a cloud service and create an account. Then, you need to prepare your app for migration, which may involve refactoring your code or making other changes to ensure compatibility with the cloud environment. Next, you need to deploy your app to the cloud, test it thoroughly to ensure it works correctly, and then switch your users over to the new version.
What are the challenges of deploying PHP apps in the cloud?
Deploying PHP apps in the cloud can present several challenges. These include dealing with the complexity of the cloud environment, ensuring the security of your app and data, managing costs, and optimizing performance. It’s important to have a good understanding of these challenges and how to address them before you start your deployment.
How can I optimize the performance of my PHP app in the cloud?
Optimizing the performance of your PHP app in the cloud can involve several strategies. These include choosing the right size and type of cloud resources for your needs, using caching and other performance-enhancing features, optimizing your code and database queries, and regularly monitoring and adjusting your resources as needed.
What is the role of Google Cloud PHP libraries?
Google Cloud PHP libraries provide a way to interact with Google Cloud services from your PHP app. They provide a set of APIs that you can use to perform various operations, such as storing and retrieving data, running queries, and managing resources. Using these libraries can make it easier to integrate your app with Google Cloud and take advantage of its features and services.
What is RunCloud and how can it help with deploying PHP apps in the cloud?
RunCloud is a cloud server management tool that simplifies the process of deploying and managing PHP apps in the cloud. It provides a user-friendly interface and a range of tools and features to help you set up, secure, and optimize your cloud servers. It supports multiple cloud providers and allows you to manage all your servers from a single dashboard.
Food Lover. Self-Acclaimed Developer Evangelist. Technical Writer at Auth0.

Published in
·APIs·Authentication·Cloud·Frameworks·Laravel·Libraries·PHP·Web Services·November 3, 2016
Published in
·automation·Cloud·Debugging & Deployment·Development Environment·Patterns & Practices·PHP·September 24, 2017

