
Key Takeaways
- Jekyll, a simple, lightweight, and customizable platform, is an excellent choice for building small, static sites, particularly for portfolio websites. It parses Markdown, has built-in code formatting, produces static files, and can be hosted via GitHub.
- Collections, a feature in Jekyll 2.0, are sets of documents with similar functionality as posts. They offer flexibility in organizing content on the site, although they currently do not support pagination. Collections can be defined in the _config.yml file and accessed on any page within the Jekyll site.
- Setting up Jekyll requires Ruby and RubyGems, and comfort with terminal commands. After installation, the config.yml file is key for setting up the site. It allows for the declaration of collections, specification of build and server options, and setting site-wide metadata using YAML front matter.

Recently, I’ve begun the process of overhauling my portfolio website to give a better sense of who I am and what I do. It’s always a fun time to play around with a personal project and update a showcase of your capabilities as a developer. My first task in redoing my portfolio site was to decide how I was going to build the thing. I decided to use Jekyll. Jekyll 2.0 has recently been released, and with it comes an interesting new feature — Collections. In this article I’ll be giving an overview of what makes Jekyll great, how to quickly get going, and explain the ins and outs of Jekyll Collections. For a primer on Jekyll, check out the documentation. It’s very well done and quite helpful, especially if you’d like to dive deeper into Jekyll’s functionality and features.
What Makes Jekyll Great
In deciding to redo my portfolio site, I knew I wanted something simple and easily customizable. I didn’t necessarily need a database or really any backend for that matter. A CMS solution like WordPress or Craft would be overkill — I just wanted something simple. In my search, I came across Jekyll. It’s simple, light, and blog-ready. It parses Markdown, has built-in code formatting, produces static files, and is even host-able via GitHub. All these (and more!) aspects of Jekyll make it quite easy to work with and the right choice for me. There have been some great improvements in the 2.0 release of Jekyll, the one I’ve been enjoying the most is Jekyll’s collections. First though, lets run through how to get started with Jekyll.
Quickly Setting Up Jekyll
To setup Jekyll, there are a couple requirements. You’ll need Ruby and RubyGems installed, and be somewhat comfortable with the terminal. Also, a common issue you might run into on Mac OSX is not having the most up to date X-Code command line tools. The most up to date command line tools can be found here, in the downloads section of Apple’s developer portal. You’ll need an Apple ID to access the downloads.
With the requirements out of the way, you’re only 4 lines in the terminal away from having a Jekyll project running. Open your terminal, and run these 4 commands:
~ $ gem install jekyll

~ $ jekyll new jekyllTest

~ $ cd jekyllTest

~/jekyllTest $ jekyll serve
In order, here’s what’s going on here:
- Installs Jekyll to your system.
- Creates a new directory full of Jekyll boilerplate files.
- Changes the working directory to the newly created “jekyllTest”.
- Spins up a server to serve those files at localhost:4000.
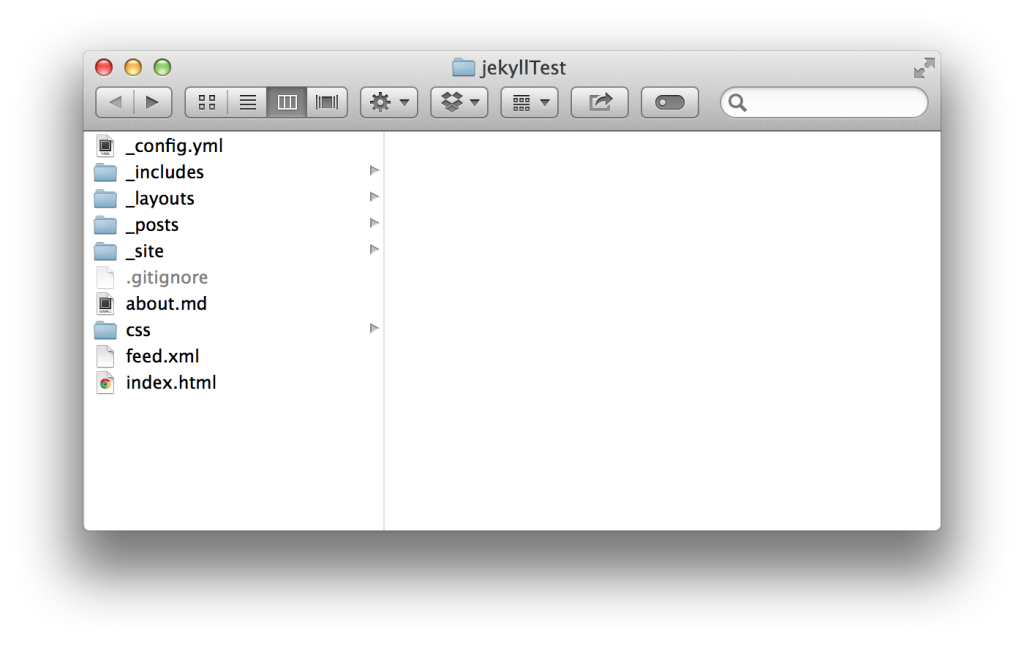
Out of all the boilerplate files put into the working directory, the main file we’ll be most concerned about for setup is config.yml. config.yml is the global configuration file for Jekyll. In this file, you can specify build options, server options, declare collections, and set site-wide metadata using YAML front matter. The ability to use YAML front matter is a particularly nice feature of Jekyll. The term front matter actually comes from the world of book design. In books, front matter is at the beginning of the book and holds all the metadata associated with a book: title, author, publisher, table of contents, and so on. Similarly, we can use front matter in YAML format to declare site-wide metadata inside the _config.yml file, and page-specific metadata in .markdown files. This metadata can then be referenced as variables using the liquid templating engine used by Jekyll.
What Are Collections?
Collections are sets of documents that have the same functionality as posts. Collections have the power of posts, but it’s all in your hands. One thing to note is that, for now, collections don’t support pagination like posts, although collections of documents can be rendered individually as pages. They can also be rendered in a list using the Liquid templating engine built into Jekyll. Collections have their own namespace throughout your site with customizable metadata and properties.
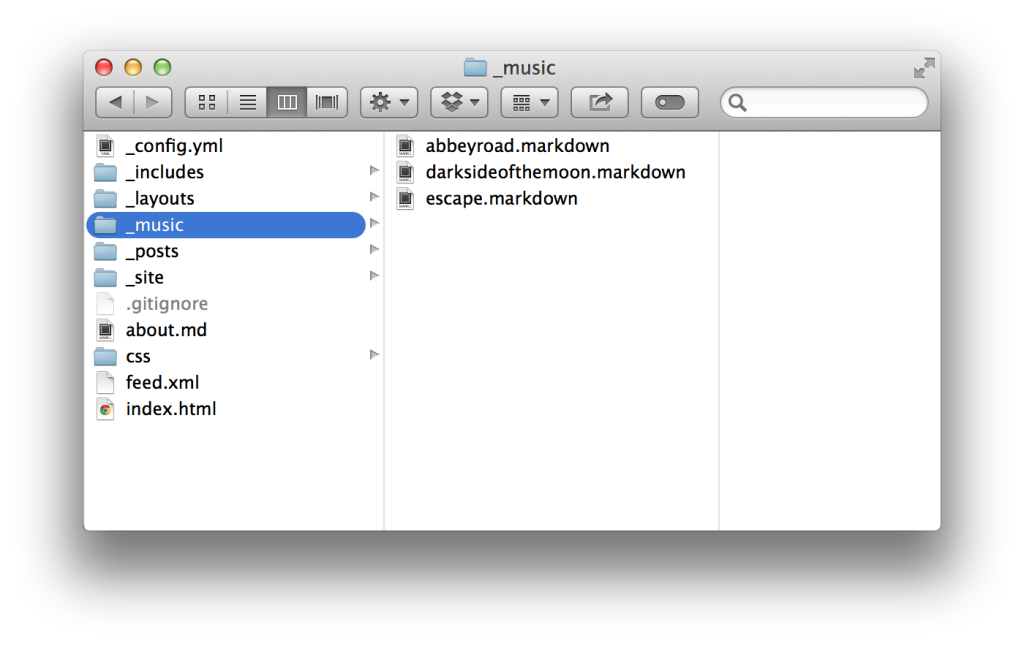
Collections work by Jekyll reading in your defined collection in the _config.yml file on site build. Jekyll adds the collection’s document’s YAML front matter to the site’s global Liquid templating variables, and optionally renders each document into its own page. Collections are a great use for any arbitrary set of content you’d like to organize on your site. Good examples for a collection are projects you’ve worked on, organizers of an event, a collection of music, API documentation, etc. We’ll use a collection of music as an example.
Configuring Collections
The first step to configuring collections is to tell Jekyll that you have a collection in the _config.yml file.
collections:

  - music
Now, add a folder to the root of the project directory with the same name as the collection. Be sure to prefix the folder with an underscore. Add some documents in markdown format to the collection’s folder.
If you so choose, you can specify to render a page for each document by modifying the _config.yml as so.
collections:

  music:

    output: true
Collections in Action
Now that the collection is defined and content has been added to the collection, it can now be accessed on any page within the Jekyll site. As an example, the most recent additions to your collection can be shown on your homepage using Liquid templating syntax. Any custom YAML front matter declared in each document can be accessed as well.
{% for album in site.music limit:3 %}

      <li>

        <img src="{{ album.thumbnail-path }}" alt="{{ album.title }}"/>

        <a href="{{ album.url }}">{{ album.title }}</a>

        <p>{{ album.short-description }}</p>

      </li>

{% endfor %}
This provides a great way to show related images, titles, etc. within a list of documents. You can use the built in url attribute to link to a document’s rendered page.
Conclusion
Jekyll is a great solution for building small, static sites. It is worth mentioning that it will struggle to compete with sites that need a robust backend – including data manipulation and search. This is something to keep in mind when debating on choosing Jekyll for your next project. That being said, Jekyll’s setup is quick and it has some configurable options that allow you to specify how you’d like the site to work. The requirements are minimal and the quick setup functionality gives you a fully functioning site.
The recently added collection functionality has a straightforward declaration configuration as well as some customizable attributes, allowing you to render your documents into their own pages. Utilizing the configuration parameters, as well as YAML front matter, gives you the ability to render the documents in different areas of the site. Jekyll really excels in the area for which it’s been designed, and the functionality of collections has opened up the doors to leverage sites with more content.
Frequently Asked Questions (FAQs) about Jekyll Collections
What are Jekyll Collections and how do they differ from posts and pages?
Jekyll Collections are a unique feature of Jekyll that allows you to define a new type of document that behaves like Pages or Posts do by default. Unlike posts, which are typically used for blog content, and pages, which are used for static content, collections allow you to create a new type of document that can be used for any type of content. This makes collections extremely versatile and adaptable to your specific needs.
How do I create a Jekyll Collection?
Creating a Jekyll Collection involves two main steps. First, you need to define the collection in your site’s _config.yml file. This involves adding a new entry under the collections key with the name of your collection. Second, you need to create a new directory in your site’s root directory with the same name as your collection, prefixed with an underscore (_). Inside this directory, you can create the individual documents for your collection.
Can I use front matter in Jekyll Collections?
Yes, you can use front matter in Jekyll Collections just like you would in posts or pages. Front matter is a block of YAML at the beginning of the file that is used to set variables and metadata for the document. This can include things like the title, layout, and other custom variables.
How do I access the documents in a Jekyll Collection?
You can access the documents in a Jekyll Collection in your site’s templates using the site.collections variable. This will give you an array of all the documents in the collection, which you can then iterate over using Liquid’s for loop.
Can I sort the documents in a Jekyll Collection?
Yes, you can sort the documents in a Jekyll Collection using the sort filter in Liquid. By default, documents are sorted by their path, but you can also sort them by any front matter variable.
Can I paginate a Jekyll Collection?
Yes, you can paginate a Jekyll Collection using the paginator variable in your templates. This allows you to create a paginated list of documents in your collection, similar to how you would paginate posts.
Can I use Jekyll Collections with GitHub Pages?
Yes, you can use Jekyll Collections with GitHub Pages. However, keep in mind that GitHub Pages only supports a limited set of Jekyll plugins, so some features may not be available.
Can I use Jekyll Collections with Jekyll’s built-in server?
Yes, you can use Jekyll Collections with Jekyll’s built-in server. When you run jekyll serve, Jekyll will automatically build your site and make it available at http://localhost:4000.
How do I customize the URL of a document in a Jekyll Collection?
You can customize the URL of a document in a Jekyll Collection using the permalink front matter variable. This allows you to set a custom URL for each document, independent of its file path.
Can I use Jekyll Collections to create a blog?
Yes, you can use Jekyll Collections to create a blog. In fact, Jekyll’s built-in posts are actually a special type of collection. However, collections give you more flexibility and control over your content, so they can be a great choice for a blog if you need more than what posts offer.