
‘Bucket lists’ (a list of things to experience before death) have always been a popular list for people to maintain.
In Part One of this tutorial, we’ll create the basis for a simple Bucket List application using the IONIC framework. This will create a home page that enables users to sign up to the Bucket list app and sign in. We’ll use Firebase as a back end for our Bucket List application.
IONIC is a HTML5 mobile application development framework which helps developers build native looking apps. It is mainly focused on creating an attractive UI using web technologies such as HTML5, CSS and JavaScript. It requires AngularJS to drive it’s many features like gestures and animations.
Part two will show how to create a platform for a wish list in the Bucket list app.
Source code from this tutorial is available on GitHub.
Key Takeaways
- The tutorial provides a step-by-step guide on building a simple Bucket List application with the IONIC framework and Firebase. The IONIC framework is an HTML5 mobile application development framework that helps developers build native-looking apps with a focus on creating an attractive UI.
- The first part of the tutorial focuses on creating the home page that enables users to sign up and sign in to the Bucket List app. This involves installing Node.js, the node package manager npm, and IONIC. The tutorial also provides instructions on setting up the project structure and creating the home screen.
- The tutorial demonstrates how to implement sign-in functionality using Firebase as the back end. This involves registering a Firebase account, injecting the Firebase module into the application, and using the $authWithPassword API to authenticate against Firebase. On successful authentication, the user is redirected to the user home page.
- The tutorial concludes with a promise to cover the implementation of the sign-up functionality for the Bucket List app in the next part. The author invites readers to share their thoughts, suggestions, or any corrections in the comments section.
Getting Started
Start by installing Node.js if you don’t have it already, also install the node package manager npm.
Use npm to install IONIC.
npm install -g cordova ionic
We’ll be creating the app for the Android platform. So, make sure you have the required platform dependencies installed.
Once the installation is complete, create an IONIC project.
ionic start iBucketApp blank
The above command creates a blank IONIC project. Navigate to the project directory iBucketApp, add the required platform, build and emulate.
cd iBucketApp

ionic platform add android

ionic build android

ionic emulate android
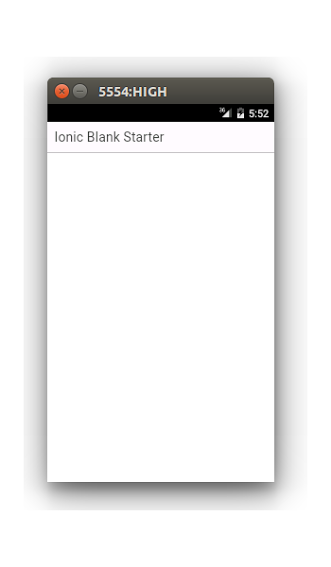
If all goes well, you should be able to see the blank app running in the android emulator.
Project Structure
If you look at the project structure, you can see that inside the project directory iBucketApp, there is a folder called www, this is the folder where we’ll be working.
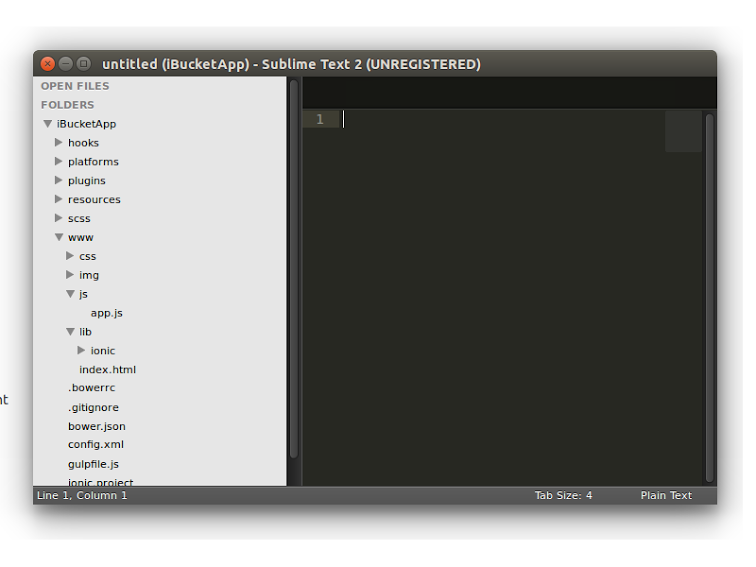
Inside www/js is a file called app.js which is the root file of our app. We’ll define our application routes inside app.js. Inside index.html, we’ll define the ion-nav-view where we’ll render different templates.
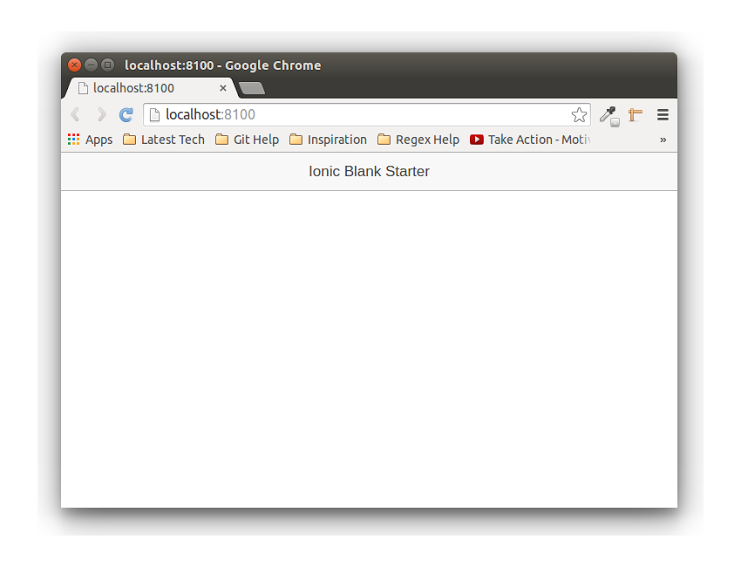
Making edits and running the app on the emulator is a time consuming task. So we’ll use the browser to test our app and when it’s ready we’ll try it on the android emulator. To make it work with the browser we’ll need to install the required package.json dependencies using npm. Inside the iBucketApp directory, run the following command to install dependencies.
npm install
IONIC provides command line utilities to make app development and testing easier. Once such command is ionic serve. Once dependencies are installed, run ionic serve and you should able to view the app in the web browser.
Creating the Home Screen
Let’s start by creating a home page for the iBucketList app. Inside the www directory create a folder called templates. Create a file called home.html.
We’ll be switching our view as per the url requested. So we’ll make use of the IONIC directive API ion-nav-view.
Remove all the code inside the index.html body tag. Add the ion-nav-view directive to the body of index.html.
<body ng-app="starter">

  <ion-nav-view></ion-nav-view>

</body>
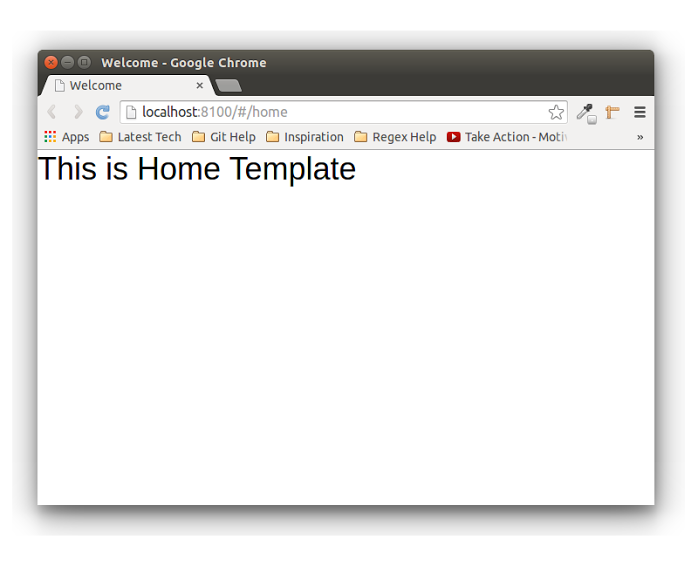
As per the url requested, we’ll render different views inside the ion-nav-view in index.html. The ion-view directive is another IONIC directive API which is the child of ion-nav-view. It’s a container which holds the view content. Open templates/home.html and add a ion-view with a header tag.
<ion-view>

     <h1>This is Home Template</h1>

</ion-view>
The template and containers are ready. Now we need to define the routes and their respective views. We’ll make use of angular-ui-router. Open js/app.js and define the home state.
.config(function($stateProvider, $urlRouterProvider) {

    $stateProvider

        .state('home', {

            url: '/home',

            templateUrl: 'templates/home.html',

            controller: 'HomeCtrl'

        })
    $urlRouterProvider.otherwise('/home');

});
In the above code, we have defined the template and controller for the url /home. We have also set the default url to /home.
Create a file called js/controller.js and define the HomeCtrl inside it.
angular.module('starter.controllers', [])
.controller('HomeCtrl', ['$scope', function($scope) {
}]);
Include the js/controller.js file in index.html.
<script src="js/controller.js"></script>
Inject starter.controllers into the starter app in app.js.
angular.module('starter', ['ionic','starter.controllers'])
Save the above changes and you should be able to see the changes in the browser.
Next, let’s modify the home.html template. We’ll start by adding a header to our app. Adding a header requires us to add the ion-nav-bar to the index.html page. Add this code above the ion-nav-view tag.
<ion-nav-bar class="bar-positive">

</ion-nav-bar>
The title of the ion-view passed will display in the header in ion-nav-bar. In home.html add the title attribute to ion-view.
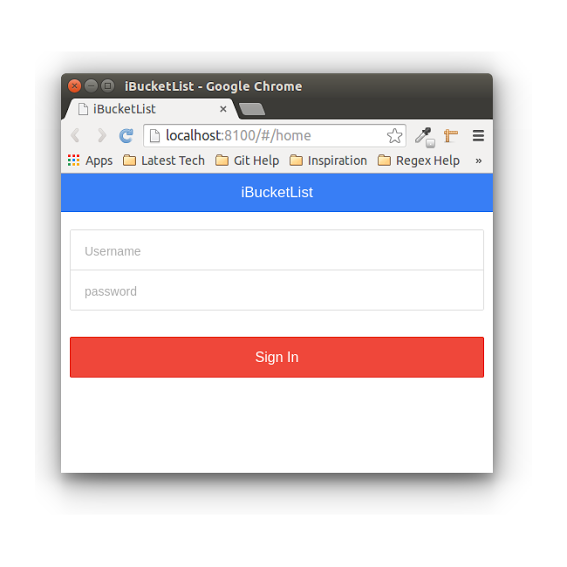
Let’s add a few elements for the user to sign in. We’ll start by adding the ion-content to home.html. Inside ion-content we’ll create input boxes and buttons. Here is the resulting code in home.html (Replace the current contents):
<ion-view title="iBucketList">

    <ion-content>

        <div class="list list-inset">

            <label class="item item-input">

                <input type="text" placeholder="Username">

            </label>

            <label class="item item-input">

                <input type="password" placeholder="password">

            </label>

        </div>

        <div>

            <button class="button button-block button-assertive">

                Sign In

            </button>

        </div>
    </ion-content>

</ion-view>
Save the changes and you should be able to view the sign in form on the home page.

The Sign In button is stretched. Let’s add some padding to it’s container.
Inside css/style.css, add:
.padding {

    padding: 10px;

}
Apply the padding style to the button parent div.
<div class="padding">

    <button class="button button-block button-assertive">

        Sign In

    </button>

</div>
Save the changes and you should be able view the new sign in form.
Implementing Sign In Functionality
We’ll be using Firebase as the back end for our Bucket list app. Register on Firebase if you don’t have an account already. Once registered you should have your own Firebase URL. For examples, here is my firebase URL:
https://burning-fire-1723.firebaseio.com
In order to use Firebase, we need to include the following script references in index.html.
<script src="https://cdn.firebase.com/js/client/2.0.4/firebase.js"></script>

<script src="https://cdn.firebase.com/libs/angularfire/0.9.0/angularfire.min.js"></script>
Once the references have been added, inject the Firebase module into the application. Modify controller.js to inject the Firebase module:
angular.module('starter.controllers', ['firebase'])
Inject $firebaseAuth into the HomeCtrl.
.controller('HomeCtrl',['$scope','$firebaseAuth', function($scope,$firebaseAuth)
Next in the home.html page, add the ng-model directive to the username and password input elements.
<label class="item item-input">

    <input type="text" placeholder="Username" ng-model="login.username">

</label>

<label class="item item-input">

    <input type="password" placeholder="password" ng-model="login.password">

</label>
Add the ngClick directive to the sign in button.
<button ng-click="signin()"  class="button button-block button-assertive">

                Sign In

</button>
In HomeCtrl, define a function called signin which will be invoked when the user clicks the Sign In button.
$scope.login={};
$scope.signin = function() {

    var username = $scope.login.username;

    var password = $scope.login.password;
    console.log(username, password);

}
Save the changes and try to sign in after entering the username and password. If all goes well you should be able to see the username and password in the browser console.
Next, we’ll try to authenticate against a user in Firebase. In order to make this work, first we’ll create a Firebase object using the Firebase URL. Add the following into the function we just created, just after ‘$scope.login={}’.
var firebaseObj = new Firebase("https://burning-fire-1723.firebaseio.com");
Using the firebaseObj we’ll create a loginObj.
var loginObj = $firebaseAuth(firebaseObj);
Now when the user clicks the Sign In button, we’ll use the $authWithPassword API to authenticate against Firebase.
loginObj.$authWithPassword({

        email: username,

        password: password

    })

    .then(function(user) {

        //Success callback

        console.log('Authentication successful');
    }, function(error) {

        //Failure callback

        console.log('Authentication failure');

    });
Here is the modified HomeCtrl code:
.controller('HomeCtrl', ['$scope', '$firebaseAuth', function($scope, $firebaseAuth) {
    $scope.login = {};

    var firebaseObj = new Firebase("https://burning-fire-1723.firebaseio.com");

    var loginObj = $firebaseAuth(firebaseObj);
    $scope.signin = function() {

        var username = $scope.login.username;

        var password = $scope.login.password;
        loginObj.$authWithPassword({

                email: username,

                password: password

            })

            .then(function(user) {

                //Success callback

                console.log('Authentication successful');
            }, function(error) {

                //Failure callback

                console.log('Authentication failure');

            });
    }

}]);
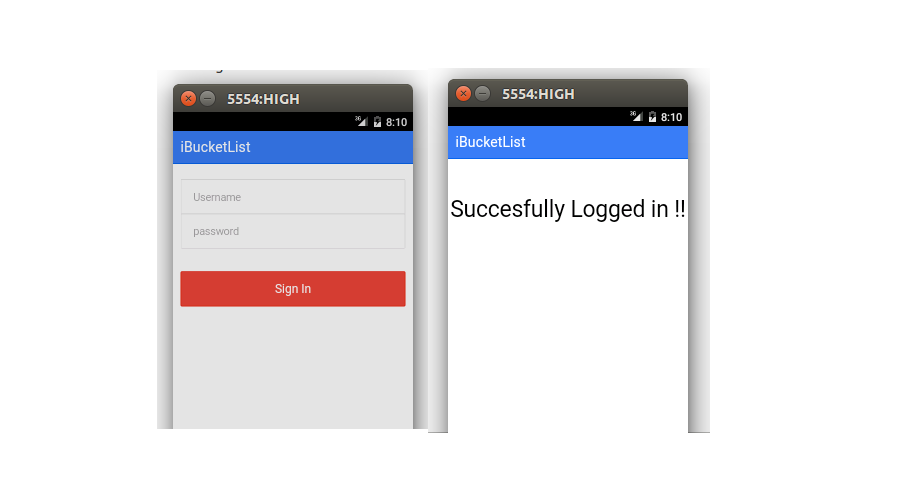
Save the above changes and try to sign in using username, sam@sam.com and password sam. On successful authentication you should have a success message in your browser console.
Let’s create a user home page to redirect the user once successfully authenticated. In the templates folder add a page called userHome.html. Here is the code for userHome.html:
<ion-view title="iBucketList">

     <ion-content>

     <div class="userHomeMsg">

        <span>

            <h2>Succesfully Logged in !!</h2>

        </span>

      </div>

    </ion-content>

</ion-view>
Add a new state called userHome for the userHome.html page in app.js.
.state('userHome', {

    url:'/userHome',

    templateUrl:'templates/userHome.html',

    controller:'UserHomeCtrl'

  })
Create the controller UserHomeCtrl inside the controller.js file.
.controller('UserHomeCtrl', ['$scope', function($scope){
}])
Now on successful authentication, we’ll redirect the user to the user home page. Inject $state into HomeCtrl.
.controller('HomeCtrl',['$scope','$firebaseAuth','$state', function($scope,$firebaseAuth,$state)
On the success callback of the $authWithPassword API call, redirect to the userHome state, replace the current sign in function with the following:
loginObj.$authWithPassword({

        email: username,

        password: password

    })

    .then(function(user) {

        //Success callback

        console.log('Authentication successful');

        $state.go('userHome');
    }, function(error) {

        //Failure callback

        console.log('Authentication failure');

    });
Save the changes and try to sign in using username sam@sam.com and password sam. On successful authentication you will be redirected to the user home page.
Wrapping Up
In this tutorial, we learnt how to get started with creating a simple Bucket List app using the IONIC framework and Firebase, developing the sign in and sign up forms and user home page.
In the next part of this tutorial, we’ll implement the sign up functionality for the bucket list app. Please let me know your thoughts, suggestions or any corrections in the comments below.
Frequently Asked Questions about Creating a Bucket List with Ionic Framework and Firebase
How can I integrate Firebase with my Ionic application?
Integrating Firebase with your Ionic application involves a few steps. First, you need to install the Firebase and AngularFire2 packages into your Ionic project using npm. Then, you need to initialize Firebase in your app module by providing your Firebase project credentials. After that, you can import Firebase modules into your components and use them to interact with Firebase services such as authentication, database, and storage.
How can I authenticate users in my Ionic app using Firebase?
Firebase provides several methods for user authentication, including email and password, Google, Facebook, and Twitter. To use these methods, you need to enable them in the Firebase console, install the necessary packages in your Ionic project, and then use the AngularFireAuth service to authenticate users.
How can I store and retrieve data in Firebase from my Ionic app?
Firebase provides a NoSQL database called Firestore for storing and retrieving data. To use Firestore, you need to install the necessary packages in your Ionic project and then use the AngularFirestore service. You can use this service to add, update, delete, and retrieve documents from your Firestore database.
How can I upload and download files in Firebase from my Ionic app?
Firebase provides a storage service for uploading and downloading files. To use this service, you need to install the necessary packages in your Ionic project and then use the AngularFireStorage service. You can use this service to upload files to your Firebase storage and download them when needed.
How can I handle errors in my Ionic app when using Firebase?
When using Firebase services in your Ionic app, errors can occur for various reasons, such as network issues, insufficient permissions, or invalid data. To handle these errors, you can use try-catch blocks in your code and display appropriate error messages to the user.
How can I secure my Firebase data in my Ionic app?
Firebase provides security rules for its database and storage services. These rules determine who can read and write data, and they can be customized based on your needs. To secure your Firebase data, you need to define these rules in the Firebase console.
How can I optimize the performance of my Ionic app when using Firebase?
Firebase provides a performance monitoring service that helps you understand how your app performs in real-world conditions. This service collects data about your app’s performance, such as startup time, network requests, and CPU usage, and displays it in the Firebase console. By analyzing this data, you can identify performance issues and fix them.
How can I test my Ionic app with Firebase?
Firebase provides a test lab service that allows you to test your app on a variety of devices and configurations. This service runs your tests in the cloud and provides detailed results, including screenshots and logs. To use this service, you need to write your tests using a supported testing framework and then upload them to the test lab.
How can I deploy my Ionic app with Firebase?
Firebase provides a hosting service that allows you to deploy your Ionic app to a global content delivery network (CDN). This service provides features such as SSL encryption, custom domain support, and automatic caching. To use this service, you need to build your Ionic app for production and then deploy it using the Firebase CLI.
How can I monitor and analyze user behavior in my Ionic app with Firebase?
Firebase provides an analytics service called Google Analytics for Firebase that helps you understand how users interact with your app. This service collects data about user behavior, such as user demographics, session duration, and in-app purchases, and displays it in the Firebase console. By analyzing this data, you can make informed decisions about how to improve your app.