

Practice is the perfect way to hone your Photoshop skills, and I’m sure we’ve all had enough practice with common, rudimentary tasks such as cropping corporate headshots, building margin and padding into document designs, and adding drop shadows to punchy marketing copy. Instead of practicing the same old tasks, let’s try a more unusual one that doesn’t hit your desk (or your inbox) every day. This tutorial is primarily an exercise in Photoshop’s Pen Tool (after all, we unfortunately can’t eat the ice cream once we’re done). We’ll be using various Pen Tool filters and layer styling to hone your Pen Tool prowess.
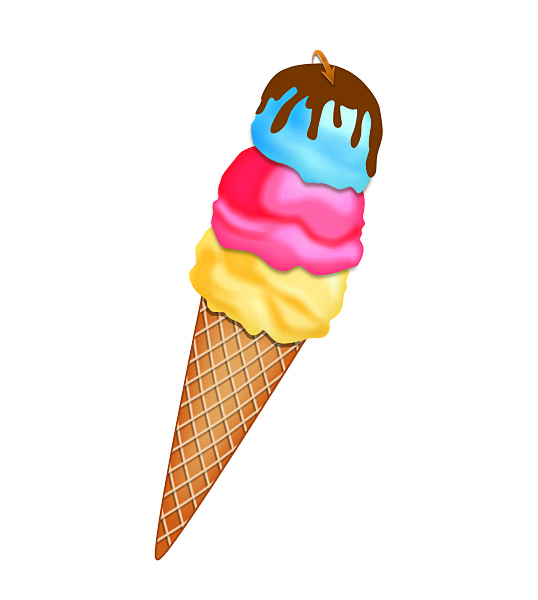
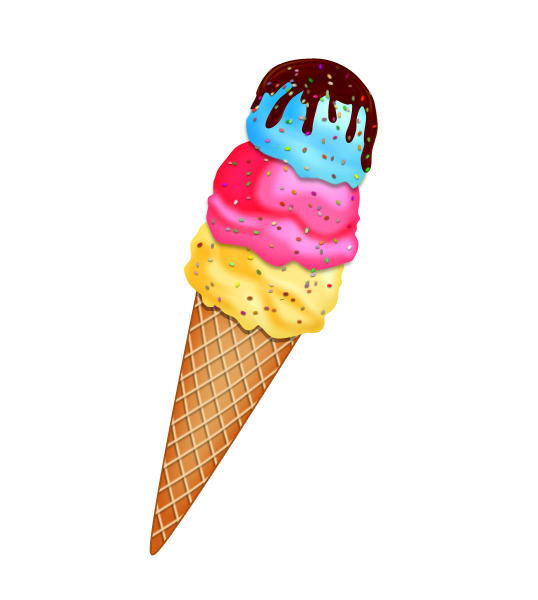
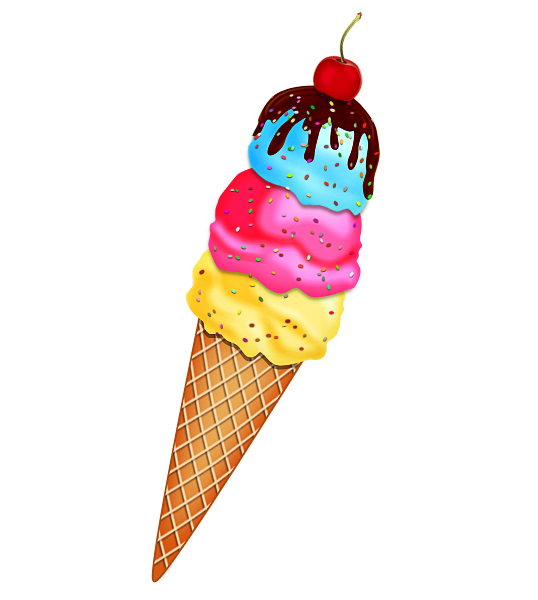
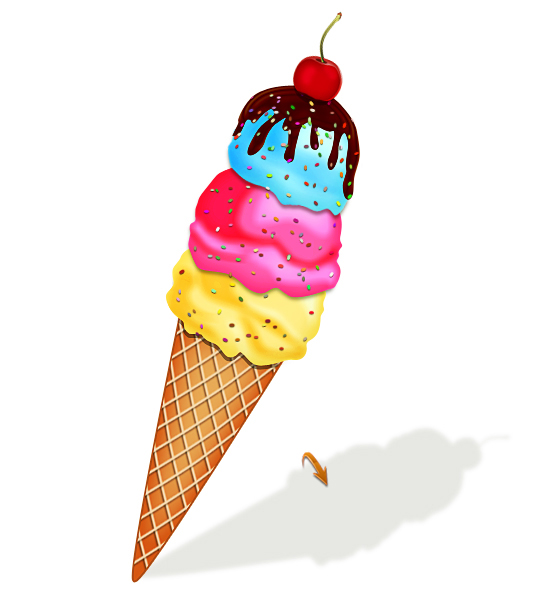
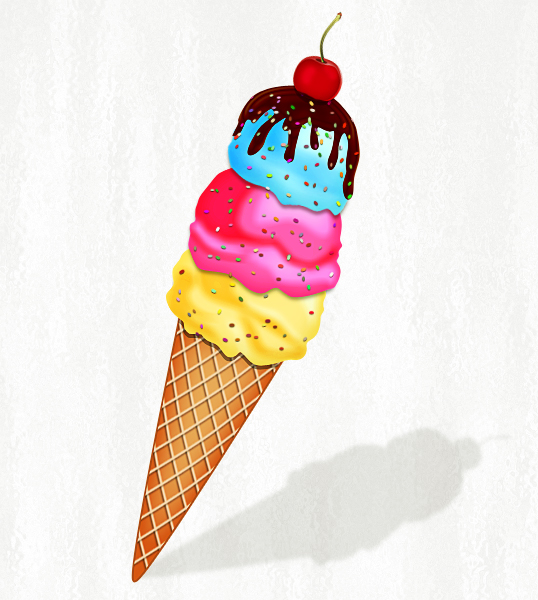
Let’s have a look at our final result:
Key Takeaways
- Photoshop’s Pen Tool is a primary focus of this tutorial, with various filters and layer styling techniques applied to create a stylized ice cream cone.
- The tutorial guides users through creating the cone, adding texture and color, designing ice cream scoops, and adding toppings like chocolate syrup and sprinkles.
- To add a realistic touch, the tutorial suggests creating shadows and highlights, using the Gaussian blur and Multiply blending mode, and adding texture to elements like the cone and cherry stem.
- The tutorial encourages experimentation with different colors, sizes, and placements of elements, emphasizing that practice and creativity are key to mastering stylized design in Photoshop.

Step 1
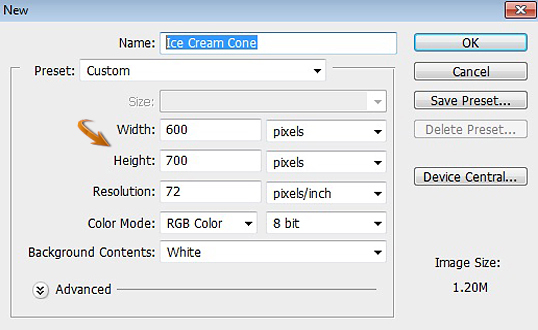
Create a new document with a 600px width and a 700px height in Photoshop.
Step 2
Set #e3a55d as your foreground color. Now, select the Pen Tool, click on the “Shape layers” option from the options bar, and draw the cone shape shown below.

Click on this cone layer and go to “Layer” > “Layer style” > “Blending options.” Use the settings provided below. You can also open the layer style window by double clicking on the cone layer.


Step 3
Next, we’ll create stripes for the cone biscuit. Firstly, select #f5c28a as your color and then pick “Hard round brush” with 3px size. Now, select the Pen Tool, choose “Paths” from top options bar, and draw a slightly curved line like the one below. After that, right-click and select “Stroke Path” > “Brush.” Then, press “Delete” to get rid of the path.

Double-click on this new line layer and use the settings below to cast a shadow.
Step 4
Now, we need few more copies of this line. To do this, take the Move Tool over the line and press the Alt key. You’ll notice double arrows; now simply drag the line a bit. Repeat this step to get the desired copies of the line.

Collect all of the stripe layers into a single group, duplicate this group, and go to “Edit” > “Transform” > “Flip horizontal.” After that, press Ctrl + “T” to activate the Free Transform Tool. Tilt these duplicated stripes group to form the crisscross pattern common to waffle cones.

Merge both “cone stripe” groups together. You can do this by selecting the groups by holding the Shift key, then right-click to open the options window and choose “Merge layers.” Once you are done, click on the merged layer and then press Ctrl + the thumbnail of cone layer. Now, click on the “Add layer mask” icon found at the bottom of the layers panel.

Step 5
Now, we’ll move ahead to create different flavored (and different colored) ice cream scoops. Select the Pen Tool with the “Shape layers” option to draw the shape as shown below. Use #ffeb8a as the color for this.

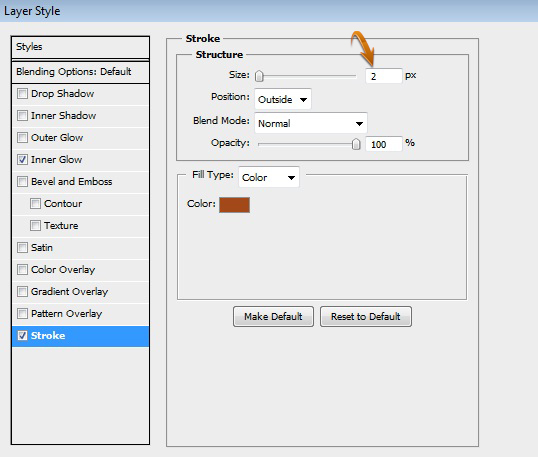
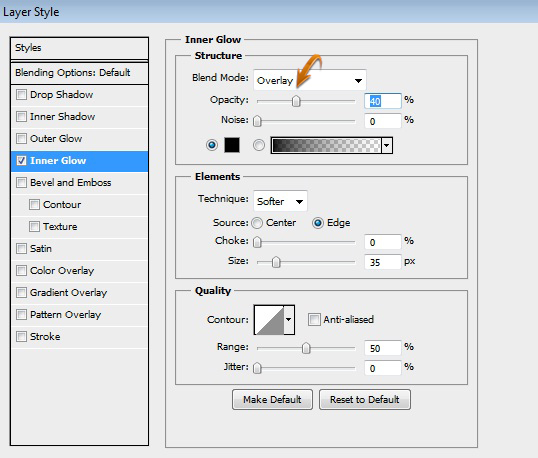
Double-click on the scoop layer and use the settings below to add Inner Glow to the ice cream.

Step 6
Next, draw some shadowing and highlights over the scoop using the Pen tool. You can approach this step roughly and imprecisely to get the proper imperfections for ice cream. I’ve used #fec22b for shadows and #fbfec6 for highlights. Once you are done, right-click on the scoop layer, choose “Copy layer style,” right-click on rest of the shape layers, and select “Paste layer style” to apply the same inner glow effect on them.

Step 7
Merge all the layers that comprise the scoop of ice cream, then go to “Filter” > “Artistic” > “Palette Knife.” Use the following settings.


Step 8
Duplicate the scoop layer, turn it black using “Color Overlay,” change the blending mode of this layer to “Multiply,” and then reduce its opacity to 40%. Place this layer below the original scoop layer; drag it a bit downward and go to “Filter” > “Blur” > “Gaussian blur.” Use a 1.5px value for the Gaussian blur. You can erase unwanted shadow area.

Step 9
You can create more scoops using the same technique from steps 5 through 8. Add as many scoops as you dare. Reducing the overall size of each new scoop will make the cone look balanced.

Step 10
Now, we’ll create chocolate syrup over the ice cream scoops. Draw the shape shown below using the Pen Tool with #753700 as your chosen color.
Step 11
Double-click on the newly-added chocolate syrup layer and use the following settings for “Satin.”


Step 12
For additional toppings (and additional Pen Tool practice), we’ll create sprinkles over the chocolate. Set any bright shades as your foreground and background colors, I am using red and yellow. Then, use these settings within the brush panel.
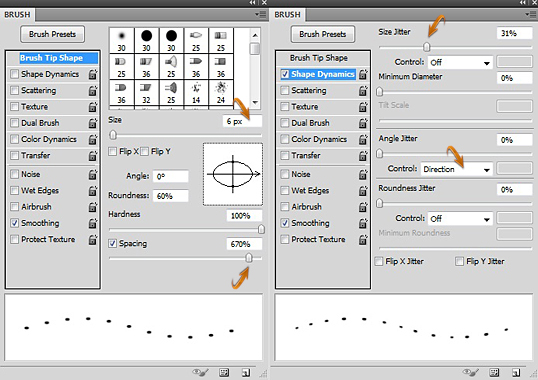

Apply the brush as shown below. Carefully drawing your brush over the ice cream should result in an even, multicolored sprinkling of… well… sprinkles on your ice cream.
Step 13
Next, we’ll create a cherry to place at the top. Set #ce6d80 as your foreground color. Select the Ellipse Tool to make a circle. Then, use “Add anchor point tool” to add anchor points and adjust the circle shape as below. Once you are done, duplicate this layer, reducing the size of the new duplicate slightly using the Free Transform Tool, and changing its color to #d6030c. Now, select the Elliptical Marquee Tool and fill it with #710000 to form the depressed area on the top of the cherry. After that, go to “Filter” > “Blur” > “Gaussian blur” and use the value of 1px to apply a blur effect.

Step 14
Use the following settings to add an Inner Glow to all of the layers comprising your cherry.
Now, draw a cherry stem using your Pen tool with #c9c770 and #b9824a as your colors.

Step 15
To give the cherry stem some texture and character, click on the green stem layer and apply the following layer style settings.


Use these settings for Inner Glow on the brown cap at the very top of the stem.


Step 16
To create few highlights, select the Soft Round Brush Tool and apply it on a new layer. Change the blending mode of this layer to “Soft Light.”

Merge all layers forming cherry together, and reduce the cherry’s size as needed using the Free Transform Tool. Place it nicely over the ice cream at an angle. Erase the lower edge of the cherry to give the impression (no pun intended) that it’s embedded in the ice cream.

Step 17
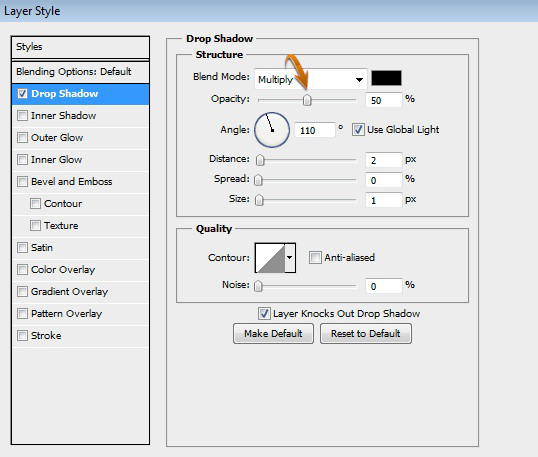
Collect all of the layers forming your ice cream cone into a new group, and duplicate this group. Now, merge the duplicated group. Reduce its size and arrange it at an angle using the Free Transform Tool. Now, use the same technique from step 8 to create shadow for the ice cream cone. My shadow is shown below.
Step 18
Now, we’ll create a subtle background. Set #e7e7e7 and #ffffff as your foreground and background colors, respectively. Create a new layer and fill it with #e7e7e7 using the Paint Bucket Tool. Then, go to “Filter” > “Render” > “Fibers.”

Step 19
Next, go to “Filter” > “Distort” > “Glass.” Use the following settings for it.

Step 20
Lastly, click on the appropriate icon to “Create new fill or adjustment layer” found at the bottom of the layers panel, and select “Curves.” Use these settings to adjust the tone.

That’s all guys. Hope you enjoyed the tutorial, polished your Pen Tool skills, and learned something useful. Don’t forget to share your thoughts, and possibly your ice cream as well. Have fun, and enjoy your ice cream!
Frequently Asked Questions (FAQs) about Creating a Stylized Ice Cream Cone in Photoshop
What are the basic tools needed in Photoshop to create a stylized ice cream cone?
To create a stylized ice cream cone in Photoshop, you will need to familiarize yourself with several tools. These include the Pen Tool for creating the basic shape of the ice cream and cone, the Gradient Tool for adding color and depth, and the Brush Tool for adding details and texture. You will also need to use the Layers Panel to manage your different elements and the Blending Options to add effects such as shadows and highlights.
How can I add texture to my ice cream cone in Photoshop?
Adding texture to your ice cream cone can make it look more realistic. You can do this by using the Brush Tool with a texture brush. You can find a variety of texture brushes online or create your own. Once you have your brush, you can add texture by painting on a new layer and adjusting the layer’s blending mode and opacity.
Can I use different colors for my ice cream cone?
Absolutely! You can use any colors you like for your ice cream cone. The Gradient Tool is particularly useful for this, as it allows you to create a smooth transition between two or more colors. You can also use the Color Picker to choose your colors, and the Swatches Panel to save them for later use.
How can I make my ice cream cone look 3D in Photoshop?
To give your ice cream cone a 3D look, you can use the Bevel and Emboss effect in the Blending Options. This effect allows you to add depth and dimension to your cone by creating the illusion of light and shadow. You can adjust the depth, size, and direction of the light to achieve the desired effect.
Can I add toppings to my ice cream cone in Photoshop?
Yes, you can add toppings to your ice cream cone. You can do this by creating new shapes with the Pen Tool or the Custom Shape Tool, and then adding color and texture with the Gradient Tool and Brush Tool. You can also use the Blending Options to add effects such as shadows and highlights to your toppings.
How can I save my ice cream cone design for future use?
Once you’re happy with your ice cream cone design, you can save it by going to File > Save As. You can choose to save your design as a Photoshop file (.PSD) to preserve your layers and effects, or as a JPEG or PNG file for sharing or printing.
Can I use my ice cream cone design for commercial purposes?
If you created the design yourself and did not use any copyrighted materials, then yes, you can use your ice cream cone design for commercial purposes. However, if you used any resources such as brushes or textures that are not free for commercial use, you will need to obtain the necessary permissions or licenses.
How can I improve my skills in creating stylized designs in Photoshop?
Practice is key when it comes to improving your skills in Photoshop. Try creating different types of designs, experimenting with different tools and effects, and challenging yourself with more complex projects. You can also learn from others by watching tutorials, taking online courses, or joining Photoshop communities.
What are some common mistakes to avoid when creating a stylized ice cream cone in Photoshop?
Some common mistakes to avoid include not using layers effectively, overusing effects, and not saving your work regularly. It’s also important to pay attention to details such as proportions, colors, and textures, as these can greatly affect the overall look of your design.
Can I create other types of food in Photoshop?
Yes, you can create all sorts of food in Photoshop! The process is similar to creating an ice cream cone. You just need to use the appropriate shapes, colors, and textures for the food you want to create. You can find many tutorials online that can guide you through the process.

