
Key Takeaways
- The tutorial series is designed to help beginners to intermediate-level developers build a Node.js-powered real-time chatroom web app fully deployed in the cloud, using Express and Azure.
- Express is a minimal, open source, and flexible Node.js web app framework designed to make developing websites, web apps, and APIs much easier. It helps you respond to HTTP requests with route support, simplifying the generation of HTTP responses.
- The tutorial discusses how to start a new Express-based Node project and deploy it to Azure. It also explains how to create and configure an HTTP server and how to map a URL path in a HTTP request to a specific function for handling the response.
- The tutorial provides instructions on how to deploy the Express-based Node.js app to Azure Cloud, assuming that the reader has an Azure account setup.
- The tutorial also provides a brief explanation of how Express works with Jade, a popular templating engine, to generate HTML responses. It also explains how to use Azure Functions with Express.js, how to handle data persistence, monitor, scale, secure, debug, and optimize the performance of a Node.js app on Azure.
This article is part of a web dev tech series from Microsoft. Thank you for supporting the partners who make SitePoint possible.
This Node.js tutorial series will help you build a Node.js-powered real-time chatroom web app fully deployed in the cloud. In this series, you’ll learn how to setup Node.js on your Windows machine (or just learn the concepts if you’re on Mac), how to develop a web frontend with Express, how to deploy a node express apps to Azure, how to use Socket.IO to add a real-time layer, and how to deploy it all together. This is a beginner- to intermediate-level article – you’re expected to know HTML5 and JavaScript.
Part 1 – Introduction to Node.js
Part 2 – Welcome to Express with Node.js and Azure
Part 3 – Building a Backend with Node.js, Mongo and Socket.IO
Part 4 – Building a Chatroom UI with Bootstrap
Part 2: Welcome to Express with Node.js and Azure
Welcome to Part 2 of the hands-on Node.js tutorial series: Build a Node.js-powered chatroom web app.
In this installment, I will show you how to start a new Express-based Node project and deploy it to Azure.
What is Express?
Express is a minimal, open source and flexible Node.js web app framework designed to make developing websites, web apps and APIs much easier.
Why use Express?
Express helps you respond to HTTP requests with route support so that you may write responses to specific URLs. Express supports multiple templating engines to simplify generating HTTP responses.
You will want to make sure Node.js is properly installed and ready. See part 1 of this tutorial series: Introduction to Node.js.
Let’s Get Started
Starting a new Node.js project with Visual Studio is fairly straightforward.
-
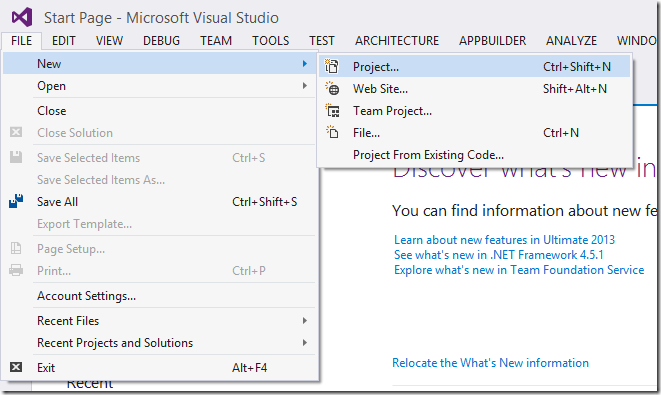
Start Visual Studio. On the File menu, click New , and then click Project.
-
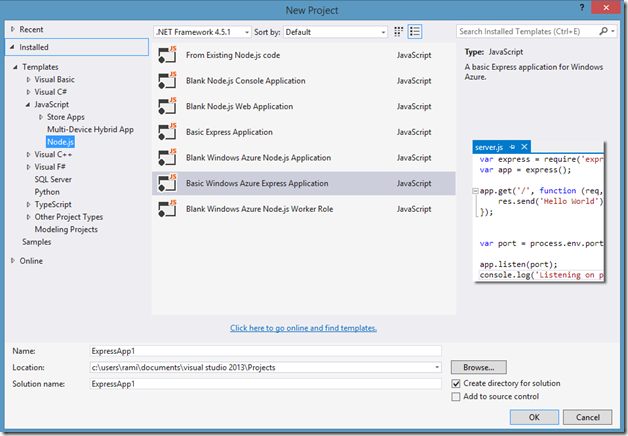
You will want to go to Installed > Templates > JavaScript menu item on the left and select Basic Windows Azure Express Application on the right. Choose a location and name for your project and click OK.
-
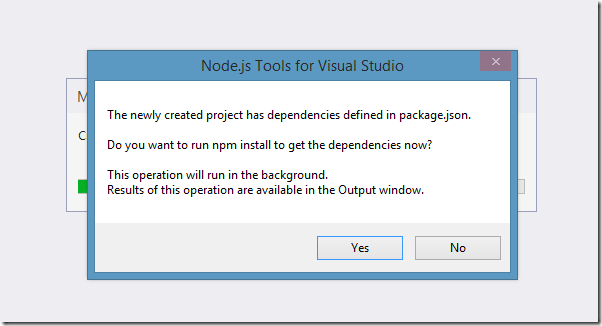
A message will notify you that dependencies defined in
package.jsonneed to be installed using npm the package manager. Take a look at an explanation of npm here. -
A project will be generated that includes a file called
app.js. We will start there.
Explanation of app.js
//
/**
* Module dependencies.
*/
var express = require('express');
var routes = require('./routes');
var user = require('./routes/user');
var http = require('http');
var path = require('path');
var app = express();
// all environments
app.set('port', process.env.PORT || 3000);
app.set('views', path.join(__dirname, 'views'));
app.set('view engine', 'jade');
app.use(express.favicon());
app.use(express.logger('dev'));
app.use(express.json());
app.use(express.urlencoded());
app.use(express.methodOverride());
app.use(app.router);
app.use(require('stylus').middleware(path.join(__dirname, 'public')));
app.use(express.static(path.join(__dirname, 'public')));
// development only
if ('development' == app.get('env')) {
app.use(express.errorHandler());
}
app.get('/', routes.index);
app.get('/users', user.list);
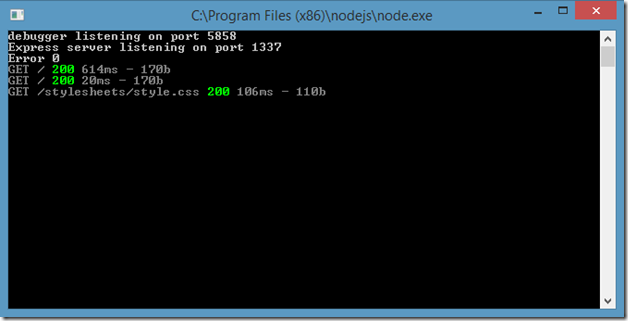
http.createServer(app).listen(app.get('port'), function(){
console.log('Express server listening on port ' + app.get('port'));
});
Lines 6 through 10
Lines 6 through 10 load various modules including express, http and path. What’s interesting is that we also load a module called routes (which will be explained later) and a module in the routes folder called user.
Line 12
On this line, we called the function express() which will create our app. This app will be used when we decide to create a HTTP Server and it will be the object containing all the properties of our web application as well as the mapping between the URL received in a request and the function handling its response.
Line 15 through 17
In these lines, we set various configuration parameters such as what port the server will run on (line 15) and in which directory the template HTML files will be found (line 16). On line 17, we specify the templating engine that we want to use, in this case Jade. Jade is a popular templating engine that makes writing HTML extremely easy and without the extraneous syntax requirements of angle brackets (<>). You can change the templating engine to simply return HTML as is and not do anything further by replacing Line 17 with the following code:
app.set('view engine', 'html');
Line 18 through 23
On these lines, we set various configuration parameters. You can find the meaning of each individual parameter by taking a look at the API documentation. The explanation of these configuration parameters is not required for this tutorial.
Line 24 and 25
These lines are interesting as it is where we specify the middleware to handle Stylus CSS sheets and HTML. Middleware is a layer that is automatically inserted into the function calls between receiving the request and returning a response. In this case, we are asking Express to run the Stylus middleware and the static middleware for all requests in which the URL specificies a path inside the public folder of our project. We use to this server CSS and JavaScript verbatim and not execute a request function for that URL.
Line 27 through 30
In these lines, we are specifying to Express to handle errors if the environment is set as development and not production. You don’t have to worry about these lines.
Line 32, 33
In these lines, we are finally mapping a URL path in a HTTP request to a specific function to handling the response. We will get back to this shortly.
Line 35 through 38
In these lines, we create a HTTP server and specify the port, along with a callback on success to say the server has been started.
Routing
Routing and how to properly do routes is a controversial topic and there is no correct answer. There are plenty of modules implementing routing for Express and Node.js, each with a different flavor and structure. We will stick to the routing engine packaged with Express. In app.js, we already specified the routing engine and we import the route modules from the route directory. We added the routes in line 32-33. In other words, we mapped the URL in the browser to the function on the server that will respond to that request. Those functions that will handle the requests are in the routes directory. Let’s take a look at index.js.
/*

 * GET home page.

 */
exports.index = function(req, res){

  res.render('index', { title: 'Express' });

};
It’s just three lines but those three lines do a ton of work. Line 1 adds a function called index to the exports variable. The exports variable is created by Node.js every time a module is loaded to allow you to pass functions and variables to other modules, in this case, the app.js module.
The function index takes two parameters, req and res. If you recall from Part 1, the req parameter held the request received and the res parameter holds a variable to which you write your response. In this case, we are executing the render function in the response variable which takes two parameters. The first is the parameter that specifies the view to use (the view is a file in the views directory) and the extension of the file is not required so index will make to index.jade. The second parameter is an object containing data that can be inserted into the jade template.
The Index Template
The index.jade template is a whole different language that will not be explained in this tutorial. A knowledge of HTML is required for this entire tutorial series and in this case you will notice that the jade templating language maps almost always directly to HTML.
extends layout
block content

  h1= title

  p Welcome to #{title}
With the exception of the block and extends keywords, the other keywords are signify exactly the same thing as in HTML. This template will be converted the Jade middleware we loaded into the following HTML.
<!DOCTYPE html>

<html>

<head>

    <title>Express</title>

    <link rel="stylesheet" href="/stylesheets/style.css">

</head>

<body>

    <h1>Express</h1>

    <p>Welcome to Express</p>

</body>

</html>
You will notice that the h1 tag that was generated contains the value of title that we passed previously in the render function. You will also notice it was inserted into the p tag directly in line with the text. You will also undoubtedly notice that the entire HTML generated includes things not mapped in Jade. That is where the extends keyword comes in. In this case, we chose to extend the layout.jade file.
doctype html

html

  head

    title= title

    link(rel='stylesheet', href='/stylesheets/style.css')

  body

    block content
You’ll notice that the block content reappears in both files, this is used by jade to specify that this block of HTML goes here (in the layout.jade file) and this is what it looks like (in the index.jade file).
In the layout.jade file, you will notice a link to a style.css file which seemingly does not exist in our initial project. This file is generated from the style.styl code using the Stylus middleware as we set it up in app.js.
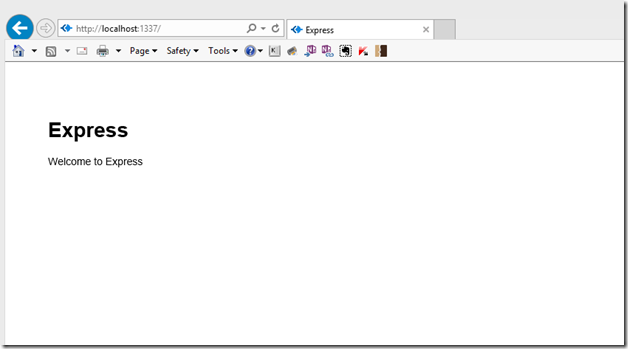
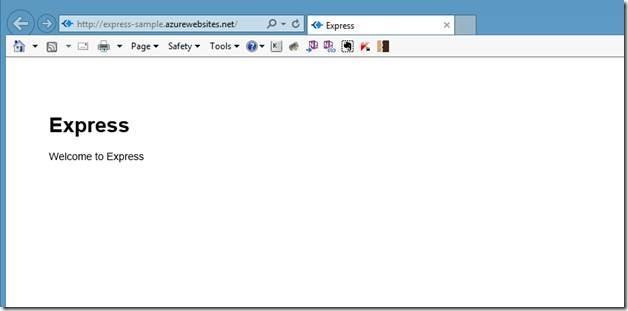
There you have it! How we go from app.js to a route defining the response and to finally the view declaring what that response looks like. If you choose to run the web app locally by clicking on the debug button (you can choose a different browser by clicking the dropdown button on the right).
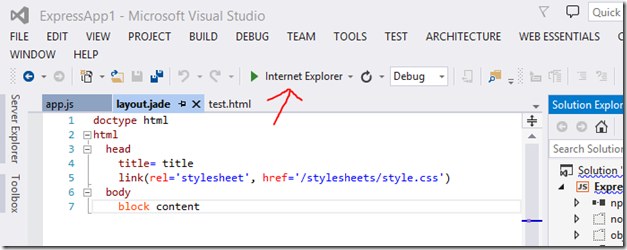
When pressed, this will start a Node.js server and open Internet Explorer to the root URL.
Publishing to Azure (For Those Using Visual Studio)
Now that we’ve got an Express-based Node.js app working, let’s deploy it to the cloud in a few clicks. You can deploy to any cloud that supports Node.js among them Nodejitsu, Heroku, and Engine Yard. I will be using Microsoft Azure as I can run a Node.js website on there for free.
You can sign up for a free trial of Microsoft Azure here. You will get $220 to spend on all Azure services. For the service we are using, Azure Websites, you can actually run 10 websites without spending a dime.
-
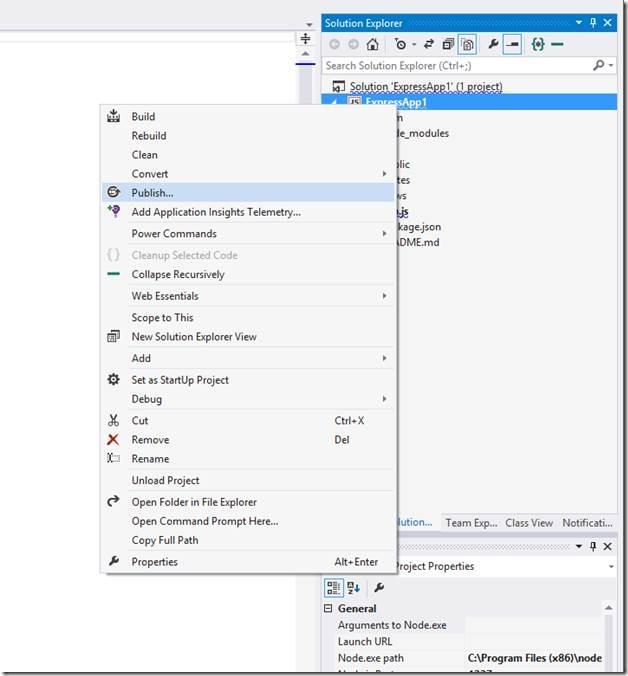
Once you’ve got your Azure account setup, we will go back to the IDE and right click on the Express project and select the Publish item from the menu.
-
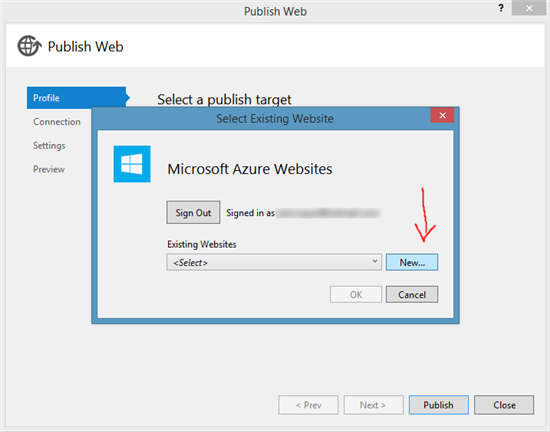
The Publish menu item will open a wizard with a few options, you will want to select the target Microsoft Azure Websites.
-
You will be asked to sign in at this step. Please use the same Microsoft Account here as you did on the Azure sign up.
-
You will want to click New to create a new Azure website. If you already have one created, you can simply select it from the dropdown.
-
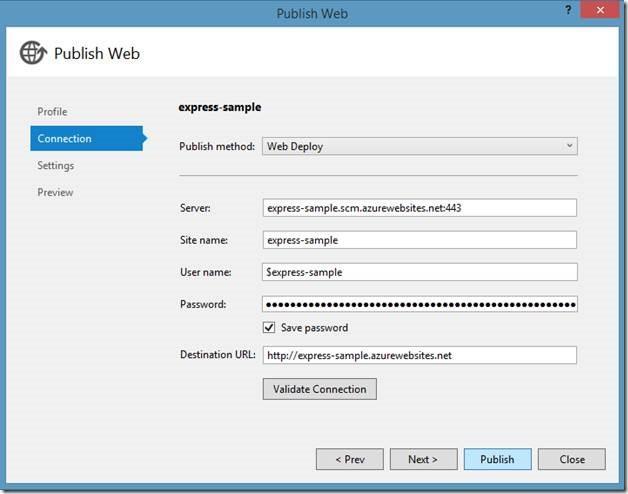
Complete the fields in the wizard (just like below). Make sure to choose a unique site name and click Create.
-
You will be faced with a pre-filled wizard with a Publish bottom at the button, press Publish.

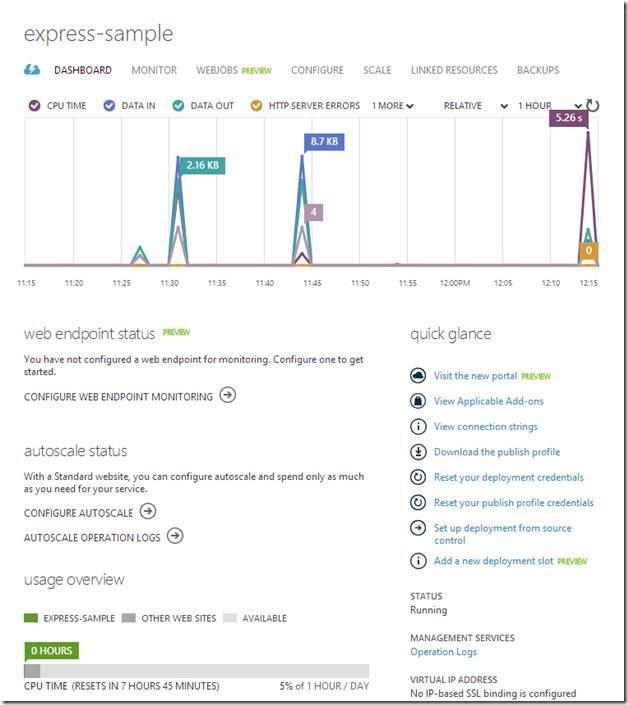
You’re Now Published to the Azure Cloud!
Take a tour of the Azure Websites in the Azure portal. You can watch a video here.
Note: if you encounter errors in publishing, be sure to place your project closer to the root of the drive to avoid temporary copying errors.
Stay Tuned for Part 3!
Part 3 – Building a Backend with Node.js, Mongo and Socket.IO here. You can stay up-to-date on this and other articles by following my twitter account.
More Learning for Node on Azure
For more in-depth learning on Node, my course is available here on Microsoft Virtual Academy.
Or some shorter-format videos on similar Node subjects:
This article is part of the web dev tech series from Microsoft. We’re excited to share Project Spartan and its new rendering engine with you. Get free virtual machines or test remotely on your Mac, iOS, Android, or Windows device at modern.IE.
Frequently Asked Questions (FAQs) about Building a Node.js Powered Chatroom Web App with Express and Azure
How can I deploy my Node.js app on Azure?
Deploying your Node.js app on Azure is a straightforward process. First, you need to create an Azure account if you don’t have one. Once you have an account, navigate to the Azure portal and create a new Web App. During the creation process, you’ll be asked to select a runtime stack – choose Node.js. After creating the Web App, you can deploy your Node.js app using Git, FTP, or Azure DevOps. Azure also supports continuous deployment from GitHub, Bitbucket, and Azure Repos.
What is Express.js and why is it used in Node.js applications?
Express.js is a minimal and flexible Node.js web application framework that provides a robust set of features for web and mobile applications. It simplifies the process of writing server code, as it combines the functionalities of both HTTP and middleware into a simple API, allowing you to build your applications with less code and effort. Express.js is used to handle requests, routing, and render HTML pages to the client.
How can I use Azure Functions with Express.js?
Azure Functions is a serverless solution that allows you to write less code, maintain less infrastructure, and save on costs. Instead of worrying about deploying and maintaining servers, the cloud infrastructure takes care of it. To use Azure Functions with Express.js, you need to install the ‘azure-function-express’ npm package. This package creates an Express application and wraps it into an Azure Function.
What are the benefits of using Azure for Node.js development?
Azure provides a robust and scalable cloud platform for Node.js development. It offers a wide range of services that can enhance your Node.js applications, such as Azure Functions for serverless computing, Azure Cosmos DB for NoSQL data, and Azure App Service for hosting. Azure also provides excellent DevOps support, with built-in continuous integration and deployment for Node.js apps.
How can I handle data persistence in my Node.js app on Azure?
Azure provides several options for data persistence in your Node.js app. You can use Azure Cosmos DB, a globally distributed, multi-model database service. It offers turnkey global distribution, elastic scaling of throughput and storage, and real-time analytics. Another option is Azure SQL Database, a fully managed relational database with auto-scale, integral intelligence, and robust security.
How can I monitor my Node.js app on Azure?
Azure provides built-in support for monitoring your Node.js applications. You can use Azure Monitor, which collects, analyzes, and acts on telemetry data from your Azure and on-premises environments. It helps you understand how your applications are performing and proactively identifies issues affecting them and the resources they depend on.
How can I scale my Node.js app on Azure?
Azure provides automatic scaling capabilities for your Node.js applications. With Azure App Service, you can configure auto-scale settings based on actual CPU usage, memory usage, or custom metrics. This allows your application to handle varying loads and helps you optimize your resource usage and costs.
How can I secure my Node.js app on Azure?
Azure provides several security features to help protect your Node.js applications. You can use Azure Active Directory for identity and access management, Azure Key Vault for managing cryptographic keys and other secrets, and Azure Security Center for unified security management and advanced threat protection.
How can I debug my Node.js app on Azure?
Azure provides several tools for debugging your Node.js applications. You can use the Azure portal’s console feature to interact with your app and diagnose issues. Azure also supports remote debugging of Node.js apps running on Azure App Service.
How can I optimize the performance of my Node.js app on Azure?
Azure provides several services and features to help optimize the performance of your Node.js applications. You can use Azure CDN to cache static assets closer to users, reducing latency. Azure Redis Cache can be used to cache frequently accessed data, reducing database load. Azure Monitor can help you identify performance bottlenecks and optimize your app accordingly.