

Key Takeaways
- The Google Maps API is a powerful tool for web developers, but lacks flexibility and creativity with map markers. By combining CSS and JavaScript, developers can create animated map markers that respond to user interactions.
- The process involves adding an image to your markers, adding ‘optimized:false’ to the marker specification to render each marker as a separate DOM element, creating an overlayView to organize all markers in one pane, and finally, using CSS to animate the markers. This strategy can be used to include animated markers in any project.
- For greater control over marker animations, developers can include external toggles, add animations for specific user interactions such as clicks or hovers, and apply different animations for different types of markers. This allows for a more interactive and engaging user experience.
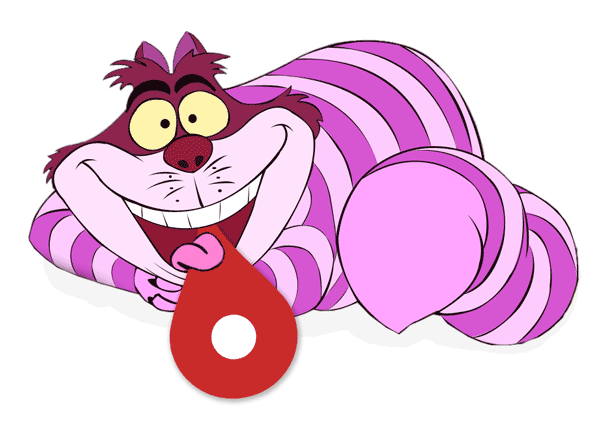
Original image: DeviantArt
The Google Maps API allows web developers to create an excellent user experience with just a few lines of code through their magical, built-in functions.
However, there’s one glaring exception: flexibility and creativity with map markers.
Sure, you can add a custom marker image, a tooltip, and a label. But those are all static, text-oriented ways of interacting, which can become overwhelming on a map with many points. There’s no standard way to create interactive markers that respond to the user’s actions.
I simply wasn’t satisfied with this, so I set out to find a way to create truly distinctive maps. I’m going to show you how to include CSS3 animations on your map markers so that you can have them dance, wriggle and hide until they pretty much jump out of the screen.
If the user hovers over a marker, clicks on it or uses a toggle outside the map, you’ll be able to use any CSS animation to bring it to life. This guide will focus on a simple strategy you can use to include animated markers in any of your projects. (For comparison, two other examples — by Ryan Connolly and Felipe Figueroa — use a similar method.)
Here’s a basic example of animated markers at work. The famous Cheshire Cat acts as a marker for three separate points in Massachusetts, and you can use the toggle in the top right to change his animations:
See the Pen CSS Google Map Markers by SitePoint (@SitePoint) on CodePen.
The Basics
There a few steps you’ll need to take to add CSS animation capabilities to your markers.
Step 1
Add an image to your markers. This is how you specify your image:
var catIcon = {

    url: myImageURLhere,

    //state your size parameters in terms of pixels

    size: new google.maps.Size(70, 60),

    scaledSize: new google.maps.Size(70, 60),

    origin: new google.maps.Point(0,0)

}
Step 2
Add optimized:false to the marker specification. This allows you to render each marker as a separate DOM element:
var marker = new google.maps.Marker({

    position:latLng,

    map: map,

    // set the icon as catIcon declared above

    icon: catIcon,

    // must use optimized false for CSS

    optimized: false

});
Step 3
Create an overlayView that will organize all your markers in one pane, which you can then access from the DOM:
var myoverlay = new google.maps.OverlayView();

    myoverlay.draw = function () {

        this.getPanes().markerLayer.id='markerLayer';

    };

myoverlay.setMap(map);
You can give your marker layer an id on the getPanes() line so you can use it in CSS. This Overlay view will automatically collect any markers that are not already in another layer. In this case, there are no other layers, so it collects all markers.
Step 4
Use CSS to give an animation to all markers in your layer. This can be an animation that happens once, or happens continuously:
#markerLayer img {

  animation: pulse .5s infinite alternate;

  -webkit-animation: pulse .5s infinite alternate;

  transform-origin: center;

  -webkit-transform-origin: center;

}
Flexibility Options
The above steps will let you add an animation to all markers immediately, so here are a few options for greater control over animating your markers.
External toggle
Let’s say you want to include a legend or some clickable toggles so that users can show and hide different layers, or have markers with certain features change their CSS animation. That’s easy! Just use a jQuery .click() handler, like this:
$('.btn').click(function(){

   $('#markerLayer img').css('animation', 'myAnimationOptionsHere');

   $('#markerLayer img').css('-webkit-animation', 'myAnimationOptionsHere')

})
On click/hover
Want to add a brief animation when users hover over one marker, or click on it? Let the hackiness begin! First, create a global array to store all your markers:
var allMarkers=[];Then, when you declare each marker, add a title attribute and stringify it:
var marker = new google.maps.Marker({

    position:latLng,

    map: map,

    icon: catIcon,

    optimized: false,

    title: allMarkers.length.toString()

});
Adding a title attribute that is dependent on the length of the array will create unique ids for each marker. Then add the marker to the array:
allMarkers.push(marker);Finally, here are your click and hover events. You identify each individual marker by using this individual title identifier:
google.maps.event.addListener(marker, 'click', function() {

  var thisTitle= Number(this.title);

  $('#markerLayer img').eq(thisTitle).css()...

})
google.maps.event.addListener(marker, 'mouseover/mouseout', function() {

  var thisTitle= Number(this.title);

  $('#markerLayer img').eq(thisTitle).css()...

})
Different animations for different marker types
Let’s say you add two separate marker types to a map: baseball fields and football fields. Since both are automatically included in your overlay layer, you need a way to apply separate animations to each of them. That’s easy! Just use the src attribute in your CSS and match it with the image URL of the respective markers:
#markerLayer img[src='/img/myURLpath'] {

    animation: pulse .5s infinite alternate;

    -webkit-animation: pulse .5s infinite alternate;

    transform-origin: center;

    -webkit-transform-origin: center;

}
Final Thoughts
Your main job as a developer or a designer is to build a product that your users love. They’ve seen plenty of Google Maps in the products that they already use. This is your opportunity to blow their expectations away!
Here are a couple ways map marker animations can create delight for your users:
- If you have marker images that resemble actual things that move (like cats!), give them a CSS animation that corresponds to a natural movement.
- If you have map marker images that don’t traditionally move (like a store), apply an animation that makes it seem like the images are happy you clicked them, like a jump or a shudder.
- If you have data that corresponds to each marker, make the marker react based on the data. Let’s say you’re labeling intersections that are heavily trafficked: you can put a flashing exclamation point over those areas.
Try it out, and wait for the user compliments to roll in!
Did this guide help you? Let me know in the comments!
Frequently Asked Questions (FAQs) about Animated Google Map Markers
How Can I Customize the Animation of My Google Map Markers?
Customizing the animation of your Google Map markers involves using CSS and JavaScript. You can use CSS to style your markers, including changing their color, size, and shape. JavaScript, on the other hand, allows you to control the behavior of your markers, such as making them bounce or change position. You can also use JavaScript to add event listeners to your markers, allowing them to respond to user interactions like clicks or mouseovers.
What Are Some Examples of Google Map Marker Animations?
There are several types of animations you can apply to your Google Map markers. For instance, you can make your markers bounce, drop, or fade in and out. You can also create custom animations using CSS and JavaScript. For example, you can make your markers pulse, spin, or change color. The possibilities are endless, and you can experiment with different animations to find the one that best suits your needs.
How Can I Add Event Listeners to My Google Map Markers?
Adding event listeners to your Google Map markers involves using JavaScript. You can use the ‘addListener’ method provided by the Google Maps API to attach event listeners to your markers. These event listeners can respond to various user interactions, such as clicks, mouseovers, and mouseouts. You can then use these events to trigger animations or other actions.
Can I Use CSS to Style My Google Map Markers?
Yes, you can use CSS to style your Google Map markers. You can change the color, size, and shape of your markers using CSS. You can also use CSS to create custom animations for your markers. However, keep in mind that the Google Maps API provides its own set of styles for markers, so you may need to override these styles to apply your own.
How Can I Make My Google Map Markers Bounce?
Making your Google Map markers bounce involves using the ‘setAnimation’ method provided by the Google Maps API. You can use this method to apply the ‘BOUNCE’ animation to your markers. This will make your markers bounce up and down continuously until you stop the animation.
How Can I Stop the Animation of My Google Map Markers?
Stopping the animation of your Google Map markers involves using the ‘setAnimation’ method provided by the Google Maps API. You can use this method to set the animation of your markers to ‘null’. This will stop any ongoing animation.
Can I Animate My Google Map Markers Using JavaScript?
Yes, you can animate your Google Map markers using JavaScript. The Google Maps API provides several methods for animating markers, including ‘setAnimation’, ‘addListener’, and ‘stopAnimation’. You can use these methods to create custom animations for your markers.
How Can I Make My Google Map Markers Drop?
Making your Google Map markers drop involves using the ‘setAnimation’ method provided by the Google Maps API. You can use this method to apply the ‘DROP’ animation to your markers. This will make your markers drop from the top of the map to their actual position.
Can I Use JavaScript to Control the Behavior of My Google Map Markers?
Yes, you can use JavaScript to control the behavior of your Google Map markers. The Google Maps API provides several methods for controlling marker behavior, including ‘setAnimation’, ‘addListener’, and ‘stopAnimation’. You can use these methods to make your markers bounce, drop, or respond to user interactions.
How Can I Create Custom Animations for My Google Map Markers?
Creating custom animations for your Google Map markers involves using CSS and JavaScript. You can use CSS to style your markers and JavaScript to control their behavior. For example, you can use CSS to make your markers pulse or spin, and JavaScript to make them bounce or drop. You can also use JavaScript to add event listeners to your markers, allowing them to respond to user interactions.