

Key Takeaways
- Obtain a Google API key through the Google Developers Console to use Google Maps Android API, ensuring you register your app and configure the API key with your app’s package name and SHA-1 fingerprint.
- Integrate Google Maps into your Android app by adding the necessary dependencies in your build.gradle file, and configuring your manifest with permissions and your API key.
- Customize the map’s appearance and behavior in your app by setting properties such as map type, camera position, and enabling user interactions like zoom controls and gesture support.
- Add markers to the map to denote specific locations, customize these markers with titles, icons, and optionally add info windows to provide more details.
- Implement location features by enabling the ‘My Location’ layer to show user’s current location or use the Google Play Services Location API for more advanced location features including real-time updates and geofencing.
In the past, traveling to a new or unfamiliar location typically required you to carry around a local map and/or ask locals for directions. Getting lost is becoming a thing of the past, as we can conveniently carry in our pockets a map of not just the whole planet, but one that will show you where you are, give directions to where you want to go, the estimated time it will take to get there, let you mark points of interest and save them for later, enable you to search for places that are close by and much more.
In this article, we’ll look at the Google Maps Android API which enables you to add maps based on Google Maps to your application. The API automatically handles access to Google Maps servers, data downloading, map display, and response to map gestures. You can use the API calls to add markers, polygons, and overlays to a basic map and to change the user’s view of a particular map area. These objects provide additional information for map locations and allow user interaction with the map.
We’ll create an application that will show some of the features available in the API. We won’t cover everything as that would take several posts, but we will cover common features like adding a map to the view, changing the map type, adding a marker to the map to mark a location and configuring the camera which will affect how the user sees a map.
The completed project can be downloaded here.
Get an API Key
To use the Google Maps Android API, you must register your app project on the Google Developers Console and get a Google API key to add your app.
The API key is based on a short form of your app’s digital certificate, known as its SHA-1 fingerprint. While you’re developing and testing, you should use a debug certificate (which we’ll cover shortly), but when publishing the app, you have to use a release certificate (you can find instructions for generating a release certificate here).
The Android SDK tools generate a debug certificate automatically when creating a debug build for the first time, so all we have to do is retrieve it. The file is named debug.keystore and by default, it’s stored in the same directory as your Android Virtual Device (AVD) files:
- OS X and Linux: ~/.android/
- Windows: C:\Users\yourusername.android\
To see details of the certificate, run the following:
Linux or OS X
keytool -list -v -keystore ~/.android/debug.keystore -alias androiddebugkey -storepass android -keypass androidWindows
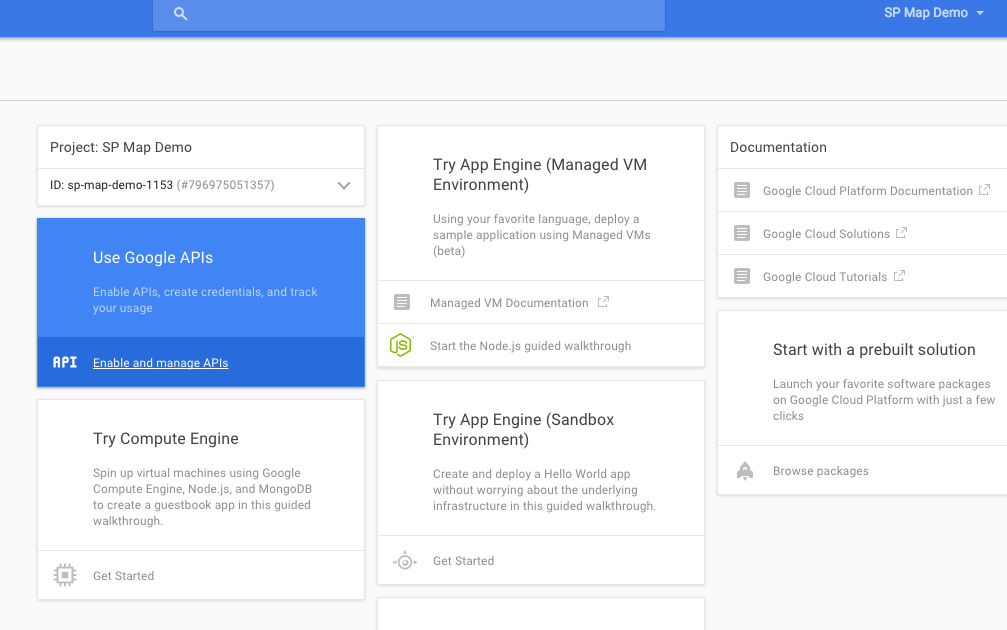
keytool -list -v -keystore "%USERPROFILE%\.android\debug.keystore" -alias androiddebugkey -storepass android -keypass androidThe Terminal will show the MD5 and SHA1 certificate fingerprints, we want the SHA1. Keep the Terminal window open and head over to the to the Google Developer Console. Click the Create Project button to create a new project and name it SP Map Demo.
You will be taken to the project’s dashboard, in the center of the screen click ‘Use Google APIs’.
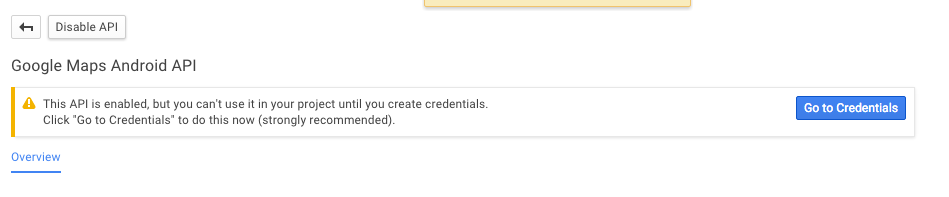
Select Google Maps Android API and click the Enable API button that appears on the next page.
After the API is enabled, click Go to Credentials, from the left panel.
From the Add Credentials menu , select API Key.
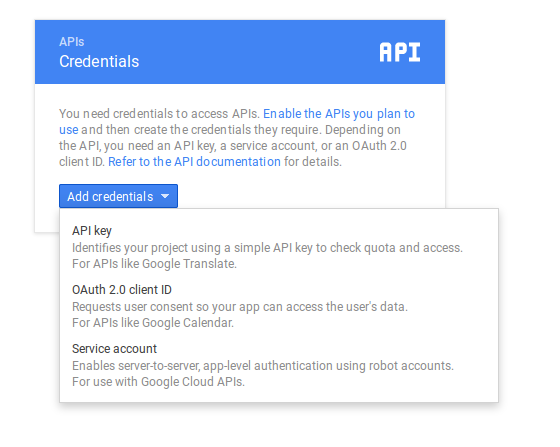
Select Android Key.

In the next dialog, you can change the key name but I left it as the default Android key 1
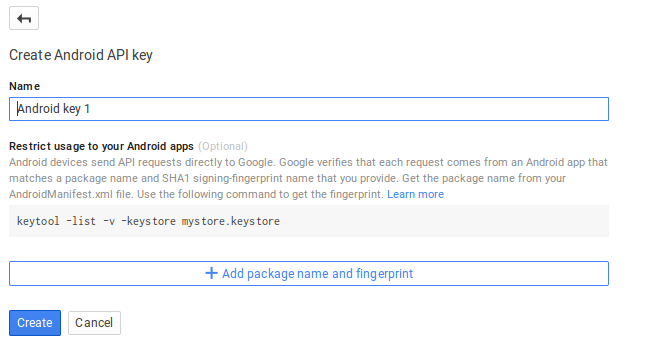
Use the Add package name and fingerprint button to add your app’s package name (I used com.echessa.mapdemo01) and your SHA1 fingerprint. After clicking the Create button, you will be shown an API key that we will use in our app.
In Android Studio, create a new project, I named mine MapDemo01. Make sure it has a package name that corresponds with what you used when generating a key on the Google Developer Console, otherwise you will have to edit the package name in the Developer Console to match your app.
Select API 15 as the Minimum SDK version. In the next window, select Empty Activity (Blank Activity if you are using Android Studio version 1.3 or earlier). Leave the last window as default and click Finish.
Adding a Map
Add the following to the build.gradle (Module: app) file and sync gradle.
compile 'com.google.android.gms:play-services:8.3.0'In the manifest file, add the following as a child of the application tag. Replace your API key in the value attribute.
<meta-data
    android:name="com.google.android.geo.API_KEY"
    android:value="YOUR_API_KEY"/>
Add the following as a child of the manifest element in the manifest file.
<uses-feature
    android:glEsVersion="0x00020000"
    android:required="true"/>
The Google Maps Android API uses OpenGL ES version 2 to render the map. If OpenGL ES version 2 is not installed, your map will not appear. It’s recommended to include the above code in the manifest file which notifies external services of the requirement. In particular, it prevents the Google Play Store from displaying your app on devices that don’t support OpenGL ES version 2.
Note: In previous versions of the Google Play Services API, you had to include external storage and internet permissions in the manifest file, this is no longer the case.
If you’re targeting version 8.3 or later of the Google Play services SDK, you no longer need the WRITE_EXTERNAL_STORAGE permission to use the Google Maps Android API.
If you’re targeting earlier versions of the Google Play services SDK, you must request the android.permission.WRITE_EXTERNAL_STORAGE permission.
<uses-permission android:name="android.permission.WRITE_EXTERNAL_STORAGE" />If your app is targeting API level 23 (Android 6.0), which requires the use of runtime permissions, you should target version 8.3 or later of the Google Play services SDK.
The following permissions are defined in the Google Play services manifest, and are automatically merged into your app manifest at build time. You don’t need to add them explicitly to your manifest:
android.permission.INTERNET: Used by the API to download map tiles from Google Maps servers.android.permission.ACCESS_NETWORK_STATE: Allows the API to check the connection status to determine whether data can be downloaded.
You also don’t need to include the following in your manifest file anymore.
<meta-data
    android:name="com.google.android.gms.version"
    android:value="@integer/google_play_services_version"/>
Maps are represented in the API by the GoogleMap and MapFragment classes.
To add a map to your app, add a Fragment object to the Activity that will handle the map. You can do this in code or XML layout files. We’ll use the latter method.
Change activity_main.xml as below:
<?xml version="1.0" encoding="utf-8"?>
<RelativeLayout
    xmlns:android="http://schemas.android.com/apk/res/android"
    xmlns:tools="http://schemas.android.com/tools"
    android:layout_width="match_parent"
    android:layout_height="match_parent"
    tools:context=".MainActivity">

    <fragment
        android:name="com.google.android.gms.maps.MapFragment"
        android:id="@+id/map"
        android:layout_width="match_parent"
        android:layout_height="match_parent"/>

</RelativeLayout>
Above we added a fragment to the activity and set its android:name attribute to com.google.android.gms.maps.MapFragment. This attaches a MapFragment to the activity. If you need to support older devices, instead use com.google.android.gms.maps.SupportMapFragment from the support library.
Run the app and you should see a map embedded on the view.
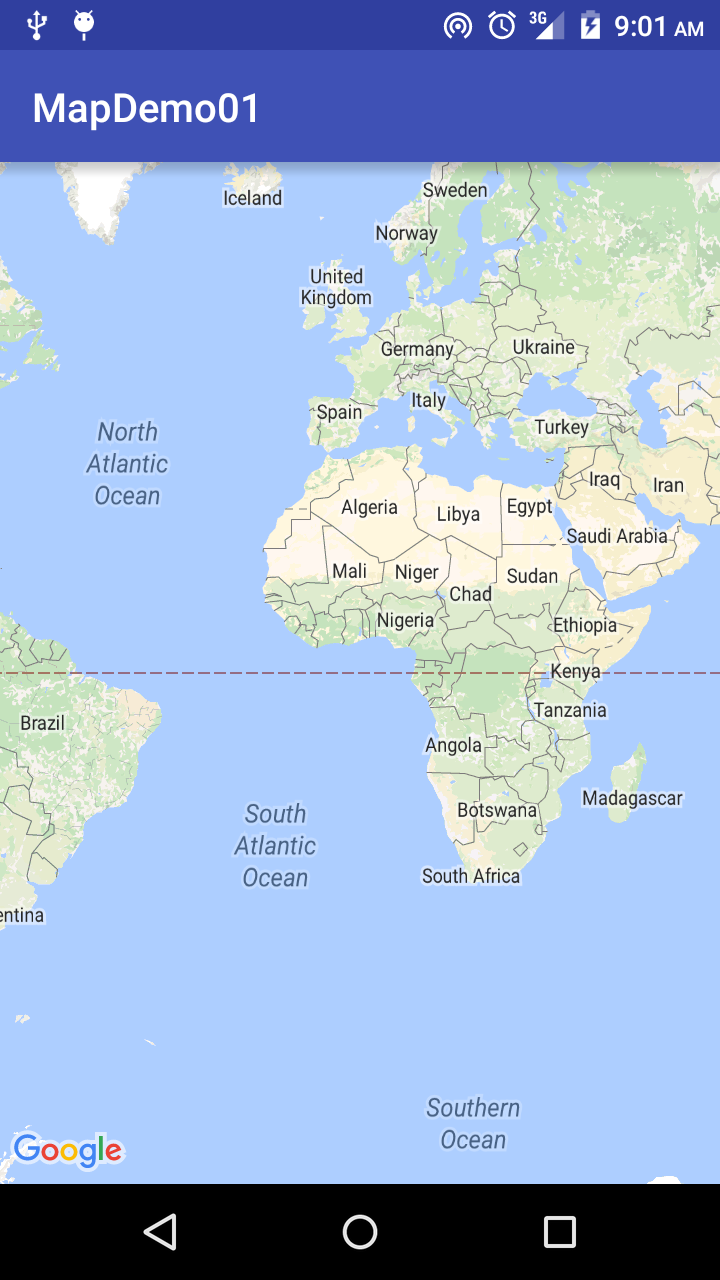
The default map view shows a view of the earth with the camera centered at the equator and perpendicular to the surface. You can configure the initial state of the map, changing settings such as the camera position (including: location, zoom, bearing and tilt), the map type, including the zoom or compass buttons on screen, the gestures a user can use to manipulate the camera, whether lite mode is enabled (a bitmap image of a map that supports a subset of the functionality supplied by the full API).
You can configure the initial state of the map either via XML or programmatically.
Update the fragment in activity_main.xml:
<fragment xmlns:map="http://schemas.android.com/apk/res-auto"
          android:name="com.google.android.gms.maps.MapFragment"
          android:id="@+id/map"
          android:layout_width="match_parent"
          android:layout_height="match_parent"
          map:cameraBearing="112.5"
          map:cameraTargetLat="37.4220041"
          map:cameraTargetLng="-122.0862515"
          map:cameraTilt="30"
          map:cameraZoom="13"
          map:mapType="normal"
          map:uiCompass="false"
          map:uiRotateGestures="true"
          map:uiScrollGestures="false"
          map:uiTiltGestures="true"
          map:uiZoomControls="false"
          map:uiZoomGestures="true"
          tools:ignore="MissingPrefix"/>
Run the app to see the changes to the initial state of the map.
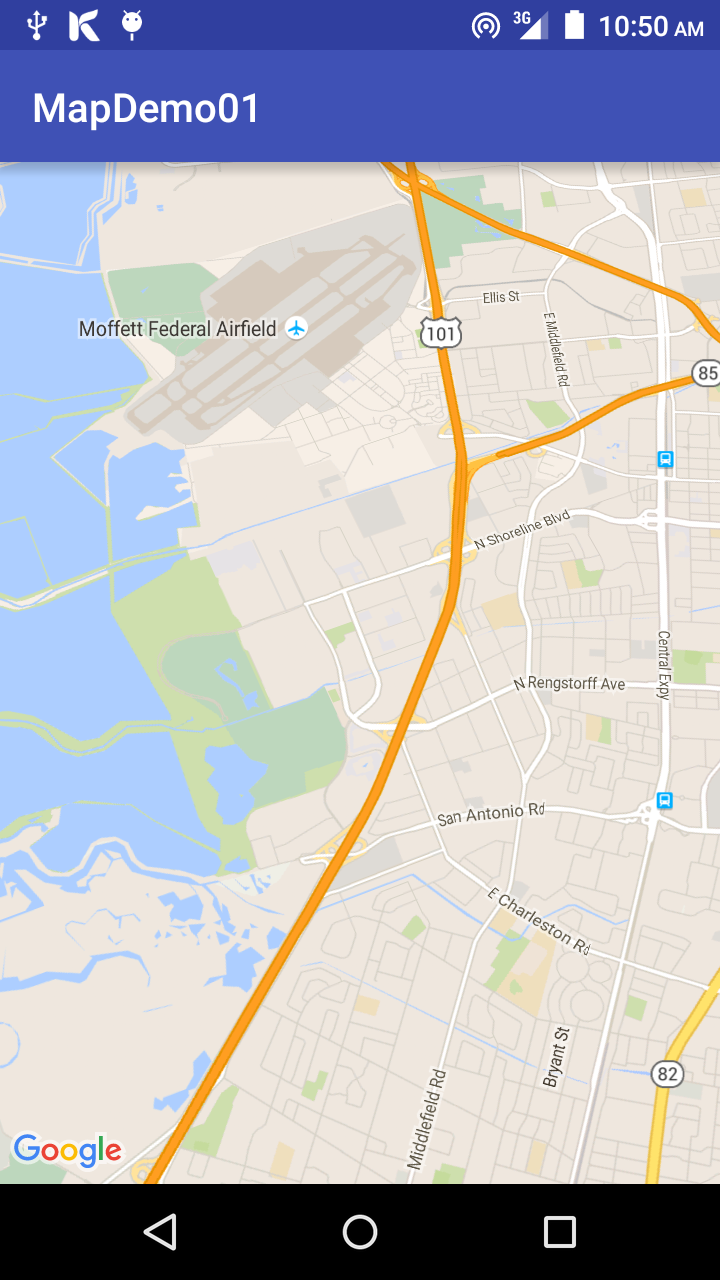
Above we included settings for the camera position such as location, zoom, bearing and tilt. cameraBearing sets the direction in which a vertical line on the map points, measured in degrees clockwise from north. cameraTargetLat and cameraTargetLng sets the location of the center of the map. cameraTilt sets the camera’s position on an arc between directly over the map’s center position and the surface of the Earth. cameraZoom determines the scale of the map, at larger zoom levels more detail can is on the screen, while at smaller zoom levels more of the world is on the screen.
We set the mapType to normal which is the default map type. The other available options are outlined below.
- Normal: Typical road map. Roads, some man-made features, and important natural features such as rivers are shown. Road and feature labels are also visible.
- Hybrid: Satellite photograph data with road maps added. Road and feature labels are visible.
- Satellite: Satellite photograph data. Road and feature labels are not visible.
- Terrain: Topographic data. The map includes colors, contour lines and labels and perspective shading. Some roads and labels are also visible.
- None: No tiles. The map is rendered as an empty grid with no tiles loaded.
The last set of settings determine whether the compass and zoom control appear on the screen and enable/disable some gestures.
The last attribute tools:ignore="MissingPrefix" is not part of the MapView settings, but it gets rid of an error message (Unexpected namespace prefix map
found for tag fragment) Android Studio shows for attributes that begin with the map: property. The project will still build and run despite Android Studio showing an error. According to this Gmaps bug report page, the problem seems to be a bug with the Android Lint tool. You can disable Lint checking, but since it’s useful in finding bugs, a better solution is to ignore the lint issue for specific tags, like we do for the fragment tag. The tools:ignore attribute can be set on any XML element, and is a comma separated list of lint issue ID’s to ignore on this element or any of its children, recursively.
Setting the Map State Programmatically
We’ve seen how to set the initial state of the map using the XML layout files, next we’ll look at how to do the same in code.
Change activity_main.xml as shown below to only include the basic MapFragment. We’ll add more configuration to the map in code.
<?xml version="1.0" encoding="utf-8"?>
<RelativeLayout
    xmlns:android="http://schemas.android.com/apk/res/android"
    xmlns:tools="http://schemas.android.com/tools"
    android:layout_width="match_parent"
    android:layout_height="match_parent"
    tools:context=".MainActivity">

    <fragment
          android:name="com.google.android.gms.maps.MapFragment"
          android:id="@+id/map"
          android:layout_width="match_parent"
          android:layout_height="match_parent"/>

</RelativeLayout>
In MainActivity, we’ll implement the OnMapReadyCallback interface and use the onMapReady callback method to get a handle to the GoogleMap object. The GoogleMap object is the internal representation of the map itself. To set the view options for a map, change its GoogleMap object.
Change the class definition:
public class MainActivity extends AppCompatActivity implements OnMapReadyCallbackAdd the onMapReady callback method.
@Override
public void onMapReady(GoogleMap map) {
map.setMapType(GoogleMap.MAP_TYPE_SATELLITE);
CameraPosition googlePlex = CameraPosition.builder()
.target(new LatLng(37.4219999,-122.0862462))
.zoom(16)
.bearing(0)
.tilt(45)
.build();
map.moveCamera(CameraUpdateFactory.newCameraPosition(googlePlex));
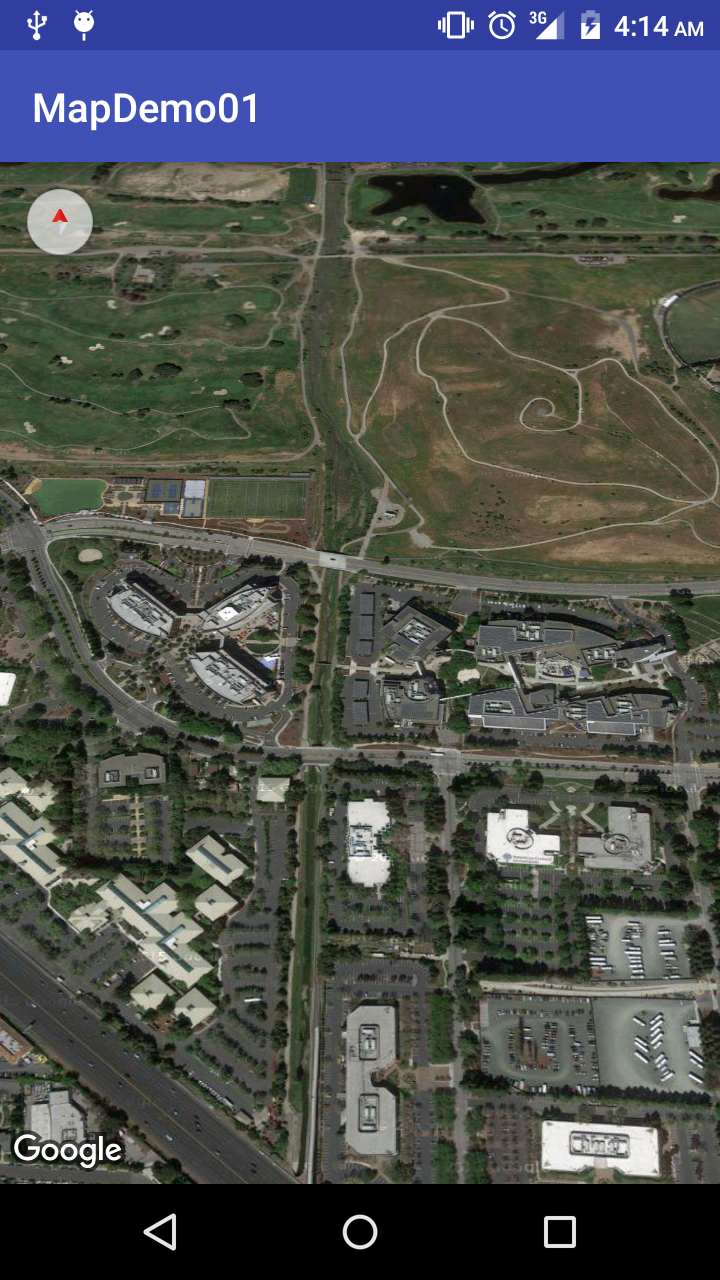
}The above gets the GoogleMap object and sets the map type and the camera position, then it moves the camera to that position.
Add the following to the end of onCreate(). We call getMapAsync() on the fragment to register the callback.
MapFragment mapFragment = (MapFragment) getFragmentManager().findFragmentById(R.id.map);
mapFragment.getMapAsync(this);
Run the app and you should see the map with the configuration set.
You can use animateCamera() instead of moveCamera() to get a nice effect of the camera moving into place as the map loads.
// map.moveCamera(CameraUpdateFactory.newCameraPosition(googlePlex));

map.animateCamera(CameraUpdateFactory.newCameraPosition(googlePlex), 10000, null);
Adding Markers on the Map
You can add markers to the map to show single locations. You can customize the markers by changing the default color, or replacing the marker icon with a custom image. You can also add info windows which provide additional context to a marker.
Add the following to onMapReady() after the statement that initializes the CameraPosition object.
map.addMarker(new MarkerOptions()
.position(new LatLng(37.4219999, -122.0862462))
.title("Google Plex")
.icon(BitmapDescriptorFactory.fromResource(R.mipmap.ic_launcher)));
map.addMarker(new MarkerOptions()
.position(new LatLng(37.4629101,-122.2449094))
.title("Facebook")
.snippet("Facebook HQ: Menlo Park"));
map.addMarker(new MarkerOptions()
.position(new LatLng(37.3092293,-122.1136845))
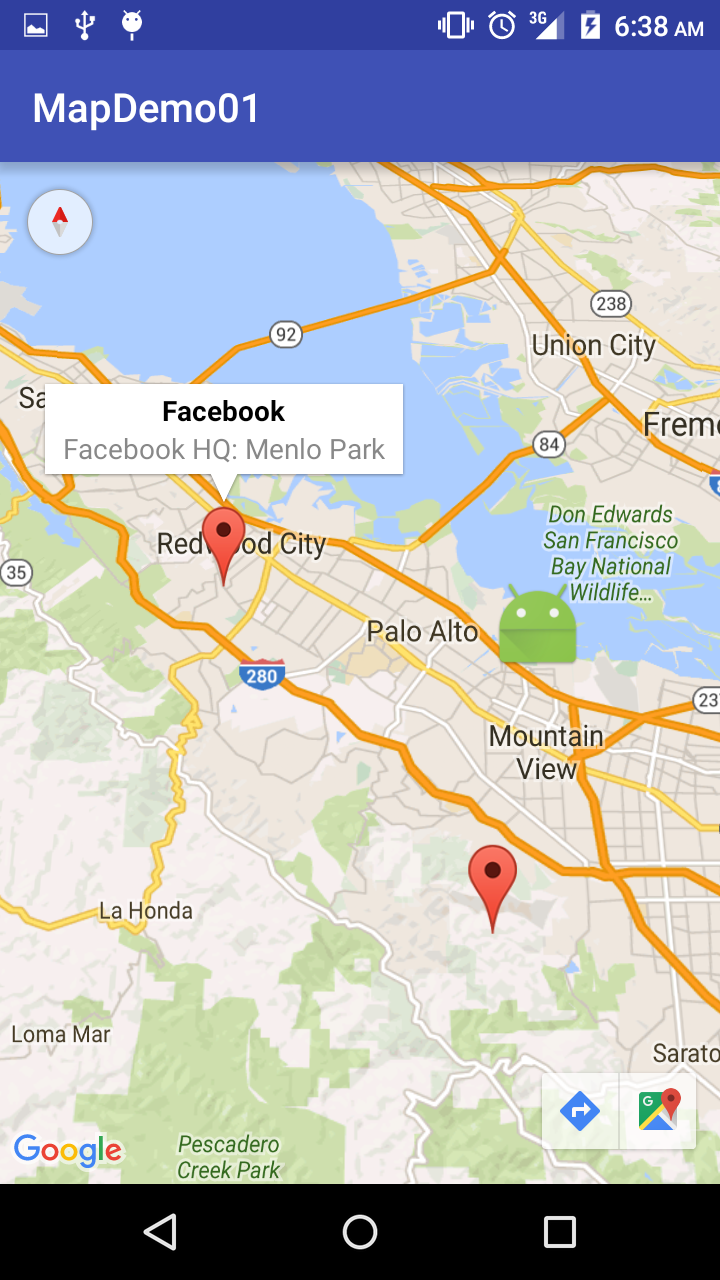
.title("Apple"));Here, we’ve created three markers. The first has a custom icon while the rest will have the default icon. The second marker uses snippet() to display more data in the Info Window when the marker is tapped. The other two will only display the title text.
Run the app to see the changes. I commented out the statement that sets the map type, so that it defaults to normal.
Showing the User’s Current Location
Your app might need to show a user’s location on the map. You can do this either by using the Google Play services Location API or by using the ‘My Location’ layer and the ‘My Location’ button to display the user’s current location on the map.
The ‘My Location’ layer provides a simple way to display a device’s location on the map. To use this, you need location permission.
Add the following permission to the manifest file.
<uses-permission android:name="android.permission.ACCESS_COARSE_LOCATION"/>Here we ask for coarse location data, but for more accuracy you can ask for fine data.
For Android Marshmallow support, you need to use the runtime location permission. To keep this article short, we won’t go into runtime permissions, but the link above shows how to do that.
Add the following to onMapReady() after the code that creates the markers.
map.setMyLocationEnabled(true);Run the app and you should see the My Location button on the top right corner of the map view. On tapping the button, the camera centers the map on the current location of the device, if known. The location is indicated on the map by a small blue dot if the device is stationary, or as a chevron if the device is moving.
The My Location layer does not return any data. If you wish to access location data programmatically, you should use the Google Play Services Location API.
The Google Play services Location API is the preferred method for adding location awareness to your Android application. It has other functionality not provided by the ‘My Location’ layer that lets you:
- Determine the device location.
- Listen for location changes.
- Determine the mode of transportation, if the device is moving.
- Create and monitor predefined geographical regions, known as geofences.
We have already covered how to use the Google Play Services Location API, so won’t cover it here.
Conclusion
We’ve just touched on the capability of the Google Maps API, there are plenty more features it offers, including displaying heatmaps, drawing shapes on the map, converting KML (an extension of the XML data format) objects into geographical shapes and rendering them as a layer on top of a map and much more. For more on the API, check out the documentation.
Frequently Asked Questions (FAQs) about Adding Maps to an Android App with Google Play Services
How can I get the API key for Google Maps in Android?
To get the API key for Google Maps in Android, you need to follow these steps. First, go to the Google Cloud Platform Console. Create a new project or select an existing one. Once you’ve selected your project, go to the ‘APIs & Services’ dashboard. Click on ‘Enable APIs and Services’. Search for ‘Maps SDK for Android’ and enable it. After enabling, go to ‘Credentials’ in the ‘APIs & Services’ section. Click on ‘Create Credentials’ and select ‘API key’. Your new API key will be created and ready to use.
How can I add Google Maps to my Android app?
Adding Google Maps to your Android app involves a few steps. First, you need to add the Google Play services library to your project. Then, you need to get an API key from the Google Cloud Platform Console. After getting the API key, you need to add it to your Android project. Finally, you can use the MapFragment or MapView classes in the Google Maps Android API to add a map to your app.
What are the prerequisites for using Google Maps in Android?
Before you can use Google Maps in your Android app, you need to have the Google Play services installed on your Android device. You also need to have an API key from the Google Cloud Platform Console. Additionally, your app needs to have the necessary permissions to access the internet and the user’s location.
How can I customize the appearance of Google Maps in my Android app?
Google Maps Android API provides several ways to customize the appearance of maps. You can change the type of map (normal, satellite, terrain, or hybrid), add markers, lines, and shapes, and customize the colors and styles of these elements. You can also control the camera to change the viewpoint of the map.
How can I handle user interaction with Google Maps in my Android app?
The Google Maps Android API provides several listeners for handling user interaction with the map. For example, you can use the OnMapClickListener to respond when the user taps on the map, or the OnMarkerClickListener to respond when the user taps on a marker.
How can I display the user’s current location on Google Maps in my Android app?
To display the user’s current location on Google Maps in your Android app, you need to use the Location Services API to get the user’s location. Then, you can use the Google Maps Android API to add a marker at the user’s location on the map.
How can I use Google Maps for geocoding in my Android app?
Google Maps provides a Geocoding API that you can use to convert between addresses and geographic coordinates. You can use this API to find the coordinates of a specific address, or to find the address for a specific set of coordinates.
How can I use Google Maps for directions in my Android app?
Google Maps provides a Directions API that you can use to get directions between different locations. You can use this API to get driving, walking, or bicycling directions, and to get information about the route, such as the distance and estimated travel time.
How can I use Google Maps for place search in my Android app?
Google Maps provides a Places API that you can use to search for places, such as businesses, landmarks, and geographic locations. You can use this API to get information about a place, such as its name, address, and phone number.
How can I handle errors when using Google Maps in my Android app?
When using Google Maps in your Android app, you may encounter various errors, such as network errors, API errors, or location errors. You can handle these errors by using try-catch blocks in your code, and by providing appropriate feedback to the user.