


In this article, we’ll look at how to upgrade a frontend web application from Webpack to Vite.
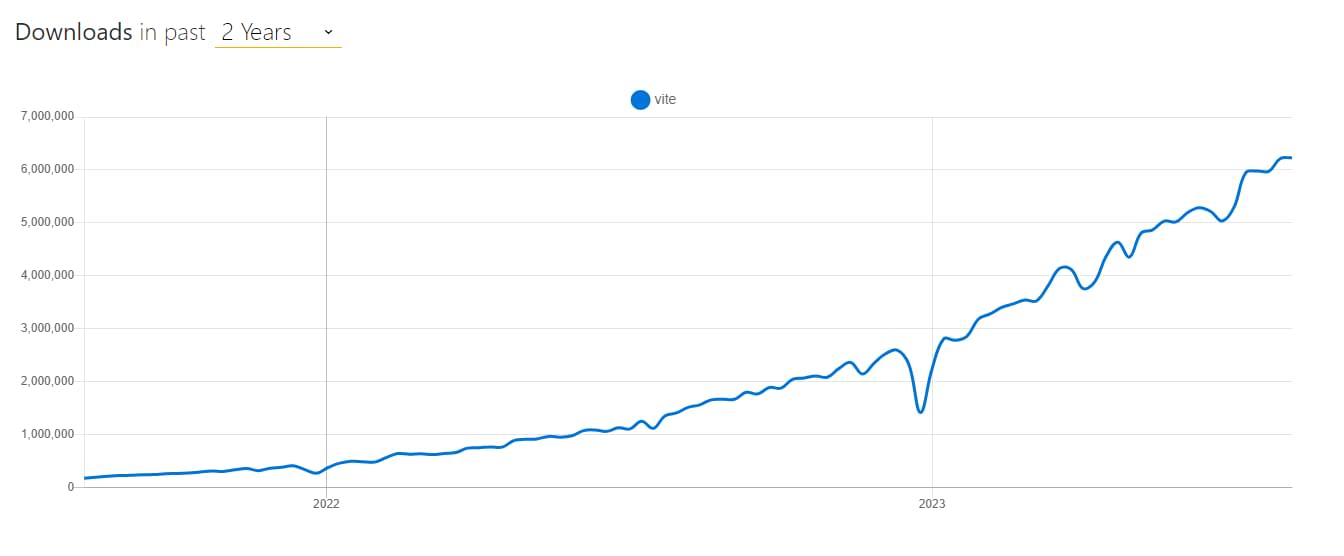
Vite is the latest frontend development tool to be enjoying a tremendous growth in popularity and adoption. Just check out these downloads from npm trends in the image below.
This trend is being driven by a key concept at the heart of Vite: developer experience. When compared with Webpack, Vite can offer significantly faster build times and hot reloading times during development. It does this by taking advantage of modern browser features such as ES modules in the browser.
Before we dive into the process of migrating from Webpack to Vite, it’s worth noting that the frontend development landscape is continuously evolving, and Vite isn’t the only tool in the spotlight. esbuild is another incredibly fast JavaScript bundler and minifier that’s catching the attention of web developers. And if you’re looking for a more zero-config approach, you might also want to explore Parcel, which provides a seamless experience for many developers.
Key Takeaways
-
Rapid Development with Vite: This article explores how to transition from Webpack to Vite, highlighting Vite’s advantages in providing faster build and hot reloading times by leveraging modern browser features like ES modules.
-
Migrating to Vite – Step-by-Step Guide: The article offers a detailed, step-by-step guide on migrating a frontend Webpack application to Vite, covering aspects like installation, configuration changes, and plugin replacements.
-
Considerations and Alternatives: While showcasing Vite’s benefits, the article also discusses potential challenges in migration, such as the availability of plugin equivalents, and introduces alternative tools like esbuild and Parcel for frontend development.
Considerations before Migrating to Vite
While Vite introduces many exciting new features into your workflow, as with any new technology there are drawbacks to consider. When compared to such a mature tool as Webpack, the primary consideration will be the ecosystem of third-party plugins.
There are dozens of core/official Webpack plugins, and hundreds (possibly thousands) of community-contributed plugins on npm that have been developed over the ten years that Webpack has been in use. While plugin support for Vite is very good, you may find yourself in the situation where the plugin you rely on for your project doesn’t have a Vite equivalent, and this could become a blocker for your migration to Vite.
Step 1: Installing Vite
The first step to migrate your project is to create a new Vite application and explore the tool you’re migrating to. You can boilerplate a new Vite app with the following:
npm create vite@latest

Then start the development server like so:
npm run dev
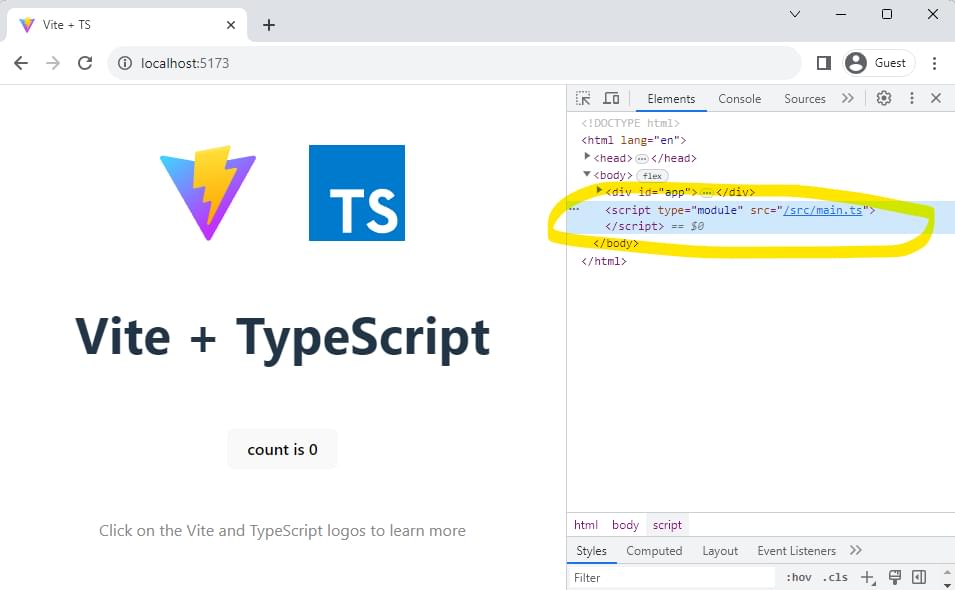
Now, navigate to the displayed localhost URL in your browser.
Vite will create a directory containing the files pictured below.
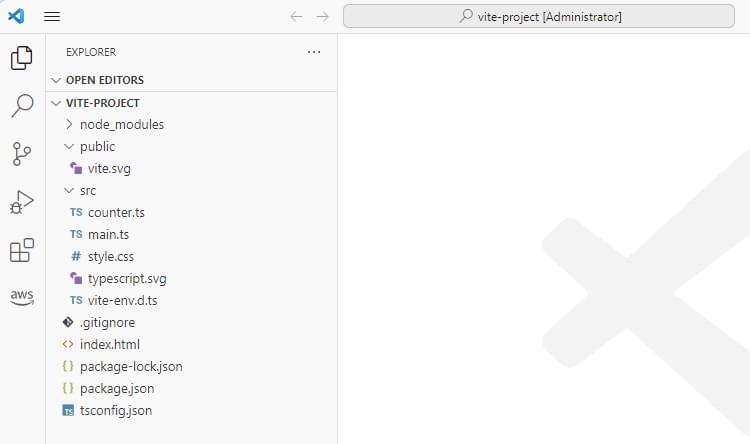
Many of these will be familiar to you and will be like-for-like replacements in your own application.
Step 2: Make package.json Changes
To begin using Vite on your existing Webpack project, head over to the package.json of the Webpack project you want to migrate and install Vite:
npm install –save vite
Depending on your frontend framework, you may also want to install the framework-specific plugin:
npm install –save @vitejs/plugin-react
You can also update any build scripts you have to use Vite instead of Webpack:
–  "build": "webpack --mode production",
–  "dev": "webpack serve",
++   "build": "vite build",
++  "dev": "vite serve",
At the same time, uninstall Webpack:
npm uninstall –save webpack webpack-cli wepack-dev-server
Now run your development script to try it out!
npm run dev
Step 3: Out with webpack.config, in with vite.config
Unless you’re extremely lucky, you’ll most likely need to include some additional configuration. Vite uses the vite.config.js file for configuration, which is largely analogous to your existing webpack.config.js file.
You can find the full documentation for this Vite config on vitejs.dev, but a simple Vite configuration for a React app might look like this:
import { defineConfig } from 'vite'
import react from '@vitejs/plugin-react'

export default defineConfig({
  plugins: [react()],
  },
})
Step 4: Plugins
Under the hood, Vite uses Rollup as its build tool, and you can add any Rollup plugins to Vite by installing them with npm:
npm install –save @rollup/plugin-image
`
Also add them into the plugins array your vite.config.js file:
// vite.config.js
import image from '@rollup/plugin-image'
import { defineConfig } from 'vite'

export default defineConfig({
  plugins: [
      image(),
  ],
})
Popular Webpack Plugins and their Vite Equivalents
Let’s next look at some popular Webpack plugins and their Vite equivalents.
HtmlWebpackPlugin -> vite-plugin-html
HtmlWebpackPlugin simplifies the creation of HTML files to serve your Webpack bundles. If you’re using HtmlWebpackPlugin in your project, Vite has the vite-plugin-html plugin, which provides similar capabilities. You can install it like so:
npm install --save-dev vite-plugin-html
And import into your vite.config.js like so:
import { defineConfig } from 'vite'
import react from '@vitejs/plugin-react'
import { createHtmlPlugin } from 'vite-plugin-html'

export default defineConfig({
  plugins: [
    react(),
    createHtmlPlugin({
      entry: 'src/main.js',
      template: 'public/index.html',
      inject: {
        data: {
          title: 'index',
          injectScript: `<script src="./inject.js"></script>`,
        },
    })
  ]
})
MiniCssExtractPlugin -> vite-plugin-purgecss
MiniCssExtractPlugin is a plugin for Webpack that extracts CSS into separate files. It creates a CSS file for each JavaScript file that contains CSS. It’s typically used in production environments to facilitate more efficient loading of CSS. The benefit of this is twofold. Firstly, it enables CSS to be cached separately by the browser. Secondly, it prevents a flash of unstyled content, as CSS is no longer embedded in the JavaScript files and can thus be loaded in parallel with JavaScript, resulting in faster page load times.
In Vite, you can use vite-plugin-purgecss:
npm install --save-dev vite-plugin-html-purgecss
Use the plugin in your vite.config.js file like so:
import htmlPurge from 'vite-plugin-html-purgecss'

export default {
    plugins: [
        htmlPurge(),
    ]
}
CopyWebpackPlugin -> vite-plugin-static-copy
CopyWebpackPlugin is used to copy individual files or entire directories to the build directory. Vite has a similar plugin called vite-plugin-static-copy:
npm install --save-dev vite-plugin-static-copy
Put the following code into vite.config.js:
import { viteStaticCopy } from 'vite-plugin-static-copy'

export default {
  plugins: [
    viteStaticCopy({
      targets: [
        {
          src: 'bin/example.wasm',
          dest: 'wasm-files'
        }
      ]
    })
  ]
}
DefinePlugin -> define()
In Webpack, the DefinePlugin is used to replace tokens in the source code with their assigned values at compile time. This allows you to create global constants that can be configured at compile time. In Vite, you can achieve the same effect using the define option in vite.config.js, so you may not need a plugin:
export default defineConfig({
  define: {
    'process.env.NODE_ENV': JSON.stringify('production'),
  },
})
Conclusion
This has been a simple guide to migrating a frontend Webpack application to Vite, including some of the most popular Webpack plugins.
If your project is a large, complex one with an intricate build process, Webpack’s feature-rich and flexible configuration may be still your best choice.
If you’re migrating a smaller or moderate project, Vite does offers some compelling benefits. Its speed, both in terms of the server start-up and hot module replacement, can significantly boost development productivity. The simplicity of its configuration can also be a welcome respite, and its being designed with native ES Modules and modern framework compatibility in mind sets it up nicely for the future.
Transitioning from Webpack to Vite does require careful planning and testing, particularly when considering plugin replacements or refactoring. But the rewards of this move can be substantial. Vite offers a faster, leaner development environment that can ultimately lead to a smoother and more efficient development workflow.
It’s always beneficial to keep an eye on the evolving landscape of tools. As you continue your journey, consider also exploring other modern tools like esbuild and Parcel to find the best fit for your project needs.
Remember, the tool isn’t what matters most, but how you use it to achieve your objectives. Webpack, Vite, esbuild, and Parcel are all excellent tools designed to help you create top-notch web projects, and the best one to use depends on your specific needs and constraints.
If you want to explore Vite further, check out our article where we explore Vite through its source code.
FAQs About Vite
Vite is a build tool and development server for modern web applications. It’s designed to be fast and lightweight, making it an excellent choice for developing JavaScript and TypeScript-based projects.
Vite differs from traditional build tools like Webpack and Parcel in its use of native ES modules for development and its ability to provide near-instantaneous development server start times. It leverages the browser’s native module system for a faster and more efficient development experience.
Vite is versatile and can be used for various web development projects, including single-page applications (SPAs), static websites, and progressive web apps (PWAs). It is especially well-suited for Vue.js and React applications.
Yes, Vite supports JavaScript, TypeScript, and CSS out of the box. It also has built-in support for various CSS preprocessors like Sass, Less, and Stylus.
Yes, Vite has built-in support for Vue.js and React, making it a suitable choice for developing applications with these frameworks.
Yes, Vite is suitable for both development and production builds. It can generate optimized production builds with minified and bundled assets.