

Key Takeaways
- PHP 5.4 and onward offers a set of configuration directives, session.upload_progress, that can be used to create a simple upload progress bar without the need for external libraries or browser dependencies.
- The session.upload_progress.enabled directive must be enabled, and a hidden field in the web form must be named as specified by the session.upload_progress.name directive to track the progress of file uploads.
- PHP provides additional directives such as session.upload_progress.cleanup, session.upload_progress.freq and session.upload_progress.min_freq to fine-tune the behavior of session uploads. These directives manage the frequency of session updates and the cleanup of extra session data after the upload has finished.
- It’s possible to implement a progress bar for multiple file uploads by creating a separate XMLHttpRequest for each file. This allows the progress of each individual file upload to be tracked and the progress bar for each file to be updated separately.
A problem that has plagued web developers for years is how to add real-time information to their applications, such as a progress bar for file uploads. Users are impatient; they don’t want to sit and wait while the browser is doing something and wonder whether it has frozen or if they have a slow connection. Providing a progress indicator gives users useful information and lets them know exactly what’s going on.
At first thought, you might think accomplishing this can be done easily by first obtaining the file’s size from the user’s computer and then performing some simple calculations against the directory on the server where the file is being uploaded to. On second thought, you’d find things aren’t quite that simple.
JavaScript can access a file’s name, type, and even the width and height of a local image, but it wasn’t until HTML5 that it could access a file’s size. Unfortunately, HTML5 still isn’t a completed standard yet and isn’t uniformly supported across all browsers. An alternate solution is to rely on a Flash, Java, or ActiveX plugin; no thanks, I’ll pass. Yet another solution is to install the Alternative PHP Cache extension, but that may not be available depending on your hosting environment and it seems like overkill for such a small task such as this.
It would seem as though all the options are fraught with nuisances and the task has quickly become a headache. But in the words of Yoda, “No… There is another.”
One of the many reasons I love PHP is that it makes seemingly difficult tasks easy. As of PHP 5.4, they’ve done it again with a new set of configuration directives, session.upload_progress.
In this article I’ll show you how this feature can be used to create a simple upload progress bar without any external libraries or browser dependencies. I’ll first discuss how it works, and then I’ll walk you through creating the four files needed to accomplish the task (an upload form, some JavaScript, a little CSS, and a file to return the status of the upload).
Session Upload Progress
Besides the usual requirements to allow file uploads, there are two more to track the progress. The session.upload_progress.enabled directive must be enabled and there must be a hidden field in your web form with the name specified by the session.upload_progress.name directive. When session.upload_progress.enabled is true (as it is by default in PHP 5.4 and presumably beyond) and $_POST[session.upload_progress.name] is sent during an upload, information about the file transfer is made available in the $_SESSION superglobal array.
The print_r() output of the $_SESSION array will look similar to the following during a file transfer:
Array
(
    [upload_progress_myForm] => Array
        (
            [start_time] => 1323733740
            [content_length] => 721127769
            [bytes_processed] => 263178326
            [done] =>
            [files] => Array
                (
                    [0] => Array
                        (
                            [field_name] => userfile
                            [name] => ubuntu-10.04.3-desktop-i386.iso
                            [tmp_name] =>
                            [error] => 0
                            [done] =>
                            [start_time] => 1323733740
                            [bytes_processed] => 263178026
                        )
                )
        )
)
When you are developing either locally or on a fast network and upload small files, you won’t be able to visually observe the progress because the transfer happens so fast. In this case, you might want to try transferring a large file. Make sure the settings in your php.ini file allow large uploads, specifically the post_max_size and upload_max_filesize directives, and then verify they are sane values when you go to production.
Create the Form
The first file I’ll present is the upload form. Just to keep things as simple as possible, the example will post to itself and only handle one file upload at a time. Additionally, I won’t bother saving the file after it has been uploaded.
Here’s the code for form.php:
<?php

if ($_SERVER["REQUEST_METHOD"] == "POST" && !empty($_FILES["userfile"])) {

    // move_uploaded_file()

}

?>

<html>

 <head>

  <title>File Upload Progress Bar</title>

  <link rel="stylesheet" type="text/css" href="style.css">

 </head>

 <body>

  <div id="bar_blank">

   <div id="bar_color"></div>

  </div>

  <div id="status"></div>

  <form action="<?php echo $_SERVER["PHP_SELF"]; ?>" method="POST"

   id="myForm" enctype="multipart/form-data" target="hidden_iframe">

   <input type="hidden" value="myForm"

    name="<?php echo ini_get("session.upload_progress.name"); ?>">

   <input type="file" name="userfile"><br>

   <input type="submit" value="Start Upload">

  </form>

  <iframe id="hidden_iframe" name="hidden_iframe" src="about:blank"></iframe>

  <script type="text/javascript" src="script.js"></script>

 </body>

</html>
In the example the code to actually process the file has been omitted to keep things simple. If you’re interested in what such code should look like, check out the article File Uploads with PHP by Timothy Boronczyk.
After the head section which provides the page’s title and includes the stylesheet, you’ll notice a small collection of div elements. The div with the ID “bar_blank” is the container for the progress bar. The div with the ID “bar_color” will be dynamically updated as the file upload progresses. The “status” div will display the numeric value of the percent uploaded.
The form is set to submit to the same URL and its target attribute points to a hidden iframe element. Submitting a form to a hidden frame allows you to keep the visitor on the same page while the work is being done in the background. In fact, this is a common practice when doing “Ajax file uploads” since it isn’t possible to send the contents of a file directly using JavaScript’s XmlHttpRequest object.
Within the form, the special hidden field needed to populate the $_SESSION array appears, followed by a file upload input and submit button. Submitting the form will trigger a JavaScript function named startUpload() which will be defined by the included JavaScript file.
At the bottom of the page is the hidden frame to which the form will post and the import of the script.js file.
Add Some Style
The next file, style.css, is pretty straight-forward. I’ve defined the size of the progress bar container and given it a 1px black border, the color of the progress bar as it’s loading, and both the iframe and the progress bar are hidden.
#bar_blank {

  border: solid 1px #000;

  height: 20px;

  width: 300px;

}
#bar_color {

  background-color: #006666;

  height: 20px;

  width: 0px;

}
#bar_blank, #hidden_iframe {

  display: none;

}
Client-Side Functionality
The script.js file is the largest of the group of files. It contains six functions which I will discuss below. Many people like to use jQuery to provide some of the functionality here, and you are certainly free to do so if you wish, but I personally prefer the old-school approach. Similar to how the Japanese place a higher value on hand crafted goods, I just feel more passionate about the code if it is my own.
function toggleBarVisibility() {

    var e = document.getElementById("bar_blank");

    e.style.display = (e.style.display == "block") ? "none" : "block";

}
function createRequestObject() {

    var http;

    if (navigator.appName == "Microsoft Internet Explorer") {

        http = new ActiveXObject("Microsoft.XMLHTTP");

    }

    else {

        http = new XMLHttpRequest();

    }

    return http;

}
function sendRequest() {

    var http = createRequestObject();

    http.open("GET", "progress.php");

    http.onreadystatechange = function () { handleResponse(http); };

    http.send(null);

}
function handleResponse(http) {

    var response;

    if (http.readyState == 4) {

        response = http.responseText;

        document.getElementById("bar_color").style.width = response + "%";

        document.getElementById("status").innerHTML = response + "%";
        if (response < 100) {

            setTimeout("sendRequest()", 1000);

        }

        else {

            toggleBarVisibility();

            document.getElementById("status").innerHTML = "Done.";

        }

    }

}
function startUpload() {

    toggleBarVisibility();

    setTimeout("sendRequest()", 1000);

}
(function () {

    document.getElementById("myForm").onsubmit = startUpload;

})();
The
toggleBarVisibility() function sets an appropriate style on the “bar_blank” div to show or hide the progress bar as needed. Initially it starts out hidden, but will be displayed once an upload starts and hidden again when an upload finishes.
The createRequestObject() function creates an XMLHttpRequest or ActiveXObject object based on the user’s browser. This is probably the function most people would look to jQuery or some other JavaScript framework to provide.
The sendRequest() function requests the progress.php file with a GET request, and then invokes the handleResponse() function to handle the returned data.
The handleResponse() function handles the response from progress.php which will be a number between 1-100 depending on the file upload progress. I also update the “status” div with the appropriate value. If the current percent is below 100 then I call JavaScript’s native setTimeout() function to send another request for an update after 1 second (you may want to adjust this value as appropriate), otherwise I hide the progress bar again and set the status to “Done.”
The startUpload() function makes the upload bar visible and sends a request for an update after a delay of 1 second. This small delay is needed in order to give the upload time to start.
The final function is a self-executing anonymous function which registers startUpload() with the form’s submit event.
Real-Time Progress
The last file that brings everything together is the progress.php file:
<?php

session_start();
$key = ini_get("session.upload_progress.prefix") . "myForm";

if (!empty($_SESSION[$key])) {

    $current = $_SESSION[$key]["bytes_processed"];

    $total = $_SESSION[$key]["content_length"];

    echo $current < $total ? ceil($current / $total * 100) : 100;

}

else {

    echo 100;

}
The script performs some simple math on the current number of bytes transferred divided by the total file size, multiplied by 100 and rounded off to give a percent.
Information about the transfer is keyed with a concatenation of the session.upload_progress.prefix directive’s value and the hidden session.upload_progress.name field’s value. Because my form passed “myForm”, the session’s key is determined with ini_get("session.upload_progress.prefix") . "myForm".
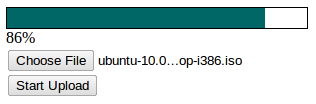
Here’s a screenshot of the progress bar in action:
Fine-Tuning the Behavior
PHP provides some additional directives to help fine-tune the behavior of session uploads you should be aware of. For example, session.upload_progress.cleanup, which is set to 1 by default, cleans up the extra session data immediately after the upload has finished. You need to be careful to avoid a potential race condition.
Take a look again at the code in progress.php and you’ll notice that I check to see if $_SESSION[$key] is empty or not before proceeding. My JavaScript functions fire off every second as long as the result returned from progress.php is less than 100. If session.upload_progress.cleanup is enabled and my script fetches 99% of the upload and a 1/2-second later the upload finishes, $_SESSION[$key] would not exist for the next check. If I didn’t take that into consideration then my JavaScript function might keep firing, even after the upload finished.
Another two directives are session.upload_progress.freq and session.upload_progress.min_freq which both determine how often the session should be updated. The value of freq can be given in either bytes (i.e., 100) or the percentage of total bytes (i.e., 2%). The value of min_freq is given in seconds and indicates the minimum number of seconds between updates. Obviously if min_freq was set to update every 1 second, it would be pointless for your JavaScript to check every 100 milliseconds.
Summary
You should now have a solid grasp on how to create a progress bar for file uploads using the session upload progress feature. Moving forward, I encourage you to experiment with uploading multiple files, giving the option to cancel an upload in progress using $_SESSION[$key]["cancel_upload"], or whatever other ideas your mind can muster. Please share in the comments your experiences and improvements you’ve made for others to benefit from and enjoy as well!
Image via file404 / Shutterstock
Frequently Asked Questions (FAQs) on Tracking Upload Progress with PHP and JavaScript
How can I implement a progress bar for multiple file uploads?
Implementing a progress bar for multiple file uploads involves a slightly different approach. You need to loop through each file and create a separate XMLHttpRequest for each. This allows you to track the progress of each file upload individually. You can then update the progress bar for each file separately. Remember to handle the case where some files may finish uploading before others.
Can I use this method to track the progress of large file uploads?
Yes, this method is suitable for tracking the progress of large file uploads. The progress event is fired periodically when the upload is in progress. So, even for large files, you will receive regular updates about the upload progress. However, keep in mind that the frequency of these updates may vary depending on the client’s network conditions.
How can I customize the appearance of the progress bar?
The appearance of the progress bar can be customized using CSS. You can change the color, size, and shape of the progress bar by modifying the CSS properties of the progress bar element. For example, you can change the color of the progress bar by setting the background-color property.
What happens if the upload fails or is cancelled?
If the upload fails or is cancelled, the XMLHttpRequest object will fire an error event. You can listen for this event and update the user interface accordingly. For example, you might want to display an error message and reset the progress bar.
Can I use this method to track the progress of downloads?
Yes, you can use a similar method to track the progress of downloads. Instead of listening for the progress event on the upload property of the XMLHttpRequest object, you would listen for it on the download property.
How can I test the upload progress feature during development?
You can test the upload progress feature by uploading files of different sizes and observing the progress bar. To simulate slower network conditions, you can use the network throttling feature in your browser’s developer tools.
Can I use this method with other server-side languages besides PHP?
Yes, you can use this method with any server-side language that supports handling file uploads and can send progress updates back to the client. The client-side code would remain largely the same, but the server-side code would need to be adapted to the specific language and framework you are using.
How can I handle multiple simultaneous uploads?
To handle multiple simultaneous uploads, you can create multiple XMLHttpRequest objects, one for each file. Each XMLHttpRequest object will track the progress of one upload, allowing you to update the progress bar for each file separately.
What browsers support the progress event?
The progress event is supported by all modern browsers, including Chrome, Firefox, Safari, and Edge. However, it is not supported by Internet Explorer.
Can I use this method to upload files to a third-party server?
Yes, you can use this method to upload files to a third-party server. However, you will need to ensure that the third-party server supports CORS (Cross-Origin Resource Sharing), as the XMLHttpRequest object will be making a cross-origin request.