

Onsen UI is a new JavaScript and CSS framework for developing mobile apps. With its large selection of web based UI components, you can develop HTML5, PhoneGap and Cordova apps. With a focus on native-like performance, user experience, responsive design and diverse platforms, it seems quite promising. It combines the power of HTML 5 , CSS, AngularJS, jQuery and Font Awesome to create impressive looking apps.
Key Takeaways
- Onsen UI is a promising new JavaScript and CSS framework for developing mobile apps, offering a large selection of web-based UI components for HTML5, PhoneGap, and Cordova apps. It focuses on native-like performance, user experience, responsive design, and diverse platform compatibility.
- The framework stands out due to its flexibility and compatibility, working with both AngularJS and React. It’s built on top of Web Components, making it highly modular and reusable. This allows developers to use the same components across different projects, saving time and effort.
- Onsen UI significantly enhances Cordova UI development by providing a rich set of pre-designed components and tools optimized for mobile devices. It supports both iOS and Android, enabling developers to create cross-platform applications using a single codebase.
Installation
To get started with Onsen UI, first make sure you have Node.js and npm installed.
Next, depending on the app platform for which you plan to develop, install the required Android or IOS platform dependencies. In this article, we’ll try to create an app for Android.
Cordova can be installed as shown below:
sudo npm install -g cordova
A number of templates are available from Onsen UI such as master details, sliding menu etc. We’ll be using the master detail template.
Download the template, extract it and navigate to the project root folder. Now, we’ll add the platform for which we’ll be developing the app. Add the platform as shown:
cordova platform add android
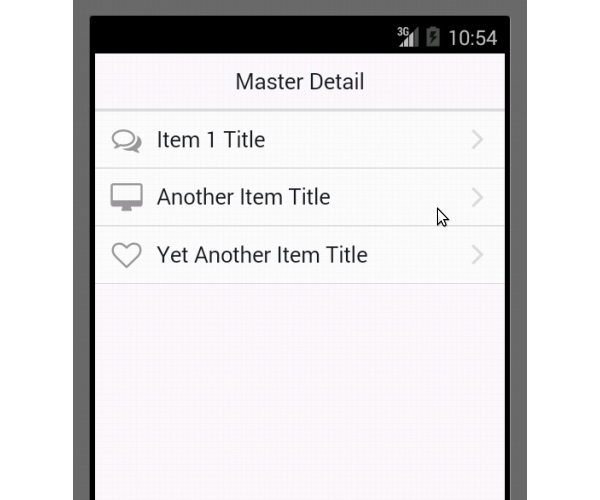
Once complete, type in the below command to emulate the template that we downloaded:
cordova emulate
Here is how it should look:
What we’ll be creating
In this tutorial, we’ll be designing our app using the Onsen UI components. The app will have a sign in, sign up page and page to list all registered users.
Once we are done with the design, we’ll hook up the app to Firebase.
You can find the final project on GitHub here
Designing Login Screen
Below is the folder structure of the template that we downloaded:
OnsenUI(root)

      -----> hooks

      -----> merges

      -----> platforms

      -----> plugins

      -----> www
The folder www contains the html, css and JavaScript files which we’ll modify to create our custom app.
I feel the best way to learn anything new is to start from scratch. Open up index.html and remove everything inside the body tag.
Onsen UI provides a number of components to create a UI. We’ll be using a few of these to design our screens.
In order to maintain a page stack, Onsen UI provides a component called ons-navigator. It acts as a container for all our pages. Inside this we’ll add another component called ons-page.
Here is how it should look:
<ons-navigator title="Navigator" var="myNavigator">

    <ons-page>

        // Page content comes here

    </ons-page>

</ons-navigator>
Inside the page add another component called ons-toolbar which acts as the toolbar.
We’ll also need to add a username and password input box. In order to add those, first we’ll add a list box and inside that we’ll include the input texts. To add list items, Onsen UI provides a component called ons-list.
Here is how it should look:
<ons-navigator title="Navigator" var="myNavigator">

    <ons-page>
        <ons-toolbar>

            <div class="center">Onsen UI App</div>

        </ons-toolbar>
        <ons-list>

            <ons-list-item>

                <input type="text" placeholder="Username" class="text-input text-input--transparent" style="margin-top:8px; width: 100%;">

            </ons-list-item>
            <ons-list-item>

                <input type="password" placeholder="Password" class="text-input text-input--transparent" style="margin-top:8px; width: 100%;">

            </ons-list-item>

        </ons-list>
    </ons-page>

</ons-navigator>
Next, we’ll add a button to sign in and for that we’ll use the ons-button component. Here is how the login screen looks after the above changes.
Designing Sign Up Screen
Next let’s add the Sign Up screen for the user to register with. The sign up screen should be accessible from the home screen. So, in the toolbar on the right side corner, add an icon for sign up. To add icons Onsen UI provides a component called ons-icon. Modify the ons-toolbar code as shown below:
<ons-toolbar>

      <div class="center">Onsen UI App</div>

      <div class="right">
        <ons-icon icon="ion-plus-circled" size="40px"</ons-icon>
      </div>

</ons-toolbar>
We’ll be defining the sign up page as a separate html fragment and for that we’ll make use of ons-template. The sign up html should have a toolbar, list items for input controls and a sign up button.
Here is the sign up template code:
<ons-template id="register.html">

    <ons-page>

        <ons-toolbar>

            <div class="left">

                <ons-back-button>Back</ons-back-button>

            </div>

            <div class="center">Register</div>

        </ons-toolbar>
        <div style="text-align: center">

            <br />

            <ons-page>
                <ons-list>

                    <ons-list-item>

                        <input type="text" placeholder="Username" class="text-input text-input--transparent" style="margin-top:8px; width: 100%;">

                    </ons-list-item>
                    <ons-list-item>

                        <input type="text" placeholder="Email Address" class="text-input text-input--transparent" style="margin-top:8px; width: 100%;">

                    </ons-list-item>

                    <ons-list-item>

                        <input type="text" placeholder="Password" class="text-input text-input--transparent" style="margin-top:8px; width: 100%;">

                    </ons-list-item>
                    <ons-list-item>

                        <ons-row>

                            <ons-col width="90px">

                                <span style="color: #666">Gender</span>

                            </ons-col>

                            <ons-col>
                                <div style="float: right; padding-right: 16px;">

                                    <label class="radio-button">

                                        <input type="radio" name="level">

                                        <div class="radio-button__checkmark"></div>

                                        Male

                                    </label>
                                    <label class="radio-button">

                                        <input type="radio" name="level">

                                        <div class="radio-button__checkmark"></div>

                                        Female

                                    </label>

                                </div>
                            </ons-col>

                        </ons-row>

                    </ons-list-item>
                </ons-list>
                <div class="content-padded">

                    <ons-button modifier="large" onclick="">

                        Sign Up

                    </ons-button>

                </div>
            </ons-page>

        </div>

    </ons-page>

</ons-template>
Most of the components used in the code above are the same we used on the sign in page. The two new components used are ons-back-button and ons-row. ons-back-button is used to provide back button support and ons-row is used to represent a row in a grid system.
Finally in order to link the icon in the toolbar to the sign in page, add an onclick event to the icon. To navigate we’ll use ons-navigator’s pushPage method as shown below:
<ons-icon icon="ion-plus-circled" size="40px" onclick="myNavigator.pushPage('register.html', { animation : 'slide' } )"></ons-icon>
Here is a demo of the sign in and sign up page.
Conclusion
In this tutorial, we learned how to get started with mobile app development using Onsen UI. We designed a simple user registration and login app. In the next part of this tutorial, we’ll make the app functional by hooking it up with Firebase.
Frequently Asked Questions about Onsen UI and Cordova UI Development
What is the main difference between Onsen UI and other UI frameworks?
Onsen UI stands out from other UI frameworks due to its flexibility and compatibility. It is designed to work with both AngularJS and React, allowing developers to choose the framework they are most comfortable with. Additionally, Onsen UI is built on top of Web Components, making it highly modular and reusable. This means that developers can use the same components across different projects, saving time and effort.
How does Onsen UI improve Cordova UI development?
Onsen UI significantly enhances Cordova UI development by providing a rich set of pre-designed components and tools. These components are optimized for mobile devices, ensuring a smooth and responsive user experience. Moreover, Onsen UI supports both iOS and Android, allowing developers to create cross-platform applications with a single codebase.
Can I use Onsen UI without any JavaScript framework?
Yes, you can use Onsen UI without any JavaScript framework. Onsen UI is built on top of Web Components, which means it can be used with plain JavaScript or HTML. This makes Onsen UI a versatile choice for developers with different skill levels and preferences.
How can I start using Onsen UI in my Cordova project?
To start using Onsen UI in your Cordova project, you need to first install it via npm. After installation, you can import the Onsen UI components into your project and start using them. Detailed instructions and examples can be found in the Onsen UI documentation.
What kind of applications can I build with Onsen UI?
With Onsen UI, you can build a wide range of applications, from simple mobile apps to complex enterprise solutions. The framework provides a rich set of components and tools that can be used to create user interfaces for different use cases. Whether you are building a social media app, a productivity tool, or a business application, Onsen UI can help you achieve your goals.
How does Onsen UI ensure a native look and feel?
Onsen UI ensures a native look and feel by providing components that mimic the native UI elements of iOS and Android. These components are designed to behave and interact just like their native counterparts, providing a seamless user experience. Moreover, Onsen UI automatically adapts to the platform, displaying the appropriate UI for iOS or Android.
Can I customize the appearance of Onsen UI components?
Yes, you can customize the appearance of Onsen UI components. The framework provides a theming system that allows you to change the colors, fonts, and other visual properties of the components. You can also create your own themes to match your brand or design guidelines.
How is Onsen UI’s performance compared to other UI frameworks?
Onsen UI is designed for performance. It uses a lightweight and efficient DOM manipulation library, which ensures a smooth and responsive user experience. Moreover, Onsen UI components are optimized for mobile devices, providing fast rendering and low memory usage.
Is Onsen UI suitable for large-scale projects?
Yes, Onsen UI is suitable for large-scale projects. The framework is built on top of Web Components, which promotes modularity and reusability. This means that you can organize your code into small, independent components, making it easier to manage and scale your project.
Where can I find resources to learn more about Onsen UI?
You can find a wealth of resources on the official Onsen UI website. This includes a comprehensive guide, API documentation, and a variety of samples and demos. Additionally, there is a vibrant community of Onsen UI developers on GitHub, where you can find additional resources and support.

