

Key Takeaways
- Sketch App 3, while not as versatile as Photoshop, provides a simple form of bitmap image editing, including features such as saturation, brightness, contrast, gaussian blur, blending modes, cropping, and a magic wand tool. However, it is not recommended for complex image adjustments, filters, and actions.
- The non-destructive nature of Sketch App’s image editing is a significant advantage, allowing for rapid testing of multiple ideas and variations. Key features such as brightness, gaussian blur, and blending modes can be effectively used to create modern web designs without needing to open Photoshop.
- While Sketch App 3 does have limitations, mastering its image editing capabilities is straightforward once you understand its purpose. For more advanced photo editing, dedicated photo editing software may still be necessary.
I’ve been talking a lot about Sketch App lately. I never forget to mention that it’s an excellent tool for mobile application and user interface designers.
I’ve also said that I think comparing Sketch to Photoshop is silly considering it’s a photo-editing tool.
But the fact is, Photoshop has become so versatile that we compare it to almost every other design tool — Sketch 3 is no exception.
In reality Sketch more closely resembles Adobe Fireworks more than anything, which is fortunate for the developers (Bohemian Coding) because Fireworks is no longer in development. Lucky timing, intuitive business strategy; whatever you want to call it, Sketch App is filling a void and it’s filling it well.
If you’ve been living on Mars for the last two years, here’s some backstory on the matter. Sketch App is currently sitting on version 3.2 (stable) and you can buy it from Bohemian Coding for a one-time fee of $99.
Despite the fact that it’s only available for Mac OS X, it’s taken the design industry by storm.
So we can’t edit images with Sketch?
Ehhh, sort of.
Actually… you can, but don’t expect complex image adjustments, filters and actions. Instead, you should expect the simplest form of bitmap image editing imaginable, for example these features:
- Saturation
- Brightness
- Contrast
- Gaussian Blur
- Blending Modes
- Cropping
- Magic Wand
Even the Magic Wand tool I feel is too much. In the case of user interface design, I’ve never understood the reason for it being there.
Many of the other features, however, allow us to design for current trends. Photography and “big images” are all the rage at the moment, whether we’re using high-contrast, impactful imagery or blurred backgrounds. Blending big images into a solid or “super gradient” background is also a major trend.
But that’s for web design, and even then it can be an instinctive habit to accomplish such things in Photoshop and copy the final bitmap over to Sketch.
Of course if you want manipulate your dogs head and create a dog/frog hybrid with laser eyes, then Photoshop is definitely your best bet, but if you can stick to using a singular application, your workflow will output better, non-destructive results in a timely manner. If you’re keen to learn more about designing non-destructively, you should totally watch Creating an Illustration in Sketch and Exporting it as an SVG (below), which is part of our Design a User Interface with Sketch course.
Let’s start with colour adjustments.
Colour adjustments
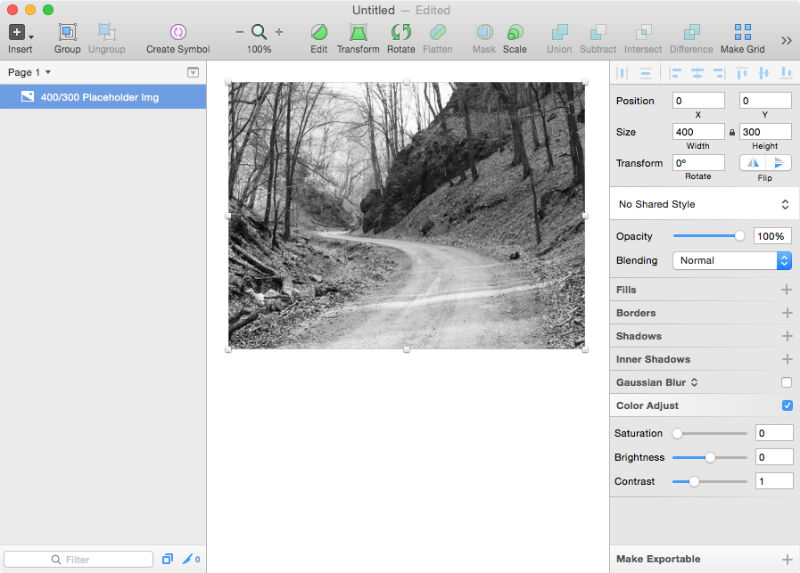
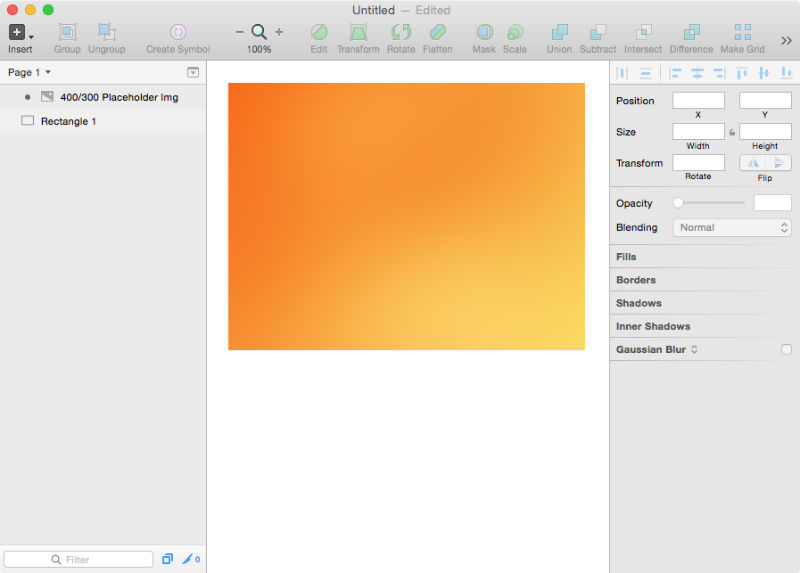
Begin by copying a bitmap image onto your canvas — a range of custom options will immediately appear on the right-hand side; Sketch App calls this area “The Inspector” and it’s where we adjust and style our layers.
First, check the box that says “Color Adjust”. It’s here that we’ll be able to make adjustments to the brightness, saturation and contrast of an image, but for the sake of this mini-tutorial we’ll only reduce the saturation to zero.
Blending modes
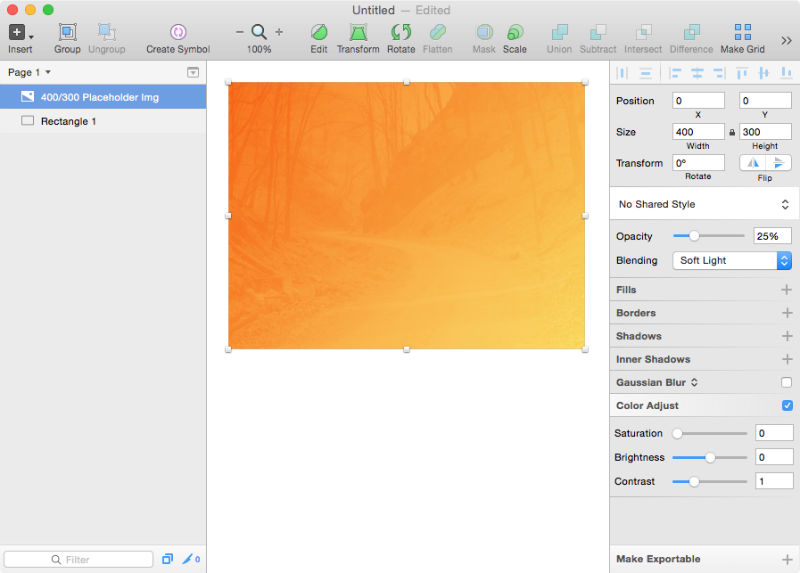
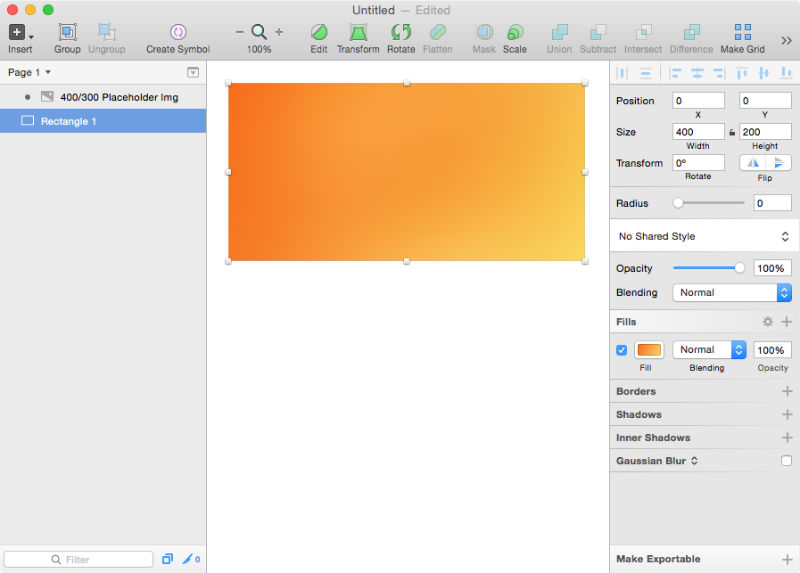
Press “R” to initiate a Rectangle shape and draw it directly on top of the image. Sketch’s snap-to automatic alignments should make this a breeze, but you can double-check the dimensions in The Inspector. While you’re there, uncheck the Borders and select a Fill → Linear Gradient, then use the keyboard shortcut Cmd + Alt + Down to reorder your two layers.
Switch back to the image (which should now be on top), change the Opacity to “25%” and the Blending Mode to “Soft Light” — this is how we use Blending Modes to create colourful but subtle website backgrounds.
Tip: blending modes actually work with all kinds of layers, not just images.
Gaussian blur
Churn the Opacity back up to “100%”. Instead we’ll make the background blurred, a common trend in modern web design that allows a more optimal focus on typography with websites that have big image splash screens. Check the “Gaussian Blur” box and turn it up t0 50px.
You should notice almost instantly that the blur exceeds the dimensions of our box — we can fix this by applying a mask. Right-click on the rectangle in the layers sidebar (on the left) and click “Use as Mask”.
Notice that all of these changes are non-destructive; we can rapid test multiple ideas (colours, blurs, intensity, et cetera) and those variations are never final.
Cropping (the best way)
Now select the rectangle and attempt to resize it, or alternatively you can use The Inspector to declare new dimensions. Since the image is masked, it never exceeds the boundaries of our rectangle and this is by far the best way to accomplish cropping, because not only can we declare specific dimensions, but we’ve not done any destructive damage to our image.
Cropping (the supposed way)
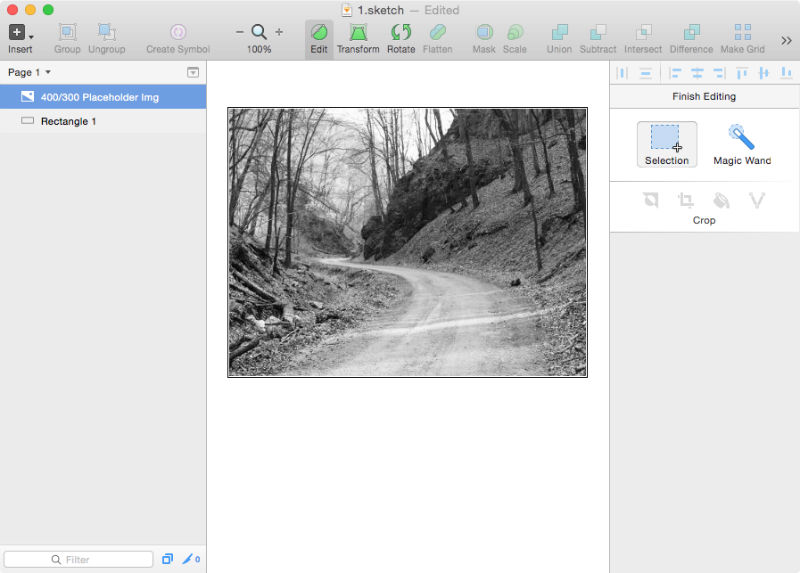
It might be useful at this stage to roll back to the very beginning by using CMD + Z and undoing everything we’ve done so far; all you should be left with on the canvas is your original image. If you double-click on the image you’ll access a range of more destructive actions such as Crop and Invert.
You first need to make a selection, which you can accomplish with either Selection or Magic Wand. Magic Wand works as expected, but it doesn’t have the same tolerance control as Photoshop and the basic Selection doesn’t offer snap-to features or ruling of any kind — you have to completely rely on your own intuition and mouse control. Aside from Crop and Invert, you’ll also have the option to Fill or Vectorize the selection that you’ve made.
Conclusion
My final conclusion is that we should still be using Photoshop for complex or destructive image editing tasks.
Sketch App simply doesn’t offer us enough flexibility to be able to use these tools effectively. However we did learn a few simple tricks that can save us from having to open up Photoshop whenever a bitmap image is involved, something that can quickly become a habit for those of us who’ve been using Photoshop for several years.
Becoming a master at image editing in Sketch App 3 is easy when you understand what it’s used for, and it’s limitations.
The features that I mentioned at the beginning of the article, Brightness, Gaussian Blur and Blending Modes (to name a few), can now even be achieved in modern web design with CSS filters. This is likely why these image editing features work flawlessly, while some others perform less efficiently.
Frequently Asked Questions about Image Editing in Sketch App
How can I crop an image in Sketch App?
Cropping an image in Sketch App is a straightforward process. First, select the image you want to crop. Then, click on the ‘Scissors’ tool in the toolbar. Draw a shape around the area you want to keep. Once you’re satisfied with the selected area, click ‘Enter’. The rest of the image outside the selected area will be removed, leaving you with your cropped image.
Can I adjust the crop area on a background image fill in Sketch?
Yes, you can adjust the crop area on a background image fill in Sketch. To do this, select the shape layer that has the image fill. Then, in the Inspector panel, click on the thumbnail of the image fill. This will open the Fill Popover. Here, you can adjust the size and position of the image within the shape.
How can I use cropped images in symbols in Sketch?
To use cropped images in symbols, first, create a symbol out of the shape you want the image to fill. Then, in the Overrides panel, you can replace the image fill with a different image. The new image will be cropped to fit the shape of the symbol.
How can I crop everything outside of an artboard in Sketch?
To crop everything outside of an artboard, first, select all the layers you want to crop. Then, click on the ‘Mask’ button in the toolbar. This will create a mask that fits the size of the artboard, effectively cropping everything outside of it.
Can I edit images directly in Sketch App?
Yes, Sketch App has a range of image editing tools. You can adjust the color, brightness, contrast, and more. To access these tools, select the image you want to edit and click on the ‘Adjust Image’ button in the toolbar.
How can I resize an image in Sketch App?
To resize an image in Sketch App, select the image and drag the handles on the corners or sides. You can also enter specific dimensions in the Inspector panel.
Can I use Sketch App for photo editing?
While Sketch App is primarily a design tool, it does have some basic photo editing capabilities. You can crop, resize, and adjust the color of images. However, for more advanced photo editing, you might want to use a dedicated photo editing software.
How can I add an image to a shape in Sketch App?
To add an image to a shape, first, select the shape. Then, in the Inspector panel, click on the ‘Fill’ button and choose ‘Image’. You can then select the image you want to add.
Can I export images from Sketch App?
Yes, you can export images from Sketch App. To do this, select the image or layer you want to export, then click on the ‘Export’ button in the toolbar. You can choose the format and quality of the exported image.
How can I undo an action in Sketch App?
To undo an action in Sketch App, simply press ‘Command + Z’ on your keyboard. You can undo multiple actions by pressing this shortcut multiple times.