

Key Takeaways
- Affinity Designer is a professional graphic design app for the Mac, offering a clean, modern, intuitive interface that is beginner-friendly and cost-effective, with a license available for $49.95. It is comparable to Adobe Illustrator and Sketch app due to its vector editing capabilities.
- The app introduces the concept of ‘Personas’ which are used to switch between different sets of tools and functions based on user objectives. It also features a dynamic UI, a hint bar for tips and shortcuts, and a customizable layout. Further, it supports import and export of projects from Photoshop and has solid support for SVG.
- Despite having a slightly steep learning curve, Affinity Designer is deemed suitable for beginners due to its range of tutorials and resources. It is compatible with multiple devices and supports a wide range of file formats. The software is regularly updated with new features, improvements, and bug fixes, and can be used for a wide range of professional design projects.

Update: Pricing has updated since orginal article was written.
Conceptualizing and building a professional design are two very distinct things. In order to build a good design, the artist must feel comfortable with the tools in front of him.
For a long time, the industry standard has been the Adobe stack (Photoshop, Illustrator etc). In this article, I will be taking a close look at a modern new alternative to these classics.
Introduction
Affinity Designer is a professional graphic design app for the Mac. It is comparable in many ways to Adobe Illustrator and Sketch app thanks to its vector editing heart.
However in contrast to the much busier, classic Adobe Illustrator UI, Affinity employs a clean, modern, intuitive interface, making it easy to learn and very beginner-friendly.
A huge upside is Affinity’s business model. There is a good trade off between power and price. You can get a license for USD $24.99 $49.95!
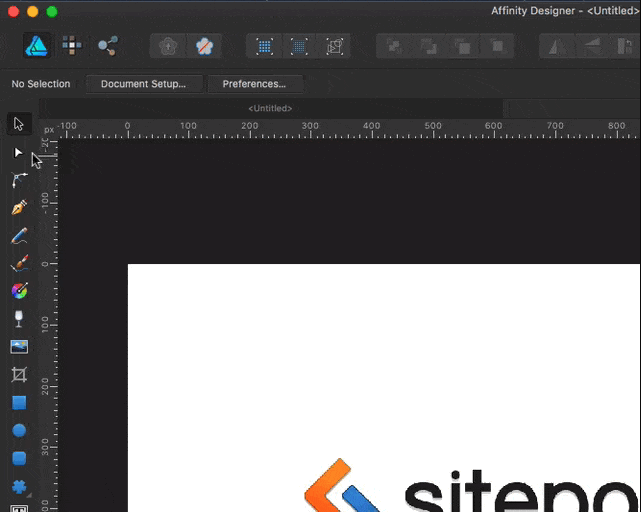
The UI

The UI of the app is very similar to what we see in the Adobe package or Sketch App. It sports a top toolbar, two side toolbars, the working canvas and a thin hint bar at the bottom of the page.
The top bar in itself is divided into three main sections:
- The Persona toolbar
- The default functionalities toolbar
- The context toolbar
The Persona Toolbar
The persona toolbar is a key concept and a feature that distinguishes Affinity Designer from other apps out there. Personas are used to easily and quickly switch between sets of tools and functions, based on what your objectives are. There are three personas at the time of this writing:
1. The Draw Persona
It changes the UI so it serves useful tools to work on creating or modifying vector graphics.
2. The Pixel Persona
Pixel persona allows you to edit your vector drawing based on pixels. Tools such as brushes, retouching tools, and pixel selection tools will be available to you.
3. Export Persona
The export persona is used to output entire layers, groups, objects or regions as graphics in your chosen format.
Personas make it very easy to find the tools you need. Every time you access a persona the left toolbar changes, offering other functionalities and tools based on the currently active one.
The Default Toolbar
The default toolbar keeps the most common tools. Such as: *Buttons – that allow you to switch between standard or retina viewing modes.
- Object controls for ordering (bringing forward or backward etc.)
- Transforming(rotating)
- Aligning
- Snapping
- Combining
- Targeting

The Context Toolbar
In the context toolbar, the different options change based on the currently active tool or functionality you have chosen. The dynamic UI makes it very intuitive to find what you are looking for without going in too deep in menus and submenus as you might traditionally expect.

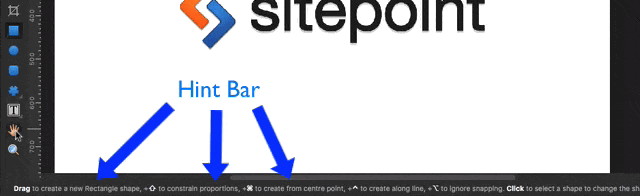
The Hint Bar
The hint bar is located at the bottom of the page. It saves a huge amount of time by providing tips and shortcuts based on the functionalities, tools or options you have hovered your mouse over, or selected.
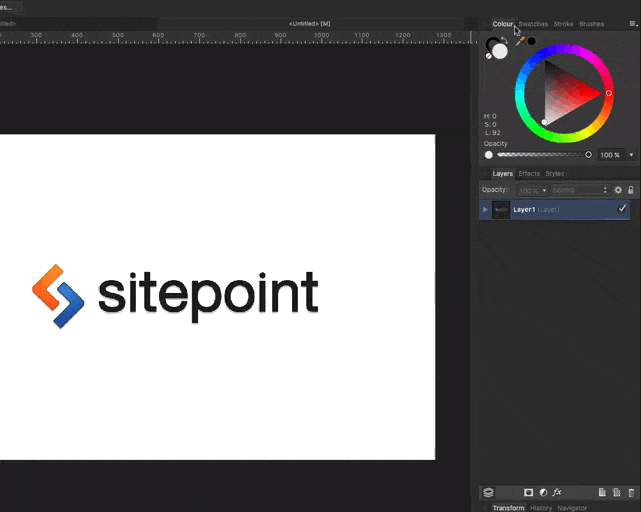
Right Sidebar
The right sidebar is composed of many useful tabbed panels. In the right sidebar, you can interact with layers, brushes, swatches, colors, effects, styles etc.

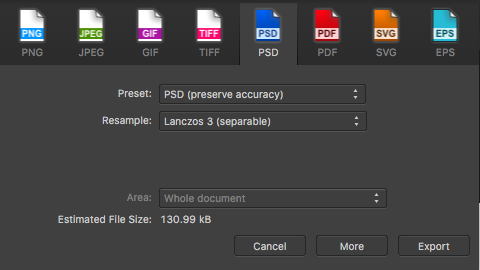
When the export persona is active the right bar changes with three new tabbed panels. The export settings, the slices panel and the layers tab that gives you options to selectively choose what to export and configure the many export variables presented in the settings panel.
Layout
If this kind of layout doesn’t suit your style of working, you can change it by navigating to Window > Separated Mode. This will detach the UI components from each other, letting you flow them on the screen as you see fit and customizing the panel layout. So you arrange it based on your workflow.
This way you can always keep your tools tidy and organized within your reach, and not get lost around.
Usability
Affinity Designer features a 1,000,000% zoom – Which means that it can handle working on very large documents without losing speed. It is a very useful tool when it comes to working on projects that have a lot of detail and large canvas dimensions.
Import and export PSDs
Another huge upside is the ability to import and export projects from Photoshop. For example, if you have designed a mobile app in Photoshop and now you want to continue working on it on Affinity Designer, you can do that with no problem and the whole design will be intact.
Same thing vice versa. When you have a mobile app design in Affinity Designer but need to work on it on Photoshop, you can export it very easily.
PSD support is a great feature since the industry standard nowadays is Adobe Photoshop. This way you can still work with a team of designers who are not using Affinity Designer.
SVG Support
Of course, when we talk about vectors and the web it’s hard to not mention SVG. I’ve read reviews from 2014 that mention that Affinity Designer’s SVG support was a little flaky. Though I’m not familiar with older versions, the current version seems to have very solid support for SVG – though some manual optimization of files destined for the web is probably still in order.
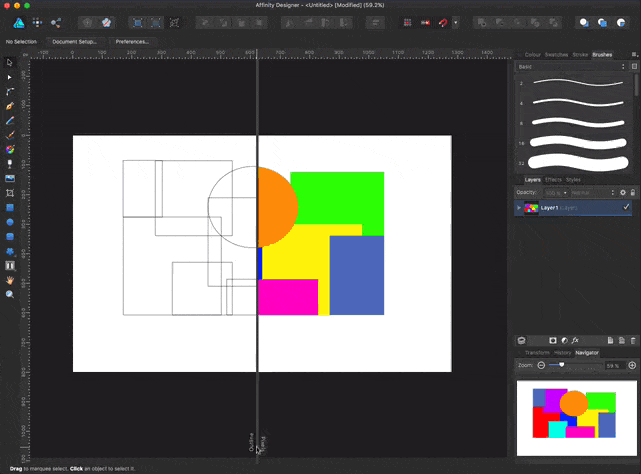
Mode Mirroring
Mode mirroring allows you to view two states at the same time. Such as outline/vector view and pixel view at one time, inside one window.
Bottom Line
Affinity Designer is a very beginner friendly program thanks to its intuitive layout and modern design. If you already use Photoshop as your go-to design app, you will likely feel at home right away.
While you can’t truly compare it with industry standards like Photoshop or Illustrator, you can think of Affinity Designer as something that draws together some nice aspects from each, since it offers an extensive set of vector drawing tools with some basic pixel-based manipulation.
Could it be a simpler, budget-conscious alternative? Yes, I think it does.
Frequently Asked Questions about Affinity Designer
How does Affinity Designer compare to other graphic design software?
Affinity Designer is a robust graphic design software that stands out for its versatility and affordability. Unlike other software like Adobe Illustrator, Affinity Designer offers a one-time purchase option, making it a cost-effective choice for designers. It also supports both vector and raster design, allowing users to switch between the two without the need for separate software. However, it may lack some advanced features found in more established software, and its interface can be challenging for beginners.
Is Affinity Designer suitable for beginners?
While Affinity Designer has a slightly steep learning curve, it is still suitable for beginners. It offers a range of tutorials and resources to help new users understand its features and functionalities. The software also has a clean and intuitive interface, although it may take some time for beginners to navigate and master.
Can I use Affinity Designer on multiple devices?
Yes, Affinity Designer is compatible with multiple devices, including Windows, macOS, and iPad. However, each version of the software must be purchased separately. This means that if you want to use Affinity Designer on both your desktop and iPad, you will need to buy two different versions.
Does Affinity Designer offer customer support?
Affinity Designer provides customer support through various channels. Users can access a comprehensive online help guide, video tutorials, and a user forum where they can ask questions and share tips. However, it does not offer direct phone or email support.
What file formats does Affinity Designer support?
Affinity Designer supports a wide range of file formats. Users can import and export files in formats such as EPS, PDF, SVG, JPG, PNG, TIFF, and more. It also supports Photoshop and Illustrator file formats, making it easy to integrate with other design software.
Does Affinity Designer support layering?
Yes, Affinity Designer supports layering, which is a crucial feature for any graphic design software. It allows users to create complex designs by stacking different elements on top of each other. Users can also group, lock, hide, and adjust the opacity of layers.
Can I create 3D designs in Affinity Designer?
While Affinity Designer is primarily a 2D design software, it does offer some 3D capabilities. Users can apply 3D effects to their designs using the software’s extensive range of layer effects. However, for complex 3D modeling, users may need to use specialized 3D design software.
Is there a trial version of Affinity Designer available?
Yes, Affinity Designer offers a free trial version for users who want to test out the software before purchasing. The trial version provides full access to all features and functionalities for a limited period.
How often does Affinity Designer get updated?
Affinity Designer is regularly updated with new features, improvements, and bug fixes. These updates are free for users who have purchased the software.
Can I use Affinity Designer for professional projects?
Absolutely. Affinity Designer is a powerful tool that can be used for a wide range of professional design projects, from logo design and branding to illustration and web design. It offers a comprehensive set of features and tools that can meet the needs of professional designers.