 The ability to put type on a path allows you to create interesting typography and can be very useful in logo design. Many graphics programs allow you to put type on a path, including Photoshop, but Illustrator has gives you some extra control over how the type appears on the path. If you’re new to Illustrator, or a bit rusty on using type on a path, this should help you get up to speed.
Let’s start by looking at type on an open path.
Open Paths
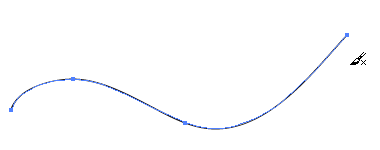
1. Create a new document in Illustrator and using any of the drawing create an open path.
![]()
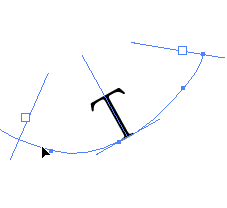
2. Select the Type tool and move your cursor so that it touches the path. Notice that the icon changes to the Type on a Path tool icon.

3. Click once on the path. When you click on the path, any Stroke attributes are removed from the path. You can put them back later if you want. Now you can type your text.
This action removes any Stroke attributes from the path, but you can apply a Stroke to the path again later if you want to. At this point, you’ll see the blinking text insertion icon and you can enter or copy text onto the path.
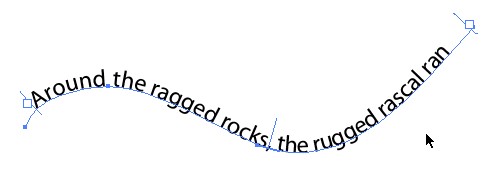
4. Switch over to the Selection tool and select the path with the text on it.
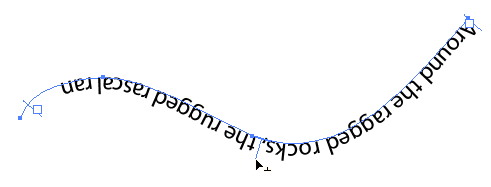
Your selection will show some extra bars and two boxes at the start and end of the path.
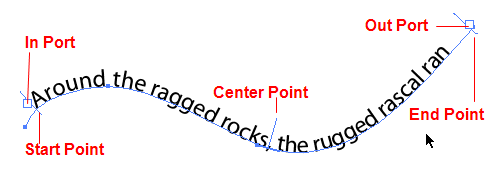
The two vertical lines that appear at each end define the boundary, or the start and end points, of the text. The line in the center determines the center point between the start and end points and lets you specify which side of the path the type sits on.
The in and out ports allow you to thread text across multiple paths. You can drag the the start and end points to change the area of the path that can contain text.
To flip the text over the path, simply drag the middle line to either side of the path.
Closed Paths
On an open path, you can easily see the start and end points because they are on opposite sides of the path. However, when you are working with a closed path, the point that you click becomes the start and the end point.
1. Select the ellipse tool and drag out a circle. Hold down Shift to make it a perfect circle.
2. Select the Type tool. You’ll notice that this time the cursor looks different when your roll your mouse over the edge of the circle. This is a Type Area cursor and if you click now, it will fill the circle with your type. That’s not what we want.
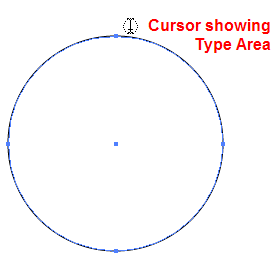
3. Hold down the Alt/Option key and now you should see the Type on a Path cursor. Click at the top of the circle to create the start point and the end point and add your text.
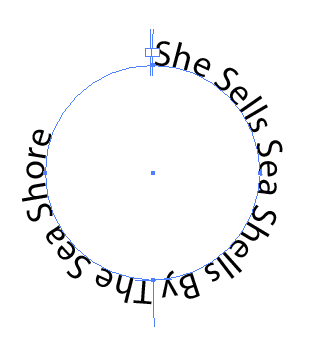
4. Switch to the Selection tool again. You’ll see the start and end points as before except this time they are right beside each other. You’ll also see the in and out ports and the center point.
Manipulating Type On A Path
The text you see on the circle above is left aligned. If you center your text by clicking on the center alignment icon on the options bar, it aligns to the bottom of the path.
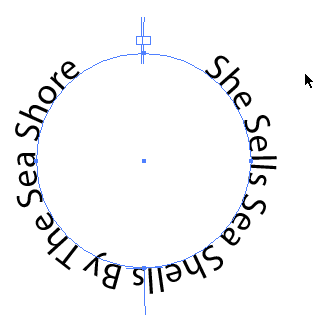
To align text to the top center of a circle, you can either:
- Click at the bottom of the circle when you’re creating the Path Type object, or
- Drag the start and end points so that the center of the text rests at the top of the circle.
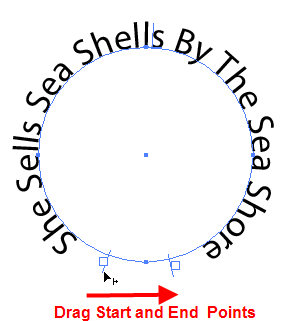
You can take even more control over how your text looks by opening up the Type On A Path Options Palette. Choose Type > Type on a Path > Type on a Path Options.
The following settings are available in the Type on a Path Options dialog:
~ Effect
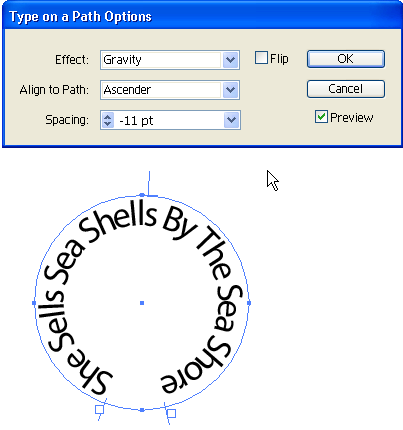
The Effect setting controls the orientation of the text relative to the path. Illustrator allows you to choose from Skew, 3D Ribbon, Stair Step, and Gravity.
~ Align to Path
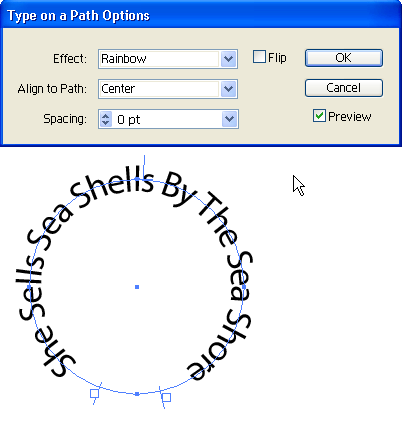
The Align to Path setting determines which part of the text actually lines up with and touches the path.
You can choose from Baseline (the default), Ascender, Descender, and Center
~ Spacing
You can use the Spacing setting to get consistent spacing between characters on curved paths. When you have a path with sharp curves, often the characters will appear at weird angles or look inconsistent. Increasing the number in the Spacing field makes the characters appear closer together.
~ Flip
This simply lets you set which side of the path the text appears on.
That’s type on a path. Once your type is on there, you can edit it as normal and apply effects and styles as to your heart’s content.

Frequently Asked Questions about Putting Type on a Path in Illustrator
How can I adjust the position of my text on the path in Illustrator?
To adjust the position of your text on the path, you need to use the Direct Selection Tool (A). Click on the text and you will see a line through it. This line is called the baseline. You can click and drag this line to move your text along the path. If you want to flip the text to the other side of the path, just drag the baseline across the path.
Can I change the direction of the text on the path?
Yes, you can change the direction of the text on the path. To do this, select the Path Selection Tool (A), then click on the text. You will see a small line perpendicular to the text. This is the direction line. Click and drag this line to change the direction of the text.
How can I add multiple lines of text on the same path?
To add multiple lines of text on the same path, you need to use the Type Tool (T) to click on a different part of the path and start typing. Each click will create a new text box on the path. You can adjust the position and direction of each text box independently.
Can I change the font and size of the text on the path?
Yes, you can change the font and size of the text on the path. To do this, select the text with the Type Tool (T), then go to the Character panel (Window > Type > Character). Here, you can change the font, size, and other attributes of the text.
How can I curve text around a circular path?
To curve text around a circular path, you need to first create a circle using the Ellipse Tool (L). Then, select the Type on a Path Tool (Shift + T), click on the circle, and start typing. The text will automatically curve along the circle.
Can I convert the text on a path to outlines?
Yes, you can convert the text on a path to outlines. To do this, select the text with the Selection Tool (V), then go to Type > Create Outlines. This will convert the text into a vector shape that you can edit with the Direct Selection Tool (A).
How can I align the text to the center of the path?
To align the text to the center of the path, select the text with the Type Tool (T), then go to the Paragraph panel (Window > Type > Paragraph). Here, you can choose to align the text to the left, center, or right of the path.
Can I add text to a path on a layer mask?
No, you cannot add text to a path on a layer mask. The layer mask is used to hide or reveal parts of the layer, not to add text. However, you can create a path on the layer, add text to the path, and then apply the layer mask.
How can I wrap text around an object in Illustrator?
To wrap text around an object, you need to first create a path that follows the shape of the object. Then, select the Type on a Path Tool (Shift + T), click on the path, and start typing. The text will automatically wrap around the object.
Can I edit the text after it has been placed on a path?
Yes, you can edit the text after it has been placed on a path. To do this, select the text with the Type Tool (T), then make your changes. You can add or delete text, change the font and size, adjust the position and direction, and more.
Jennifer Farley is a designer, illustrator and design instructor based in Ireland. She writes about design and illustration on her blog at Laughing Lion Design.

