

Key Takeaways
- Python’s Twitter libraries can be used to connect to a Twitter account via the Twitter API, enabling users to extract high quantities of data or control posts from the Python platform.
- The tutorial covers how to connect Python to the Twitter API, download tweets and lists of followers and following users, post multiple tweets at once, and customize searches for specific terms on Twitter.
- Python’s GetSearch() function is a powerful tool that allows users to search for specific terms across Twitter, including parameters such as date and geolocation.
- Python is particularly useful for conducting in-depth data analysis on the information collected from Twitter, including network analysis and machine learning techniques to make meaningful predictions.
This tutorial illustrates how to use a Python API to connect to a Twitter account using the Twitter library. Specifically, this API allows a user to extract high quantities of data pertaining to a specific Twitter account, as well as directly control Twitter posts from the Python platform (such as posting multiple tweets at once).

Even if you’re not a regular Python user, using one of Python’s Twitter libraries is quite useful when it comes to analytics. For instance, while web developers might be more inclined to use a language such as PHP in connecting to the API, Python offers more flexibility in analyzing trends and statistics with the data. Therefore, data scientists and other analysts would find Python to be a better fit for this purpose.
In this tutorial, we’ll start with some basic steps in connecting Python to the Twitter API, and then look at how to stream the desired data. Note that, while the Twitter library (and other Python libraries such as Tweepy and Twython) can carry out a multitude of different tasks with the data, I’ll focus on some of the more basic (and useful) queries in this article. Specifically, I’ll walk through how to:
- connect Python to the Twitter API using the appropriate credentials
- download tweets associated with the specific account
- download a list of all following and followed users for an account
- post multiple tweets at once
- customize a search for instances of a specific term on Twitter.
1. Connect Python to the Twitter API
This tutorial uses iPython as the Python interface to connect to Twitter. In order to connect to the API, we need to obtain the Consumer Key, Consumer Secret, and Access Token Secret.
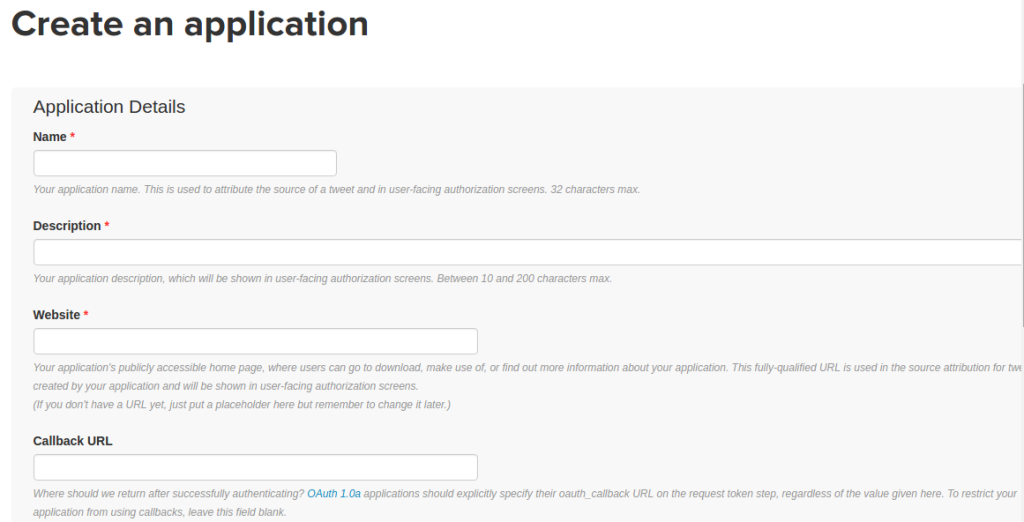
To obtain these, you need to sign into your account at apps.twitter.com. Once there, you’ll be prompted to create an application:
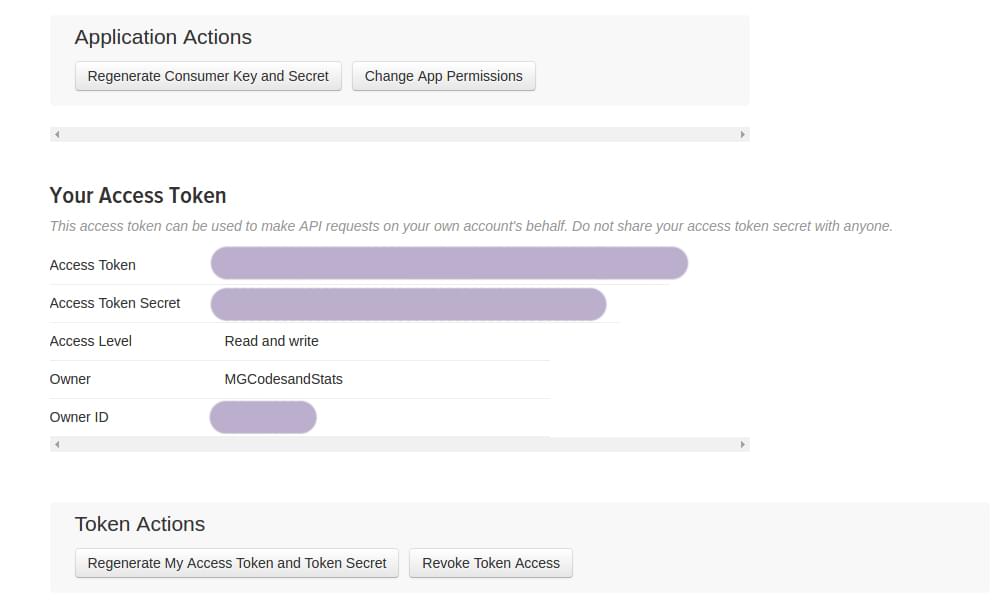
Once you have the application created, you’ll find the relevant keys and tokens under the Keys and Access Tokens section.

Firstly, we install the python-twitter library in our terminal as follows:
pip install python twitter
Once we’ve done that, we import the Twitter library and enter the credentials as follows:
import twitter
api = twitter.Api(consumer_key='your_consumer_key',
  consumer_secret='your_consumer_secret',
    access_token_key='your_access_token_key',
    access_token_secret='your_access_token_secret')
print(api.VerifyCredentials())
As soon as the correct credentials are entered, the connection to the API is complete, and we’re now able to control our Twitter account through the Python platform!
2. Download User Timeline
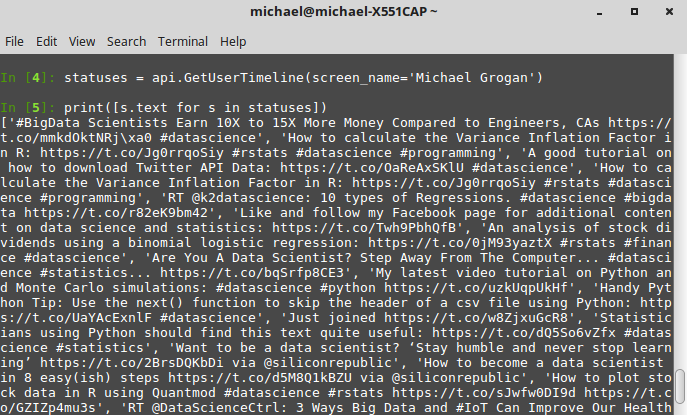
Now that we have connected Python to the Twitter API, we can go ahead and start utilizing different Twitter functions remotely. For instance, if we wish to download a user timeline of tweets, we do this using api.GetUserTimeline as below (and specifying the screen name for the appropriate account), and then using the print() function to display the results:
statuses = api.GetUserTimeline(screen_name='Michael Grogan')
print([s.text for s in statuses])
Once we’ve inputted the above, we see the respective timeline displayed in the Python interface:
3. Download Following and Followed Contacts
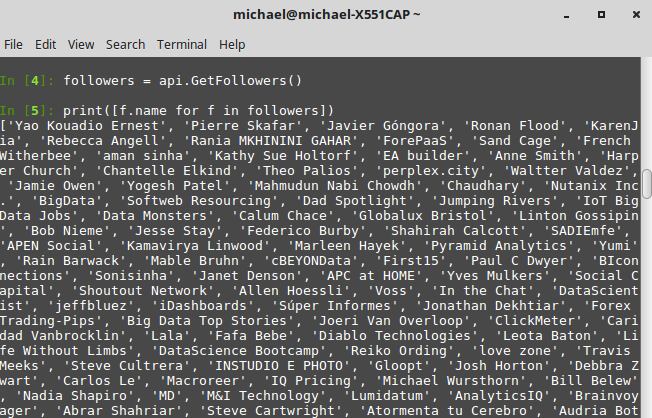
The Twitter library also enables us to download a list of accounts that a particular user is following, as well as accounts that are followers of that particular user. To do this, we use api.GetFriends() for the former, and api.GetFollowers() for the latter:
users = api.GetFriends()
print([u.name for u in users])

followers = api.GetFollowers()
print([f.name for f in followers])
Note that we can also set an upper bound on the number of users we wish to fetch. For instance, if we wish to fetch 100 followers for any particular account, we can do so by adding a total_count variable to the function as follows:
followers = api.GetFollowers(total_count=100)
print([f.name for f in followers])
4. Post Multiple Tweets
One of the neat things about using a Twitter API is the ability to post multiple tweets at once. As an example, we can post the below two tweets concurrently using the api.PostUpdate command (again, using the print() function to confirm). Once we then go to the Twitter account in question, we see that both tweets have been posted:
status = api.PostUpdate('How to calculate the Variance Inflation Factor in R: http://www.michaeljgrogan.com/ordinary-least-squares-an-analysis-of-stock-returns/ #rstats #datascience #programming')
print(status.text)

status = api.PostUpdate('#BigData Scientists Earn 10X to 15X More Money Compared to Engineers, CAs http://bit.ly/1NoAgto  #datascience')
print(status.text)

5. Search Tweets
The GetSearch() function included with the twitter library is a particularly powerful tool. This function allows us to search for a specific term across Twitter. Note that this applies for all users who have inputted a particular term — not simply the account we’ve provided credentials for in Python.
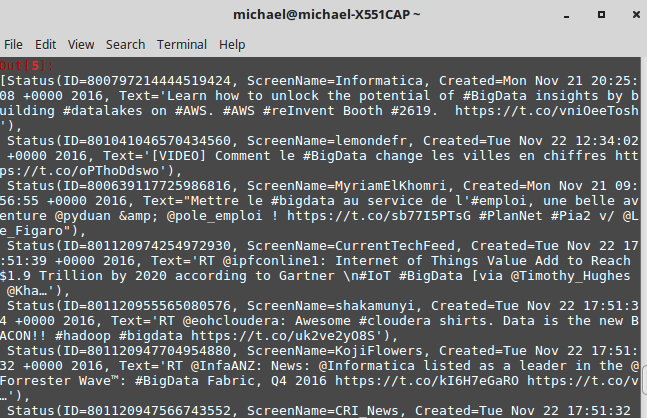
As an example, let’s conduct a search for the term “bigdata” in Python. The parameters we set are those tweets since 21st November 2016 that contain the term, and we’re choosing to cap the number of tweets streamed at 10:
api.GetSearch(term='bigdata', since=2016-11-21, count=10)
Note that we can customize the GetSearch() function in a variety of ways, depending on how we wish to extract the data. For instance, though this will take significantly longer to stream if no date is specified, we could also choose to gather tweets before 21st November 2016 that contain the term “bigdata” as follows:
api.GetSearch(term='bigdata', until=2016-11-21, count=10)
It’s worth bearing in mind that this function downloads up to 7 days’ worth of data prior to the date we specify under the until variable.
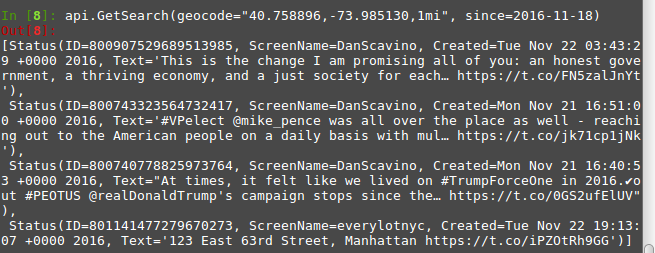
Additionally, we’re not limited to merely searching by terms with GetSearch. For instance, suppose that we wish to search tweets by geolocation — specifically tweets sent since 18th November within a 1 mile radius of Times Square, New York (note that distance can be formatted in either miles or kilometers using mi or km respectively):
api.GetSearch(geocode="40.758896,-73.985130,1mi", since=2016-11-18)
Upon running the GetSearch() function, we see that Python returns the following tweets (and of course, what better place to find Donald Trump!):
How Can This Data Be Used?
One of the particular reasons why Python is highly attractive for streaming social network data is — as mentioned before — the ability to conduct in-depth data analysis on the information we collect.
For instance, we’ve already seen how to search tweets by location using GetSearch. With machine learning being all the rage among data scientists involved in analyzing social media trends, one particular technique that has become quite popular in this area is network analysis. This is a technique where dispersed data (or nodes) can in fact be shown to form close networks — typically with certain nodes proving to be a focal point. As an example, suppose we were to analyze the 1000 most popular tweets in ten different locations across the world.
On a random day, we might find that hashtags on tweets in London vary significantly from those of tweets in New York, even though we likely still see some coherency between the different tweets in the network. However, during a major world event such as US election night or Brexit, when Twitter is trending on that particular topic, it’s found that networks tend to be much more close-knit, and as a result, there’s more opportunity for sentiment analysis under such a scenario — for example, as it becomes evident who will win the presidency, or that Britain is voting to leave the EU. One will typically see networks cluster in different fashions, depending on the trending tweets, as further real-time information becomes available.
This is just one of the advantages of Python. While it’s one thing to use an API to connect to Twitter (which can be done in many programming languages), it’s another to be able to employ analytics to sort through that data in a meaningful way. Machine learning techniques can be employed through Python to both analyze streamed data from social networks and make meaningful predictions from that data.
Conclusion
The module documentation provides a highly detailed description of the different functions that can be used in Python to download, filter and manipulate data. Ultimately, while we’ve also looked at ways to directly post to Twitter using the API, the techniques described above are particularly useful when it comes to analysis of trends — such as hashtag popularity, frequency of search terms by location, and so on. In this regard, interacting with Twitter through Python is particularly useful for those who wish to implement data analysis techniques on the information gathered.
Of course, API interaction with Twitter can be done in a wide variety of languages, depending on what your end goal is. If the goal is web development or design, then PHP or Ruby might be your best bet. However, if your goal is to use data obtained from Twitter to conduct meaningful analysis, then Python is in a league of its own. In this context, I highly recommend Python when it comes to doing some serious number-crunching with Twitter.
Frequently Asked Questions (FAQs) about Creating a Twitter App and API Interface via Python
How can I set up a Twitter Developer Account?
To set up a Twitter Developer Account, you need to go to the Twitter Developer’s site and apply for a developer account. You will be required to fill out an application form detailing how you plan to use the Twitter data. Once your application is approved, you can create a new project and generate your API keys.
What are the different types of Twitter APIs available?
Twitter provides three types of APIs: REST API, Streaming API, and Ads API. The REST API allows developers to read and write Twitter data. The Streaming API provides real-time access to Twitter data. The Ads API is used for managing Twitter Ad campaigns.
How can I authenticate my Twitter API requests?
Twitter API requests are authenticated using OAuth 2.0. You need to include your API keys in the request header. The keys consist of an API key, API secret key, Access token, and Access token secret.
How can I post a tweet using the Twitter API?
To post a tweet using the Twitter API, you need to make a POST request to the ‘statuses/update’ endpoint. The tweet text should be included in the ‘status’ parameter of the request.
How can I retrieve tweets using the Twitter API?
To retrieve tweets, you can use the ‘statuses/user_timeline’ endpoint of the Twitter API. You can specify parameters like ‘count’ to limit the number of tweets returned, and ‘screen_name’ to specify the user whose tweets you want to retrieve.
How can I handle rate limits in the Twitter API?
Twitter API imposes rate limits to prevent abuse. If you exceed the rate limits, you will receive a ‘429 Too Many Requests’ response. You should implement a strategy to handle rate limits, such as slowing down your requests or queuing them.
How can I search for tweets using the Twitter API?
You can search for tweets using the ‘search/tweets’ endpoint of the Twitter API. You can specify search criteria in the ‘q’ parameter of the request.
How can I stream tweets in real-time using the Twitter API?
To stream tweets in real-time, you can use the ‘statuses/filter’ endpoint of the Twitter Streaming API. You can specify filter criteria like ‘track’ to filter the tweets by keywords.
How can I handle errors in the Twitter API?
Twitter API returns HTTP status codes to indicate the success or failure of a request. You should check the status code in the response and handle errors accordingly.
How can I use the Twitter API with Python?
To use the Twitter API with Python, you can use libraries like Tweepy or python-twitter. These libraries provide a Pythonic interface to the Twitter API and handle things like authentication and rate limit handling.