
- Key Takaways
- What Are We Going To Build?
- What Is a Google Chrome Extension?
- Step 1: Create the Extension Files
- Step 2: Create the Manifest File
- Step 3: Create the Content Script
- Step 4: Adding Some Styling
- Step 5: Test the Extension
- Taking it Further
- Conclusion
- Frequently Asked Questions (FAQs) about Creating a Chrome Extension
Key Takaways
What Are We Going To Build?
In recent times, we’ve witnessed an explosion in AI capabilities. And while our new cyber companions offer unprecedented levels of assistance, they also come with a reminder: don’t share sensitive information with them. I don’t know about you, but more often than not, my fingers are faster than my brain. So, to prevent potential slip-ups, we’re going to build a “molly-guard” for ChatGPT. If you’re scratching your head wondering what a molly-guard is, it originally referred to a shield put over a button or switch to prevent accidental activation. In our context, it’s a digital guardian ensuring we don’t overshare. Users can specify a list of words or phrases they deem sensitive. Should we attempt to submit a message to ChatGPT containing any of those words, the extension will jump into action, disabling the submit button and saving us from a potential oversight.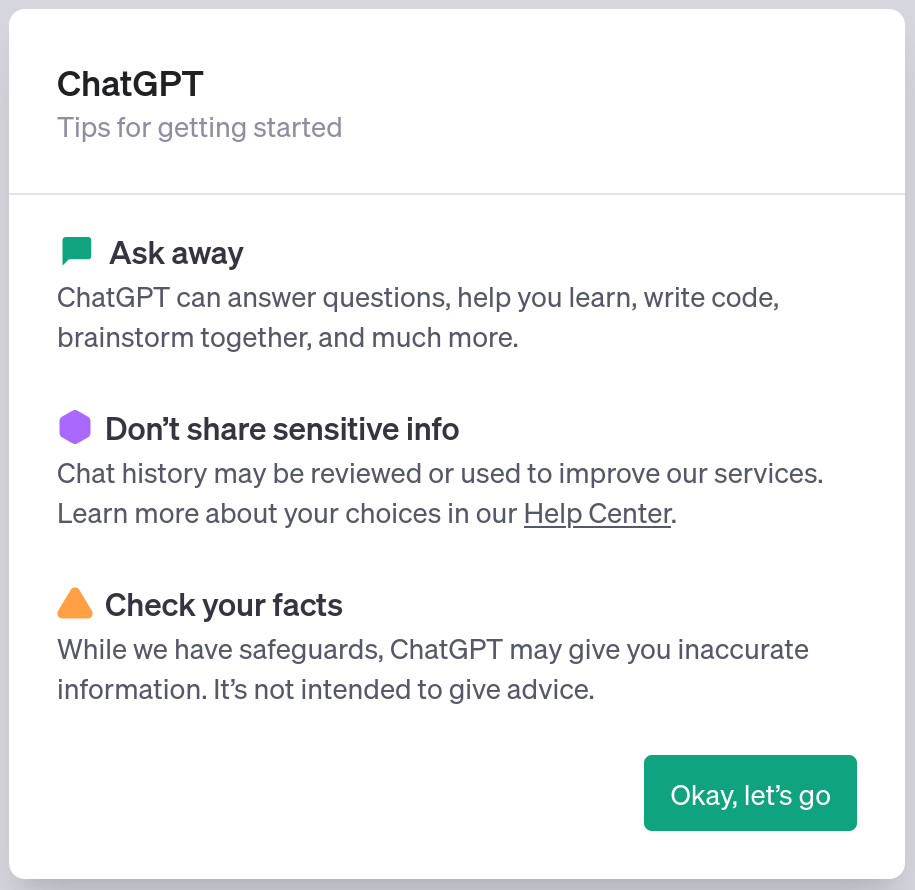 To follow along with this tutorial, you’ll need a ChatGPT account. Don’t have one? You can sign up for free here.
The code for this tutorial is available on GitHub.
To follow along with this tutorial, you’ll need a ChatGPT account. Don’t have one? You can sign up for free here.
The code for this tutorial is available on GitHub.
What Is a Google Chrome Extension?
Before we get started, let’s clarify what a Chrome extension is. A Chrome extension is a small piece of software designed to enhance or modify the Chrome browsing experience. Extensions are developed using standard web technologies — HTML, JavaScript, and CSS — and they can range from simple tools, like color pickers, to more intricate ones, like password managers. Many of these extensions are available for download on the Chrome Web Store. Note: for those keen on a deeper understanding of Chrome extensions, Google’s official documentation is an invaluable resource. It’s worth noting that Google Chrome extensions can take various forms based on their intended function. Some have a browser action, visibly represented by an icon next to the address bar, providing quick access to their features. Others might run silently in the background, across all web pages or only on specific ones, depending on their design. For our tutorial, we’ll focus on an extension type that uses a content script. This script will allow us to interact and manipulate the DOM of a specific page – in our case, the ChatGPT interface.Step 1: Create the Extension Files
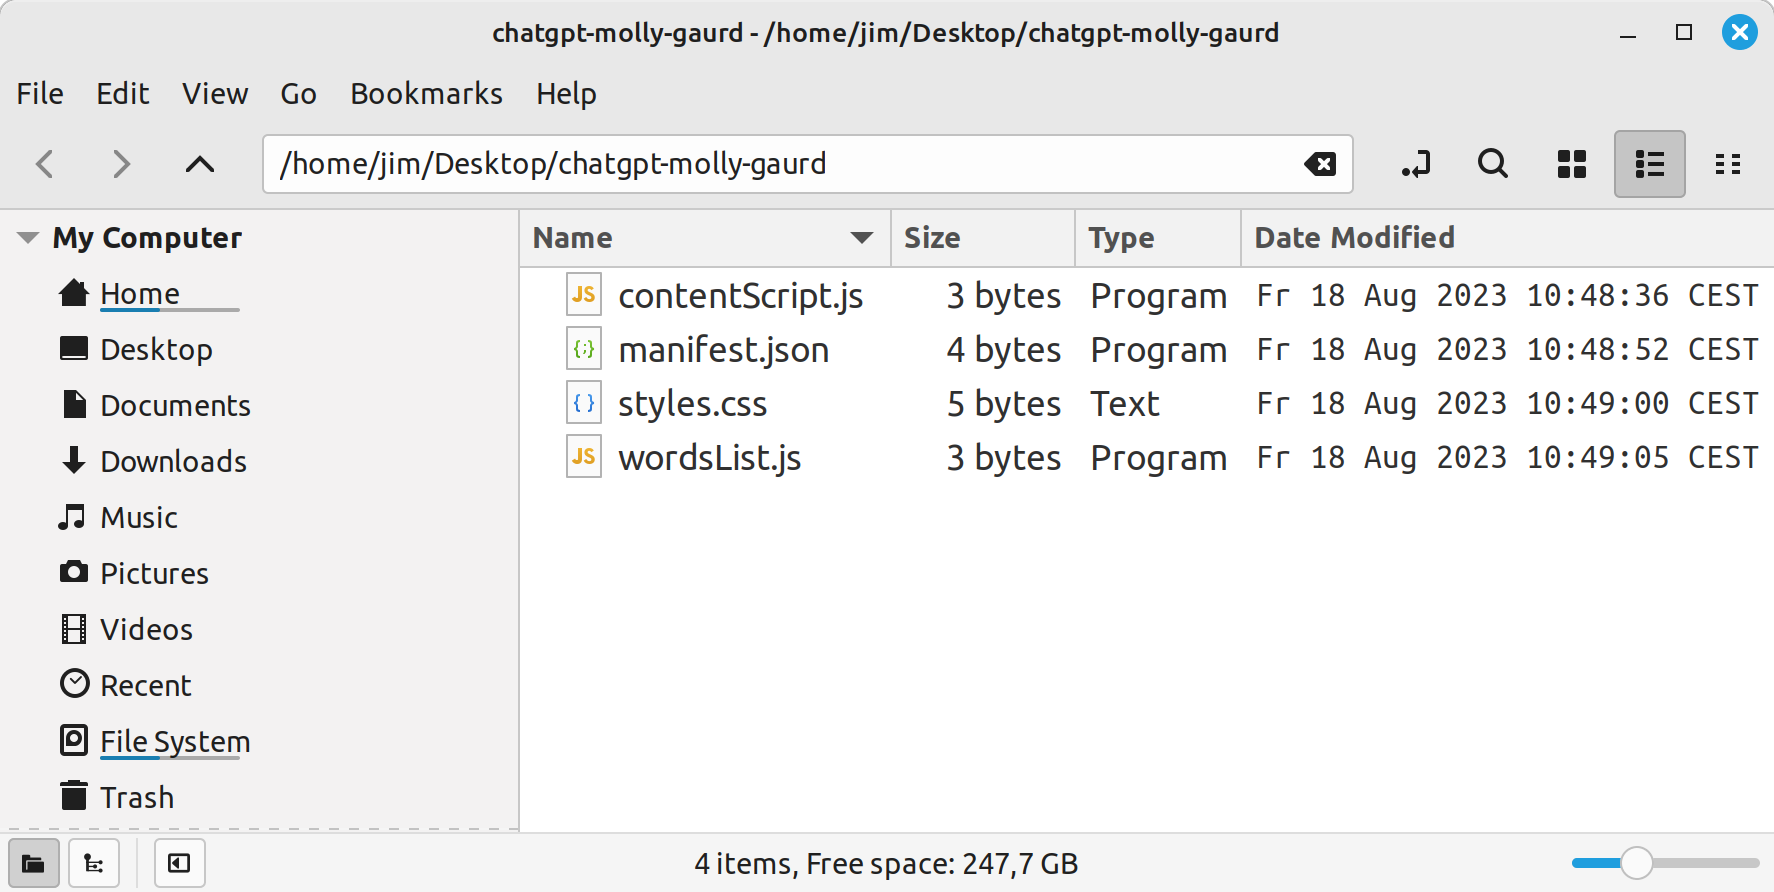
To kick things off, we need to set up the basic structure for our Chrome extension. Our extension, namedchatgpt-mollyguard, will be organized in a dedicated folder. This extension directory will contain all the necessary files to make our molly-guard function smoothly.
Here’s a breakdown:
- Folder:
chatgpt-molly-guard. This is the root directory of our extension. All our files will reside in this folder. - File:
manifest.json. The heart and soul of our extension. This file contains metadata about the extension, such as its name, version, and permissions it requires. Most importantly, it specifies which scripts to run and on which websites. - File:
contentScript.js. As its name suggests, this JavaScript file contains the content script. This script has direct access to the web page’s content, allowing us to scan for sensitive words and modify the page as needed. - File:
wordsList.js. A JavaScript file dedicated to containing the list of sensitive words or phrases the user specifies. We’ve separated this to make it easy for users to customize their list without diving into the core functionality incontentScript.js. - File:
styles.css. A stylesheet to add some flair to our extension. While our primary goal is functionality, there’s no harm in making our warnings or prompts look good!
- Create a new folder on your computer named
chatgpt-molly-guard. - Inside this folder, create the four files listed above.
- With the files in place, we’re ready to start filling in the details.
 In the next sections, we’ll dive deeper into each file and outline its specific role in the extension.
Step 2: Create the Manifest File
The manifest file is a JSON file that provides the browser with essential details about your extension. This file must be located in the extension’s root directory. Here’s our manifest structure. Copy this code intomanifest.json:
{
  "manifest_version": 3,
  "name": "ChatGPT Molly-guard",
  "version": "1.0",
  "description": "Prevents submission if specific words are typed into chat window",
  "content_scripts": [
    {
      "matches": ["https://chat.openai.com/*"],
      "css": ["styles.css"],
      "js": ["wordsList.js", "contentScript.js"]
    }
  ]
}
manifest_version, name and version. Everything else is optional.
Key Manifest Elements
manifest_version: an integer specifying the version of the manifest file format. We’re using Manifest V3, the latest version available. Be aware that Google is actively phasing out Manifest V2 extensions in 2023.name: a short, plain text string (max 45 characters) that identifies the extension.version: one to four dot-separated integers identifying the version of the extension.description: a plain text string (no HTML, max 132 characters) that describes the extension.content_scripts: this key specifies statically loaded JavaScript or CSS files to be used every time a page is opened that matches a URL pattern (specified by thematcheskey). Here, we’re saying that our script should run on any URL starting withhttps://chat.openai.com/.
name, version and description when displaying your extension on Chrome’s extension management page (<chrome://extensions>) and in the Chrome Web Store.
Though our manifest is streamlined for our needs, many other fields can add depth and functionality to your extensions. Fields such action, default_locale, icons, and so on, offer customization options, UI control, and internationalization support.
For a comprehensive overview of what’s available in the manifest.json file, please consult Google’s official documentation.
Step 3: Create the Content Script
Content scripts in a Chrome extension are JavaScript files that run in the context of web pages. They can view and manipulate the DOM of the page they’re running on, enabling them to modify both the web page’s content and behavior. This is our content script. Copy the following code into thecontentScript.js file:
const debounce = (callback, wait) => {
  let timeoutId = null;
  return (...args) => {
    window.clearTimeout(timeoutId);
    timeoutId = window.setTimeout(() => {
      callback.apply(null, args);
    }, wait);
  };
};

function containsForbiddenWords(value) {
  return forbiddenWords.some(word => value.toLowerCase().includes(word.toLowerCase()));
}

function updateUI(target) {
  const containsForbiddenWord = containsForbiddenWords(target.value);
  const sendButton = target.nextElementSibling;
  const parentDiv = target.parentElement;

  if (containsForbiddenWord) {
    sendButton.disabled = true;
    parentDiv.classList.add('forbidden-div');
  } else {
    sendButton.disabled = false;
    parentDiv.classList.remove('forbidden-div');
  }
}

document.body.addEventListener('keyup', debounce((event) => {
  if (event.target.id === 'prompt-textarea') updateUI(event.target);
}, 300));

document.addEventListener('keydown', (e) => {
  if (e.target.id === 'prompt-textarea' && e.key === 'Enter') {
    if (containsForbiddenWords(e.target.value)) {
      e.stopPropagation();
      e.preventDefault();
    }
  }
}, true);
debounce function. We’ll use this to ensure that we don’t check for forbidden words every time the user presses a key. That would be a lot of checks! Instead, we’ll wait until the user stop typing before doing anything. I’ve taken this snippet from Josh W. Comeau’s site, so you can check out his post for an explanation of how it works.
Next comes a containsForbiddenWords function. As the name implies, this function returns true if the text passed to it contains any of our forbidden words. We’re lower-casing both values to ensure that the comparison is case-insensitive.
The updateUI function determines if any forbidden words are present in the chat box. If they are, it disables the send button and adds a CSS class (forbidden-div) to the chat box’s parent div. We’ll leverage this in the next step to provide a visual cue to the user.
The script finally registers two event listeners:
- The first is set to trigger on a
keyupevent. It checks if the modified element is our target (the chat window) and then calls theupdateUIfunction. Thanks to ourdebouncefunction, this won’t run continuously, but only after a brief pause in typing. - The second event listener is listening for a
keydownevent on our target. Specifically, it’s watching for the Enter keypress, which, if pressed while a forbidden word is in the text area, will prevent the the browser’s default action (in this case a form submission).
Step 4: Adding Some Styling
While the core functionality of our extension is to prevent certain submissions, it’s important for users to instantly recognize why their action is being blocked. Let’s add some styling to provide a visual cue and enhance the user experience. Here’s the rule we’re using. Add it to thestyles.css file:
.forbidden-div {
  border: 2px solid red !important;
  background-color: #ffe6e6 !important;
}
!important flag is also worth noting. When dealing with web pages that you don’t own — like in this case with ChatGPT — the existing styles can be very specific. To ensure our styles take precedence and are applied correctly, the !important flag overrides any potential conflicts due to existing styles’ specificity.
Step 5: Test the Extension
There’s one last step: populating the list of forbidden words that our extension should monitor for. We can add these inforbiddenWords.js:
const forbiddenWords = [
  "my-company.com",
  "SitePoint",
  "Jim",
];
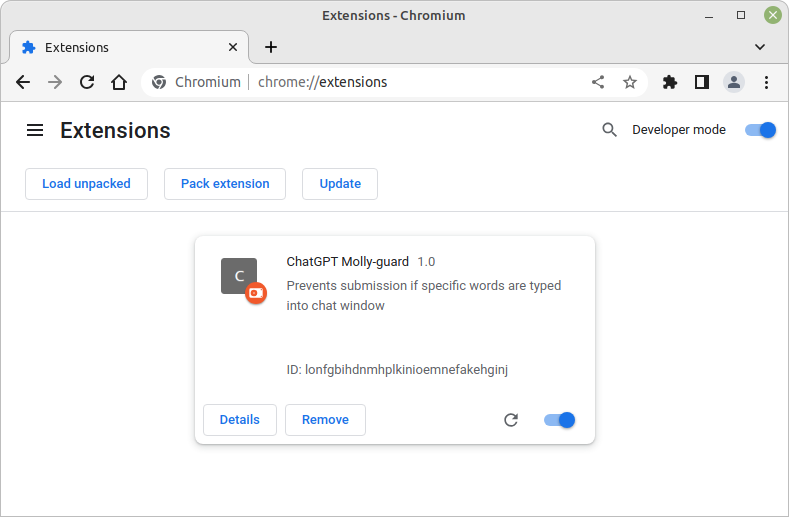
- Open Chrome and navigate to <chrome://extensions/> in the address bar.
- Turn on the Developer mode toggle, located at the top right corner.
- Click on the Load unpacked button, which will now be visible.
- Navigate to and select the directory of your extension (
chatgpt-molly-guardin our case) and click Select. Our extension should now appear in the list of installed extensions.
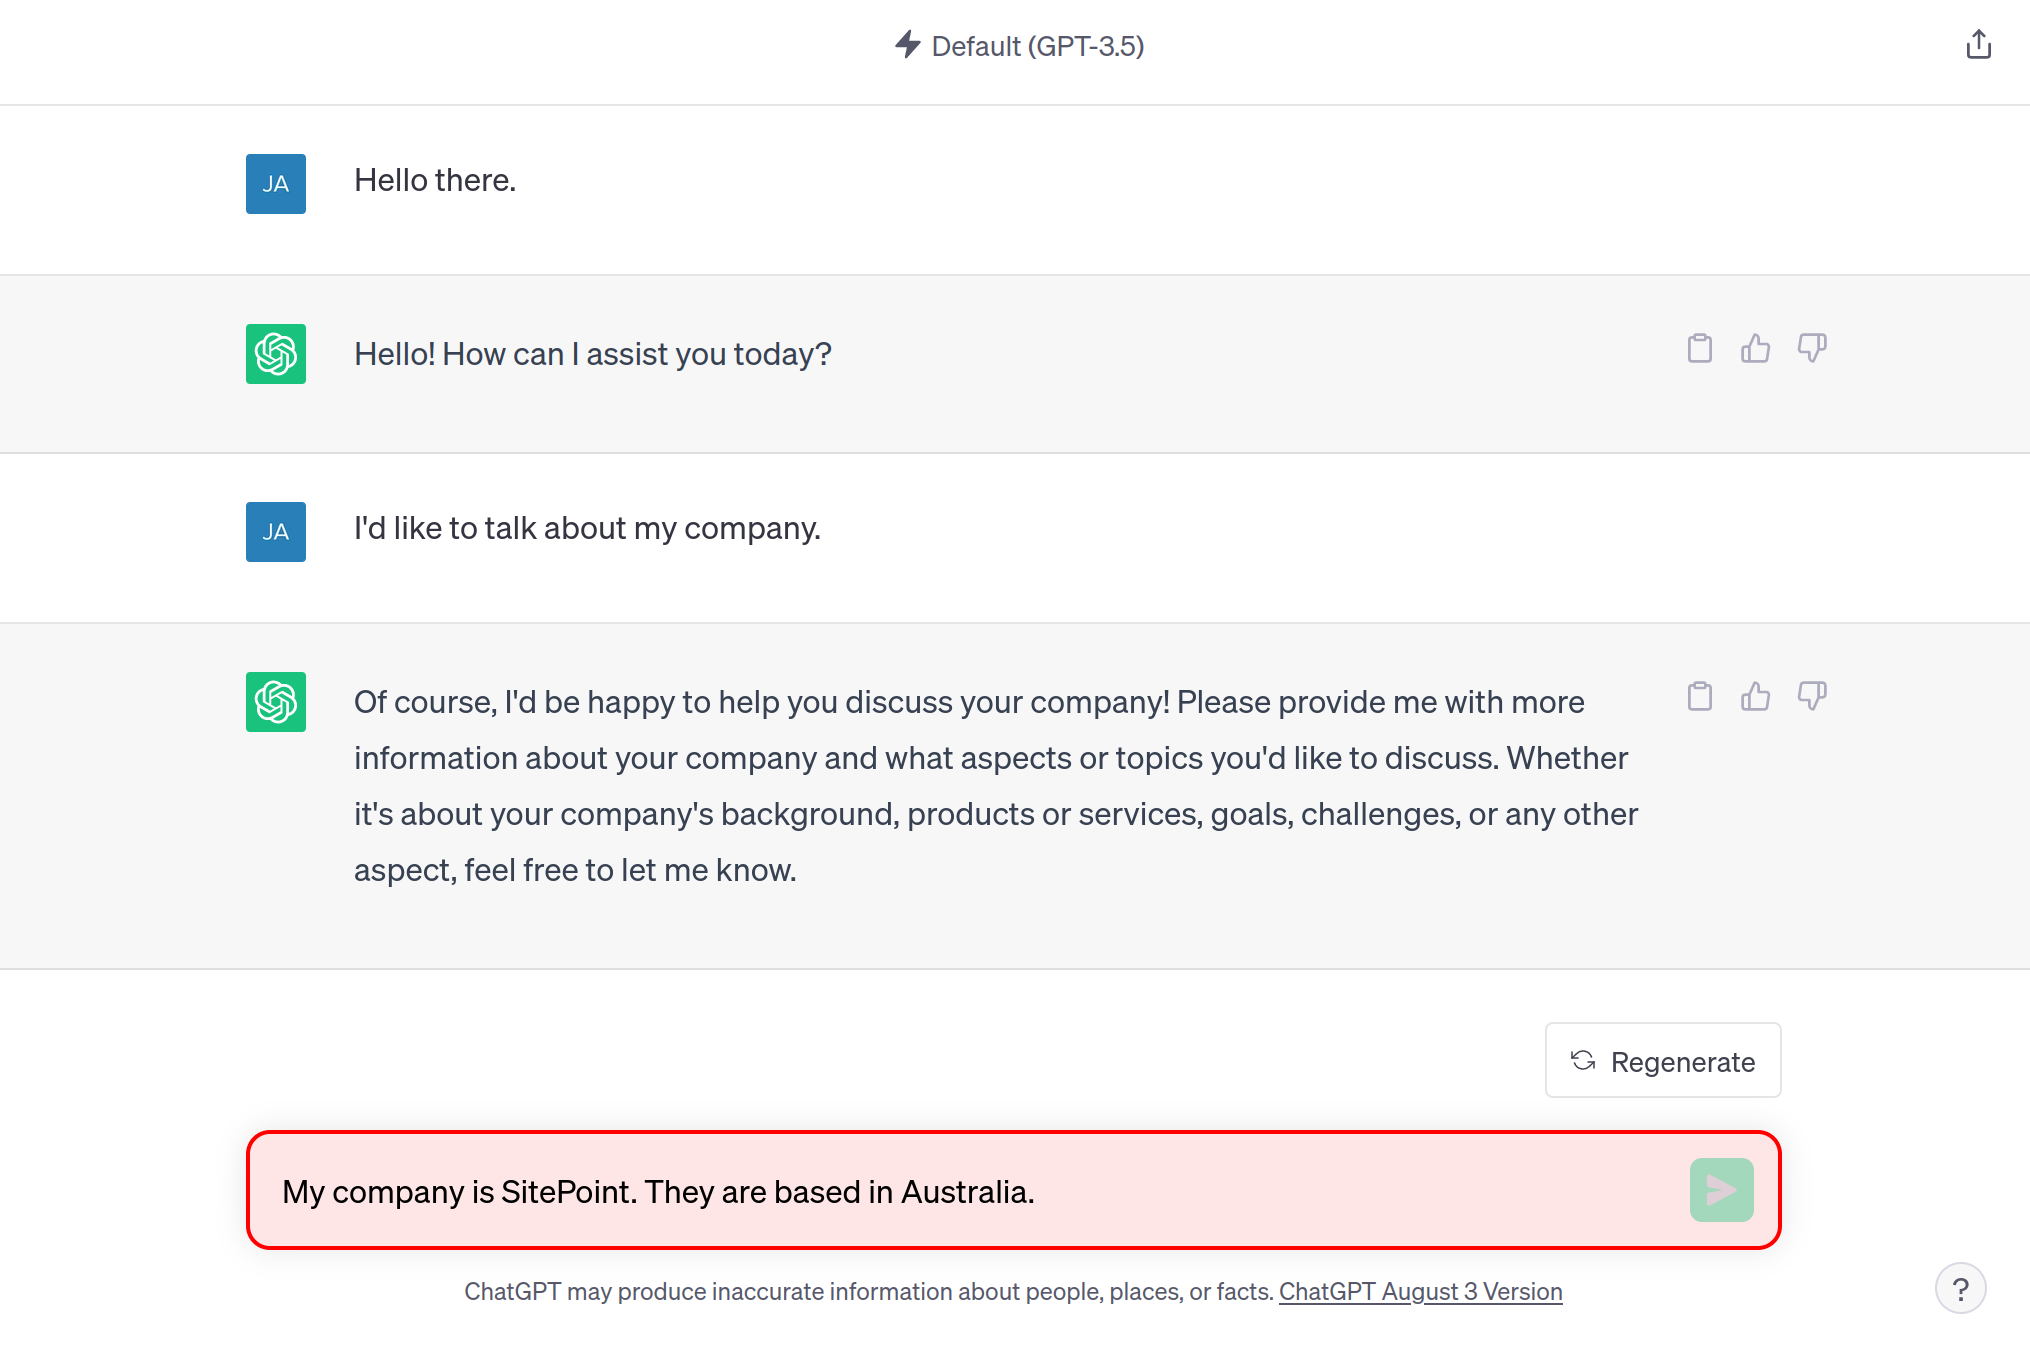
 Now, to test out the functionality, navigate to ChatGPT, refresh the page and try typing in your restricted words to see if the extension behaves as expected.
If all has gone according to plan, you should see something like the picture below.
Now, to test out the functionality, navigate to ChatGPT, refresh the page and try typing in your restricted words to see if the extension behaves as expected.
If all has gone according to plan, you should see something like the picture below.
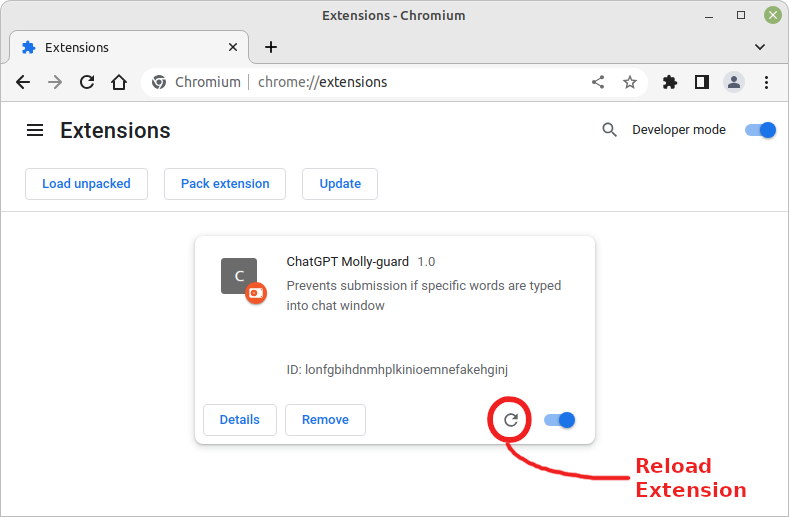
 If you make any changes to your extension code — such as updating the word list — be sure to hit the circular arrow in the bottom right-hand corner on the extension’s card on the extension page. This will reload the extension. You’ll then need to reload the page that your extension is targeting.
Taking it Further
Our current basic Chrome extension serves its purpose, but there’s always room for improvement. If you’re eager to refine the extension further and expand its capabilities, there are some suggestions below.1. User Interface for Word List Editing
Currently, our extension relies on a predefined list of restricted words. Implementing a user-friendly interface would allow users to dynamically add, remove, or modify words on the go. This can be done using a popup UI (browser action) that opens when the extension icon is clicked, where users can manage their list. You’ll also need to persist the words to storage.2. Handling Mouse Paste Events
While our extension detects keypresses, users can bypass this by pasting sensitive information using the mouse’s right-click menu. To plug this loophole, we could add an event listener for thepaste event (or consolidate both to listen for input). This will ensure that, whether information is typed or pasted, the filter remains robust.
3. Contextual Override
Blocking certain terms can be a bit too generic. For example, I might want to block mentions of “Jim” (my name) but have no issues referencing “Jim Carey”. To address this, consider introducing a feature which would disable the molly-guard until the next submit event occurs. You can also check out the Firefox version of this extension, where this functionality has been implemented.Conclusion
As we’ve discovered, building your own Google Chrome extension isn’t an insurmountable challenge. We started with a clear objective: to create a protective layer for ChatGPT, ensuring that sensitive information remains confidential. Throughout this tutorial, we’ve seen how a handful of files and a bit of code can result in a functional and useful browser extension. For those eager to dive deeper, Google’s official Chrome Extension documentation is an excellent starting place. Additionally, the Chrome Extension migration guide offers insights on the transition to Manifest V3, which is crucial given the impending phase-out of Manifest V2 in 2023. Now that you’ve seen how it’s done, I encourage you to refine, enhance, and adapt the extension to suit your needs. You’re welcome to hit me up on Twitter and let me know about any improvements you’ve made.Frequently Asked Questions (FAQs) about Creating a Chrome Extension
What are the prerequisites for creating a Chrome Extension?
To create a Chrome extension, you need a basic understanding of HTML, CSS, and JavaScript. You also need to have Google Chrome installed on your computer. Familiarity with JSON (JavaScript Object Notation) is also beneficial as the manifest file of the extension is written in JSON format.
How can I test my Chrome Extension during development?
Google Chrome provides a feature to load unpacked extensions for testing and development. You can load your extension by going to chrome://extensions in your browser, enabling Developer mode, and clicking on ‘Load unpacked’. Then, select your extension’s directory to load it.
How can I debug my Chrome Extension?
Debugging a Chrome extension is similar to debugging a regular web page. You can use the Chrome Developer Tools (DevTools) to debug the background page and any other pages that are part of your extension. Right-click on the page and select ‘Inspect’ to open DevTools.
How can I publish my Chrome Extension?
To publish your Chrome extension, you need to create a ZIP file of your extension directory and upload it to the Chrome Web Store. You will also need to pay a one-time developer registration fee. After submission, your extension will be reviewed before it is published.
How can I update my Chrome Extension?
To update your Chrome extension, you need to increase the version number in your manifest file and create a new ZIP file of your extension directory. Then, you can upload the new ZIP file to the Chrome Web Store. The update will be automatically pushed to all users who have installed your extension.
How can I add an icon to my Chrome Extension?
You can add an icon to your Chrome extension by including it in your extension directory and referencing it in your manifest file. The icon should be a square PNG file. The recommended sizes are 16×16, 48×48, and 128×128 pixels.
How can I add a popup to my Chrome Extension?
You can add a popup to your Chrome extension by creating an HTML file for the popup and referencing it in your manifest file. The popup can include any HTML, CSS, and JavaScript that you want.
How can I use external libraries in my Chrome Extension?
You can use external libraries in your Chrome extension by including them in your extension directory and referencing them in your HTML files. However, you need to be careful about the security implications of using external libraries.
How can I communicate between different parts of my Chrome Extension?
You can communicate between different parts of your Chrome extension using the chrome.runtime API. This API provides methods for sending and receiving messages between the background page, content scripts, and other parts of your extension.
How can I access the current page’s DOM in my Chrome Extension?
You can access the current page’s DOM in your Chrome extension using content scripts. Content scripts are JavaScript files that run in the context of web pages and can read and modify the DOM.
 James Hibbard
Network admin, freelance web developer and editor at SitePoint.