
HTML’s pre element is a simple and semantic way of displaying formatted content (such as source code) but it does have a few quirks. Let’s talk about how this element works, potential issues to keep in mind, as well as some basic tips and tricks for enhancing it.
Key Takeaways
- The HTML ‘pre’ element is a useful tool for preserving the exact formatting of text, including spaces, line breaks, and tabs, making it ideal for displaying code snippets or any text where formatting is essential for understanding or aesthetics.
- While the ‘pre’ element is handy, it comes with potential issues such as handling of overflow and accidental spacing. These can be addressed through CSS properties such as ‘overflow: auto’ for scrollbar display and ‘white-space: pre-wrap’ for text wrapping.
- The ‘pre’ element can be enhanced for better readability and aesthetics. This can be achieved through adjusting the tab size using the ‘tab-size’ CSS property, using monospaced web fonts for better design control, and applying syntax highlighting to make the code easier to read and understand.
How <pre> Works
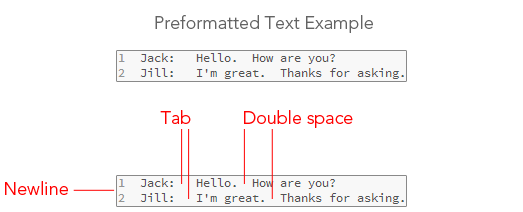
In an HTML document, the pre element represents preformatted text. This means your tab indents, double-spaces, newlines, and other typographic formatting will be preserved inside a pre element.
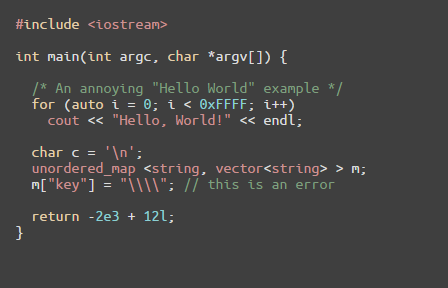
By default, browsers will display the content inside a pre element using a monospaced (or fixed-width) font such as Courier or Monaco. This is typical when displaying code, which, as we’ll see, is one of the primary uses for the pre element.
Let’s look at an example of preformatted text.
If you were to place that same text in another element, say a div, all of your extra spaces, new lines, and indenting will be ignored. So even though your code will look like this:
<div>

Jack:   Hello.  How are you?

Jill:   I'm great.  Thanks for asking.

</div>
The browser will render it like this:
See the Pen Div element ignores white space by SitePoint (@SitePoint) on CodePen.
The same text block inside a pre, however, will be rendered with a monospaced font and with all of your extra white space intact:
<pre>

Jack:   Hello. How are you?

Jill:   I'm great.  Thanks for asking.

</pre>
See the Pen IpECf by SitePoint (@SitePoint) on CodePen.
Marking Up Source Code the Right Way
The pre element should be used for text that has typographic formatting that affects the meaning of the content, such as in poems, ASCII art, transcripts, and, of course, computer code.
If you want to represent a block of source code in your HTML document, you should use a code element nested inside a pre element. This is semantic, and functionally, it gives you the opportunity to tell search engine crawlers, social media apps, RSS readers, and other interoperating web services that the content is computer code.
Here’s an example of a JavaScript snippet marked up semantically:
<pre><code>// Logs "Hello World!"

// in the browser's developer console

console.log("Hello World!");</code></pre>
See the Pen Example of pre with code tags by SitePoint (@SitePoint) on CodePen.
Using Nested HTML Elements
You can use other HTML elements within your pre elements and they will be rendered appropriately.
Just to demo the concept, I’ve marked up some JavaScript with em and strong elements, and even gave the nested elements color properties using the style attribute.
<pre><code>var total = 0;

<em style="color: green;">// Add 1 to total and display in a paragraph</em>

<strong style="color: blue;">document.write('<p>Sum: ' + (total + 1) + '</p>');</strong></code></pre>
See the Pen Pre element with nested tags for styling by SitePoint (@SitePoint) on CodePen.
Problems
Now that we’ve discussed how the pre element works, let’s go over a few potential headaches you might encounter when using it.
Overflows
By default, text inside pre elements is displayed as it is in the source, so having a line of text that’s wider than the width of the containing pre element will mean the line will flow out of its container.
Below is a page layout with some content overflowing outside of the containing pre element.
See the Pen Example of pre element breaking the layout by SitePoint (@SitePoint) on CodePen.
In multi-column layouts, and especially in float-based fixed-width layouts, overflow issues are more devastating if not dealt with proactively because they can seriously mess up the layout by pushing adjacent columns down the page to places where they shouldn’t be.
There are a couple of solutions to the problem.
Solution 1: Display a Scrollbar
One way to avoid overflow issues is to display a scrollbar whenever the content of the pre element is too wide. This is done by assigning the element overflow: auto in the CSS.
pre {

    overflow: auto;

}
See the Pen FIxing the pre element with overflow: auto by SitePoint (@SitePoint) on CodePen.
In this solution, the user will need to scroll horizontally to see all the content inside the pre. But, to put it mildly, horizontal scrolling is not an ideal reading experience. Plus, and this is subjective, a scrollbar is not aesthetically pleasing.
There’s another way to tackle pre overflows.
Solution 2: Text-Wrapping
We’re used to our source code wrapping to the next line if it’s wider than our code editor’s window. It wouldn’t be unusual to port this convention over to the Web.
Text-wrapping can be done using the white-space CSS property. There’s a nifty value for white-space that works well for preelements: pre-wrap.
pre {

    white-space: pre-wrap;

}
See the Pen Using pre-wrap to fix the pre element by SitePoint (@SitePoint) on CodePen.
Rendering HTML
There’s a particular type of source code that’s a bit more difficult to work with inside a pre element: HTML. Earlier, I told you that you can nest HTML elements inside pre elements. But what if we wanted to show those tags in the displayed code so the reader can see the them?
To display HTML tags in the browser, you’ll usually need to escape reserved HTML characters. Let’s say we wanted to show the following markup inside pre tags:
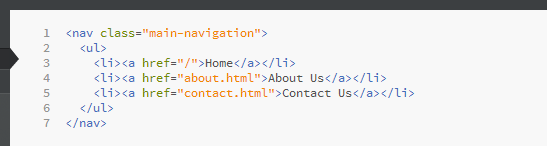
In order to render the above inside a pre element verbatim, we can escape many of the reserved HTML characters such as <, >, and " to their corresponding character entities, like so (although the quotes and closing angle brackets technically do not need to be escaped):
<pre><code><nav class="main-navigation">

<ul>

<li><a href="/">Home</a></li>

<li><a href="about.html">About Us</a></li>

<li><a href="contact.html">Contact Us</a></li>

</ul>

</nav></code></pre>
See the Pen Pre element with escaped HTML tags (entities) by SitePoint (@SitePoint) on CodePen.
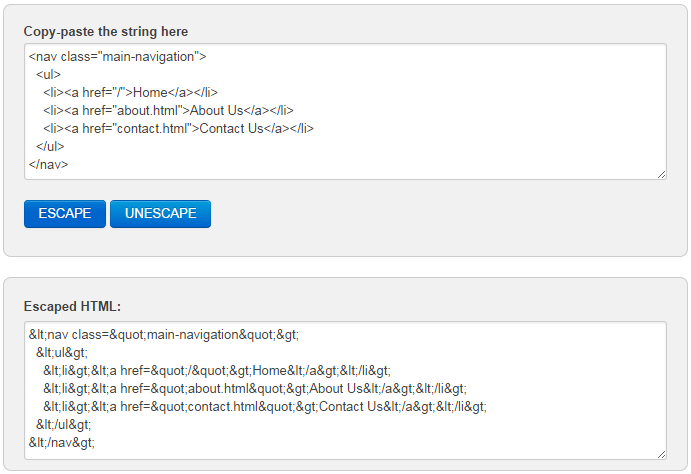
Fortunately, there are many tools that will help you do this. There’s, for instance, the Free Online HTML Escape Tool.
Accidental Spacing
Another issue to watch out for is the appearance of unwanted tabs, newlines, and spaces.
Many of us indent our HTML to illustrate the hierarchy of block-level elements. This can be problematic with pre elements if we’re not careful. Let me show you what I mean.
If my HTML document had the following structural hierarchy (tabs to represent nested child elements), my pre element would be indented as follows:
<html>

    <head>

        <title>My tutorial</title>

    </head>

    <body>

        <section>

            <article class="main-content">

                <h1>My Tutorial's Title</h1>

                <p>Here's some example JavaScript:</p>

                <!-- My pre element -->

                <pre><code><script type="text/javascript">

                        console.log('Hello there');

                        </script></code></pre>

            </article>

        </section>

    </body>

</html>
In the example above, the pre element is four-levels deep in the document’s hierarchy.
The problem is the pre element (rightfully) assumes my indentations are part of its content, and thus, the content is displayed with unwanted tabs preceding each line:
<script type="text/javascript">

                        console.log('Hello there');

                    </script>
To accurately depict the content visually, I’ll have to write it so the pre element has no tabs and other spacing characters on the left of the lines. In other words, the content shouldn’t be indented at all:
<html>

    <head>

        <title>My tutorial</title>

    </head>

    <body>

        <section>

            <article class="main-content">

                <h1>My Tutorial's Title</h1>

                <p>Here's some example JavaScript:</p>

                <!-- My pre element -->

                <pre><code><script type="text/javascript">

console.log('Hello there');

</script></code></pre>

            </article>

        </section>

    </body>

</html>
Now, the content will render like this:
<script type="text/javascript">

    console.log('Hello there');

</script>
A Bulletproof Markup Pattern
To avoid issues altogether, I suggest using this markup pattern:
<pre><code>Line 1 (first line)

Line 2

Line 3

Line 4 (last line)</code></pre>
Enhancements
Here are a few things you can do to improve your pre elements.
Change the Tab Size
You can tailor the size of your indents inside pre elements.
For example, personally, I follow the convention of one tab = two spaces (using spaces instead of tabs is often referred to as “soft tabs”) as is done in Bootstrap and many other open source projects.
But the default tab size in browsers is the equivalent of eight spaces under specs, which doesn’t work well for front-end developers, especially with regards to HTML source code readability because we often find ourselves working with deeply nested structures.
One way to alter the tab size is through the intuitively-named tab-size CSS property. It’s a new property, so it’s not going to be 100% supported, but it’s a nice little progressive enhancement for people using modern browsers.
pre {

  tab-size: 2;

}
Use Monospaced Web Fonts
For better design control of our typography, it’s a good idea to render our web page text using CSS @font-face and the fonts we’ve chosen, instead of what the browser thinks is good for our design. Also, using web-safe monospaced fonts is so boring.
Here’s an example of using the PT Mono font served via Google Fonts.
See the Pen Using PT Mono font in a pre element by SitePoint (@SitePoint) on CodePen.
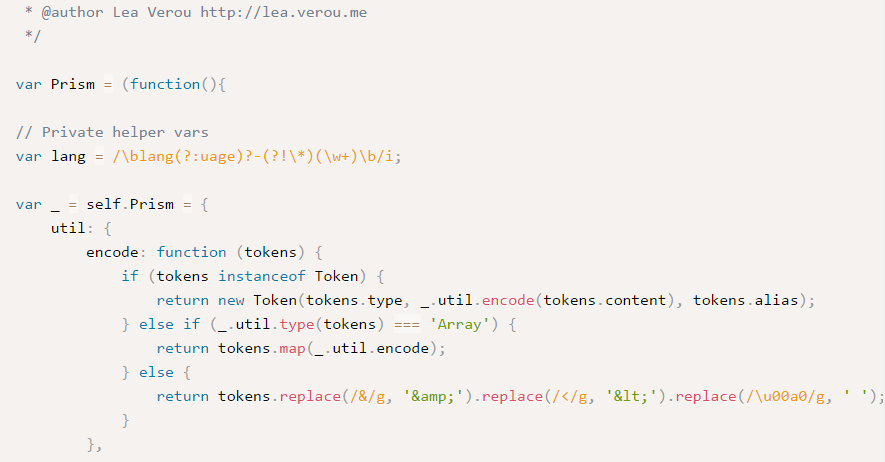
Improve Readability and Aesthetics with Syntax Highlighting
One of the easiest improvements we can implement with our pre content is syntax highlighting. It makes code easier to read and understand. In addition, it makes our design a bit more vibrant.
Below are a couple of examples of syntax highlighting based on the pre element.
There are tons of syntax highlighters, and it seems like every day there’s a shiny new one that comes out. There’s also a multitude of methods for implementing syntax highlighting on a web page – JavaScript plugins, PHP classes, Rails gems, you name it – so I’ll leave it to you to hunt down the one that suits your particular needs best. For example, if you’d like to use a jQuery plugin, check out this list of ten syntax highlighting plugins by Sam Deering.
Performance of Syntax Highlighting
I should also state that syntax highlighting can be very taxing on web performance. When using a client-side library, for instance, there’s usually going to be a lot of regular expression matching and DOM manipulation happening on the content residing inside your pre tags; and you already know these processes can seriously hurt your web page response times. So this is just a friendly reminder to profile your web pages after implementing a syntax highlighter to see if the performance cost is reasonable.
Wrapping Up
We’ve talked extensively about the pre element – how to use it, things to watch out for, and ways you can enhance its implementation – and perhaps you’ve learned a trick or two about it that you didn’t know before. If you have other tips and tricks about pre, please share them with us in the comments.
Frequently Asked Questions (FAQs) about HTML Pre Element
What is the main purpose of the HTML pre element?
The HTML pre element is used to preserve the exact formatting of text as it was written in the HTML document. This includes spaces, line breaks, and tabs. It’s particularly useful when you want to display code snippets, poetry, or any text where line breaks and spaces are important for understanding or aesthetics.
How does the HTML pre element differ from other HTML elements?
Unlike most HTML elements, the pre element respects white space and line breaks. This means that the text within a pre element will appear exactly as it is written in the HTML document, including all spaces and line breaks. Other HTML elements ignore extra white space and line breaks, collapsing them into a single space.
Can I use CSS with the HTML pre element?
Yes, you can use CSS to style the text within a pre element. This includes properties like font-size, color, background-color, and more. However, keep in mind that the pre element will still preserve the original formatting of the text, including spaces and line breaks.
Can I nest other HTML elements inside a pre element?
Yes, you can nest other HTML elements inside a pre element. However, the nested elements will still follow the rules of the pre element, meaning that white space and line breaks will be preserved.
How does the HTML pre element handle special characters?
Special characters within a pre element should be encoded to ensure they display correctly. For example, the less than symbol (<) should be written as < to prevent it from being interpreted as the start of an HTML tag.
Is there a limit to how much text I can put inside a pre element?
There is no specific limit to the amount of text you can put inside a pre element. However, keep in mind that the pre element does not automatically wrap text, so long lines of text may extend beyond the edge of the browser window or container element.
How does the HTML pre element affect SEO?
The pre element itself does not directly affect SEO. However, the content within the pre element is still readable by search engines. Therefore, it’s important to ensure that the content is relevant and useful to your audience.
Can I use the HTML pre element to display code snippets?
Yes, the pre element is often used to display code snippets because it preserves the original formatting of the text, including spaces and line breaks. This makes it ideal for displaying code, where spacing and indentation are often important for understanding the code.
How does the HTML pre element handle tabs?
The pre element preserves tabs as they are written in the HTML document. However, the exact display of tabs may vary depending on the browser and the user’s tab settings.
Can I use the HTML pre element in combination with other elements to create more complex layouts?
Yes, the pre element can be used in combination with other HTML elements to create more complex layouts. However, remember that the pre element will preserve the original formatting of the text, including spaces and line breaks.