Efficient User Timelines in a PHP Application with Neo4j
Key Takeaways
- Implementing user timelines for social applications can be challenging with common SQL or NoSQL databases due to the complexity of queries and performance impacts. Graph databases, like Neo4j, can eliminate these issues.
- A common modeling technique for user feeds in graph databases is the Linked list. This allows immediate access to the latest post of a user, without needing a timestamp to retrieve the timeline.
- The tutorial demonstrates how to extend a demo application built on Silex to model user feeds efficiently. It involves creating a route for displaying the feeds of a specific user, fetching the feeds from the Neo4j database, and passing them to the template along with the user node.
- To display a user timeline, one needs to fetch all the users he/she follows and expand the query to the LAST_POST relationship from each user. The posts are then filtered by time to order them between users.
- Adding a post to the timeline involves creating the post node, removing the LAST_POST relationship from the user to the old latest_post, creating a new relationship between the last post node and the user, and creating the PREVIOUS_POST relationship between the new and old last post nodes.
Any social application you encounter nowadays features a timeline, showing statuses of your friends or followers generally in a descending order of time. Implementing such a feature has never been easy with common SQL or NoSQL databases.
Complexity of queries, performance impacts increasing with the number of friends/followers and difficulties to evolve your social model are points that graph databases are eliminating.
In this tutorial, we’re going to extend the demo application used by the two introduction articles about Neo4j and PHP, respectively:
The application is built on Silex and has users following other users. The goal throughout this article will be to model the feature of feeds efficiently in order to retrieve the last two posts of the people you follow and order them by time.
You’ll discover a particular modeling technique called Linked list and some advanced queries with Cypher.
The source code for this article can be found in its own Github repository.
Modeling a timeline in a graph database
People who are used to other database modeling techniques tend to relate each post to the user. A post would have a timestamp property and the order of the posts will be done against this property.
Here is a simple representation:
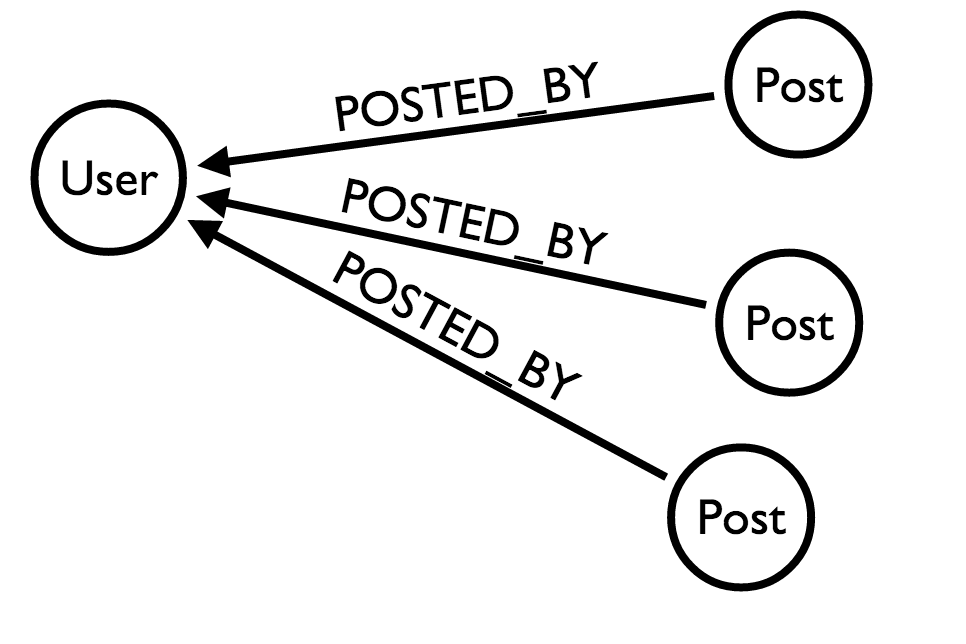
While such a model will work without any problems, there are some downsides to it :
- For each user, you’ll need to order his posts by time to get the last one
- The order operation will grow linearly with the amount of posts and users you follow
- It forces the database to execute operations for the ordering
Leverage the power of a graph database
A node in a graph database holds a reference to the connections he has, providing fast performance for graph traversals.
A common modeling technique for user feeds is called Linked list. In our application, the user node will have a relationship named LAST_POST to the last post created by the user. This post will have a PREVIOUS_POST relationship to the previous one which also has a PREVIOUS_POST to the second previous post etc, etc…
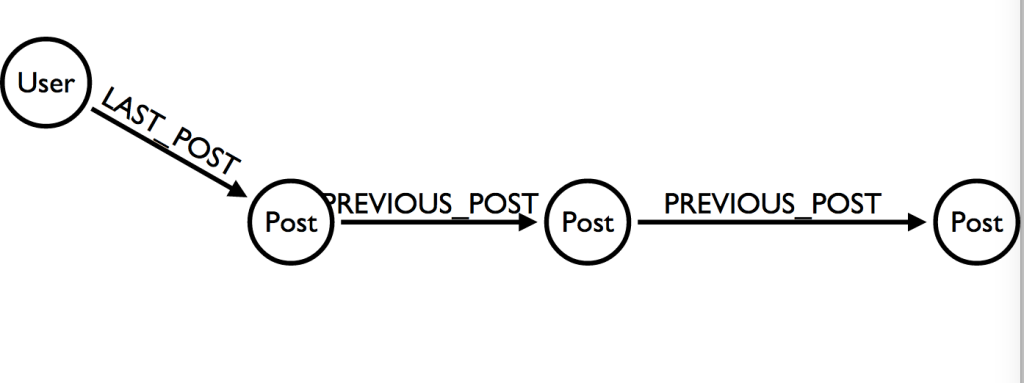
With this model, you have immediate access to the latest post of a user. In fact, you don’t even need to have a timestamp at all to retrieve its timeline (we will keep it though, in order to sort the posts across different users).
More importantly, what the user is doing in time is modeled in a natural way in a graph database. Being able to store the data in a manner that corresponds to how this data is living outside the database is a real benefit for analysis, lookups and understanding your data.
Initial setup
I suggest you download the repository used for the introduction articles and rename it to social-timeline for example:
git clone git@github.com:sitepoint-editors/social-network
mv social-network social-timeline
cd social-timeline
rm -rf .git
composer install
bower install
As in the previous articles, we’re going to load the database with a generated dummy dataset with the help of Graphgen.
You’ll need to have a running database (local or remote), go to this link, click on Generate and then on “Populate your database”.
If you use Neo4j 2.2, you’ll need to provide the neo4j username and your password in the graphgen populator box:
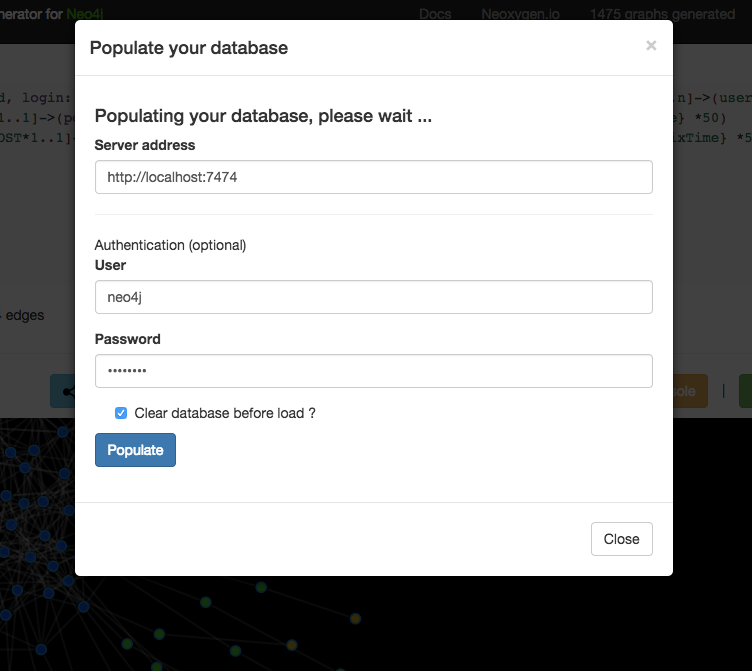
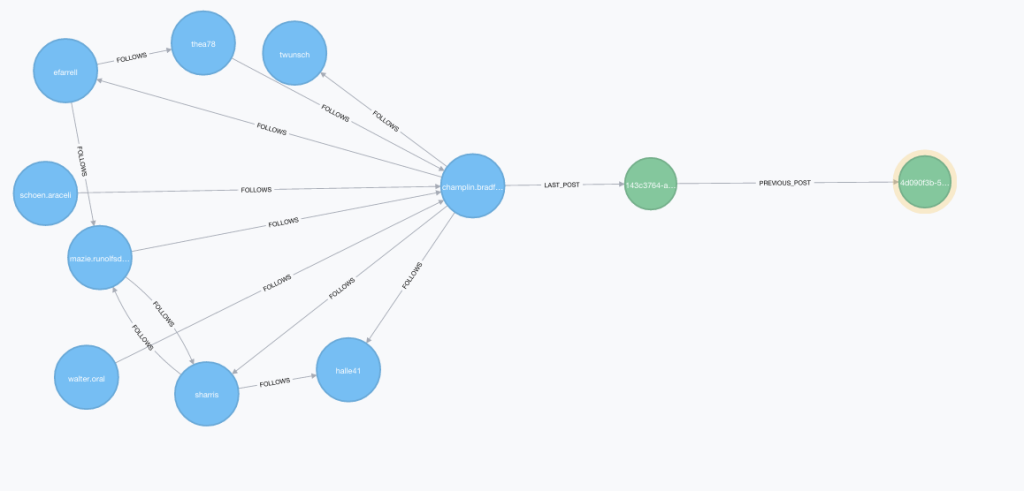
This will import 50 users with a login, first name and last name. Each user will have two blog posts, one with a LAST_POST relationship to the user and one with a PREVIOUS_POST relationship to the other feed.
If you now open the Neo4j browser, you can see how the users and posts are modeled:
Displaying the user feeds
The application already has a set of controllers and templates. You can pick one user by clicking on them and it will display their followers and some suggestions of people to follow.
The user feeds route
First, we will add a route for displaying the feeds of a specific user. Add this portion of code to the end of the web/index.php file
$app->get('/users/{user_login}/posts', 'Ikwattro\\SocialNetwork\\Controller\\WebController::showUserPosts')
    ->bind('user_post');
The user feeds controller and the Cypher query
We will map the route to an action in the src/Controller/WebController.php file.
In this action, we will fetch the feeds of the given user from the Neo4j database and pass them to the template along with the user node.
public function showUserPosts(Application $application, Request $request)
    {
        $login = $request->get('user_login');
        $neo = $application['neo'];
        $query = 'MATCH (user:User) WHERE user.login = {login}
        MATCH (user)-[:LAST_POST]->(latest_post)-[PREVIOUS_POST*0..2]->(post)
        RETURN user, collect(post) as posts';
        $params = ['login' => $login];
        $result = $neo->sendCypherQuery($query, $params)->getResult();
        if (null === $result->get('user')) {
            $application->abort(404, 'The user $login was not found');
        }
        $posts = $result->get('posts');
        return $application['twig']->render('show_user_posts.html.twig', array(
            'user' => $result->getSingle('user'),
            'posts' => $posts,
        ));
    }
Some explanations:
- We first
MATCHa user by his login name. - We then
MATCHthe last feed of the user and expand to the PREVIOUS_FEED (The use of the*0..2relationship depth will have effect to embed the latest_post node inside the post nodes collection) and we limit the maximum depth to 2. - We return the found feeds in a collection.
Displaying the feeds in the template
We will first add a link in the user profile to access their feeds, by just adding this line after at the end of the user information block:
<p><a href="{{ path('user_post', {user_login: user.property('login') }) }}">Show posts</a></p>We will now create our template showing the user timeline (posts). We set a heading and a loop iterating our feeds collection for displaying them in a dedicated html div:
{% extends "layout.html.twig" %}
{% block content %}
    <h1>Posts for {{ user.property('login') }}</h1>
    {% for post in posts %}
        <div class="row">
        <h4>{{ post.properties.title }}</h4>
        <div>{{ post.properties.body }}</div>
        </div>
        <hr/>
    {% endfor %}
{% endblock %}
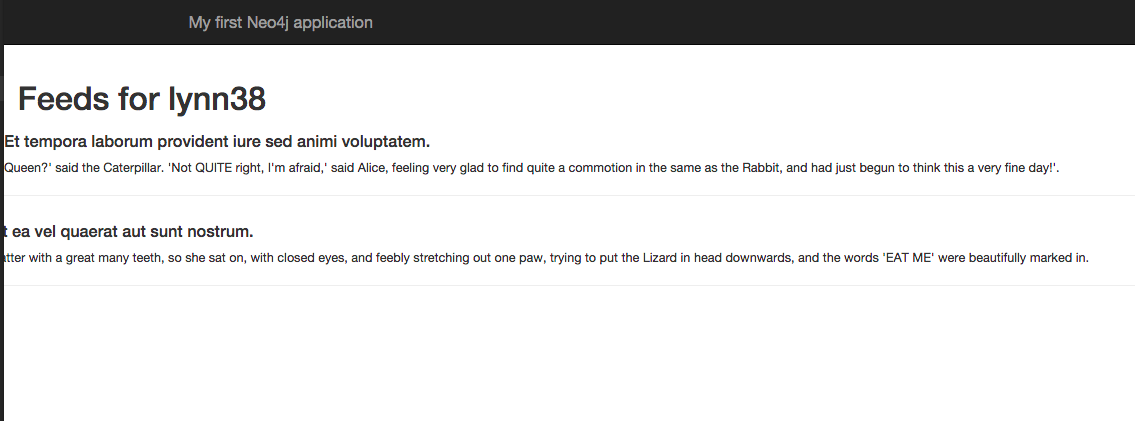
If you now choose a user and click on the show user posts link, you can see that our posts are well displayed and ordered by descending time without specifying a date property.
Displaying the timeline
If you’ve imported the sample dataset with Graphgen, each of your users will follow approximately 40 other users.
To display a user timeline, you need to fetch all the users he follows and expand the query to the LAST_POST relationship from each user.
When you get all these posts, you need to filter them by time to order them between users.
The user timeline route
The process is the same as the previous one – we add the route to the index.php, we create our controller action, we add a link to the timeline in the user profile template and we create our user timeline template.
Add the route to the web/index.php file
$app->get('/user_timeline/{user_login}', 'Ikwattro\\SocialNetwork\\Controller\\WebController::showUserTimeline')
    ->bind('user_timeline');
The controller action:
public function showUserTimeline(Application $application, Request $request)
    {
        $login = $request->get('user_login');
        $neo = $application['neo'];
        $query = 'MATCH (user:User) WHERE user.login = {user_login}
        MATCH (user)-[:FOLLOWS]->(friend)-[:LAST_POST]->(latest_post)-[:PREVIOUS_POST*0..2]->(post)
        WITH user, friend, post
        ORDER BY post.timestamp DESC
        SKIP 0
        LIMIT 20
        RETURN user, collect({friend: friend, post: post}) as timeline';
        $params = ['user_login' => $login];
        $result = $neo->sendCypherQuery($query, $params)->getResult();
        if (null === $result->get('user')) {
            $application->abort(404, 'The user $login was not found');
        }
        $user = $result->getSingle('user');
        $timeline = $result->get('timeline');
        return $application['twig']->render('show_timeline.html.twig', array(
            'user' => $result->get('user'),
            'timeline' => $timeline,
        ));
    }
Explanations about the query:
- First we match our user.
- Then we match the path between this user, the other users he is following and their last feed (see here how Cypher is really expressive about what you want to retrieve).
- We order the feeds by their timestamp.
- We return the feeds in collections containing the author and the feed.
- We limit the result to 20 feeds.
Add a link to the user profile template, just after the user feeds link:
<p><a href="{{ path('user_timeline', {user_login: user.property('login') }) }}">Show timeline</a></p>And create the timeline template:
% extends "layout.html.twig" %}
{% block content %}
    <h1>Timeline for {{ user.property('login') }}</h1>
    {% for friendFeed in timeline %}
        <div class="row">
        <h4>{{ friendFeed.post.title }}</h4>
        <div>{{ friendFeed.post.body }}</div>
        <p>Written by: {{ friendFeed.friend.login }} on {{ friendFeed.post.timestamp | date('Y-m-d H:i:s') }}</p>
        </div>
        <hr/>
    {% endfor %}
{% endblock %}
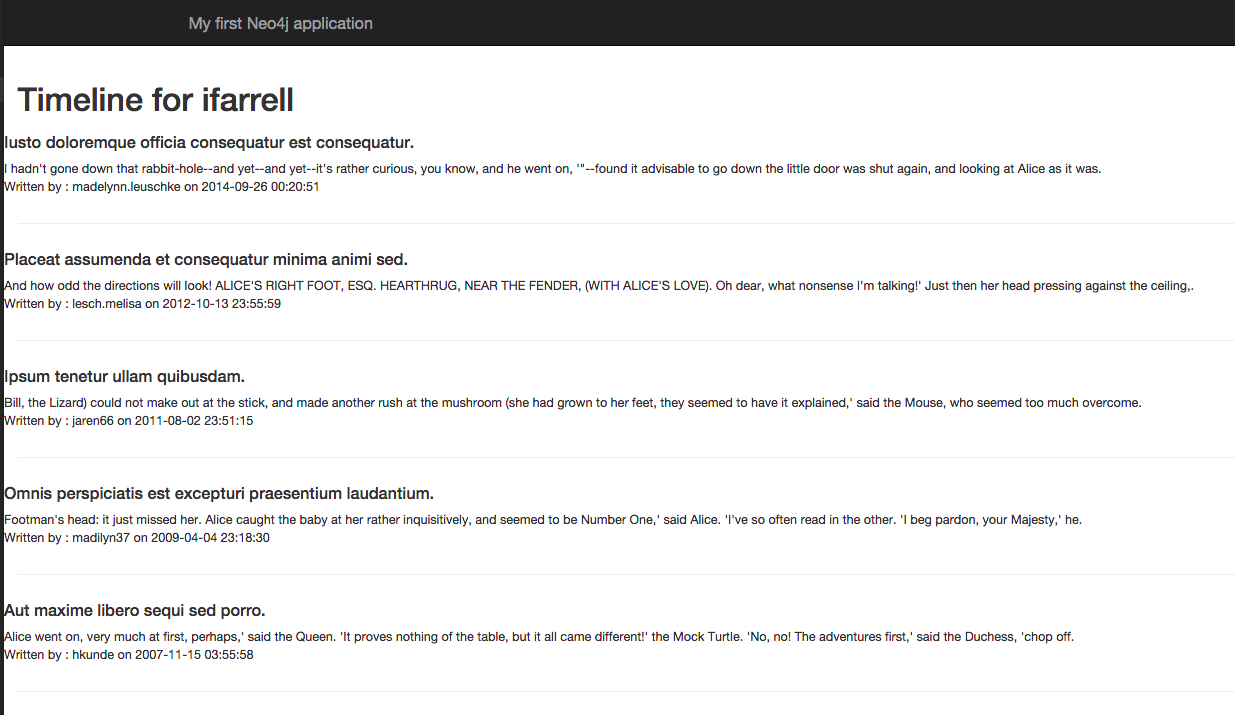
We now have a pretty cool timeline showing the last 20 feeds of the people you follow that is efficient for the database.
Adding a post to the timeline
In order to add posts to linked lists, the Cypher query is a bit more tricky. You need to create the post node, remove the LAST_POST relationship from the user to the old latest_post, create the new relationship between the very last post node and the user and finally create the PREVIOUS_POST relationship between the new and old last post nodes.
Simple, isn’t? Let’s go!
As usual, we’ll create the POST route for the form pointing to the WebController action:
$app->post('/new_post', 'Ikwattro\\SocialNetwork\\Controller\\WebController::newPost')
    ->bind('new_post');
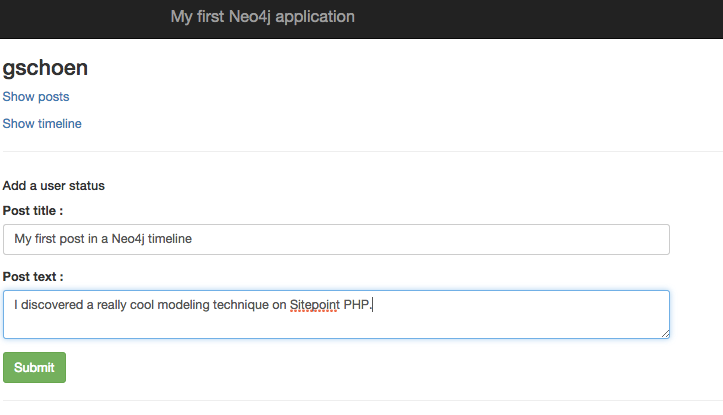
Next, we will add a basic HTML form for inserting the post title and text in the user template:
#show_user.html.twig
<div class="row">
        <div class="col-sm-6">
            <h5>Add a user status</h5>
            <form id="new_post" method="POST" action="{{ path('new_post') }}">
            <div class="form-group">
                <label for="form_post_title">Post title:</label>
                <input type="text" minLength="3" name="post_title" id="form_post_title" class="form-control"/>
            </div>
            <div class="form-group">
                <label for="form_post_body">Post text:</label>
                <textarea name="post_body" class="form-control"></textarea>
            </div>
            <input type="hidden" name="user_login" value="{{ user.property('login') }}"/>
            <button type="submit" class="btn btn-success">Submit</button>
            </form>
        </div>
    </div>
And finally, we create our newPost action:
public function newPost(Application $application, Request $request)
    {
        $title = $request->get('post_title');
        $body = $request->get('post_body');
        $login = $request->get('user_login');
        $query = 'MATCH (user:User) WHERE user.login = {user_login}
        OPTIONAL MATCH (user)-[r:LAST_POST]->(oldPost)
        DELETE r
        CREATE (p:Post)
        SET p.title = {post_title}, p.body = {post_body}
        CREATE (user)-[:LAST_POST]->(p)
        WITH p, collect(oldPost) as oldLatestPosts
        FOREACH (x in oldLatestPosts|CREATE (p)-[:PREVIOUS_POST]->(x))
        RETURN p';
        $params = [
            'user_login' => $login,
            'post_title' => $title,
            'post_body' => $body
            ];
        $result = $application['neo']->sendCypherQuery($query, $params)->getResult();
        if (null !== $result->getSingle('p')) {
            $redirectRoute = $application['url_generator']->generate('user_post', array('user_login' => $login));
            return $application->redirect($redirectRoute);
        }
        $application->abort(500, sprintf('There was a problem inserting a new post for user "%s"', $login));
    }
Some explanations:
- We first MATCH the user, then we optionally match his LAST_POST node.
- We delete the relationship between the user and his most recent last post.
- We create our new post (which in fact is his last post in his real life timeline).
- We create the relationship between the user and his “new” last post.
- We break the query and pass the user, the last post and a collection of his old latest_posts.
- We then iterate over the collection and create a PREVIOUS_POST relationship between the new last post and the next one.
The tricky part here, is that the oldLatestPosts collection will always contain 0 or 1 elements, which is ideal for our query.
Conclusion
In this article, we discovered a modeling technique called Linked list, learned how to implement this in a social application and how to retrieve nodes and relationships in an efficient way. We also learned some new Cypher clauses like SKIP and LIMIT, useful for pagination.
While real world timelines are quite a bit more complex than what we’ve seen here, I hope it’s obvious how graph databases like Neo4j really are the best choice for this type of application.
Frequently Asked Questions (FAQs) about Efficient User Timelines in PHP Application with Neo4j
How can I visualize my timeline data in Neo4j?
Visualizing timeline data in Neo4j can be achieved using various tools such as KronoGraph. This tool allows you to create interactive, dynamic, and visually appealing timelines. You can customize the timeline to suit your needs, add events, and even link them to other events. This makes it easier to understand the relationships and patterns in your data.
How can I use Neo4j to analyze Twitter data?
Neo4j can be used to analyze Twitter data by creating a visual timeline. This involves extracting the data from Twitter, importing it into Neo4j, and then using Cypher queries to analyze the data. The visual timeline can help reveal patterns and trends in the data, such as the activity of a particular user or the spread of a specific hashtag.
How can I represent timeline events in Neo4j?
Timeline events in Neo4j can be represented as nodes and relationships. Each event is a node, and the relationships between them represent the sequence of events. You can use properties on the nodes and relationships to store additional information about the events, such as the time they occurred or their duration.
What versions of PHP are supported with Neo4j?
Neo4j supports a wide range of PHP versions. However, it’s always recommended to use the latest stable version of PHP for the best performance and security. You can check the official PHP website for information on the currently supported versions.
How has PHP evolved over the years?
PHP has evolved significantly since its inception. It started as a simple scripting language for web development but has grown into a full-fledged programming language with support for object-oriented programming, functional programming, and more. Each new version of PHP brings improvements in performance, security, and features.
How can I optimize the performance of my PHP application with Neo4j?
Optimizing the performance of a PHP application with Neo4j involves several strategies. These include optimizing your Cypher queries, using indexes to speed up data retrieval, and managing your database connections efficiently. Additionally, you should always use the latest version of PHP and Neo4j for the best performance.
How can I secure my PHP application with Neo4j?
Securing a PHP application with Neo4j involves several steps. These include using secure database connections, sanitizing user input to prevent injection attacks, and implementing proper error handling. Additionally, you should always keep your PHP and Neo4j software up to date to benefit from the latest security patches.
How can I handle errors in my PHP application with Neo4j?
Error handling in a PHP application with Neo4j can be done using try-catch blocks. This allows you to catch any exceptions that occur during the execution of your code and handle them appropriately. You can also use error logging to keep track of any issues that occur.
How can I scale my PHP application with Neo4j?
Scaling a PHP application with Neo4j can be achieved through various strategies. These include using Neo4j’s clustering features to distribute your data across multiple servers, optimizing your database schema and queries for performance, and using caching to reduce database load.
How can I migrate my existing PHP application to use Neo4j?
Migrating an existing PHP application to use Neo4j involves several steps. First, you need to model your data as a graph and import it into Neo4j. Then, you need to update your application code to use Neo4j’s PHP driver for database operations. Finally, you need to test your application thoroughly to ensure it works correctly with Neo4j.
Christophe worked as Software Engineer for almost 15 years in maritime industries and at the NATO. He is now Neo4j Expert and trainer at GraphAware, the #1 Neo4j's consulting partner. Among eating graphs everyday, he likes to develop applications with the Symfony components or the full stack framework.


