


Amazon Simple Email Service (Amazon SES) is a cost-effective email service built on the reliable and scalable infrastructure that Amazon.com developed to serve its own customer base. With Amazon SES, you can send transactional email, marketing messages, or any other type of high-quality content to your customers. You can also use Amazon SES to receive messages and deliver them to an Amazon S3 bucket, call your custom code via an AWS Lambda function, or publish notifications to Amazon SNS. With Amazon SES, you have no required minimum commitments – you pay as you go and only pay for what you use.
Key Takeaways
- Amazon Simple Email Service (SES) is a cost-effective and scalable email service that can be used to send transactional email, marketing messages, or any other type of high-quality content to your customers. It also allows you to receive messages and deliver them to an Amazon S3 bucket, call your custom code via an AWS Lambda function, or publish notifications to Amazon SNS.
- Amazon SES is a great option for sending a large amount of emails within a budget, offering the ability to send 62,000 free emails per month from an Amazon EC2 instance. It also allows you to receive 1,000 emails per month for free.
- Setting up a Rails app to send emails with Amazon SES requires creating a new Rails app, creating a welcome controller with index action, defining a get route, a post route and application root, adding the send_email action to welcome_controller, and making a form on the application root for sending the emails.
- It’s important to monitor your Amazon SES account as it can be blacklisted and blocked if there are a lot of Bounces, Complaints or Rejects. You can request Amazon to move you out of the Sandbox if you’re sending emails from Amazon SES Sandbox.
Outline
This post will walk you through quickly setting up a Rails app to send 62,000 free emails per month if you are sending from an Amazon EC2 instance (App deployed on Amazon EC2). Additionally, you can also receive 1,000 emails per month for free on Amazon SES. Even if you’re not on Amazon EC2 you can still get the cheapest ($0.10 per 1,000 emails) pricing available when hosted elsewhere (Heroku, DigitalOcean etc.). We’ll be sending emails from the Amazon SES Sandbox for this article, as moving out of the sandbox requires requesting AWS support for extended access. Sending emails from the sandbox has some limitations, like we have to verify both the sending and receiving email addresses. But we can test our setup by doing so and ensure that everything is setup properly with the right code is in place to send emails with extended access in production.
Why Amazon SES?
It’s the cheapest. Although there are some limitations, like you can’t use dedicated IP addresses and the analytics are not as good as some of the other alternatives out there. But this is great option if you need to send a lot of email within a budget.
Price Comparison
Here is a quick comparison of SES pricing to some of the other well-known email providers.
Cost at 40,000 emails per month:
| Service | Price |
|---|---|
| AmazonSES | $4 |
| Mailgun | $15 |
| MailJet | $17 |
| Postmark | $30 |
| SendinBlue | $7.5 |
| SendGrid | $10 |
Getting Started
Let’s jump straight into coding to quickly set things up to send emails with our Rails app through Amazon SES. We’re not going to worry about a lot of the vanilla Rails setup, focusing on the intended feature which is to create a bare bone Rails application to send emails through Amazon SES.
I’m running Ruby 2.3.0 and Rails 4.2.6.
rails new my_ses_app
This will create a new Rails app. Change your directory to the newly created app:
cd my_ses_app
Create a welcome controller with index action:
rails generate controller welcome index
Go to the config/routes.rb file and remove all the commented out examples so that you get a clean routes file to work with. Define a get route, a post route and application root by adding these three lines:
get 'welcome/index'
post '/send_email', to: 'welcome#send_email', as: 'send_email'
root 'welcome#index'
The routes file should look something like this after adding the above three lines:
Rails.application.routes.draw do
  get 'welcome/index'
  post '/send_email', to: 'welcome#send_email', as: 'send_email'
  root 'welcome#index'
end
Add the send_email action to welcome_controller (app/controllers/welcome_controller.rb)
def send_email
  MyMailer.send_email(name: params[:name], phone: params[:phone], email: params[:email], message: params[:message]).deliver
  redirect_to root_url, notice: "Email sent!"
end
Let’s make a form on our application root for sending the emails. Before adding the form to the view file, add Twitter Bootstrap to have an shiny elegant email form. Add the bootstrap-sass Gem to your Gemfile:
gem 'bootstrap-sass'
Run the bundle command to make sure the Gem is installed and picked up by our Rails app. You need to remove all contents from your app/assets/stylesheets/application.css file, rename it to application.scss, and add these two lines:
@import "bootstrap-sprockets";
@import "bootstrap";
You’re good to go with Twitter Bootstrap, now paste this HTML in app/views/welcome/index.html.erb:
<% flash.each do |name, msg| %>
<div class="alert alert-<%= name == 'notice' ? "info" : "danger" %> fade in">
<button class="close" data-dismiss="alert">
×
</button>
<i class="fa-fw fa fa-info"></i>
<strong><Info><%= name %>!</strong> <%= raw(msg) %>
</div>
<% end %>
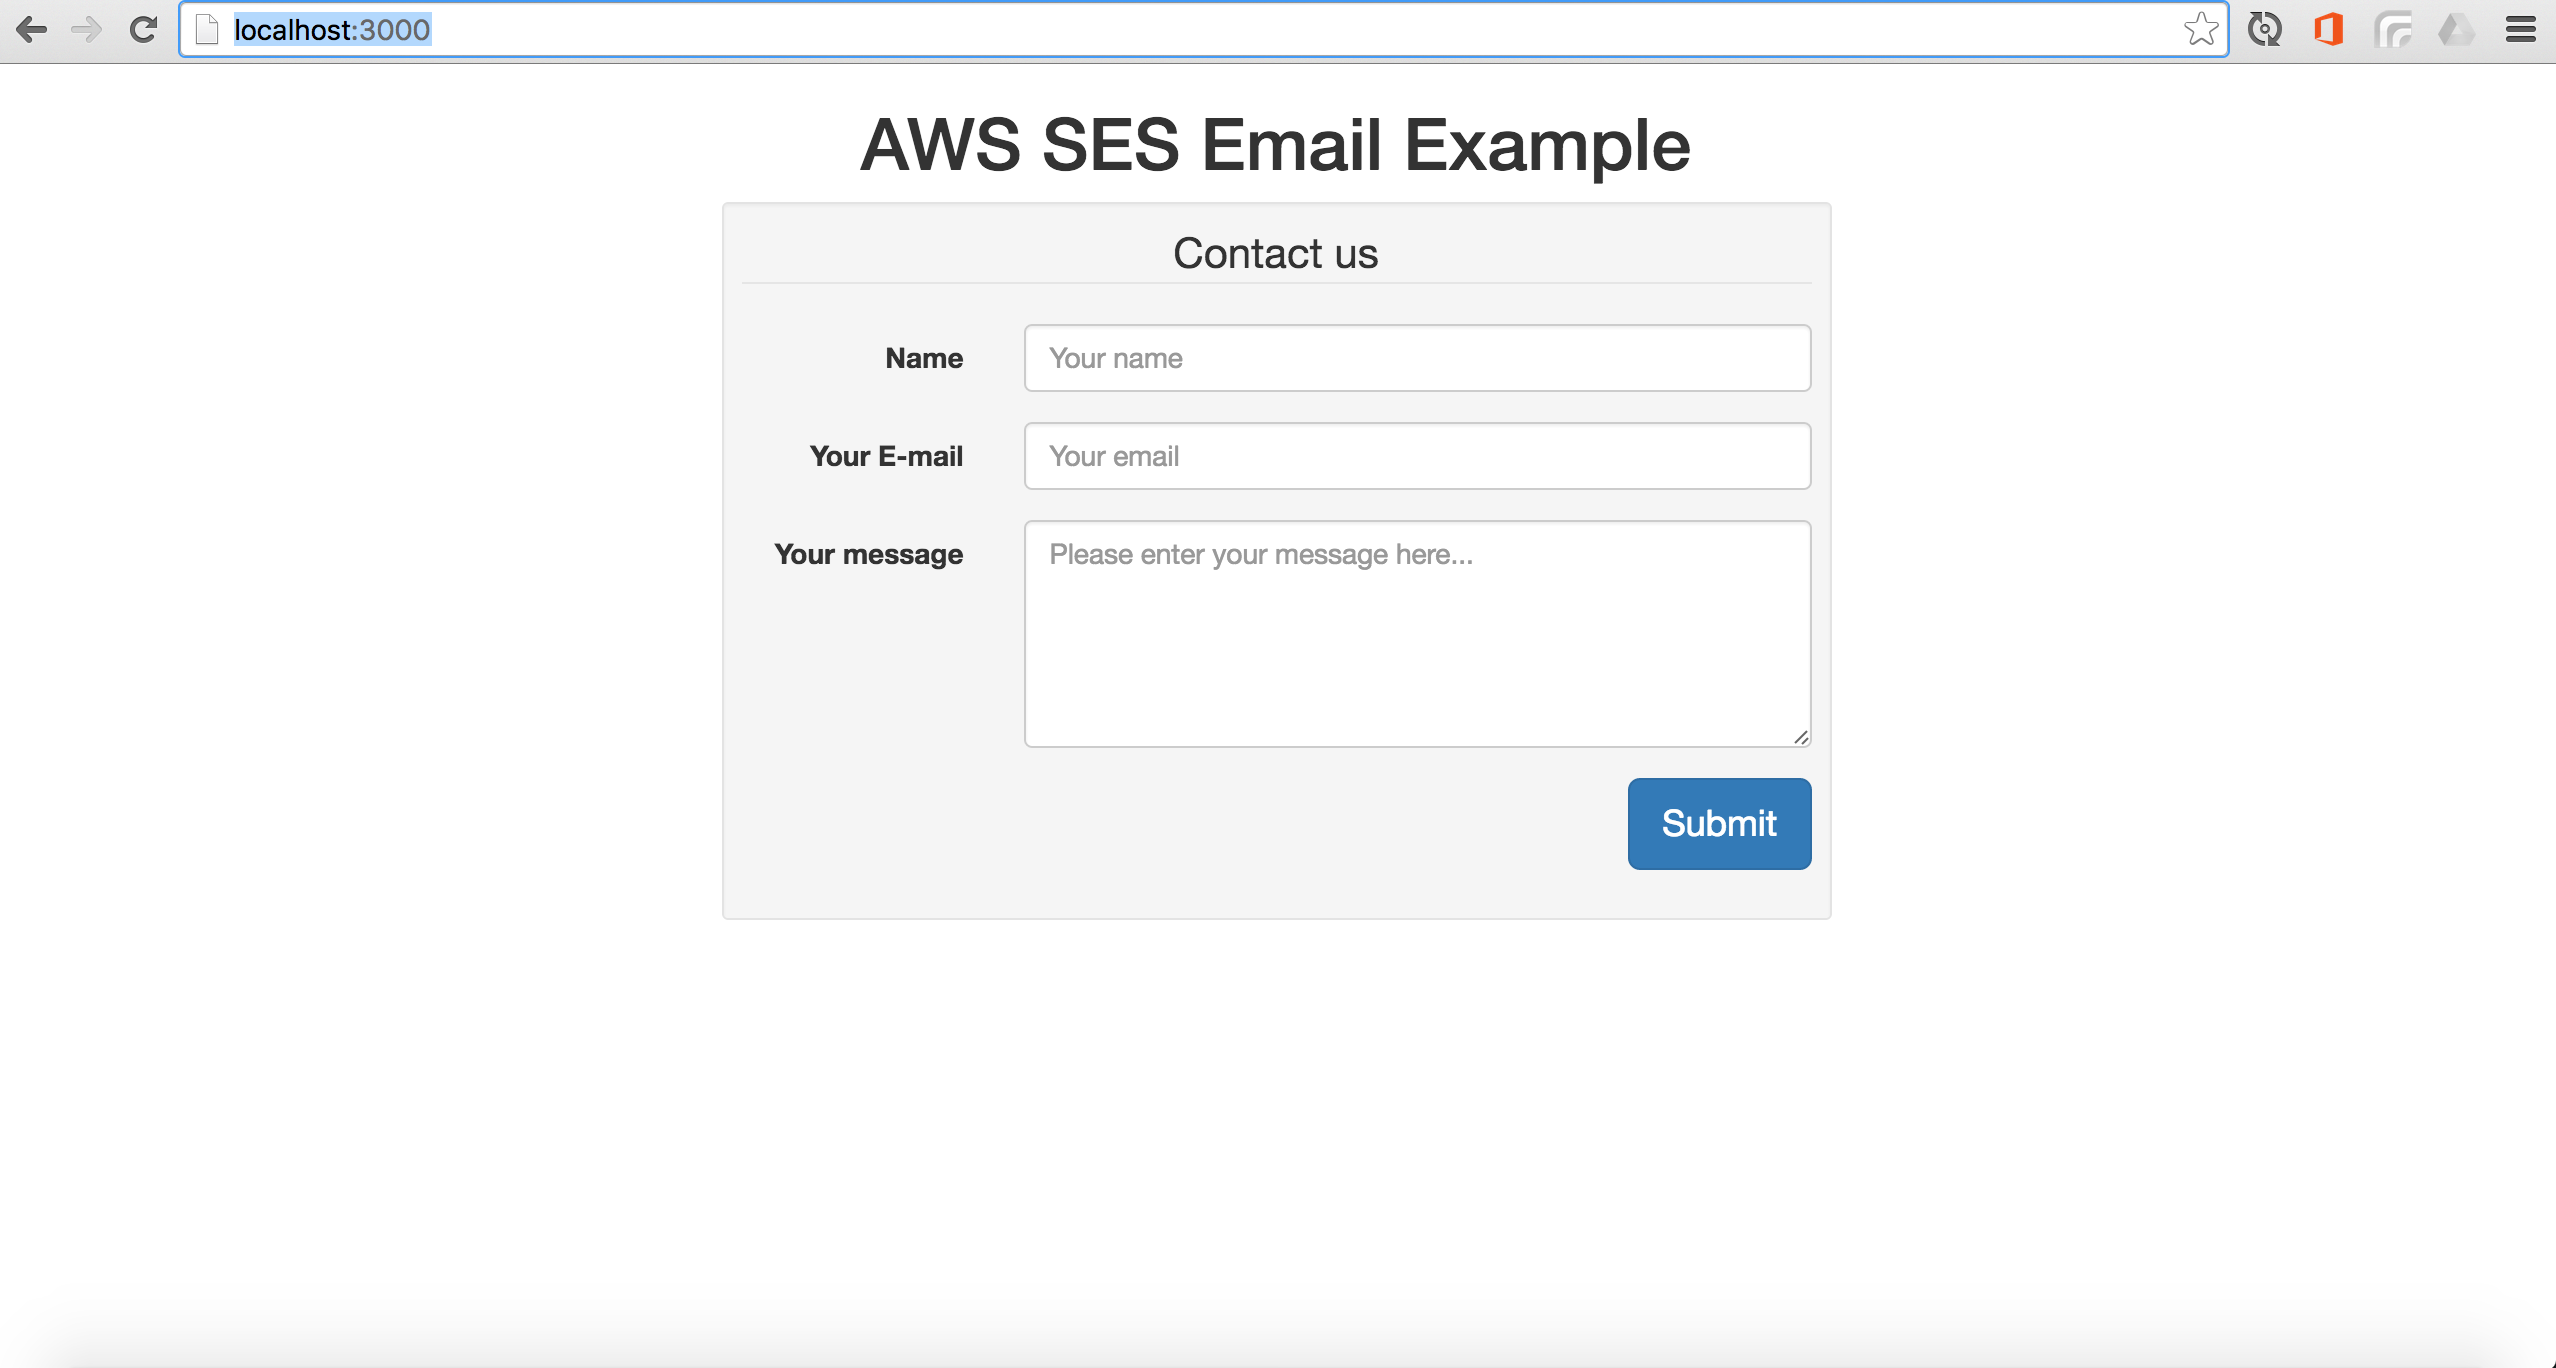
<h1 class="text-center">AWS SES Email Example</h1>
<div class="container">
<div class="row">
<div class="col-md-6 col-md-offset-3">
<div class="well well-sm">
<%= form_tag(send_email_path, method: "post", :class=>"form-horizontal") do %>
<fieldset>
<legend class="text-center">Contact us</legend>
<!-- Name input-->
<div class="form-group">
<label class="col-md-3 control-label" for="name">Name</label>
<div class="col-md-9">
<input id="name" name="name" type="text" placeholder="Your name" class="form-control">
</div>
</div>
<!-- Email input-->
<div class="form-group">
<label class="col-md-3 control-label" for="email">Your E-mail</label>
<div class="col-md-9">
<input id="email" name="email" type="text" placeholder="Your email" class="form-control">
</div>
</div>
<!-- Message body -->
<div class="form-group">
<label class="col-md-3 control-label" for="message">Your message</label>
<div class="col-md-9">
<textarea class="form-control" id="message" name="message" placeholder="Please enter your message here..." rows="5"></textarea>
</div>
</div>
<!-- Form actions -->
<div class="form-group">
<div class="col-md-12 text-right">
<button type="submit" class="btn btn-primary btn-lg">Submit</button>
</div>
</div>
</fieldset>
<% end %>
</div>
</div>
</div>
</div>
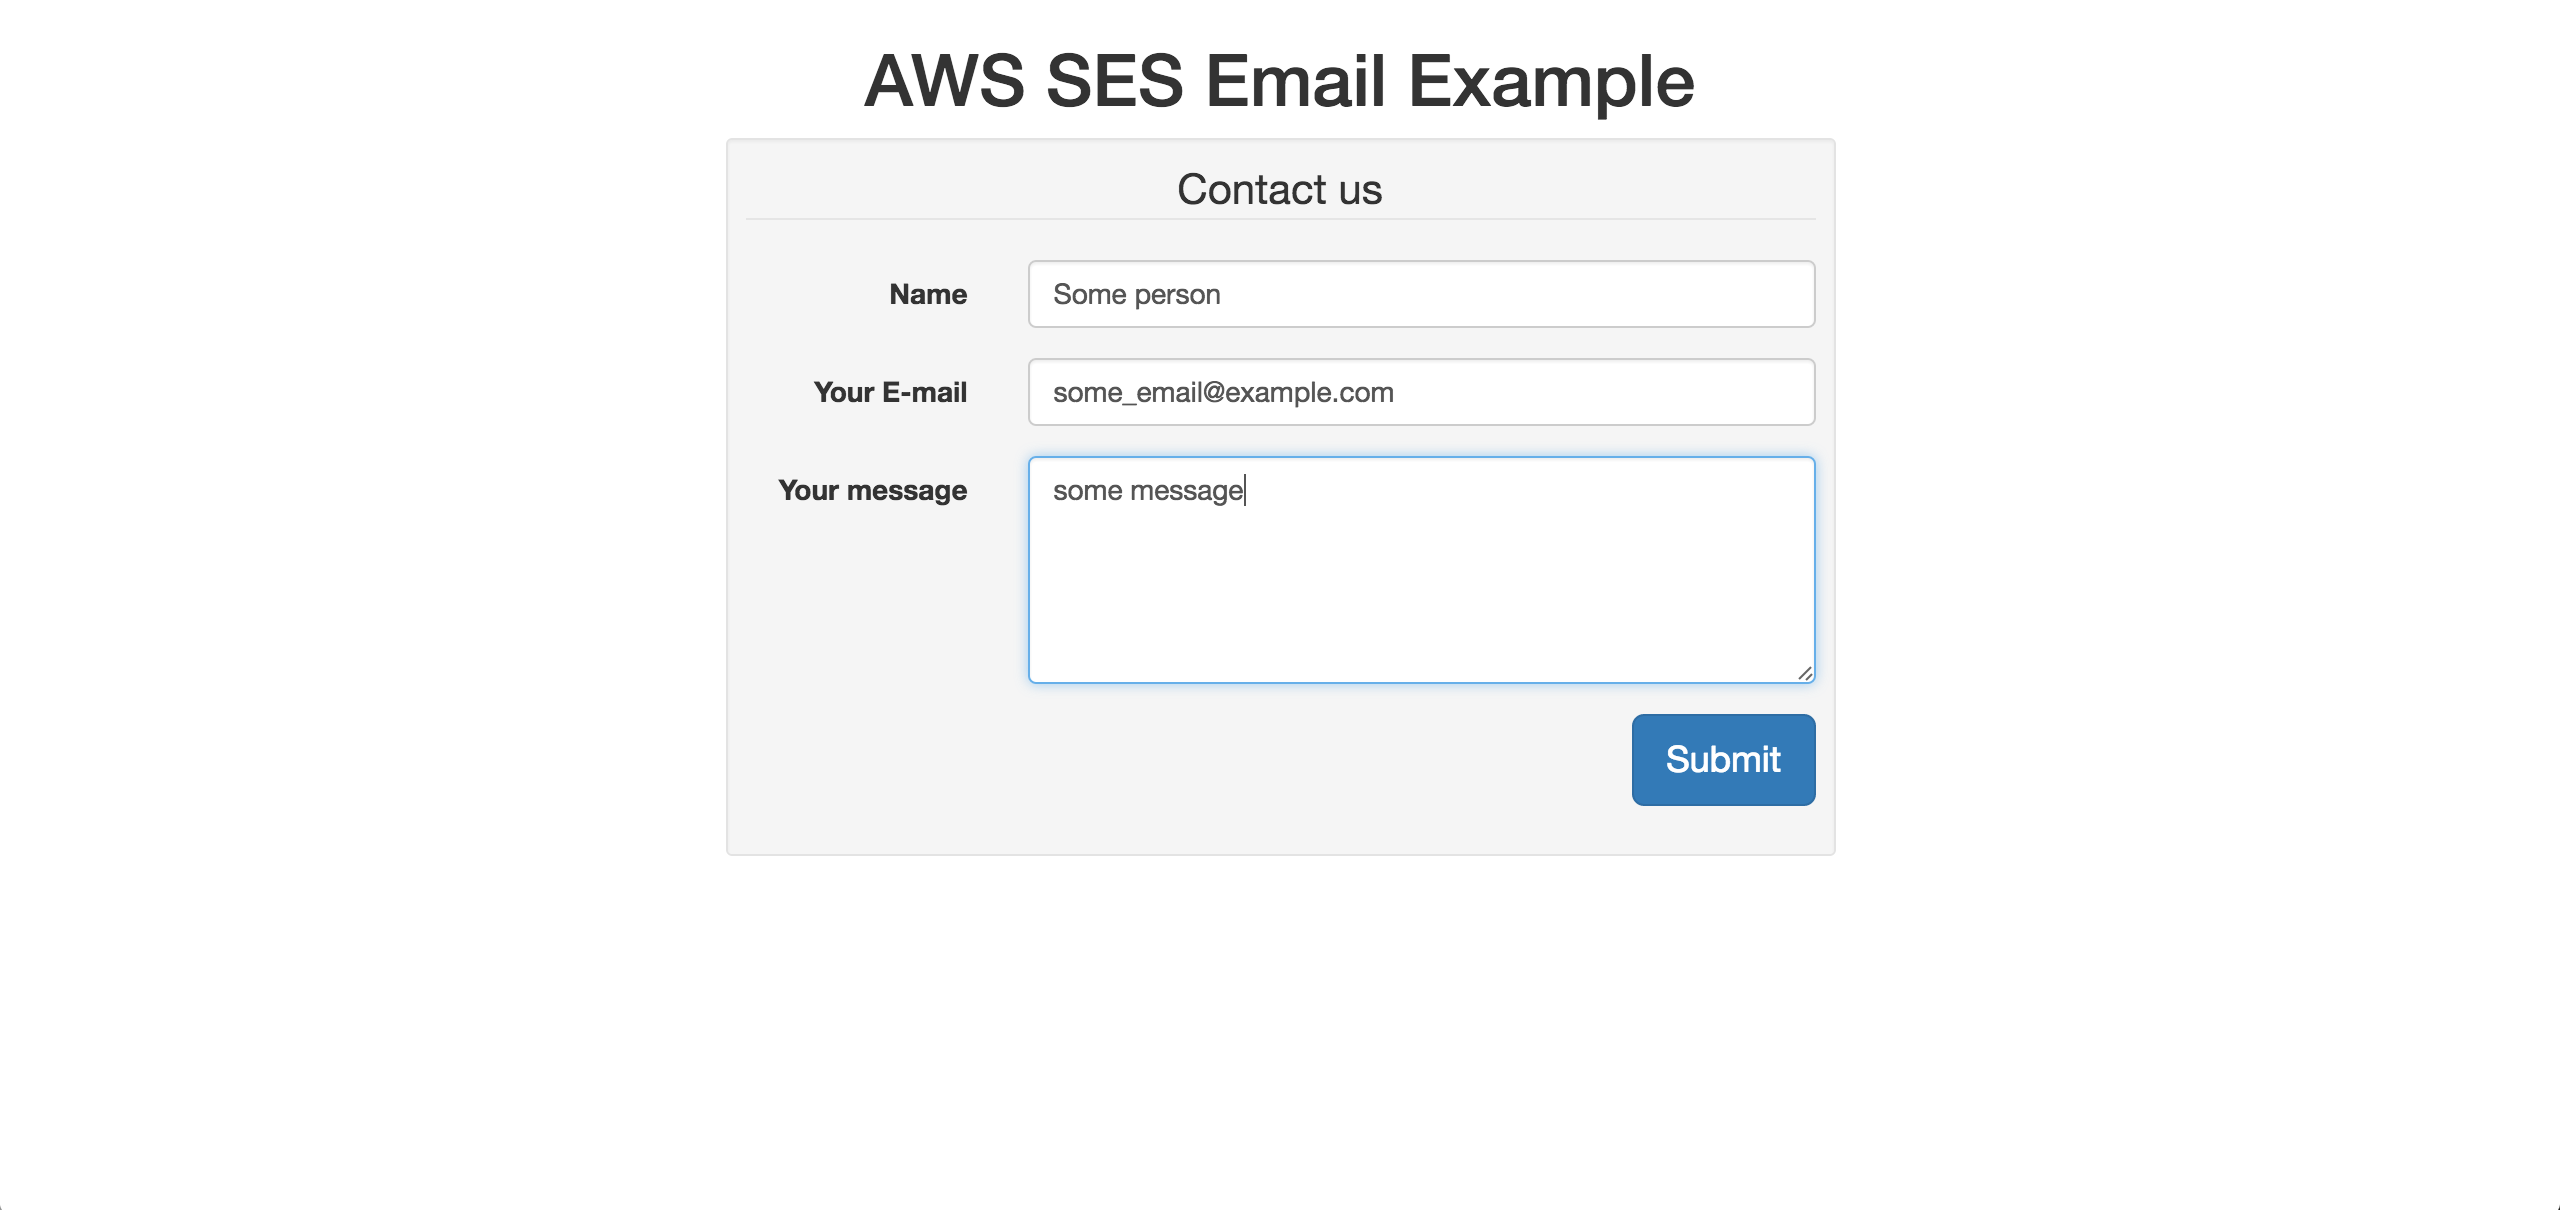
We won’t go into the details of this HTML, as it clearly is out of scope of our intended feature. But this is a super easy HTML form with some Twitter Bootstrap magic which gives us a nice email form.
Go to http://localhost:3000/ in the browser and you should a form like this:
Let’s generate a mailer for our Rails app:
rails generate mailer my_mailer
This will add two files application_mailer.rb and my_mailer.rb in app/mailers directory, as well as two files mailer.html.erb and mailer.text.erb in app/views/layouts directory. Now add the send_email action to the empty app/mailers/my_mailer.rb file, which should look something like this:
class MyMailer < ApplicationMailer
  def send_email(options={})
    @name = options[:name]
    @email = options[:email]
    @message = options[:message]
    mail(:to=>"another_email@example.com", :subject=>"Amazon SES Email")
  end
end
After adding the send_email action to our mailer file, change the default from email address in app/mailers/application_mailer.rb file to the address you wish to use. In this tutorial, I’ll call it some_email@example.com.
class ApplicationMailer < ActionMailer::Base
  default from: "some_email@example.com"
  layout 'mailer'
end
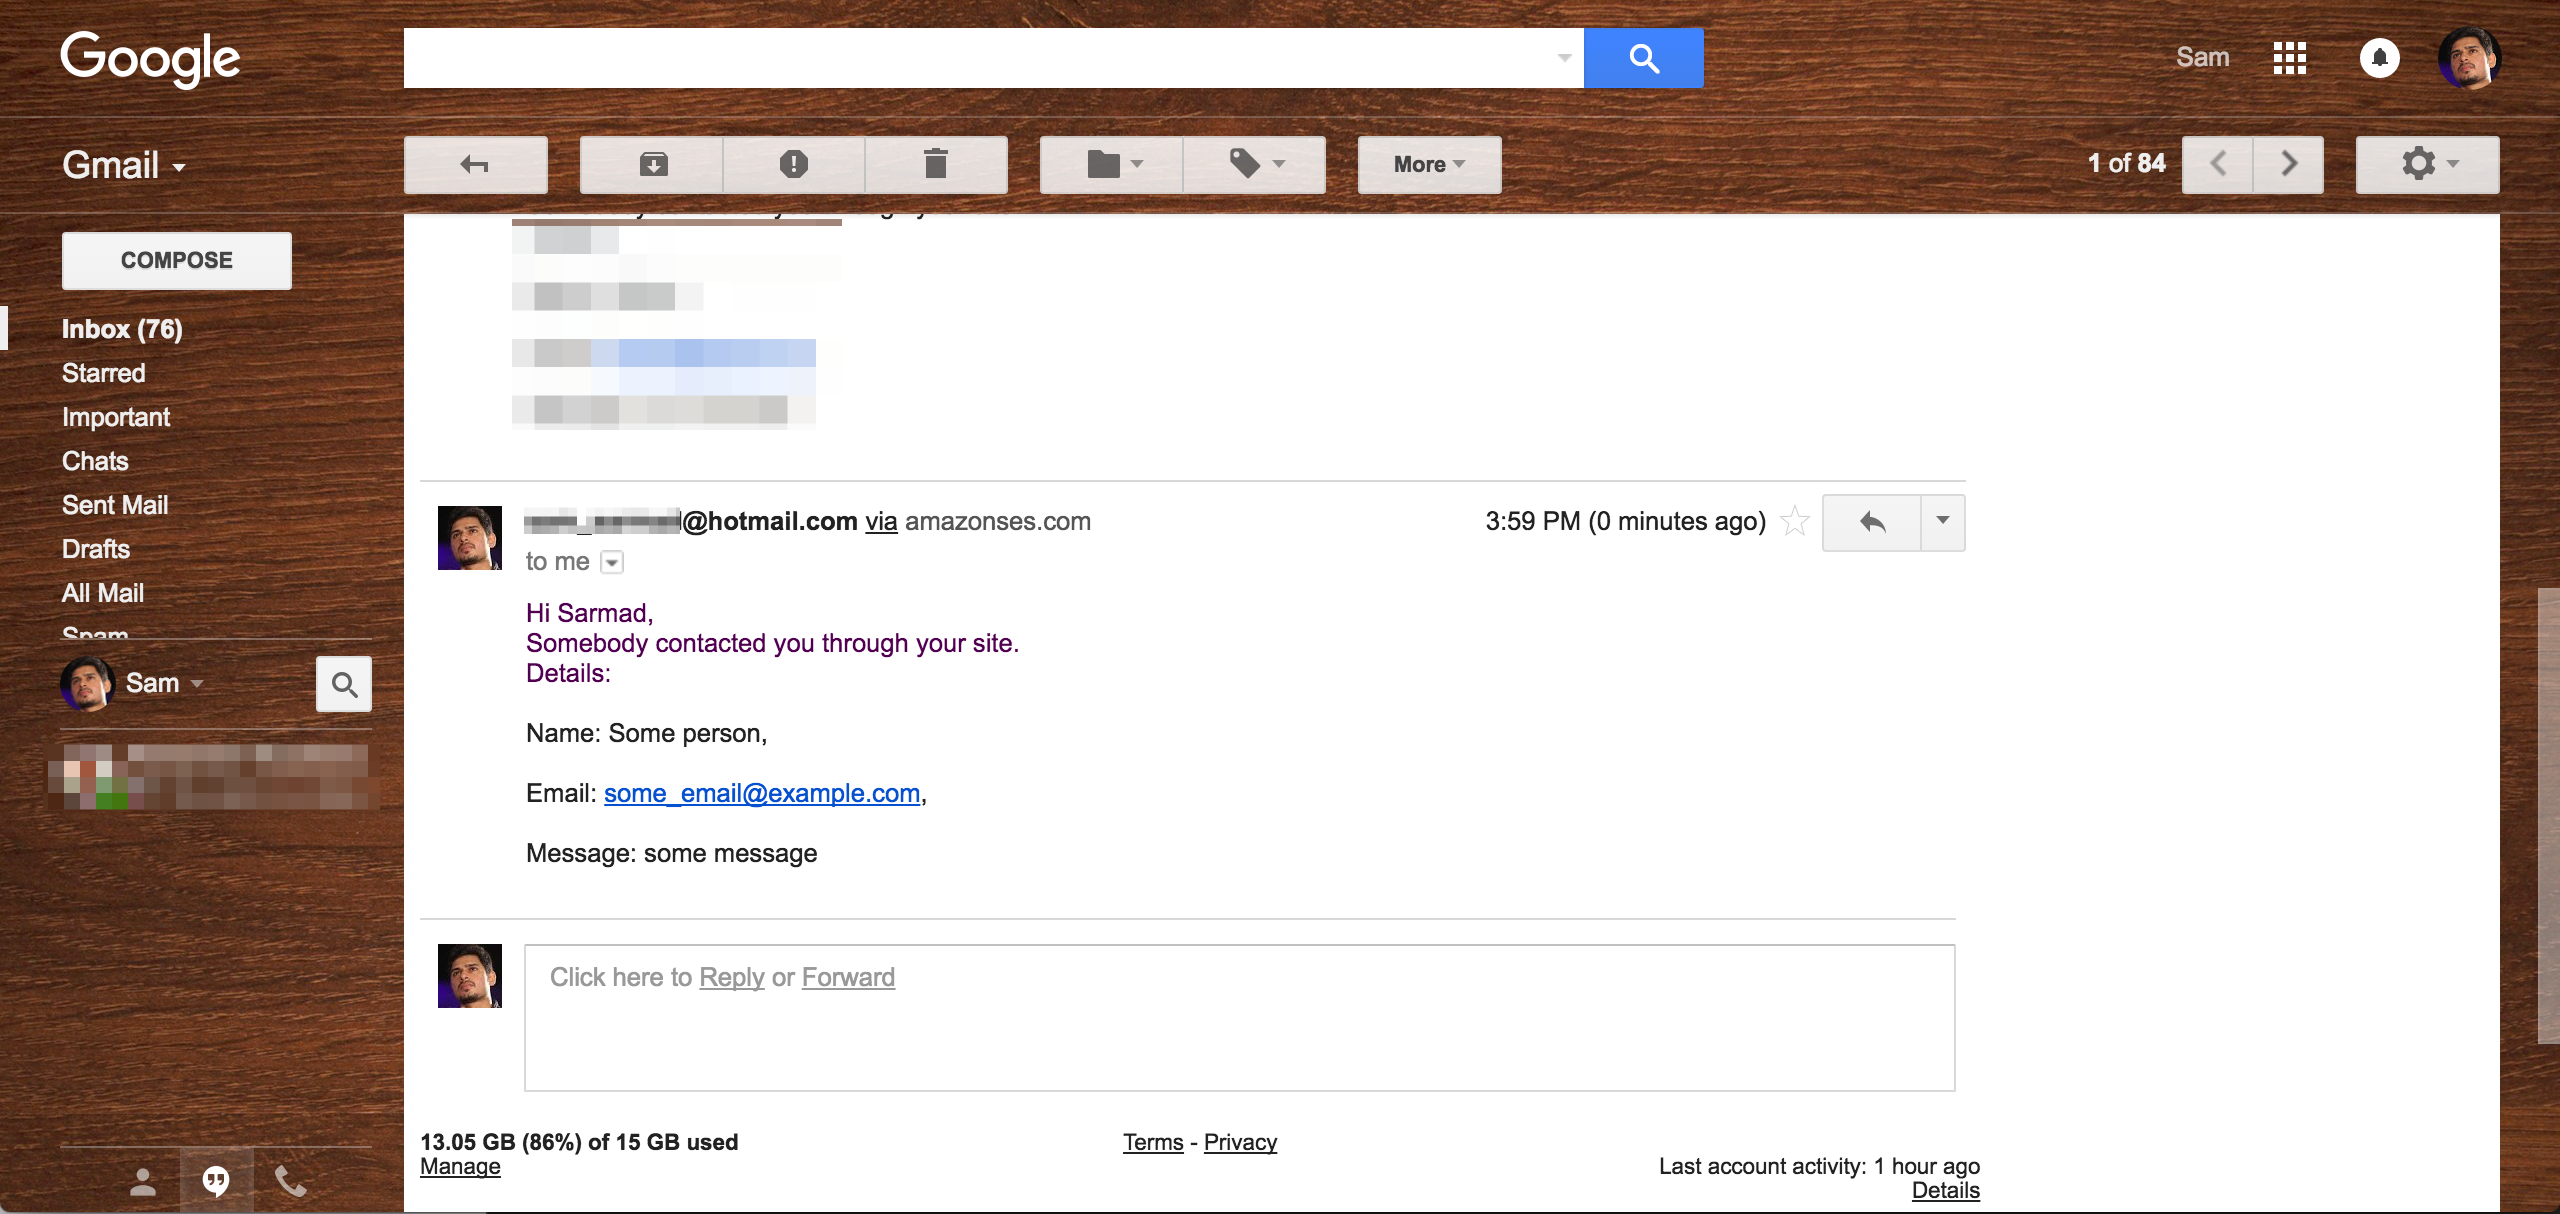
We can remove app/views/layouts/mailer.html.erb for now, as we will be sending plain text emails for this tutorial. Create a new file in app/view/mailers/ named send_email.text.erb and add these lines :
Hi Sarmad,
Somebody contacted you through your site.
Details:

Name: <%= @name %>,

Email: <%= @email %>,

Message: <%= @message %>
This will be used as text template for our emails.
Open up config/environments/development.rb in order to change the SMTP configuration and test the emails out in the local development environment. Deploying this application to a production environment is out of scope of this post. We’re just going to go through the Amazon SES setup, code and configuration to get our app ready to send 62,000 free email per month from an Amazon EC2 instance. There’s already a great in-depth tutorial on SitePoint which runs through deploying to EC2. In fact, I personally read that tutorial to deploy on Amazon EC2 with Capistrano.
Head over to the config/environments/development.rb and make these changes to get our app ready to send emails. First of all set action_mailer.perform_deliveries to true as it is set to false by default in the development environment:
config.action_mailer.perform_deliveries = true
Next, look for this line:
config.action_mailer.raise_delivery_errors = false
and set it’s value to true. This will help debug delivery errors if our email fails to deliver for some reason.
Now paste the SMTP settings info the configuration block:
config.action_mailer.smtp_settings = {
  :address => "...",
  :port => 587,
  :user_name => ENV["SES_SMTP_USERNAME"], #Your SMTP user
  :password => ENV["SES_SMTP_PASSWORD"], #Your SMTP password
  :authentication => :login,
  :enable_starttls_auto => true
}
We have left address out for later, which we will copy from the Amazon SES management console.
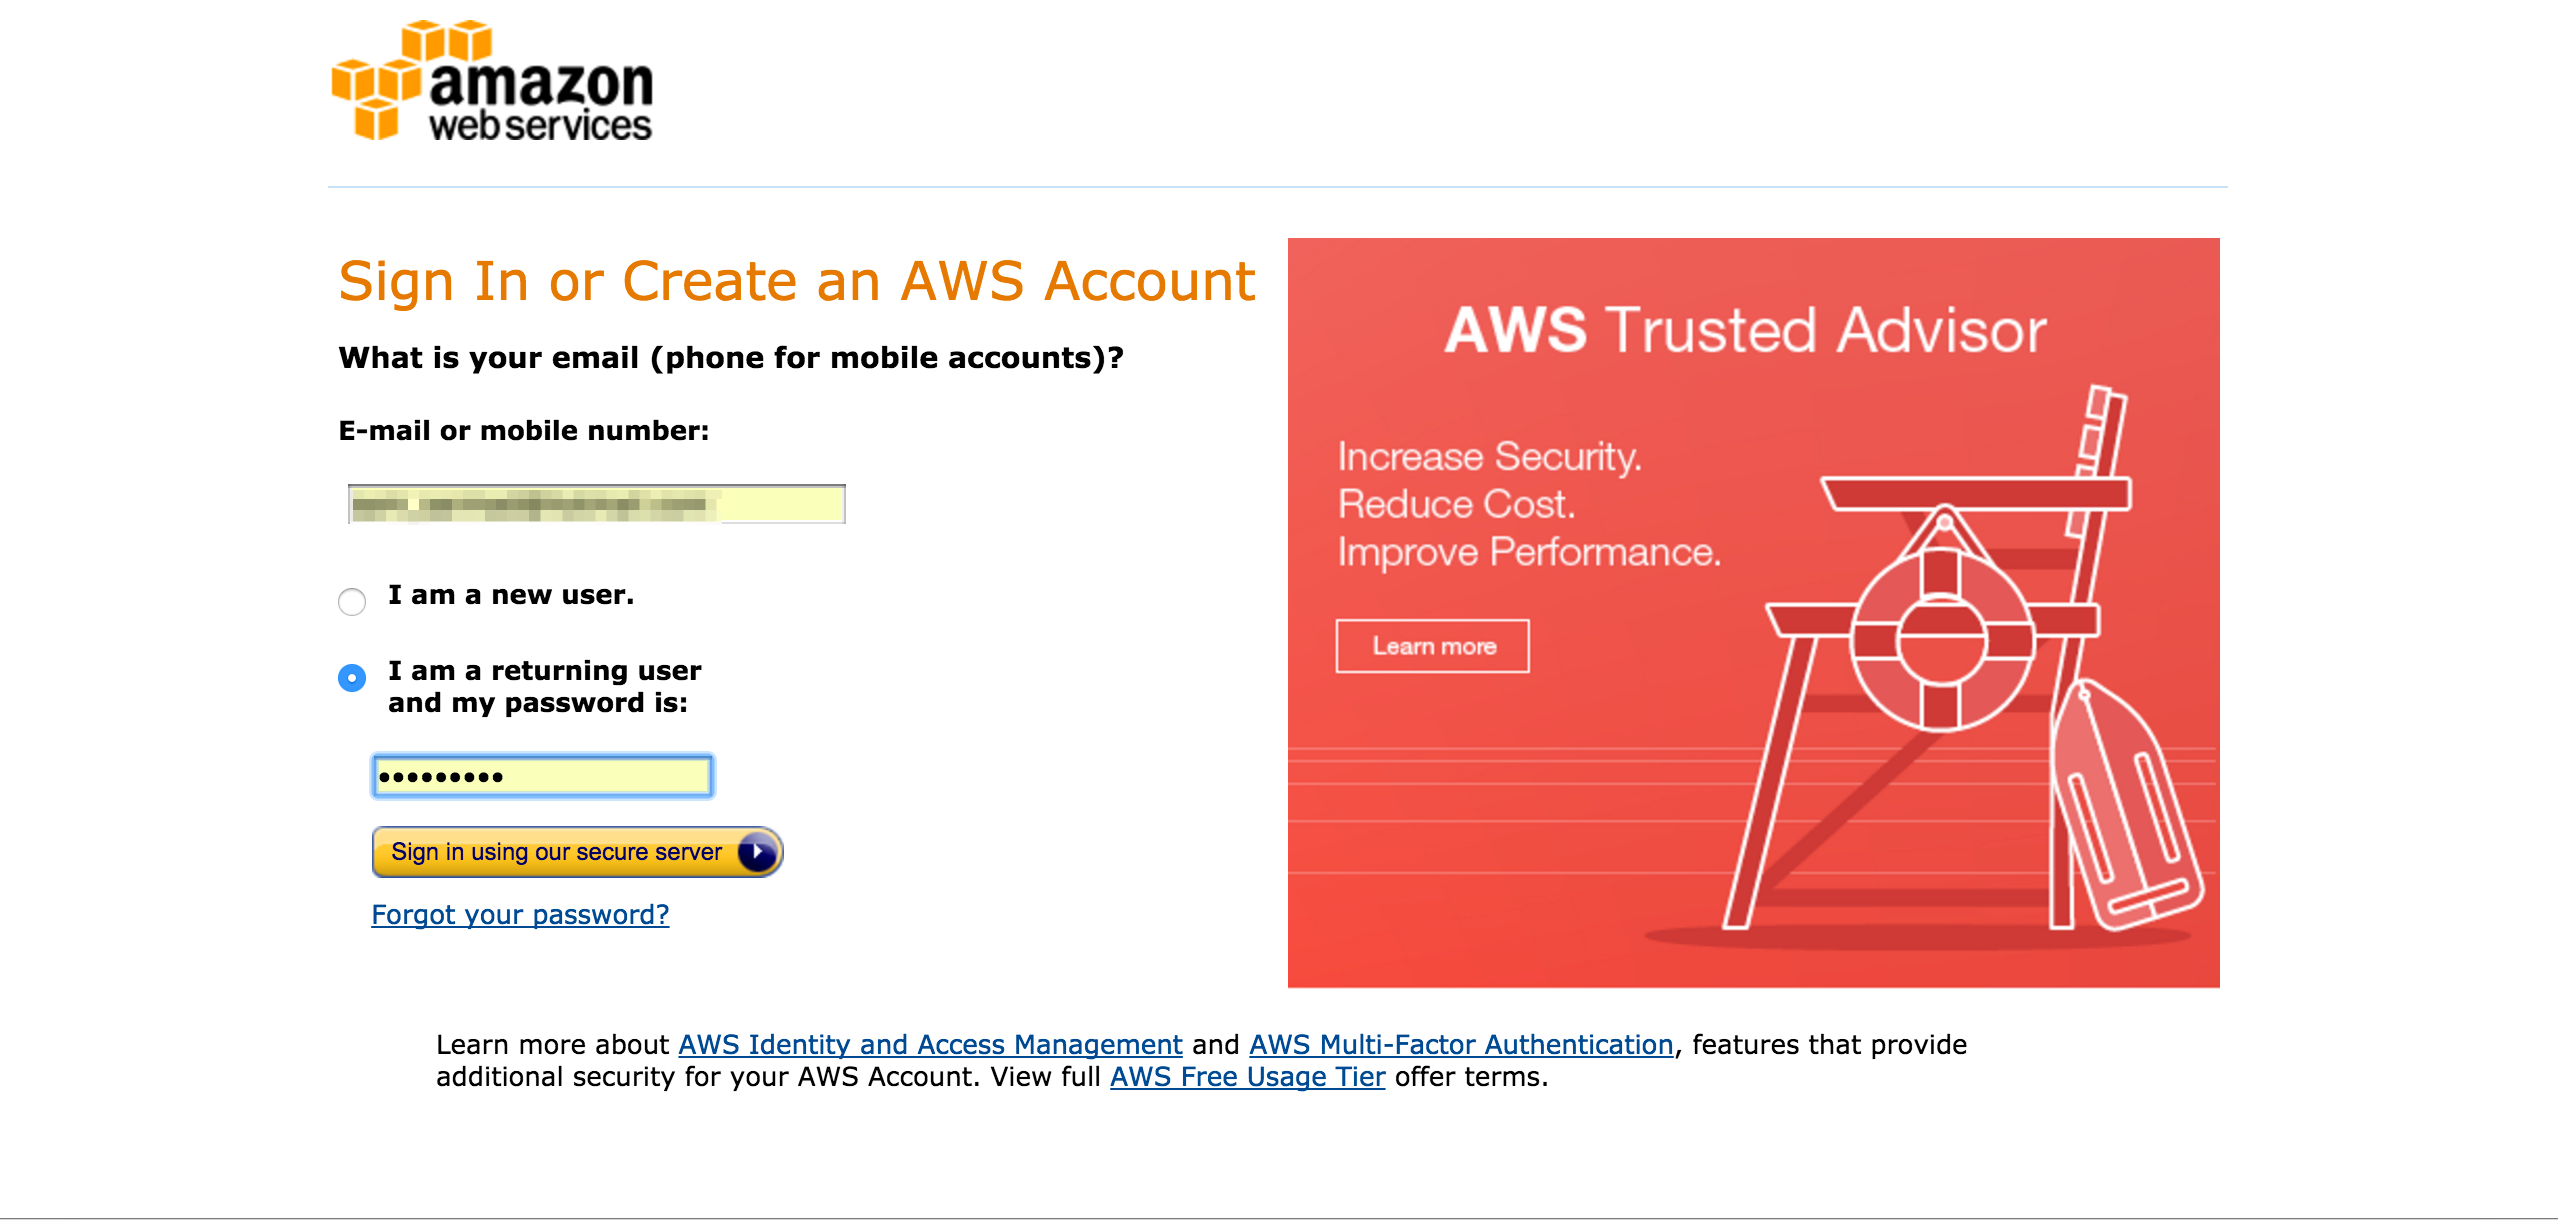
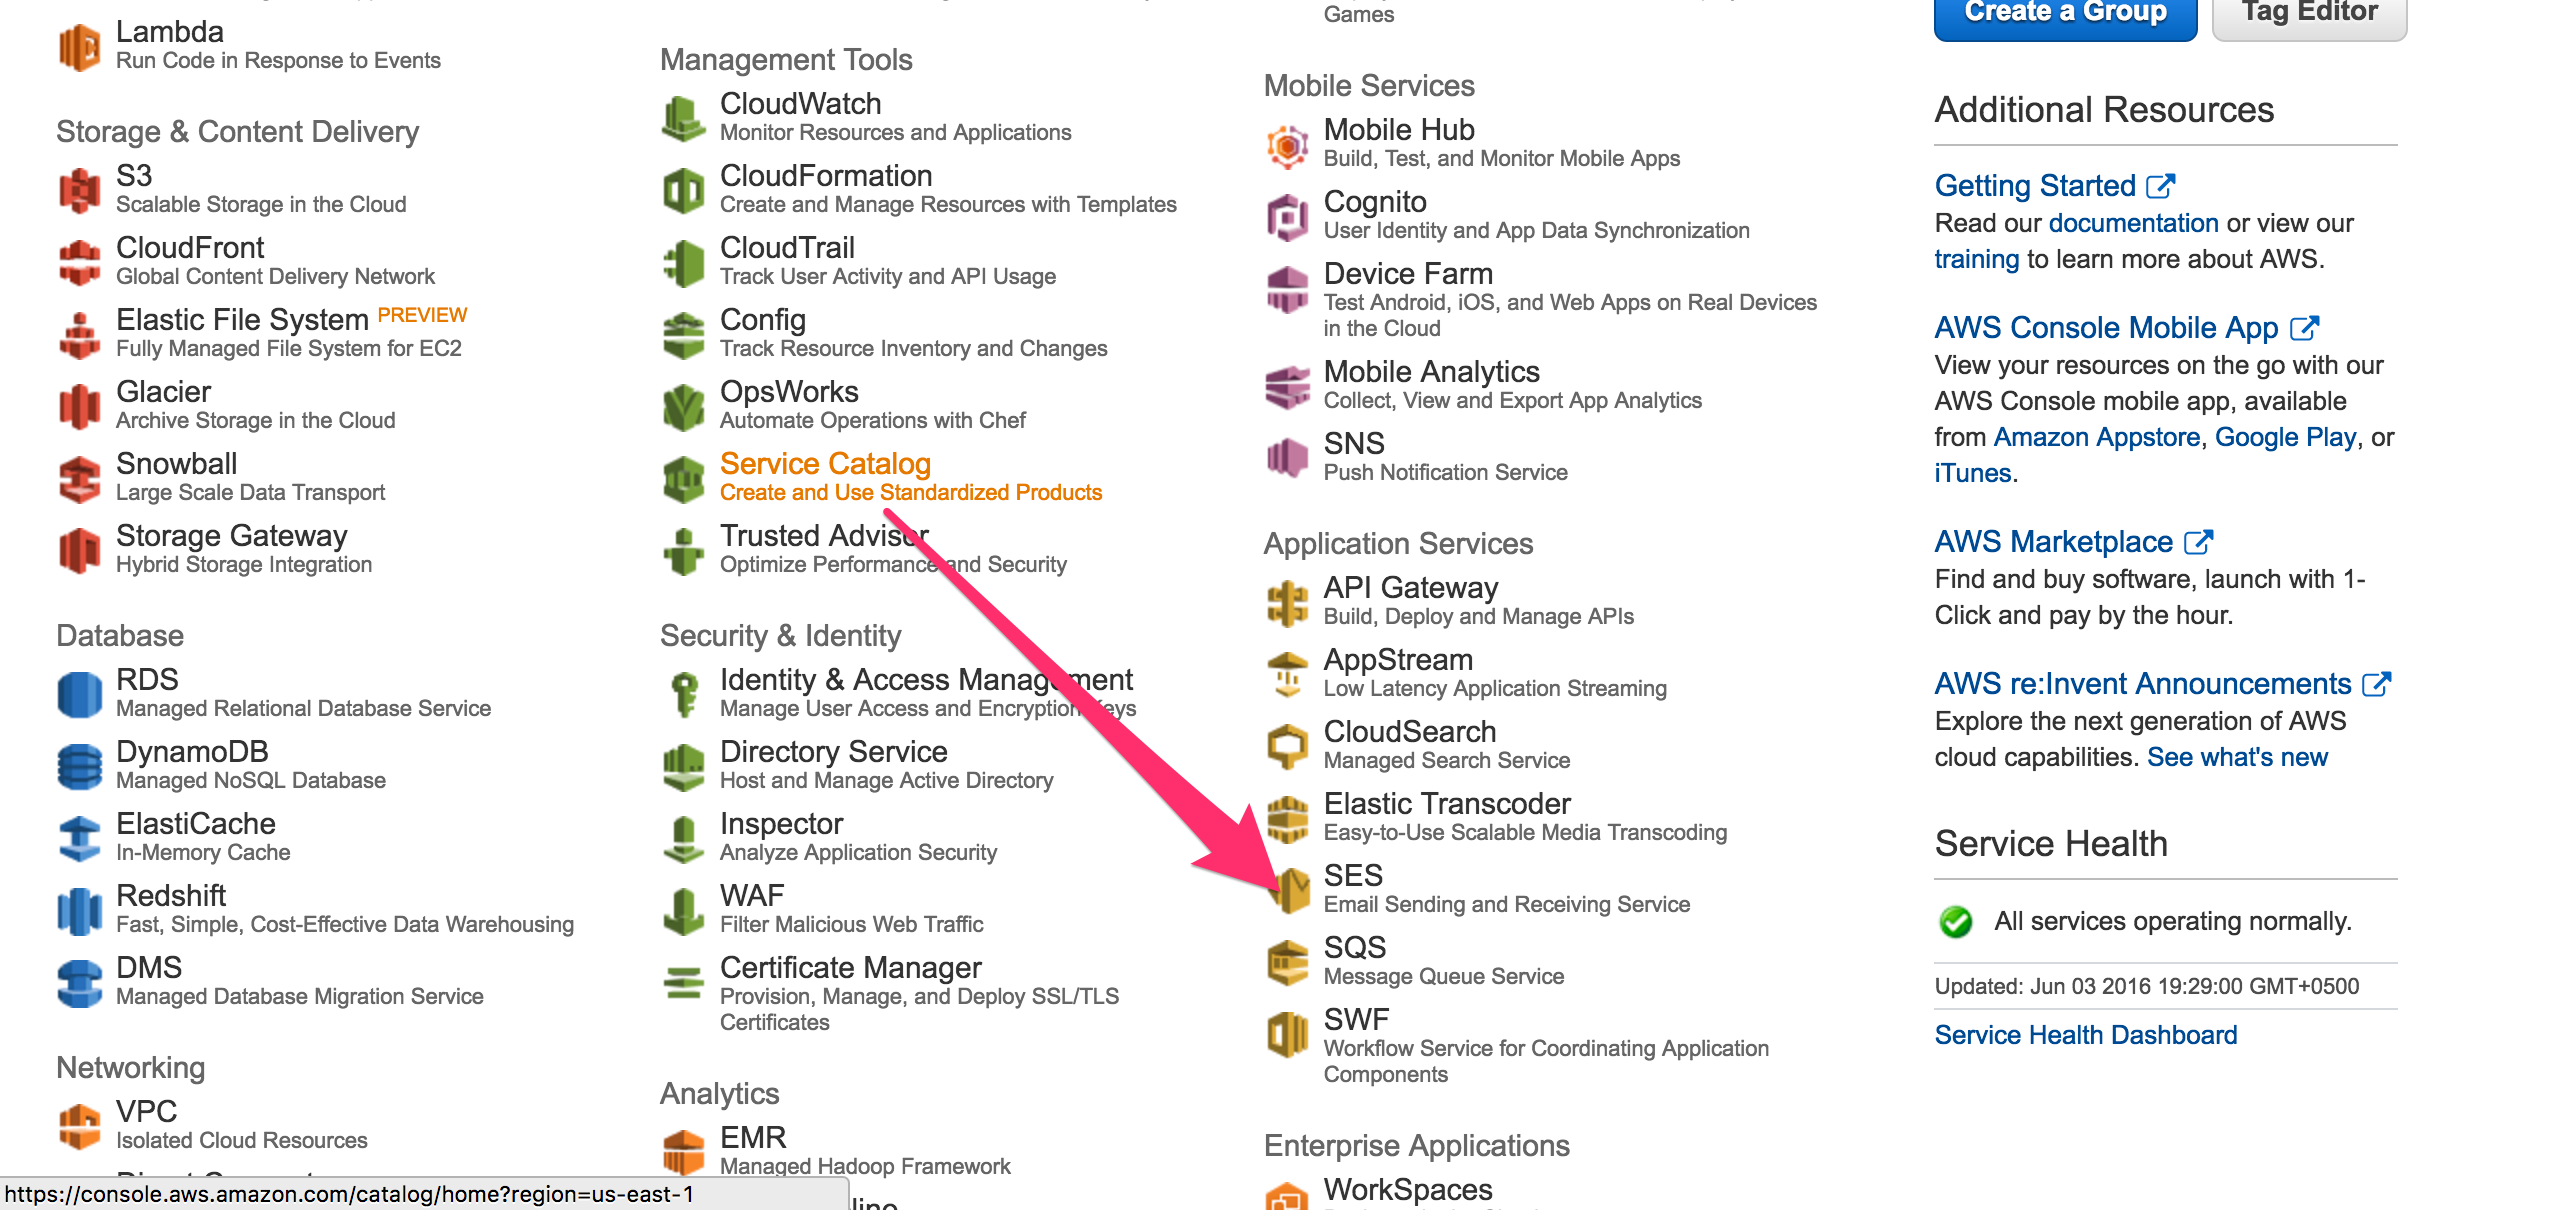
There’s a number of things we need to do now on our Amazon SES management console:
- Login to AWS management console. Sign up for AWS if you haven’t already. It’s pretty simple.
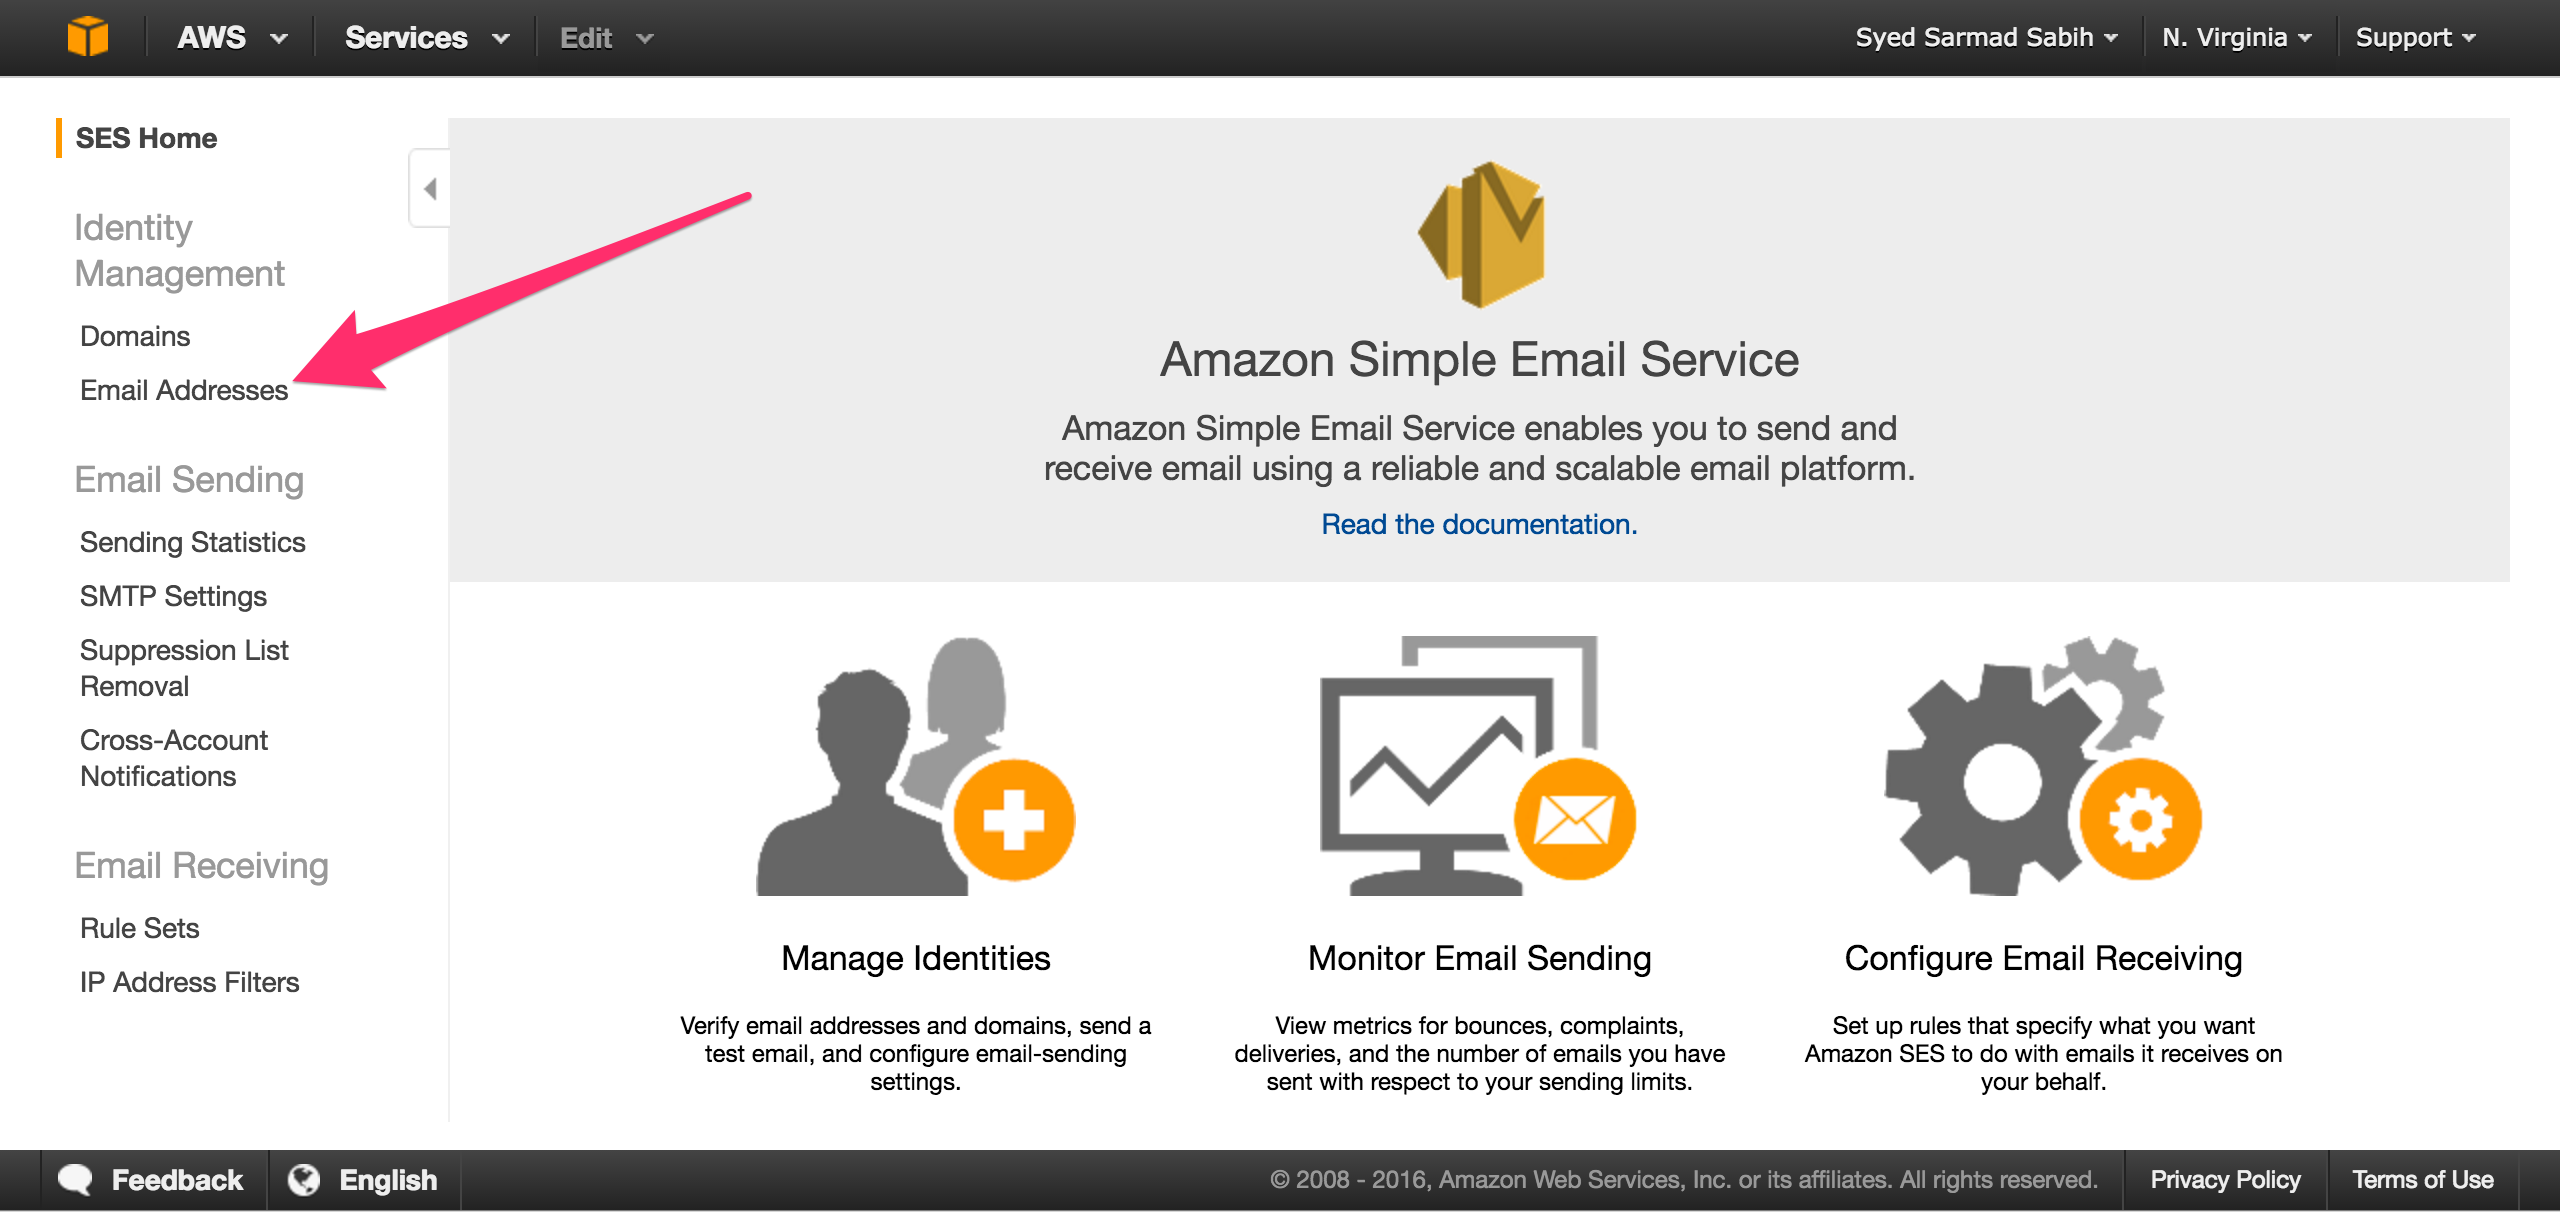
- It will take you to the AWS Dashboard, look for SES.
- Click on “SES” to go to the Amazon SES Dashboard. Click on “Email Addresses”
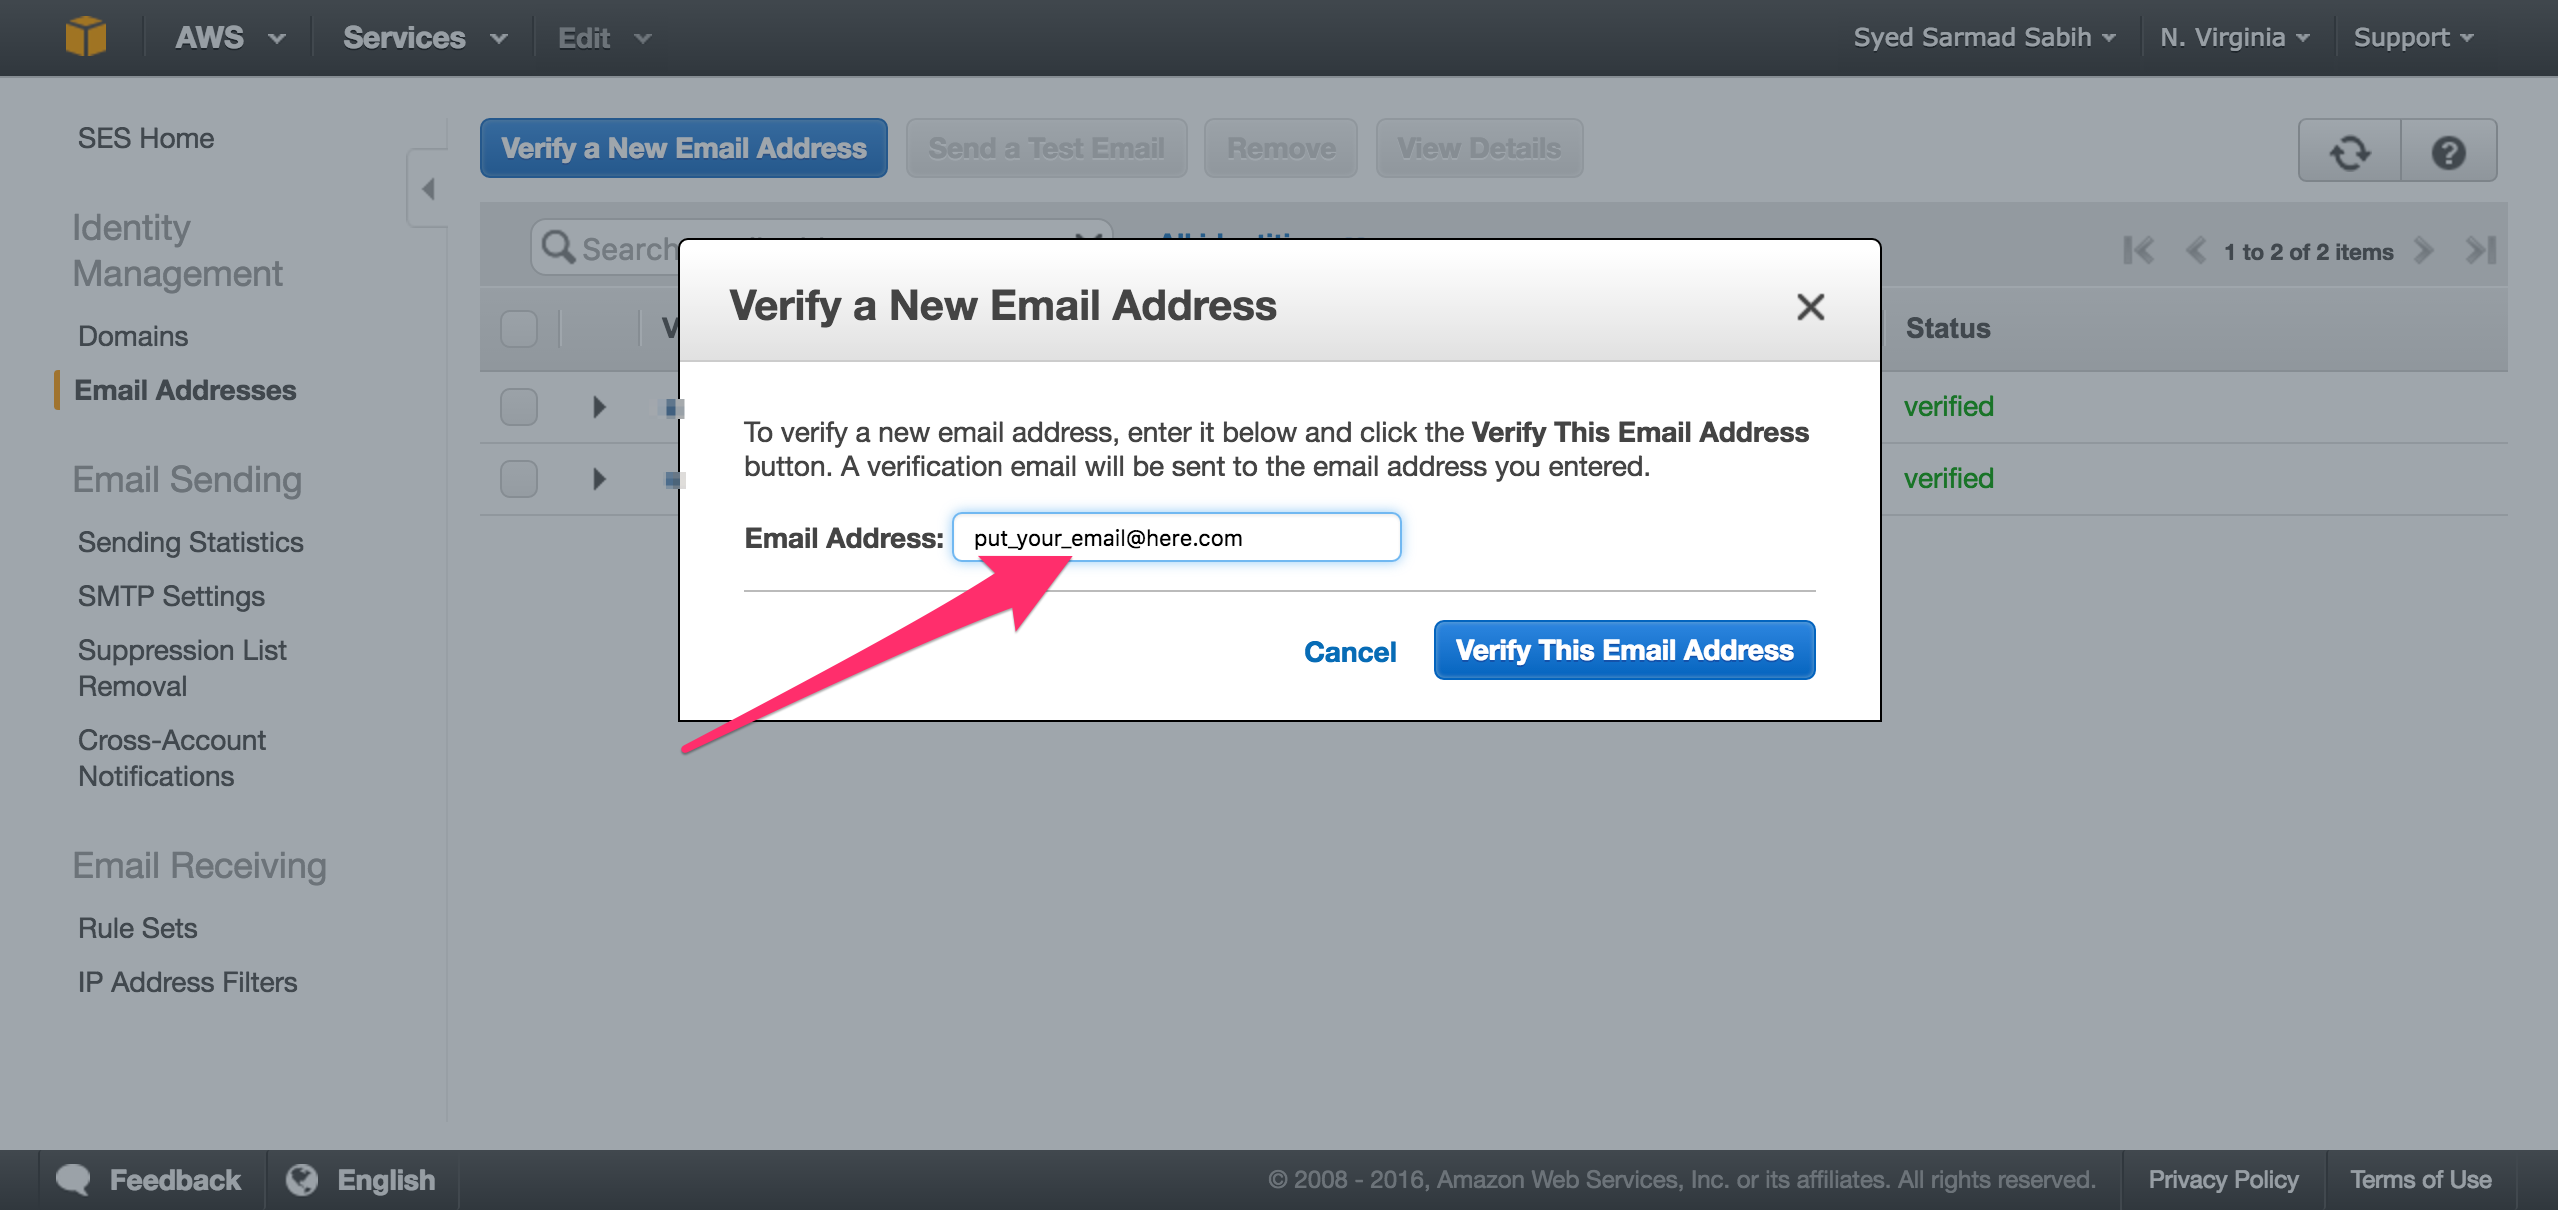
- Verify two email addresses (You must have two email addresses to complete the email sending flow in sandbox mode). I have already added two emails and verified them. Click on Verify a New Email Address button to add your sending and receiving email addresses.
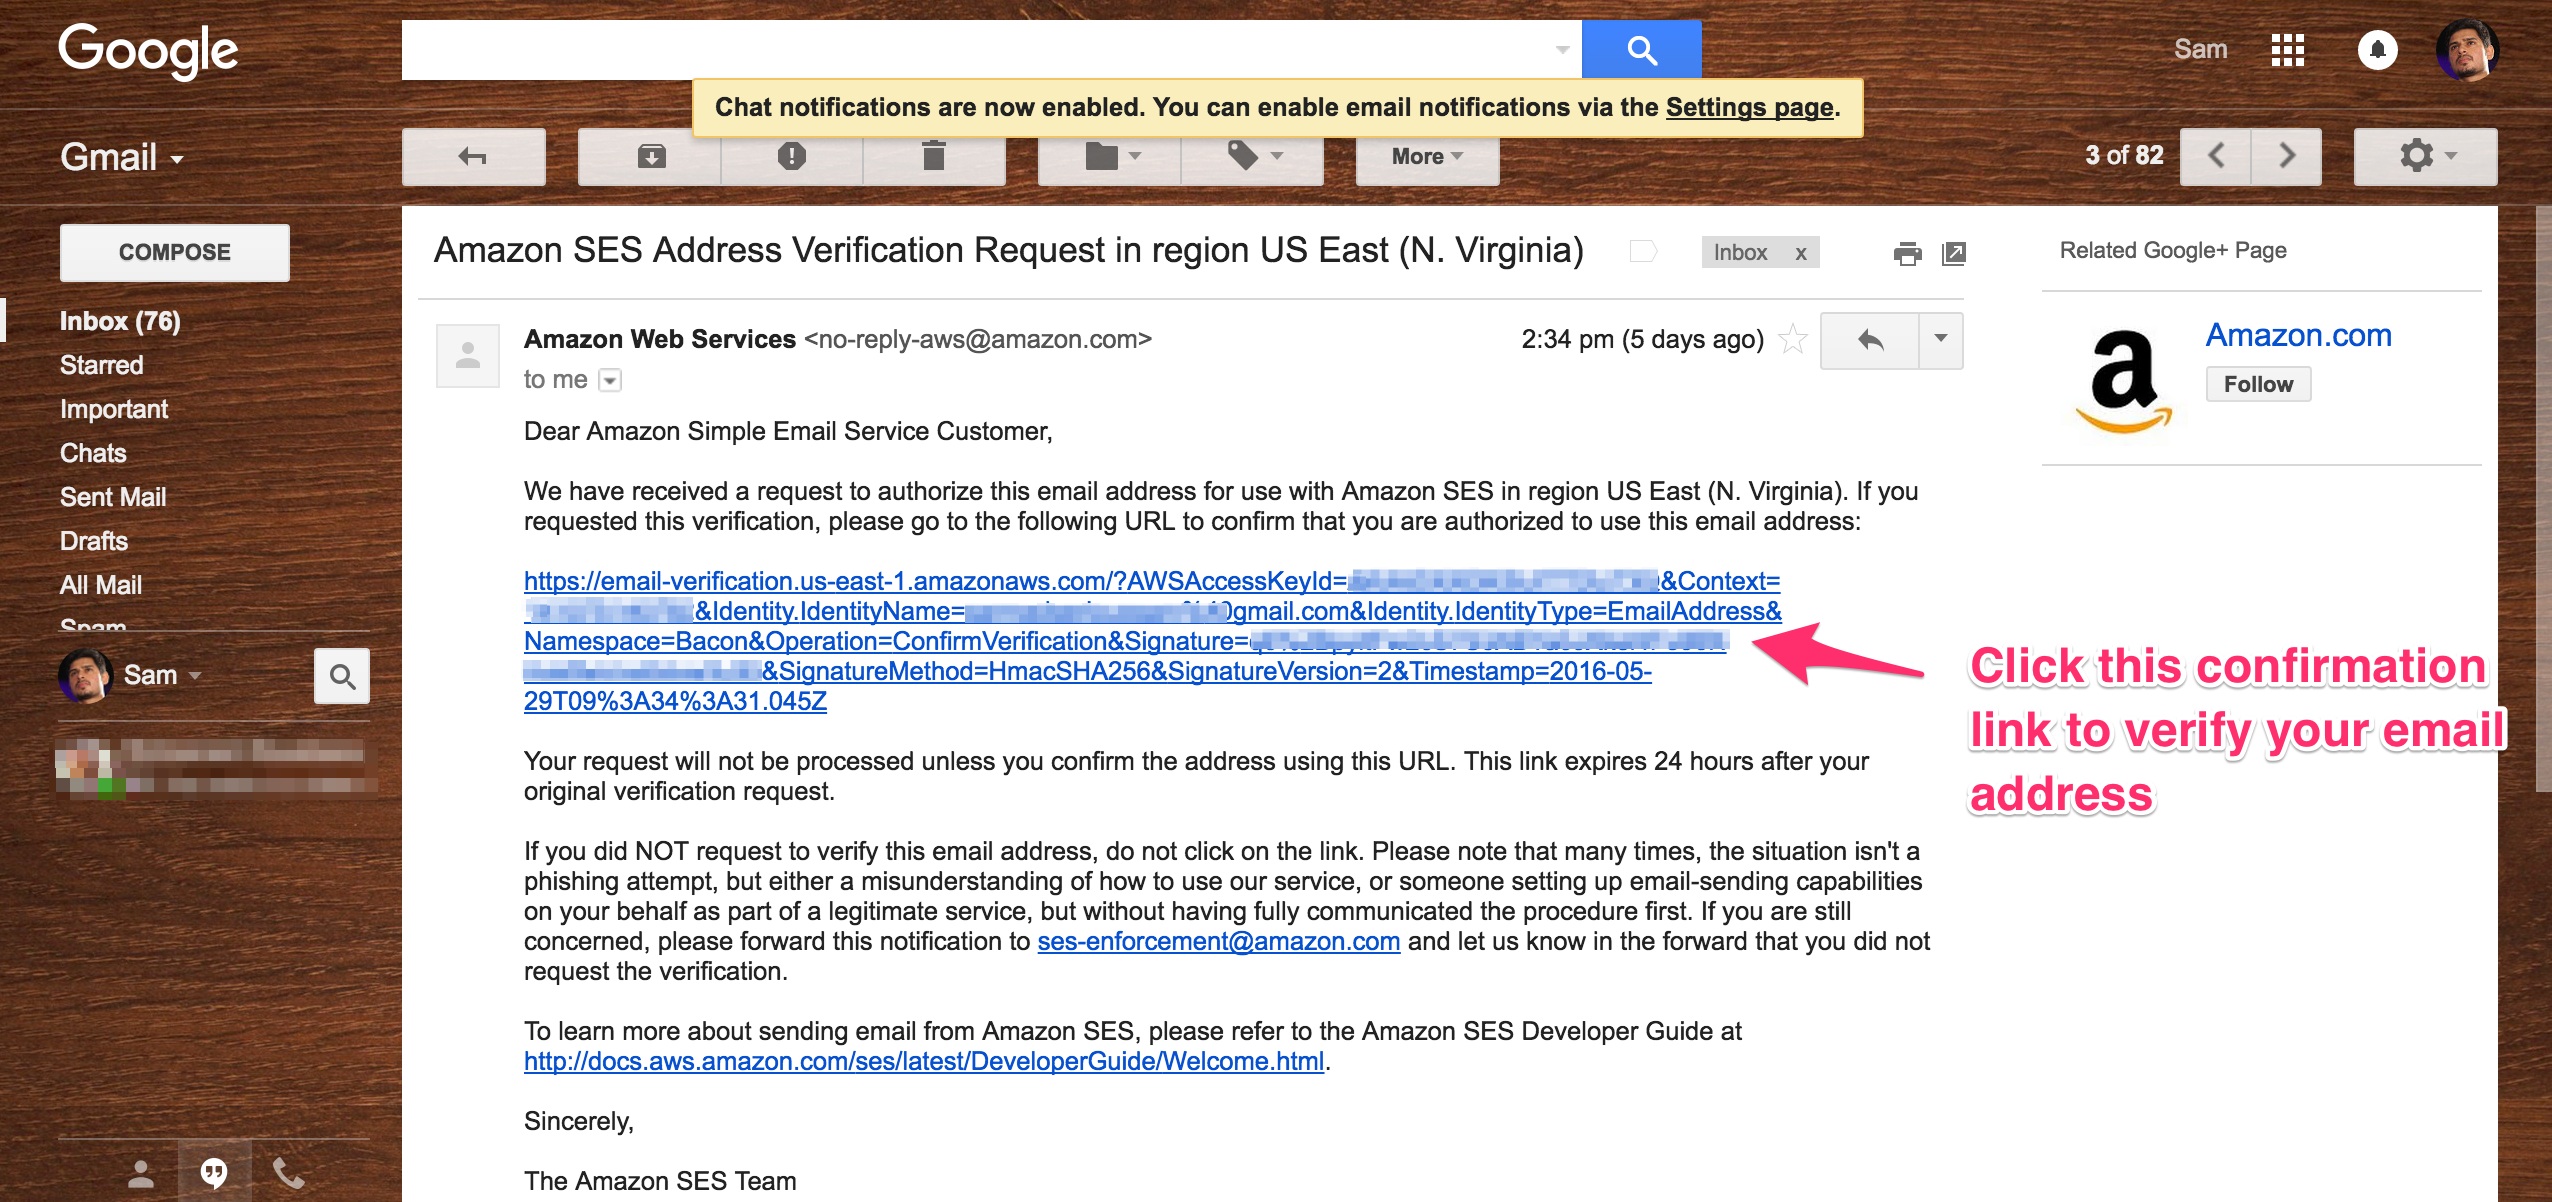
- SES will send you a confirmation email, like the one below.
- Create your SMTP credentials to use in your app.
- Copy the SMTP server name to use in your app.
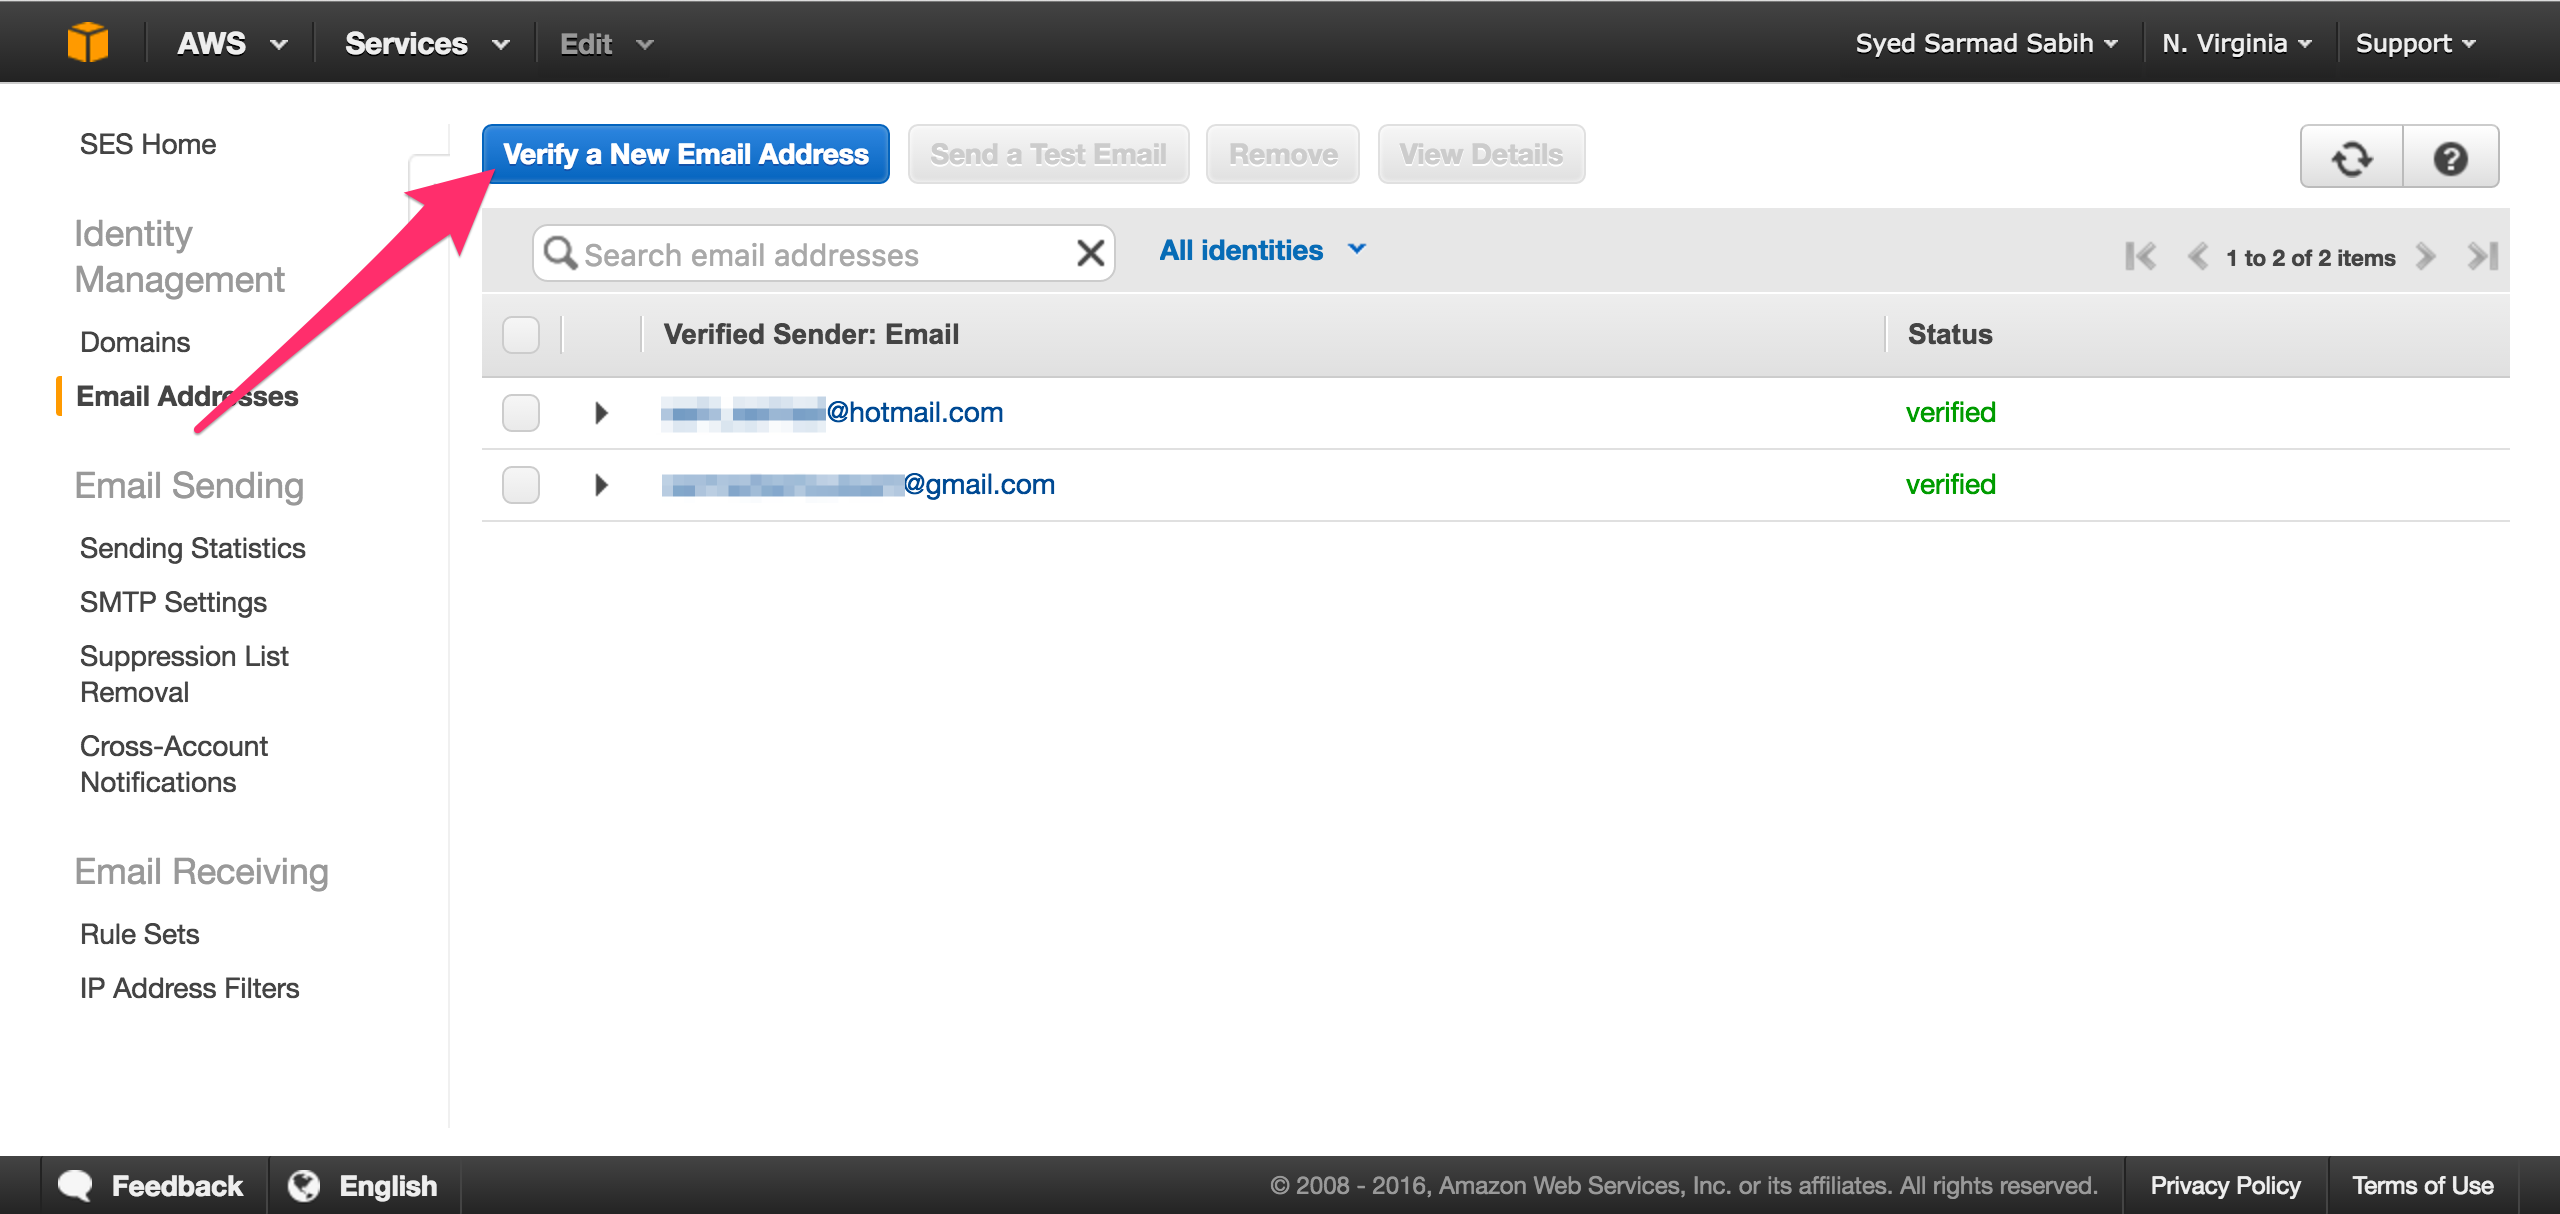
Refreshing the SES Email Adresses page, you should see your email address as verified. Add another one repeating the same steps. Put one email address in app/mailers/application_mailer.rb, replace some_email@example.com with yours.
default from: "some_email@example.com"
And put the other one in app/mailers/my_mailer.rb, replace another_email@example.com with your other verified email address.
mail(:to=>"another_email@example.com", :subject=>"Amazon SES Email")
Go to the SES SMTP Settings page
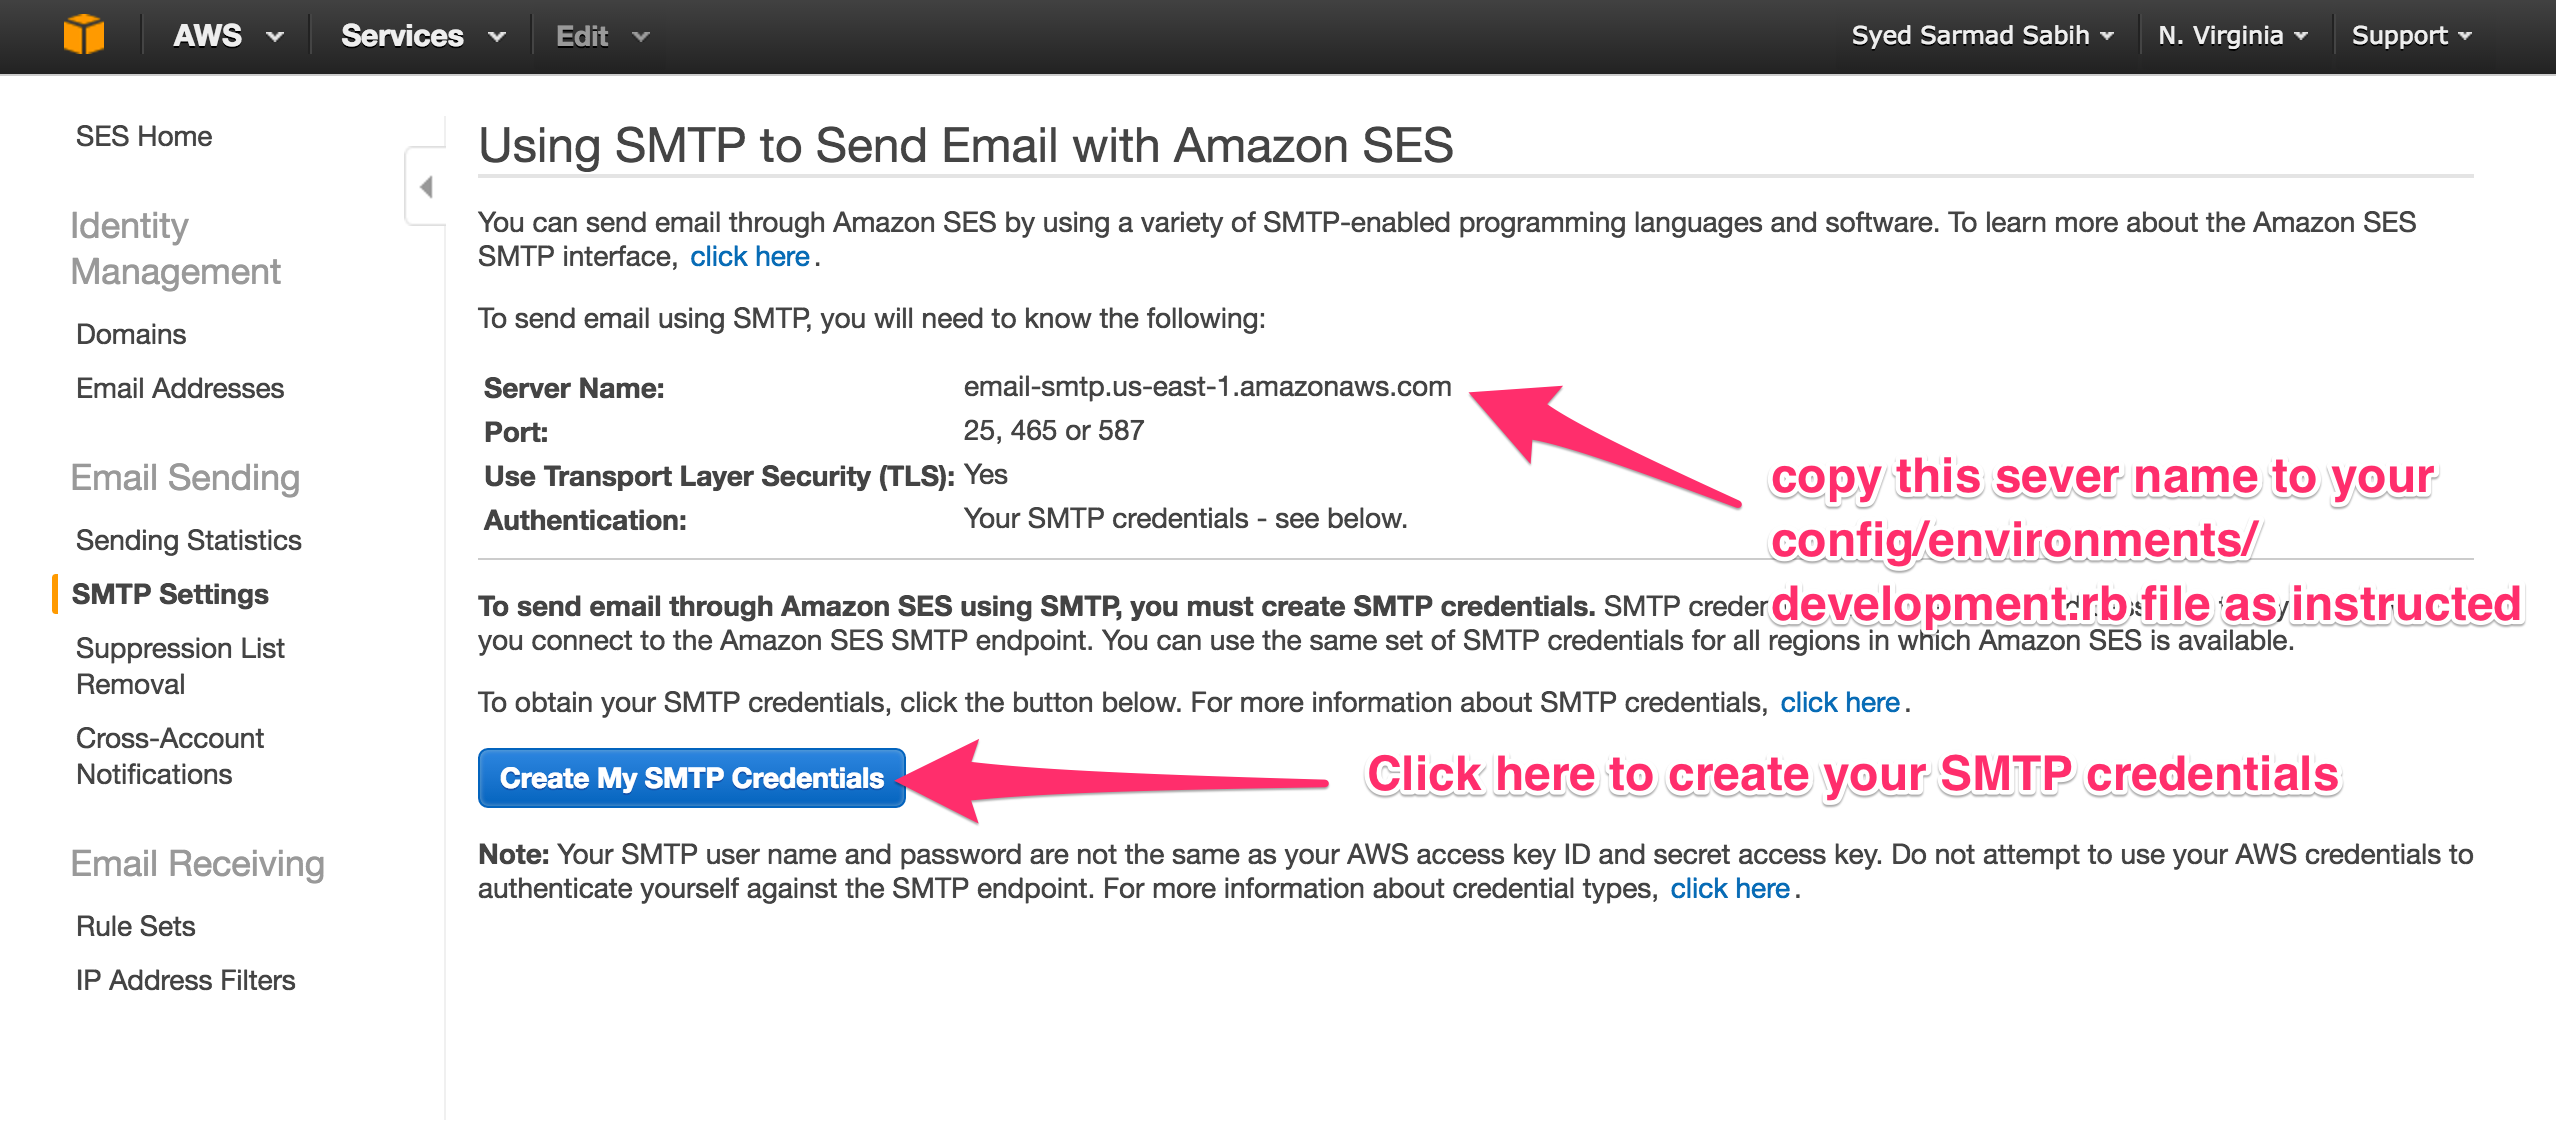
Copy the Server Name from there and put it in the action_mailer.smtp_settings block in config/environments/development.rb. Replace this line
:address => "<ses server name>",
with the Server Name you copied from the SMTP Settings page.
Now the action_mailer.smtp_settings block should look similar to this
config.action_mailer.smtp_settings = {
  :address => "email-smtp.us-east-1.amazonaws.com",
  :port => 587,
  :user_name => ENV["SES_SMTP_USERNAME"], #Your SMTP user
  :password => ENV["SES_SMTP_PASSWORD"], #Your SMTP password
  :authentication => :login,
  :enable_starttls_auto => true
}
Click on the “Create My SMTP Credentials” button shown in the picture above.
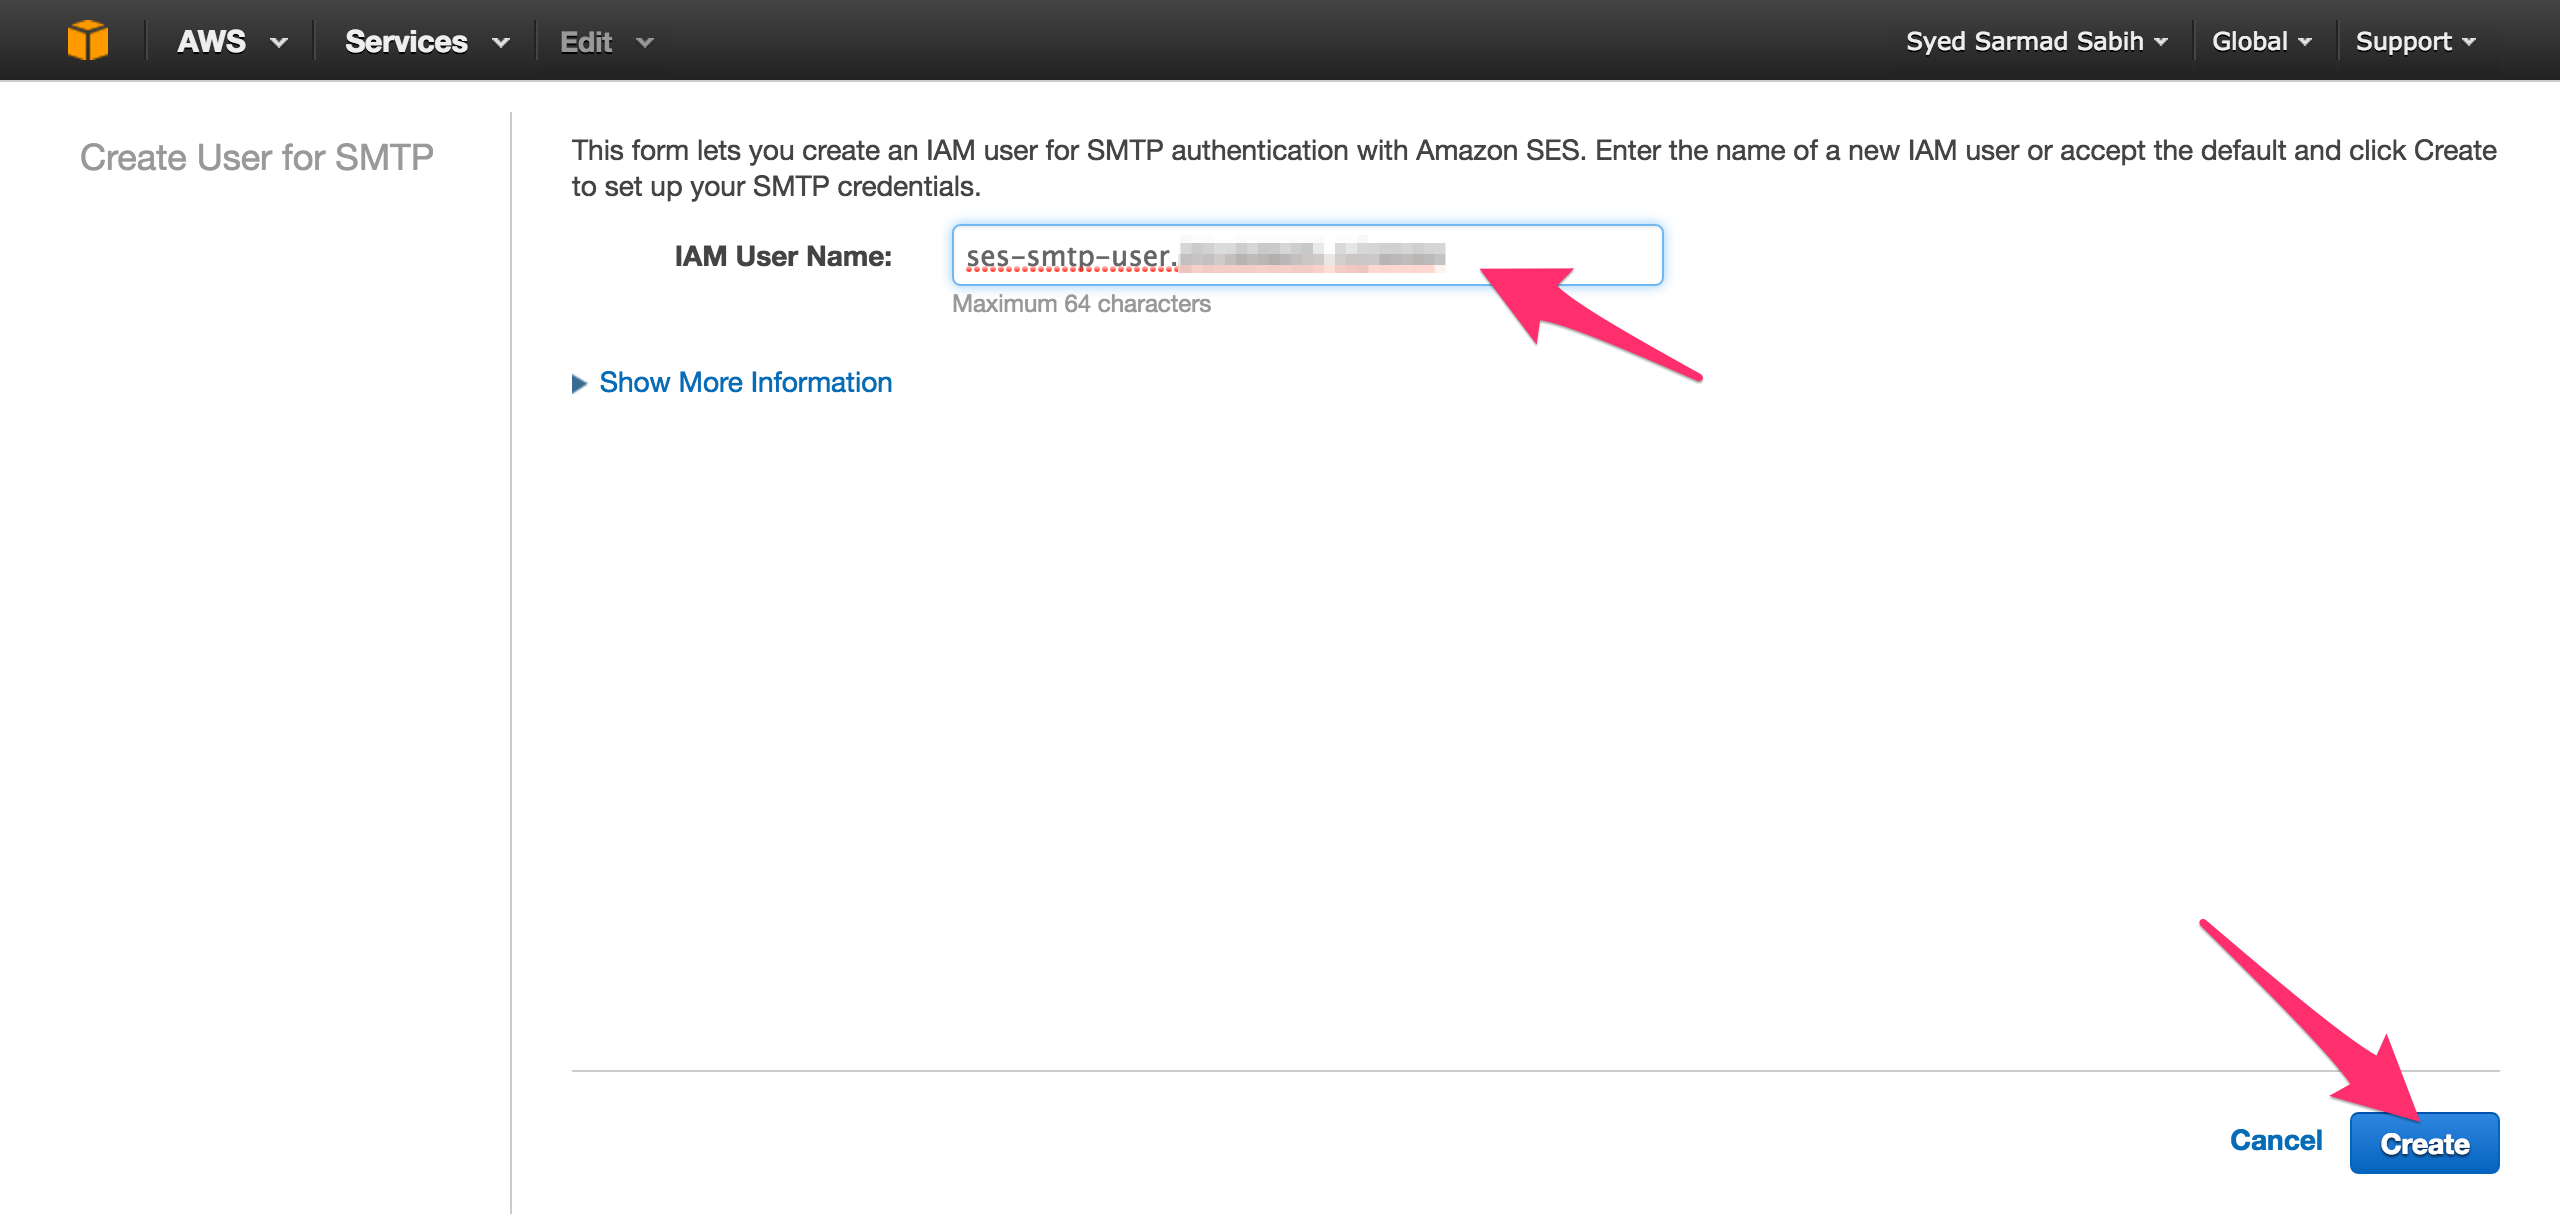
You can change this username if you want, but this default one will do the trick for now.
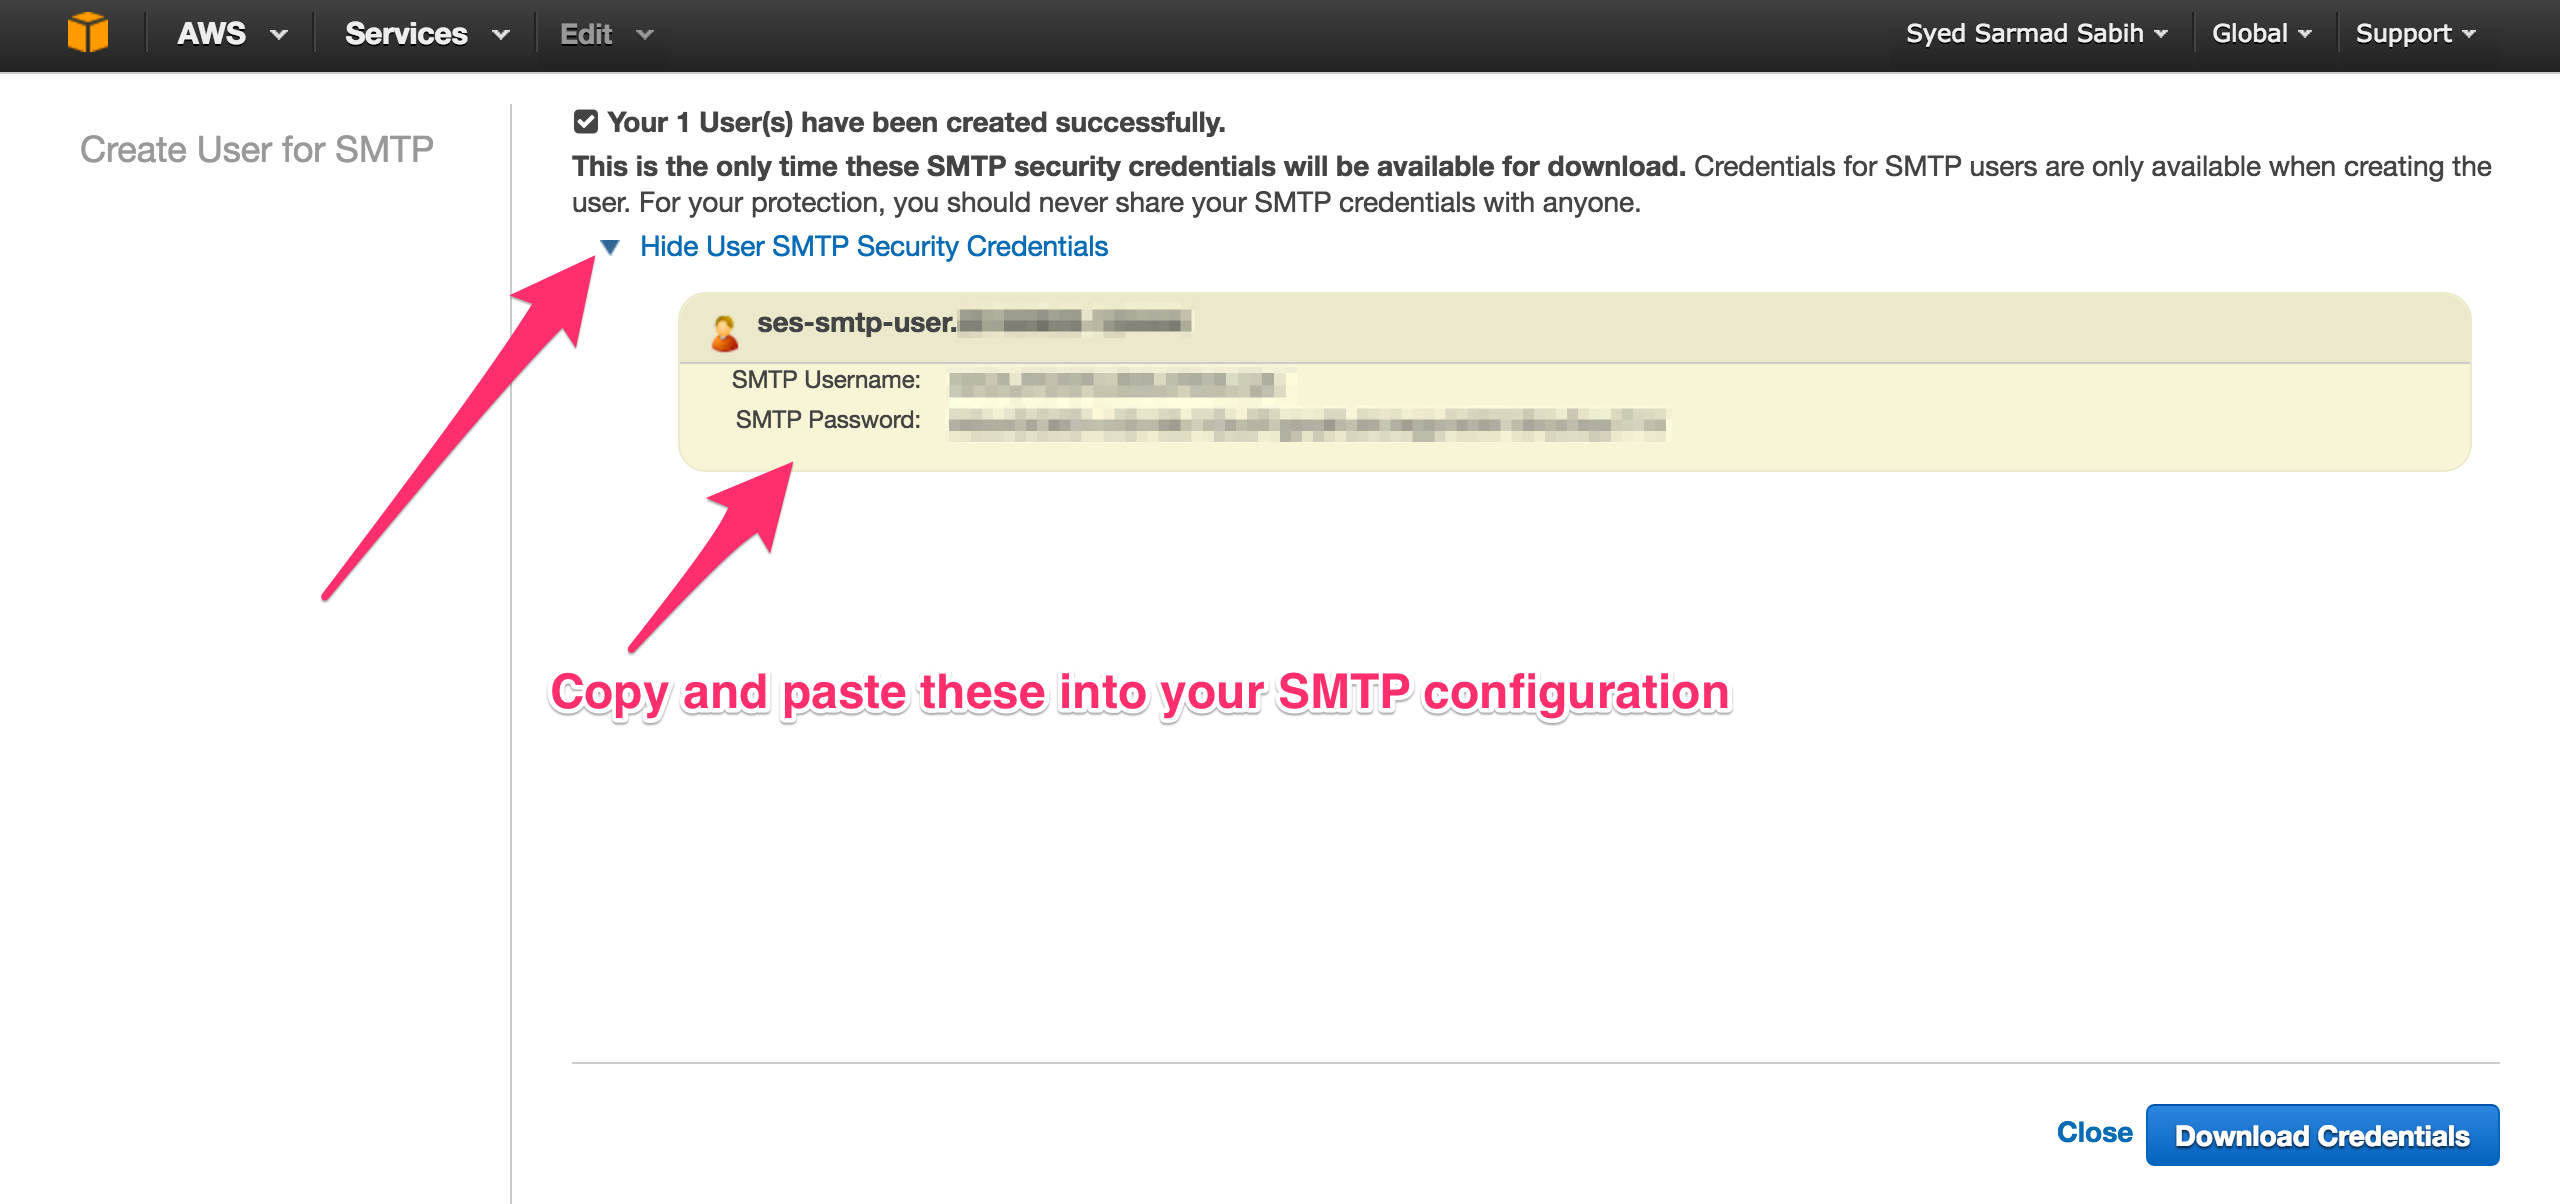
Copy these credentials and paste into your config/environments/development.rb or, better yet, export them in your environment:
ENV["SES_SMTP_USERNAME"] = "*****" # Replace with your SMTP username
ENV["SES_SMTP_PASSWORD"] = "*****" # Replace with your SMTP password
We are all set to send emails now.
Click Submit. You will see an email sent notice.

Let’s head over to the inbox to verify if the email was properly sent and received.
This sums up this post about setting up our Rails app to send emails with Amazon SES. With this setup and configuration, you can send 62,000 free emails if the app is deployed on Amazon EC2. However, there are some things you must keep a close eye on
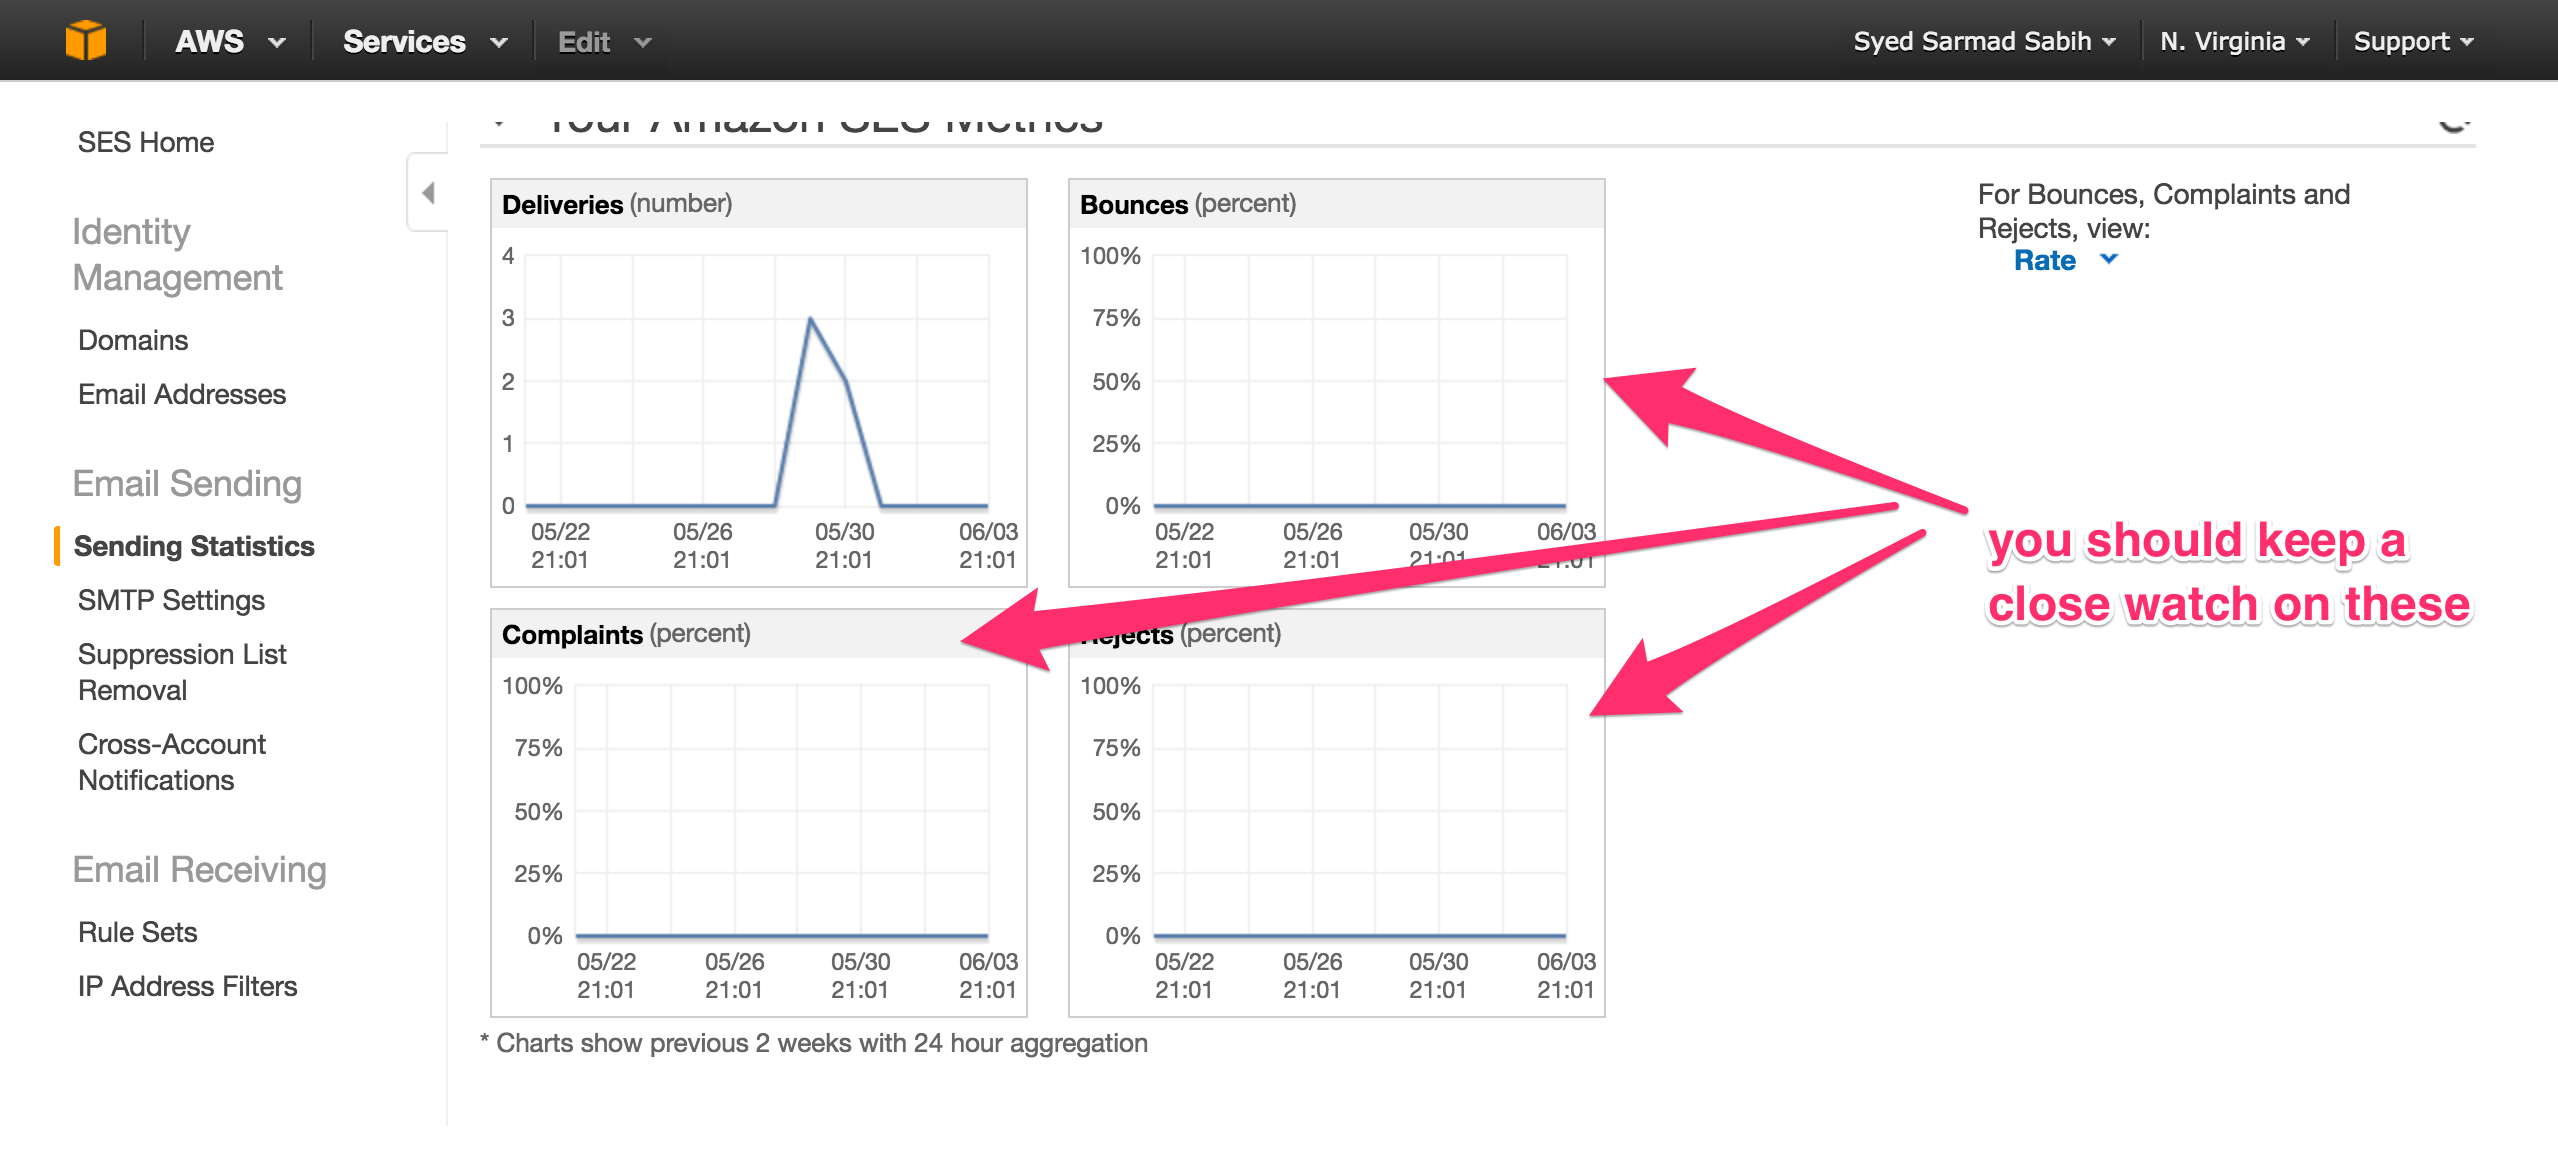
Your Amazon SES account can be blacklisted and blocked if you have a lot of Bounces, Complaints or Rejects. You can read more about it here.
As we discussed that we’re going to be sending emails from Amazon SES Sandbox for this post. You can request Amazon to move you out of the Sandbox from here

You can read more about that here.
Conclusion
Amazon SES is a great option out there to send easy and inexpensive emails. There are other services as well which might be a better fit than Amazon SES, in some cases, which I’ll hopefully cover in the future.
Frequently Asked Questions (FAQs) about Delivering Mail with Amazon SES and Rails
How do I set up Amazon SES with Rails?
Setting up Amazon SES with Rails involves a few steps. First, you need to sign up for an Amazon Web Services (AWS) account. Once you have an account, navigate to the SES section and verify your email address. After verification, you can create SMTP credentials which will be used in your Rails application. In your Rails application, you need to configure the ActionMailer to use Amazon SES as the delivery method. This can be done in the environment configuration file. You will need to provide the AWS SMTP server, username, password, and other necessary details.
What are the benefits of using Amazon SES with Rails?
Amazon SES provides a scalable and cost-effective email sending service which can be easily integrated with your Rails application. It offers high deliverability and reliability, ensuring your emails reach the intended recipients. It also provides detailed analytics about your email sending activities, helping you monitor and improve your email strategy.
Can I send emails in different formats with Amazon SES and Rails?
Yes, you can send emails in different formats including plain text, HTML, and multipart/alternative with Amazon SES and Rails. You can specify the format in your mailer class in Rails.
How can I handle bounce and complaint notifications with Amazon SES and Rails?
Amazon SES provides a feature called feedback notifications which can be used to handle bounce and complaint notifications. You can set up an SNS topic and subscribe your application to this topic. When a bounce or complaint occurs, Amazon SES will send a notification to this topic which can be processed by your Rails application.
How can I test my email sending functionality with Amazon SES and Rails?
You can use the Amazon SES sandbox environment to test your email sending functionality. In the sandbox environment, you can send emails to verified email addresses and domains without affecting your sending quota.
How can I monitor my email sending activities with Amazon SES and Rails?
Amazon SES provides detailed analytics about your email sending activities. You can view metrics such as delivery rate, bounce rate, complaint rate, and more in the Amazon SES console. You can also set up CloudWatch alarms to receive notifications when certain metrics exceed a specified threshold.
How can I increase my sending quota with Amazon SES and Rails?
You can request an increase in your sending quota by submitting a request to Amazon. The request should include details about your use case, the expected email volume, and other relevant information.
How can I handle email attachments with Amazon SES and Rails?
You can handle email attachments by using the attachments method in your mailer class in Rails. The attachments method allows you to add files to your emails.
How can I ensure high deliverability with Amazon SES and Rails?
Amazon SES provides several features to help ensure high deliverability. These include DKIM signing, SPF records, and a feedback loop for handling bounces and complaints. You should also follow best practices for email content and list management.
Can I use Amazon SES with Rails for transactional emails?
Yes, you can use Amazon SES with Rails for transactional emails. Transactional emails such as order confirmations, password resets, and account notifications can be easily sent using Amazon SES and Rails.

