Customizing WordPress Themes with Action Hooks

Key Takeaways
- WordPress action hooks offer an effective way for developers to customize and extend WordPress themes, allowing for unique designs and functionalities tailored to specific user needs.
- Essential action hooks built into almost all WordPress themes include wp_head, wp_footer, and comment_form. These hooks allow plugin developers to add scripts, styles, and necessary information or modify existing design elements.
- Custom action hooks can be developed and implemented to add new components or modify existing ones in the theme. Developers can also set the execution priority of these hooks to manage the precedence of actions.
- Proper documentation of the available action hooks in a theme is crucial for plugin developers. It should include details such as the positioning of the action hook in the template, preferred parameters, and types of design components preferred in given locations.
Your WordPress theme is one of the main core components that defines the look and feel of your website.
While WordPress theme development has become a popular and profitable business for some developers and designers, all developers working with WordPress should know how to customize – if not construct – a quality theme.
Professional premium themes in popular marketplaces contain dozens of in-built features and components to define the presentation and functionality of WordPress websites. Nevertheless, we need to be able to make the themes extendable and customizable, allowing their users to stand out from the rest and to meet specific needs.
WordPress action hooks provide an excellent way to extend WordPress themes. In this tutorial, we’re going to look at how we can effectively use these action hooks. Here I am assuming that you have some basic knowledge of using WordPress action hooks.
The Role of Action Hooks
Themes are built by designers of developers based on their imagination. You may think you have the capabilities to design the “perfect theme” with all the necessary features. But still there will be people who want your theme to have certain modifications to the design, before being willing to use it on their own websites.
Here is a screenshot of my favorite WordPress theme called Avada.
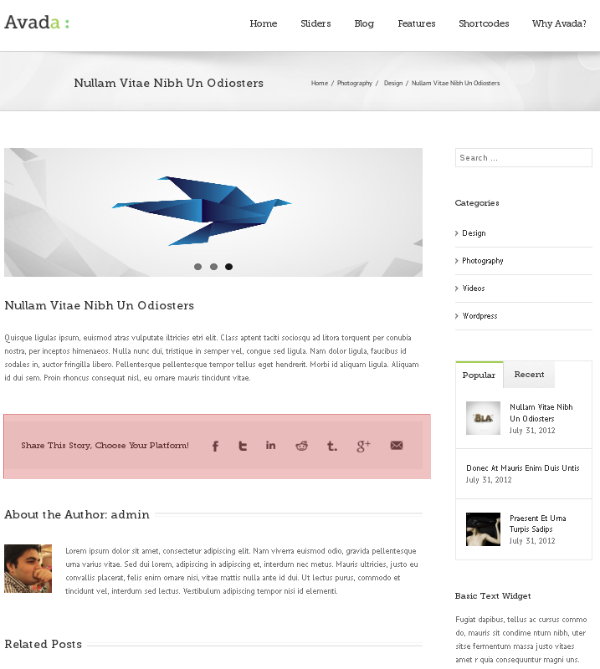
I like most things in the features and design, but I don’t like the social menu (highlighted). I’d prefer to use my own design for this section. Similarly, each user may have their own requirements.
No WordPress developer can satisfy everyone with any one theme design. But we can extend and adapt themes, so that anyone can have a unique design built with components on top of the basic design and features.
WordPress action hooks simplify this process. With action hooks, we can remove existing components or add new components as necessary. Anyone who is experienced in WordPress development can then easily customize the existing features by modifying the theme code or adding custom codes through plugins.
Essential Action Hooks
We have the choice of deciding whether to go with action hooks or not. There are three action hooks that are built into almost all WordPress themes. Any theme would be considerably limited without these hooks:
wp_head
Included in the head section of the theme for plugin developers to add their own scripts, styles and necessary information. Calling the wp_head function in your theme header, will call the do_action function inside the core code.
wp_footer
Included just before the closing body tag of the HTML document, for plugin developers to add scripts, styles and necessary display information. wp_footer works in a similar way to the wp_head function and calls the do_action function inside the core files.
comment_form
Used to modify the design and fields of existing comment form for posts and pages.
Developing Custom Action Hooks
Now it’s time to develop our own custom hooks specific to themes. The real power of hooks comes with this method as we can define any number of custom hooks anywhere in the theme.
First let’s consider the following code which creates a custom action hook for our themes.
function wpr_after_post_title() {

echo "<img src='promotion-image.jpg' />";

}

add_action('wpr_after_post_title','wpr_after_post_title');
These days, many websites offering a product or services have a blog or articles section to attract readers and market their products. So they produce articles about information related to the product. The goal is to market the products through the blog. Often, we see advertisements or promotion placed just after the post title. In such scenarios we can use the preceding code to implement the feature.
add_action function takes a custom action name and function name unique to the application. Then we can add the do_action in the theme after the title of the post to display the promotion banner as shown in the following code.
<h2><a href="<?php the_permalink(); ?>"><?php the_title(); ?></a></h2>

<?php do_action('wpr_after_post_title'); ?>
Having action hooks in important positions like this allows plugin developers to quickly add custom features without digging into the core theme code.
Multiple Execution of Single Action Hooks
Once you define custom action hooks and make it public, any developer can implement them using various plugins. In situations where two or more developers implement the same hook in their plugins, precedence of the actions becomes a concern.
Consider the following code where two plugins implement the same action.
<?php

function wpr1_after_post_title() {

// Plugin 1

}

add_action('wpr_after_post_title','wpr1_after_post_title');

function wpr2_after_post_title() {

// Plugin 2

}

add_action('wpr_after_post_title','wpr2_after_post_title');

?>
In this scenario, which action executes first depends on the plugin name and how the plugin is positioned in the active_plugins field in wp_options table. Let’s say we want to display the output of Plugin 2 before the output of Plugin 1. We won’t be able to get it work with the above technique since Plugin 1 is located first in the active_plugins field.
The priority parameter of action hooks becomes useful at this point. We can pass a numeric value as a third parameter to define the execution priority of the action hooks. Let’s consider the preceding example with priority values.
function wpr1_after_post_title() {

// Plugin 1

}

add_action('wpr_after_post_title','wpr1_after_post_title',50);

function wpr2_after_post_title() {

// Plugin 2

}

add_action('wpr_after_post_title','wpr2_after_post_title',40);
Now you will be able to see the execution of Plugin 2 function before the Plugin 1 function based on the priority level given. As value gets higher, priority will get lower and hence will execute further down the page.
So it’s better to define your action hooks with priority values so that precedence of other actions can be adjusted according to the required positioning.
How to Add Pluggable Action Hooks to Themes?
WordPress action hooks implementation consists of two parts. First we define an action hook using add_action function. Then we execute the action hook using do_action. As theme developers, your responsibility is to execute action hook when necessary. Defining and implementing the action needs to be done by plugin developers. So whenever you want to use an action hook, just place the following code in necessary locations.
<?php do_action("action hook name"); ?>
Proving action hooks makes it easy for plugin developers to add new sections and content for the theme layout. But what if someone wants to change existing section?
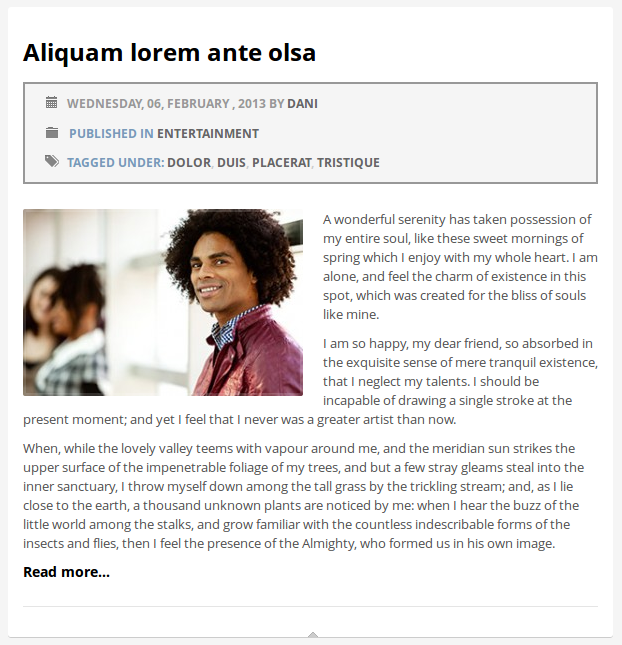
Consider the following layout.

This screen shows the blog post design of a WordPress theme. You can see the post date and author under the title. Also the category and tags are placed at the end. Let’s say you don’t like the design of these components and want to design your own.
If those sections are directly inserted into the theme, it’s difficult for plugin developers to change the design without modifying the core theme code. Let’s see how we can provide a solution with action hooks.
<?php

// Post title code

do_action("post_date_and_author");

// Post content

do_action("post_category");

do_action("post_tags");

?>
All the sections are defined as action hooks instead of directly embedding into HTML document. The following code implements the post_date_and_author action inside the theme functions file.
<?php

function post_date_and_author(){

echo "Date area related HTML code";

}

add_action('post_date_and_author','post_date_and_author');

?>
Now you have can replace existing design components as well as add new components to the theme. Following is the implementation for the preceding scenario inside a custom plugin.
<?php

function wpr_post_date_and_author(){

echo "New design for date section by the plugin";

}

add_action('post_date_and_author','wpr_post_date_and_author');

function wpr_remove_custom_actions() {

remove_action('post_date_and_author','post_date_and_author');

}

add_action('init','wpr_remove_custom_actions');

?>
Here, the developer has provided their own design for the date and author section. The original post_date_and_author hook defined by the theme will be removed on init action.
Important: To remove a hook, the $function_to_remove and $priority arguments must match when the hook was added. This goes for both filters and actions. No warning will be given on removal failure. – WordPress Codex
Then we add the same action with plugin specific functions to modify the date section design.
The following screen previews how the previous layout can be changed to provide a different design.
Documenting Pluggable Action Hooks
You can add any number of action hooks add features to make your theme highly customizable. Plugin developers are not aware of the available theme hooks, unless they explore the source codes to find them. Therefore it’s ideal to document the available action hooks of your theme.
One way of using action hooks is to add scripts, styles and similar contents which work internally without displaying anything on the browser. Another way is to directly modify the page layout to add design components or remove existing components.
If you do go with action hooks, your documentation needs to include the details such as the positioning of the action hook in the template, preferred parameters, dimensions of the content and types of design components preferred in the given locations.
It’s up to you to decide the places to apply action hooks in your themes. I would use action hooks in the following sections:
- After the main menu
- After the post or page content
- Before and after the post title
- Before footer section
- Before and after sidebar widgets
Now it’s time to help each other by sharing our experiences. Feel free to add your suggestions on action hooks and how you use them effectively in your WordPress themes.
Looking forward to hearing from you.
Frequently Asked Questions (FAQs) about Customizing WordPress Themes with Action Hooks
What are the basic types of hooks in WordPress?
In WordPress, there are two basic types of hooks: Action Hooks and Filter Hooks. Action Hooks allow you to insert custom code at various points (wherever the hook is run). Filter Hooks, on the other hand, allow you to manipulate and return a variable which it passes (for instance, a product price). Understanding these hooks is crucial to customizing WordPress themes effectively.
How can I add an action hook in WordPress?
To add an action hook, you need to use the WordPress function add_action(). This function requires two parameters: the name of the action hook and the name of the function you wish to be called. For example, add_action(‘wp_footer’, ‘your_function_name’);. This code will execute your function when the ‘wp_footer’ action hook is called.
How can I remove an action hook in WordPress?
To remove an action hook in WordPress, you can use the remove_action() function. This function also requires two parameters: the name of the action hook and the name of the function to be removed. For instance, remove_action(‘wp_footer’, ‘your_function_name’); will remove your function from the ‘wp_footer’ action hook.
Can I create my own custom hooks in WordPress?
Yes, you can create your own custom hooks. To create a custom action hook, you can use the do_action() function. For example, do_action(‘your_custom_hook’);. To create a custom filter hook, you can use the apply_filters() function. For instance, $output = apply_filters(‘your_custom_hook’, $output);.
What is the difference between add_action() and add_filter()?
The add_action() function is used to attach a function to a specific action hook. This allows you to insert custom code at the point where the hook is run. On the other hand, the add_filter() function is used to attach a function to a specific filter hook. This allows you to manipulate and return a variable which it passes.
How can I find available hooks in a WordPress theme?
To find available hooks in a WordPress theme, you can use a plugin like “Simply Show Hooks”. This plugin will show all the available action hooks and filter hooks in your current theme.
Can I use hooks in WordPress plugins?
Yes, you can use hooks in WordPress plugins. In fact, hooks are a fundamental part of WordPress plugin development. They allow you to insert custom code at specific points in the WordPress execution process, without modifying core files.
How can I prioritize my functions on a hook?
You can prioritize your functions on a hook by adding a priority parameter to the add_action() or add_filter() function. This parameter is an integer, and functions with a lower number will run first. For example, add_action(‘wp_footer’, ‘your_function_name’, 10);.
Can I use hooks to change the layout of my WordPress theme?
Yes, you can use hooks to change the layout of your WordPress theme. By using action hooks, you can insert custom code at specific points in your theme. This allows you to add, remove, or rearrange elements of your theme without modifying the theme’s core files.
What is the best way to learn about WordPress hooks?
The best way to learn about WordPress hooks is by practicing. Start by understanding the basic concepts, then try to use hooks in your own WordPress theme or plugin. You can also refer to the WordPress Codex and developer resources for more detailed information.
Rakhitha Nimesh is a software engineer and writer from Sri Lanka. He likes to develop applications and write on latest technologies. He is available for freelance writing and WordPress development. You can read his latest book on Building Impressive Presentations with Impress.js. He is a regular contributor to 1stWebDesigner, Tuts+ network and SitePoint network. Make sure to follow him on Google+.