
Key Takeaways
- The libGDX framework is a powerful tool for developing cross-platform applications and games, with a unified API that allows seamless compilation to multiple platforms. To begin, download and install the Community version of IntelliJ, the Android SDK, and the libGDX Setup App.
- Setting up libGDX involves filling out the required forms to generate a new project, specifying which platforms to compile and which libraries to include. The settings can always be changed later. The tutorial focuses on developing applications for Desktop and Android, with an emphasis on avoiding the use of emulators as much as possible.
- To deploy an application to Android, a ‘Signed APK’ needs to be created. This involves entering details such as the key store path, password, alias, and certificate. It’s important to keep this information private as it is your personal APK signature. After generating the signed APK, it can be copied and launched from an Android phone.
Setup LibGDX with IntelliJ
This tutorial will show how to set up and run libGDX applications using IntelliJ for desktop and Android applications. libGDX is a Java application development framework with a unified API that allows the user to seamlessly compile to multiple platforms.
I will be using the library with IntelliJ, a powerful Java IDE to help manage the project throughout it’s development.
Download and install the Community version of IntelliJ
Next, Install the Android SDK.
Finally, download and run the libGDX Setup App
Setting up LibGDX
In the libGDX Setup App, fill out the required forms for generating a new libGDX project. Leave everything at their default values except for the destination and Android SDK paths.
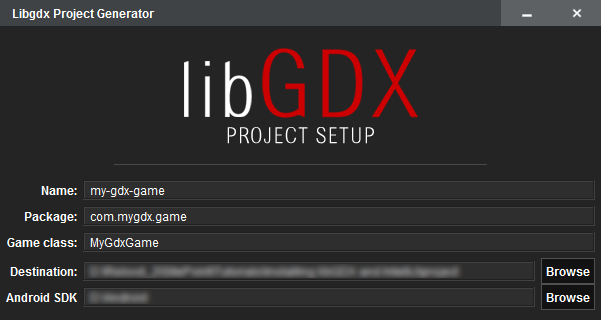
Under the Sub Projects and Extensions tabs are where you specify which platforms to compile and which libraries to include in the project.
These settings are not permanent and you will always have the option to change them.
NOTE: This tutorial is aimed at developing applications for Desktop and Android. Compiling to Desktop allows for fast prototyping and I want to avoid using any emulators as much as possible. There’s always the option of compiling straight to an android device, but it will be slower than compiling to desktop.
Under Extensions, there are a plethora available for use. Hovering over each extension’s check box will show a tool-tip giving a description of that extension. Only select the extensions used by the application. Otherwise they will unnecessarily increase the file size of the application.

Most applications (especially games) will use:
- Freetype for text and fonts.
- Tools for efficient texture packing
- Box2d for physics.
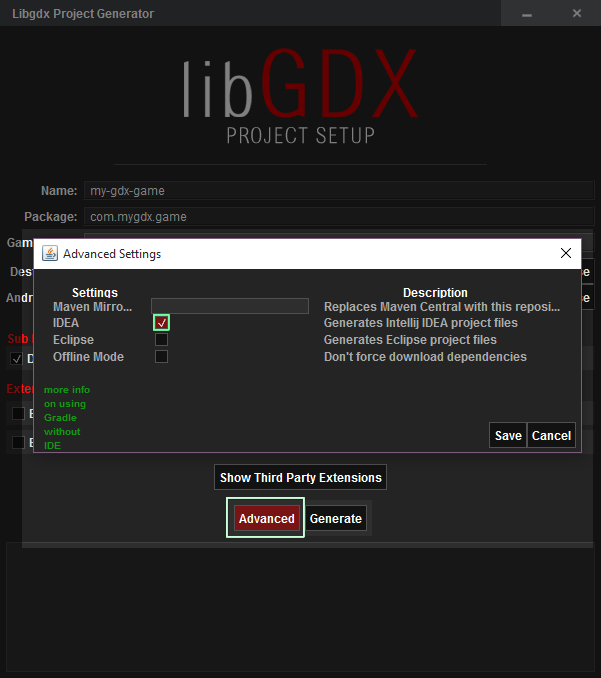
The last step before generating the project is to click the Advanced button and make sure IDEA is selected. Click Save and then Generate. Because libGDX uses Gradle to manage all dependencies, the setup application will download all required dependencies for this project. Once everything downloads, you can open the project with IntelliJ.
Setting up IntelliJ
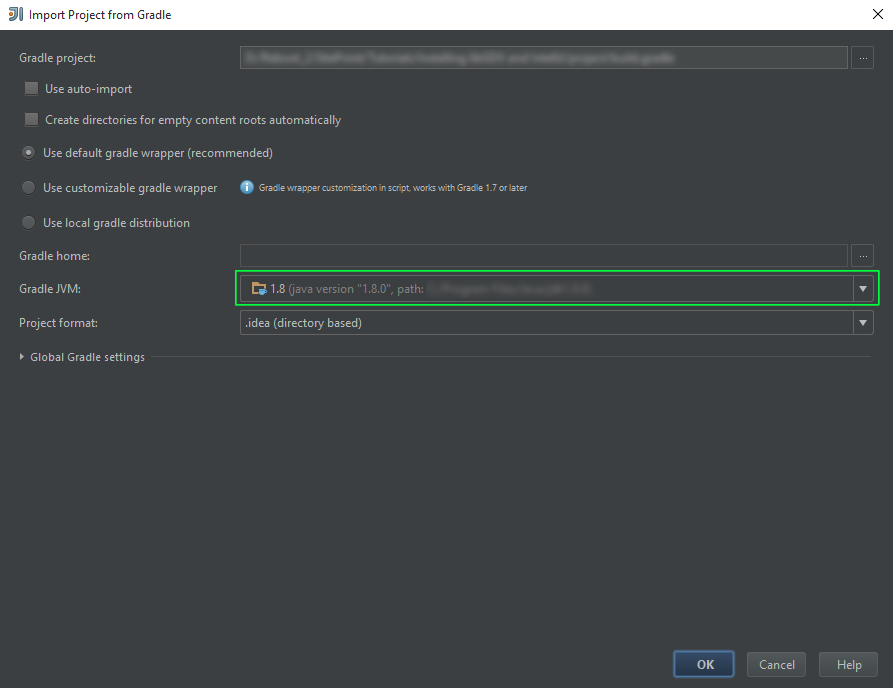
Open the generated IntelliJ project file and when prompted to link Gradle do so. In the Import Project from Gradle window, set the path to the JVM and when prompted Open exisiting project.
There are a more steps needed before the application can run.
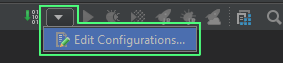
In the upper right corner of the screen, click the drop down arrow and select Edit Configurations…
A new Run/Debug Configurations window will appear. In the upper left corner of the screen, select the green + symbol, and in the Add New Configuration popup select Application.

You now have a new configuration which will handle how the file will compile for Desktop.
Now, There’s three adjustments you need to make.
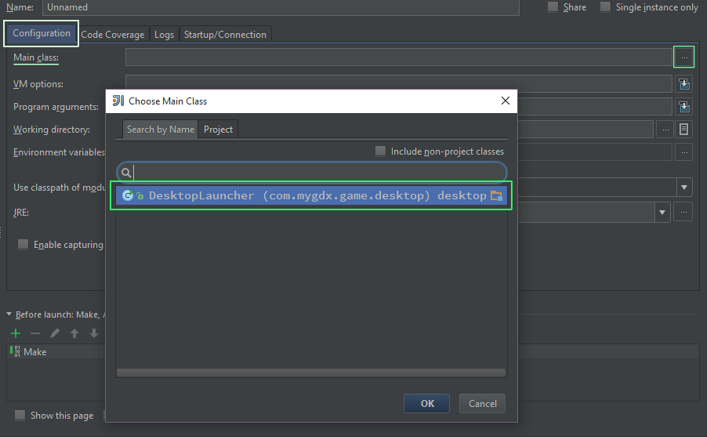
Make sure the Configuration tab is selected and under Main class click the three ellipses. A new window will appear, click Choose Main Class, select DesktopLauncher and click OK.
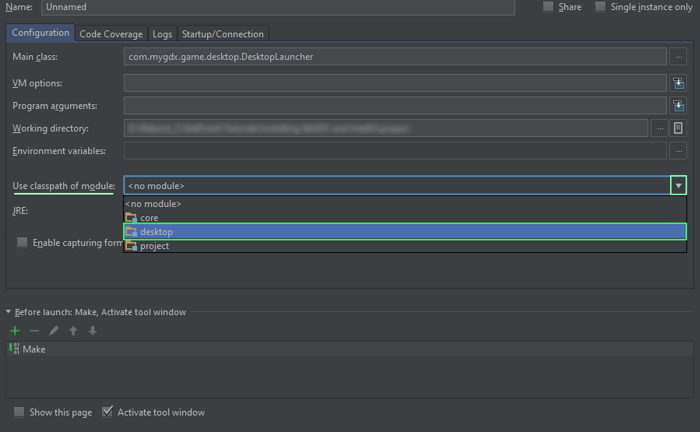
Under Use classpath of module, click the drop down arrow and select desktop.
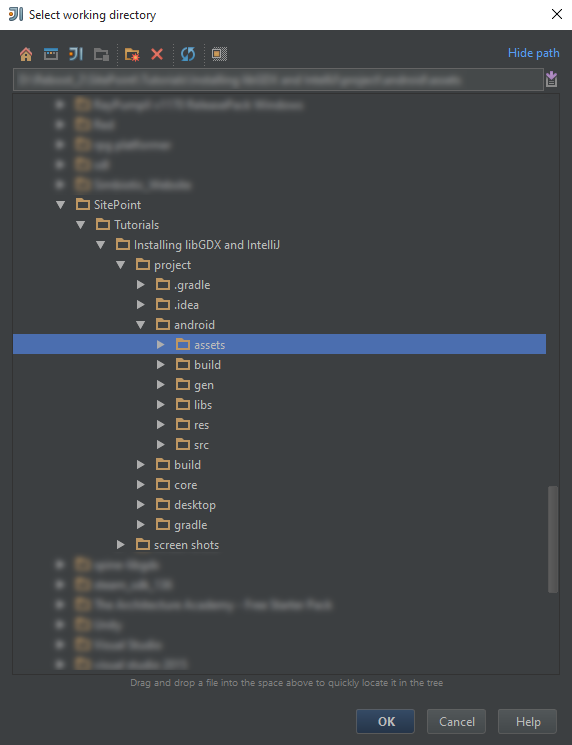
Next set the Working Directory to store al all assets of a project, such as textures, audio, JSON files, etc.
Under Working directory click the three ellipses, select the project/android/assets folder, and click OK.
Everything is now setup in Run/Debug Configurations, so click Apply and then OK. The application can now be run by clicking the green Play button.

You are now ready to get started with developing applications with libGDX!
Deploy Application to Android
To deploy an application to Android, you need create a ‘Signed APK’. Open the Build -> Generate Signed APK… menu item and a new Generate Signed APK window will appear.
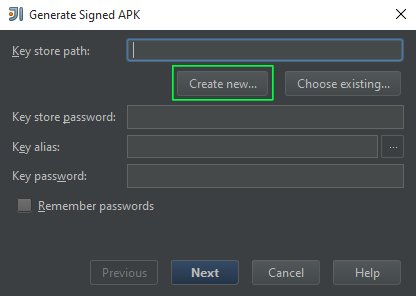
If you have never created a signed APK before, then you will need to add some details.
- Key store path: Path to key store location.
- Password: Password for key store.
- Alias: Alias of key.
- Password: Password for key.
- Validity: For how many years is the key valid.
- Certificate: Enter any values as needed.
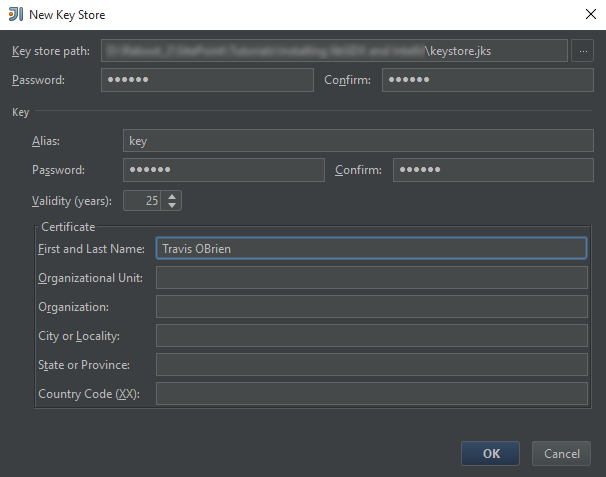
NOTE: This information should be kept private as this is your personal APK signature. Don’t forget the details or where you save the key.
After clicking OK, You will be back to Generate Signed APK and can select the type.
IMPORTANT: When deploying a final release of an application, make sure to select build. Releasing an application signed with debug may cause unnecessary performance penalties.
After generating the signed APK, copy it to and launch it from an Android phone.
NOTE: You may need to enable access to unknown APK files.
Debugging an APK File
Instead of generating an APK file and sending it to an Android phone, you can run the application directly from IntelliJ and have it run on you phone.
Create a new Run/Debug Configuration setup and set Module to the project’s android module. Now you can launch the application on an Android device or in the emulator.
<32 id=”swappingbetweendesktopandandroidfordebugging”>Swapping between Desktop and Android for Debugging
Now you have two Run/Debug Configuration options, each is ready to target their specific platform. Switch between the two setups to choose which platform to run the application from.
Conclusion
libGDX is a powerful tool for developing cross-platform applications and games. In this tutorial I showed you how to setup an IDE to get started developing with the framework and in the next installment I’ll get stuck into some actual coding.
In the meantime, any questions or comments, let me know below.
Frequently Asked Questions about Cross-Platform Games and Applications with LibGDX Setup
What is LibGDX and why should I use it for my game development?
LibGDX is a free and open-source game development framework that allows developers to write their code once and deploy it to multiple platforms, including Windows, Linux, Mac OS X, Android, iOS, and web browsers. It provides a unified API that works across all these platforms, which means you don’t have to worry about platform-specific code. This can save you a significant amount of time and effort. Moreover, LibGDX is highly flexible and allows you to use any programming language that compiles to Java bytecode.
How do I set up LibGDX for my game development project?
Setting up LibGDX for your game development project involves several steps. First, you need to download and install the Java Development Kit (JDK). Next, you need to download the LibGDX setup app, which will generate a project with all the necessary files and directories for your game. You can then import this project into your preferred Integrated Development Environment (IDE), such as Eclipse, IntelliJ IDEA, or Android Studio.
What are the main features of LibGDX?
LibGDX offers a wide range of features that make it a powerful tool for game development. These include a unified API for all supported platforms, a flexible and efficient scene graph API for managing complex scenes, a robust and customizable input handling system, support for 2D and 3D graphics, audio and video playback, and a physics engine. It also provides tools for texture packing, font generation, and building and deploying your games.
Can I use LibGDX to develop 3D games?
Yes, you can use LibGDX to develop 3D games. It provides a 3D API that supports loading, manipulating, and rendering 3D models. It also includes a physics engine that supports collision detection, rigid body dynamics, and soft body dynamics. However, keep in mind that while LibGDX is capable of 3D game development, it’s primarily designed for 2D games, and its 3D capabilities may not be as extensive or as high-performance as those of dedicated 3D game engines.
How do I handle input in a LibGDX game?
LibGDX provides a robust and customizable input handling system. You can handle input events such as key presses, mouse clicks, and touch events by implementing the InputProcessor interface and registering your implementation with the Input class. You can also use the GestureDetector class to handle complex gestures such as flings, pinches, and long presses.
How do I deploy my LibGDX game to different platforms?
LibGDX makes it easy to deploy your game to multiple platforms. Once you’ve written your game code, you can use the Gradle build system to build and package your game for each platform. For example, to build an Android APK, you would run the ‘gradlew android:assembleRelease’ command in your project directory. To build a desktop application, you would run the ‘gradlew desktop:dist’ command.
Can I use other programming languages with LibGDX?
Yes, you can use any programming language that compiles to Java bytecode with LibGDX. This includes languages such as Kotlin, Scala, and Groovy. However, keep in mind that the LibGDX API is designed with Java in mind, and using other languages may require additional setup or may not be as straightforward.
What kind of games can I create with LibGDX?
You can create a wide variety of games with LibGDX, from simple 2D games to complex 3D games. It’s particularly well-suited for 2D games, with features such as a flexible and efficient scene graph API, support for sprite sheets and animations, and a physics engine. However, it also includes a 3D API and a physics engine for 3D games.
How do I debug my LibGDX game?
You can debug your LibGDX game using the debugging tools provided by your IDE. For example, if you’re using Eclipse, you can use the Eclipse debugger to set breakpoints, step through your code, inspect variables, and so on. LibGDX also provides a logging API that you can use to log messages, which can be helpful for tracking down bugs.
Can I monetize my LibGDX game?
Yes, you can monetize your LibGDX game in several ways. You can sell your game on various app stores, such as the Google Play Store or the Apple App Store. You can also include in-app purchases or ads in your game. LibGDX provides APIs for integrating with ad networks and in-app purchase systems.