

Brushes are one of the fundamental features in Photoshop. With brushes, you can blend masks, create effects, add textures, and create lighting. There are thousands of brushes available online that you can download for your projects, but sometimes it can take hours to find the right brushes to get the specific look that you want. It can save you a lot of time if you just create your own brushes. You can use literally anything to create a custom brush. You just have to know how to convert your images or objects into the right format to define them as brushes.
Keep in mind that if you are going to create custom brushes, it’s a good idea to use large or high resolution images. Just like a photo, it’s okay to go from a large brush to a small brush, but if you create a brush from a low resolution image, it will look bad when used in large applications.
Key Takeaways
- Brushes are a fundamental feature in Photoshop which can be used to blend masks, create effects, add textures, and create lighting. Creating your own custom brushes can save time and allow for more personalized effects.
- To create a custom brush, start with a high-resolution image. Convert it to grayscale, invert it, and increase contrast. After removing unwanted elements and selecting the desired brush content, define the brush and name it.
- Once a custom brush is created, it can be saved for later use or shared online. This can be done through the brush preset panel, where brushes can also be organized into sets.
- Custom brushes can be modified and combined for unique effects. The Brush Panel allows for adjustments such as size, orientation, scattering, textures, and color. Experimenting with these settings can result in a wide variety of unique brushes.
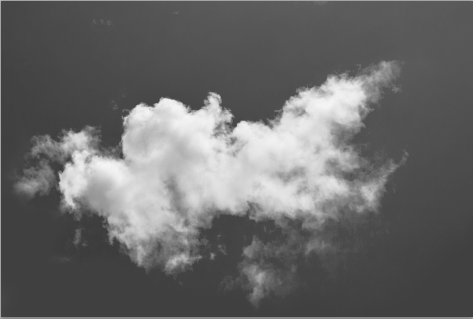
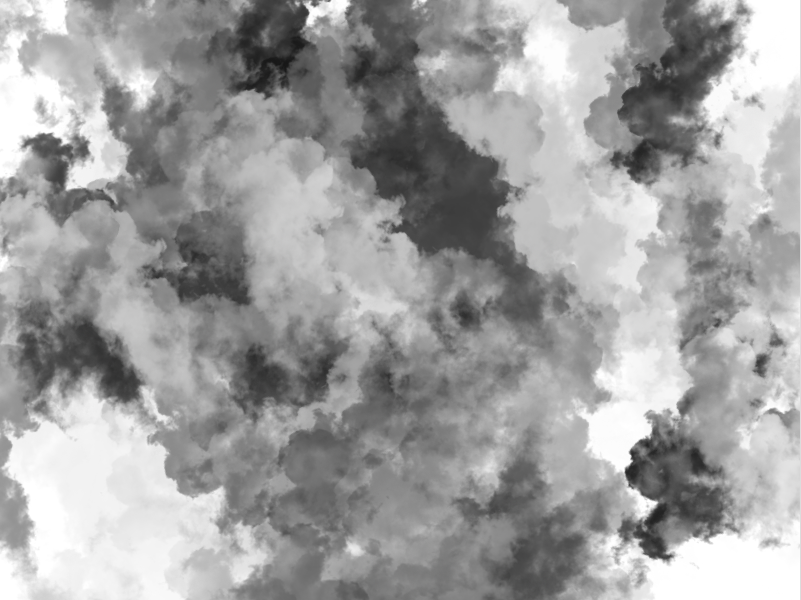
Step 1: Find the Image
For this example, I found a cloud image to use. The best kind of image to use for custom brushes are ones that don’t bleed off of the edge. This way, if you end up using the cloud brush in the middle of your design, it will look natural without any sharp edges.

Step 2: Eliminate Color Information
Go to Image > Adjustments > Desaturate to turn your image into a grayscale image. This will allow you to keep the highlights and shadows in your image, allowing your brush to look more natural.

Step 3: Invert Your Image
When you are defining a brush, anything that is pure white won’t be included, and anything black or gray will show up as part of your brush. Hit the command/ctrl key + “I” to invert your image, so that the black areas will be white and the white areas of the cloud will be black.
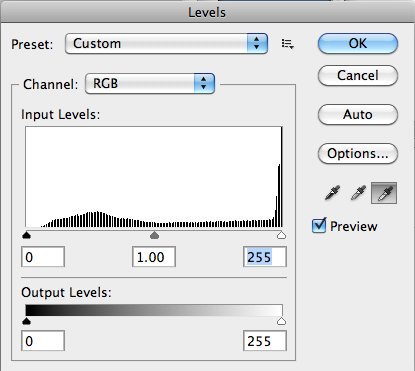
Step 4: Increase Contrast
The background isn’t a perfectly pure white, so open up your levels adjustment by hitting the command/ctrl key + “L” to bring up your levels dialog box.

Step 5: Make Your Background Pure White
Choose the white eyedropper on the right side. This allows you to set what should be the whitest point in your image.

Step 6: Make Your Image Stand Out
Click the darkest area within the light background in your inverted image (Not the cloud!), and click “OK.”
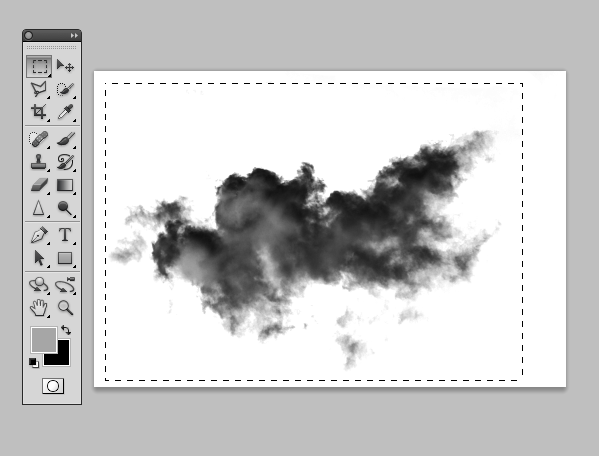
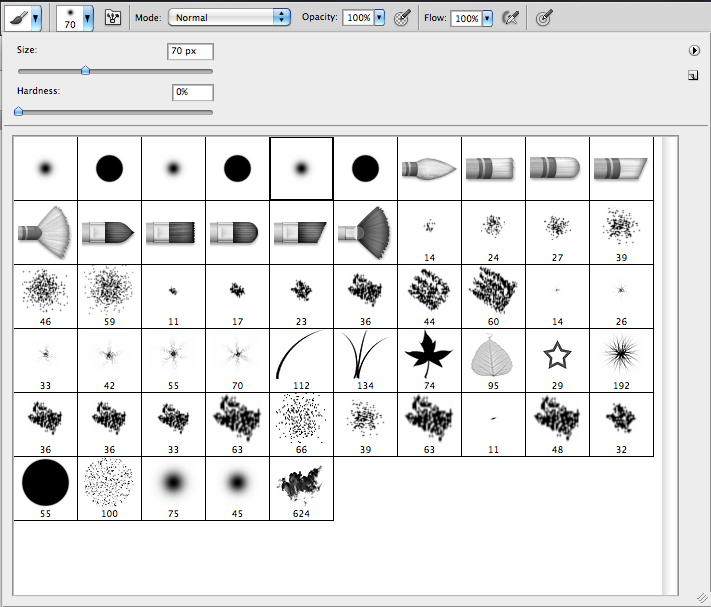
Step 7: Get Rid Of Stray Marks and Anything You Don’t Want
Before we define the black areas as our custom brush, we may need to clean up our image. Choose the brush tool, select a simple soft-edge brush, and use white as your foreground color. With your brush, paint white on all of the areas that you don’t want to show up in your brush. The main point of this step is to remove stray marks or unwanted spots that you don’t want in your brush.
Step 8: Select Your Brush Content
Select your marquee tool and make a selection around the dark cloud that you have created.
Step 9: Define Your Brush
Go to Edit > Define Brush Preset.

Step 10: Name Your Brush
A dialog box will pop up. Name your custom brush. A good rule of thumb is to name your brush something memorable and descriptive. Notice the preview box on the left side that shows a preview image of your brush and its size in pixels.

Step 11: View Your Brush Thumbnail
Choose the brush tool again, and go up to the brush selection toolbar at the top of the screen. You should see your custom brush at the bottom of the list.
Step 12: Choose Your Foreground Color
Create a new document. I created a document that is 800px wide by 600px tall. Choose a medium blue for your foreground color. I chose #3883ff.

Step 13: Choose Your Background Color
Choose a slightly darker color for your background color. I chose #354ac7.

Step 14: Select Your Gradient Type
Click on the gradient tool, and choose the foreground to background gradient.

Step 15: Draw Your Gradient
Drag a gradient from the bottom of the canvas to the top of the canvas. This will create a gradient that goes from the lighter blue at the bottom to the darker blue at the top.

Step 16: Testing Your Custom Brush
Choose white as your Foreground Color, and create a new layer. Click once where you want your cloud to be, and you will see your cloud, complete with highlights and shadows.

Step 17: Saving Your Custom Brush
If you want to save your own custom brush set, either for later use or to share on the internet, you can accomplish this within the brush preset panel.
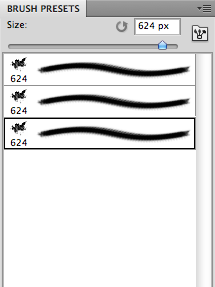
Step 18: View Your Brush Presets
Go to Window > Brush Presets to make this panel appear.
Step 19: Use Your Preset Manager to Create a Brush Set
Then, click the fly-out menu choose Preset Manager. A new dialog box will come up.

Step 20: Select Which Brushes Will Go In Your Set
If you have created a new collection of several custom brushes, hold shift and select all of the brushes that you want to include in the set, and choose Save Set.

Step 21: Save Your Set
Choose a Folder to save your new set in and click Save. If you are going to use this set yourself, point to Photoshop’s Brushes folder within the Presets folder of Photoshop’s application folder. This will make the brushes easy for you to find next time.
Step 22: Varying Your Brushes
One advantage to using your own custom brushes is that you can also alter them using the Brush Panel. With this panel, you can drastically change how your brushes behave. The first setting, Shape Dynamics, allows you to play with how large or small the brush is, and whether or not it varies in size while you are painting with it. I changed the size jitter and the angle jitter, which allows the brush to change size and orientation while you are painting with it. Just from changing those settings, I was able to create a smoky cloud with one small circular motion.

Here’s the smoky cloud that I made with my brush variation:

Step 23: Scattering your Brushes
Scattering allows you to set your brush to randomly scatter your brush shape as you are painting. You can decide on the amount of scattering, whether your brush scatters on both the horizontal and vertical axes, if the count increases or decreases, and if it jitters in its count.
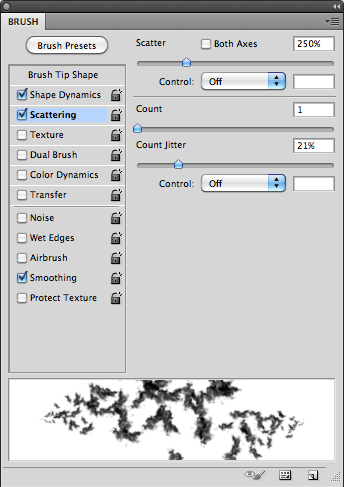
Here are the results from painting one continuous stroke with these settings:

Step 24: Adding Textures For Realistic Effects
The next setting, texture, can really create some amazing results. Since you can download your own textures and patterns, the possibilities are endless. You can also chose various blend modes, just like in the layers panel, which allow you to overlay the textures on your brushes. You can choose the scale of the texture, as well as its depth.
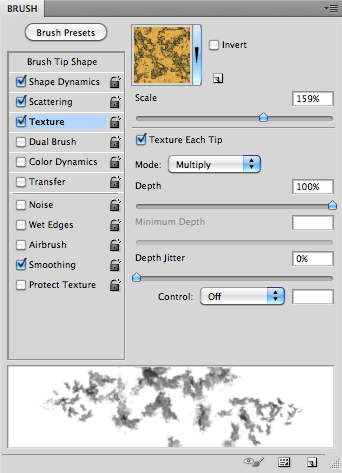
I chose the multiply blend mode with this texture, and the result looks like marble.

Step 25: Combining Your Brushes
The next step is an interesting one, because it takes your custom brush and combines it with another active brush. The setting is called dual brush, and it can create some unique results by itself. This setting also has blend modes, so you can spend hours mixing your brushes and never get the same results. I turned off texture, so the unique setting to watch here is spacing, because it slides the overlaid brush back and forth to create a completely different brush.

I combined our current brush with itself and varied the spacing to get a completely different brush than I had before.

Step 26: Vary the Color and Opacity
I will talk about the next two settings together. If you are using colors and want them to vary, you can set properties via the color dynamics options, where you can determine the hue, saturation, brightness and purity properties. The foreground/background jitter setting at the top controls how much your brush will fade back and forth between your foreground and background colors. The transfer property is an important one, because enables you to change the opacity jitter, which allows your brush to fade from totally transparent to completely opaque. It also controls wetness and the mixing strength, which requires that you have wetness turned on. Wetness will give you a wet painting effect to your brush work.
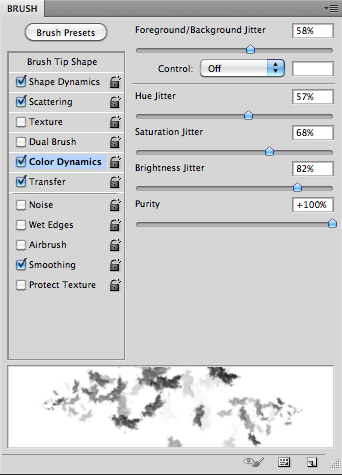

With opacity jitter turned on, and foreground/background jitter turned on, I was able to make a subtle background of grey clouds that flowed well together.
Final Thoughts
You can make your custom brushes from anything, including images, shapes, textures, and more. When you create something that you like, you can save it in your presets and use it again and again. The great thing about custom brushes, is that you can change the settings, combine brushes, and truly create any type of brush that you could ever need, with quick and simple settings. Experiment and see what you can create!
Frequently Asked Questions about Creating Custom Brushes in Photoshop
How can I create a custom brush from an image in Photoshop?
To create a custom brush from an image in Photoshop, first open the image you want to use. Convert the image to grayscale by going to Image > Mode > Grayscale. This will remove any color from the image. Next, adjust the contrast of the image to your liking. The darker areas of the image will appear more opaque in the brush, while the lighter areas will be more transparent. Once you’re satisfied with the image, go to Edit > Define Brush Preset. Give your brush a name and click OK. Your custom brush is now ready to use.
Can I modify the properties of my custom brush in Photoshop?
Yes, you can modify the properties of your custom brush in Photoshop. To do this, select the Brush tool and then click on the Brush panel icon in the Options bar. In the Brush panel, you can adjust various properties such as size, hardness, spacing, angle, roundness, and more. You can also use the Brush Presets panel to save your custom brush with its current settings for future use.
How can I use my custom brush in Photoshop?
To use your custom brush in Photoshop, first select the Brush tool from the Tools panel. Then, click on the Brush Preset picker in the Options bar. Scroll down to the bottom of the list and you should see your custom brush. Click on it to select it. You can now use your custom brush just like any other brush in Photoshop.
Can I share my custom brushes with others?
Yes, you can share your custom brushes with others. To do this, go to Edit > Presets > Preset Manager. In the Preset Manager, select Brushes from the drop-down menu. Then, select the brushes you want to share and click on the Save Set button. This will create a .abr file that you can share with others.
How can I load custom brushes into Photoshop?
To load custom brushes into Photoshop, go to Edit > Presets > Preset Manager. In the Preset Manager, select Brushes from the drop-down menu. Then, click on the Load button. Navigate to the .abr file you want to load and click Open. The brushes will now be available in the Brush Preset picker.
Can I create a custom brush from a selection in Photoshop?
Yes, you can create a custom brush from a selection in Photoshop. To do this, first make a selection using any of the selection tools. Then, go to Edit > Define Brush Preset. Give your brush a name and click OK. Your custom brush is now ready to use.
How can I create a custom brush with texture in Photoshop?
To create a custom brush with texture in Photoshop, first create or open an image with the texture you want to use. Then, follow the same steps as creating a custom brush from an image. In the Brush panel, you can also adjust the texture settings to further customize your brush.
Can I create a custom brush with color in Photoshop?
No, you cannot create a custom brush with color in Photoshop. Brushes in Photoshop are grayscale, meaning they only contain shades of gray. However, you can apply color to your brush strokes by selecting a foreground color before using your brush.
How can I create a custom brush with pressure sensitivity in Photoshop?
To create a custom brush with pressure sensitivity in Photoshop, you need a pressure-sensitive tablet. In the Brush panel, you can adjust the Shape Dynamics settings to control how the brush responds to pressure. For example, you can set the Size Jitter control to Pen Pressure to make the brush size vary based on pressure.
Can I create a custom brush with dual brush in Photoshop?
Yes, you can create a custom brush with dual brush in Photoshop. In the Brush panel, select the Dual Brush option. Then, choose a second brush from the list. You can adjust the settings of the second brush to create a variety of effects.

