
Key Takeaways
- Icon systems can be a central design element in web projects, and creating a custom set of icons can help to better coordinate the design elements of a project. Tools such as Illustrator and IcoMoon can make this process easier.
- To create an icon font, start by designing icons in Illustrator and saving them as SVG files. It’s important to define style properties for your glyphs, such as stroke sizes and grid proportions, before you start drawing.
- Once your icons are designed and saved as SVG files, you can upload them to IcoMoon to build your icon font. The IcoMoon app allows you to import your SVG files, arrange and edit them, and then compile them into a font.
- The IcoMoon app provides a CSS file with your icon font that includes necessary browser compatibility fixes. This file contains the @font-face rule and all your symbols selectors, and can be included in your website’s HTML to add your custom icon font to your web project.
An icon system can often become central design element in your web project. You can find many free or commercial icon sets on the web, and they are often included in major CSS frameworks (Bootstrap 3 Glyphicons is a perfect example).
On some occasions, however, you may need more specific glyphs not included in a generic set. Or you may just want to better coordinate the design of your icons with the other design elements of your project. In these cases you’ll want to draw a new icon set from scratch.
There are two widely-used methods to add a set of icons to your projects:
- Web font
- SVG
Today I’m going to cover web fonts. We’ll cover the use of SVG in another article.
Traditionally font creation had been known as a difficult and demanding task, but thankfully building icon font sets, has become considerably easier thanks to easy online tools such as IcoMoon, Fontastic, or Fontello. Each allows you to build a font by either ‘cherry-picking’ pre-built icons from public libraries, or by uploading and compiling SVG files you’ve prepared yourself.
BYO Icons
To build your own icon font, the first step is to design icons – we will use Illustrator for this task – and then save them as SVGs.
Find your design style
Before you start drawing, you need to define style properties for your glyphs such as stroke sizes, grid proportions and so on.
Begin by doing some readability test at different sizes and build a template you will use to draw all your glyphs. It’s no use designing finely-detailed icons that don’t work at lower resolutions.
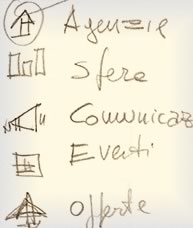
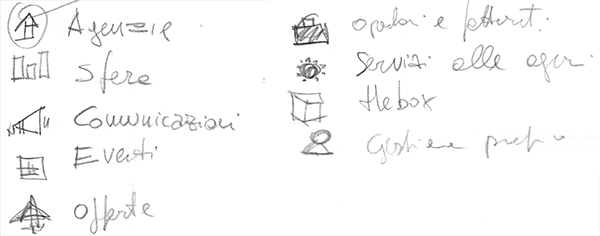
It’s also very useful to sketch your font before drawing, also a very rough sketch (like the one below) will help you to find ideas for all the symbols you need.
You can then to decide on a grid size for your glyphs. My tip is to not draw directly at your target size (for example 16x16px) or at very big sizes either. Instead I’ve found that a grid of 60-80px side is often good for me. Scaling up or down from this size is generally successful.
Of course, this is not a ‘set-in-stone’ type rule: project needs and experience may change on a case by case basis.
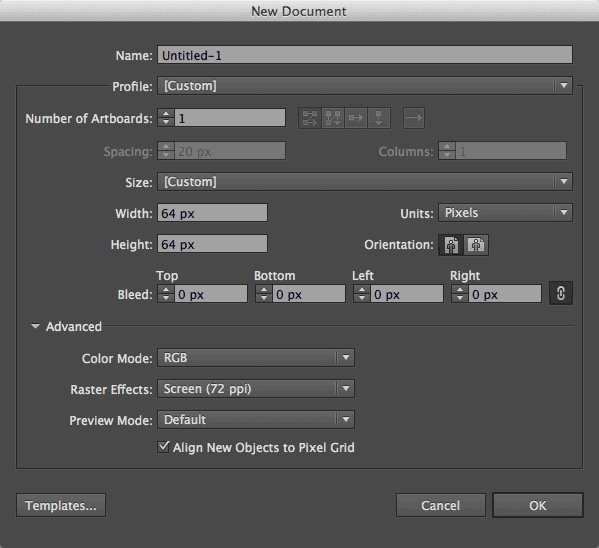
For this article, I chose to draw my icons with a stroke of 8px, without fill and set inside a grid of 64x64px.
Starting drawing
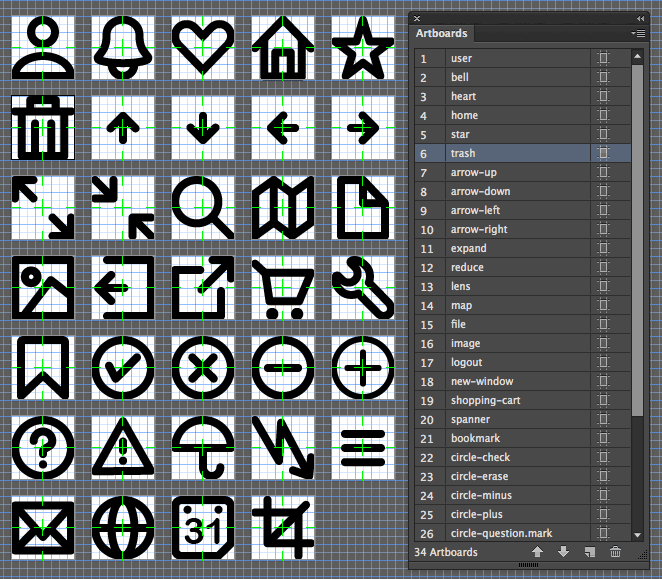
Illustrator artboards are very useful for this job: you can draw each glyph in a different artboard, keeping each in a single file. The artboards can be rearranged, renamed and can be exported as standalone SVG files (which is precisely what we need for IcoMoon).
Each artboard can also have independent axis coordinates, that will be very valuable for objects alignment, as we will see later.
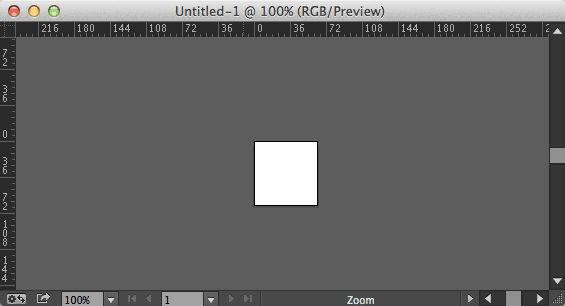
We can now start creating a new 64x64px Illustrator document:
Note that you can start create all the artboards you need using the Number of Artboards option: I prefer to add artboards as I need them, but there is no reason why you can’t create all your artboards first.
Now we can set up the grid. We want it to start from each artboard origin (the top-left corner) and to divide the artboard into a 8×8 checkerboard. Before doing that, let’s take a quick look at the way the Illustrator coordinates system works.
Illustrator workspace
Illustrator workspace is composed of a canvas that contains one or more artboards.
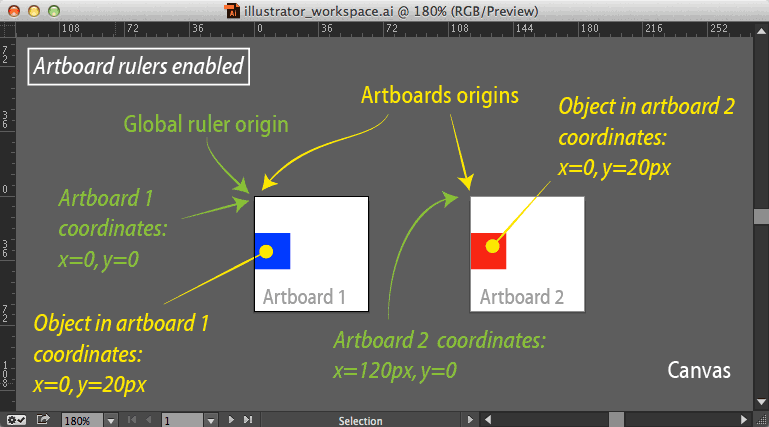
Artboards are placed on the canvas starting from a point called the Global ruler origin. In addition every artboard has its own origin point and rulers as well.
When you’re positioning new artboards using the Artboard tool, you will always use the global ruler. In almost all other cases, you will use the artboard ruler according to View → Rulers → Change to Artboard (or Global) Ruler option.
If you are using the Global ruler, every object you draw on any artboard is drawn in relation to that single origin point (i.e. the Global ruler origin). Otherwise coordinates refer to the origins of the artboard which contains it.
In short, using the Artboard ruler system:
- Artboards are placed in the canvas according to the Global ruler origin
- The objects we draw are placed in an artboard according to the Artboard ruler origin (in the screenshot below, you can see that the two squares have the same coordinates values even if they are placed in two different artboards).
For this job, we will use the Artboard ruler, since it is more suitable for glyphs alignment.
Setting up the grid
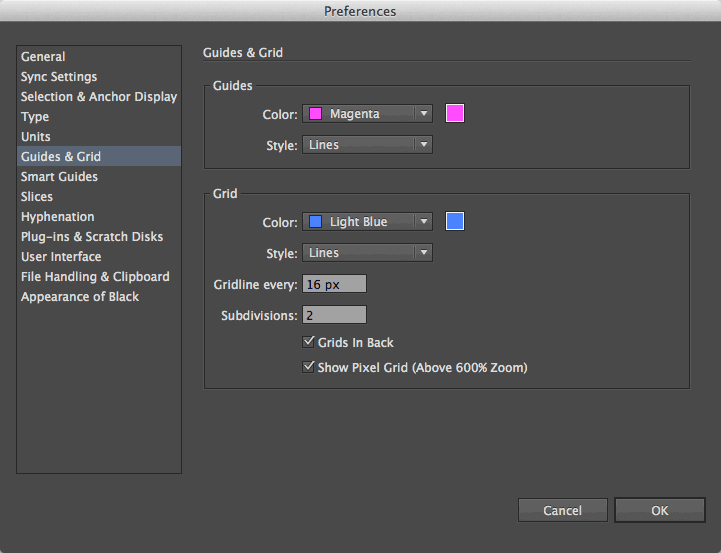
Illustrator’s grid is placed on the workspace starting from global ruler origin. You can set its properties choosing Preferences → Guides & Grid. Since we want our 64x64px canvas to be divided into 8 parts each side, we will set a main gridline every 16px (this will cause our artboards to be divided in 4×4 parts) with two subdivision:
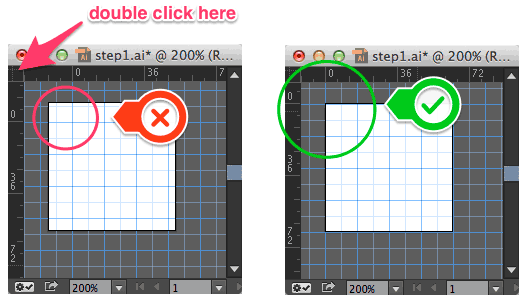
Now we have to ensure that our grid matches exactly our artboard. By default, the first artboard is placed at global ruler origin, but, since artboards can be moved and reset: to do this simply double-click the ruler origin with the artboard tool.
Our grid should now perfectly align with our artboards:
The first glyph
Let’s start our first glyph, a simple check-sign inside a circle:

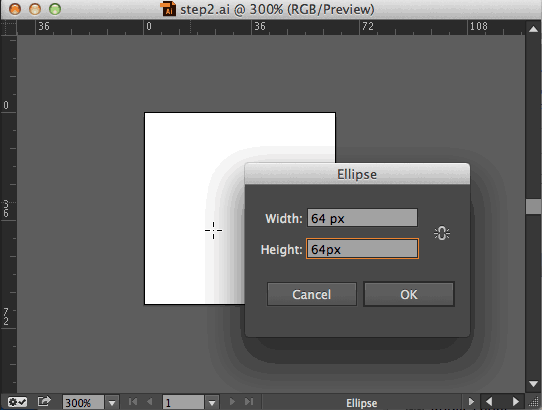
To draw the circle, we have to select the Ellipse tool, click in a point inside the artboard and input the ellipse width and height:
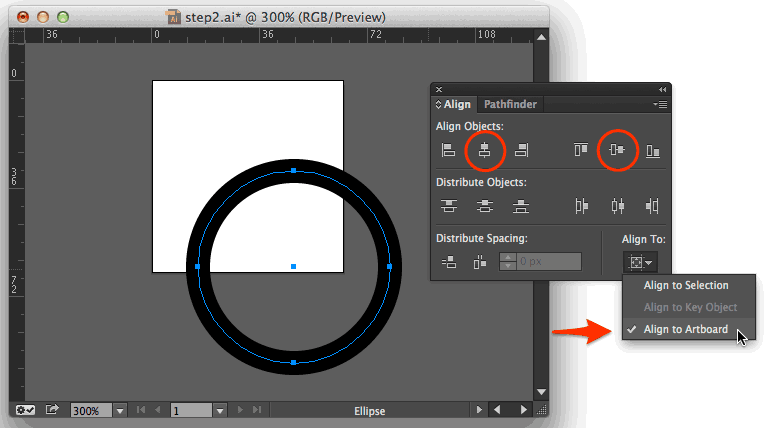
Next, we have to remove any fill and to set a black stroke of 8px size. At this point we can align the circle to the artboard (make sure the align to artboard option is selected):
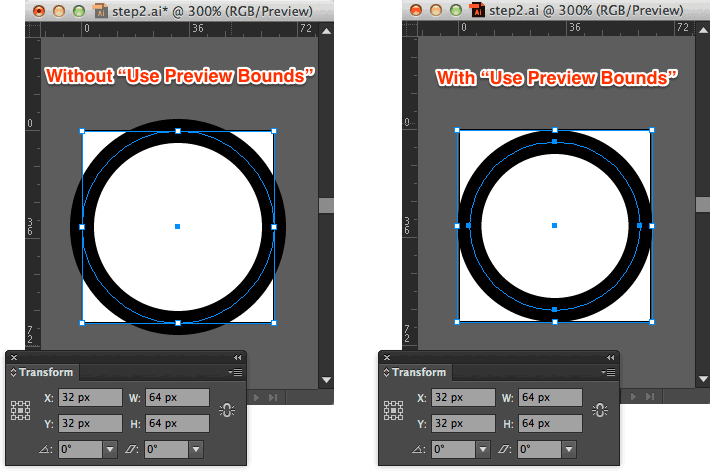
But the result isn’t quite what we expected: Illustrator aligned the path without computing the stroke width. Thankfully, this can be easily resolved, setting the Use Preview Bounds option in the Preference Panel. Now Illustrator will compute stroke widths inside the artboard regardless of aligning and resizing, and this makes drawing quicker and more accurate.
Completing the glyphs drawing
We now have to draw each glyph, adding a fresh artboard each time. You can add an Artboard using the Artboard tool and option/alt dragging an existing one or clicking the New Artboard icon in the Artboards Panel.
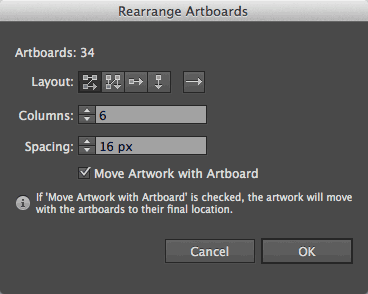
Artboards can then be easily rearranged by choosing Object → Artboards → Rearrange (or the Rearrange Artboards command in the Artboards Panel menu) following the order in the Artboards Panel.
Note that glyphs are always uploaded in alphabetical order, so keep this in mind if you want the artboard order in Illustrator to match the glyphs order in the font.
Give to each Artboard a name (no spaces): this will become the name of the glyph and also the class names of the generated CSS, so it’s very important to use meaningful words for them.
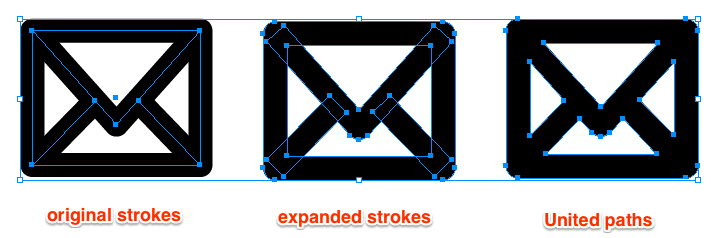
Although we often use strokes to draw our symbols, font creation has some special needs. We have to remember that:
- Each stroke must be converted to fills
- Fills must be combined creating compound paths if necessary (no overlapping shapes)
- Any color will be ignored: glyphs will always be interpreted as black. You also can’t use white for backgrounds: you can have only transparent ones
- Any embedded image in your SVG will be ignored
You can use the Expand command to convert paths to filled shapes, and the Pathfinder panel to quickly combine overlapping shapes into single elements.
Once our glyphs are ready, we can save each one as a distinct SVG file by using the Use Artboards option in the Save as dialog.
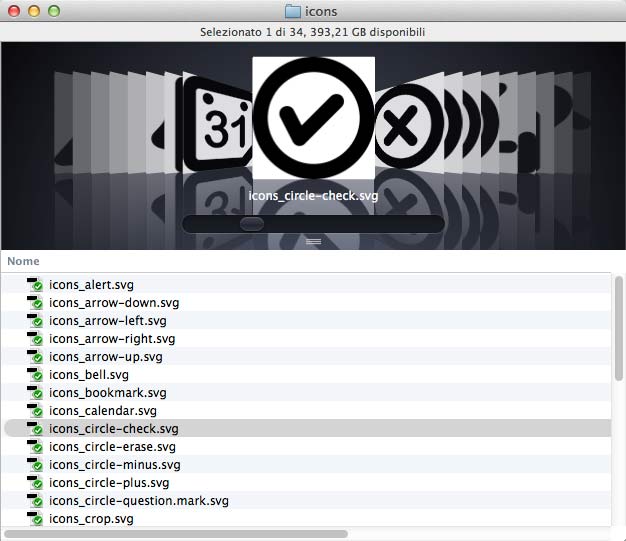
Illustrator saves SVG files by prefixing their names with the .ai document name (icons_). Since IcoMoon uses files names for glyphs, I prefer to remove this prefix (there are a lot of small applications to easily rename all files) to reduce any confusion.
Uploading files to IcoMoon
The IcoMoon site provides an online app to build icon fonts. The app starts with an Untitled project with access to some free icon libraries from which you can choose symbols.
Since we will upload our own glyphs, we can remove all preloaded libraries using the small menu at the right of each of them (note that this is not mandatory, since only selected symbols will be added to your font). It just keeps your project clean.
You can then save your project clicking the Manage projects icon on the right of the app menu bar. Note that with IcoMoon free accounts, your project will be stored locally in your browser, so, you won’t be able to access it elsewhere until you download the project data (a JSON file) or upgrade to Premium account (that allows you to store projects in the cloud).
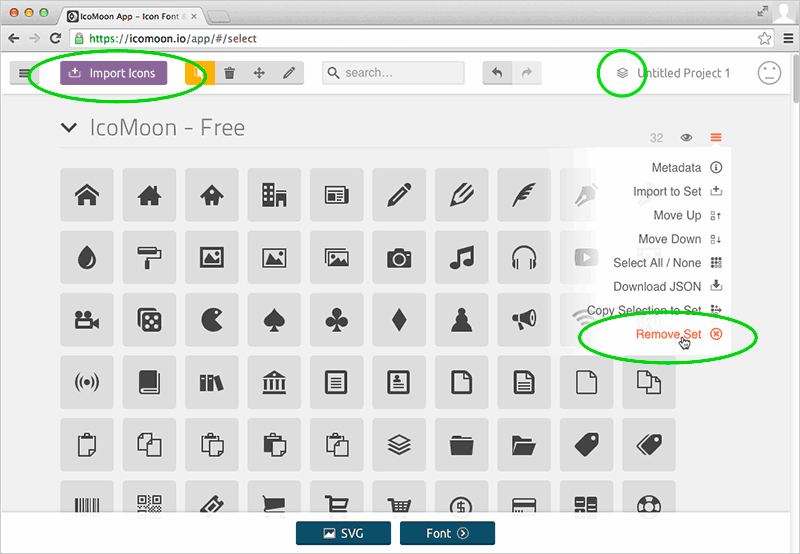
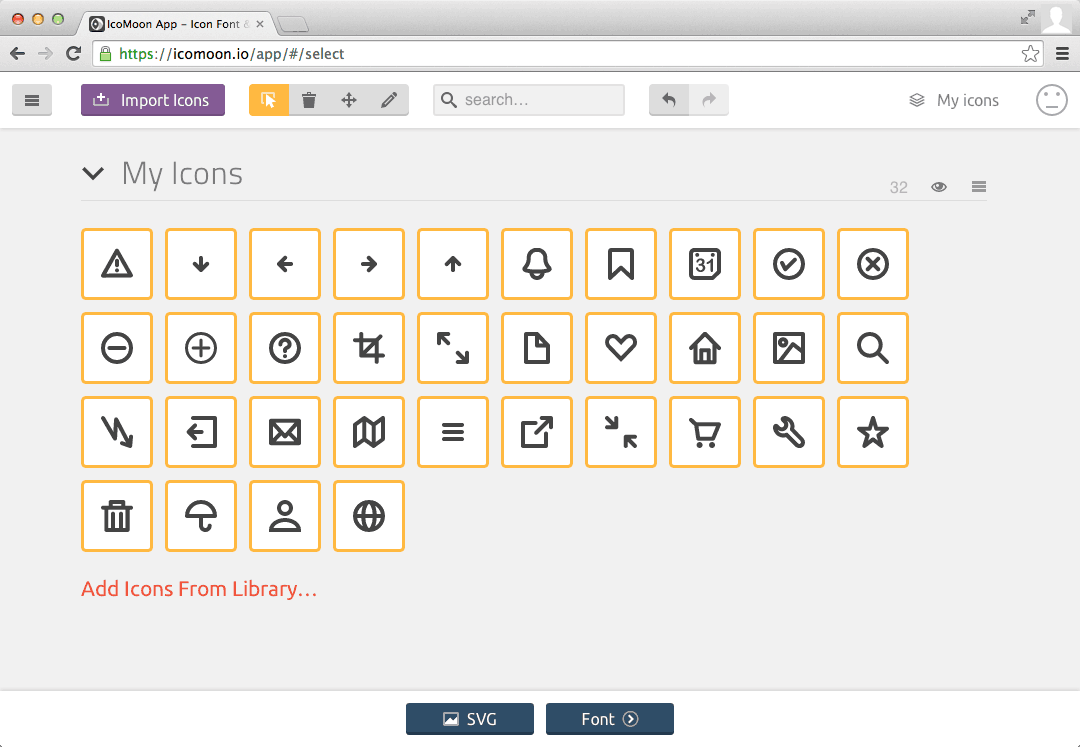
Now, you can upload your SVG files using the Import icons button: your glyphs will appear in the app as a Set. It’s easy to rearrange, delete them or edit each glyph using the tools provided by the app at this stage. You can also edit the set metadata (the name of the set and some author info) or perform other tasks using the small menu at the right of the set.
Icons can be edited in the app using the edit tool. You can’t alter vector data in this way, but it is possible to resize or move the glyph, download the SVG file or replace it.
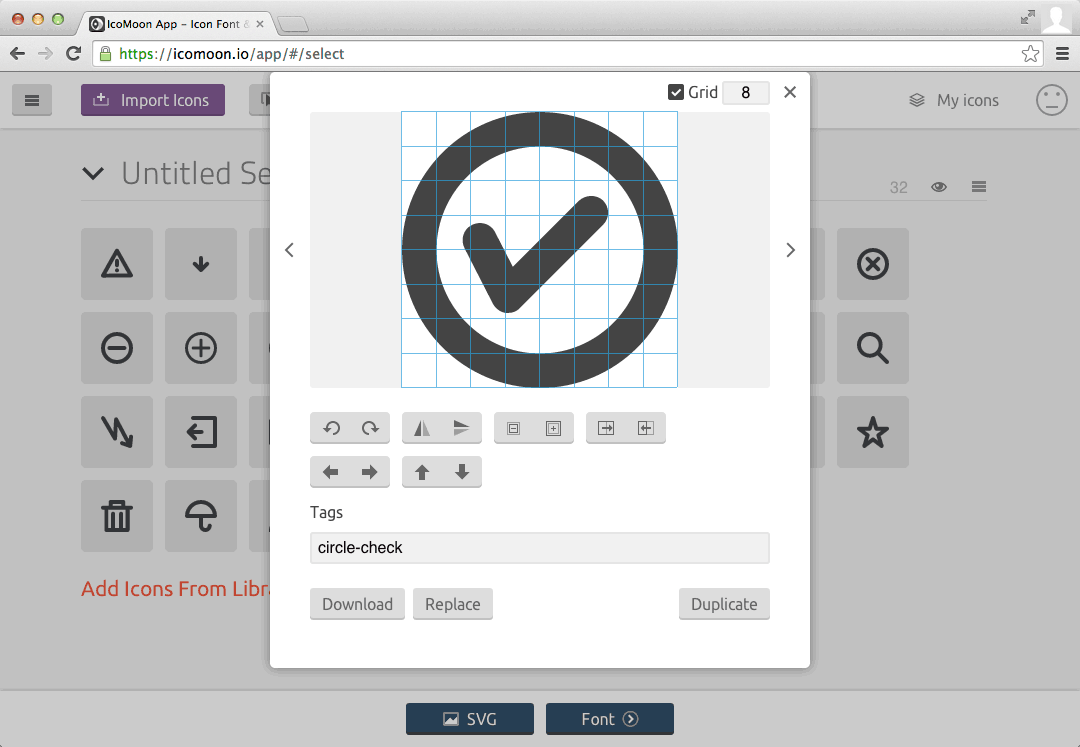
To build your font, you’ll first need to select all required icons using the select tool (or just Select All/None command in the Set menu if that suits). You’ll be able to identify selected glyphs by their yellow borders. Then you must click the Font button at the bottom of the page.
The app will load a secondary window with all selected symbols, displaying for each of them the glyph, the name, and the Unicode point that IcoMoon assigned to it in the PUA range. The use of the PUA range is considered the safest unicode sector to host your icons, although IcoMoon lets you use the standard Basic Latin range, if you like, by clicking the Codes button in the top bar.
You can also assign different range codes to each character by manually inserting a new code or a character:

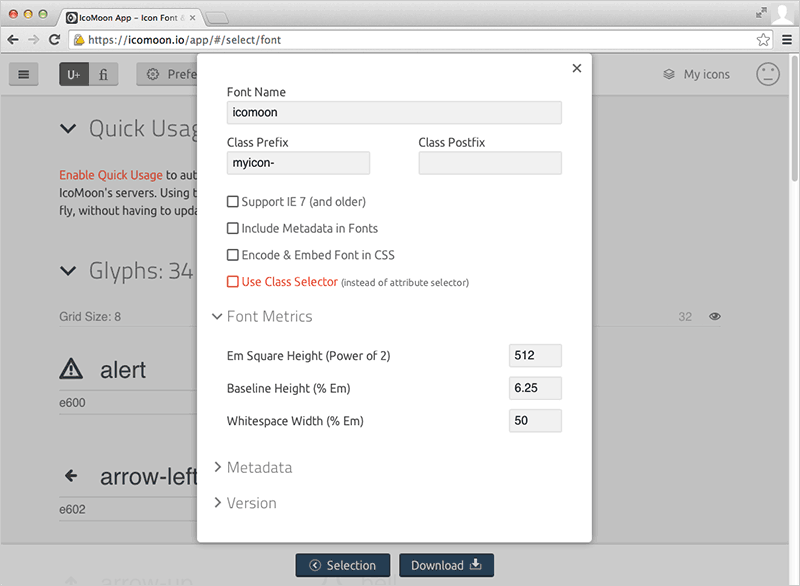
Before downloading your font, add a font name (this will be used in the @font-face rule), and Class Prefix and/or Postfix (that will be used as selectors in the generated CSS).
There are many other parameters you can set: from Metadata info to Metrics values, I recommend to read carefully the short and well explained documentation to set properly all of them.
Your icon set is done! Download your font (or, if you have a premium account, simply link to the CSS) and add it to your project.
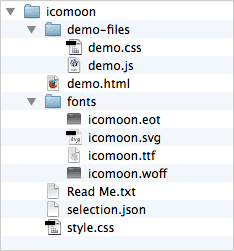
The downloaded .zip file contains the font in various formats, a demo file you can use as a reference, a .json file that can be re-uploaded to restore your project (to view it into another computer, for example), and, of course, a .css file encoding your icons.
The CSS (you can see an example below) contains the @font-face rule and all your symbols selectors.
@font-face {

    font-family: 'icomoon';

    src:url('fonts/icomoon.eot?-88cxph');

    src:url('fonts/icomoon.eot?#iefix-88cxph') format('embedded-opentype'),

        url('fonts/icomoon.woff?-88cxph') format('woff'),

        url('fonts/icomoon.ttf?-88cxph') format('truetype'),

        url('fonts/icomoon.svg?-88cxph#icomoon') format('svg');

    font-weight: normal;

    font-style: normal;

}
[class^="myicon-"], [class*=" myicon-"] {

    font-family: 'icomoon';

    speak: none;

    font-style: normal;

    font-weight: normal;

    font-variant: normal;

    text-transform: none;

    line-height: 1;
    /* Better Font Rendering =========== */

    -webkit-font-smoothing: antialiased;

    -moz-osx-font-smoothing: grayscale;

}
.myicon-alert:before {

    content: "\e600";

}

.myicon-arrow-down:before {

    content: "\61";

}
/* etc */
Have a go!
I’ve found this is a very quick way to build an icons font, but it certainly takes time to find the perfect workflow, and to test all options that both Illustrator and IcoMoon can offer.
Have fun
Frequently Asked Questions (FAQs) about Creating an Icon Font with Illustrator and IcoMoon
What is the advantage of using IcoMoon for creating icon fonts?
IcoMoon is a powerful tool that allows you to build and manage your own icon sets. It provides a wide range of icons to choose from, and you can also import your own SVGs to create custom icon fonts. The advantage of using IcoMoon is that it simplifies the process of creating icon fonts, making it accessible even to beginners. It also allows you to control the size, color, and other CSS properties of your icons, providing greater flexibility in design.
How can I import my own SVGs into IcoMoon?
To import your own SVGs into IcoMoon, first, ensure that your SVGs are properly optimized. Then, go to the IcoMoon app and click on the “Import Icons” button. From there, you can select and upload your SVG files. Once uploaded, your icons will appear in the “Your Custom Icons” section, ready to be added to your icon set.
Can I use Adobe Illustrator to create SVGs for IcoMoon?
Yes, you can use Adobe Illustrator to create SVGs for IcoMoon. Illustrator is a powerful vector graphics editor that allows you to create and edit SVG files. Once you’ve created your icons in Illustrator, you can export them as SVG files and then import them into IcoMoon to create your icon font.
How can I control the size and color of my icons in IcoMoon?
In IcoMoon, the size and color of your icons can be controlled using CSS. When you generate your icon font, IcoMoon provides a CSS file that includes classes for each of your icons. You can edit this CSS file to change the size, color, and other properties of your icons.
What are the best practices for creating icon fonts in IcoMoon?
When creating icon fonts in IcoMoon, it’s important to keep a few best practices in mind. First, ensure that your SVGs are properly optimized before importing them into IcoMoon. Second, try to keep your icon set as small as possible to reduce the load time of your website. Finally, remember to test your icon font in different browsers to ensure that it displays correctly.
Can I use IcoMoon to create icon fonts for commercial projects?
Yes, you can use IcoMoon to create icon fonts for commercial projects. However, you should be aware that some of the icons provided by IcoMoon are subject to licensing restrictions. Always check the license of an icon before using it in a commercial project.
How can I add my icon font to my website?
Once you’ve created your icon font in IcoMoon, you can add it to your website by including the CSS file provided by IcoMoon in your website’s HTML. Then, you can use the classes defined in the CSS file to add icons to your website.
Can I edit my icon set after I’ve created it in IcoMoon?
Yes, you can edit your icon set in IcoMoon after you’ve created it. To do this, go to the “Manage Projects” section in the IcoMoon app. From there, you can select your project and make any necessary changes to your icon set.
How can I ensure that my icon font displays correctly in all browsers?
To ensure that your icon font displays correctly in all browsers, it’s important to test it in different browsers during the development process. Additionally, IcoMoon provides a CSS file with your icon font that includes necessary browser compatibility fixes.
What should I do if I encounter problems while creating my icon font in IcoMoon?
If you encounter problems while creating your icon font in IcoMoon, you can refer to the IcoMoon documentation or contact the IcoMoon support team for help. Additionally, there are many online communities and forums where you can ask for help and advice.