

In this Photoshop layout tutorial I will walk you through the process of designing a clean, modern, and stylish Portfolio layout from scratch. We all know a unique and stylish portfolio is essential for every designer. But sometimes we do get carried away when it comes to our portfolios. So I think for a brilliant portfolio the key is creating a balance between the style and order. So today we are going to create a portfolio layout that is stylish and professional at the same time.
Resources:
Images: Microbot, Suharrhyme
Icons: Circle Social Icons
Now before we start let’s have a proper look at what are we going to design today.

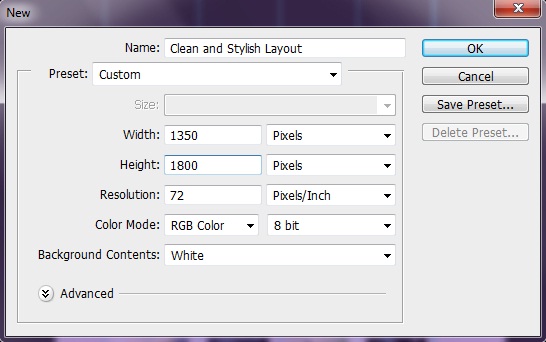
Step 1: Create Your Photoshop Document
Open your Photoshop and create a new file with 1350px Width and 1800px Height.
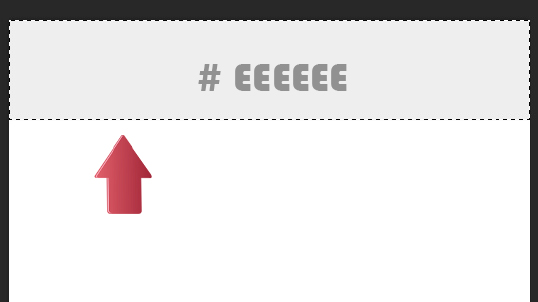
Step2: Fill the Background and Top Area
Now fill the background with color # ffffff. And then create a new layer go to Layer> new>Layer. Then click on the “Rectangular Marquee Tool” and select some of the top area. Fill it with # eeeeee.
Step 3: Creating Navigation Area
Now we will start with our navigation area. So create a new layer and select again using “Rectangular Marquee Tool” and fill it with # ffffff.

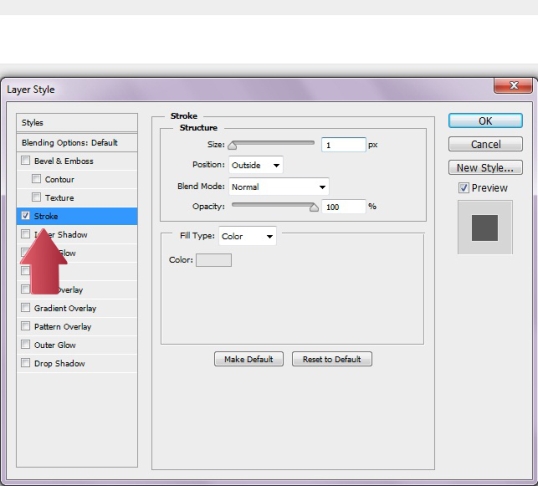
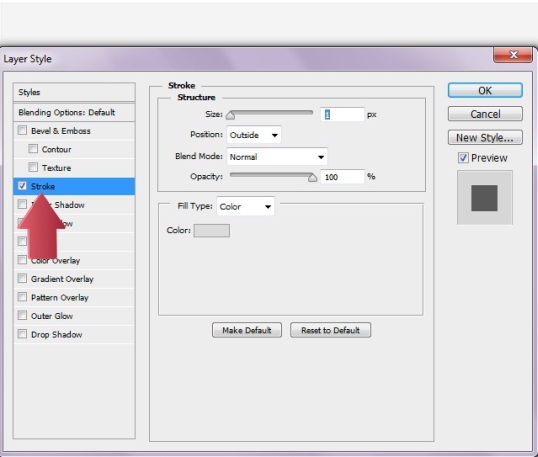
Step 4: Add Stroke
We will add a bit of stroke here so click on layer> Layer style> Stroke with color # e5e5e5.
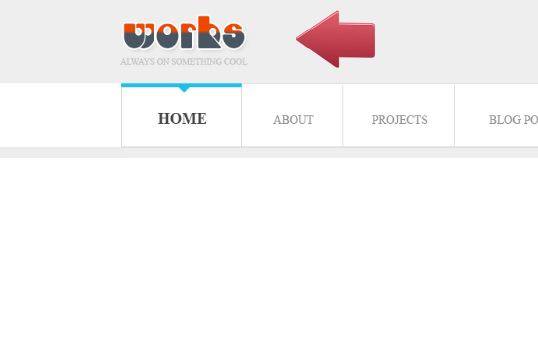
Step 5: Adding the Navigation Text and Dividers
Now let’s add the navigation text using “Text Tool”. And then create some small lines between the text using line tool with 1px weight and color # a8a8a8.

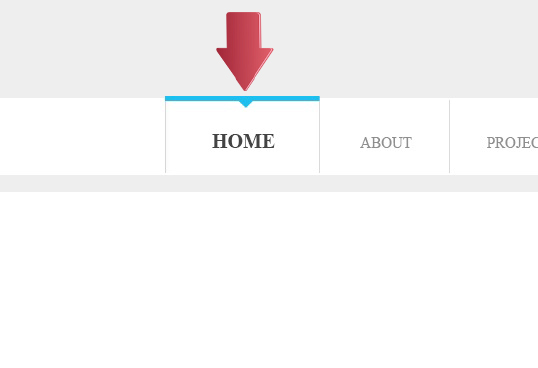
Step 6: Creating Hover Effect
Select the “Line Tool” again and use it on top of the Home text with 5p weight and color # 1dbfee. Now select “Pen Tool” and create a small triangle in the middle of the line and fill it with the same color.
Step 7: Paste your logo
Now we will add our logo and tag line and place it on the upper left corner.
Step 8: Add Social Media icons
Now copy and paste some social media icons on the right.

Step 9: Starting with the slider
Now let’s start with our slider, simply paste the image and add some stroke. Go to Layer > Layer Style> Stroke.

Step 10: Adding Slider dots
Select the “Hard Round Brush” and add small orange circles on our feature image. Now reduce the brush size and this time use a dark color I’ve used # 222222 and then again reduce the size and use lighter color.
Step 11: News box designing
Now we will start with the news box. So first select the “Rectangle Tool” and create a rectangle and add a 1px stroke with # dbdbdb.
Step 12: Adding Text and button
Add text using “Text Tool” you can give any title and then reduce the font size and choose a lighter font for the rest of the text and then add a button on the right.

Step 13: Project Title
Now let’s start with the projects and posts. Select “Line Tool” and draw two lines with 5px and 3px weights and color # 1dbfee and # ea2900. And add title in the middle.

Step 14: Blog Post Title
Repeat the same process for the “Blog Posts” and change the color order.

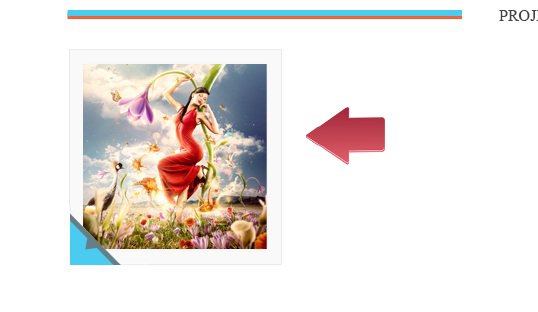
Step 15: Creating Image Frame
Now select “Rectangle Tool” and create a box with color # f9f9f9 and add 1px stroke to it with color # eaeaea.

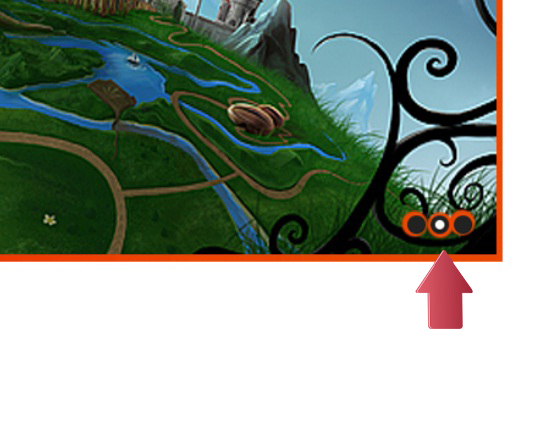
Step 16: Adding the triangle in the corner
Now select “Pen Tool” and create a triangle in the corner and fill it with # 4accf1.

Step 17: Add the dark strip
Select the “Line Tool” and create a small line with 5px weight and color # 667e85. Now create the same color small triangle same as we did in the top navigation.

Step 18: Add the Image
Now paste the feature image and place it in the center of our frame.
Step 19: Create More Projects
Repeat the same process and create some more projects.
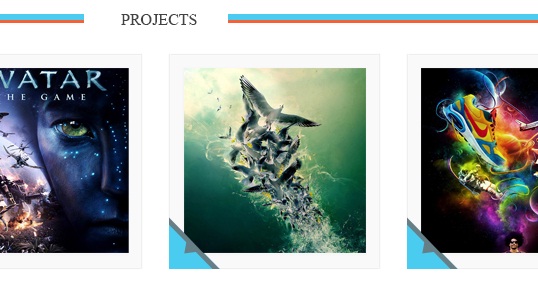
Step 20: More frames and images
Again we will repeat the same frames as above but this time we will create the colored corners on the upper right side and use the color # f15f27.

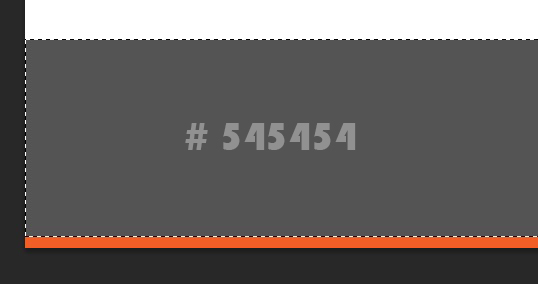
Step 21: Building the Footer
Now we will start with the footer, so select the “Rectangular Marquee Tool” and select a small strip at the bottom and fill it with # f15f27.

Step 22: Add Orange Strip
Now select rest of the footer area and fill it with color # 545454.
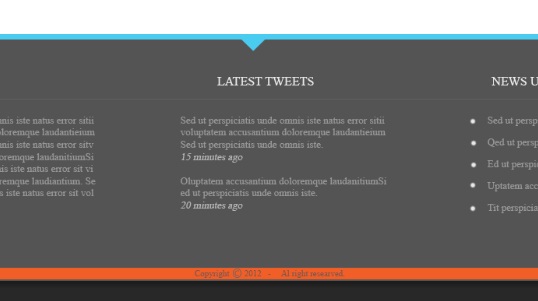
Step 23: Create blue Strip on Top
Select the “Line Tool” and create a line on top of the footer area with 8px weight and color # 4accf1 and then add a triangle in the middle with the same color.

Step 24: Add the Footer Text
Now select the “Text Tool” and add some widget and copyright text and we are all done.
Our clean and stylish layout is done, hope you enjoyed the tutorial and I’ll be back with some more fun tutorials, till then keep designing.
Frequently Asked Questions about Creating a Clean and Stylish Layout in Photoshop
What are the basic tools in Photoshop that I need to know to create a clean and stylish layout?
Photoshop offers a wide range of tools that can be used to create a clean and stylish layout. The most basic tools include the Move Tool for moving layers, the Rectangular Marquee Tool for making rectangular selections, the Elliptical Marquee Tool for making circular selections, the Lasso Tools for making freeform selections, the Magic Wand Tool for selecting similarly colored areas, and the Crop Tool for cropping images. The Brush Tool, the Clone Stamp Tool, and the Eraser Tool are also essential for editing images. Understanding how to use these tools effectively is the first step in creating a clean and stylish layout in Photoshop.
How can I customize my workspace in Photoshop to better suit my design needs?
Photoshop allows you to customize your workspace to suit your specific needs. You can rearrange the panels, choose which panels to display, and even save your workspace configuration for future use. To customize your workspace, go to the Window menu and select Workspace. From there, you can choose a preset workspace or create your own by selecting New Workspace. You can then name your workspace and choose which panels and tools to include.
How can I create a business card in Photoshop?
Creating a business card in Photoshop involves several steps. First, you need to create a new document with the correct dimensions for a business card. Then, you can use the various tools and features in Photoshop to design your card. This includes adding text, images, and shapes, and applying effects such as gradients and shadows. Once you’re happy with your design, you can save it as a high-resolution image for printing.
What size should a business card be in Photoshop?
The standard size for a business card in Photoshop is 3.5 inches by 2 inches. However, you should also include a bleed area of 0.125 inches on all sides to allow for cutting variations during printing. This means the total size of your document should be 3.75 inches by 2.25 inches. When setting up your document, make sure to set the resolution to 300 pixels per inch to ensure high-quality printing.
How can I use Photoshop templates to create a clean and stylish layout?
Photoshop templates can be a great starting point for creating a clean and stylish layout. These templates come with pre-designed layouts that you can customize to suit your needs. To use a template, go to the File menu and select New. From there, you can choose from a variety of templates in different categories. Once you’ve chosen a template, you can customize it by adding your own text, images, and other elements.

