Contributing to Open Source: Gatekeeper Case Study

Key Takeaways
- Contributing to open source projects involves several steps, including asking the repository owner about the status of a feature, forking and cloning the repository, planning your contributions, implementing changes, and testing the new feature.
- The Gatekeeper library, which handles user registration, authentication and authorization, was extended with a count feature to provide the total number of users in the database without needing to fetch all user records or write a manual query.
- The process of adding the count feature involved modifying abstract and interface classes, creating a new count handler, delegating the static call to the new handler, and writing the logic for counting in MySQL.
- After implementing the new feature, it’s important to test it in a realistic scenario. In this case, the count feature was tested in a new project using the composer.json file, and then a pull request was submitted for review by the project owner.
GateKeeper is a pretty nifty user registration, authentication and authorization library which uses its own database to store and query the user records. This means that it’s completely decoupled from your main app (so you can, essentially, use Postgre or Mongo for your business logic while using a completely different engine like MySQL for basic user records) and easy to tweak and extend.

An example of the library’s use is clearly demonstrated in our post about [the skeleton no-framework project][nowf] which is a sample app composed entirely of Composer packages and acting like a framework-powered app, but completely free of any framework coupling.
This post isn’t about Gatekeeper per-se, though. It’s about contributing to open source, and going about the right way to doing it.
In this tutorial, we’ll extend GateKeeper with a count feature. Currently, in order to find out the total number of users in the database one would have to fetch them all, then count them – either that or write a query to do so manually. But it might be better if this were built into the adapter interface so that it’s not only a native feature, but also a requirement for future database engines to be added.
Step 1: Ask the owner
The first step of contributing to open source is doing due diligence. This can be as simple as asking the repo owner about the status of this feature, in order to make sure it isn’t planned and is, in fact, desirable. An issue in the repo is often enough, as evident in this case.
Step 2: Fork, clone, test
Note: if you’d like to follow along, please clone an older version of Gatekeeper which doesn’t have this feature yet. This one should do.
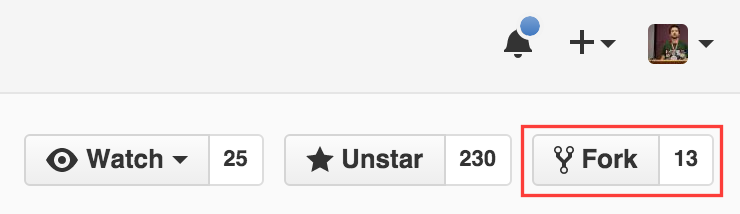
First, let’s fork the repo so we can start working on it.
Next, we need to set up a development environment in which to work on the package. Naturally, we use our trusty Homestead Improved for this. Once the VM has been set up and SSHed into, we can clone our fork, install dependencies and run tests:
git clone https://github.com/swader/gatekeeper
cd gatekeeper
composer install
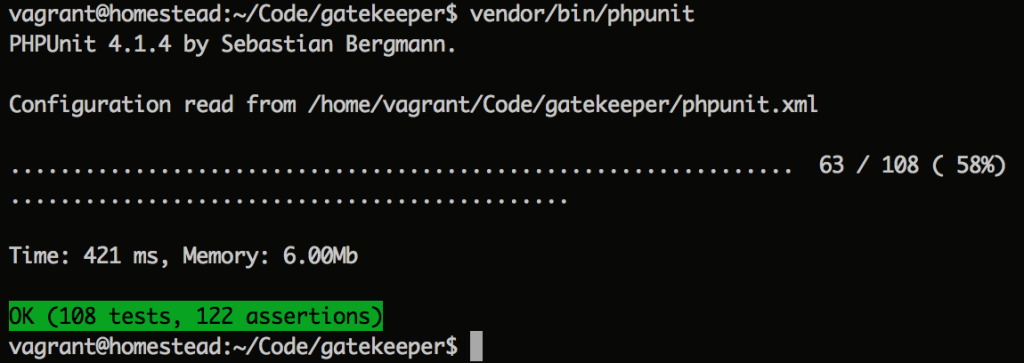
vendor/bin/phpunit
All the tests should be green:
At this point, it’s preferred to make a separate branch for all the changes we’ll be making.
git checkout -b "feature-count"
Step 3: Plan of Action
Gatekeeper currently only supports MySQL – this makes our job a bit easier, but still not trivial. Despite only supporting a single type of datasource (for now), abstract and interface classes still need to be updated, seeing as they’re written with future compatibility with different data sources in mind.
We will, thus, need to modify:
Gatekeeper/DataSource– the abstract DataSource classDataSource/MySQL– the MySQL datasource which contains the actual methods we useDataSource/Stub– to upgrade the stub with which to write other datasources, so other contributors know they need acountmethod, too
We also need to create a new Count handler, because Gatekeeper uses magic static calls to create, find, update and delete entities, forwarding them to the appropriate handler depending on the name of the invoked method. For an example, see the __callStatic magic method in Gatekeeper/Gatekeeper.php, and how it defers method calls to handlers like Handler/Create.php or Handler/FindBy.php, etc.
Step 4: Just Do It ™
Delegating the static call
To prepare the foundation for our custom Count handler, we delegate the static call to it and pass forward the argument and the data source. This is all done by simply adding another elseif block to Gatekeeper::__callStatic:
        } elseif ($action == 'count') {
            $action = new \Psecio\Gatekeeper\Handler\Count($name, $args, self::$datasource);
        }
Since we added a new action, we need to modify the static property $actions as well:
    /**
     * Allowed actions
     * @var array
     */
    private static $actions = array(
        'find', 'delete', 'create', 'save', 'clone', 'count'
    );
Count handler
We then create the handler in the file Psecio/Gatekeeper/Handler/Count.php:
<?php

namespace Psecio\Gatekeeper\Handler;

class Count extends \Psecio\Gatekeeper\Handler
{
    /**
     * Execute the object/record count handling
     *
     * @throws \Psecio\Gatekeeper\Exception\ModelNotFoundException If model type is not found
     * @return int Count of entities
     */
    public function execute()
    {
        $args = $this->getArguments();
        $name = $this->getName();

        $model = '\\Psecio\\Gatekeeper\\' . str_replace('count', '',
                $name) . 'Model';
        if (class_exists($model) === true) {
            $instance = new $model($this->getDb());

            $count = (!$args) ? $this->getDb()->count($instance) : $this->getDb()->count($instance,
                $args[0]);
            return (int)$count['count'];
        } else {
            throw new \Psecio\Gatekeeper\Exception\ModelNotFoundException(
                'Model type ' . $model . ' could not be found'
            );
        }
    }
}
It’s almost identical to the Create handler, except for the unreachable return statement at the bottom which I’ve removed, small changes in the body, and a minor alteration to the class’ description.
DataSource and Stub
Next, let’s get the easy ones out of the way.
In Psecio/Gatekeeper/DataSource/Stub.php, we add a new blank method:
    /**
     * Return the number of entities in DB per condition or in general
     *
     * @param \Modler\Model $model Model instance
     * @param array $where
     * @return bool Success/fail of action
     * @internal param array $where "Where" data to locate record
     */
    public function count(\Modler\Model $model, array $where = array()){}
We then add a similar signature to the abstract:
    /**
     * Return the number of entities in DB per condition or in general
     *
     * @param \Modler\Model $model Model instance
     * @param array $where
     * @return bool Success/fail of action
     * @internal param array $where "Where" data to locate record
     */
    public abstract function count(\Modler\Model $model, array $where = array());
With all this out of the way, it’s time to write the actual logic that takes care of counting.
MySQL
It’s time to change DataSource/MySQL.php now. We’ll add the count method right under the find method:
    /**
     * Find count of entities by where conditions.
     * All where conditions applied with AND
     *
     * @param \Modler\Model $model Model instance
     * @param array $where Data to use in "where" statement
     * @return array Fetched data
     */
    public function count(\Modler\Model $model, array $where = array())
    {
        $properties = $model->getProperties();
        list($columns, $bind) = $this->setup($where);

        $update = array();
        foreach ($bind as $column => $name) {
            // See if we keep to transfer it over to a column name
            if (array_key_exists($column, $properties)) {
                $column = $properties[$column]['column'];
            }
            $update[] = $column.' = '.$name;
        }

        $sql = 'select count(*) as `count` from '.$model->getTableName();
        if (!empty($update)) {
            $sql .= ' where '.implode(' and ', $update);
        }

        $result = $this->fetch($sql, $where, true);
        return $result;
    }
Harvesting the logic from the similar find method above, our count method does the following:
- Grab properties as defined in model in question (e.g. see
UserModel::$properties) - Separate the values as passed in via
$whereinto columns and their values - Build the
WHEREpart of the query by looking into theproperties, seeing if any of them have different names to those requested (e.g. requestedFirstNamehas a database counterpart offirst_name) - Build whole query
- Execute with forced
singlemode ontrue(seefetchmethod) because we only expect to get a single value back – an integer indicating the count. - Return the count.
Step 5: Testing
Ordinarily, there would be a unit testing stage. This is out of the scope of this tutorial, and I encourage you to look at this tutorial instead. If there’s sufficient interest in seeing unit tests developed for this package, we will, of course, accommodate. Let us know in the comments.
Implementing the Experimental Version
Let’s do a manual test. First, we’ll commit and push our work online.
git add -A
git commit -m "Adding count feature"
git push origin feature-count
The changes will now be in our fork, online. Then, let’s go ahead and create a brand new project in another folder with the following composer.json file:
{
    "require": {
        "psecio/gatekeeper": "dev-master"
    },
    "repositories": [
        {
            "type": "vcs",
            "url": "https://github.com/swader/gatekeeper"
        }
    ]
}
Using Composer’s Repositories feature, we can make sure that Composer fetches our copy of Gatekeeper instead of the original, while still thinking it has the original – this allows us to test our changes as if in a real project using Gatekeeper – arguably a more realistic testing scenario than unit tests would be at this point. Save and exit this file, and then run:
composer require symfony/var-dumper --dev
This will both install the above defined custom package, and Symfony’s VarDumper for easier debugging. You might get asked for a Github token during installation – if that’s the case, just follow the instructions.
Lo and behold, if we look inside the Gatekeeper main class now, we’ll see that our count updates are all there. Next, let’s follow the typical Gatekeeper installation procedure now by executing vendor/bin/setup.sh and following instructions. If you’re using Homestead Improved, just enter the default values (localhost, homestead, homestead, secret).
Testing
Now let’s create an index.php file which we’ll use for testing:
<?php

require_once 'vendor/autoload.php';

use Psecio\Gatekeeper\Gatekeeper;
Gatekeeper::init('./');

$groups = [
    'admin' => 'Administrators',
    'users' => 'Regular users'
];

foreach ($groups as $name => $description) {
    if (!Gatekeeper::findGroupByName($name)) {
        Gatekeeper::createGroup([
            'name' => $name,
            'description' => $description
        ]);
    }
}
We activate the autoloader, initialize Gatekeeper (it uses the .env file from the root of our folder for credentials), and set up two default groups.
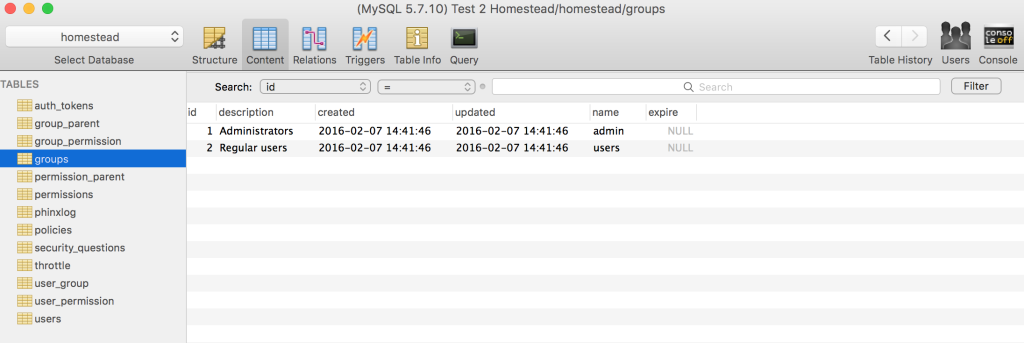
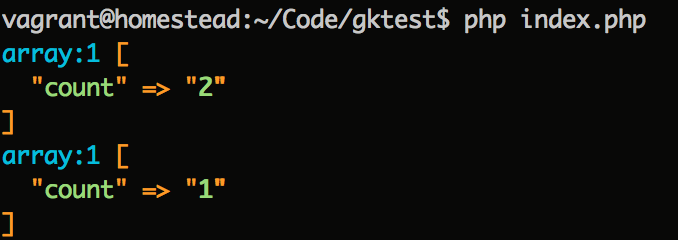
Then, let’s go ahead and test counting on the groups:
dump(Gatekeeper::countGroup());
dump(Gatekeeper::countGroup(['id' => 1]));
Sure enough, it works.
Let’s test users now.
Gatekeeper::countUser();
This accurately produces a count of 0. A common use case for out-of-the-box apps is seeing if there are no users in the database when a user is being created, and then giving that new user Admin privileges. The first user of a system is often considered its owner, so it’s a convenience for setting up super-user accounts. Let’s do that.
Gatekeeper::createUser([
    'username' => 'bruno-admin',
    'first_name' => 'Bruno',
    'last_name' => 'Skvorc',
    'email' => 'bruno.skvorc@sitepoint.com',
    'password' => '12345',
    'groups' => (Gatekeeper::countUser()) ? ['users'] : ['admin']
]);

Gatekeeper::createUser([
    'username' => 'reg-user',
    'first_name' => 'Reggie',
    'last_name' => 'User',
    'email' => 'reg@example.com',
    'password' => '12345',
    'groups' => (Gatekeeper::countUser()) ? ['users'] : ['admin']
]);


dump(Gatekeeper::findUserByUsername('bruno-admin')->groups[0]->name);
dump(Gatekeeper::findUserByUsername('reg-user')->groups[0]->name);
Sure enough, the output is accurate – the first group printed on screen is admin, and the second is users.
With the count mechanics correctly implemented, it’s time to submit a pull request.
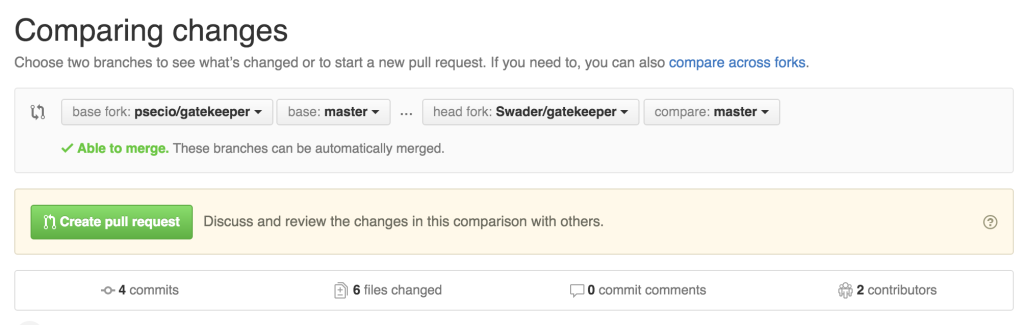
Submitting a PR
First, we go to our own fork of the project. Then, we click the “New Pull Request” button. On the next screen everything should be green – the UI should say “Able to merge”:
Once we click the “Create Pull Request” button, we should add a title and a description as detailed as possible, preferably referencing the issue from Step 1 above.
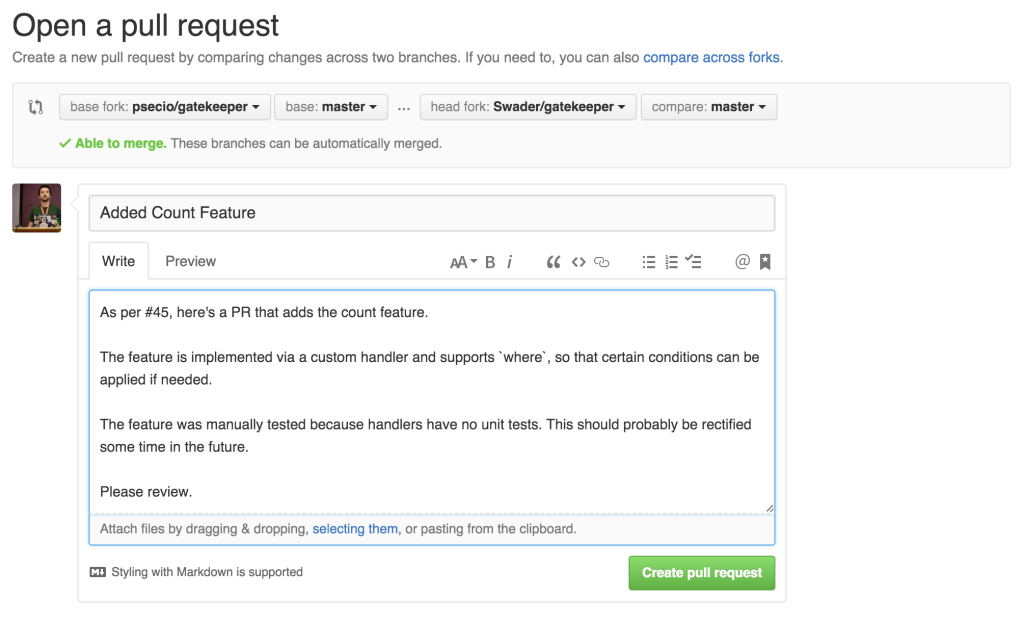
That’s it – pressing the “Create Pull Request” button wraps things up – all we can do now is wait for feedback from the project owner.
Conclusion
This was a case study of contributing to a relatively popular PHP package. I hope it was useful as a learning material and a basic guide into giving back and the process of adding features into something you use.
It’s important to note that while this is a common process, as I mentioned before, it’s rather uncommon in that it had no unit tests. However, the original library doesn’t test the handlers either, and making a mocking framework for the handlers and the data they can interact with would be too out of scope for this particular post. Again, if you’re curious about that process and would like us to cover it in depth, please do let us know in the comments below that like button.
It should also be noted that while this was a very easy feature upgrade, sometimes things don’t go according to plan and the changes won’t work immediately in the new project where they’re being tested. In that case, changes can, for example, be made in the vendor folder of the test project until everything works, copied over to the development project, pushed online and then re-installed into the test project to make sure everything still works.
Have your own contribution stories to share? Let us know – we’d love to explore them!
Bruno is a blockchain developer and technical educator at the Web3 Foundation, the foundation that's building the next generation of the free people's internet. He runs two newsletters you should subscribe to if you're interested in Web3.0: Dot Leap covers ecosystem and tech development of Web3, and NFT Review covers the evolution of the non-fungible token (digital collectibles) ecosystem inside this emerging new web. His current passion project is RMRK.app, the most advanced NFT system in the world, which allows NFTs to own other NFTs, NFTs to react to emotion, NFTs to be governed democratically, and NFTs to be multiple things at once.