


With the advent of WebRTC and the increasing capacity of browsers to handle peer-to-peer communications in real time, it’s easier than ever to build real-time applications. In this article, we’ll take a look at SimpleWebRTC and how we can use the platform in implementing WebRTC technology. We’ll also look at other alternatives that could help us achieve the same goal.
If you need a bit of background regarding WebRTC and peer-to-peer communication, I recommend reading “The Dawn of WebRTC” and “An Introduction to the getUserMedia API”.
Due to the complex nature of building custom WebRTC applications, this won’t be a step-by-step tutorial on building one. Instead, we’ll look at the libraries and the types of servers required to build your own reliable app. I’ll provide links of complete sample apps you can refer to while building yours.
Our focus will mainly be on SimpleWebRTC as a platform. Later on, we’ll briefly look at other commercial and open-source alternatives that may help you accomplish the same.
Key Takeaways
- WebRTC enables peer-to-peer, real-time communication directly within web browsers without the need for third-party plugins, supporting modern browsers like Chrome, Firefox, and Safari.
- Signaling in WebRTC, crucial for establishing peer connections, relies on STUN and TURN servers to navigate around NAT (network address translation) and firewalls, ensuring connectivity across various network configurations.
- SimpleWebRTC offers a comprehensive platform for building and deploying WebRTC applications, providing SDKs, hosting services, and technical support, making it easier for developers to implement custom video chat solutions.
- Alternatives to SimpleWebRTC, such as Daily.co and other commercial platforms, offer different levels of ease and customization for setting up WebRTC applications, catering to needs ranging from quick setups to fully branded solutions.
- The deployment of WebRTC applications involves considerations like network reliability, security, and browser compatibility, with commercial platforms simplifying many of the complexities associated with custom development.
What WebRTC Is
WebRTC (Web Real Time Communication) is an open-source project that allows peer-to-peer, real-time communication between web browsers to stream live video, audio and data streams over a network. Modern desktop and mobile browsers such as Google Chrome, Mozilla Firefox, Safari, Opera and other Chromium-based browsers have already implemented this technology natively. This is good news, as users don’t have to install a third-party plugin or an app to access the technology.
Older browser versions and legacy browsers such as Internet Explorer don’t have this technology. Users will need to use up-to-date browsers. You can check the full list of supported browsers:
In January 2021, the WebRTC 1.0 specification was transitioned from Candidate Recommendation to Recommendation status by the World Wide Web Consortium. This is a remarkable achievement considering the technology was first released into the public 10 years ago.
The WebRTC specification covers how browsers can access local media devices and how they can transmit media and generic application data to a browser using a set of real-time protocols. It does this through a set of JavaScript APIs which have already been covered by the articles linked to earlier. The specification also ensures that all communication is encrypted and that unwanted third parties can’t eavesdrop into the streams.
It’s important to note that WebRTC doesn’t cover everything such as signaling, the process of initiating a connection between browsers. This part of the specification was left out in order to prevent limitations with potentially new technology. A second reason was that WebRTC is primarily client-side technology, and issues such as sessions are best handled using server technology.
How Signaling Works for Web Browsers
The very definition of WebRTC is peer-to-peer communication between web browsers. The reality is, most browsers run in computers that operate behind a NAT (network address translation) device, and optionally a firewall. The NAT device, usually a router or modem, allows computers with private IP addresses to connect to the Internet via a single public IP address.
NAT devices protect personal computers from being directly exploited by malicious users over the Internet via the IP address. Unfortunately, it also blocks devices with private IP addresses from connecting to another private IP device over the Internet.
To overcome this challenge, the ICE (Interactive Connectivity Establishment) protocol was proposed by the Internet Engineering Task Force to allow private IP computers to discover and connect to other private computers over the public network.
This involves the use of a public signaling server that both clients can easily connect to. The peer computers connect to this server and use it to exchange IP addresses and ports required for the data sources and sinks. With this information, they can establish direct connection with each other and start streaming video, audio and data.
Here’s an animated demonstration:
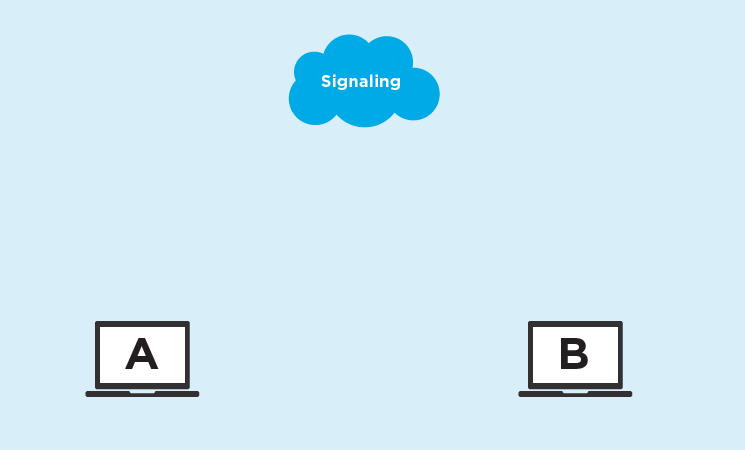
Photo credit: WebRTC Signaling
To set up WebRTC signaling, the ICE framework requires you to provide two types of servers, detailed below.
1. STUN Server
The STUN (Session Traversal Utilities for NAT) server does exactly what I’ve just described above. It simply provides a meeting space for computers to exchange contact information. Once the information is exchanged, a connection is established between the peer computers and then the STUN server is left out of the rest of the conversation.
Here’s an example script that runs on the client, which allows the browser to initiate connection through a STUN server. The script allows for multiple STUN server URLs to be provided in case one fails:
function createPeerConnection() {
  myPeerConnection = new RTCPeerConnection({
    iceServers: [
      {
        urls: "stun:stun.stunprotocol.org",
      },
    ],
  });
}
Connections established via STUN servers are the most ideal and cost-effective type of WebRTC communication. There’s hardly any running cost incurred by the users. Unfortunately, the connection may fail to establish for some users due to the type of NAT device each peer is using. In such a situation, the ICE protocol requires you to provide a fallback, which is a different type of signaling server known as a TURN server.
2. TURN Server
A TURN (Traversal Using Relay NAT) server is an extension of the STUN server. Where it differs from its predecessor is that it handles the entire communication session.
Basically, after establishing a connection between the peers, it receives streams from one peer and relays it to the other, and vice versa. This type of communication is more expensive and the host has to pay for the processing and bandwidth load required to operate a TURN server.
Below is a graphical depiction of the entire signaling process involving first the STUN server and then the TURN server as fallback:
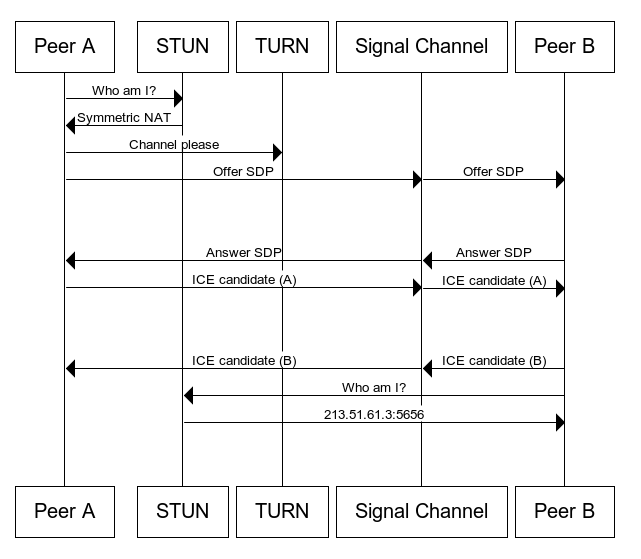
Photo credit: A complete architectural diagram showing the whole WebRTC process.
Building a Custom Video Chat Application
While it’s possible to set up your own video chat solution using plain JavaScript code and free public STUN servers, not everyone will be able to connect with each other on your platform. Using TURN servers is mandatory if you want to provide a reliable service to all your users.
As mentioned earlier, setting up WebRTC platforms can be complex. Fortunately for us, we have all-in-one commercial platforms that make building a WebRTC video chat application a breeze. Let’s now look at how SimpleWebRTC can lift our burdens.
What SimpleWebRTC Is
SimpleWebRTC is a platform that provides an easy and cost-effective service for developers to build and deploy custom real-time applications using React. Specifically, they provide the following:
- SimpleWebRTC SDK: a front-end library
- Hosting: STUN/TURN and SFU (Selective Forward Unit) servers
- Technical support
- Custom app development and WebRTC consulting services
- Single-tenant and on-premise infrastructure
- Talky: a free video chat app built entirely with SimpleWebRTC
Below are sample screenshots of some of the custom video chat projects they’ve helped their clients develop and launch.
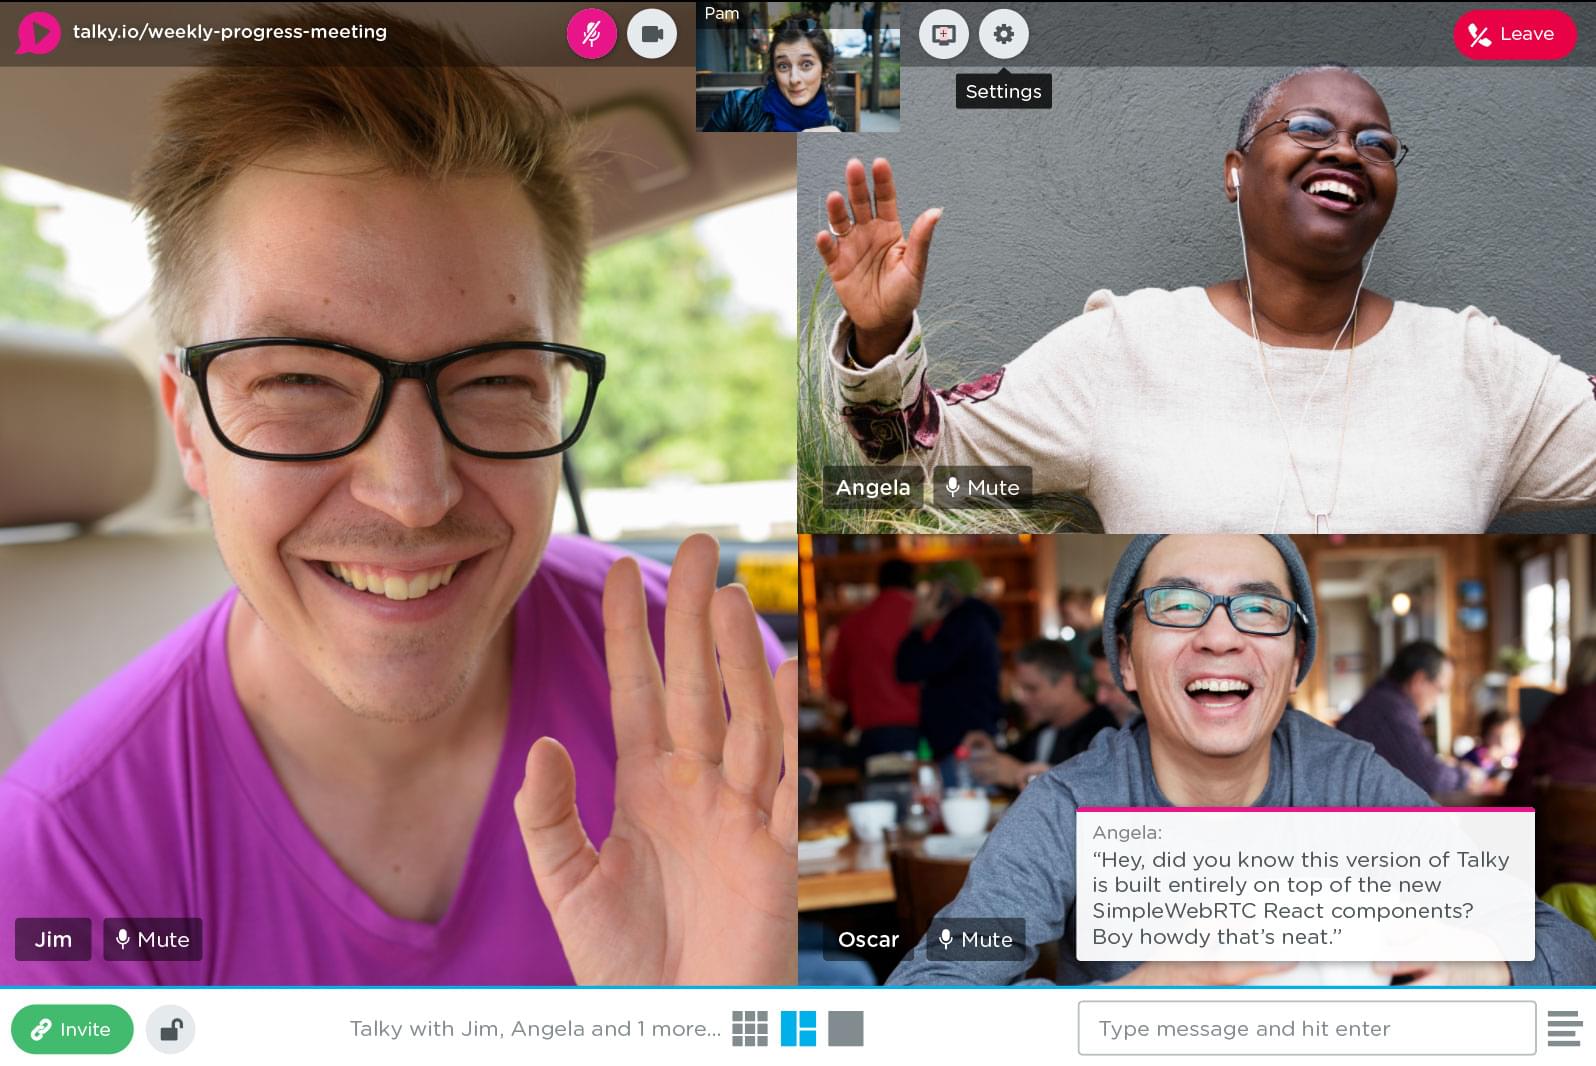
Photo credit: Talky
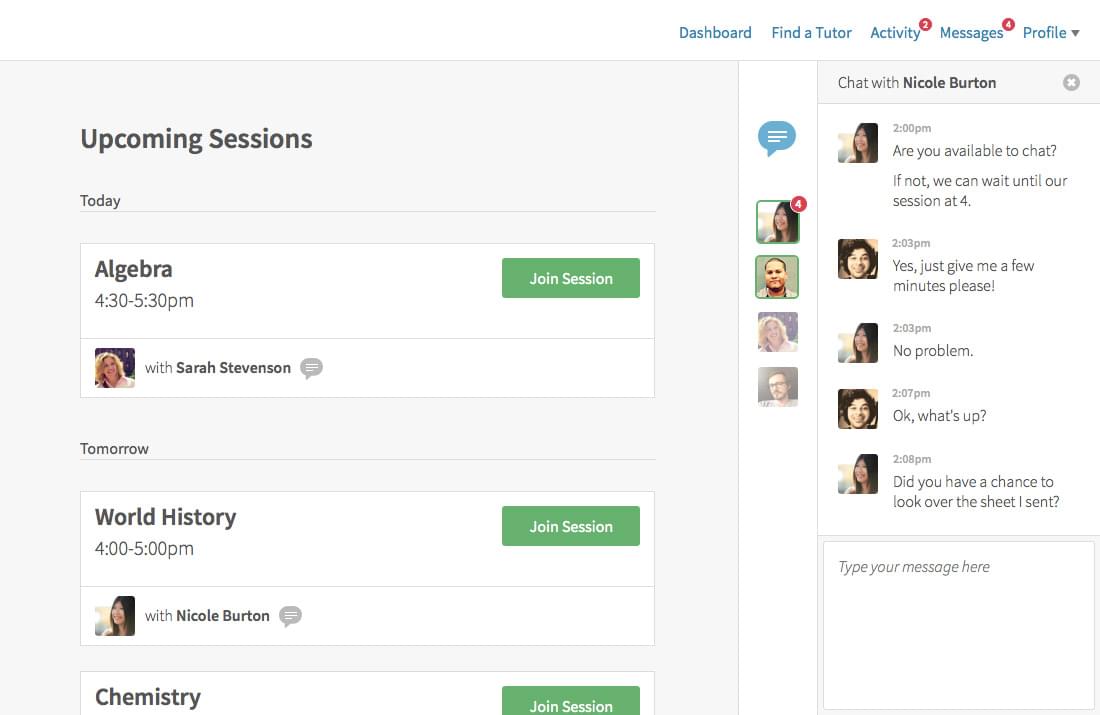
Photo credit: Web tutoring app
The main WebRTC services provided by SimpleWebRTC platform include:
- secure streaming of video, voice and screen-sharing
- end-to-end encryption
- support for up to 30 concurrent users
- unlimited rooms
In terms of pricing, they offer the following plans:
- Small Group: up to 6 participants, starting from $5 per month
- Large Group: up to 30 participants, starting from $3 per month
The Small Group plan has the benefit of having end-to-end encryption available over the Large Group plan. With the Small Group plan, 60–80% of the sessions are peer-to-peer connections where media streams never touch the servers. Bandwidth consumption for such types of sessions isn’t charged.
With Large Group plans, traffic is routed through a server called an SFU (Selective Forwarding Unit), where all streams are metered.
It’s important to note that most commercial alternatives, which we’ll briefly look at later, have per minute pricing. At first glance, it does appear quite affordable. However, you do get charged for peer-to-peer connections, which is free for SimpleWebRTC.
Prerequisites
The SimpleWebRTC client library is reliant on React and the Redux ecosystem. You’ll need to possess fundamental skills in the following areas:
- React
- Redux
- Asynchronous Redux Libraries — such as Redux Thunk, Redux Saga and Redux Observables
Future versions of the SimpleWebRTC SDK will include support of other frameworks such as React Native, Angular, Flutter, and Vue.js. There are also plans for releasing a “no-code” video chat solution that will allow users to automatically deploy a custom branded version of Talky.
Setting up an Account
Head over to simplewebrtc.com’s signup page and register a new account. You’ll be provided with 2GB of bandwidth plus another 3GB if you sign up for their newsletter. This allowance should be sufficient for developing and testing your video chat application.
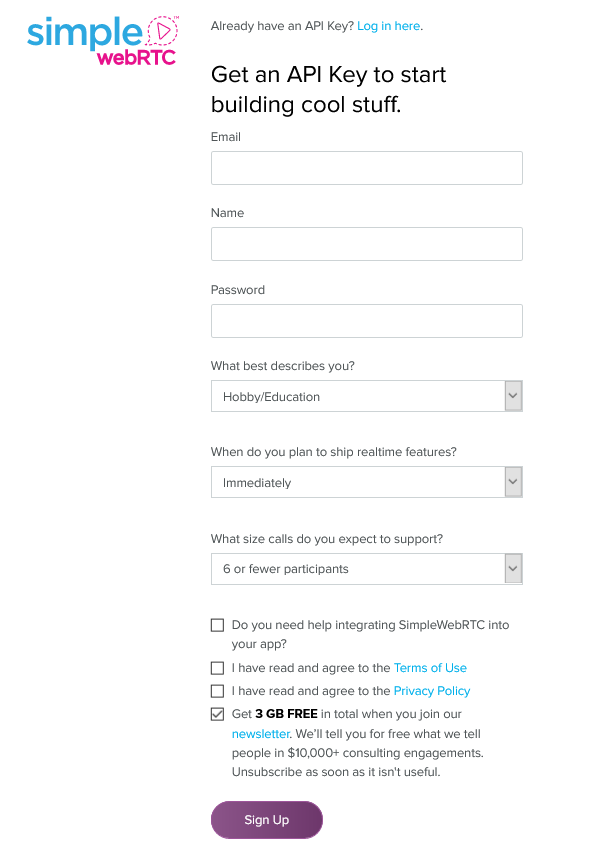
After signing up, you’ll need to confirm your email address. Completing this step should lead you to your dashboard page, where you’ll receive your API key.
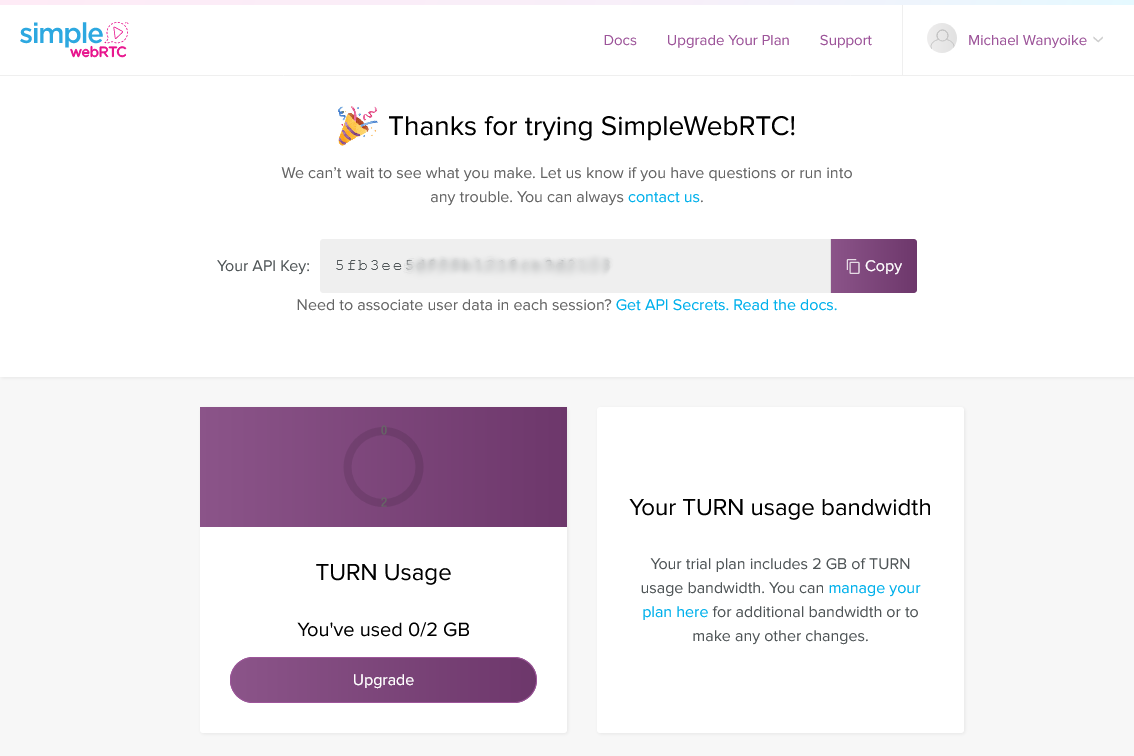
With this API key, you can start building your own custom WebRTC app. In the next section, we’ll run a complete sample application that the team at SimpleWebRTC have built.
Building and Running Sample App
Before we run the sample app, let’s briefly look at how we can start from scratch. First, you’ll need to set up a React project that uses webpack for development. The create-react-app generator can help you with this.
Next, you’ll need to install at least the following Redux dependencies:
npm install redux redux-thunk react-redux
Finally, install the client library provided by SimpleWebRTC:
npm install @andyet/simplewebrtc
After installing the package, you’ll need to updating your index.js file as follows:
import { Provider } from "react-redux";
import React from "react";
import ReactDOM from "react-dom";
import * as SWRTC from "@andyet/simplewebrtc";

// ====================================================================
// IMPORTANT SETUP
// ====================================================================
// Replace `YOUR_PUBLISHABLE_API_KEY` here with the Publishable API Key
// you received when signing up for SimpleWebRTC
// --------------------------------------------------------------------
const API_KEY = "YOUR_PUBLISHABLE_API_KEY";
// ====================================================================

const ROOM_NAME = "YOUR_ROOM_NAME";
const ROOM_PASSWORD = "YOUR_ROOM_PASSWORD";
const CONFIG_URL = `https://api.simplewebrtc.com/config/guest/${API_KEY}`;

const store = SWRTC.createStore();

ReactDOM.render(
  <Provider store={store}>
    <SWRTC.Provider configUrl={CONFIG_URL}>
      {/* Render based on the connection state */}
      <SWRTC.Connecting>
        <h1>Connecting...</h1>
      </SWRTC.Connecting>

      <SWRTC.Connected>
        <h1>Connected!</h1>
        {/* Request the user's media */}
        <SWRTC.RequestUserMedia audio video auto />

        {/* Enable playing remote audio. */}
        <SWRTC.RemoteAudioPlayer />

        {/* Connect to a room with a name and optional password */}
        <SWRTC.Room name={ROOM_NAME} password={ROOM_PASSWORD}>
          {(props) => {
            /* Use the rest of the SWRTC React Components to render your UI */
          }}
        </SWRTC.Room>
      </SWRTC.Connected>
    </SWRTC.Provider>
  </Provider>,
  document.getElementById("app")
);
As you can see in the code above, the SimpleWebRTC library handles the media connections, room creation, and keeps track of connection states with the help of Redux. We won’t progress with this example, unfortunately, since this would make up for quite a long tutorial.
Instead, we’ll look at a complete sample project you can download from GitHub, where you can see how it’s all put together. After downloading, you’ll need to provide your API key in public/index.html, as highlighted below:
<!DOCTYPE html>
<html lang="en">
  <head>
    <!-- IMPORTANT SETUP -->
    <!-- Change the YOUR_API_KEY section of the config URL to match your API key -->
    <meta
      name="simplewebrtc-config-url"
      content="https://api.simplewebrtc.com/config/guest/<PLACE YOUR API KEY HERE>"
    />
  </head>
  <body>
    ...
  </body>
</html>
Below are step-by-step instructions on setting up the sample app:
# Download sample app to your workspace
git@github.com:simplewebrtc/simplewebrtc-talky-sample-app.git

# Install Package dependencies
cd simplewebrtc-talky-sample-app
npm install

# Edit public/index.html as described above

# Start the dev server
npm start
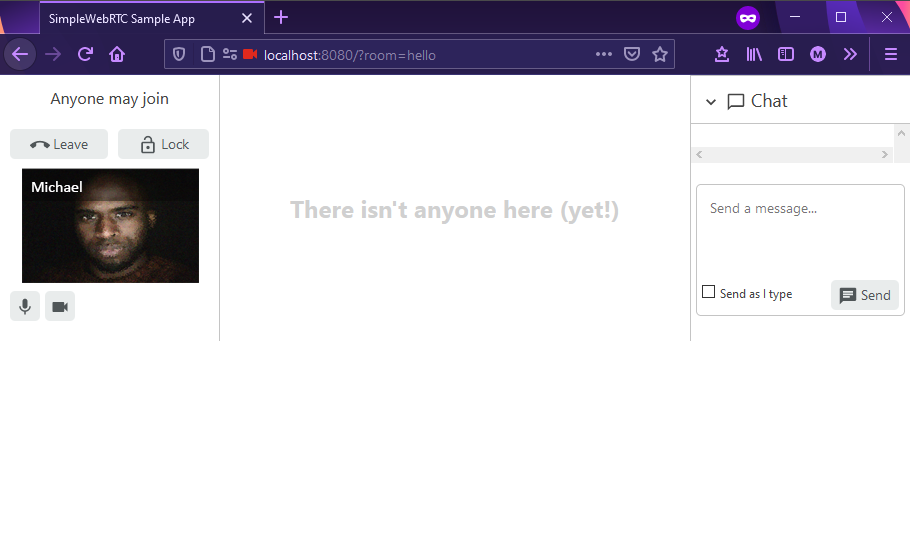
The browser should open automatically on localhost:8000. There are basically three steps on setting up a video chat meeting:
- specify a room name
- permit camera and microphone process
- join the call
Once you’ve completed the above steps, you should be met with a screen similar to that shown below.
To test the application locally, you can use another device on the same local network to connect to the app. All you have to do is provide the IP address and port of the host machine. You may also have to configure your firewall on the host machine to allow external network devices to connect to the application’s port.
Deployment
In order to deploy simplewebrtc-talky-sample-app, you’ll need to run the command npm run build. This will generate a dist folder. Copy the contents of this folder and upload via FTP to your web hosting platform. You can also use a service such as Netlify to host the application for you. However, the deployment process is different. You need to do the following:
- Fork or upload the
simplewebrtc-talky-sample-appto your own GitHub account. Make sure you’ve committedindex.htmlwith your API key. - Go to your Netlify dashboard, click New Site from Git, select GitHub, authorize Netlify to access your GitHub account, and then locate and select your
simplewebrtc-talky-sample-apprepository. - In the build settings page, ensure the build command is
npm run buildand the publish directory isdist. Click the Deploy site button.
In a few minutes, Netlify will pull in the source code, install the dependencies, run the build command, and deploy it to a unique subdomain on its platform. From here, you can share this URL with anyone in the world you’d like to have a video chat with.
Alternatives to SimpleWebRTC
As promised, we’ll end with some alternatives to SimpleWebRTC.
Daily
Daily.co is an alternative commercial platform that provides a real-time video API for developers. It comes with the easiest setup process if you want to host your own webRTC application quickly. All you need to do is register an account and acquire a unique subdomain on their platform.
You’ll also need to perform a quick video test on your browser to confirm that the API video call technology is working on your end. Next, you’ll be redirected to your dashboard where you need to create a room. Let’s call it hello for now. The dashboard provides a number of configurable settings for your room such as privacy, screen sharing and recording permissions.
Once you have your room set up, you can create an HTML file and copy the following code:
<!DOCTYPE html>
<html lang="en">
  <head>
    <meta charset="UTF-8" />
    <meta name="viewport" content="width=device-width, initial-scale=1.0" />
    <title>Vite App</title>
  </head>
  <body>
    <div id="root"></div>
    <script type="module" src="/src/main.jsx"></script>
    <script src="https://unpkg.com/@daily-co/daily-js"></script>
    <script>
      callFrame = window.DailyIframe.createFrame();
      callFrame.join({ url: "https://you.daily.co/hello" });
    </script>
  </body>
</html>
On the callFrame.join({ url: "https://you.daily.co/hello" }) line, you need to replace you with your subdomain, and hello with your room name. You can open the page locally in your browser and you should be able to make a video call. However, you’ll need to host this page on a public server to allow others to connect with you.
The above setup is quick and fast if you need to communicate with your remote team. However, if you need to build a custom video chat app with your own brand, or with custom front-end features, you’ll need to use the daily-js front-end library:
npm install @daily-co/daily-js
Your application will need a bundler like webpack or Rollup to work with this library. Vite and Parcel users are out of luck, unfortunately. There’s a complete sample React app on their GitHub repo that you can check out. There are instructions on how to configure the application and how to deploy it to Netlify.
Despite the library doing a lot of heavy lifting, you’ll notice the sample provided is complex, as there are numerous edge cases you need to keep track of and features you need to provide in order to give your users a reliable video chat experience.
Other Alternatives
There are many other alternatives to SimpleWebRTC and Daily that I’ll list next. The commercial ones include:
Twilio, Vonage and Frozen Mountain provide developers with front-end libraries and the back-end servers required to build and run a real-time video chat solution. Xirsys only provides the back-end servers — that is, the STUN and TURN servers. You’ll need to use an open-source library such as PeerJS for the client library to connect with it.
There are many open-source WebRTC libraries available online. However, most are not actively maintained except the following:
With the guidance of this tutorial on Google Codelabs, you can use plain JavaScript and a few Node.js libraries to build a simple video chat app. However, there are many edge cases not covered by the guide that you’ll have to figure out on your own.
Conclusion
To conclude, building a real-time video chat solution with WebRTC is easier when using a commercial platform. Going the open-source route is doable, but you’ll need to host your own TURN servers to ensure a reliable connection for all your users. In any case, the building process can be time consuming, given the relative complexity of the sample apps we’ve looked at.
They key question to ask yourself is whether or not it’s worth your time building your own custom real-time solution. Unless you plan on making WebRTC your core business, you’ll probably need to first consult with a company that has experience dealing with the technology.
Frequently Asked Questions (FAQs) on Building WebRTC Video Chat Applications
What is the Role of Signaling in WebRTC Video Chat Applications?
Signaling is a crucial part of WebRTC video chat applications. It is the process of coordinating communication to set up a call. Signaling is used to exchange metadata between peers, such as session control messages, error messages, and media metadata like codecs and codec settings, bandwidth, and media types. It’s important to note that WebRTC doesn’t specify a signaling protocol, leaving it up to the application.
How Can I Handle Network Changes in WebRTC?
Network changes, such as switching from Wi-Fi to 4G, can disrupt a WebRTC video chat. To handle this, you can use the ICE (Interactive Connectivity Establishment) framework. ICE uses STUN (Session Traversal Utilities for NAT) and TURN (Traversal Using Relays around NAT) servers to find the best path for the data packets, ensuring a stable connection even when the network changes.
How Can I Improve the Quality of Video Calls in WebRTC Applications?
The quality of video calls in WebRTC applications can be improved by adjusting the bitrate, resolution, and framerate. You can use the RTCRtpSender.setParameters() method to change these parameters dynamically during a call. Also, consider implementing adaptive bitrate (ABR) algorithms that adjust the video quality based on the network conditions.
How Can I Secure WebRTC Video Chat Applications?
WebRTC provides built-in security measures such as DTLS (Datagram Transport Layer Security) and SRTP (Secure Real-time Transport Protocol) for encrypting the data and media streams. However, you should also implement application-level security measures such as authentication and authorization, secure signaling, and data validation.
Can I Use WebRTC for Group Video Calls?
Yes, you can use WebRTC for group video calls. However, it requires more complex signaling and media routing. You can use a media server like Jitsi or Janus to handle the media streams in a group call. Also, consider using Simulcast or SVC (Scalable Video Coding) to optimize the video quality for each participant.
How Can I Test and Debug WebRTC Applications?
You can use tools like the WebRTC Internals page in Chrome and the about:webrtc page in Firefox to monitor the WebRTC stats and logs. Also, consider using automated testing tools like KITE (Karoshi Interoperability Testing Engine) for large-scale testing.
Can I Use WebRTC on Mobile Devices?
Yes, you can use WebRTC on mobile devices. The WebRTC APIs are available in the mobile browsers and you can also use native libraries like Google’s WebRTC for Android and iOS.
How Can I Handle Echo in WebRTC Video Calls?
Echo can be a common issue in WebRTC video calls. You can use the built-in echo cancellation feature in WebRTC. Also, consider using headphones or a headset to reduce echo.
Can I Record WebRTC Video Calls?
Yes, you can record WebRTC video calls. You can use the MediaRecorder API to record the media streams locally. For server-side recording, you can use a media server that supports recording, like Kurento.
How Can I Optimize the Bandwidth Usage in WebRTC Applications?
You can optimize the bandwidth usage in WebRTC applications by adjusting the video resolution, framerate, and bitrate. Also, consider using adaptive bitrate algorithms and congestion control mechanisms like Google’s BWE (Bandwidth Estimation) algorithm.