A Simple Content Management System in Sinatra

Key Takeaways
- The author proposes building a simple Content Management System (CMS) using Sinatra, a lightweight Ruby framework, and MongoDB for data persistence. The CMS would support Markdown and could be used as middleware for project content management.
- The CMS is built around a ‘Page’ model, which includes a title and content field. Pages can be created and saved in the MongoDB database, either individually or in a single line using the ‘create’ method.
- The CMS supports viewing pages through the creation of routes and views. An index page lists all pages in the database, and individual pages can be viewed by following links. The content of the pages is displayed using the Markdown method.
- The CMS also supports the creation of new pages through the browser. This is done by creating a route handler for a new page, displaying a form for the new page, and then handling the form submission. The new page is then saved to the database, and the user is redirected to the newly created page.
- Future developments for the CMS include editing and deleting pages, creating permalinks with ‘pretty URLs’ based on the page title, and adding more fields to the page model. The author also mentions the possibility of adding extension modules for navigation lists, file uploads, emails, etc.
One of the ideas put forward at the recent Summit Awesome Manchester Hackathon was put forward by Tom Oakley for a simple Content Management System that used Markdown. The idea didn’t get selected as one of the Hackathon projects, but I thought it sounded a great fit for writing in Sinatra (being lighweight itself and already having support for Markdown baked in). So, after the hackathon was over I decided to have a go at building it.
I thought it would be interesting (and hoepfully useful) if I documented the progress I made on RubySource as I went along … so here is part one of the series!
My idea is to build some Sinatra middleware that could be bolted on to a project to add some simple content management support. I also want to have taggable pages and the possibility of extensions (such as navigation lists modules, file upload modules, email modules etc).
MongoDB and Mongoid
I decided to use MongoDB for persistance. I’ve used it a little bit in the past and thought that it would be a good fit here. MongoDB is a NoSQL data store that is fast and scalable. It uses the concept of collections of documents instead of tables and rows. A big advantage is that it is schemaless, and therefore, doesn’t require any migrations. Also, you can add new fields on the fly (in fact documents in the same collection don’t even have to have the same fields), making it very flexible and suitable for agile development.
I chose to use Mongoid as an ORM since I liked the look of the syntax, it is well documented, and under very active development. I found installing MongoDB locally to be a bit of a pain, but the MongoDB documentation should help you out. Once it it installed, you need to start the mongod server. This is operating system specific, so consult the documentation about how to get it done.
Setting Up
To get started, I created the following Gemfile:
    source "https://rubygems.org"
    ruby "2.0.0"
    gem "sinatra"
    gem "slim"
    gem "sass"
    gem "mongoid"
    gem "redcarpet"
First of all, Mongoid requires at least Ruby 1.9.3, so it helps to put this in the Gemfile (specifically for when we come to deploy on Heroku later.) Obviously, we need Sinatra. I will be using Slim for the view logic and Sass for the styles. This is purely my choice and my default development choices currently. To be honest, there won’t be that much styling going on, but it’s always easier to use Sass. I’ve already mentioned Mongoid, which leaves Red Carpet – an implementation of markdown, created by the kind folks at GitHub.
To make sure everything is installed run bundle install from a command prompt.
Mongoid also requires a bit of set up. To do this, create a file called mongoid.yml and save it in the same directory. These are the default settings that I’ve found work nicely to start with Mongoid:
    development:
      sessions:
        default:
          database: cms
          hosts:
            - localhost:27017
    production:
      sessions:
        default:
          uri: <%= ENV['MONGOHQ<em>URL'] %>
          options:
            skip_version_check: true
            safe: true
In the same directory, we need to create a file called main.rb where our main functionality will go. To get things moving, I decided to dive in and build a classic application and will move it to modular later. At the beginning of main.rb, we need to require the relevant gems and configure Mongoid:
    require 'sinatra'
    require 'sinatra/reloader' if development?
    require 'mongoid'
    require 'slim'
    require 'redcarpet'
    configure do
      Mongoid.load!("./mongoid.yml")
    end
A Page Class
Now we come on to the heart of our CMS – the page model. We’ll start simple – give it a title and content field:
    class Page
      include Mongoid::Document
      field :title,   type: String
      field :content, type: String
    end
To use Mongoid in a class, all you need to do is include the Mongoid::Document model. After this you can define the fields to be used in the database. Our two fields are ‘title’ and ‘content’ and they are both of type string. Now we can have a go at creating some pages!
Create Some Pages
We don’t have any routes defined yet, but that doesn’t mean we can’t create any pages. It’s always useful to be able to run our program through the console. Open up a terminal and start up IRB using the following command:
$> irbThis should give you a ruby prompt similar to the one below where we can require the main.rb file:
2.0.0-p0 :001 > require './main'
=> true
Now we can have a go at adding some pages:
2.0.0-p0 :002 > hello = Page.new
 => #
2.0.0-p0 :003 > hello.title = "Hello World!"
 => "Hello World!"
2.0.0-p0 :004 > hello.content = "
This is our first page
"
 => "
This is our first page
"
2.0.0-p0 :005 > hello.save
 => true
We’ve just created our first page! This is done using the new method. We assign the page to the variable hello. This has setter methods of title and content provided by Mongoid. Once these have been set, we use the save method to commit the changes to the database.
Rather than writing out each property one at a time and then saving the object, we can create a document in the database in one line, using the create method:
2.0.0-p0 :006 > Page.create(title: "Markdown Page", content: "This page uses markdown")
 => #
We can check that the pages have been created by querying the database. First of all, let’s check how many pages have been saved using the count method:
2.0.0p0 :007 > Page.count
 => 2
That’s good news – there are 2 pages saved in the database, as we expected. There are numerous ways to search for the pages using Mongoid. Here are a selection of queries that we might use:
    2.0.0p0 :009 > Page.first
     => # Page.last
     => #, title: "Hello World!", content: "
This is our first page
">
The first and last methods do exactly as they say on the tin and find the first and last documents in the database, respectively. We can also find a specific document using the find method with the document’s id string as an argument:
    2.0.0p0 :011 > Page.find("5173f574a39401776a000002")
     => #
We might not always know the document id, so we can also search by the different fields, using the find_by and where methods:
2.0.0p0 :012 > Page.find_by(title: "Hello World!")
 => #This is our first page
">
2.0.0p0 :013 > Page.where(title: "Hello World!").first
 => #This is our first page
">
Although these look the same, there is a subtle difference: find_by returns a Page object, wheras where returns a MongoDB criteria, which is a proxy object that can be chained together. It doesn’t query the database until all the criteria have been completed.
Viewing the Pages
Now that we have some pages, let’s create some routes and views so that we can see them!
First of all, we’ll create an index page that lists all of the pages in the database. Add the following route to the bottom of main.rb:
get '/pages' do
  @pages = Page.all
  @title = "Simple CMS: Page List"
  slim :index
end
This finds all of the pages in the database and stores them as an array in the instance invariable @pages. We also use the instance variable @title to store the title of the page (this will be used in the layout view). We then render the view called index using slim.
We need to create that view now. Create a file called ‘index.slim’ and save it in a folder named views in the root directory. Place the following code inside this file:
  h1 Pages
  -if @pages.any?
    ul.pages
    - @pages.each do |page|
      == slim :page, :locals => {page: page}
  - else
    p No pages here!
This is simply a list of all the pages, but it uses a partial to display the actual information about each page in the line == slim :page, :locals => {page: page}. This means that we need to create another view called ‘page.slim’ (also saved in the ‘views’ folder), containing the following code:
li
  a href="/pages/#{page.id}" =page.title
It’s not a huge partial, but it makes sense to keep it in a separate file, as we might want to add more information to what we place in here later or use it in other views.
The page partial had a link to each individual page. We need to write a route handler to deal with that. This is used to display each individual page – place the following code below:
    get '/pages/:id' do
      @page = Page.find(params[:id])
      @title = @page.title
      slim :show
    end
This finds the page based on the id give in the URL and creates an instance variable called @page to store the Page object. We also store the title of the page in the @title instance variable.
Next, let’s create a page to view the actual page. Save the following code in the views directory as ‘show.slim’:
h1= @page.title
- if @page.content
  == markdown @page.content
This is a very straightforward view that shows the title as a level-1 heading and using the markdown method to display the content (if there actually is some content). Notice that both of these are methods of the @page instance variable created in the route handler.
Before we test this out, we need to create a layout for the application. Here is a basic HTML5 layout that will do just fine:
doctype html
html
head
title= @title || "Simple Sinatra CMS"
body
h1
a href="/pages" Simple Sinatra CMS
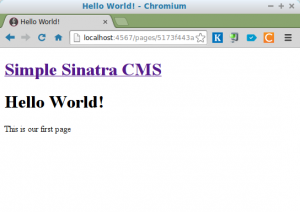
== yieldSave the code snippet above as ‘layout.slim’ in the views directory, then start up a server by typing ruby main.rb into a terminal, then go to http://localhost:4567/pagesin your browser and you should see a list of pages similar to the following:

Have a go at navigating around all the pages!
Creating Pages
That was fun, but we only have two pages, so we need to create more … and in the browser too.
First of all, we need to create a route handler for the page where we will add a new page. Add the following code to ‘main.rb’, but make sure that it goes before the ‘/pages/:id’ route (this is because Sinatra always looks for the first route that matches a URL and ‘/pages/:id’ matches ‘/pages/new’ by setting params[:id] to ‘new’):
get '/pages/new' do
  @page = Page.new
  slim :new
end
This simply creates a new page object and stores it in the instance variable @page, which will be available in the view. We probably won’t need this object at the moment, but in the future we might be using the same form to edit a page as we do to create a new one. The edit form will have references to the page that is being edited, which will be the @page instance variable. If this didn’t exist then we’d get errors, so we just create a new Page object to avoid this.
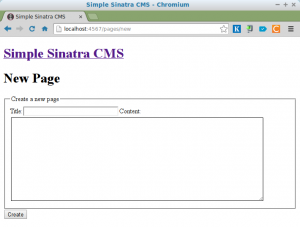
We then display the new view, which we better create in the ‘views’ folder, here’s the code:
h1 New Page
form action="/pages" method="POST"
  fieldset
    legend Create a new page
    == slim :form
  input type="submit" value="Create"
This uses a partial for the actual form (so we can reuse it in the edit page). We also need to save the following as ‘form.slim’:
label for="title" Title:
input.title type="text" name="page[title]" value="#{@page.title}" size="32"
label for="content" Content:
textarea.content name="page[content]" rows="12" cols="72" ==@page.content
At the moment, we only have two fields that are required, so it’s a fairly straighforward form. You can see the references to the @page instance variable – these will show up as blank when it is a new page.
Now we need to sort out what happens when that form is submitted. We can use a route handler to deal with this. We use the URL ‘/pages’ as this is what was in the form’s ‘action’ attribute. But in this case, we use the HTTP verb ‘post’ as this is the method used by the form when it is submitted:
post '/pages' do
   page = Page.create(params[:page])
   redirect to("/pages/#{page.id}")
end
In this action, we create a new Page object using the create method that we used in IRB earlier. params[:page] is a hash of all the values entered in the form. We then use Sinatra’s helpful redirect and to methods to redirect to the URL for the newly created page.
Now that all the routes are in place, we just need to add a link on the index page to create a new page. Make the following line somewhere near the top of index.slim:
a href='/pages/new' Add a new pageRestart the server (Hold down Ctrl + C then type ruby main again) and have a go at creating some new pages.
Eureka! We have the beginnings of our simple content management system. We can create new pages using Markdown and view them.
In part 2, we’ll look at editing and deleting pages and also how to create permalinks with ‘pretty URLs’ based on the title of the page.
I hope you’ve enjoyed this post, please leave any feedback in the comments section. I’d be especially interested in hearing any ideas for the project going forward.
Frequently Asked Questions about Sinatra Content Management System
How can I install Sinatra for my Ruby application?
Sinatra is a gem, a package in Ruby, which can be installed by running the command gem install sinatra in your terminal. Ensure that you have Ruby installed on your system before you proceed. If you’re using Bundler, you can add Sinatra to your Gemfile with the line gem 'sinatra' and then run bundle install.
How can I connect my Sinatra application to a database?
Sinatra doesn’t come with built-in database support, but you can easily connect it to a database using gems like ActiveRecord or DataMapper. For instance, to use ActiveRecord, you’ll need to add the sinatra-activerecord and rake gems to your Gemfile, then run bundle install. You can then set up your database connection in your main application file.
How can I create routes in Sinatra?
In Sinatra, routes are defined in the main application file. A route is simply a HTTP method paired with a URL-matching pattern. When your app receives a request, it matches the request against the defined routes and executes the code in the matching block. For example, to create a route for the homepage, you would write get '/' do 'Hello, world!' end.
How can I use templates in Sinatra?
Sinatra supports templates via several different engines, including ERB and Haml. To use a template, you simply need to create a view file with the appropriate extension (e.g., .erb for ERB templates), then call the erb or haml method in your route. For example, get '/' do erb :index end would render the views/index.erb file.
How can I handle form data in Sinatra?
Form data in Sinatra is available via the params hash. For example, if you have a form with a text field named username, you can access the submitted username with params['username']. You can then use this data to update your database, render a new view, or perform any other action.
How can I serve static files in Sinatra?
By default, Sinatra serves static files from the public directory in your application root. Simply place your static files (e.g., CSS, JavaScript, images) in this directory, and they’ll be available at the root URL. For example, public/style.css would be available at http://yourapp.com/style.css.
How can I handle errors in Sinatra?
Sinatra provides several methods for handling errors. The simplest is the error method, which takes an HTTP status code and a block. The block will be executed whenever an error with that status code occurs. For example, error 404 do 'Not found' end would display a ‘Not found’ message whenever a 404 error occurs.
How can I test my Sinatra application?
Sinatra applications can be tested using a variety of tools, including Rack::Test, RSpec, and Capybara. These tools allow you to simulate requests to your application and check the responses. For example, with Rack::Test, you can write a test like get '/' assert last_response.ok?.
How can I deploy my Sinatra application?
Sinatra applications can be deployed on any server that supports Rack applications. This includes popular options like Heroku, AWS, and DigitalOcean. The exact deployment process will depend on your server, but generally involves pushing your code to the server, installing any necessary dependencies, and starting the application.
How can I secure my Sinatra application?
Sinatra provides several built-in mechanisms for securing your application, including session support and protection against cross-site scripting and cross-site request forgery. Additionally, you can use the sinatra-flash gem to display one-time messages to the user, which can be useful for displaying error or success messages.
Darren loves building web apps and coding in JavaScript, Haskell and Ruby. He is the author of Learn to Code using JavaScript, JavaScript: Novice to Ninja and Jump Start Sinatra.He is also the creator of Nanny State, a tiny alternative to React. He can be found on Twitter @daz4126.