


Key Takeaways
- ThemeableBrowser is a customizable fork of the core InAppBrowser plugin in PhoneGap, allowing enhanced styling and functionality for in-app web browsing.
- Installation of the ThemeableBrowser requires Node.js and npm, followed by adding the plugin via the Cordova command line with `cordova plugin add cordova-plugin-themeablebrowser`.
- The plugin supports a variety of customizable options such as toolbar color, button images, and event callbacks, enhancing the user’s browsing experience within the app.
- Custom buttons and menus can be added to the browser’s toolbar, with functionality to handle specific actions or navigate within the app, providing a tailored browsing interface.
- Developers can utilize event listeners to interact with the browser, handling events like page loads, button presses, and custom actions, which allows for dynamic web content management directly within the app.
PhoneGap is a framework that allows developers to build mobile applications using HTML, CSS and JavaScript. With it, you can build applications for a variety of mobile operating systems such as Android, iOS and Windows Mobile. Plenty of core plugins and API hooks are available and there is a thriving community ecosystem.
For example, using cordova-plugin-geolocation you can get a user’s locations and with cordova-plugin-vibration you can make the user’s device vibrate. In this tutorial I am going to focus on one specific plugin that is not part of the core suite, ‘ThemeableBrowser’. It’s a fork of the core InAppBrowser plugin that allows you to open external websites within an app, style the browser and add custom actions.
By the end of this tutorial, you will have created a simple mobile app which displays SitePoint’s website alongside some bonus features.
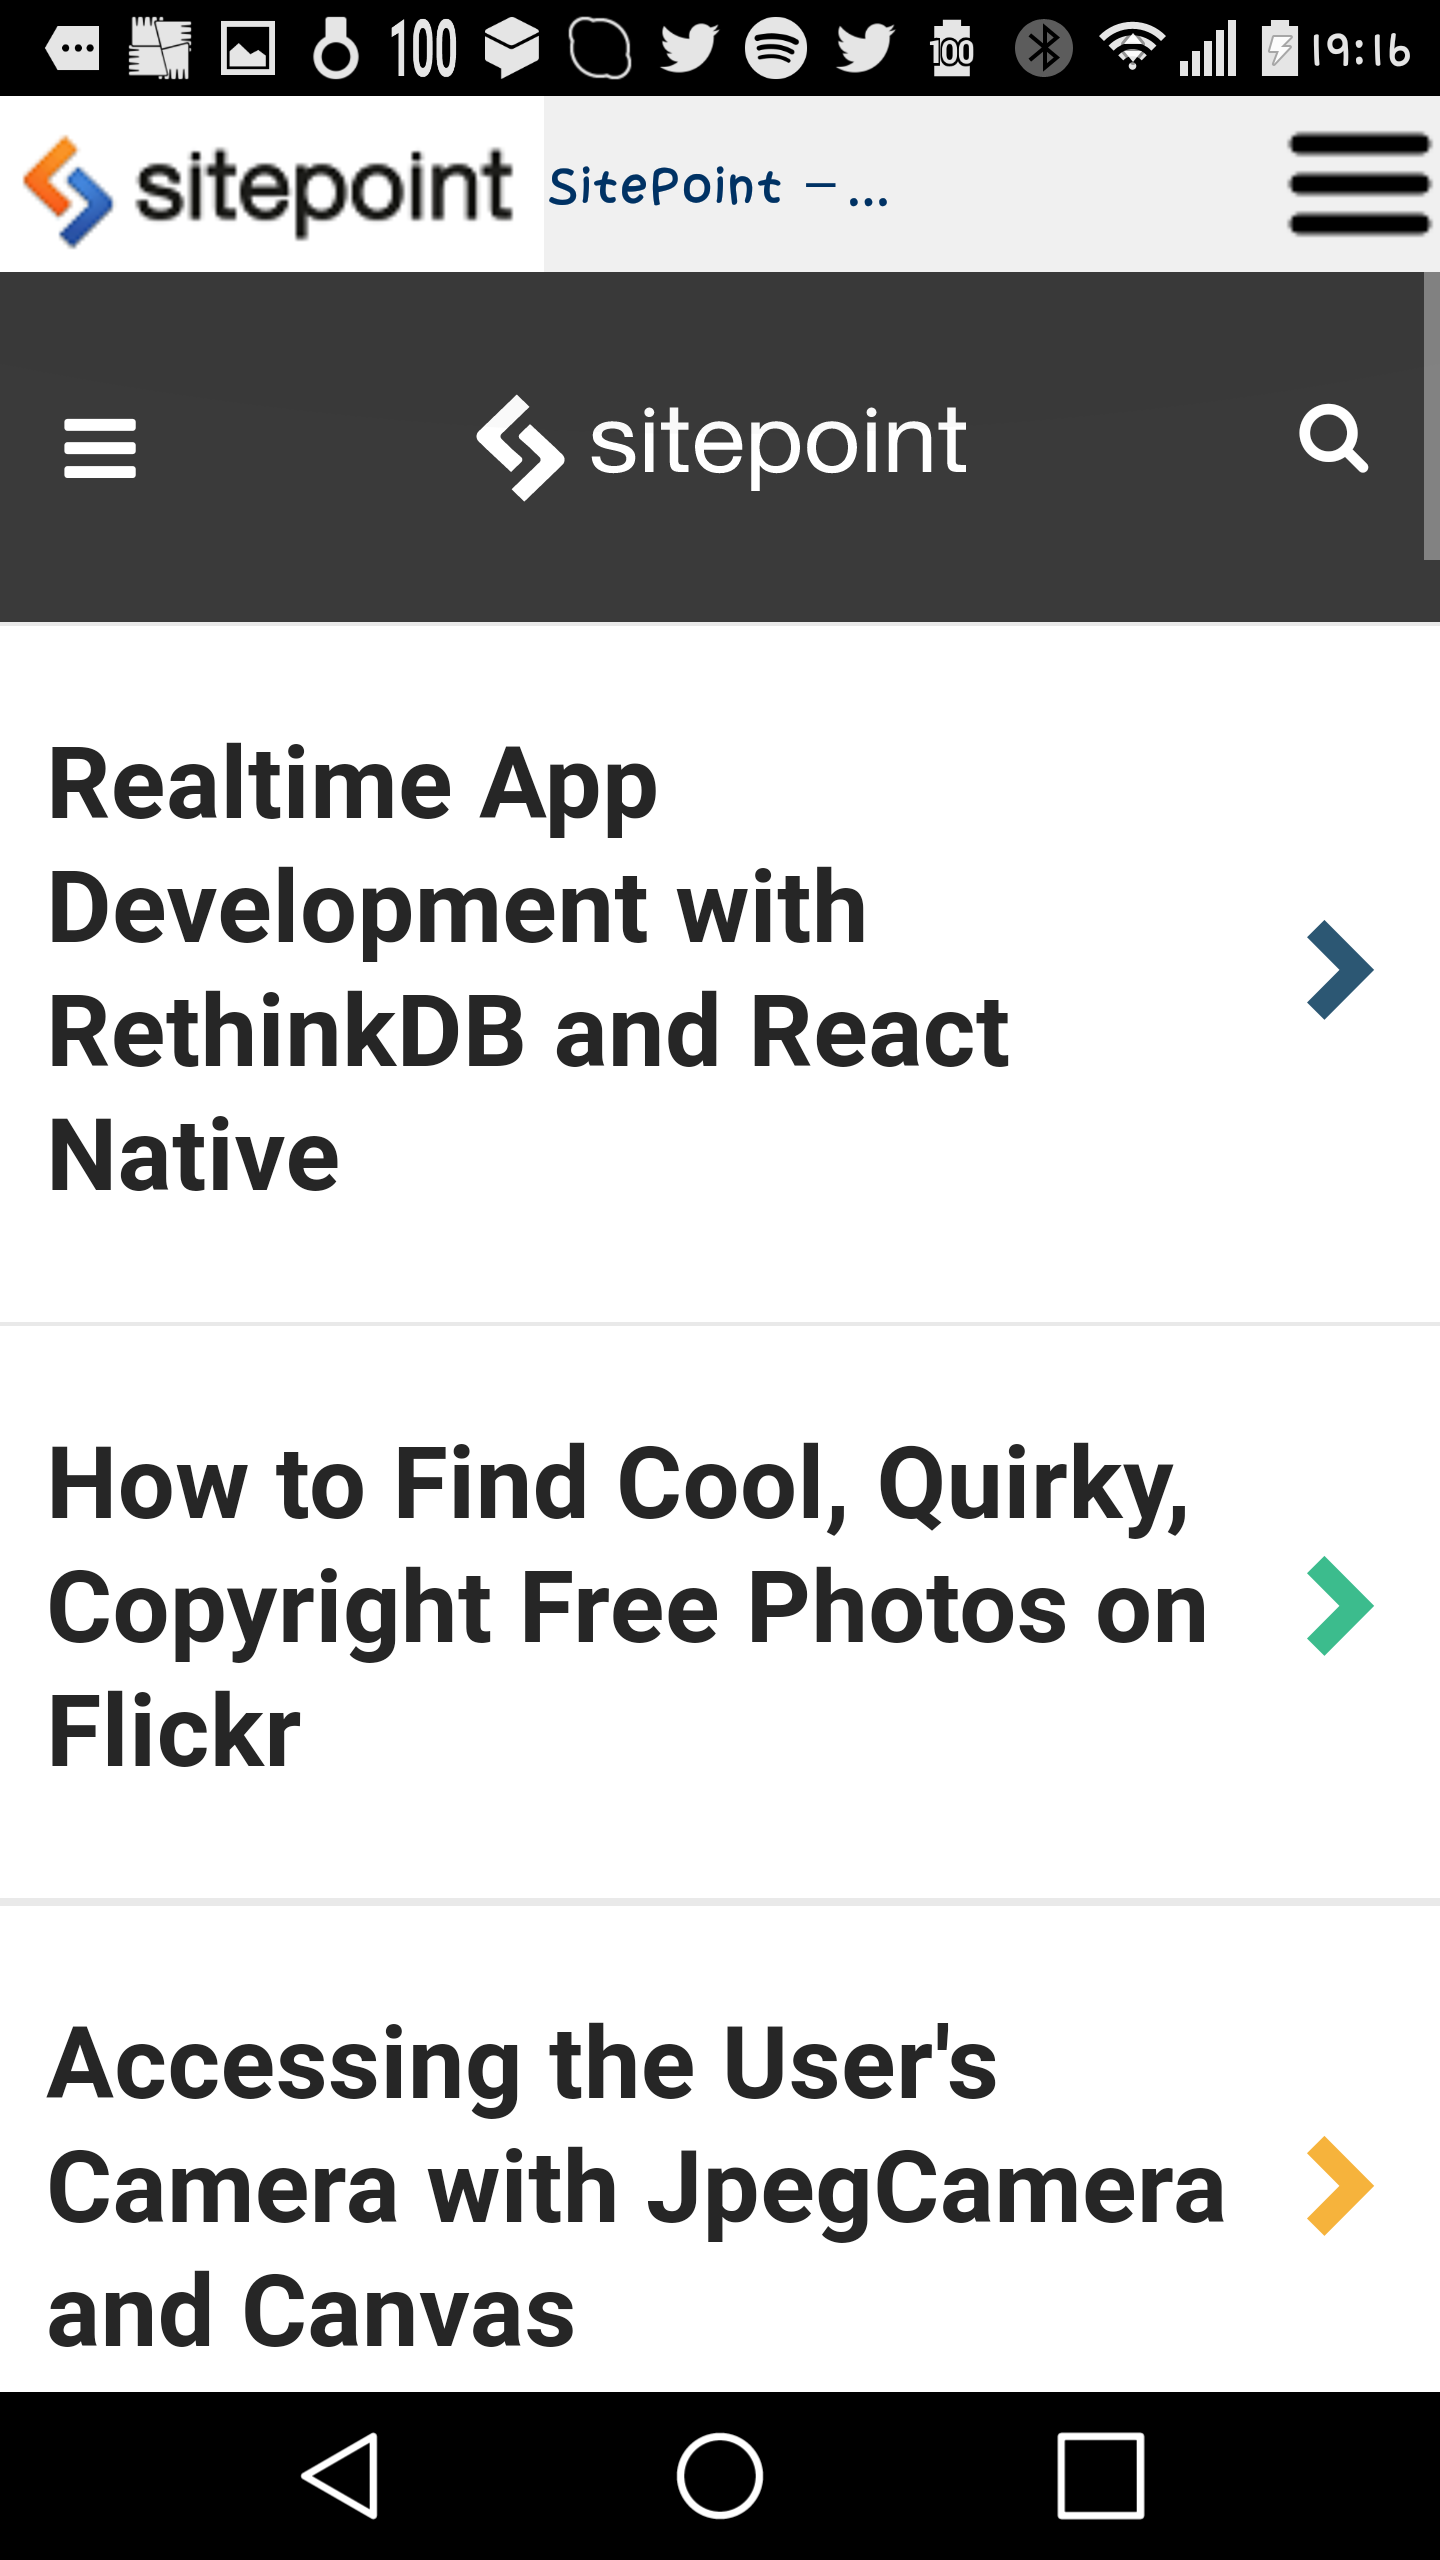
Notice the hamburger icon to the right, the logo to the left and the title of the current webpage in the middle
You can find the code for this tutorial on GitHub.
Creating an ‘Hello World’ PhoneGap App
You will need Node and npm installed. If you don’t already then read SitePoint’s quick tip to get you started.
Now run the following in your terminal to install PhoneGap:
npm install -g phonegap@latest
Now you can run:
phonegap create project-name
On the command line to create a new project and a project-name folder. Inside that folder is a www folder that contains your HTML-based application.
To test the application in a browser run:
phonegap serve
Or run the application on an emulator (in this case iOS) or device with:
phonegap run ios
You can build a test version of the app using the phonegap build command. If you want to make a version ready for release to the appropriate device store (in this case Android), run phonegap build android --release --buildConfig fileWithKeyInformation.json, passing the command build data (such as a keystore) in a JSON file.
You may need to download other dependencies to build mobile apps for different devices. For example, to build an app for the Google Play Store you will need to install the Android SDK, Java SE Runtime Environment and the Java Development Kit.
Installing and Managing Required Plugins
You can see the plugins an app is using by typing phonegap plugin list inside a PhoneGap project folder. You can delete unneeded plugins using phonegap plugin remove plugin-name. You can add plugins using phonegap plugin add plugin-name. It’s good practice to remove the plugins you don’t need as many use permissions that may be unnecessary and put off potential users.
To declare that you want to use the ThemeableBrowser plugin, run phonegap plugin add cordova-plugin-themeablebrowser inside the project folder. You can then call its methods within JavaScript code using cordova.ThemeableBrowser. You also need to add a text-to-speech (tts) API for use within the custom browser. Do this by running phonegap plugin add https://github.com/domaemon/org.apache.cordova.plugin.tts.git and using navigator.tts within JavaScript code. You can see all the available methods of the tts in its included JavaScript file.
Launching the Custom Mobile Browser
As the code for the application contains only HTML, CSS and JavaScript you can use a file and folder structure that suits you. The ‘Hello World’ PhoneGap app comes with an index.html file (you can define the file from which your application starts in config.xml) where you can add your logic and load other assets that the application requires such as JavaScript files.
Sections of the code use JQuery, so add this as a dependency to index.html:
<script src="https://code.jquery.com/jquery-1.12.4.min.js" integrity="sha256-ZosEbRLbNQzLpnKIkEdrPv7lOy9C27hHQ+Xp8a4MxAQ=" crossorigin="anonymous"></script>
Open www/js/index.js and you will notice:
...
bindEvents: function() {
    document.addEventListener('deviceready', this.onDeviceReady, false);
},
...
With PhoneGap, it’s best to trigger application logic after the deviceready event has fired. This event fires after all PhoneGap APIs have loaded and the device is ready to execute further code. If you run any code before it has fired and use an hardware APIs, Geolocation for example, there is a chance that the application will crash.
Call the method that will open the SitePoint website with ThemeableBrowser inside the receivedEvent function after receiving notification that the device is ready:
receivedEvent: function(id) {
    app.openPage("https://www.sitepoint.com");
    ...
}
The openPage method takes an URI, calls cordova.ThemeableBrowser.open, passing it the URI and an object with options and saves the reference to the opened webpage in a property. You need that property if you want to navigate to another page whilst the user is browsing this one, or if you want to close the web browser.
Create the function in www/js/index.js:
...
openPage: function(url) {
   var options = app.getBrowserOptions();
   app.properties.ref = cordova.ThemeableBrowser.open(url, '_blank', options);
   app.addEventListeners();
},
...
And the associated getBrowserOptions function that passes the options to the function:
...
getBrowserOptions: function() {
    var options = {
      ...
    }
    return options;
},
...
In the options object, add a status bar, and a toolbar property which sets the height of the toolbar to 44 pixels and adds a white-ish background color:
var options = {
  statusbar: {
    color: '#ffffffff'
},
  toolbar: {
      height: 44,
      color: '#f0f0f0ff'
  },
}
Add another property which indicates that you want to show the title of the opened webpage in the middle of the toolbar, and give it a specific color:
var options = {
 toolbar: {
     height: 44,
     color: '#f0f0f0ff'
 },
 title: {
     color: '#003264ff',
     align: "center",
     showPageTitle: true
 }
}
Add a customButtons property which contains an array of custom buttons to be added to the browser. To add a new button, you pass an object with the button’s features.
For this particular button pass the object an image or wwwImage property with the URL to the image of the button. wwwImage differs from the image property in that the path to the image when using wwwImage starts from the www folder whereas image expects images in the native project. You can find the images used in the example here.
Align the button to the left side of the toolbar and tell ThemeableBrowser that you want the event called SitePointSitePressed to fire when the button is clicked. You will add the event later.
...
options.customButtons = [{
    wwwImage: 'img/btns/sitepoint-logo.png',
    wwwImagePressed: 'img/btns/sitepoint-logo.png',
    wwwImageDensity: 1,
    align: 'left',
    event: 'SitePointSitePressed'
}]
...
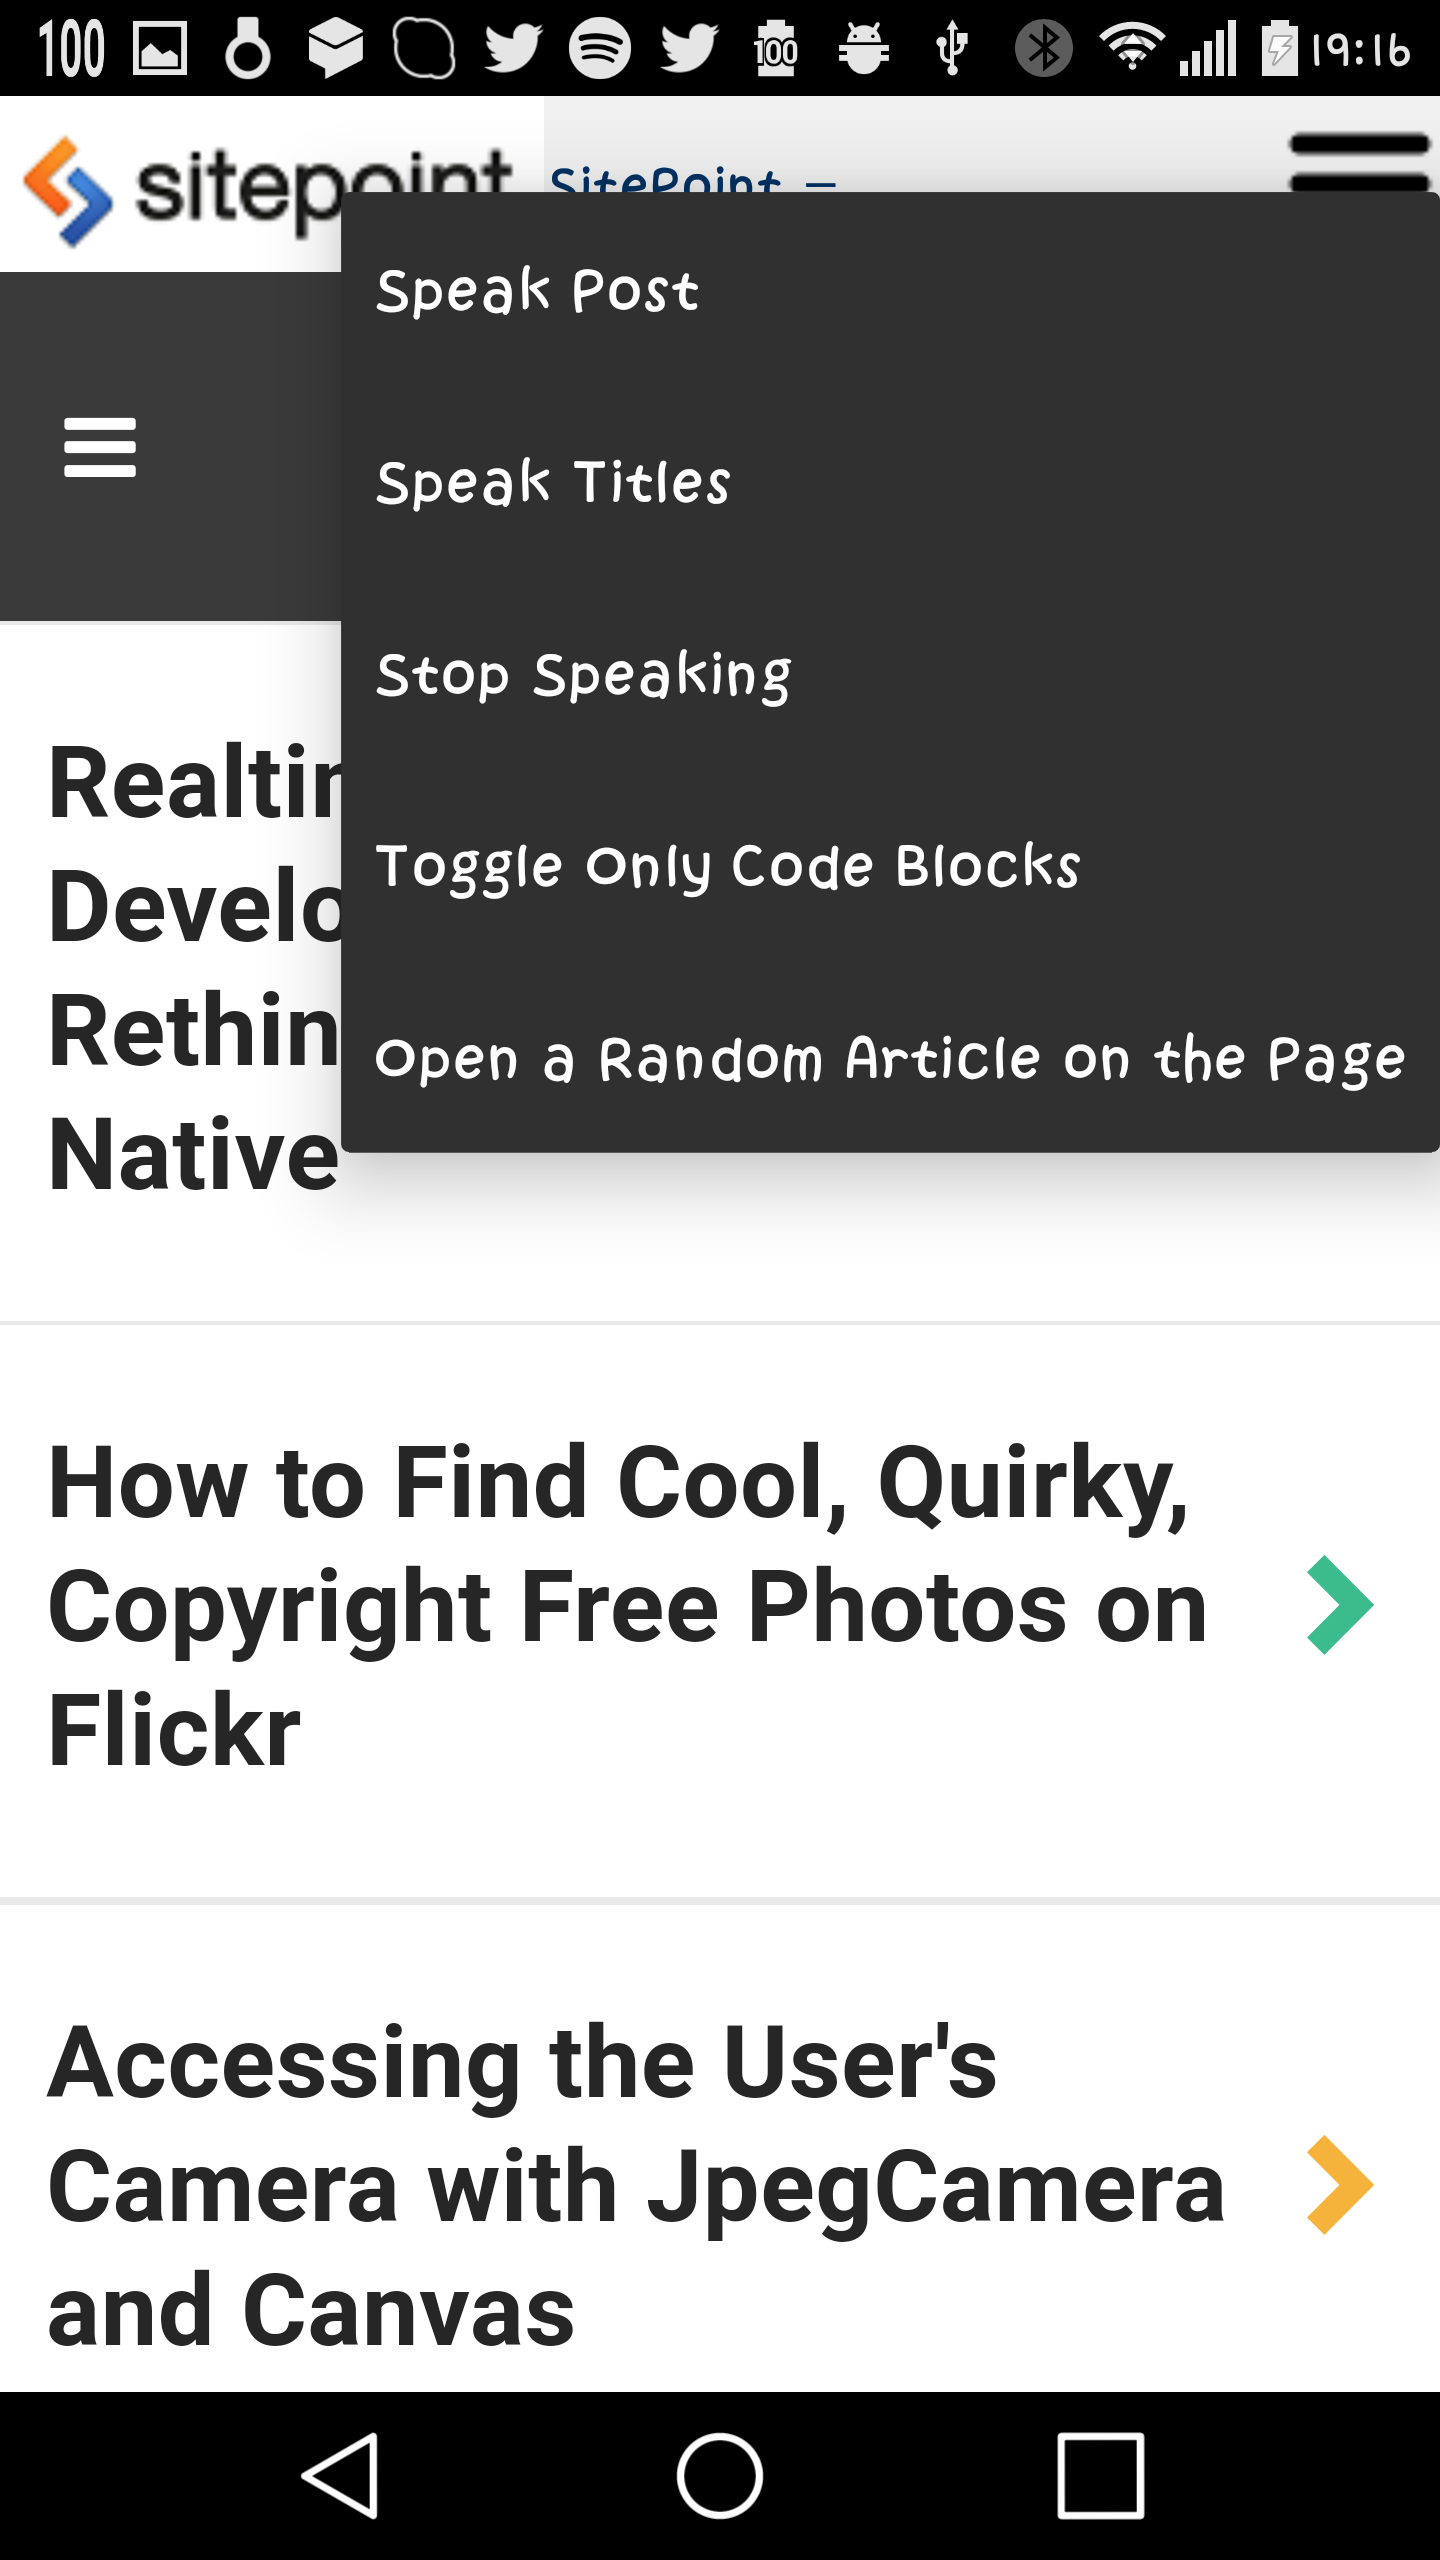
Add a menu to the toolbar by creating a menu property, again passing an image. Align it to the right and add an items property which contains an array of the different menu items and the event that is going to fire when selected.
...
options.menu = {
    wwwImage: 'img/btns/menu.png',
    imagePressed: 'img/btns/menu-pressed.png',
    wwwImageDensity: 1,
    title: 'Effects',
    cancel: 'Cancel',
    align: 'right',
    items: [{
        event: 'speakPostPressed',
        label: "Speak Post"
    },
        {
            event: 'speakTitlesPressed',
            label: "Speak Titles"
        }, {
            event: 'stopSpeakingPressed',
            label: "Stop Speaking"
        }, {
            event: 'viewCodeBlocks',
            label: 'Toggle Only Code Blocks'
        },
        {
            event: 'randomArticlePressed',
            label: 'Open a Random Article on the Page'
        }
    ]
}
...
You now need to add event listeners and functions. To do this, set the event listeners on the reference you have of the result of cordova.ThemeableBrowser.open, i.e. the app.properties.ref set before.
These event listeners that call the run method of the object that will handle the application’s logic, passing it different parameters for each event. The run method will to try to call the method that you pass as a parameter.
addEventListeners: function() {
  app.properties.ref.addEventListener('viewCodeBlocks', function(e) {
        SitePointPostOptions.run("viewCodeBlocks");
    }).addEventListener('speakPostPressed', function(e) {
        SitePointPostOptions.run("speakPost");

    }).addEventListener(cordova.ThemeableBrowser.EVT_ERR, function(e) {
        console.error(e.message);
    }).addEventListener(cordova.ThemeableBrowser.EVT_WRN, function(e) {
        console.log(e.message);

    }).addEventListener("stopSpeakingPressed", function(e) {
        SitePointPostOptions.run("stopSpeaking");

    }).addEventListener("speakTitlesPressed", function(e) {
        SitePointPostOptions.run("speakTitles");
    })
    .addEventListener("SitePointSitePressed", function(e) {
        SitePointPostOptions.run("logoClick");
    })
    .addEventListener("randomArticlePressed", function(e) {
        SitePointPostOptions.run("randomArticle");
    }).addEventListener("loadstop", function(evt) {
        if (SitePointPostOptions.properties && SitePointPostOptions.properties.length) {
            SitePointPostOptions.properties.areCodeBlocksShown = false;
        }
},
The next step is crucial. Add an extra event listener for the loadstop event of the property that contains a reference to the opened webpage. The loadstop event fires whenever the browser finishes loading a webpage. It could be the webpage that just opened or any other webpage that the user navigates to afterwards.
In the listener, return from the function if the user is not located on the SitePoint website. If they are, execute JavaScript code on the webpage that the user is on.
Call document.body.innerHTML to get the HTML contents of the webpage and add a callback which saves the content to a property. Using this property, you can traverse and read the contents of any webpage the user navigates to.
addEventListeners: function() {
  app.properties.ref.addEventListener('viewCodeBlocks', function(e) {
          SitePointPostOptions.run("viewCodeBlocks");
      }).addEventListener('speakPostPressed', function(e) {
          SitePointPostOptions.run("speakPost");

      }).addEventListener(cordova.ThemeableBrowser.EVT_ERR, function(e) {
          console.error(e.message);
      }).addEventListener(cordova.ThemeableBrowser.EVT_WRN, function(e) {
          console.log(e.message);

      }).addEventListener("stopSpeakingPressed", function(e) {
          SitePointPostOptions.run("stopSpeaking");

      }).addEventListener("speakTitlesPressed", function(e) {
          SitePointPostOptions.run("speakTitles");
      })
      .addEventListener("SitePointSitePressed", function(e) {
          SitePointPostOptions.run("logoClick");
      })
      .addEventListener("randomArticlePressed", function(e) {
          SitePointPostOptions.run("randomArticle");
      }).addEventListener("loadstop", function(evt) {
          if (SitePointPostOptions.properties && SitePointPostOptions.properties.length) {
              SitePointPostOptions.properties.areCodeBlocksShown = false;
          }

       if (evt.url.indexOf("sitepoint.com") === -1) {
           return;
       }
       app.properties.ref.executeScript({
               code: "document.body.innerHTML"
           },
           function(values) {
               alert("The app's menu is now ready for use.");
               app.properties.pageContents = values;
           }
       );
   })
},
The method that opens a random article shows something interesting, how to close the open webpage and open a new one. This uses the close method on the property with the opened page and sets a listener for the exit event of the browser. Whenever the browser is about to exit, wait a few seconds for it to close and open a new page by calling the openPage method with the new URI. The new URI is a random href attribute of the anchors of all articles within a SitePoint page that contains lists of articles. If the page does not contain any articles, pop up an alert.
Add the logic behind the browser to a new www/js/menuLogic/logic.js file:
SitePointPostOptions = {};
SitePointPostOptions.properties = {};
SitePointPostOptions.properties.areCodeBlocksShown = false;

SitePointPostOptions.run = function(type, options) {
    SitePointPostOptions[type].call(this, options);
}

SitePointPostOptions.randomArticle = function() {
    var articles = $(app.properties.pageContents[0]).find(".article .article_title a");
    if (!articles.length) {
        alert("You are probably not on a SitePoint page with a list of articles!");
    }
    var randomIndex = Math.floor(Math.random() * articles.length);
    var linkToFollow = articles[randomIndex].getAttribute("href");
    app.properties.ref.addEventListener("exit", function() {
        setTimeout(function() {
            app.properties.ref = null;
            app.openPage(linkToFollow);
        }, 2000)

    })
    app.properties.ref.close();
}
Link to this new file in index.html:
<script type='text/javascript' src='js/menuLogic/logic.js'></script>
When the user clicks the logo (the custom button added on the left side), open the SitePoint website using the system’s default browser. To open a webpage outside of the internal browser, give a second parameter to the cordova.ThemeableBrowser.open method with the value _system.
Still inside www/js/menuLogic/logic.js, add:
SitePointPostOptions.logoClick = function() {
  cordova.ThemeableBrowser.open("https://www.sitepoint.com", "_system");
}
The next method speaks the titles of webpages by passing the text of all heading elements to the speakText helper.
SitePointPostOptions.speakTitles = function() {
    //TODO: Speak only the tiles of the pages
    var titlesContents = $(app.properties.pageContents[0]).find("h1,h2,h3,h4,h5,h6");
    if (!titlesContents.length) {
        alert("There is probably no title out there to speak aloud!");
    }
    titlesContents = titlesContents.text();
    SitePointPostOptions.speakText(titlesContents);
}
The next method speaks the contents of posts, with an accompanying method that stops the speaking:
SitePointPostOptions.speakPost = function() {
    //TODO: speak post
    var postContents = $(app.properties.pageContents[0]).find(".ArticleCopy").find("p,h1,h2,h3,h4,h5,h6");
    if (!postContents.length) {
        alert("There is probably no post open to speak aloud.");
    }
    postContents = postContents.text();
    SitePointPostOptions.speakText(postContents);
}

SitePointPostOptions.stopSpeaking = function() {
    navigator.tts.stop(function() { /*success callback*/ }, function() { /*err callback*/ });
    navigator.tts.interrupt("", function() { /*success callback*/ }, function() { /*err callback*/ });

    navigator.tts.shutdown(function() {
        /*successfully shut down tts*/
    }, function() { /*err*/ })
}
The next method toggles code blocks on the given SitePoint post by inserting specific CSS rules to the webpage that the user is viewing:
SitePointPostOptions.viewCodeBlocks = function() {
  //TODO: filter only code blocks;
  if (SitePointPostOptions.properties.areCodeBlocksShown) {
      app.properties.ref.insertCSS({
          code: ".ArticleCopy > *:not(pre) { display:block !important;}"
      })
      SitePointPostOptions.properties.areCodeBlocksShown = false;
      return;
  }
  app.properties.ref.insertCSS({
      code: ".ArticleCopy > *:not(pre) { display:none !important;}"
  })
  SitePointPostOptions.properties.areCodeBlocksShown = true;
}
What Else?
You have created a mobile app browser packed full of goodies. You could expand these to include custom branding and functionality that suits your app use case.
Have you ever implemented a custom mobile browser before or do you feel like you have something that you want to create? What is it?
Frequently Asked Questions about In-App Browser with ThemeableBrowser PhoneGap Plugin
How do I install the ThemeableBrowser PhoneGap Plugin?
To install the ThemeableBrowser PhoneGap Plugin, you need to have Node.js and npm installed on your system. Once you have these, you can install the plugin using the Cordova command line interface. The command to install the plugin is cordova plugin add cordova-plugin-themeablebrowser. After running this command, the plugin should be installed and ready to use in your Cordova project.
What are the main features of the ThemeableBrowser PhoneGap Plugin?
The ThemeableBrowser PhoneGap Plugin offers a variety of features that enhance the in-app browsing experience. These include customizable browser options, such as toolbar color, button color, and title color. It also supports event callbacks, allowing you to handle events like loadstart, loadstop, and loaderror. Additionally, the plugin supports various browser actions like back, forward, and close.
How can I customize the appearance of the browser using the ThemeableBrowser PhoneGap Plugin?
The ThemeableBrowser PhoneGap Plugin allows you to customize the appearance of the in-app browser by setting various options in the browserOptions object. These options include toolbar color, button color, title color, and more. You can set these options when you call the cordova.ThemeableBrowser.open method.
How do I handle events in the ThemeableBrowser PhoneGap Plugin?
The ThemeableBrowser PhoneGap Plugin supports event callbacks, which allow you to handle various browser events. You can add event listeners using the addEventListener method of the ThemeableBrowser object. The plugin supports events like loadstart, loadstop, and loaderror.
What are the limitations of the ThemeableBrowser PhoneGap Plugin?
While the ThemeableBrowser PhoneGap Plugin offers a lot of customization options, it does have some limitations. For instance, it does not support all the features of a full-fledged web browser, such as multiple tabs or bookmarks. Also, the plugin’s appearance and behavior may vary slightly on different platforms due to platform-specific limitations.
How can I add buttons to the browser toolbar using the ThemeableBrowser PhoneGap Plugin?
The ThemeableBrowser PhoneGap Plugin allows you to add custom buttons to the browser toolbar. You can do this by adding button objects to the browserOptions object when you call the cordova.ThemeableBrowser.open method. Each button object should specify the button’s image, imagePressed, and action.
Can I use the ThemeableBrowser PhoneGap Plugin with other PhoneGap plugins?
Yes, the ThemeableBrowser PhoneGap Plugin can be used in conjunction with other PhoneGap plugins. However, you should be aware that some plugins may not be fully compatible with the ThemeableBrowser plugin, and may cause conflicts or unexpected behavior.
How do I debug issues with the ThemeableBrowser PhoneGap Plugin?
Debugging issues with the ThemeableBrowser PhoneGap Plugin can be done using the same tools and techniques you would use to debug any Cordova plugin. This includes using the browser’s developer tools to inspect the DOM and JavaScript console, and using the Cordova command line interface to check for errors and log messages.
Can I use the ThemeableBrowser PhoneGap Plugin in a commercial project?
Yes, the ThemeableBrowser PhoneGap Plugin is open source and can be used in both personal and commercial projects. However, you should be aware that the plugin is provided “as is”, without warranty of any kind, and the authors are not responsible for any issues or damages that may arise from its use.
Where can I find more information about the ThemeableBrowser PhoneGap Plugin?
More information about the ThemeableBrowser PhoneGap Plugin can be found on its GitHub page. This includes detailed documentation on the plugin’s features and usage, as well as a list of known issues and upcoming features. You can also find community support on various online forums and discussion boards.