Images are a fantastic way to enhance your WordPress website or blog. Automatically, images add colour and vibrancy to your website. They engage your website visitors, and make your website more memorable by helping visitors make an emotional connection with your content. They even enhance SEO (provided you add descriptive file name and alt tags) and, with social networks becoming increasingly visual, website posts with images are much more likely to be shared on social media platforms. Recently, I penned an article about Eight WordPress plugins to create awe-inspiring image effects. Today, I thought I’d take the search for image greatness a little bit further. First of all, I’ll explain how to edit images within WordPress itself. Then, I’ll run through some external software platforms that can make your content stand out. There is a myriad of platforms available for editing and enhancing images. Many of these platforms have been around for years and years. Used extensively by graphic designers and photographers, their rich heritage lends itself to levels of image enhancement that are not so easily achievable through WordPress plugins. There’s nothing wrong with enhancing your images using third-party platforms and software prior to uploading them to your WordPress Media Library. Your WordPress website might even thank you for it in the long run. Finally, I’ll take you through some WordPress image management tools, designed to keep your Media Library lean and clean.
Using WordPress to Edit Images
When it comes to editing images for WordPress websites, people often tend to forget about the built-in image editor that is readily available in WordPress itself. If all you need to do is perform simple image edits (like cropping, resizing, flipping or rotating), then there is no need to even leave the WordPress dashboard. Just follow these simple steps:- Navigate to the Media Library section of your WordPress dashboard.
- Either upload the image you want to edit (using the ‘Add New’ button at the top of the page), or click on an already-uploaded image.
- Once you’ve selected the image that you want to edit, you’ll be greeted with the screen below. Directly underneath your image, on the far left-hand side, there is an ‘Edit Image’ button. Click on it.
- You’ll then be presented with a range of options, including: scaling the original dimensions of the image, cropping the image using aspect ration, flip horizontally, flip vertically, and rotate clockwise or anti-clockwise.
- You can then choose whether you want to make all these changes to all variations of the image, just the thumbnail, or everything apart from the thumbnail.
 Best of all, WordPress even has a special little built-in safety net when it comes to editing images. So, if you happen to make a change to an image, and then suddenly decide that you don’t like the end-result, WordPress has a ‘Restore Image’ option. You simply select your edited image, click on the same ‘Edit Image’ button as the first time around, and you’ll see, on the right-hand side of the screen, a drop down option entitled ‘Restore Original Image’. This discards any changes you’ve made, returning your image to its former glory once more.
 If you’re looking to undertake some more advanced image editing within WordPress itself, then it might be time to investigate some plugins, such as those covered in Eight WordPress plugins to create awe-inspiring image effects.
Non-WordPress Image Editing and Design Tools
Photoshop
Part of Adobe’s Creative Suite of products, Photoshop is the world’s leading digital imaging software platform. Created in 1988, over the last 25 years, it has quickly become the industry-leading image editing software, even giving rise to a new verb: photoshopping. Photoshop offers a range of price points, for a range of users, starting from $119 per annum for individual users. Some of the most useful features that Photoshop has to offer include:- Smart Sharpen: this nifty little tool allows you to reduce the noise in the background of your images (that causes your images to look slightly out of focus), while sharpening the edges of the subject matter at hand.
- Perspective Warp: with this feature, you can shoot first and then adjust the perspective of your image later. You can make your photo look like you took it from a little to the left or a little to the right. And, if you need to composite two photos taken from two entirely different points of view, you can change the perspective in one, so that the two photos combine seamlessly as one.
- Image Resizer: resizing images is a task regularly undertaken when adapting images for the web. All too often, images need to be upsized, culminating in a somewhat less than sharp result. With Photoshop, your enlarged images can be rescued somewhat. Photoshop provides a dialogue box that enables you to tweak quite a few different options, including the all-important ‘preserve details when enlarging’ tick box.
- Content-Aware Move: this feature seems quite miraculous when you first start playing with it. It allows you to select a region of an image, move that region to a different part of the image, and then fill in the blank hole left behind. It does not always render a perfect result, but you can adjust the adaption after the fact, which determines how the moved object adapts to its new background. Adobe has a fantastic tutorial on how to use this tool.
- Upright: this feature enables you to straighten horizons and buildings, manipulate vertical and horizontal elements, and straighten slightly skewed scenes.
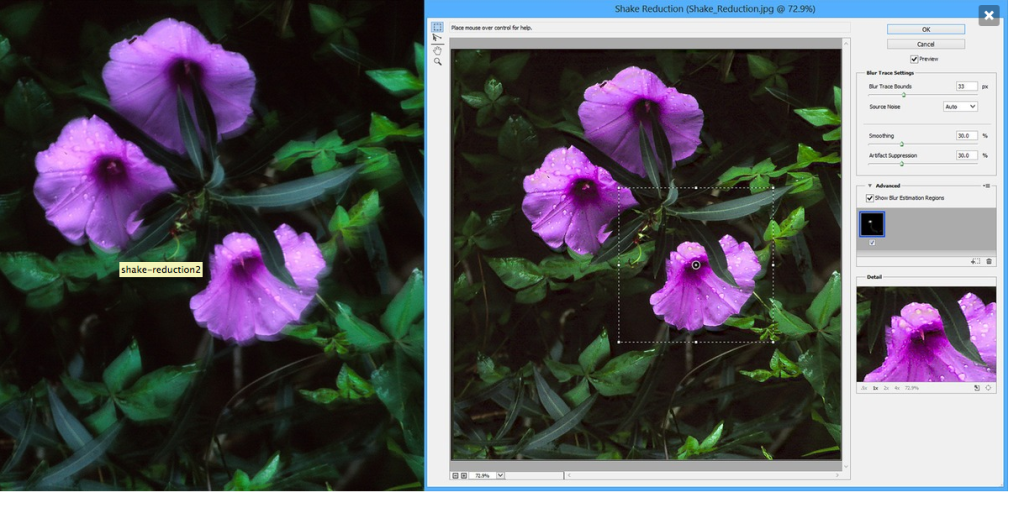
- Shake Reduction: this setting allows you to eradicate blur from images taken with an unsteady hand. You can even focus in on particularly blurry sections of photos to make the sharpening more accurate. The results speak for themselves in the example shown below.
 Photoshop has so many other features and tools, almost too many to list. You can adjust the opacity of images, the colour fill of images, reduce red eye, add a stroke, undertake automated lens correction, restore old or damaged images, blend pixels, and much, much more.
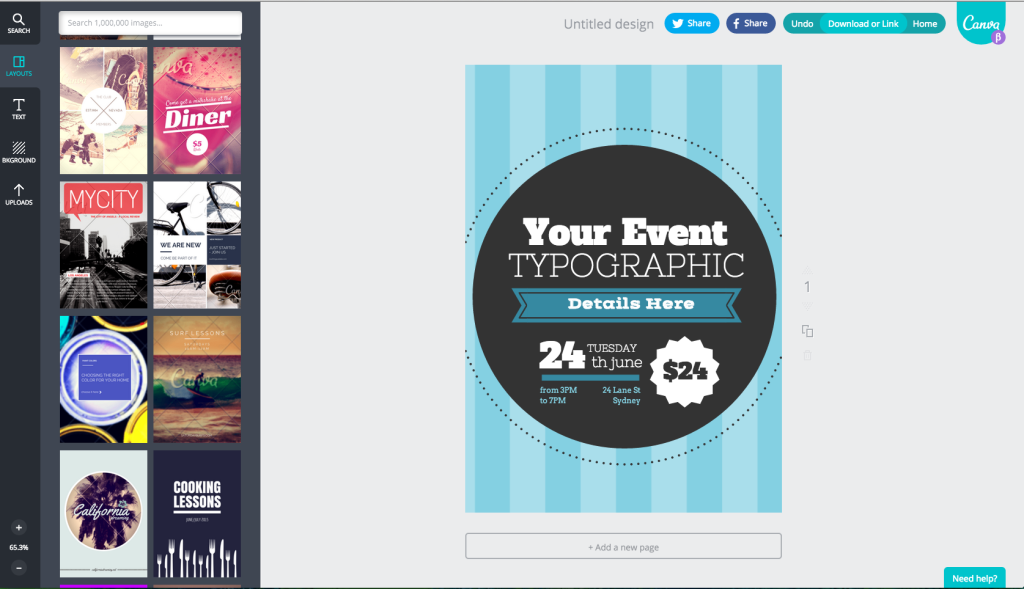
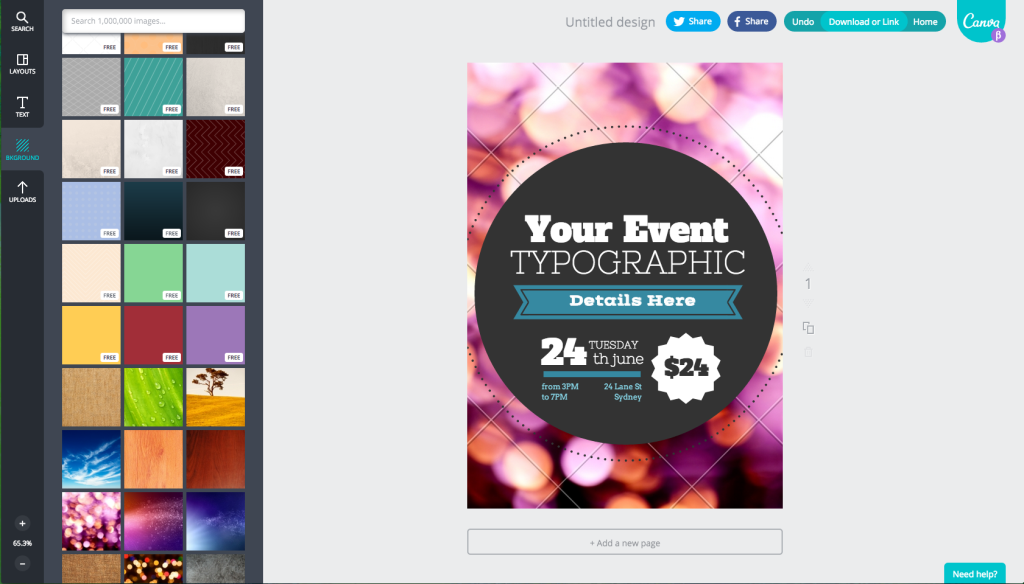
Canva
A relatively new online image editor and graphic design tool, Canva is an Australian startup that launched in August 2013. There’s a lot to love about Canva:- It’s free (always a winning feature!).
- It’s hosted online, so there’s no need to install a big software package on your hard-drive.
- It’s simple to use, with an interface that anyone can master. So, if you’re not a graphic designer (or a graphically-minded person), you can still use it to edit your images, or create awe-inspiring graphics.
- It has a built-in library of over a million images, and thousands of fonts.
- You can easily collaborate online with your team members, clients, family or friends.
- It allows you to share images, with the ability to upload your own images, logos, illustrations, and graphics.
- Photo Editing: you can edit your images using Canva’s filters, and adjust elements such as contrast, brightness, saturation, blur, tints, and vignette.
- Pre-Set Templates: Canva has a multitude of design templates already set up for users. There is one for blog graphics, a photo collage, an invitation, and all manner of social media templates (Twitter posts, Facebook banners and ads, Google+ covers, and Pinterest posts). And, if none of the pre-set templates tickle your fancy, you can create images with custom dimensions.
- Pre-Set Layouts: once you’ve selected a template, you’ll be greeted with a range of pre-set layouts to choose from. All of these layouts already include sleek, slick typography, combined with beautiful graphic elements. With just a few clicks, you can easily drag and drop your own images into the layout to create a personalised image, all ready to upload to your website.
 And then, with just two more clicks, you can easily change the background of your layout, completely altering the look and feel of your image in instant.
PicMonkey
PicMonkey is one software platform that lives up to its slogan: take your images further. Much like Canva, PicMonkey is a free image editing and graphic design tool that is hosted solely online. There is no software to download and no annual fee to pay, unless, of course, you want to. PicMonkey offers users the option to upgrade to a paid premium version, dubbed Royale, which is priced at 33 per year). With Royale, you get access to an ad-free editing mode, as well as additional touch-up tools, effects, frames, overlays and texture options. PicMonkey has four main features:- Photo Editor: pesky problems like red eye, overexposure and blur can be corrected in just a couple of clicks with PicMonkey. You can add some flare to your images, with in-built filters like light and focal effects as well.
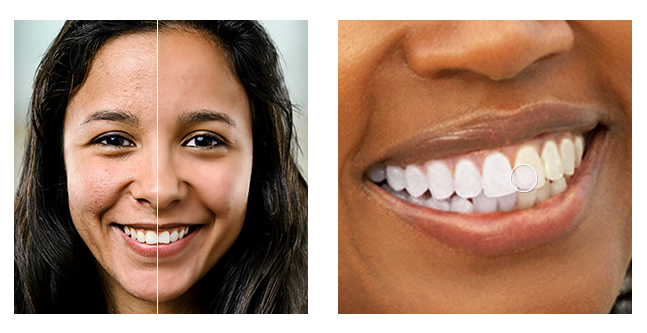
- Touch Up: with PicMonkey in your bag of tricks, there’s no need to dread posting your headshot on your website anymore. The Touch Up tool includes a range of facial feature filters. With Airbrush, you can smooth out blemishes and give yourself a radiant glow. Use Wrinkle Remover to take years off your age. And use Teeth Whitener to make your pearly whites even whiter. There’s even Whisker Grow that can generate facial hair, or add highlights to your existing flowing locks. Other Touch Up effects include Mascara, Eye Brighten, Spray Tan, Lip Tint, and Final Polish; it’s a bit like a make-up bag for your headshots. A word of warning on this little feature though: it’s easy to get carried away. So try to use restraint, or you run the risk of your images looking a little fake.
- Collage: with PicMonkey’s range of pre-set templates, you can quickly and easily create image collages. Alternatively, customise the layouts to create a unique, individual image collage. You can even edit images while they’re in PicMonkey’s collage view, from rotating and flipping images, to adjusting exposure and aperture.
- Design: last, but by no means least, you can use PicMonkey to create insanely great visuals. Much like Canva, PicMonkey has every pre-set template that you could ever need, or, you can create your own custom sizing.
Fotor
Launched in 2012, Fotor is another online photo editing tool. While it shares many of the same features as Canva and PickMonkey, Fotor is the only online image editing tool that offers users access to HDR (High Dynamic Range) photography techniques. HDR photography is focused on emphasising the range of intensity levels in photo, so that it most accurately represents real life. To use this particular feature, you need to upload three images (that capture the exact same scene) to Fotor: one image that has a normal exposure, one that is under-exposed, and another image that is over-exposed. Once uploaded, the Fotor algorithms work their magic to produce one tone-mapped image. This image will have exactly the right amount of exposure applied to every single area. You can capture shadows, highlights, and detail that you would normal only be able to achieve using more expensive image editing software. And, if there were objects moving through your photos (like flag flapping in the breeze), you can use Fotor’s select ‘Ghost Reduction’ tool to correct inconsistencies or blurry areas.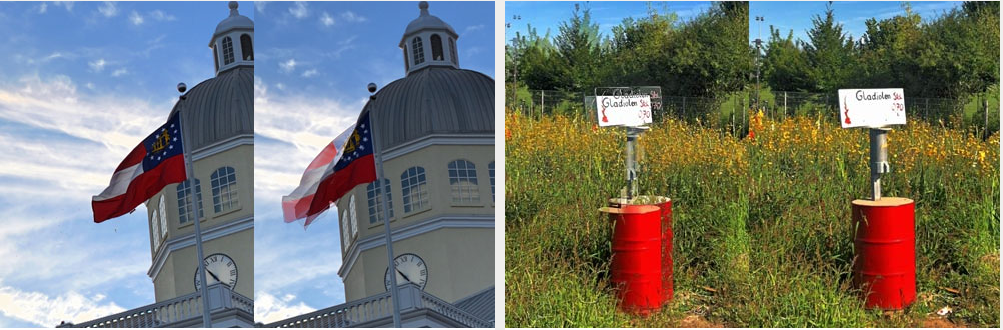
WordPress Plugins to Keep Your Media Library Lean and Clean
Clearly, if you’re interested in image design and editing tools, you’re well aware of just how important visual assets are to any website. So, chances are, you have quite a number of media files loaded into the back-end of your WordPress website. So, it might be time to invesitgate some plugins to help keep your Media Library lean and clean. While not strictly image design or editing tools, all these WordPress plugins will come in handy once your image editing and design is complete!WordPress Plugins to Categorise Your Image Library
If you’re finding that locating specific files, or managing the sheer volume of files, in your media library is becoming way too difficult, then it might just be time to invest in one of the following plugins. All of these plugins have been designed with a clear goal in mind: to help categorise your media library.Enable Media Replace
When it comes to media file management, this plugin is such a timesaver. It allows you to replace an existing file in your WordPress Media Library, simply by uploading a new file in its place. There is no need to delete, rename or re-load images files any longer. Once installed, an additional option will be available in the ‘Edit Media’ view: ‘Replace Media’. With over 4000,000 downloads in total, and over 100,000 active downloads and a 4.8 star rating, this plugin is definitely doing something right.
Enhanced Media Library
The Enhanced Media Library plugin allows you to create an unlimited number of media taxonomies for your media files. You have complete control over all the taxonomy parameters, and it is super easy to edit, delete, assign and unassign taxonomies as you see fit. You can even use this plugin to create new MIME types. If you opt for the Pro Version of the plugin, you’ll also be able to set multiple taxonomies for multiple media files simaltaneously, and you’ll have compatiblity with quite a few other plugins, such as WooCommerce and Meta Slider. This plugin has over 20,000 active downlods, 4,7 stars and is compatible up to version 4.1.1.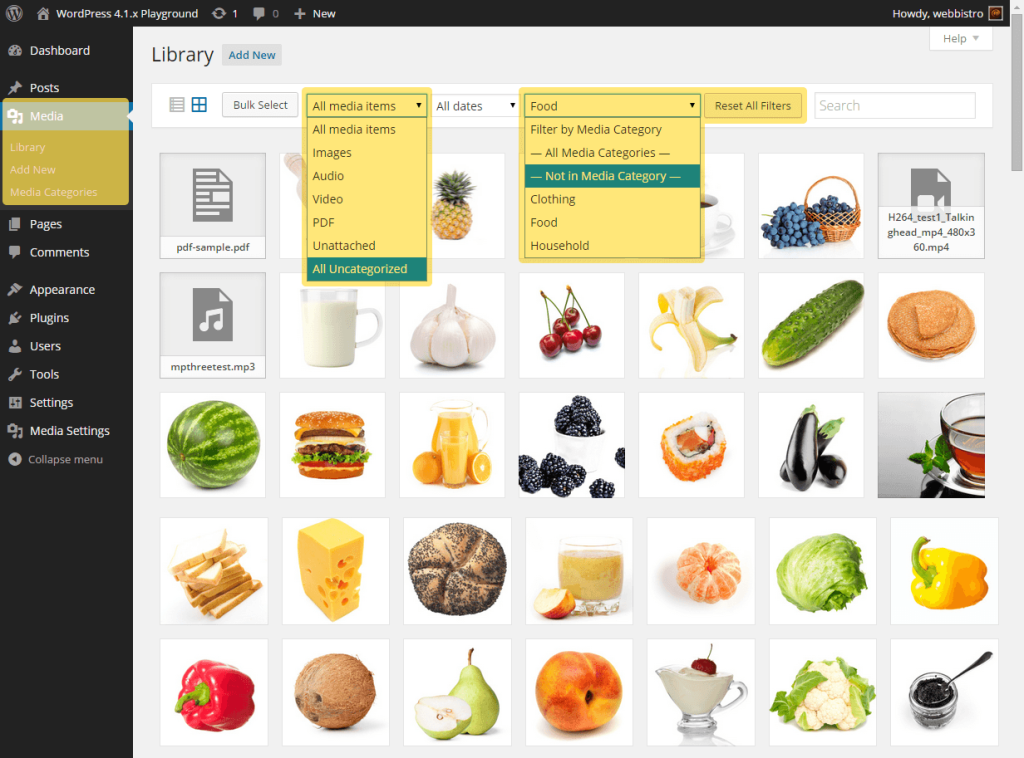
Media File Manager Advanced
With 8,000 downloads, this media management plugin is not quite as popular as the one above. But, it still packs a punch. Rather than create taxonomies, with this plugin, you create folders and sub-solders within your Media Library, allowing you to easily sort media without any fear of breaking links. It operates using the same simple drag and drop method usually employed in WordPress for images. It does only come with a 3.5 star rating, and is only compatible up to version 4.0.0 only (so it might be worth waiting until its upgraded before installing).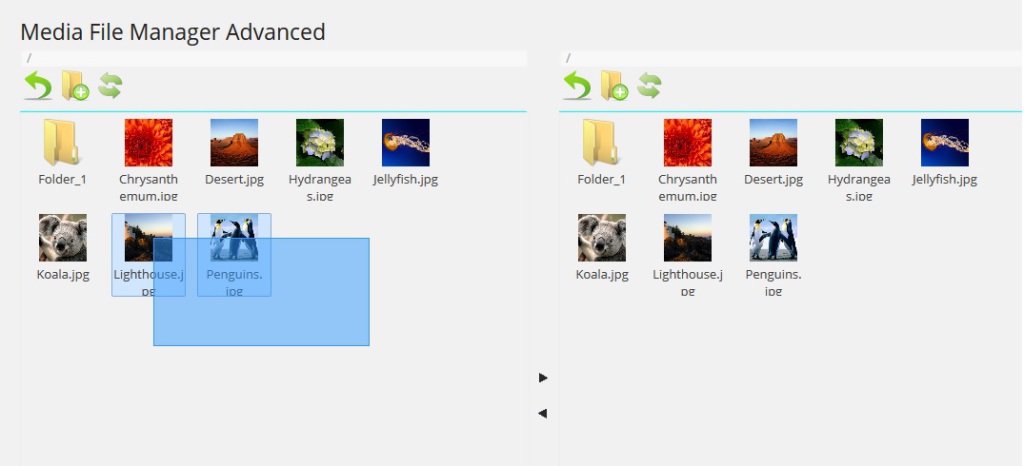
Media Library Categories
This plugin has one feature, and one feature only, but it does it incredibly well. It enables you to add categories to your WordPress Media Library. Once installed on your website, it will activate a big long list of drop-down categories within your Media Library. It also allows you to change the category of multiple image files simaltaneously, through bulk actions. This plugin appears to be regularly updated, is compatible with version 4.1.1 of WordPress, and has secured a 4.5 star rating with more than 10,000 active downloads at the moment.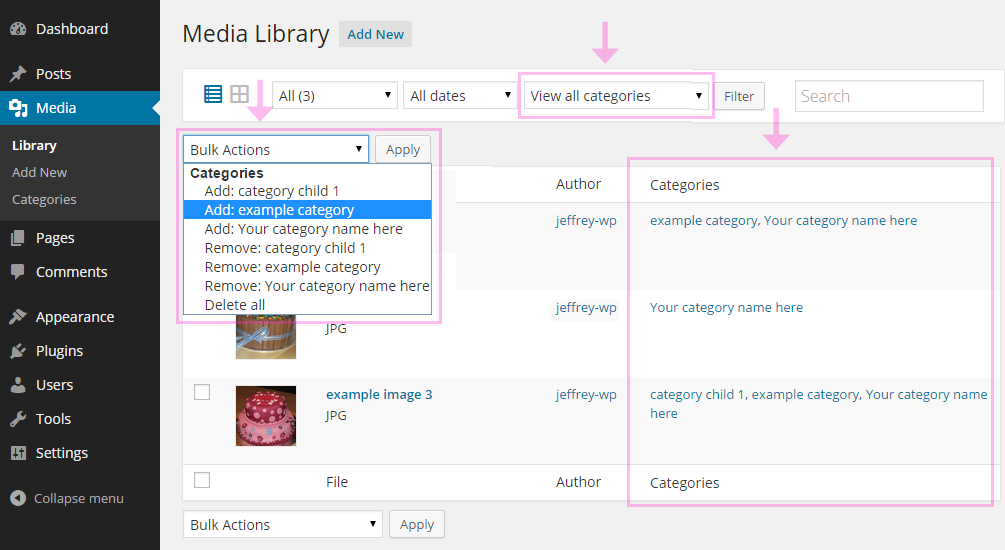
WordPress Plugins to Optimise Your Images
Once you have a large volume of images uploaded to your WordPress dashboard, you really need to monitor the overall loading time of your wesbite. You need to ensure that the overall performance of your site isn’t being affected, particularly given that Google now include website speed as a factor in its search engine ranking algorithm. If your site speed is being affected, then an image optimiser plugin might be just what the doctor ordered. These plugins are able to reduce your overall image size by up to as much as 90% in some instances, without actually reducing the quality or the image itself.WP Smush.it
According to the WordPress Plugin Directory, this image optimiser is the best plugin of its kind. Given this lofty statement, I thought it fitting to begin here. WP Smush.it has over a million downloads (300,000 of which are currently active) downloads and (at the time of writing) was updated just five days ago. But, it does only manage 3.5 stars. It works by stripping bulky, hidden data from your images and can be set to strip back all your existing images with just one click. There is a free version, and a pro version; the main difference being that the free version works for images up to 1MB, and the pro handles images up to 5MB.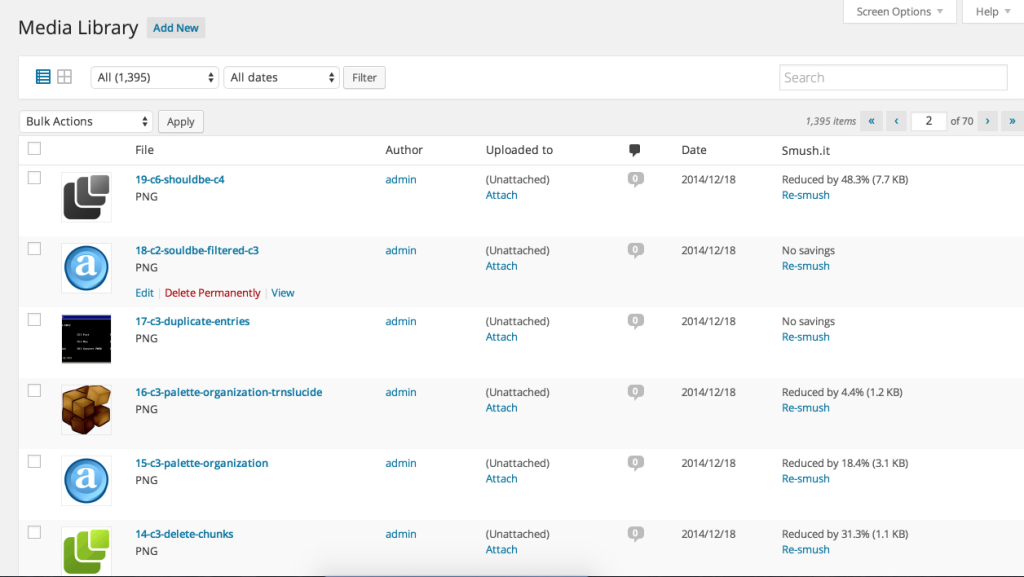
EWWW Image Optimiser
Similar to WP Smush.it, EWWW Image Optimiser uses what is known as lossless techniques to reduce the file sizes of your images, either as you upload them, or in bulk to all existing images on your site. The method uses algorithms to reduce image quality loss, which results in much better image quality than a more static image compression level. And, it allows you to restore the original version of the image if you so desire. This plugin is available in multiple languages, has more than 100,000 active downloads and is compatible with version 4.1.1 of WordPress.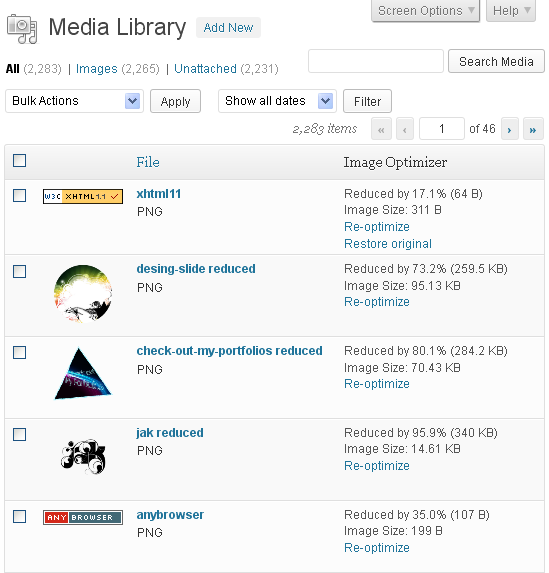
WordPress Visual Content Creation Made Easy
While WordPress does offer a range of image design functionality, bolstered by a number of Plugins that Create Awe-Inspiring Image Effects, unfortunately, sometimes (and it really is only sometimes) WordPress plugins just can’t deliver the same output when it comes to image editing and graphic design. After all, WordPress wasn’t originally built for image editing. So, to really make your images stand out, sometimes you need to bring in the big guns—professional editing and design software, like Photoshop that has been created specifically for image design and editing. Some of the newer software platforms like Canva and PicMonkey also offer untold potential when it comes to WordPress websites. You can use their pre-set templates to generate jaw-droppingly amazing blog headers, sleek media kits, slick advertisements, and some of the most intricate infographics ever seen. All of which can be achieved with a modicum of fuss, in a tighter-than-tight timeframe. And with many of these tools available for free, what have you really got to loose? Don’t forget, once you’ve edited and designed your beautifully compelling images, take the time to organise them; why not try some of the Media Library categorising plugins mentioned above. After all, there’s no point in creating amazing website images if they’re quickly lost in a muddled, jumbled Media Library. Feel free to share any other tools or plugins I’ve missed in the comments below.Frequently Asked Questions about Visual Content in WordPress
How can I edit images directly in WordPress?
WordPress has a built-in image editor that allows you to perform basic image editing tasks. You can access it by going to your Media Library, clicking on the image you want to edit, and then clicking on the ‘Edit Image’ button under the image preview. This will open the image editor where you can crop, rotate, and resize the image, as well as flip it vertically or horizontally.
What are some good plugins for image editing in WordPress?
There are several plugins available that can enhance the image editing capabilities of WordPress. Some popular ones include ‘Image Editor by Pixo’, ‘WP Smush’, and ‘EWWW Image Optimizer’. These plugins offer advanced features like image compression, bulk editing, and the ability to edit images in various formats.
Can I add custom visual content to my WordPress site?
Yes, WordPress allows you to add custom visual content to your site. This can be done by uploading your own images, videos, and other media files to the Media Library. You can also use plugins to add custom visual elements like sliders, galleries, and infographics.
How can I optimize images for my WordPress site?
Optimizing images for your WordPress site can help improve its loading speed and overall performance. You can do this by compressing your images, resizing them to the correct dimensions, and converting them to a web-friendly format. There are also plugins available that can automate these tasks for you.
How can I add alt text to images in WordPress?
Alt text can be added to images in WordPress to improve their accessibility and SEO. To add alt text, go to your Media Library, click on the image you want to edit, and then enter your alt text in the ‘Alt Text’ field.
Can I use AWS QuickSight for visual content in WordPress?
AWS QuickSight is a business analytics service that can be used to create interactive dashboards and visualizations. However, it is not directly integrated with WordPress. To use QuickSight in WordPress, you would need to embed your QuickSight dashboards or visualizations into your WordPress pages or posts using an iframe.
How can I manage media files in WordPress?
WordPress has a built-in Media Library that allows you to manage all your media files. You can upload new files, delete existing ones, and edit their details. You can also organize your files into categories and tags using plugins like ‘Media Library Assistant’.
Can I add captions to images in WordPress?
Yes, you can add captions to images in WordPress. To do this, click on the image you want to add a caption to, then enter your caption in the ‘Caption’ field.
How can I add a gallery to my WordPress site?
WordPress has a built-in gallery feature that allows you to create image galleries. To create a gallery, go to the page or post where you want to add the gallery, click on the ‘Add Media’ button, select ‘Create Gallery’, and then select the images you want to include in the gallery.
Can I edit the metadata of images in WordPress?
Yes, you can edit the metadata of images in WordPress. This can be done by going to your Media Library, clicking on the image you want to edit, and then editing the details in the ‘Attachment Details’ section.
 Sally Wood
Sally has worked in marketing, communications, and PR for over 10 years. She is the Chief Wordsmith at Wordly: a copywriting and content marketing agency that works predominantly with WordPress powered websites.