Using Babylon.js to Build 3D Games for the Web
This article is part of a web development series from Microsoft. Thank you for supporting the partners who make SitePoint possible.
Babylon.js is a WebGL-based 3D engine that focuses mainly on game development and ease of use. As a 3D engine, it has the tools to create, display, and texture meshes in space, and to add light sources and cameras. Because it’s game-focused, Babylon.js has some extra features that a regular 3D engine doesn’t require.
It has native support for collision detection, scene gravity, game-¬oriented cameras (for example, a follow-camera that tracks a moving object), as well as native support for Oculus Rift and other virtual reality (VR) devices. It has a physics engine plug-in system, native audio support, a user input-based action manager and much more. I’ll explore all of these features in this tutorial.
Start by getting the code here
Key Takeaways
- Babylon.js is a WebGL-based 3D engine tailored for game development, offering features like collision detection, scene gravity, and VR support.
- The tutorial demonstrates building a simple bowling game using Babylon.js, focusing on using native JavaScript for all development aspects without external tools.
- Babylon.js is compatible with various IDEs, and this tutorial uses Visual Studio 2015 Community Edition for project setup and management.
- The tutorial is divided into basic and advanced sections, starting with creating simple 3D objects and scenes, and advancing to adding physics, audio, and complex user interactions.
- Babylon.js supports integration with external resources and advanced features, which are not covered in this tutorial but are crucial for more complex game development.
- The tutorial emphasizes the engine’s ease of use and compatibility, ensuring that developers can focus on creative game development without struggling with technical details.
About the Tutorial
In this tutorial I’ll develop a simple bowling game. I’ll create a bowling lane, add 10 pins and a bowling ball, and provide the ability to throw the ball. My game will surely not be ready to be released, but it will show how you can develop a game using the tools Babylon.js provides. I’ll deliberately avoid using any external tools during development. The objects, cameras, textures and more will be created using JavaScript code only.
The Babylon.js version I’ll be using during this tutorial is the latest stable release—2.1. David Catuhe and the Babylon development team are trying to keep the framework as backward-compatible as possible, so I can only assume that this tutorial will work properly on future releases, at least until the next major release. And I’m using Visual Studio 2015 Community Edition, but you can use any IDE you’d like.
The tutorial will be divided into two parts. In this article, I’ll present an overview of the basic building blocks of Babylon.js. I’ll create the meshes, texture them, add cameras and light sources, and enable simple user interaction. In part two, I’ll show where Babylon.js really shines by adding collision and physics, audio, user actions, and special types of cameras.
Getting Started: A New Babylon.js Project
A simple Babylon.js project is a static Web site. Because I’m using Visual Studio, I’ll use the local IIS server embedded in Visual Studio to host those static files. Visual Studio doesn’t have a template for a static Web site, so a different approach is needed.
First, create a new blank solution. Open Visual Studio and go to File | New | Project. Select Other Project Types on the left pane and then Blank Solution, as shown in Figure 1. Give the solution a name (I used BabylonBowling) and click OK.
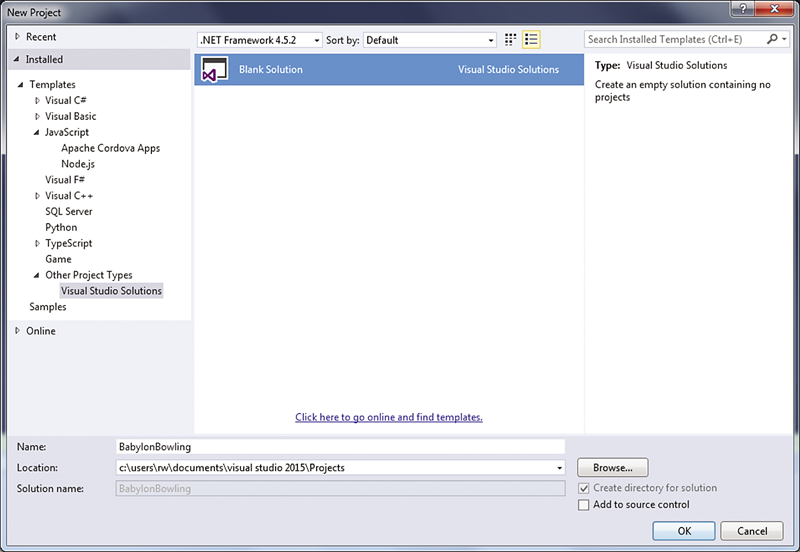
Figure 1 Creating a New Blank Solution in Visual Studio
To create a new static Web site, first you need to create a new directory to host it. Right-click on the empty solution, then click on Open Folder in File Explorer, as shown in Figure 2.
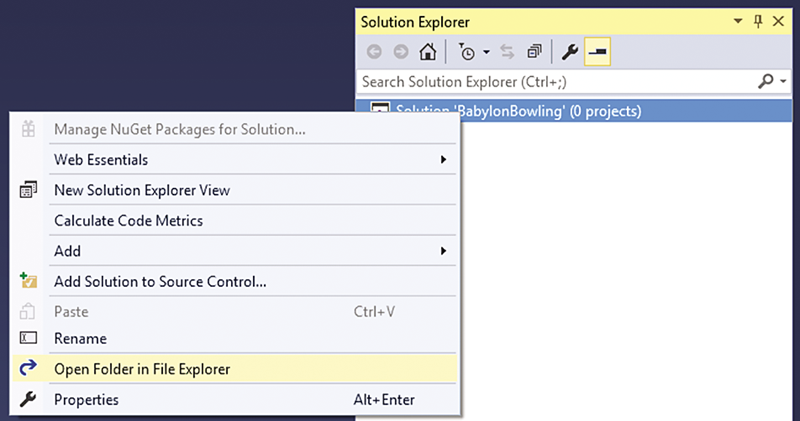
Figure 2 Opening the Solution’s Folder in File Explorer
Create a new directory for the project called BabylonBowling and close File Explorer.
Right-click on the solution and choose Add | Existing Website. Select the newly created folder (make sure you choose the folder you just created and not the solution’s folder) and click Open. You should now have a blank Web site as the only project of this solution.
After creating the project, you need to add the framework and the framework’s dependencies. There are a few ways to do that. The simplest way is to use the NuGet Package Manager.
Right-click on the project and choose Manage NuGet packages. Click in the search field (the keyboard shortcut is Ctrl+E) and type babylon. You’ll see a window similar to the one in Figure 3. Select BabylonJS. Make sure the Version selected is 2.1 (or the latest stable version) and click Install. Click OK in the Preview window that pops up (if one pops up) and Babylon.js will be installed into your empty project, including a demo scene.
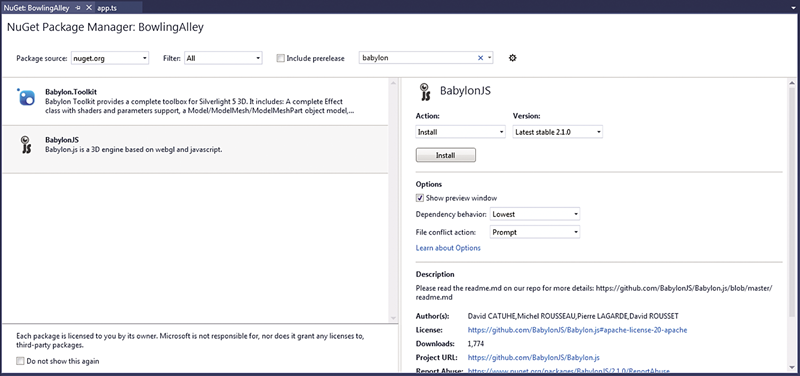
Figure 3 Adding Babylon.js Using the NuGet Package Manager
For those using npm as a package manager, you can install Babylon.js using the command:
npm install babylonjsAfter installing the package, you should have the following files in the scripts folder:
- babylon.js, a minified version of Babylon.js
- babylon.max.js, a debug version of Babylon.js
- Oimo.js, the Oimo JS physics engine that will be used in part two of this tutorial
- poly2tri.js, an optional triangulation library (github.com/r3mi/poly2tri.js)
- hand-minified.js, a pointer-events polyfill; this is missing when using npm, so install using the command:
npm install handjsThe NuGet installer also creates an index.html file and an index.js file.
An error in the NuGet package adds an unneeded line to web.config. Until it’s fixed, double-click on this file and remove the line highlighted in Figure 4 (in my solution, it’s line 9).

Figure 4 Delete the Highlighted Line from web.config
You can now test the project. Open the project in your default browser using Ctrl+Shift+W or by clicking the Run button on the top navbar. If you see the 3D spaceship shown in Figure 5, your project is all set.
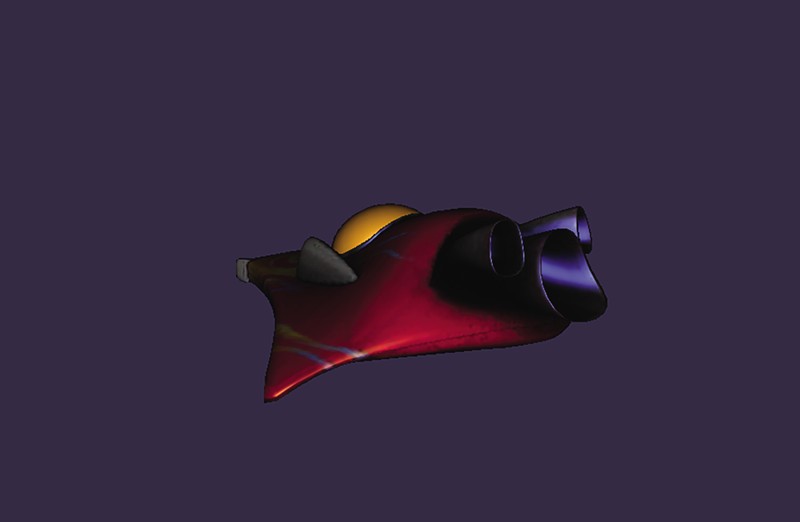
Figure 5 The Babylon Default Spaceship
For those using different IDEs, just follow the “Creating Basic Scene” tutorial on the Babylon.js Documentation page to get to the current state. I still recommend using the npm to install the dependencies if not using NuGet. The tutorial can be found at bit.ly/1MXT6WP.
To start from scratch, delete the function createScene in index.js.
The Building Blocks
The first two elements I’ll discuss are the engine and the scene.
The engine is the object responsible for communicating with the low-level WebGL API (WebGL 1 is based on OpenGL ES2, with very similar syntax). Instead of forcing you to write low-level WebGL code, the engine provides a higher-level and easier-to-understand API. It’s also transparent to the developer. Except for the initial project setup, I won’t directly use the engine at all. Certain lower-level functionality can be accomplished using the engine, but I won’t be covering this.
The engine requires two parameters in order to initialize. The first is a canvas on which to draw. The canvas is an HTML element that’s already in index.html. The second parameter is the state of anti-aliasing (on or off).
Open the currently blank index.js and add the following lines of code:
function init() {
  var engine = initEngine();
}
function initEngine() {
  // Get the canvas element from index.html
  var canvas = document.getElementById("renderCanvas");
  // Initialize the BABYLON 3D engine
  var engine = new BABYLON.Engine(canvas, true);
  return engine;
}
During development, I’ll use the init function to add new functionality with each step. Each element I create will have its own function.
To understand what a scene represents, think of a Web site with different pages. A single Web page contains the text, images, event listeners, and all other resources needed to render that one, single page. Loading a different page loads different resources.
Just as with a single Web page, the scene holds the needed resources to show one, single 3D “page.” This scene can be very large and full of resources—meshes, cameras, lights, user actions and more. But in order to move from one page to another, a new scene is recommended. The scene is also responsible for rendering its own resources and communicating the needed information to the engine. The bowling game requires only a single scene. But if I planned to add new levels or a bonus game, I’d create them using new scenes.
To initialize the scene requires only the engine I created. Add the following to index.js:
function createScene(engine) {
  var scene = new BABYLON.Scene(engine);
  // Register a render loop to repeatedly render the scene
  engine.runRenderLoop(function () {
      scene.render();
  });
}
First, I create the scene object. The next lines are the only interaction I’ll have with the engine. They tell the engine to render this specific scene every time the render loop is running.
Add this line of code to the end of the init function to actually create the scene:
var scene = createScene(engine);
Two more things before I continue. When you resize the browser window, the canvas is also being resized. The engine must also resize its internal width and height to keep the scene in perspective. Adding the following lines to the initEngine function right before the return engine; statement will keep the scene in perspective:
// Watch for browser/canvas resize events
window.addEventListener("resize", function () {
  engine.resize();
});
The second thing is to alter index.html to use the new init function. Open index.html and find the script tag containing the call to createScene. Change createScene to init, then save index.html and close it.
The scene has an extremely advanced debug layer that allows you to debug the scene being rendered. It shows the number of meshes being rendered and the current frames per second (FPS). It allows turning off features such as texturing and shadows and makes it easy to find lost meshes. Turning the debug layer on is simple:
scene.debugLayer.show();Do that, and you’ll be able to debug your scene on your own.
I now have an engine and a scene, and I’m ready to start adding a camera, lighting and meshes to create my Bowling Alley scene.
Cameras
Babylon.js offers many types of cameras, each with its own specific purpose. Before choosing the camera for the game, let’s review the most common types:
- Free Camera is a first-person-shooter camera. It can freely move throughout the scene, using the keyboard arrow keys, and the direction can be set using the mouse. Optional gravity and collision detection can be enabled, as well.
- Arc Rotate Camera is used to rotate around a specific target. Using the mouse, the keyboard or touch events, the user can view the object from all directions.
- Touch Camera is a free camera that uses touch events as input. It’s suitable for all mobile platforms.
- Follow Camera automatically follows a specific target.
Babylon.js supports WebVR and device-orientation cameras natively, which means you can easily address such devices as the Oculus Rift or Google Cardboard.
A new concept introduced in version 2.1 makes each camera type 3D-ready. This means that each camera type can be set to fit Oculus Rift-style stereoscopic view and red-blue glasses (anaglyph 3D). Figure 6 shows shows the spaceship scene rendered with the anaglyph-free camera and Figure 7 shows the scene with the stereoscopic camera.
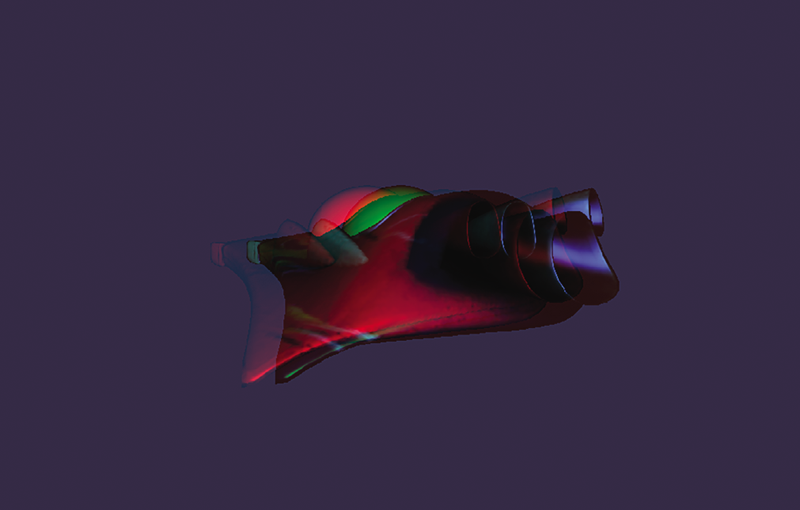
Figure 6 Anaglyph 3D Camera
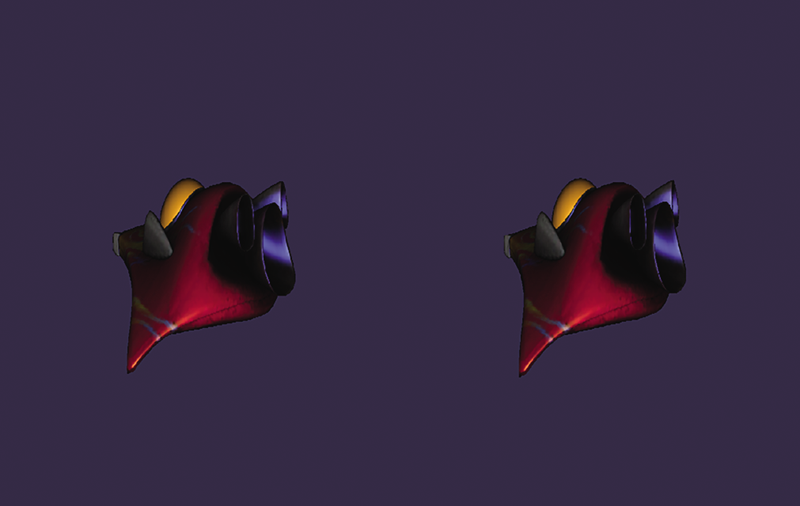
Figure 7 Stereoscopic Camera
For my bowling game, I’ll use two types of cameras. The first is the player’s main camera, which will set the position from which the bowling ball will be thrown. This is the exact purpose of the free camera. I also want to add a different view—when the ball is en route, I want to follow it until it hits the pins.
First, I add the free camera. The createFreeCamera function takes the scene as a single variable:
function createFreeCamera(scene) {
  var camera = new BABYLON.FreeCamera(
    "player camera", BABYLON.Vector3.Zero(), scene);
  return camera;
}
I created a camera position at location 0,0,0 of my scene. Later, I’ll extend this function (when necessary) to further configure the camera.
And, of course, don’t forget to add it to the init function, at the end:
...
// Create the main player camera
var camera = createFreeCamera(scene);

// Attach the control from the canvas' user input
camera.attachControl(engine.getRenderingCanvas());

// Set the camera to be the main active camera
scene.activeCamera = camera;
The attachControl function registers the native JavaScript event listeners needed for the specific camera (such as those for mouse, touch or keyboard input). Setting the scene’s active camera tells the scene that this camera should be used for rendering.
I’ll add the second camera in part two, after enabling a ball throw.
Creating the Lane
A bowling lane is a relatively simple geometric structure. I’ll start by setting some constants, which are the actual dimensions of a bowling lane in meters. The reason I use meters is the physics engine, which will be explained in the second part of this article.
You can see the constants in the project file. To calculate these values I used online-available information about bowling lanes.
After setting the constants, I’m ready to start creating the meshes that will construct the bowling lane. My (2D) plan is shown in Figure 8. I’ll start by creating the meshes. Texturing the meshes — giving them materials — will come afterward.
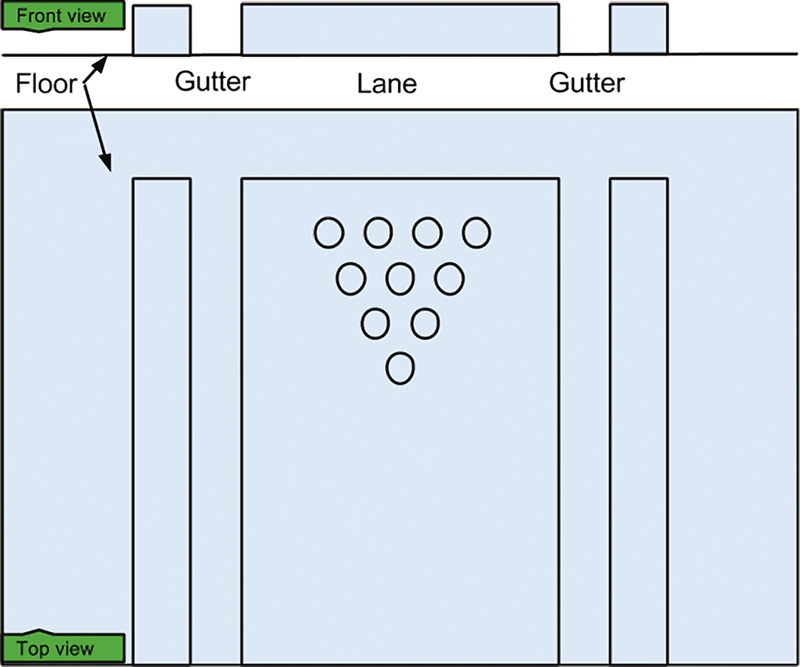
Figure 8 2D Plan of the Bowling Lane Scene
First, I’ll create a global floor for the scene:
function createFloor(scene) {
  var floor = BABYLON.Mesh.CreateGround("floor", 100, 100, 1, scene, false);
  return floor;
}
This creates a simple 100×100-meter floor. All meshes created using Babylon.js internal functions are created at position 0,0,0 of the scene and are centered. There are three important variables that transform the mesh and position it correctly in the scene:
mesh.positionis a vector of the mesh’s position in spacemesh.scalingis the mesh’s scale factor in each of the axesmesh.rotationare the Euler angles (in radians) of the rotation in each axis; if you’re more comfortable with quaternions (I know I am), you can usemesh.rotationQuaternioninstead
After adding the function to my init function and starting the scene, I notice an interesting thing—I can’t see the floor I added at all! The reason is that the camera and the floor were both created at the same point in space (0,0,0). Because the ground is completely flat, only viewing from above (or below) will show it on screen. Going back to the camera’s initialization in the createCamera function, I change the second variable, which is the initial position of the camera, to a new vector—the camera will now be 1.7 units (meters, in this case) above the ground:
var camera = new BABYLON.FreeCamera(
  "cam", new BABYLON.Vector3(0,1.7,0), scene
);
If you start the scene now, you’ll see the floor stretching over half of the screen, as shown in Figure 9.

Figure 9 Adding a Floor to the Scene
Try moving around with the arrows and the mouse to get the hang of controlling the free camera.
You’ll notice the floor is completely black. I’m missing light! I’ll add a new function, createLight, which I’ll extend later on.
function createLight(scene) {
  var light = new BABYLON.DirectionalLight(
    "dir01", new BABYLON.Vector3(-0.5, -1, -0.5), scene
  );
  // Set a position in order to enable shadows later
  light.position = new BABYLON.Vector3(20, 40, 20);
  return light;
}
Don’t forget to add this line to init:
var light = createLight(scene);Babylon.js has four types of lights:
- Hemispheric: Ambient light, predefined with ground color (the pixels that are facing down), sky color (the pixels that are facing up) and specular color.
- Point: A light emitted from a single point in all directions, like the sun.
- Spot: Just as the name suggests, a light from a single point with a specific direction and emission radius. This light can emit shadows.
- Directional: Light emitted in a specific direction from everywhere. The sun might be a point light, but a directional light simulates sunlight better. This light can also emit shadows, and it’s the one I used in my example.
Now the floor will be white. Babylon.js assigns a default white material to each mesh with no assigned material.
The lane itself will be a box, laid on the floor I just created:
function createLane(scene) {
  var lane = BABYLON.Mesh.CreateBox("lane", 1, scene, false);
  lane.scaling = new BABYLON.Vector3(
    laneWidth, laneHeight, totalLaneLength
  );
  lane.position.y = laneHeight / 2; // New position due to mesh centering
  lane.position.z = totalLaneLength / 2;
  return lane;
}
Once again, don’t forget to add this function to init.
You can see how I used the scaling parameter — I created a box sized 1x1x1 and changed its scaling to fit the constants I predefined.
Using the same technique, I created two boxes that will act as my gutter borders on both sides of the lane (this is what the ball will fall into if it’s thrown in the wrong direction). Try creating them yourself, and take a look at the accompanying project to see how I did it.
Bowling Pins and Ball
What’s now missing is the bowling pins and the ball. To create the pins, I’ll use a cylinder, just a single cylinder that will be multiplied many times—10 to be exact. In Babylon.js, such multiplications are called instances. An instance is an exact copy of a mesh, except for its transformation in space. This means that an instance’s geometry and texture can’t be changed, but the position, scaling and rotation can. I personally never use the original object in the scene; if I want 10 pins, I’ll create one pin, disable it, and create 10 instances of it in 10 predefined locations:
function createPins(scene) {
  // Create the main pin
  var mainPin = BABYLON.Mesh.CreateCylinder(
    "pin", pinHeight, pinDiameter / 2, pinDiameter, 6, 1, scene
  );
  // Disable it so it won't show
  mainPin.setEnabled(false);
  return pinPositions.map(function (positionInSpace, idx) {
    var pin = new BABYLON.InstancedMesh("pin-" + idx, mainPin);
    pin.position = positionInSpace;
    return pin;
  });
}
The missing variables used in this function can be found in the project file, including the pinPositions, which is an array with the global positions of all 10 pins.
Now for the bowling ball. A bowling ball is a simple sphere, with 3 holes for the fingers. To create the sphere, I will use the CreateSphere function Babylon.js offers:
var sphere = BABYLON.Mesh.CreateSphere("sphere", 12, 0.22, scene);Now I need to drill the holes. To do that, I’ll use a feature called constructive solid geometry (CSG) integrated into Babylon.js, which allows me to add or subtract meshes from existing meshes, or better yet, to add or subtract geometries from one another. What this means is that if two meshes intersect, I can “remove” one from the other and get an altered mesh. In my case, I want to create three round holes in a sphere. A cylinder will fit perfectly.
First, I create the cylinder I’ll use for the first hole:
var cylinder = BABYLON.Mesh.CreateCylinder(
  "cylinder", 0.15, 0.02, 0.02, 8, 1, scene, false
);
Next, I’ll change the cylinder’s position to intersect with the sphere:
cylinder.position.y += 0.15;Then, I’ll create CSG objects and use them to subtract the cylinder from the sphere:
var sphereCSG = BABYLON.CSG.FromMesh(sphere);
var cylinderCSG = BABYLON.CSG.FromMesh(cylinder);
sphereCSG.subtractInPlace(cylinderCSG);
var ball = sphereCSG.toMesh("test", sphere.material, scene, false);
Figure 10 shows what the sphere and cylinders look like, and right next to it the bowling ball that was created using CSG.
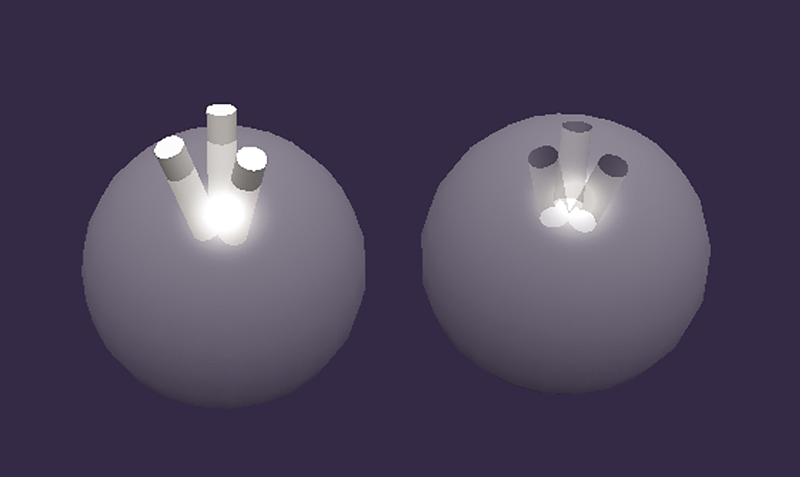
Figure 10 Creating the Bowling Ball
Figure 11 and the playground at babylonjs-playground.com/#BIG0J show the entire code used to create the ball from scratch.
Figure 11 Creating a Bowling Ball Using CSG
// The original sphere, from which the ball will be made
var sphere = BABYLON.Mesh.CreateSphere("sphere", 10.0, 10.0, scene);
sphere.material = new BABYLON.StandardMaterial("sphereMat", scene);

// Create pivot-parent-boxes to rotate the cylinders correctly
var box1 = BABYLON.Mesh.CreateBox("parentBox", 1, scene);
var box2 = box1.clone("parentBox");
var box3 = box1.clone("parentBox");

// Set rotation to each parent box
box2.rotate(BABYLON.Axis.X, 0.3);
box3.rotate(BABYLON.Axis.Z, 0.3);
box1.rotate(new BABYLON.Vector3(0.5, 0, 0.5), -0.2);

[box1, box2, box3].forEach(function (boxMesh) {
  // Compute the world matrix so the CSG will get the rotation correctly
  boxMesh.computeWorldMatrix(true);
  // Make the boxes invisible
  boxMesh.isVisible = false;
});

// Create the 3 cylinders
var cylinder1 = BABYLON.Mesh.CreateCylinder(
  "cylinder", 4, 1, 1, 30, 1, scene, false
);
cylinder1.position.y += 4;
cylinder1.parent = box1;
var cylinder2 = cylinder1.clone("cylinder", box2);
var cylinder3 = cylinder1.clone("cylinder", box3);

// Create the sphere's CSG object
var sphereCSG = BABYLON.CSG.FromMesh(sphere);
// Subtract all cylinders from the sphere's CSG object
[cylinder1, cylinder2, cylinder3].forEach(function (cylinderMesh) {
  sphereCSG.subtractInPlace(BABYLON.CSG.FromMesh(cylinderMesh));
});

// Create a new mesh from the sphere CSG
var ball = sphereCSG.toMesh("bowling ball", sphere.material, scene, false);
Textures
All of the meshes I created have the default white material. To make the scene more appealing, I should add other materials. The standard Babylon.js material (the default shader) has a lot of definitions to play with, which I won’t be discussing here. (To learn more about the default Babylon.js shader you can try out the BabylonJS Material Editor at materialeditor.raananweber.com.) I will, however, discuss how I textured the lane and the bowling ball.
To texture the bowling ball I’ll use another wonderful Babylon.js feature—procedural textures. Procedural textures aren’t standard textures that use 2D images. They’re programmatically created textures that are generated by the GPU (rather than the CPU), which has a positive performance impact on the scene. Babylon has many types of procedural textures—wood, bricks, fire, clouds, grass and more. The one I’m going to use is the marble texture.
Adding the following lines after creating the ball’s mesh will make it a green marble ball like the one in Figure 12:
var marbleMaterial = new BABYLON.StandardMaterial("ball", scene);
var marbleTexture = new BABYLON.MarbleProceduralTexture(
  "marble", 512, scene
);
marbleTexture.numberOfTilesHeight = 2;
marbleTexture.numberOfTilesWidth = 2;
marbleMaterial.ambientTexture = marbleTexture;

// Set the diffuse color to the wanted ball's color (green)
marbleMaterial.diffuseColor = BABYLON.Color3.Green();
ball.material = marbleMaterial;
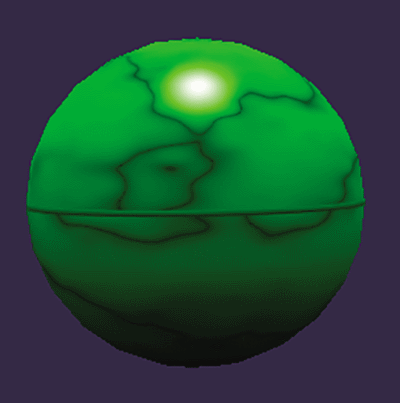
Figure 12 Marble Texture Applied to Ball
Adding a wooden texture to the lane can be done using the standard material’s diffuse texture. But that’s not why I wanted to talk about the lane’s material. If you look at a real bowling lane, you’ll notice it has several sets of dots and a set of arrows or triangles on it. To simulate that, I could create a very large texture with all of them on it, but that might impact performance (due to a very large texture) or reduce the image quality.
I could also use decals, a new feature introduced in Babylon.js 2.1. Decals are a way of “drawing” on top of an already-textured mesh. They can be used, for example, to simulate gunshots on a wall or, as in my case, add decorations to a bowling lane. Decals are meshes, and are therefore textured using standard materials. Figure 13 shows how I add the foul line and Figure 14 shows what the lane looks like after adding the decals, as well as how the floor and gutters look after using procedural textures (bricks and grass) as materials.
Figure 13 Adding the Foul Line Decal
// Set the decal's position
var foulLinePosition = new BABYLON.Vector3(0, laneHeight, foulLaneDistance);
var decalSize = new BABYLON.Vector3(1,1,1);

// Create the decal (name, the mesh to add it to, position, up vector and the size)
var foulLine = BABYLON.Mesh.CreateDecal("foulLine", lane, foulLinePosition, BABYLON.Vector3.Up(), decalSize);

// Set the rendering group so it will render after the lane
foulLine.renderingGroupId = 1;

// Set the material
var foulMaterial = new BABYLON.StandardMaterial("foulMat", scene);
foulMaterial.diffuseTexture = new BABYLON.Texture("Assets/dots2-w-line.png", scene);
foulMaterial.diffuseTexture.hasAlpha = true;
foulLine.material = foulMaterial;

// If the action manager wasn't initialized, create a new one
scene.actionManager = new BABYLON.ActionManager(scene);

// Register an action to generate a new color each time I press "c"
scene.actionManager.registerAction(new BABYLON.ExecuteCodeAction({
  trigger: BABYLON.ActionManager.OnKeyUpTrigger, parameter: "c" },
  // The function to execute every time "c" is pressed"
  function () {
    ball.material.diffuseColor =
      new BABYLON.Color3(Math.random(), Math.random(), Math.random());
  }
));
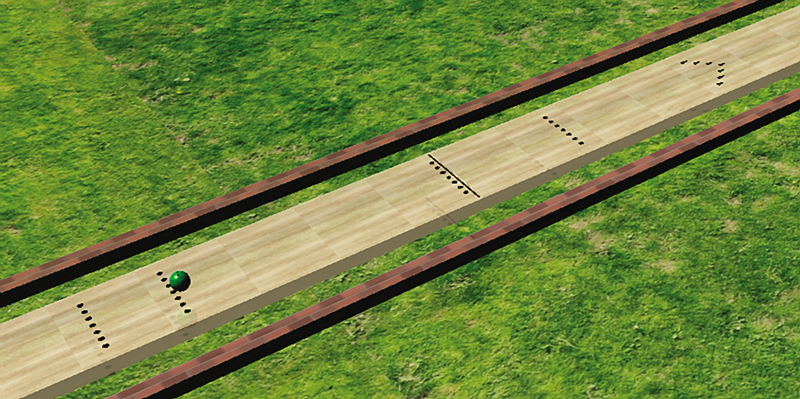
Figure 14 Lane with Decals Added
User Input—the Babylon.js Action Manager
As a fully featured game engine, Babylon.js has a simple way to interact with user input. Let’s say I want to change the ball’s color using the C key. Every time I press the C, I want to set a random color to the ball:
// If the action manager wasn't initialized, create a new one
scene.actionManager = new BABYLON.ActionManager(scene);

// Register an action to generate a new color each time I press C
scene.actionManager.registerAction(
  new BABYLON.ExecuteCodeAction({ trigger:
    BABYLON.ActionManager.OnKeyUpTrigger, parameter: "c" },
    // The function to execute every time C is pressed
    function () {
      ball.material.diffuseColor =
        new BABYLON.Color3(Math.random(), Math.random(), Math.random());
    }
));
The Babylon.js Action Manager is a powerful tool for controlling actions according to triggers. A trigger can be mouse movement or clicks, mesh intersections or keyboard input. There are many triggers and actions from which to choose. Take a look at the Babylon.js Tutorial site (bit.ly/1MEkNRo) to see all of them.
I’m going to use the action manager to control the ball and reset the scene. I’ll add those actions in part two of the tutorial.
Using External Resources
I’ve created the meshes I needed using the internal functions of Babylon.js. Most of the time, this will not be enough. Babylon.js offers a lot of meshes—from spheres and boxes to complex ribbons—but it’s hard to create complex models such as people, weapons for your Doom-for-the-Web, or a spaceship for your Space Invaders clone.
Babylon.js offers exporter plug-ins to many known 3D tools, such as Blender and 3D-Studio. You can also export your models from the wonderful Clara.io and download a .babylon file.
Babylon.js uses its own file format that can contain an entire scene, including meshes, cameras, lights, animations, geometries and other information. So if you wish, you can use Blender only to model your entire scene. You can also import single meshes.
However, that’s not part of this tutorial’s scope. For this article, I just wanted to show how you can create a simple game using Babylon.js alone.
What’s Next?
I’ve skipped many features integrated in Babylon.js. It has a huge number of features and I highly recommend you check the playground (babylonjs-playground.com), the Documentation page (doc.babylonjs.com), and the main Babylon.js page (babylonjs.com) to see the endless possibilities. If you have difficulties with any part of this tutorial, contact me or any of the Babylon.js heroes at the very active Babylon.js HTML5 Game Devs forum (bit.ly/1GmUyzq).
In the next article, I’ll create the actual gameplay—adding physics and collision detection, the ability to throw the ball, sounds and more.
Thanks to the following Microsoft technical expert for reviewing this article: David Catuhe
More Hands-on with Web Development
This article is part of the web development series from Microsoft evangelists and engineers on practical JavaScript learning, open source projects, and interoperability best practices including Microsoft Edge browser and the new EdgeHTML rendering engine.
We encourage you to test across browsers and devices including Microsoft Edge – the default browser for Windows 10 – with free tools on dev.microsoftedge.com:
- Scan your site for out-of-date libraries, layout issues, and accessibility
- Download free virtual machines for Mac, Linux, and Windows
- Check Web Platform status across browsers including the Microsoft Edge roadmap
- Remotely test for Microsoft Edge on your own device
More in-depth learning from our engineers and evangelists:
- Interoperability best practices (series):
- Coding Lab on GitHub: Cross-browser testing and best practices
- Woah, I can test Edge & IE on a Mac & Linux! (from Rey Bango)
- Advancing JavaScript without Breaking the Web (from Christian Heilmann)
- Unleash 3D rendering with WebGL (from David Catuhe)
- Hosted web apps and web platform innovations (from Kiril Seksenov)
Our community open source projects:
- vorlon.JS (cross-device remote JavaScript testing)
- manifoldJS (deploy cross-platform hosted web apps)
- babylonJS (3D graphics made easy)
More free tools and back-end web dev stuff:
- Visual Studio Code (lightweight code-editor for Mac, Linux, or Windows)
- Visual Studio Dev Essentials (free, subscription-based training and cloud benefits)
- Code with node.JS with trial on Azure Cloud
Frequently Asked Questions about Using Babylon.js to Build 3D Games for the Web
How do I start with Babylon.js for creating 3D games?
To start with Babylon.js, you need to have a basic understanding of JavaScript. Once you’re comfortable with JavaScript, you can download Babylon.js from the official website or use it directly from a CDN. The next step is to create an HTML file and include Babylon.js in it. You can then start creating a scene, which is the space where your 3D objects will live. You can add a camera, lights, and meshes (3D objects) to your scene. Babylon.js provides a lot of features and tools to make this process easier.
What are the key features of Babylon.js?
Babylon.js is a powerful, beautiful, simple, and open game and rendering engine packed with all the features you could possibly need. Some of its key features include a complete scene graph with lights, cameras, materials, and meshes, a physics engine, support for 3D audio, and support for various types of textures. It also supports collisions, particle systems, and a lot of different camera controls. Babylon.js also provides a playground where you can experiment with your code and see the results in real-time.
How can I add textures and materials in Babylon.js?
Babylon.js provides a simple and intuitive API for adding textures and materials to your 3D objects. You can create a material and then assign it to a mesh. You can also load textures from an image file and apply them to your material. Babylon.js supports various types of materials and textures, including standard materials, PBR materials, multi-materials, procedural textures, and video textures.
How does Babylon.js handle animations?
Babylon.js has a powerful animation system that allows you to animate almost anything in your scene. You can create animations for your meshes, lights, cameras, and even materials. Babylon.js supports keyframe animations, skeletal animations, and morph target animations. You can control the speed, loop, and blending of your animations. You can also use easing functions to make your animations more realistic.
Can I use Babylon.js with other JavaScript libraries?
Yes, Babylon.js can be used with other JavaScript libraries. It is designed to be modular and flexible. You can use it with libraries like jQuery, React, Angular, and Vue.js. You can also use it with Node.js on the server side. Babylon.js also integrates well with WebGL and WebXR for creating immersive 3D and VR experiences.
How can I handle user input in Babylon.js?
Babylon.js provides a comprehensive input system that allows you to handle user input from the keyboard, mouse, touch, and gamepad. You can detect key presses, mouse clicks, mouse movement, touch events, and gamepad input. You can also pick objects in your scene with the mouse or touch.
Does Babylon.js support virtual reality (VR)?
Yes, Babylon.js has built-in support for virtual reality. It provides a WebXR experience helper that makes it easy to add VR capabilities to your game or application. You can create immersive VR experiences with stereo rendering, gaze tracking, and motion controllers.
Can I use Babylon.js for creating multiplayer games?
Yes, you can use Babylon.js for creating multiplayer games. However, Babylon.js does not provide a built-in networking solution. You will need to use a networking library or a backend service for handling the multiplayer aspect of your game.
How can I optimize my Babylon.js game for better performance?
Babylon.js provides several tools and techniques for optimizing your game. You can use level of detail (LOD) to reduce the complexity of your 3D models. You can use occlusion queries to avoid rendering objects that are not visible. You can also use the inspector to analyze your scene and find performance bottlenecks.
Where can I find resources and tutorials for learning Babylon.js?
The official Babylon.js website provides a lot of resources for learning Babylon.js. It has a comprehensive documentation, a series of tutorials, and a playground where you can experiment with your code. You can also find tutorials and examples on various other websites and blogs.
Raanan Weber is an IT consultant, full stack developer, husband, and father. In his spare time, he contributes to Babylon.js and other open source projects. You can read his blog at blog.raananweber.com.
Published in
·Android·App Development·iOS·Mobile·Mobile Web Development·Tools & Libraries·August 7, 2015
Published in
·Design·Design & UX·Mobile·Mobile Web Development·UI Design·Usability·UX·January 5, 2016

Published in
·Content strategy·Copywriting·Design·Design & UX·Technology·UI Design·Usability·UX·June 28, 2016


