Key Takeaways
- The Robot Factory is a web application that allows users to build a production line of robots, with each robot saved to a database with randomly chosen head, body, and legs. Robots can also be deleted after they have been built.
- The Robot Factory application is built using Sinatra, a DSL for quickly creating web applications in Ruby. The app uses DataMapper for setting up the database, and Slim and Sass for creating and styling the views.
- The application includes route handlers for creating and deleting robots, with the robot’s data saved in a database. The views are created using the Slim templating language and styled using Sass.
- The Robot Factory is designed to be user-friendly and accessible to people of all skill levels. It provides a range of tools and features that enable users to design robots according to their specific needs and preferences. It also offers tutorials and guides to help users understand the basics of robotics and automation.
Adding and Deleting Resources in Sinatra
In this tutorial I’m going to go through how to use Sinatra to add and remove resources to and from a database.
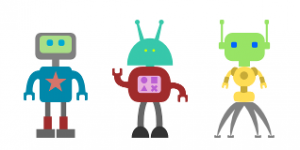
To demonstrate this, I’m going to build a tiny web app called The Robot Factory that allows users to ‘build’ a production line of robots. Each robot will be saved to a database with randomly chosen head, body and legs and can also be deleted after it has been built. You can see the final version running here – http://robotfactory.heroku.com/. You can also see all of the finished code here – https://gist.github.com/1110005.
To follow this tutorial you will need to have the following gems installed:
$ gem install sinatra data_mapper sqlite3 dm-sqlite-adapter slim sassBefore I started, I used the brilliant Inkscape to draw a some cool looking robot parts and then saved them as top1.png, top2.png, middle1.png … etc. You can find all the files here, but feel free to create your own images using the same naming conventions.
Building the App
Everything in this app is going to be in the same file, so open up your favourite text editor and save the file as `main.rb`. To start with, we need to require some gems and set up the database in DataMapper.
%w[sinatra dm-core dm-migrations slim sass].each{ |lib| require lib }
DataMapper.setup(:default, ENV['DATABASE_URL'] || File.join("sqlite3://",settings.root, "development.db"))
Next is the Robot Class. As you can see, the robot class has 4 properties: an auto-incrementing id and 3 integers that correspond to the top, middle and bottom images. These integers are generated by using a Proc to set the default value as a random number that corresponds to how many top,middle and bottom images there are:
class Robot
  include DataMapper::Resource
  property :id, Serial
  property :top, Integer, :default => proc { |m,p| 1+rand(6) }
  property :middle, Integer, :default => proc { |m,p| 1+rand(4) }
  property :bottom, Integer, :default => proc { |m,p| 1+rand(5) }
end
DataMapper.finalize
Now that the Robot model is set up, it needs migrating to the database. Open up a terminal and navigate to the folder where you have saved the main.rb file, then type the following:
$> irb
ruby-1.9.2-p180 :002 > require './main'
=> true
ruby-1.9.2-p180 :003 > Robot.auto_migrate!
=> true
Route Handlers
The next job is to create the route handlers. The first allows the CSS to be written as inline-views in the same document.
get('/styles.css'){ scss :styles }
Next, we will create the three main handlers. The first is the index page, which is actually the only page in the Robot Factory. It gets all the robot objects in the database and stores them as an array in the instance variable @robots that can be accessed in the views. The second deals with the post request that is actioned when the ‘BUILD A ROBOT’ button is pressed. This creates a new robot then redirects back to the index page, where the new robot will become part of the @robots array. The last handler deals with deleting the robots. It finds the robot that was deleted using the :id part of the url and then removes it from the database using DataMapper’s destroy method. It then redirects back to the index page where that robot will no longer be part of the @robots array.
get '/' do
  @robots = Robot.all
  slim :index
end
post '/build/robot' do
  robot=Robot.create
  redirect to('/')
end
delete '/delete/robot/:id' do
  Robot.get(params[:id]).destroy
  redirect to('/')
end
__END__
Views
Now, it’s time for some views. In this example, I’ve chosen to use inline views so that they can be included in the same file. I’m also using the awesome Slim templating language to write them in.
The first is a fairly standard HTML 5 layout. I’ve also included a link to some fonts from the Google Web Font Directory that I will be using in the CSS later.
@@layout
doctype html
html
  head
    meta charset="utf-8"
    title Robot Factory
    link rel="shortcut icon" href="/fav.ico"
    link href="http://fonts.googleapis.com/css?family=Megrim|Ubuntu&v2" rel='stylesheet'
    link rel="stylesheet" media="screen, projection" href="/styles.css"
    /[if lt IE 9]
      script src="http://html5shiv.googlecode.com/svn/trunk/html5.js"
  body == yield
    footer role="contentinfo"
      p Building Quality Robots since 2011
The next view is the index page which is the only page in the app. It basically includes a button inside a form that is pressed to build a robot, as well as a list of robots if any exist. If no robots exists yet, a message will appear telling you to get on and build some. I’ve separated the code for the robot into a separate view and included it as a partial (==slim :robot, :locals => { :robot => robot }, this is usually a good idea anyway, but has extra benefits when dealing with Ajax as we shall see later.
@@index
h1 Robot Factory
form.build action="/build/robot" method="POST"
  input.button type="submit" value="Build A Robot!"
-if @robots.any?
  ul#robots - @robots.each do |robot|
    ==slim :robot, :locals =>; { :robot =>; robot }
- else
  h2 You Need To Build Some Robots!
The code for the robot places the three images that form its body inside a list item. There is also a form at the end that is used for the delete button. This has to be part of a form so that the correct HTTP verb DELETE can be used (notice the hidden form field that is used to tell Sinatra that this is actually a DELETE request).
@@robot
li.robot
  img src="https://s3.amazonaws.com/daz4126/top#{robot.top}.png"
  img src="https://s3.amazonaws.com/daz4126/middle#{robot.middle}.png"
  img src="https://s3.amazonaws.com/daz4126/bottom#{robot.bottom}.png"
  form.destroy action="/delete/robot/#{robot.id}" method="POST"
    input type="hidden" name="_method" value="DELETE"
    input type="submit" value="×"
The app is now fully complete and will run perfectly well as it is, although it won’t look very good. The main problem is that the images that make up the robots are displayed side by side, rather than vertically on top of each other as intended.
Adding Some Style
This is all sorted out by applying some styles. Earlier on, we added a handler that allowed us to place our CSS into the views, since we’re using inline views, it just goes underneath the other views in the same file:
@@styles
html,body,div,span,object,iframe,h1,h2,h3,h4,h5,h6,p,blockquote, pre,abbr,address,cite,code,del,dfn,em,img,ins,kbd,q,samp,small,strong,sub,sup,var,b,i,dl,dt, dd,ol,ul,li,fieldset,form,label,legend,table,caption,tbody,tfoot,thead,tr,th,td,article, aside, canvas, details,figcaption,figure,footer,header,hgroup,menu,nav,section, summary,time,mark,audio,video {
  margin:0;
  padding:0;
  border:0;
  outline:0;
  font-size:100%;
  vertical-align:
  baseline;
  background:transparent;
  line-height:1;
}
body{font-family:ubuntu,sans;}
footer {
  display:block;
  margin-top:20px;
  border-top:3px solid #4b947d;
  padding:10px;
}
h1 {
  color:#95524C;
  margin:5px 40px;
  font-size:72px;
  font-weight:bold;
  font-family:Megrim,sans;
}
.button {
  background:#4b7194;
  color:#fff;
  text-transform:uppercase;
  border-radius:12px;
  border:none;
  font-weight:bold;
  font-size:16px;
  padding: 6px 12px;
  margin-left:40px;
  cursor:pointer;
  &:hover{background:#54A0E7;}
}
#robots {
  list-style:none;
  overflow:hidden;
  margin:20px;
}
.robot {
  float:left;
  width:100px;
  padding:10px 0;
  position:relative;
  form {
    display:none;
    position:absolute;
    top:0;
    right:0;
  }
  &:hover form {
    display:block;
  }
  form input {
    background:rgba(#000,0.7);
    padding:0 4px;
    color:white;
    cursor:pointer;
    font-size:32px;
    font-weight:bold;
    text-decoration:none;
    border-radius:16px;
    line-height:0.8;
    border:none;
  }
  img {
    display:block;
    padding:0 10px;
  }
}
This is all very standard stuff. It starts off with a basic reset, then sets all the fonts and colors for the body, footer, and headings. The ‘Build A Robot’ button is styled so that it is nice, bright and rounded (like all good web 2.0 buttons should be). The robots are floated left, so they will appear side by side and the images set to display:block which forces them to sit on top of each other. The form that contains the delete button is set to be hidden, unless the robot is hovered on. It has also been styled to look like a standard ‘delete’ button.
The app now works, and looks as it should, but there are some page reloads every time you try to build or destroy a robot that slow the whole process down. This sounds like a job for the XMLHttpRequest … but that will have to wait until part 2 of this tutorial!
In the meantime, crank out some robots to keep you company…
Frequently Asked Questions about The Robot Factory
What is the purpose of the Robot Factory?
The Robot Factory is a platform that allows users to create, customize, and operate their own robots. It provides a unique opportunity for users to explore the world of robotics and automation. The platform is designed to be user-friendly and accessible to people of all skill levels, from beginners to advanced users. It offers a wide range of features and tools that enable users to design robots according to their specific needs and preferences.
How does the Robot Factory differ from AskMrRobot?
While both platforms are designed to assist users in creating and managing robots, they differ in several ways. The Robot Factory focuses on providing a comprehensive platform for designing, customizing, and operating robots. On the other hand, AskMrRobot is more of a tool for optimizing the performance of robots in the World of Warcraft game. It provides recommendations on gear, talents, and rotations to improve the efficiency of the robots.
Can I use the Robot Factory if I am a beginner?
Absolutely! The Robot Factory is designed to be user-friendly and accessible to people of all skill levels. It provides a range of tools and features that make it easy for beginners to start creating and customizing their own robots. Additionally, it offers tutorials and guides to help users understand the basics of robotics and automation.
What kind of robots can I create with the Robot Factory?
The Robot Factory allows you to create a wide variety of robots. You can design robots for different purposes, such as for entertainment, education, or industrial applications. The platform provides a range of tools and features that enable you to customize your robots according to your specific needs and preferences.
How can I optimize the performance of my robots?
The Robot Factory provides a range of tools and features that can help you optimize the performance of your robots. These include various design options, customization features, and performance analysis tools. Additionally, you can use the platform’s tutorials and guides to learn more about robotics and automation, which can help you improve the efficiency of your robots.
Is the Robot Factory compatible with other platforms?
Yes, the Robot Factory is designed to be compatible with a variety of platforms. This means you can use it to create and manage robots for different applications, including games, educational programs, and industrial applications.
Can I share my robots with others?
Yes, the Robot Factory allows you to share your robots with others. This can be a great way to showcase your creativity and share your passion for robotics with the world.
What kind of support does the Robot Factory offer?
The Robot Factory offers a range of support options to assist users. This includes tutorials and guides to help users understand the basics of robotics and automation, as well as a dedicated support team that can assist with any technical issues or questions.
How can I get started with the Robot Factory?
Getting started with the Robot Factory is easy. Simply sign up for an account, and you can start creating and customizing your own robots. The platform provides a range of tools and features to assist you, as well as tutorials and guides to help you understand the basics of robotics and automation.
Is the Robot Factory free to use?
The Robot Factory offers a range of pricing options to suit different needs and budgets. While some features are available for free, others require a subscription. For more information, please visit the Robot Factory’s pricing page.
Darren loves building web apps and coding in JavaScript, Haskell and Ruby. He is the author of Learn to Code using JavaScript, JavaScript: Novice to Ninja and Jump Start Sinatra.He is also the creator of Nanny State, a tiny alternative to React. He can be found on Twitter @daz4126.