Podtastic! Professional Podcasting for the Rest of Us

Share this article

Using the Internet to deliver audio isn’t new. Streaming audio has been alive and well on the Internet since the late nineties, but that’s a far cry from podcasting. Podcasting is a perfect marriage of two technologies: the RSS specification and the MPEG Level 3 (MP3) compression algorithm. Dave Winer’s work on the RSS spec and Adam Curry’s experience in broadcasting came together to give the world podcasting — the ability for pre-recorded audio shows to download automatically to listeners’ audio players while they sleep.

While a full history of podcasting is beyond the scope of this article, I would be remiss if I didn’t point out some critical dates and people. In October of 2000, Tristan Louis proposed the idea of syndication feed enclosures. Around that same time, the author of the RSS format, Dave Winer, and Much Music Alumni, Adam Curry, had a discussion about the same concept. Winer responded by creating the enclosure element in the RSS 0.92 specification and proved it could work by enclosing a Grateful Dead song in his personal blog on January 11th, 2001. What followed was a veritable stampede of developers and entrepreneurs rushing to create applications and services to support this new medium. For those with a thirst for the details, Wikipedia has an excellent Podcasting entry that will quench your thirst.

This article will give you a complete introduction to podcasting; by the end of it you should be in an excellent position to set up, record, and distribute your own podcast to the masses! But, before we roll up our sleeves and get our hands dirty, it’s important to understand a few of the basics.

A Little Background

The word podcasting is a combination of the words broadcasting and iPod. Regardless of its prominent position in the name, an iPod isn’t required to listen to podcasts. Any old MP3 player will do and, in fact, many podcasters have started to produce their shows in formats other than MP3.

As with any good dance, podcasting takes two. The podcaster is the person or people who create the show and the listeners are at the other end of the dance floor, waiting for each show to appear in their audio player. The application that makes this all possible is the podcatcher. A podcatcher is an application that’s designed to read RSS feeds and look for the magical enclosure element that heralds a path to a binary file. Podcatchers are smart enough not only to go and download the file indicated in the enclosure element, but to do so only if the file isn’t already resident in the podcatcher’s archives.

At first glance, it may be difficult to discern why podcasting may be superior to the direct downloading of audio files or the streaming of content on demand. There are a number of arguments for all these methods of listening to audio content, but the good ones focus on lifestyle: podcasting allows people who don’t spend their days in front of a computer to listen to shows. It’s no trouble to set a podcatcher to load up an audio player each night with fresh shows to take on the road, the bus, or a fishing trip. Podcasting also addresses the same ‘long tail’ issues as blogging. Local radio stations have a hard time building a business case for producing shows on topics of little interest. Not so with podcasters. As with blogs, barriers to entry in the podcasting market are virtually non-existent; therefore, the breadth of available topics is astounding.

The Nuts and Bolts

Creating a podcast is no small feat. The technical aspects of recording, editing, and encoding an audio file aren’t terribly hard to grasp, but putting that knowledge together with good content, a decent voice, and a sense of timing can be quite a challenge.

Digital Audio Editors

The first thing that you’re going to need to head out on your podcasting journey is a good editor. An editor is a piece of software that records and allows the editing of audio (it’s more correctly known as a digital audio editor or digital audio workstation). There are many flavours of editors for all platforms and price points. Audacity is likely the most popular editor in use at present. The reasons for Audacity’s popularity are numerous but at the top of the list are the facts that it’s available for Windows, Mac, and GNU/Linux; the interface is mature and intuitive; and it’s free (as in free of charge and as in Free Software Foundation).

On the commercial side of the house, CastBlaster (fronted by Adam Curry himself) is the most promising tool on the horizon. The main feature of CastBlaster that’s missing from Audacity is the ability to ‘cue’ tracks and play them at the push of a button. When using Audacity, recording has to be stopped and the desired sound clip moved into the proper place. With CastBlaster, a single button push starts, stops, and pauses these clips, which can make for a much more spontaneous show. CastBlaster is still in beta and the trial version will only record ten-minute shows. Since it’s only available for Windows, I’ll be sticking with Audacity for the time being.

ID Taggers

Many audio file formats have the ability to contain information tags. Generally, these tags are short bits of information about the show, such as its title, date, recording artist, length, comments, and a picture. Any music player worth its salt can display the information contained in these tags.

As a podcaster, you must take the time to fill in at least some of these tags when you publish your shows. Unlike music, a podcast episode may not be readily identifiable and the listener should be able to take a quick glance at the screen to see what and who they’re listening to. As podcasts are shared among listeners, this information gains even greater importance because listeners might genuinely not know what they’re listening to.

MP3 and OGG Vorbis file formats support the inclusion of ID tags. Both Audacity and CastBlaster provide the functionality to ‘tag’ a show upon completion, but in both cases the tags provided are limited. Many podcasters may choose to access more tags by using a third-party external tagging application. For GNU/Linux, Easy Tag is a powerful, free ID tagger; for Windows, Multi ID3 is in frequent use (although some tagging ability is built into Windows Media player); and for Mac, MP3tagger seems to fit the bill, although being a Java application it should run on any platform.

Audio files are still looked at as “music” files, so some of the names of the ID Tag fields don’t cross over well to podcasting, but at a bare minimum, the tags that you should fill out are:

  • Artist: Your name! People like to know who they’re listening to.
  • Title: The show name. The data in this field will scroll prominently across the player’s screen. The show name should consist of the name, the episode number, and the published date. All of this is information that listeners will need to figure out if they’ve heard the episode before, and want to know what they’re listening to.
  • Genre: Pick podcast if it’s available; if not, type it in manually. Some editors (like Audacity) provide a limited drop-down list box of genres that don’t include “podcast.” That’s the primary reason why I use Easy Tag to tag my shows.

Generally, podcast listeners listen to other types of audio as well. Many of them have huge audio libraries that are organized according to the information contained in these ID tags. Taking the time to fill the tags out properly can endear you to your listeners.

Hardware

It’s time to reveal my deep, dark secret: I am a successful podcaster with almost a year of shows under my belt, but I know next to nothing about microphones. In my geek life, I’ve always avoided hardware, preferring the mystique of software, and that preference has spilled over into my podcasting life. Happily, a good microphone isn’t really required for podcasting.

Microphones are likely the single biggest point of hype in the entire podcasting industry. It’s imperative to keep in mind that we’re talking about speech or mostly speech podcasts here. If you’re looking to record a music album, then this information isn’t going to be any good to you. In the podcasting world, there is no end to the number of resources that focus on “how to get into podcasting for less than $200”, and “why you should spend no less than $100 on a microphone”. This is all garbage. My most expensive microphone is a $30 Audio-Technica that I bought from my local Radio Shack. To be truthful, I hardly ever use that mic because there are usually two of us in each recording, so we use $25 NeXXt headsets from — you guessed it — the local Radio Shack. Admittedly, we do have a mixer, but I don’t think we’ve spent $200 in total since we started podcasting. As with blogging, in the world of podcasting, content is king — not the trappings. Beware of those people who are “willing” to sell you everything you need for $200. If you can’t get into podcasting for the cost of a decent headset, you’re concentrating on the wrong thing.

I know there are podcasters reading this who are shaking their heads right now, but I invite anyone to experiment with an inexpensive microphone and editor. Using some technique and the proper settings can work wonders. While a minimum level of quality is certainly required to keep your listeners sane (and coming back!), a $25 headset mic is more than sufficient for speech recordings.

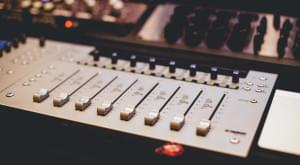
I do recommend an audio mixer, though. A mixer is a simple device that allows podcasters to plug more than one set of inputs (usually microphones, but not always) into a single sound card. Think of a two-channel mixer like a Y-Cable, but with a volume control for each input. The magic of the mixer is those volume controls, which give you control over the volume of each input. Given that, a mixer is only useful if you’re going to have more than one input to the show, such as a co-host or music from a DVD player. If you’re going it alone, spending money on a mixer is a waste of money.

Until podcasting really comes into its own, it’s going to be much easier to find hardware mixers that have the larger 1/4 inch jacks rather than the 3.5mm jacks that most computer headsets have. Generally, mixers that do have the 3.5mm plugs are more expensive, so I opted to purchase an inexpensive mixer with the 1/4-inch jacks and spend $5 on adapters. My mixer only has input jacks, which means that when we’re recording a show, the mic plugs from our headsets are plugged into the mixer, but the headphone plugs from our headsets are plugged into a y-cable connected directly into the soundcard’s output jack. This is somewhat cumbersome, but it’s much cheaper than the alternative: a mixer with both input and output jacks.

As podcasting grows, podcasters try new things. One area that’s growing well is mobile podcasting — podcasting from events or on the drive to work is becoming quite popular, and to do so requires some special equipment. When I looked into mobile podcasting I had visions of lugging laptops, headsets, and cables around with me but a little research put that misconception to rest in short order. Technology has improved in recent times, and many audio players now come with built-in microphones. These players/recorders will record and encode right into WAV or MP3 format, which makes the file very easy to pull into Audacity or CastBlaster and incorporate into a show. Some of these recorders are better than others, but I have received some very high-quality clips from listeners with inexpensive players.

Other Software

Software-wise, a good editor and a tagger are about all you need to get started in the world of podcasting. However, as your show gains traction, it might be nice to speak with guests who aren’t geographically near to you. Telephone interviews are common on podcasts these days, but how is that done? In a word: Skype. There are a few other options out there, but Skype is by far the best option for podcasters today.

Skype is an Internet telephony application that uses the Internet to make and receive voice calls. Skype also has an instant messenger component, but the reasons why I recommend Skype is that it is mature; the client is available for Windows, GNU/Linux, and Mac, so we can all use it; and there are a few tools out there that work very well to record Skype calls. Further, for a reasonable fee, Skype provides the means to call normal telephone numbers and receive calls from normal telephone numbers, which means that your interviewee need not have a Skype account or even be aware of what Skype is.

To record Skype calls, I use Hot Recorder, but there’s an Outlook toolbar plugin that will record calls, and some other fledgling applications, such as FreeCorder, will also do the job. One caution though — I’d highly recommend that whatever application you use to record Skype calls, make sure it has the ability to record you and your caller on separate tracks (Hot Recorder does this). I’ve had many phone calls that became “out of sync” and while this is not obvious while the conversation is underway, it’s painfully obvious when the call is pulled into an audio editor. If you and your caller are on separate tracks, you can sync the tracks back up again, play with the volume of each participant individually, and take out any disturbing noises that may have occurred on either side of the conversation.

I wish there was a decent method of recording Skype calls for GNU/Linux but, other than some ungainly scripts, there isn’t. Therefore, I use Skype on my Windows box and Hot Recorder to record my Skype calls.

1530_fig1
Main screen of SmartFTP, an FTP client for Windows

Depending on the service you intend to use to serve your podcasts, you may have to become familiar with a File Transfer Protocol (FTP) client. An FTP client is essentially a glorified Windows Explorer that allows you to transfer files from your computer to a server somewhere else on the network. In general, after you supply some login credentials (that your provider will have given you), an FTP client will show you two panes containing lists of files. One pane shows your local computer’s file system; the other displays the remote server’s file system. Transferring files is usually as simple as dragging and dropping them from one pane to the other. Smart FTP is a good FTP client for Windows, GFTP is popular among GNU/Linux users, and Fetch is commonly used for Mac.

However, many of the more mature services offer file upload via a web interface, so you may not have any use for an FTP client.

Techniques

One of the reasons I can get away with using an inexpensive microphone is mic technique. While I’m not perfect at it, a few little pointers on how to use a microphone will go a long way in covering up your inexpensive mic.

  • If possible, buy a headset mic that has a little foamy screen on the microphone. That screen takes some of the ‘wind’ out of your voice when you talk.
  • Position the mic so it’s not right in front of your mouth. Off to the side or above or below your mouth works well. The object is to move the mic out of the main flow of air from your mouth. Keep that in mind when you’re trying out new positions, and don’t move the mic into the path of air from your nose.
  • Try not to ‘pop’ or ‘ess’. Popping is the sound created when you speak a hard ‘P’ sound right into the microphone. Essing is the slithery ‘S’ sound that’s created when you expel air right into the mic while saying an ‘S’ word. Positioning the mic properly and having a mic screen will reduce these effects, but paying some attention to the way you’re speaking will help as well.
  • Normalize, normalize, and normalize! Normalization is a method of smoothing out the high and low points of a given audio track. It’s natural for a show to have sudden fluctuations in sound level — for instance, when someone laughs — but it’s very easy to blow a listener’s ears off with these fluctuations. Audacity gives you the ability to normalize your recordings, but I don’t see similar capabilities in CastBlaster. Normalization is completed as a final step once the show or track has been recorded. To normalize a track in Audacity, select the track with your mouse and select Effect -> Normalize. I normalize all tracks individually, then export the show into MP3 or OGG Vorbis format.

Show Notes

Many podcast users listen on the go. This means that they generally aren’t able to jot down a web address or sentence of important information from your podcast that they might want to remember. To combat this, show notes should accompany each podcast episode.

Show notes are generally written on the show blog, and while there’s no real hard-and-fast rule about creating show notes, at a bare minimum the notes should contain:

  • A minute-by-minute account of the show to allow people to find parts that interest them quickly.
  • Links to everything that’s mentioned on the show, so listeners can get more detailed information about something you’ve mentioned.
  • A written copy of any technical or complicated steps or instructions given on the show.
  • Contact information, such as the show’s email address (don’t forget to mention the address of the show blog on the show!).
Audio File Encoding

Saving a show (called encoding) seems to be a relatively innocuous task, but there are a few variables that can drastically affect both the show’s quality and file size. It’s important to find a good balance between quality and file size because your listeners will want the highest quality they can get, though generally they won’t be willing to spend 40 minutes downloading the show.

First, here’s a primer on file formats.

The MP3 file format is the most common audio format for podcasts by far. Most, if not all, audio editors have the ability to encode into MP3 format, and all audio players have the ability to play MP3s. There is one problem that looms on the horizon, though. While both creators and consumers of audio content use the MP3 format with wild abandon, the owners of the MP3 format are quietly starting to enforce their patent. Thomson Multimedia and Fraunhofer Gesellschaft hold the patent on the MP3 format, and that has potential licensing and monetary issues for us down the road.

OGG Vorbis is the unfortunately named main competitor to the MP3 format. Unlike MP3, patents do not encumber OGG Vorbis. As an aside, OGG Vorbis format is generally referred to simply as “OGG”, although there are many compression schemes other than Vorbis that may be used with OGG. OGG is a truly open source project that is free for all to use and develop.

On the technical side of the equation, OGG provides comparable (and in many cases better) compression than the MP3 format; OGG also supports Variable Bit Rate (VBR) by default. VBR is the process by which an audio editor can encode a file using different bitrates in different parts of the file, rather than enforcing a constant bitrate throughout the entire file. The end result is a higher quality audio file that usually takes up more space. Early MP1 and MP2 formats didn’t have the VBR capability, but the MP3 format does. In general, an OGG file encoded with the same settings as a Non-VBR MP3 will be a smaller file; however, many of today’s audio players don’t support the OGG format. Each year, the support for OGG grows in the portable audio player market, but it’s far from ubiquitous. My response is to provide two versions of the each episode — an MP3 (because it would be show suicide not to) and an OGG (because I want to support the open format).

The next section deals with the all-important encoding settings for MP3. When you’re encoding into OGG format, your editor may or may not make these settings available. Audacity, for example, does not provide bit rate and sample rate settings for OGG encoding. It simply supplies a 0 to 10 slider bar. I encode my OGGs at zero on this slider bar.

If you’re using MP3 (and your editor provides these settings for OGG) some consideration must be given to bit rate and sample rate. Bit rate is defined as the number of bits per second in an audio file. These days, we generally talk about thousands of bits per second (kbps) but the principal remains the same: the higher the bit rate, the higher the sound quality. Unfortunately, the higher the bit rate, the larger the file as well.

The second consideration is sample rate. Sample rate is defined as the frequency at which an audio stream is converted into a digital file expressed in kilohertz (kHz). Think of sample rate as how frequently the encoder ‘dips’ into the audio stream to pull a piece out and encode it into digital. The principal that applies to bit rate also applies here — the higher the sample rate, the higher the sound quality (and larger the end file).

The most suitable bit and sample rates for a given show will depend entirely on its content. Finding the perfect match of rates and file sizes is something of a holy grail for podcasters. A general rule of thumb is that music should be recorded at a higher bit rate and sample rate, while speech may be recorded at a much lower setting. I encode my speech podcasts at a sample rate of 22kHz and a bit rate of 48kbps, which usually results in a file that’s about 6MB per 15 minutes of show. Here are some common benchmarks to get you started, but keep in mind that experimentation is the key:

  • Pure speech podcast: 22kHz/48kbps
  • Speech with some music: 44.1kHz/64-96kbps
  • Mostly music: 44.1kHz/128-192kbps
Using Audacity or CastBlaster to Record a Show

A full tutorial on the use of Audacity or CastBlaster is outside of the scope of this article, but the general steps, in quick-and-dirty format, follow.

Audacity
1530_fig2
Main Audacity window with a show loaded and ready for editing

  • Plug in the microphone/headset.
  • Press the red record button and start talking.
  • Press the stop or pause button to take a break. Note: pressing the stop button will terminate the current track and start a new one when you resume recording. Pressing the pause button will continue with the same track when you resume recording.
  • If you don’t like the way a track turned out, click the X button on the top left of the left-side control block for the track to discard it.
  • Use the Project -> Import Audio menu item to bring in other pre-recorded audio files. Note: Use the time shift tool to move tracks around to the positions at which you want them. The time-shift tool is the button on the top left of the Audacity window with the double-arrow graphic on it.
  • Use the mouse to select pieces of audio, and the Effect menu to apply filters such as echoes and silence.
  • Use the Project -> Edit ID3 Tags to input MP3 ID tags. If you intend to export the file in OGG Vorbis format, you will have to manually enter the tags using a third-party application such as Easy Tag.
  • Use the File -> Export As OGG Vorbis to create an OGG file.
  • Use the File -> Export As MP3 to create an MP3 file. Note: Due to the aforementioned licensing restrictions, Audacity does not come with the ability to encored MP3s out of the box. You must find and download the libmp3lame library to encode MP3 and use the File -> Preferences -> File Formats -> Find Library button to tell Audacity where it is. Then you can export as MP3.
  • Don’t forget to do a normal File -> Save to save the native *.aup file. The *.aup file contains all of the individual tracks, which makes editing much easier. The MP3 or OGG file that you’ve exported will only be a single track, which makes editing difficult. Think of the *.aup file as the equivalent to Photoshop’s *.psd file. If you have it, you can edit to your heart’s content. If you don’t, you’ll need to be a wizard to edit your work.

CastBlaster

Remember that CastBlaster is in beta, but since it has such great functionality, I feel that it’s worth covering.

1530_fig3
Partial CastBlaster main window

  • Plug in the microphone/headset.
  • Go to the Create tab. If you know what kinds of external audio you’re going to need, press any of the blank buttons to open a file browser window. Find the file you want and click OK. Repeat as necessary.
  • Go to the Edit tab to set start and end points, editing out the bits of the track that you’re not happy with.
  • Go to the Describe tab to enter the ID tag information.
  • Go to the Publish tab to save your show. You can also upload your show here if you’ve filled in the server details on the Configure tab.
  • Go to the Configure tab to set the sample and bit rates, and enter the server information.
  • As a convenient place to keep show notes, click the Show Notes text link on the top right of the main CastBlaster window to open a text editor. These notes can later be pasted into a blog entry.

Note that while CastBlaster has exceptional ability to import and control external audio clips, it lacks a lot of the granular control that Audacity provides. I also miss the ability to encode into OGG Vorbis format. Admittedly, Audacity’s complete tool set can be overwhelming for some first-time podcasters, so perhaps CastBlaster’s ‘higher view’ of things will appeal to some.

Producing the RSS Feed and Hosting the File

As mentioned before, the enclosure element is the lynchpin of the entire podcasting system. An RSS feed is just an RSS feed unless it has an enclosure element. Then, it becomes a medium for distributing binary files. For the technically inclined, the enclosure element is a sub-element of <item>. The enclosure element has three required attributes: the URL to the binary file (which must be http), the length of the file in bytes, and the file format. A typical podcast enclosure element looks like this:

<enclosure url="http://www.mypodcastsite.com/media/myshow_20060202_12.mp3" length="16276324" type="audio/mpeg">

As a podcaster, you need to provide a proper RSS feed with the enclosure element. This is the only way that listeners are going to be able to use their podcatchers to get your shows. We’ve already covered off the necessity of having a show blog or some other type of site to provide the show notes, so what’s the best way to provide all of this?

There are basically two ways to look at the situation. I prefer to look at the show blog feed and the podcast feed as being one and the same thing, and provide them both from a single source (a single feed from my show blog). Others prefer to keep their blog feed separate from their podcast and indeed some networks require that podcast feeds contain only podcasts. I don’t understand this requirement, since podcatchers will ignore the text blog entries and only act on the entries in which the enclosure element appears, but some networks insist on this regardless.

Some good starting points for all-in-one services are as follows:

  • Liberated Syndication provides an integrated blog/podcasting solution starting from $5US/month.
  • Podbus offers either a simple hosting and feed type service, or an integrated blog/podcasting service from $4-$6US/month.

Some starting points for “feed only” services are below:

  • Podcaster Hosting provides a service that takes a podcast and produces an RSS feed that you can then use on any web site — basically a “bring your own blog” type of service — at $20US/month.
  • Blip Media is totally free. I find it somewhat confusing to use, but the price is right.
  • Ourmedia is also free and backed by the Internet Archives and Drupal.

I’ve used Blipmedia (back when it was r.Podcaster), Ourmedia, and Liberated Syndication. None of them are perfect, but Liberated Syndication is where I made my home. The bandwidth and disk space involved with hosting podcasts isn’t trivial and many services underestimate the resources they will need. By all means, feel free to check out the free services, but be vigilant. A feed that gives your listeners trouble is a feed from which they will quickly unsubscribe.

The enclosure element is also now supported by some blogware. If you run your own blog on your own server (and you think you can handle the bandwidth), you may want to investigate whether your blogware can create enclosure elements. If so, you can host your own show.

Lastly, you’ll likely want to know how many people are listening to your show. This is a tricky area of podcasting because of the mix of direct downloads and podcatchers. Direct downloads are fairly easy to count, but podcatcher hits are a little trickier. Since a podcatcher is essentially an RSS aggregator, it will check all its subscribed feeds every time it is launched. This check is generally counted as a hit, regardless of whether or not there are any new shows to be downloaded. At the moment, the two solutions that seem to work are to use Liberated Syndication for hosting (they’ve put a LOT of work into their stats) or to push your feed through Feedburner. Both services have made great strides in attempting to normalize their stats.

Listeners

Your listeners can download your audio files in two ways. They will either use a podcatcher application, or download the podcast directly from your site.

As I’ve already mentioned, “podcatcher” is the affectionate name given to those applications that can subscribe to an RSS feed, recognize an enclosure element, check whether it has already downloaded the file indicated by the enclosure element, and grab it if it hasn’t. Podcatchers are what make podcasting seem like “casting”. Ideally, the podcatcher runs at night and downloads all of the media to which the listener has subscribed. That gives the user the impression that they’re able to “click and play” large media files.

To be honest, I’m not sure how many people actually use podcatchers. Certainly the idea of downloading media in the middle of the night is neat, but our statistics show that much less than 50% of our listeners actually use podcatcher software. Most choose the direct download method and just visit our site to download each episode. That stat changed slightly when iTunes 4.9 started to support podcatching functionality, but still, less than 50% of our listeners use any sort of podcatcher.

Promotion

If you build it, they won’t necessarily come. You need to promote your show so that people know they can check it out. Aside from marketing it yourself on your own blog, there are a few places where your podcast needs to be seen.

Thus far, this article has concentrated on the independent podcaster who’s going solo. But there’s another type of podcaster out there — the network podcaster. At first glance, a network and a directory may seem the same, but there are some fundamental differences between them.

A network, such as The Podcast Network or the Tech Podcast Network, is generally interested in building a brand. One of the lessons we learned from the blogging explosion is that grassroots media has a high signal to noise ratio. It’s hard to find the diamonds in the pile of coal. Podcast networks are attempting to alleviate this problem by trying to associate their brands with high quality shows. The idea is that if I want to find a podcast on fishing, I’d be more likely to check out a network than an open directory because such a show on a network would (theoretically) have a certain quality, credibility, and production frequency.

Open directories, such as Podcast Alley or the Podcast Pickle, are just that — directories. There are no membership requirements or guarantees of quality or frequency. Anyone can sign up and his or her show will appear in the directory. To be fair, most directories have some sort of rating system that allows show listeners to indicate which shows they like, but that’s a rather subjective measure. And just between you and me, I’d stake money on the fact that the most popular podcasts out there right now are independent and not network shows.

Both directories and networks have their advantages and disadvantages. An independent show in a directory can enjoy a tremendous amount of success if the show’s listeners are apt to vote, but it’s hard to get your show noticed. A network virtually guarantees high listenership, but in many networks you’ll have to sign over part or all of your rights to the show, so you won’t really “own” it. Want some numbers? Okay. My GNU/Linux user show on The Podcast Network averaged over 2,000 listeners per show. My indie podcast in a directory averages about 200. Where you publish your podcast depends on your answer to one very important question: what’s ownership worth to you?

Monetizing

Podcasting for money. Some people look at me sadly when I utter this phrase, and I understand why. To be blunt, there is no money in podcasting. Yet. Much like the beginning of blogging, no advertiser wants to associate their brand with a rogue podcaster who might say all sorts of nasty things that will tarnish their reputation. A few names have embraced podcast advertising, however. GoDaddy, GoToMeeting, and Motorola have spent money on podcast advertising, but it’s pennies compared to the money being spend on blog advertising these days, and it’s all network advertising. There will be money in podcasting, but it’s not here yet.

Before I tackle this topic properly, I should throw out a warning: in general, listeners aren’t keen on the idea of advertising in podcasts. Since podcast advertising revenue is almost guaranteed to be tied to downloads, monetizing your podcast could hurt rather than help you if your listeners wander away. Only pitch to your listeners ads that they might actually be interested in, and keep the ads minimal.

There are two obvious ways to monetize a podcast:

    1. Put ads in the body of the podcast itself. Since this can’t be done automatically (yet), you will bear the burden of sourcing advertisers, getting an ad in the format you can use, and putting it into your show.


  1. Tack ads on to the beginning or end of the show. This can be done manually, but many services are starting to emerge that will take care of this for you automatically. With these services, the average payment per download is around 5 to 10 cents. You will have to decide for yourself where your line is, but I wouldn’t consider putting ads in my show at those prices until I had 500 listeners or more. The other consideration for this type of service is your show feed. In order to put ads into your show, the ad insertion service will have to get their hands on your feed. In general this takes the following process: your original feed goes to the service, then goes through the service’s feed to the end listener. Sometimes you can use Feedburner to get around these little issues, but changing the address of your feed when the show is in full swing is going to cost you at least some of your listeners.

The newer and perhaps less obvious way to monetize a podcast is to use a pay-per-download model. Services like BitPass have been built around the idea of charging small amounts for digital media. In industry terms this is called a micro-payment service, because the cost for these pieces of media is fairly low (under the $5 range in most cases). Some podcasters are starting to experiment with this method of monetizing their shows, but I don’t think it has a bright future.

I’m skeptical about the pay-per-download model working for podcasts because it breaks the whole podcatcher model. Granted, our stats show a lot of people aren’t using podcatchers, but using BitPass to intercept the download will guarantee that no one can use a podcatcher to listen to your show. Secondly, how much is a 45-minute podcast actually worth? This model might work for podcasts that are instructional or educational in nature, but I can’t see a lot of people paying a quarter to listen to your typical rollicking entertainment podcast. The future will tell which monetizing options work best.

Try Your Own Hand

At the end of the day, podcasting is a lot of work, but it can be very rewarding. We’re made a grand total of $110 dollars through podcasting in the last year, but the other rewards have been great. The exposure I received from doing the GNU/Linux show has brought me into contact with some of the movers and shakers of the GNU/Linux world such as Richard Stallman, Nick Petreley, Doc Searls, Marcel Gagne, and Mark Rais, to name a few. These contacts have blossomed and I’m now being interviewed every couple of weeks on the subject of podcasting and writing articles for publications like Linux Journal and SitePoint. This type of reward, in lieu of receiving a direct monetary gain from a show, might well be typical for some years to come.

Like many things, podcasting seems simple from afar but becomes complex upon closer inspection. It’s important to remember that, in podcasting, content is king. As long as you have a microphone, an editor, and can produce a proper RSS feed for your show, you can get to work putting solid content on the airwaves. Ultimately, your listeners will stay or go on the basis of your content, not on the trappings of advertising, pretty show blogs, or expensive hardware. So sit down, generate some solid content, strap on that microphone, and let the people hear!

Jon WatsonJon Watson
View Author

Jon Watson is a podcaster, blogger, and Internet Jedi. Jon has been podcasting and evangelizing GNU/Linux since May of 2005 with his partner in crime, Kelly Penguin Girl. When he's not strapped to his mic, Jon can be found kicking around on New Linux User or his personal blog at jonwatson.ca.

Share this article
Read Next
Get the freshest news and resources for developers, designers and digital creators in your inbox each week
Loading form