Create Offline Web Apps Using Service Workers & PouchDB


Offline web applications are becoming more and more popular. Offline support is so important that it’s now common to talk about the ‘Offline First’ approach, where it becomes a primary consideration. It’s also gathering popularity with the rise of Progressive Web Apps.
In this post, we will look at how to add offline support to a basic contact list web app by implementing asset caching, client-side data storage and synchronization with a remote data store.
The source code of the app is available on GitHub.
Key Takeaways
- Utilize Service Workers for a flexible, scriptable network proxy in your web app to enable effective offline experiences by intercepting network requests and managing asset caching.
- Implement PouchDB for client-side data storage to allow data persistence locally which syncs back to a server when online, supporting robust offline capabilities.
- Enhance user experience in unstable network conditions by adopting an ‘Offline First’ approach, ensuring app usability during intermittent connectivity.
- Leverage Progressive Web Apps (PWA) methodologies to deliver a native-like experience on the web, incorporating features such as responsiveness, offline support, and home-screen installation.
- Incorporate fallback mechanisms using AppCache for older browsers to ensure broader accessibility and reliability of offline functionality until Service Workers are universally supported.
Why Support Offline?
Why should we care about offline support?
I myself spend more than one hour on a train every day. I don’t want to waste this time, so I take my laptop to work a bit along the way. I use the cell network to be online. The connection is not reliable, so I lose it from time to time. My user experience is up to the web app I’m using. Only a few apps, with good offline support, behave as expected and connection loss is transparent. Some behave weirdly, so when I refresh the page, I lose data. Most don’t support offline at all, and I have to wait for a stable connection to be able to use them.
An unreliable connection is not the only use case. We can also talk about situations where you might be offline for several hours, for example, while on an airplane.
Another important advantage of offline support is the performance boost. Indeed, the browser doesn’t need to wait for assets to be loaded from the server. The same for data, once stored on the client.
Thus we need offline:
- to be able to use apps even with flaky connection (cell network in a train)
- to be able to work without network connection (on an airplane)
- to boost the performance
Progressive Web Apps
Google’s Progressive Web Apps (PWA) concept is a methodology aimed at delivering web apps that provide the UX of native mobile apps. PWA includes offline support, but it also covers a lot more:
- Responsiveness – support for different form factors: mobile, tablet, desktop
- Web App Manifest – to install an app on the home screen
- App Shell – a design pattern in which the basic UI app shell is separated from the content loaded afterward
- Push notifications – to get “instant” updates from the server
Addy Osmani wrote a great intro post about PWA.
In this article, we are going to focus only on a single aspect: offline support.
Defining Offline Support
Let’s clarify what it takes to support offline. We need to take care of two aspects:
- app assets – caching HTML, JS scripts, CSS style sheets, images
- app data – storing data on client-side
App assets
The first solution in HTML5 to cache offline assets was AppCache. The idea is to provide an app manifest describing which resources should be stored in the browser cache. Thus, the next time an app is loaded, these assets will be taken from the browser cache.
Important: While being simple, there are quite a lot of pitfalls with using AppCache. The standard is now deprecated, although it’s still widely supported by browsers.
Service Workers were introduced to replace AppCache. They provide a flexible solution for the offline support. Service Workers give control over outgoing requests, allowing a script intercept them and return the necessary responses. The caching logic is entirely on the developer’s shoulders. The app code itself can check if an asset is saved in the cache and requests it from the server only if needed.
It’s important to note that Service Workers are supported only via HTTPS (HTTP is allowed for localhost) connections. We will look at how to use Service Workers shortly.
App data
App data can be stored in the offline storage provided by browsers.
There are several options introduced by HTML5:
- WebStorage – key-value storage
- IndexedDB – NoSQL database
- WebSQL – built-in SQLite database
WebStorage is a key-value storage. This is the simplest cross-browser storage, but there are several pitfalls to be aware of. You have to take care of serialization and deserialization of data that you put inside because the values must be plain strings. You may run up against size limits with larger data sets. Also, it’s possible to get into a race condition, meaning if you have two tabs opened at the same time in the browser you could end up with unexpected behavior.
IndexedDB is much more powerful and seems to be the best way to go with offline storage. It has plenty of space available. It supports transactions and can be safely used in several browser tabs at the same time. It’s also supported by all modern browsers.
WebSQL is literally SQLite in the browser. Full-featured relational DB with ACID on the client. Unfortunately, WebSQL has been deprecated by the standards committee and was never supported in non-Blink/Webkit browsers.
There are several libraries out there which provide an abstraction over offline storage:
- localForage – simple localStorage-like API
- IDBWrapper – cross-browser IndexedDB wrapper
- PouchDB – client-side storage solution inspired by CouchDB. It supports automatic sync with the backend if CouchDB is being used.
The ContactBook App
Now, let’s see how to add offline support to a web application. Our sample app is a basic contact book:
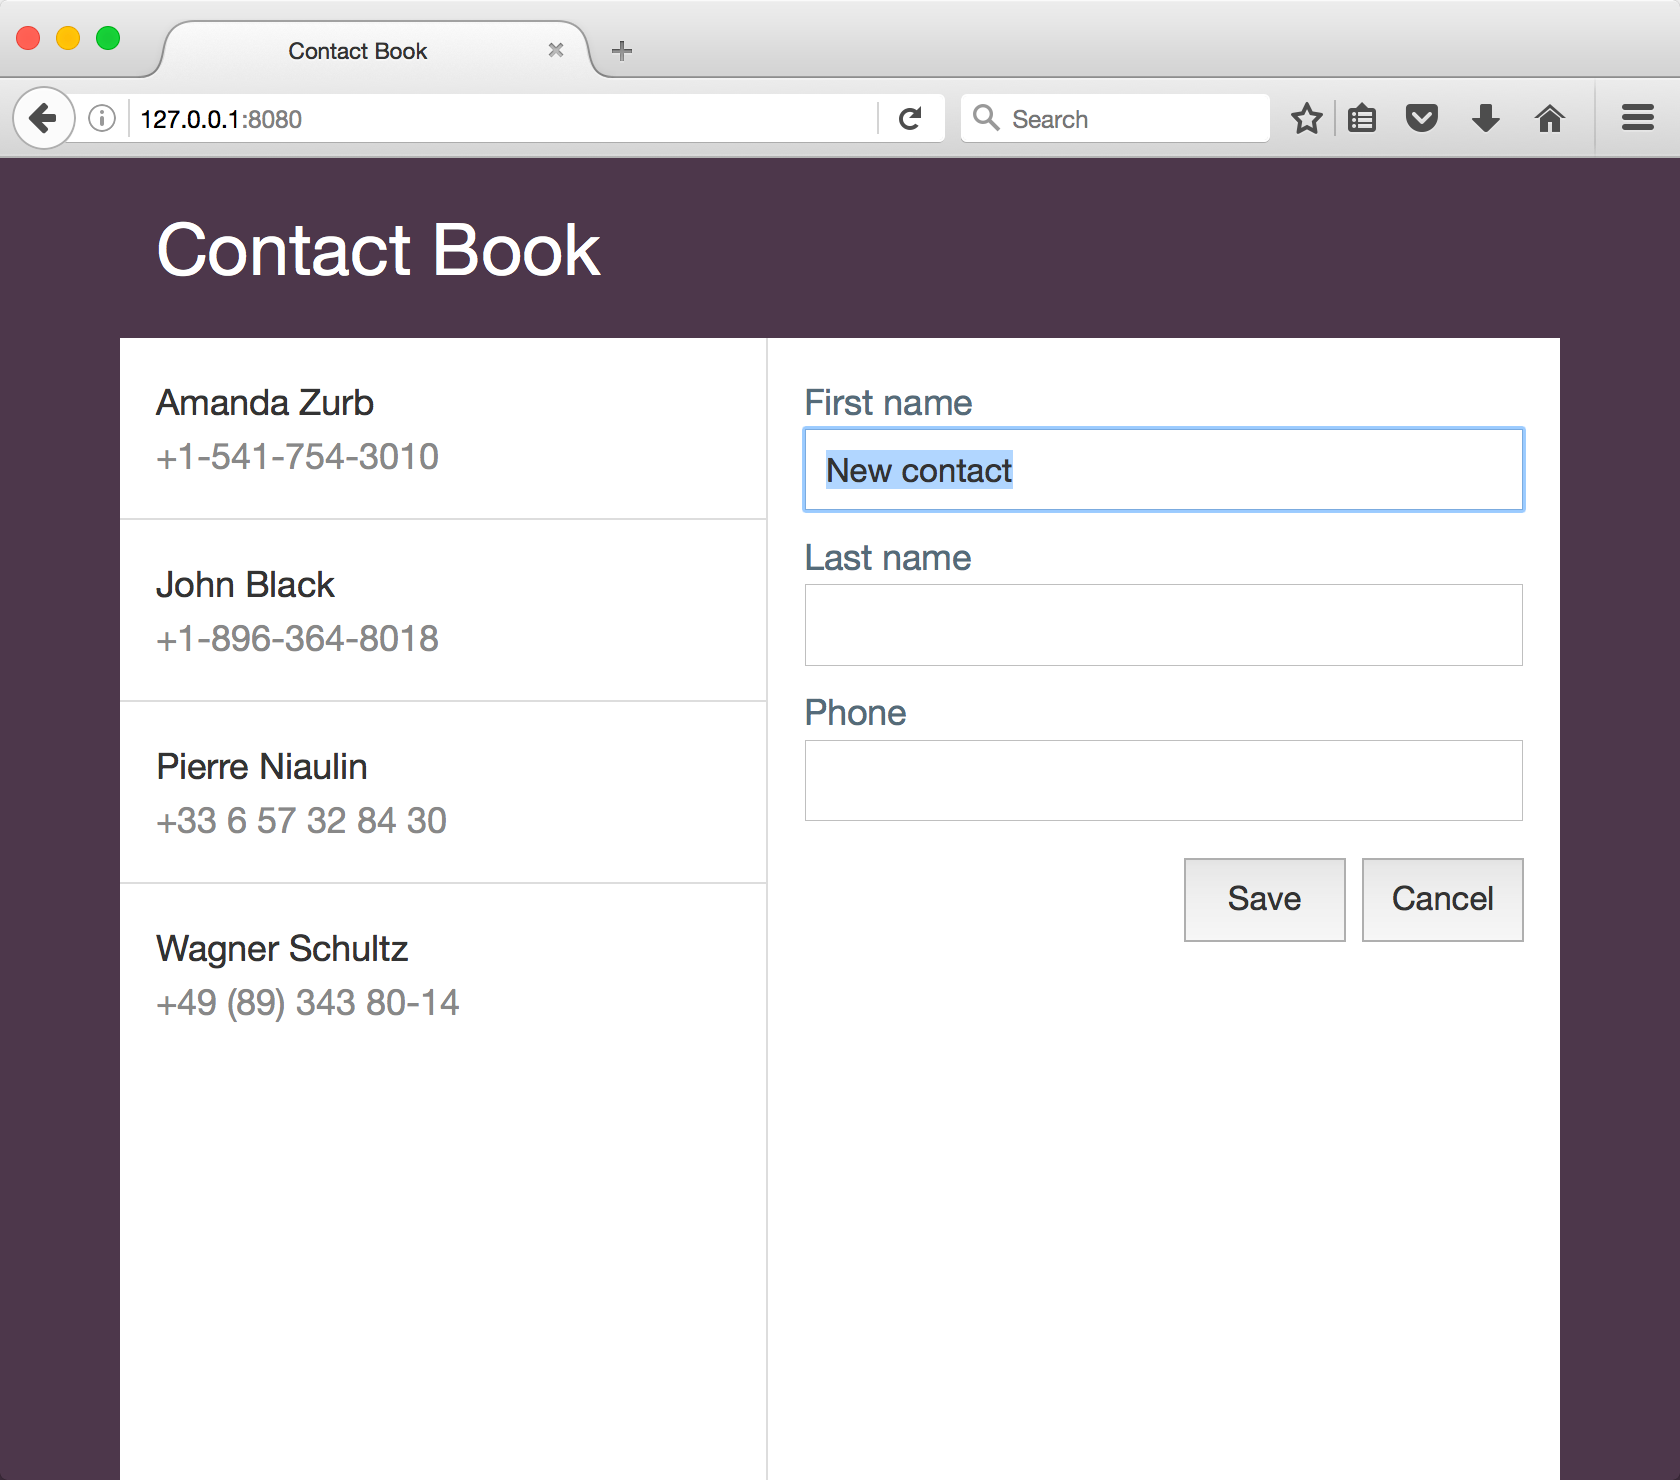
We have the list of contacts on the left and a details form on the right used for editing contacts. A contact has three fields: first name, last name, and phone.
You can find the app source code on GitHub. To run the app you’ll need Node.js installed. If you’re not sure about this step, you can follow our beginner’s guide to npm.
Start by downloading the sources and running the following commands from the project folder:
$ npm install
$ npm run serve
What about backend? We are using pouchdb-server to provide a REST API over CouchDB storage, and http-server to serve frontend assets.
Our scripts section of package.json looks like this:
  "scripts": {
    "serve": "npm-run-all -p serve-front serve-backend",
    "serve-front": "http-server -o",
    "serve-backend": "pouchdb-server -d db"
  },
The package npm-run-all allows running several commands in parallel. We start both servers: http-server and pouchdb-server.
Now let’s look at the implementation of offline support for the app assets.
Offline Assets
The directory /public contains all the assets for the application:
- /css/style.css – the application style sheet
- /js/ext – directory containing external libs (PouchDB, and Babel to use ES2015 syntax)
- /js/app.js – the main application script
- /js/register-service-worker.js – the script that registers the service worker
- /js/store.js – the adapter class to work with PouchDB storage
- /contactbook.appcache – the AppCache manifesto
- /index.html – the application markup
- /service-worker.js – the source of the service worker
The journey begins with the registration of a service worker. Here is the registration code in register-service-worker.js:
if ('serviceWorker' in navigator) {
    navigator.serviceWorker.register('/service-worker.js', {
        scope: '/'
    }).then(function() {
        // success
    }).catch(function(e) {
        // failed
    });
}
First, we check that serviceWorker is supported by the browser. If yes, we call the register method, providing the URL to the service worker script (in our case /service-worker.js) and extra parameters to specify the scope of the service worker. Parameters are optional and the root / is the scope default value..
Important: to be able to use the root of the app as a scope, the service worker script should be located in the root directory of the app.
The register method returns a Promise.
The life-cycle of a service worker starts with installation. We can handle the install event and put all required resources in the cache:
var CACHE_NAME = 'contact-book-v1';

var resourcesToCache = [
  '/',
  '/css/style.css',
  '/js/ext/babel.min.js',
  '/js/ext/pouchdb.min.js',
  '/js/register-service-worker.js',
  '/js/store.js',
  '/js/app.js'
];

self.addEventListener('install', function(event) {
  event.waitUntil(
    // open the app browser cache
    caches.open(CACHE_NAME)
      .then(function(cache) {
        // add all app assets to the cache
        return cache.addAll(resourcesToCache);
      })
  );
});
The last thing is to handle the fetch event triggered each time a resource from the Service Worker scope is fetched:
self.addEventListener('fetch', function(event) {
  event.respondWith(
    // try to find corresponding response in the cache
    caches.match(event.request)
      .then(function(response) {
        if (response) {
          // cache hit: return cached result
          return response;
        }

        // not found: fetch resource from the server
        return fetch(event.request);
      })
  );
});
That’s it. Let’s test that it’s working:
- run the app with
npm run serve - open the URL http://127.0.0.1:8080/ in Chrome
- stop the web server with
Ctrl + Cin the console (or use the Chrome dev tools to simulate going offline) - refresh the web page

The app is still available. Awesome!
AppCache
The problem with the solution above is that Service Workers have limited browser support. We can implement a fallback solution using widely supported AppCache. Read more info about AppCache usage here.
The basic usage is straightforward and includes two steps:
-
Defining the app cache manifest
contactbook.appcache:CACHE MANIFEST # v1 2017-30-01 CACHE: index.html css/style.css js/ext/babel.min.js js/ext/pouchdb.min.js js/store.js js/app.jsFor our simple app, we define a single section
CACHEand put all the assets there. -
Reference the manifest file from the HTML:
<html manifest="contactbook.appcache" lang="en">
That’s it. Let’s open the page in a browser not supporting Service Workers and test it the same way we did before.
Offline Data
Being able to cache assets is great. But it’s not enough. What makes an app alive is unique data. We are going to use PouchDB as a client-side data storage. It’s powerful, easy-to-use, and provides data sync out-of-box.
If you’re not familiar with it, check out this introduction to PouchDB.
The helper class Store is responsible for the interaction with PouchDB:
class Store {

  constructor(name) {
    this.db = new PouchDB(name);
  }

  getAll() {
    // get all items from storage including details
    return this.db.allDocs({
        include_docs: true
      })
      .then(db => {
        // re-map rows to collection of items
        return db.rows.map(row => {
          return row.doc;
        });
      });
  }

  get(id) {
    // find item by id
    return this.db.get(id);
  }

  save(item) {
    // add or update an item depending on _id
    return item._id ?
      this.update(item) :
      this.add(item);
  }

  add(item) {
    // add new item
    return this.db.post(item);
  }

  update(item) {
    // find item by id
    return this.db.get(item._id)
      .then(updatingItem => {
        // update item
        Object.assign(updatingItem, item);
        return this.db.put(updatingItem);
      });
  }

  remove(id) {
    // find item by id
    return this.db.get(id)
      .then(item => {
        // remove item
        return this.db.remove(item);
      });
  }
}
The code of the Store class is a typical CRUD implementation, providing a Promise-based API.
Now, our main app component can use the Store:
class ContactBook {

  constructor(storeClass) {
    // create store instance
    this.store = new storeClass('contacts');

    // init component internals
    this.init();

    // refresh the component
    this.refresh();
  }

  refresh() {
    // get all contacts from the store
    this.store.getAll().then(contacts => {
      // render retrieved contacts
      this.renderContactList(contacts);
    });
  }

    ...
}
The Store class is passed to the constructor to decouple the app class from the concrete store. Once the store is created, it’s used in the refresh method to get all the contacts.
The app initialization looks like this:
new ContactBook(Store);
Other app methods interact with the store:
class ContactBook {
  ...

  showContact(event) {
    // get contact id from the clicked element attributes
    var contactId = event.currentTarget.getAttribute(CONTACT_ID_ATTR_NAME);

    // get contact by id
    this.store.get(contactId).then(contact => {
      // show contact details
      this.setContactDetails(contact);

      // turn off editing
      this.toggleContactFormEditing(false);
    })
  }

  editContact() {
    // get id of selected contact
    var contactId = this.getContactId();

    // get contact by id
    this.store.get(this.getContactId()).then(contact => {
      // show contact details
      this.setContactDetails(contact);

      // turn on editing
      this.toggleContactFormEditing(true);
    });
  }

  saveContact() {
    // get contact details from edit form
    var contact = this.getContactDetails();

    // save contact
    this.store.save(contact).then(() => {
      // clear contact details form
      this.setContactDetails({});

      // turn off editing
      this.toggleContactFormEditing(false);

      // refresh contact list
      this.refresh();
    });
  }

  removeContact() {
    // ask user to confirm deletion
    if (!window.confirm(CONTACT_REMOVE_CONFIRM))
      return;

    // get id of selected contact
    var contactId = this.getContactId();

    // remove contact by id
    this.store.remove(contactId).then(() => {
      // clear contact details form
      this.setContactDetails({});

      // turn off editing
      this.toggleContactFormEditing(false);

      // refresh contact list
      this.refresh();
    });
  }
These are the basic operations using the store CRUD methods:
showContact– displays contact details once a contact is selected from the listeditContact– enables editing of a contact’s detailssaveContact– saves details of a new or existing contactremoveContact– removes the selected contact
Now, if you add contacts while offline and refresh the page, the data won’t be lost.
But, there is a ‘but’…
Data sync
This all works fine, but all data is stored locally in the browser. If we open the app in another browser, we won’t see the changes.
We need to implement data sync with the server. Implementation of the two-way data sync is not a trivial problem. Fortunately, it’s provided by PouchDB if we have CouchDB on the backend.
Let’s change our Store class a bit, so it syncs with the remote data source:
class Store {

  constructor(name, remote, onChange) {
    this.db = new PouchDB(name);

    // start sync in pull mode
    PouchDB.sync(name, `${remote}/${name}`, {
      live: true,
      retry: true
    }).on('change', info => {
      onChange(info);
    });
  }
We’ve added two parameters to the constructor:
remote– the URL of the remote serveronChange– a callback fired once changes have come from the backend
The PouchDB.sync method does the trick and starts the sync with the backend. The live parameter indicates that it should periodically check for changes, while retry indicates to retry when an error happens (thus if the user goes offline, synchronization won’t stop).
We need to change the app class accordingly and pass required parameters to the Store constructor:
class ContactBook {

  constructor(storeClass, remote) {
    this.store = new storeClass('contacts', remote, () => {
      // refresh contact list when data changed
      this.refresh();
    });

    ...
  }
The main app class constructor now accepts the remote URL which is passed to the store. The onChange callback just calls refresh method to refresh the list of contacts.
The app initialization has to be updated:
new ContactBook(Store, 'http://localhost:5984');
Done! Now our app allows editing the contact list while offline. Once the app has a network connection, the data is synchronized with the backend storage.
Let’s test it:
- run the web server with
$ npm run serve - open the URL http://127.0.0.1:8080/ in two different browsers
- stop the web server clicking
Ctrl + C - edit contact list in both browsers
- run the web server again with
$ npm run serve - check out the contact list in both browsers (it should be up-to-date according to the changes in both browsers)
Wonderful, we did it!
Check out the full source code of the app on GitHub.
Conclusion
Providing an offline experience has more and more value today. Being able to use an app with a flaky connection in transport or being offline in the airplane is critical for frequently used apps. It’s also about improving the app performance.
To support offline we needed to take care of:
- caching app assets – use Service Workers with fallback to AppCache until the former is supported by all modern browsers
- storing data on the client-side – use browser offline storage, like IndexedDB, with one of the libs available out there
We’ve just looked at how all this can be implemented. I hope you enjoyed reading. Please, share your thoughts about the topic in comments!
This article was peer reviewed by James Kolce and Craig Buckler. Thanks to all of SitePoint’s peer reviewers for making SitePoint content the best it can be!
Frequently Asked Questions (FAQs) about Offline Web Apps, Service Workers, and PouchDB
What is the main advantage of using PouchDB for offline web applications?
PouchDB is a JavaScript database that allows applications to store data locally while offline, then synchronize it with CouchDB and compatible servers when the application is back online, keeping the user’s data in sync no matter where they next go online. This is particularly beneficial for applications that need to provide offline functionality, such as mobile apps or web apps in areas with intermittent internet connectivity.
How does a service worker function in an offline web application?
A service worker is a type of web worker. It’s a JavaScript file that can control the web page/site it is associated with, intercepting and modifying navigation and resource requests, and caching resources in a very granular fashion to complete offline experiences, or to boost performance.
Can PouchDB be used with other databases apart from CouchDB?
Yes, PouchDB can be used with any database that implements the CouchDB Replication Protocol. This includes databases like IBM Cloudant and Apache CouchDB. It can also sync with other PouchDB databases, allowing for flexible and distributed data storage.
How secure is data stored using PouchDB?
PouchDB uses the same security model as the web. If your web application is served over HTTPS, then all data stored and retrieved by PouchDB is also sent over HTTPS. It’s important to note that PouchDB itself does not provide any additional encryption beyond what’s provided by the web platform.
What are the limitations of using service workers?
Service workers require sites to be served over HTTPS for security reasons. They are also asynchronous, meaning they can’t use XHR and localStorage. Another limitation is that they are not available in all browsers.
How does offline servicing work in Windows?
Offline servicing in Windows involves applying updates to a Windows image while it’s offline, i.e., not currently running on a device. This can include adding or removing drivers, enabling or disabling Windows features, or applying updates and patches.
What is the difference between PouchDB and traditional SQL databases?
PouchDB is a NoSQL database that stores data in a flexible, JSON format, whereas traditional SQL databases store data in a rigid, table-like format. This makes PouchDB more adaptable to different types of data and easier to use for developers familiar with JavaScript and JSON.
Can service workers improve the performance of my web application?
Yes, service workers can significantly improve the performance of your web application. By intercepting network requests and serving cached responses, service workers can eliminate the need to retrieve resources from the network every time, resulting in faster load times.
How does PouchDB handle conflict resolution?
PouchDB handles conflicts automatically using a built-in conflict resolution algorithm. When a conflict occurs, PouchDB will choose one version of the document as the “winner” and the other versions will be marked as “conflicts”. Developers can also implement custom conflict resolution strategies if needed.
What are the prerequisites for learning PouchDB?
To learn PouchDB, you should have a basic understanding of HTML, CSS, and JavaScript. Knowledge of JSON (JavaScript Object Notation) and some familiarity with NoSQL databases can also be helpful.
Artem is a web developer with 8 years experience in back-end and front-end development. He worked at DevExpress creating DevExtreme and currently works at Criteo. He loves learning new web-related things and believes in open source.


Published in
·Audio & Video·Design·Design & UX·HTML & CSS·Photography & Imagery·Technology·UI Design·Usability·UX·November 23, 2015