Some years back, the Chrome team announced packaged apps – applications that behave like native ones, with access to a large part of your machine’s hardware. Ever since, we’ve seen terminal emulators, IRC clients, IDEs, true 3D games and more pop up.
ChromeMyAdmin
I’d like to take this opportunity and review ChromeMyAdmin, a Packaged App by Yoichiro Tanaka.
I personally consider the MySQL/MariaDB database management landscape particularly barren. With the often unstable MySQL Workbench on one hand, and the bloated but underdeveloped PhpMyAdmin on the other, sometimes you just need a simpler solution for quick and dirty edits.
Let’s take it for a spin and see how it does.
Installing
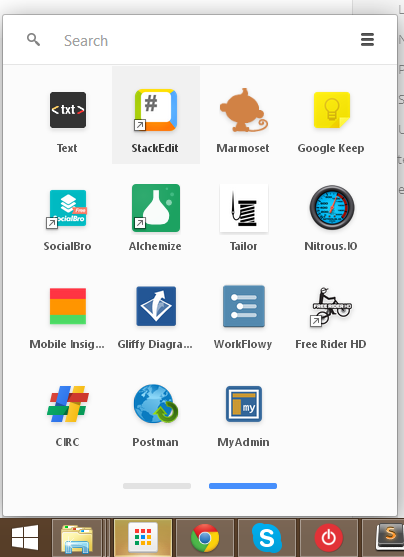
Go to the Web Store page and install the app. It should appear in your Chrome App launcher immediately. On Windows, this looks like the figure below:
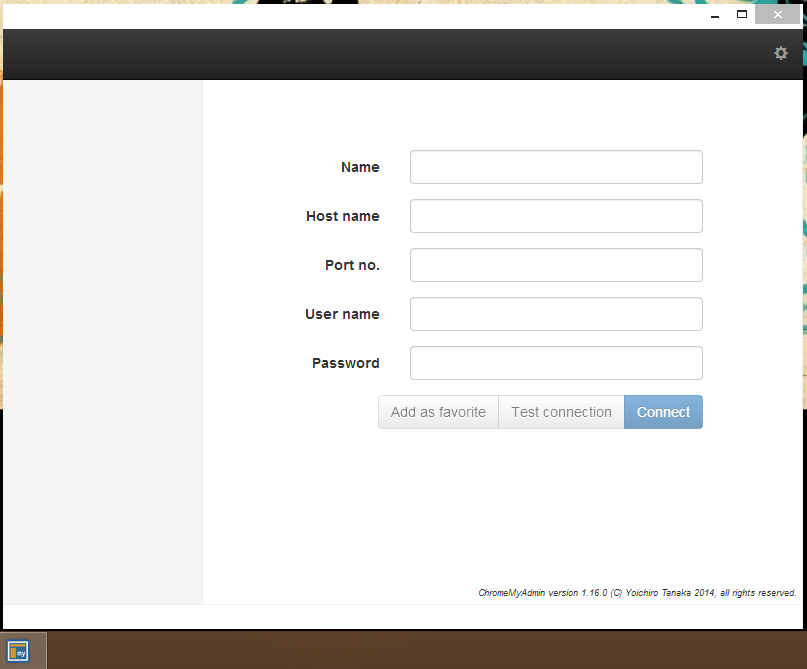
The starting interface is simple and smooth, a familiar Bootstrap look:
Vagrant Up
If you’ve read any of my previous posts, you know I don’t favor polluting my everyday machine with SDKs, programming languages and their runtimes, or database drivers. I’ve made a simple Vagrantfile which boots up a 14.04 Ubuntu server instance with MySQL pre-installed, and remote connections enabled. This means you can jack into the virtual machine’s database from the host machine and still keep your host machine clean of unwanted software.
If you’re not familiar with Vagrant and the aforementioned virtualization methods, please see our previous articles on the topic.
You can download the Vagrantfile from Github. After you do, simply bash into the folder (use Git Bash if on Windows) and run “vagrant up”, provided you have Vagrant and VirtualBox installed.
Connecting
The IP address of our VM is set to 192.168.56.101, so this is what we use for the connection’s host name in ChromeMyAdmin’s main screen. This is also the first place ChromeMyAdmin dropped the ball – you have to input the port number – it doesn’t assume a default. Not a big problem, but it would get bonus points for usability.
After we input the credentials (root, root, if you’re using my Vagrantfile), we should be able to successfully test the connection.
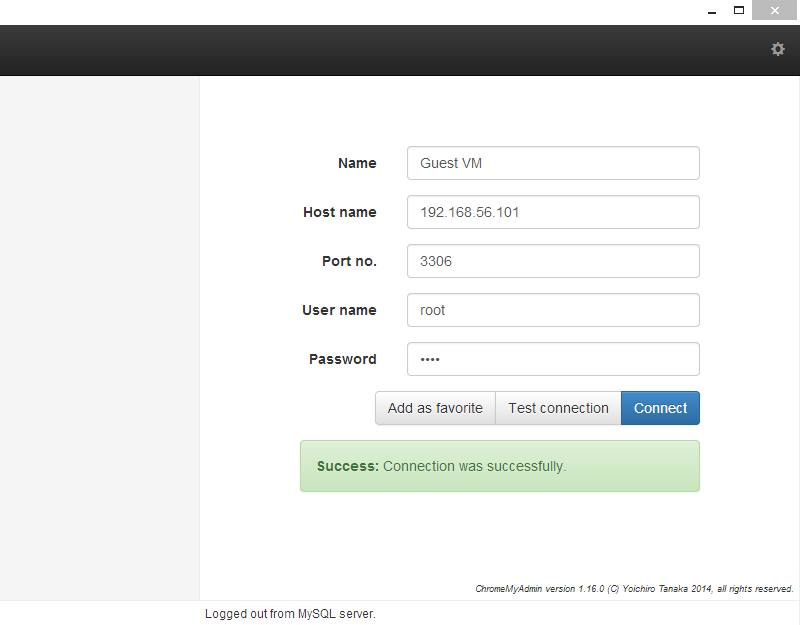
Immediately after hitting “Connect” (and possibly “Add to Favorites”), you should see the next screen allowing you to select a database.
Creating and Populating a Database
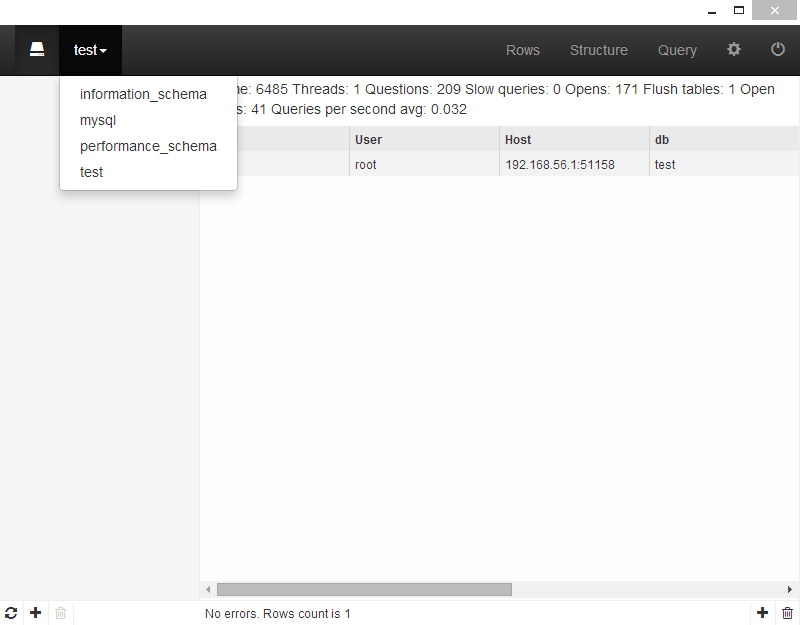
Let’s take it for a quick spin and create a new database. Click the little plus icon in the bottom right corner of the window to initialize the process. Make sure you’re on “server view”, to which you get by clicking the “hard drive” icon in the top left corner, next to the database selection dropdown. Leave the encoding option on the UTF-8 Unicode default and type in a sample name like “test”. You should then see your database in the database selection dropdown, from where you can select it.
We create a new table by clicking the little plus icon in the bottom left corner. Create a table called “users”, and leave all other options on their default values. You’ll notice ChromeMyAdmin automatically creates an unsigned integer field that autoincrements and makes it a primary key of the table. While this goes quite nicely in hand with my own habits, I’m certain some people will be bothered by this and the inability to change the default behavior. Such actions should definitely be configurable.
Using the third plus button “Add new column” in the table column view frame, add the fields “first_name“, “last_name“, “username” and “password“. Make them all maximum varchars. I allowed NULL on first_name, but on no other field.
We need to make our username field unique now, in order to make sure no two of our users have overlapping usernames. Let’s do this by adding an index with the plus icon which previously served as the “Create Database” button – the bottom right plus in the app’s window. Use the settings I used in the figure below.
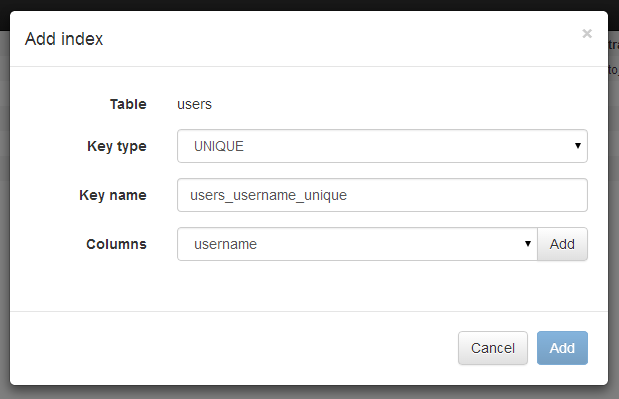
Don’t forget to click the “Add” button next to the selected column first, otherwise the Add button in the bottom row of the modal window will never activate.
If, at any point, you’re curious about the SQL statements that get executed as you click around the interface, go into the Configure menu (top right, in between “Query” and the power off icon) , and select Query History.
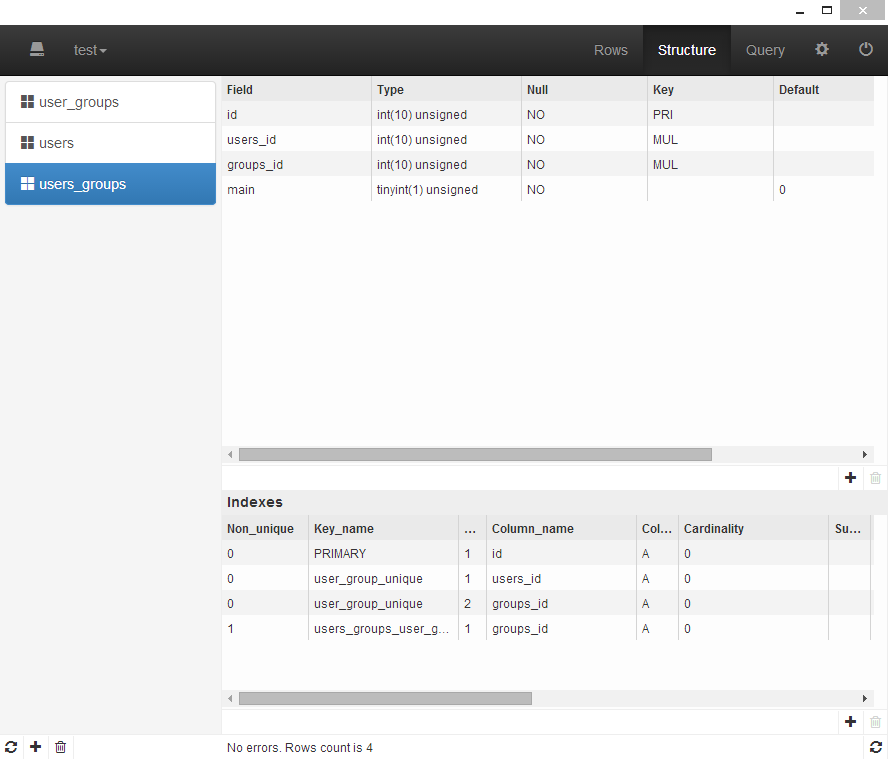
We now have a table with some columns and indices defined – let’s use the Query window to create two more tables: users_groups and user_groups. In the Query window (top right option, between Structure and Configure), paste the following:
CREATE TABLE `user_groups` (
  `id` int(10) unsigned NOT NULL AUTO_INCREMENT,
  `name` varchar(120) NOT NULL,
  `slug` varchar(120) NOT NULL,
  `description` text,
  PRIMARY KEY (`id`),
  UNIQUE KEY `email_address_UNIQUE` (`name`),
  UNIQUE KEY `slug_UNIQUE` (`slug`)
) ENGINE=InnoDB DEFAULT CHARSET=utf8;

CREATE TABLE `test`.`users_groups` (
  `id` INT UNSIGNED NOT NULL AUTO_INCREMENT,
  `users_id` INT UNSIGNED NOT NULL,
  `groups_id` INT UNSIGNED NOT NULL,
  `main` TINYINT(1) UNSIGNED NOT NULL DEFAULT 0,
  PRIMARY KEY (`id`),
  UNIQUE INDEX `user_group_unique` (`users_id` ASC, `groups_id` ASC),
  INDEX `users_groups_user_groups_id_idx` (`groups_id` ASC),
  CONSTRAINT `users_groups_users_id`
    FOREIGN KEY (`users_id`)
    REFERENCES `test`.`users` (`id`)
    ON DELETE CASCADE
    ON UPDATE CASCADE,
  CONSTRAINT `users_groups_user_groups_id`
    FOREIGN KEY (`groups_id`)
    REFERENCES `test`.`user_groups` (`id`)
    ON DELETE CASCADE
    ON UPDATE CASCADE);
At first, I was disappointed to find ChromeMyAdmin lacking an SQL import tool, but I was even more disappointed when I realized that it is unable to execute two statements one after the other. No matter – pasting in one CREATE, executing, then doing the same for other worked and we now have all three tables.
The CREATE statement also created the necessary indices and some foreign keys that bind the three tables together in an M:M fashion. But… where are our foreign keys?
ChromeMyAdmin does NOT support GUI editing of foreign keys in its current iteration. Still under heavy development and by only one person, advanced features such as those are, unfortunately, being put on the backburner.
Ok, let’s see what else we can do.
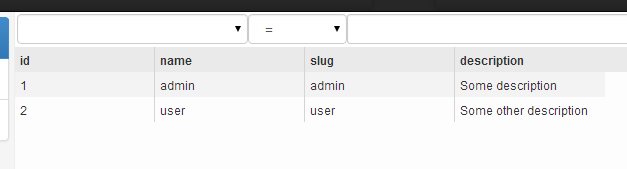
Open the user_groups table and add two groups: admin and user. You do this by selecting the table, then selecting “rows” in the top navigation, and finally hitting the bottom-right plus icon. In its current form, ChromeMyAdmin offers a regular textarea for every column data type, and does not prepopulate values in any way, not even with default values. We can, however, leave the field we know is set to autoincrement empty, and ChromeMyAdmin and MySQL will take care of the rest for us.

The autoincrement works well, and we add two rows:
Let’s add two users now. Name them whatever you wish, but try giving the second one the same username as the first. We can see the error reporting works well, and we’re prevented from adding the second user unless we change the username.
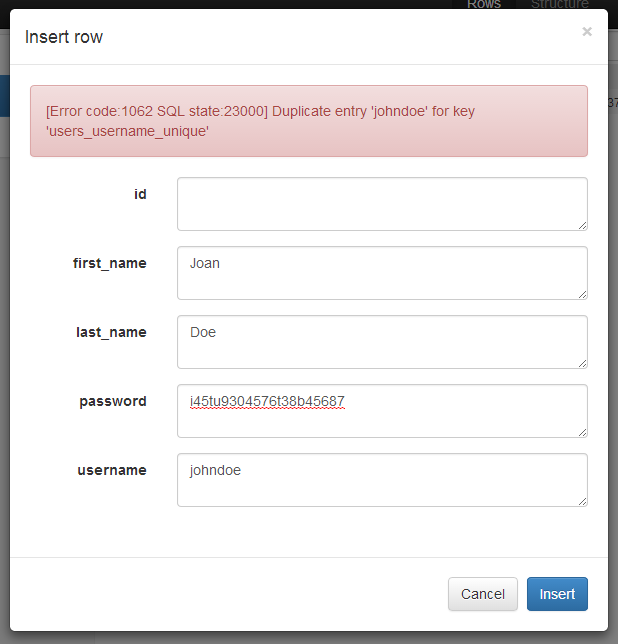
However, the autoincrement still triggered, and our second user now has an ID of 3 instead of 2.

Granted, this is a MySQL issue, but it can easily be avoided if proper measures are taken.
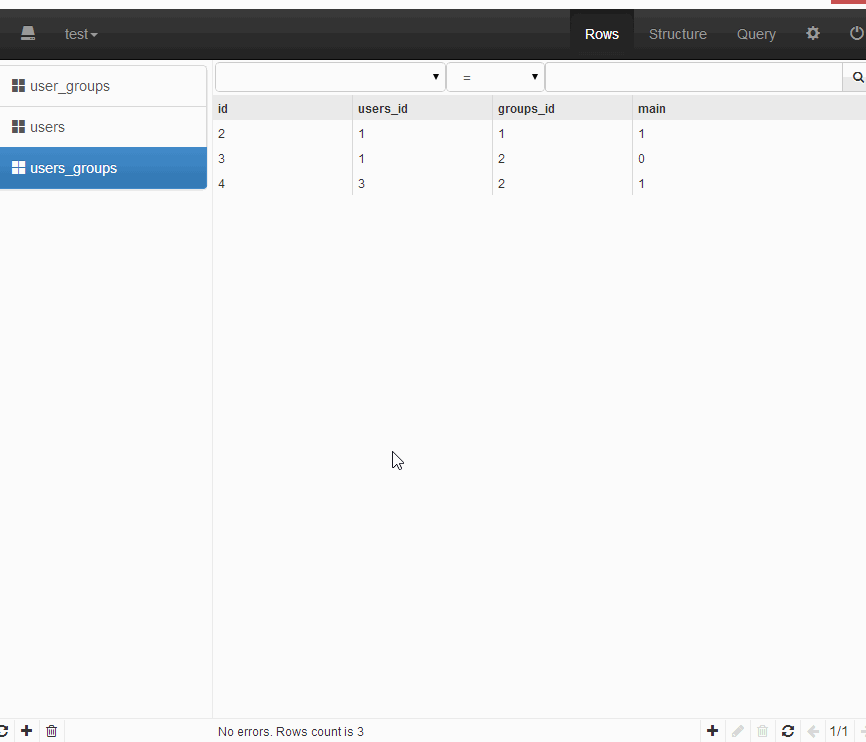
Finally, let’s add some users_groups entries. In modern MySQL management tools, adding a new row into a table that has a foreign key bound to its columns would turn the input fields into dropdown menus from which you can select the correct value. In ChromeMyAdmin, the GUI looks identical to the one where you add rows into a table without foreign keys – pure textareas.
If you try to add the entry NULL, 5, 5, 0, you’re successfully stopped. After all, there are no users or groups with the ID = 5. Let’s add three valid entries instead:
NULL, 1, 1, 1
NULL, 1, 2, 0
NULL, 3, 2, 1
The first one sets the first user as the admin, and defines admin as his main role. The second one also gives him a “user” role, just because every user of the website should have it. The third entry gives the second user the main role of “user”.
With these roles defined, let’s see how ChromeMyAdmin handles deletions of values that are bound by foreign keys and set to Cascade (as the Create statement above defined them).
As you can see, the situation resolves perfectly. The logic behind this is up to MySQL, but it’s very important to see that ChromeMyAdmin not only sends the proper commands, but also refreshes all that needs refreshing.
In this current version, this is the extent of ChromeMyAdmin – very basic operations on your databases, limited query history, and some elemental constraints which can be realized only through manual input via the Query frame.
Contributing
You can find the full source code of ChromeMyAdmin on Github and the JS MySQL Driver that powers it alongside it. Both projects accept contributions and could use your help. Yoichiro will be looking at your PRs and approving them on a case by case basis, or you can just fork it and make your own version.
If you do decide to upgrade it, do document the procedure and let us know, we’d love more contribution examples.
Conclusion
What’s the final tally? Is ChromeMyAdmin worth it? Let’s look at the pros and cons.
Pros
- automatically installs on every Chrome instance you log into, and is ready to go
- fast, in spite of using Bootstrap for the GUI
- open source, can be easily extended and upgraded
Cons
- automatically installs, but doesn’t transfer saved connections. Some may be remote and tedious to re-add.
- no SSL or other advanced connection options – only the very basic types of connecting supported. This is good when you’re doing local development, but probably renders it quite useless when doing production database inspection or maintenance. Then again, would you use anything other than a behemoth app like Workbench for that?
- no foreign keys
- cannot select multiple entries for multi-delete (drop several tables at once, drop several rows at once)
- cannot deactivate foreign key check on deletion (very important when dropping data with foreign keys, especially during development when you need to reiterate quickly)
- cannot execute several statements at once
All in all, ChromeMyAdmin is a decent tool for basic database management. It will install automatically for you, allow you to perform basic operations, and that’s all you really need when doing small tasks or demos and don’t feel like installing Workbench, PhpMyAdmin, SequelPro or another more fully-fledged app. In time, I hope to see it drastically evolve into something that can rival the best of them out there right now, but until then, I intend to use it for simple tasks and keep an eye on it.
Have you tried it out? Would you replace your current MySQL tool with it? Let us know in the comments below.
 Bruno Skvorc
Bruno is a blockchain developer and technical educator at the Web3 Foundation, the foundation that's building the next generation of the free people's internet. He runs two newsletters you should subscribe to if you're interested in Web3.0: Dot Leap covers ecosystem and tech development of Web3, and NFT Review covers the evolution of the non-fungible token (digital collectibles) ecosystem inside this emerging new web. His current passion project is RMRK.app, the most advanced NFT system in the world, which allows NFTs to own other NFTs, NFTs to react to emotion, NFTs to be governed democratically, and NFTs to be multiple things at once.