


In this tutorial, we’re going to build an app that talks to the Google Drive API. It will have file search, upload, download and delete features. If you want to follow along, you can clone the repo from Github.
Key Takeaways
- Laravel is fully capable of integrating with the Google Drive API to create a custom UI, allowing for functionalities like file search, upload, download, and delete.
- Setting up involves creating a project in the Google Console, enabling necessary APIs, and configuring OAuth 2.0 credentials to authenticate and obtain user permissions.
- The Laravel framework supports the use of the official Google API client for PHP, which is essential for interacting with Google Drive.
- Configuration of the Laravel project includes setting up environment variables in the .env file for Google API credentials and other settings.
- The app structure in Laravel handles user authentication, file operations, and session management through specific routes and controller methods.
- The application provides a practical example of a full-fledged Google Drive interface, demonstrating file operations like listing, searching, uploading, and deleting within a custom Laravel-driven UI.
Creating a New Google Project
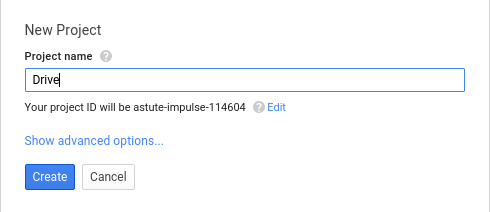
The first thing that we need to do when working with any of Google’s APIs is create a new project in the Google Console.
Then, we need to enable the Google+ API and Google Drive API. We’ll need G+ to get the user’s information.
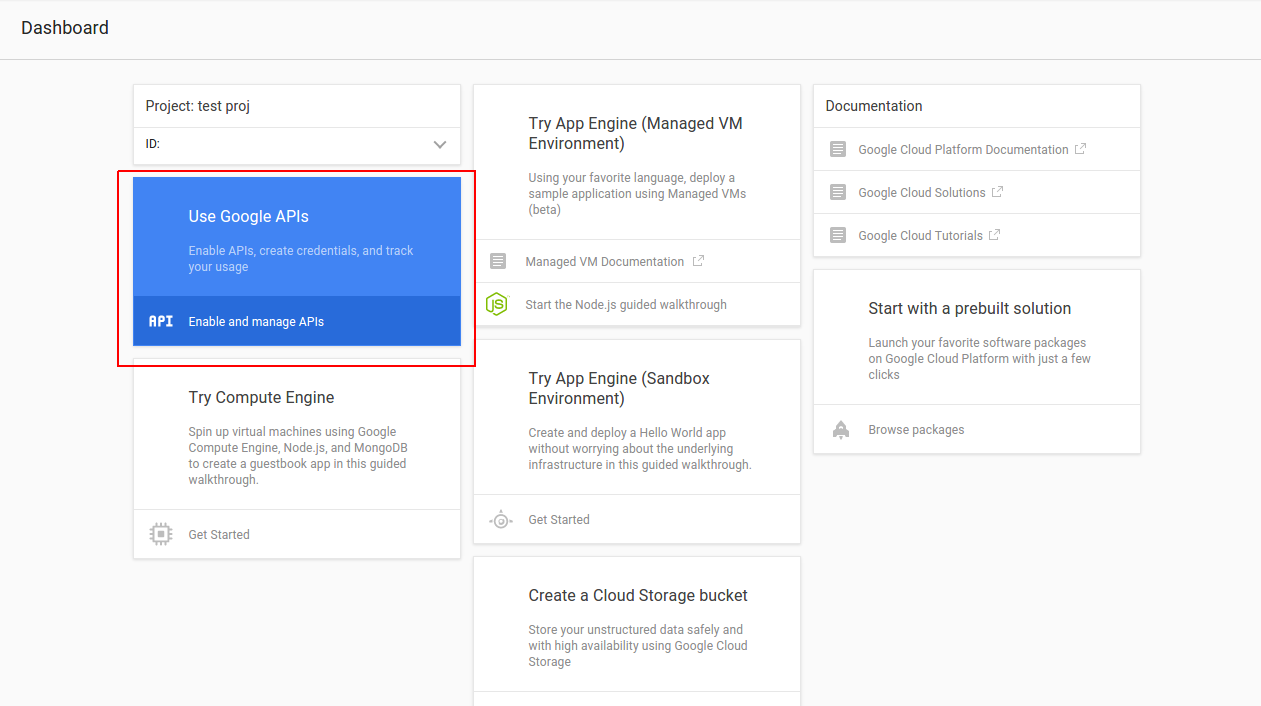
In the credentials menu, we pick Add credentials, selecting OAuth 2.0 client ID.
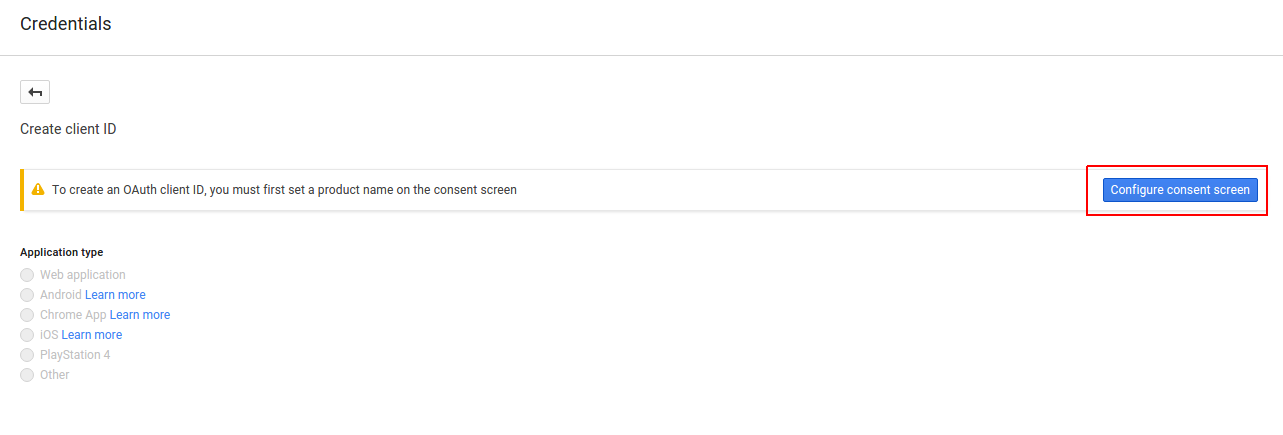
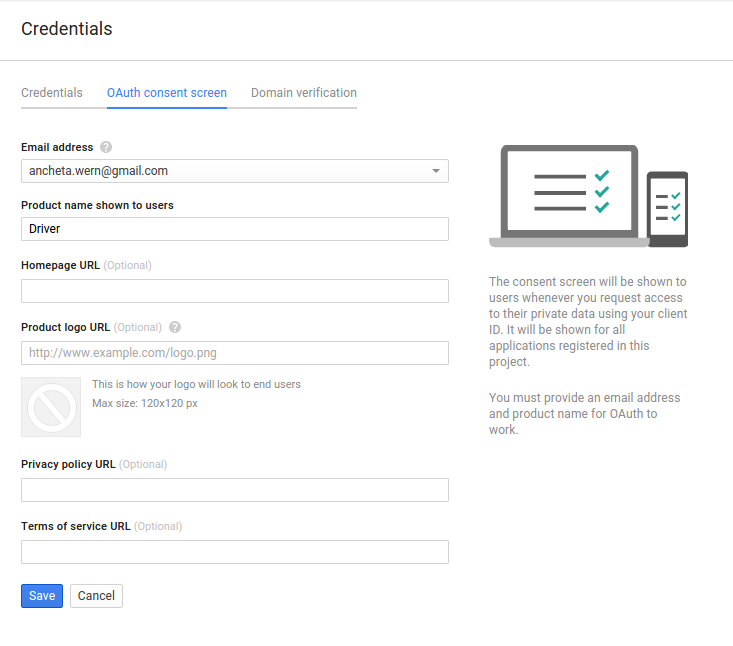
Next is the configure consent screen button. This allows us to enter the details of the project such as the name, homepage URL, and other details that are helpful to the user. For now we only really need to enter the name of the project.
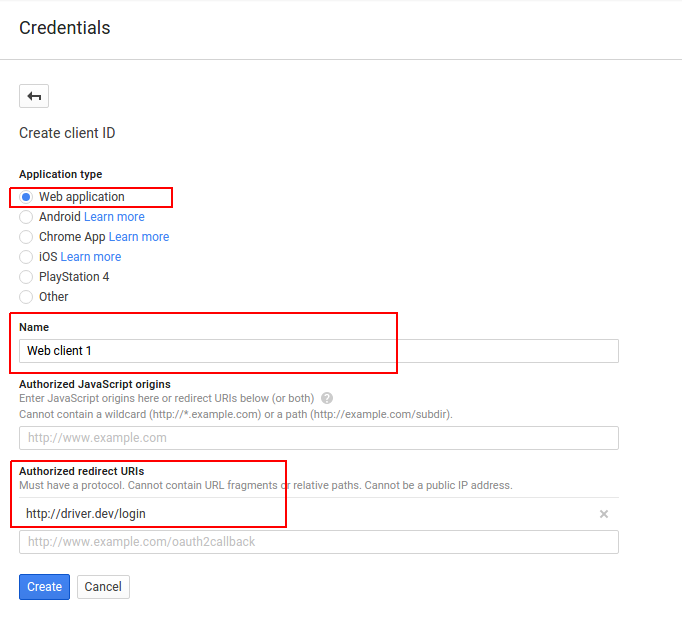
Next, we create a client ID. We need web application for the application type, and then we need to enter a value for the Authorized redirect URIs. This is the URL Google will redirect to after the user gives the app permission.
Building the Project
For this project, we will be using the Laravel Framework.
composer create-project --prefer-dist laravel/laravel driver
Installing the Dependencies
We’re going to need the official Google API client for PHP, as well as the Carbon library. Update composer.json to add those:
composer require nesbot/carbon google/apiclient
Configuring the Project
We need to specify a few global settings for our project. In Laravel, that is done through the .env file. Let’s edit the file and add the app title, timezone and Google configuration below the default configuration:
APP_ENV=local
APP_DEBUG=true
APP_KEY=base64:iZ9uWJVHemk5wa8disC8JZ8YRVWeGNyDiUygtmHGXp0=
APP_URL=http://localhost

SESSION_DRIVER=file

#add these:
APP_TITLE=Driver
APP_TIMEZONE="Asia/Manila"
GOOGLE_CLIENT_ID="YOUR GOOGLE CLIENT ID"
GOOGLE_CLIENT_SECRET="YOUR GOOGLE CLIENT SECRET"
GOOGLE_REDIRECT_URL="YOUR GOOGLE LOGIN REDIRECT URL"
GOOGLE_SCOPES="email,profile,https://www.googleapis.com/auth/drive"
GOOGLE_APPROVAL_PROMPT="force"
GOOGLE_ACCESS_TYPE="offline"
Breaking it down we have:
GOOGLE_CLIENT_IDandGOOGLE_CLIENT_SECRET– the client ID and secret that we got earlier from the Google console.GOOGLE_REDIRECT_URL– the URL to which Google will redirect after the user gives permission to our app. This should be the same as the one added earlier in the Google console. It should also be a valid route in the app. If we used artisan to serve the project, the redirect URL will be something likehttp://localhost:8000/login.GOOGLE_SCOPES– the permissions that we need from the user.emailgives our app access to the user’s email.profilegives us the basic user info such as the first name and the last name.https://www.googleapis.com/auth/drivegives us permission to manage files on the user’s Google Drive.
Googl
The Googl class (app\Googl.php) is used for initializing the Google and Google Drive Client libraries. It has two methods: client and drive.
The client method is where we initialize the Google API client and then set the different options that we’ve added earlier in the .env file. Once all the different options are set, we simply return the newly created client.
The drive method is used for initializing the Google Drive service. This accepts the client as its argument.
<?php
namespace App;

class Googl
{
    public function client()
    {
        $client = new \Google_Client();
        $client->setClientId(env('GOOGLE_CLIENT_ID'));
        $client->setClientSecret(env('GOOGLE_CLIENT_SECRET'));
        $client->setRedirectUri(env('GOOGLE_REDIRECT_URL'));
        $client->setScopes(explode(',', env('GOOGLE_SCOPES')));
        $client->setApprovalPrompt(env('GOOGLE_APPROVAL_PROMPT'));
        $client->setAccessType(env('GOOGLE_ACCESS_TYPE'));

        return $client;
    }


    public function drive($client)
    {
        $drive = new \Google_Service_Drive($client);
        return $drive;
    }
}
Routes
The different pages in the app are defined in the app/Http/routes.php file:
// This is where the user can see a login button for logging into Google
Route::get('/', 'HomeController@index');

// This is where the user gets redirected upon clicking the login button on the home page
Route::get('/login', 'HomeController@login');

// Shows a list of things that the user can do in the app
Route::get('/dashboard', 'AdminController@index');

// Shows a list of files in the users' Google drive
Route::get('/files', 'AdminController@files');

// Allows the user to search for a file in the Google drive
Route::get('/search', 'AdminController@search');

// Allows the user to upload new files
Route::get('/upload', 'AdminController@upload');
Route::post('/upload', 'AdminController@doUpload');

// Allows the user to delete a file
Route::get('/delete/{id}', 'AdminController@delete');

Route::get('/logout', 'AdminController@logout');
Home Controller
The Home Controller (app/Http/Controller/HomeController.php) is responsible for serving the home page and handling the user login.
<?php
namespace App\Http\Controllers;

use Illuminate\Http\Request;
use App\Googl;

class HomeController extends Controller
{
    public function index()
    {
        return view('login');
    }


    public function login(Googl $googl, Request $request)
    {
        $client = $googl->client();

        if ($request->has('code')) {

            $client->authenticate($request->input('code'));
            $token = $client->getAccessToken();

            $plus = new \Google_Service_Plus($client);

            $google_user = $plus->people->get('me');
            $id = $google_user['id'];

            $email = $google_user['emails'][0]['value'];
            $first_name = $google_user['name']['givenName'];
            $last_name = $google_user['name']['familyName'];

            session([
                'user' => [
                    'email' => $email,
                    'first_name' => $first_name,
                    'last_name' => $last_name,
                    'token' => $token
                ]
            ]);

            return redirect('/dashboard')
                ->with('message', ['type' => 'success', 'text' => 'You are now logged in.']);

        } else {
            $auth_url = $client->createAuthUrl();
            return redirect($auth_url);
        }
   }
}
Breaking down the code above, first we return the login view:
public function index()
{
    return view('login');
}
The login view is stored in resources/views/login.blade.php and contains the following code:
@extends('layouts.default')

@section('content')
<form method="GET" action="/login">
    <button class="button-primary">Login with Google</button>
</form>
@stop
The login view inherits from the resources/views/layouts/default.blade.php file:
<!DOCTYPE html>
<html lang="en">
<head>
    <meta charset="UTF-8">
    <title>{{ env('APP_TITLE') }}</title>
    <link rel="stylesheet" href="{{ url('assets/css/skeleton.min.css') }}">
    <link rel="stylesheet" href="{{ url('assets/css/style.css') }}">
</head>
<body>
    <div class="container">
        <header>
            <h1>{{ env('APP_TITLE') }}</h1>
        </header>
        @include('partials.alert')
        @yield('content')
    </div>
</body>
</html>
We’re using the Skeleton CSS framework for this app. Since Skeleton already has us covered in making things look good, we only have minimal CSS code (public/assets/css/style.css):
.file-title {
    font-size: 18px;
}

ul#files li {
    list-style: none;
}

.file {
    padding-bottom: 20px;
}

.file-modified {
    color: #5F5F5F;
}

.file-links a {
    margin-right: 10px;
}

.alert {
    padding: 20px;
}

.alert-success {
    background-color: #61ec58;
}

.alert-danger {
    background-color: #ff5858;
}
Going back to the Home Controller, we have the login method where we check if there is a code passed in as a query parameter. If there isn’t one, we create the authentication URL and redirect the user:
if ($request->has('code')) {
    ...
} else {
    $auth_url = $client->createAuthUrl();
    return redirect($auth_url);
}
The authentication URL is basically a Google login page which the user can use to give permission to the app. After the user has given the permission, Google redirects back to the redirect URL we’ve specified. A code is passed to that URL, which we use to acquire an access token.
$client->authenticate($request->input('code'));
$token = $client->getAccessToken();
From there, we get the basic user information which we then save into the session along with the access token:
$plus = new \Google_Service_Plus($client);

$google_user = $plus->people->get('me');
$id = $google_user['id'];

$email = $google_user['emails'][0]['value'];
$first_name = $google_user['name']['givenName'];
$last_name = $google_user['name']['familyName'];

session([
    'user' => [
        'email' => $email,
        'first_name' => $first_name,
        'last_name' => $last_name,
        'token' => $token
    ]
]);
Lastly, we redirect the user to the dashboard page:
return redirect('/dashboard')
                ->with('message', ['type' => 'success', 'text' => 'You are now logged in.']);
Admin Controller
The Admin Controller (app/Http/Controllers/AdminController.php) deals with operations that only logged in users can perform. This is where the code for listing, searching, uploading and deleting files resides.
<?php
namespace App\Http\Controllers;

use Illuminate\Http\Request;
use App\Googl;
use Carbon\Carbon;

class AdminController extends Controller
{
    private $client;
    private $drive;

    public function __construct(Googl $googl)
    {
        $this->client = $googl->client();
        $this->client->setAccessToken(session('user.token'));
        $this->drive = $googl->drive($this->client);
    }


    public function index()
    {
        return view('admin.dashboard');
    }


    public function files()
    {
        $result = [];
        $pageToken = NULL;

        $three_months_ago = Carbon::now()->subMonths(3)->toRfc3339String();

        do {
            try {
                $parameters = [
                    'q' => "viewedByMeTime >= '$three_months_ago' or modifiedTime >= '$three_months_ago'",
                    'orderBy' => 'modifiedTime',
                    'fields' => 'nextPageToken, files(id, name, modifiedTime, iconLink, webViewLink, webContentLink)',
                ];

                if ($pageToken) {
                    $parameters['pageToken'] = $pageToken;
                }

                $result = $this->drive->files->listFiles($parameters);
                $files = $result->files;

                $pageToken = $result->getNextPageToken();

            } catch (Exception $e) {
                return redirect('/files')->with('message',
                    [
                        'type' => 'error',
                        'text' => 'Something went wrong while trying to list the files'
                    ]
                );
              $pageToken = NULL;
            }
        } while ($pageToken);

        $page_data = [
            'files' => $files
        ];

        return view('admin.files', $page_data);
   }


    public function search(Request $request)
    {
        $query = '';
        $files = [];

        if ($request->has('query')) {
            $query = $request->input('query');

            $parameters = [
                'q' => "name contains '$query'",
                'fields' => 'files(id, name, modifiedTime, iconLink, webViewLink, webContentLink)',
            ];

            $result = $this->drive->files->listFiles($parameters);
            if($result){
                $files = $result->files;
            }
        }

        $page_data = [
            'query' => $query,
            'files' => $files
        ];

        return view('admin.search', $page_data);
   }


    public function delete($id)
    {
        try {
            $this->drive->files->delete($id);
        } catch (Exception $e) {
            return redirect('/search')
                ->with('message', [
                    'type' => 'error',
                    'text' => 'Something went wrong while trying to delete the file'
                ]);
        }

        return redirect('/search')
            ->with('message', [
                'type' => 'success',
                'text' => 'File was deleted'
            ]);
    }


    public function upload()
    {
        return view('admin.upload');
    }


    public function doUpload(Request $request)
    {
        if ($request->hasFile('file')) {

            $file = $request->file('file');

            $mime_type = $file->getMimeType();
            $title = $file->getClientOriginalName();
            $description = $request->input('description');

            $drive_file = new \Google_Service_Drive_DriveFile();
            $drive_file->setName($title);
            $drive_file->setDescription($description);
            $drive_file->setMimeType($mime_type);

            try {
                $createdFile = $this->drive->files->create($drive_file, [
                    'data' => $file,
                    'mimeType' => $mime_type,
                    'uploadType' => 'multipart'
                ]);

                $file_id = $createdFile->getId();

                return redirect('/upload')
                    ->with('message', [
                        'type' => 'success',
                        'text' => "File was uploaded with the following ID: {$file_id}"
                ]);

            } catch (Exception $e) {

                return redirect('/upload')
                    ->with('message', [
                        'type' => 'error',
                        'text' => 'An error occurred while trying to upload the file'
                    ]);

            }
        }

    }


    public function logout(Request $request)
    {
        $request->session()->flush();
        return redirect('/')->with('message', ['type' => 'success', 'text' => 'You are now logged out']);
    }

}
Breaking down the code above, first we create two private variables for the Google client and the Google Drive Service and initialize them in the constructor.
private $client;
private $drive;

public function __construct(Googl $googl)
{
    $this->client = $googl->client();
    $this->client->setAccessToken(session('user.token'));
    $this->drive = $googl->drive($this->client);
}
Dashboard
To build the dashboard, we add the index method which serves the dashboard page:
public function index()
{
    return view('admin.dashboard');
}
The dashboard page contains the links to the different pages in the app:
@extends('layouts.default')

@section('content')
<h3>What do you like to do?</h3>
<ul>
    <li><a href="/files">List Files</a></li>
    <li><a href="/search">Search File</a></li>
    <li><a href="/upload">Upload File</a></li>
    <li><a href="/logout">Logout</a></li>
</ul>
@stop
Listing Files
Next we have the files method which is responsible for listing the files that have been recently modified or viewed. In the example, we’re filtering the files that have been modified or viewed during the last three months. We do that by providing the request for listing files with some params.
$three_months_ago = Carbon::now()->subMonths(3)->toRfc3339String();

$parameters = [
    'q' => "viewedByMeTime >= '$three_months_ago' or modifiedTime >= '$three_months_ago'",
    'orderBy' => 'modifiedTime',
    'fields' => 'nextPageToken, files(id, name, modifiedTime, iconLink, webViewLink, webContentLink)',
];
Most of the filtering can be done through the use of the q parameter. Here we’re using viewedByMeTime to specify that the file should have been viewed by the current user during the past three months. We use the modifiedTime to specify that the file should have been modified by any user who has access to the document in that same period. These two conditions are linked together by using the or keyword.
The results can then be ordered by specifying the orderBy parameter. In this case, we’re ordering the files using the modifiedTime field in descending order. This means that the files that have been recently modified are returned first. Also note that we’re passing in a fields parameter which is used for specifying the fields we want returned.
The full list of values usable as the q parameter is in the documentation.
We’re also specifying an additional parameter called pageToken. This allows us to paginate through a big result set. So while there’s a page token being returned, we continue fetching results from the API.
if ($pageToken) {
    $parameters['pageToken'] = $pageToken;
}
To perform the request, we use the Google Drive service to get the list of files that meets the criteria that we’ve specified earlier. The page token can also be fetched from the results.
$result = $this->drive->files->listFiles($parameters);
$files = $result->files;

$pageToken = $result->getNextPageToken();
Note that this is all done inside a do..while loop. So while the page token is not null it continues to execute.
do {
    ...
} while ($pageToken);
The following (resources/views/admin/files.blade.php) is the view used for listing the files:
@extends('layouts.default')

@section('content')
<h3>List Files</h3>
<ul id="files">
    @foreach($files as $file)
    <li>
        <div class="file">

            <div class="file-title">
                <img src="{{ $file->iconLink }}">
                {{ $file->name }}
            </div>
            <div class="file-modified">
                last modified: {{ Date::format($file->modifiedTime) }}
            </div>
            <div class="file-links">
                <a href="{{ $file->webViewLink }}">view</a>
                @if(!empty($file->webContentLink))
                <a href="{{ $file->webContentLink }}">download</a>
                @endif
            </div>
        </div>
    </li>
    @endforeach
</ul>
@stop
Here we’re looping through the files and then outputting them inside a list. Each list item contains the Google drive icon associated with the file, the title, the modification date, and a couple of links for viewing and downloading the file. Note that we’re using a custom helper class called Date. We’ll take a look at that in the Date Helper section.
Searching for Files
The search method is responsible for returning the search page. Inside, we check if the query is passed in as a request parameter. Then we we use that as the value for the filename to be searched for. Note that this time we’re not passing in nextPageToken and orderBy as parameters because we’re assuming that there will only be a few items in the result set.
if ($request->has('query')) {
    $query = $request->input('query');

    $parameters = [
        'q' => "name contains '$query'",
        'fields' => 'files(id, name, modifiedTime, iconLink, webViewLink, webContentLink)',
    ];

    $result = $this->drive->files->listFiles($parameters);
    if($result){
        $files = $result->files;
    }
}
The following (resources/views/admin/search.blade.php) is the corresponding view:
@extends('layouts.default')

@section('content')
<h3>Search Files</h3>
<form method="GET">
    <div class="row">
        <label for="query">Query</label>
        <input type="text" name="query" id="query" value="{{ $query }}">
    </div>
    <button class="button-primary">Search</button>
</form>
@if(!empty($files))
<ul id="files">
    <h4>Search results for: {{ $query }}</h4>
    @foreach($files as $file)
    <li>
        <div class="file">

            <div class="file-title">
                <img src="{{ $file->iconLink }}">
                {{ $file->name }}
            </div>
            <div class="file-modified">
                last modified: {{ Date::format($file->modifiedTime) }}
            </div>
            <div class="file-links">
                <a href="{{ $file->webViewLink }}">view</a>
                @if(!empty($webContentLink))
                <a href="{{ $file->webContentLink }}">download</a>
                @endif
                <a href="/delete/{{ $file->id }}">delete</a>
            </div>
        </div>
    </li>
    @endforeach
</ul>
@else
No results for your query: {{ $query }}
@endif
@stop
Deleting Files
When the delete link is clicked, the delete method is executed. It accepts the ID as the parameter. This is the ID of the file in Google Drive.
public function delete($id)
{
    try {
        $this->drive->files->delete($id);
    } catch (Exception $e) {
        return redirect('/search')
            ->with('message', [
                'type' => 'error',
                'text' => 'Something went wrong while trying to delete the file'
            ]);
    }

    return redirect('/search')
        ->with('message', [
            'type' => 'success',
            'text' => 'File was deleted'
        ]);
}
Uploading Files
Uploading files requires a different method for showing the view and actually uploading the file. This is because we need to use the POST method for uploading the file and GET method for showing the view.
The upload view (resources/views/admin/upload.blade.php) contains the form for uploading a single file:
@extends('layouts.default')

@section('content')
<h3>Upload Files</h3>
<form method="POST" enctype="multipart/form-data">
    <input type="hidden" name="_token" value="{{ csrf_token() }}">
    <div class="row">
        <label for="file">File</label>
        <input type="file" name="file" id="file">
    </div>
    <div class="row">
        <label for="description">Description</label>
        <input type="text" name="description" id="description">
    </div>
    <button class="button-primary">Upload</button>
</form>
@stop
Once the form is submitted, the doUpload method is executed. This checks if a file was uploaded. We then get the file and its info (mime type, file name). That information is then used to create a new Google Drive File.
if ($request->hasFile('file')) {

    $file = $request->file('file');

    $mime_type = $file->getMimeType();
    $title = $file->getClientOriginalName();
    $description = $request->input('description');

    $drive_file = new \Google_Service_Drive_DriveFile();
    $drive_file->setName($title);
    $drive_file->setDescription($description);
    $drive_file->setMimeType($mime_type);
}
Next, we upload the file to Google drive by using the files->create method. This accepts the drive file as its first argument and an array containing the actual contents of the file, mime type and upload type as its second argument. The upload type can either have a value of media, multipart or resumable. You can check out the documentation for uploads if you want to explore those upload types. For our example though, we’re only going to use multipart since we are directly uploading the files to Google Drive by submitting a form. The create method returns the ID of the file if the upload was successful.
try {
    $createdFile = $this->drive->files->create($drive_file, [
        'data' => $file,
        'mimeType' => $mime_type,
        'uploadType' => 'multipart'
    ]);

    $file_id = $createdFile->getId();

    return redirect('/upload')
        ->with('message', [
            'type' => 'success',
            'text' => "File was uploaded with the following ID: {$file_id}"
    ]);

} catch (Exception $e) {

    return redirect('/upload')
        ->with('message', [
            'type' => 'error',
            'text' => 'An error occured while trying to upload the file'
        ]);

}
Date Helper
The Date helper is used for formatting the dates returned by the Google Drive API. Here we only have one static method called format which accepts two arguments: date and format. The date is required and for the format we specify a default: M j, which outputs the date in the following format: Feb 28. Carbon is used to do the formatting.
<?php

use Carbon\Carbon;

class Date {

    public static function format($date, $format = 'M j'){

        return Carbon::parse($date)->format($format);
    }
}
In order to autoload the helper, we need to add the path app/Helpers to the classmap array in the composer.json file. Once that’s done, executing composer dump-autoload will apply the changes.
"autoload": {
    "psr-4": {
        "App\\": "app/"
    },
    "classmap": [
        "database/",
        "app/Helpers"
    ]
},
Conclusion
That’s it! In this tutorial we’ve seen how to work with the Google Drive API using PHP. Specifically, we looked at how to list, search, upload and delete files from a user’s Google drive.
We’ve barely scratched the surface in this tutorial. There’s so much more you can do: there are file revisions and real-time capabilities, to name a few. Be sure to check out the docs if you want to learn more.
Questions? Comments? Leave your feedback below!
Frequently Asked Questions (FAQs) about Laravel and Google Drive UI
How can I integrate Google Drive with Laravel?
Integrating Google Drive with Laravel involves using Google’s API client. First, you need to create a project in the Google Cloud Console and enable the Drive API. Then, you need to create credentials for the API and download the JSON file. In Laravel, you can use the google/apiclient package to interact with the API. You need to set up the client with your credentials and then you can use the Drive service to interact with Google Drive.
Can Laravel handle large files on Google Drive?
Yes, Laravel can handle large files on Google Drive. Laravel’s filesystem abstraction allows for handling files of any size. When dealing with large files, it’s important to use streaming downloads and uploads to avoid running out of memory. This can be done using the Storage::stream method for downloads and the Storage::put method for uploads.
How can I use Google Drive as a filesystem in Laravel?
Laravel’s filesystem abstraction allows you to use Google Drive as a filesystem. This involves setting up a custom filesystem driver. You can use the nao-pon/flysystem-google-drive package to easily set up a Google Drive filesystem. Once set up, you can use the Storage facade to interact with Google Drive just like any other filesystem.
Is it possible to display Google Drive content in a Laravel application?
Yes, it is possible to display Google Drive content in a Laravel application. Once you have set up the Google Drive API and integrated it with Laravel, you can use the Drive service to list files, download files, and display them in your application. You can use the listFiles method to get a list of files and the get method to download a specific file.
How can I handle Google Drive API errors in Laravel?
Google Drive API errors can be handled in Laravel using exception handling. The Google API client throws exceptions when an error occurs. You can catch these exceptions and handle them appropriately in your application. For example, you might want to log the error and display a user-friendly message to the user.
Can I use Google Drive for file storage in a Laravel application?
Yes, you can use Google Drive for file storage in a Laravel application. Laravel’s filesystem abstraction allows you to use any filesystem for file storage, including Google Drive. This can be a cost-effective solution for storing large amounts of data.
How can I search for files on Google Drive in a Laravel application?
You can search for files on Google Drive in a Laravel application using the files.list method of the Drive service. This method allows you to specify a query parameter to search for files. The query language allows for complex searches, such as searching for files of a specific type or files that contain a specific word.
How can I upload files to Google Drive in a Laravel application?
You can upload files to Google Drive in a Laravel application using the files.create method of the Drive service. This method allows you to specify the file data and metadata. You can use the Storage::put method to upload the file data.
How can I download files from Google Drive in a Laravel application?
You can download files from Google Drive in a Laravel application using the files.get method of the Drive service. This method allows you to specify the file ID. You can use the Storage::get method to download the file data.
How can I delete files from Google Drive in a Laravel application?
You can delete files from Google Drive in a Laravel application using the files.delete method of the Drive service. This method allows you to specify the file ID. You can use the Storage::delete method to delete the file data.

