Key Takeaways
- The article provides a detailed guide on creating an all-purpose loading view for iOS, using a spinner view with a gradient background. It highlights the importance of providing feedback to users when an application has to wait for a response.
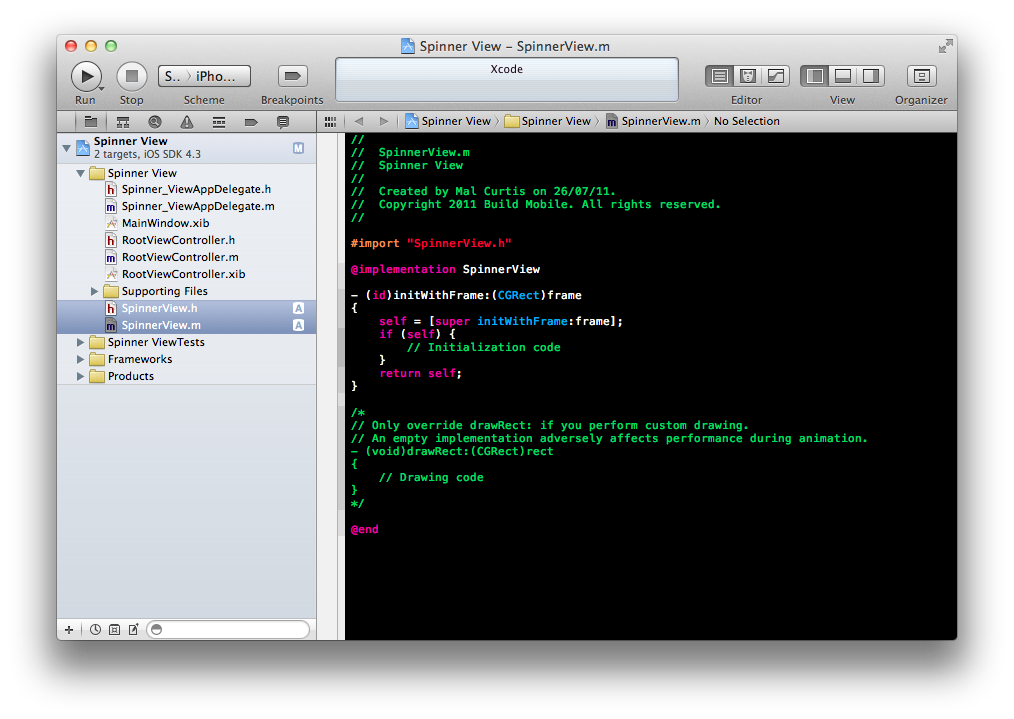
- The author uses Xcode 4.1 to create a new project and the SpinnerView class. The goal is to load a spinner view in a single line of code, which is achieved by creating a method that takes a UIView, allocates a new instance of the SpinnerView class, and adds itself as a subview.
- The author then adds an activity indicator to the view and replaces the black background with a radial gradient. This is done using the Core Graphics framework and a method that returns a UIImage object. The gradient’s colors and size can be customized.
- The final steps involve adding a fade-in and fade-out effect using the QuartzCore framework, and linking the button to the IBAction. The end result is a reusable spinner view that resizes to the size of the view it’s placed in.
Loading screens are a necessity of digital life.
It’s important to provide a user with feedback when you start a process for which your application has to wait for a response. If a user presses a button it’s important they know that the action they’ve taken has been acted upon.
Today I’m going to show you how to make a reusable loading screen with an activity indicator (that’s one of those spinner things) and a gradient background.
Here’s what it will look like!
iOS Loading Spinner from BuildMobile on Vimeo.
Before we start, there are some prerequisites. You’ll need to know a little about iOS development, like how the hierarchy of windows, views and controllers all fit together. We’ve got some excellent tutorials that will get you up to speed if you’re not quite there yet. Check out the Introduction to iOS Programming Series.
Also note that I’m using Xcode 4.1. If you’re on a different version some things might look a bit different, but since we’re doing some pretty basic stuff it shouldn’t be too far off the mark!
Baby steps. Let’s start with a project
I’m going to start a new project, but you may already have one that you plan on using this in, so this step may be redundant for you. It’s just a simple navigation based project, using all the Xcode defaults.
The first real step is to create a new class for our spinner view. This will need to subclass UIView, so cmd + N, select ‘Objective-C Class’ and hit Next. Make sure it’s a subclass of UIView then hit Next again. Finally choose a name to save your class as, I’m going to call mine SpinnerView.
You should now have a project that looks a little like this (unless you’re using an existing project, in which case it will most likely look nothing like this).
Using the spinner view should be a simple task. The goal here is to be able to load a spinner view in a single line of code. So the first thing we’re going to do is create a method that takes a UIView, and allocates a new instance of the SpinnerView class, then adds itself as a subview.
Head to your SpinnerView header file and pop in a method definition before @end
+(SpinnerView *)loadSpinnerIntoView:(UIView *)superView;Next up we need to define the actual method. This method is going to do the heavy lifting in regards to creating a view with content in it, and placing it into the passed superView.
+(SpinnerView *)loadSpinnerIntoView:(UIView *)superView{
	// Create a new view with the same frame size as the superView
	SpinnerView *spinnerView = [[[SpinnerView alloc] initWithFrame:superView.bounds] autorelease];
	// If something's gone wrong, abort!
	if(!spinnerView){ return nil; }
	// Just to show we've done something, let's make the background black
	spinnerView.backgroundColor = [UIColor blackColor];
	// Add the spinner view to the superView. Boom.
	[superView addSubview:spinnerView];
	return spinnerView;
}
This code will create a very basic view, with a black background, and insert it into the supplied main view.
We’ve got enough code now that we can test to see we’re in action, so now we need to set up some code to actually use this!
Head over to your root view controller and define a new IBAction method to be called when we press a button.
// In the RootViewController header definition
-(IBAction)didPressSpinnerButton:(id)sender;
// In the RootViewController class file, don't forget to #import "SpinnerView.h"
-(IBAction)didPressSpinnerButton:(id)sender{
	// Load a new spinnerView into the current view
	[SpinnerView loadSpinnerIntoView:self.view];
}
So we’ve created a method that, when called, will load a new spinnerView into the controller’s view. Next up we’ll add a button into our xib, and hook it up to call the IBAction we created.
Open up MainWindow.xib (or whatever xib you have if you’re using your own project). From the Objects inspector drop in a new view under “Root View Controller”, then drop a Round Rect Button into that newly created view. Pop a label in your button so you know what it’s going to do. My descriptive label was “Load Something”. Finally select the button and, in the connections inspector (opt + cmd + 6 to toggle) drag from the circle next to “Touch Up Inside” to over the “Root View Controller” on the left. When you let go you should be able to select the IBAction you created. Once you’ve done that it should look like this picture, and you should now have connected the button to the method.

Time to test!
Alright. We’ve proven that we can add a view into another view. Big whoop. Let’s now make sure that we can remove it when we’re done!
In the SpinnerView class define a new method, removeSpinner.
// .h file
-(void)removeSpinner;
// .m file
-(void)removeSpinner{
	// Take me the hells out of the superView!
	[super removeFromSuperview];
}
removeSpinner is pretty straight forward. It simply removes the view from the superView. Easy.
We can see this in motion by adding a timer into our didPressSpinnerButton method. We’ll need to pop the spinner into a variable to do this too. Here’s our updated didPressSpinnerButton method.
-(IBAction)didPressSpinnerButton:(id)sender{
    SpinnerView * spinner = [SpinnerView loadSpinnerIntoView:self.view];
    [NSTimer scheduledTimerWithTimeInterval:2.0
                                     target:spinner
                                   selector:@selector(removeSpinner)
                                   userInfo:nil repeats:NO];
}
Building the app now and pressing the button will result in the black view being inserted, then removed again after 2 seconds.
Foundations. Check!
We’ve got the foundations for our spinner view class done. The rest is just icing. And by icing I mean UI and design.
The first thing I’m going to do is add an activity indicator into the view, so that it’s obvious this is a loading page, and lets the user know that this is a temporary solution and that they should expect something to happen soon.
In our loadSpinnerIntoView method, in the SpinnerView.m file, we’re going to create, and insert the activity indicator.
if(!spinnerView){ return nil; }
	// This is the new stuff here ;)
    UIActivityIndicatorView *indicator =
    [[[UIActivityIndicatorView alloc]
      initWithActivityIndicatorStyle: UIActivityIndicatorViewStyleWhiteLarge] autorelease];
	// Set the resizing mask so it's not stretched
    indicator.autoresizingMask =
    UIViewAutoresizingFlexibleTopMargin |
    UIViewAutoresizingFlexibleRightMargin |
    UIViewAutoresizingFlexibleBottomMargin |
    UIViewAutoresizingFlexibleLeftMargin;
	// Place it in the middle of the view
    indicator.center = superView.center;
	// Add it into the spinnerView
    [spinnerView addSubview:indicator];
	// Start it spinning! Don't miss this step
	[indicator startAnimating];
Build that and see how it looks. Hopefully it looks a little (exactly) like this.

You know what we need? Gradients!
Time for us to do something about that horrible black background. It’s time for our radial gradient. I bet you’re expecting me to say “open up photoshop…” but I’m not. We’re going to write our gradient in code, for two reasons. Firstly we don’t have to worry about creating two images (one for older phones, and another for iPhone 4 retina displays) – which would be a pain to update! Secondly, if we do this in code then we don’t add anywhere near as much file size to our app. Keeping it slim people. This is the BuildMobile Gym for apps.
So… how do I do it?
Gradient eh? I bet the iOS sdk has a nifty easy API to create a gradient for us. Correct! But also incorrect.
The iOS SDK has a useful way to create a linear gradient, using CAGradientLayer, but it doesn’t provide a quick and easy way to generate a radial gradient, which is what we want. To do this we have to dig a littler deeper and start working with the Core Graphics framework.
What we’re actually going to do is define a method which returns a UIImage object, an object which we’re going to make from scratch – using code! Code is great.
The code looks a little hairy, so view the comments to make sense. Or just copy paste it and forget about it.
- (UIImage *)addBackground{
	// Create an image context (think of this as a canvas for our masterpiece) the same size as the view
    UIGraphicsBeginImageContextWithOptions(self.bounds.size, YES, 1);
	// Our gradient only has two locations - start and finish. More complex gradients might have more colours
    size_t num_locations = 2;
	// The location of the colors is at the start and end
    CGFloat locations[2] = { 0.0, 1.0 };
	// These are the colors! That's two RBGA values
    CGFloat components[8] = {
        0.4,0.4,0.4, 0.8,
        0.1,0.1,0.1, 0.5 };
	// Create a color space
    CGColorSpaceRef myColorspace = CGColorSpaceCreateDeviceRGB();
	// Create a gradient with the values we've set up
    CGGradientRef myGradient = CGGradientCreateWithColorComponents (myColorspace, components, locations, num_locations);
	// Set the radius to a nice size, 80% of the width. You can adjust this
    float myRadius = (self.bounds.size.width*.8)/2;
	// Now we draw the gradient into the context. Think painting onto the canvas
    CGContextDrawRadialGradient (UIGraphicsGetCurrentContext(), myGradient, self.center, 0, self.center, myRadius, kCGGradientDrawsAfterEndLocation);
	// Rip the 'canvas' into a UIImage object
    UIImage *image = UIGraphicsGetImageFromCurrentImageContext();
	// And release memory
    CGColorSpaceRelease(myColorspace);
    CGGradientRelease(myGradient);
    UIGraphicsEndImageContext();
	// … obvious.
    return image;
}
Still with me? No? Damn.
The main things of note are the CGFloat components, which define the colours for the gradient, and the float myRadius which allows you to resize how big the gradient is.
If you add that method, and its appropriate method definition in the header, we’re now ready to call it from the loadSpinnerIntoView method, and pop it in the background instead of the plain black background.
Remove the line that makes the background black
spinnerView.backgroundColor = [UIColor blackColor];And add this in before the activity indicator code (otherwise it will be above the activity indicator. Not good.
// Create a new image view, from the image made by our gradient method
    UIImageView *background = [[UIImageView alloc] initWithImage:[spinnerView addBackground]];
	// Make a little bit of the superView show through
    background.alpha = 0.7;
    [spinnerView addSubview:background];
Now if you build your app you should see a pretty damn good looking spinner!

That’s all the hard work done. The only thing left is to add in the cherry on top; fading the spinner view in and out. This is surprisingly straight forward – with the exception that you have to add in the QuartzCore framework.
For those of you who’ve forgotten the steps to add a framework: Head to your projects settings, select your target (in my case “Spinner View”) -> Build Phases -> Link Binary With Libraries, hit the plus symbol and find QuartzCore.framework.
Make sure that you’re importing, and then add this just before returning from the loadSpinnerIntoView method.
// Create a new animation
    CATransition *animation = [CATransition animation];
	// Set the type to a nice wee fade
	[animation setType:kCATransitionFade];
	// Add it to the superView
	[[superView layer] addAnimation:animation forKey:@"layerAnimation"];
In the removeSpinner function, the code is almost identical.
// Add this in at the top of the method. If you place it after you've remove the view from the superView it won't work!
    CATransition *animation = [CATransition animation];
	[animation setType:kCATransitionFade];
	[[[self superview] layer] addAnimation:animation forKey:@"layerAnimation"];
Congratulations, you’ve now got a spinner view that fades in, looks nice and fades out. It can be used again and again, and resizes to the size of the view that it’s placed in.
Mint.
Frequently Asked Questions (FAQs) about All-Purpose Loading View for iOS
How can I customize the appearance of the UIActivityIndicatorView?
The UIActivityIndicatorView class provides a set of properties that you can use to customize its appearance. For instance, you can change the color of the activity indicator by setting the ‘color’ property to a UIColor object. You can also adjust the size of the activity indicator by setting the ‘style’ property to either ‘large’ or ‘medium’. Additionally, you can use the ‘hidesWhenStopped’ property to automatically hide the activity indicator when it’s not animating.
How can I display text along with the activity indicator?
Displaying text along with the activity indicator can be achieved by creating a custom UIView that contains both a UIActivityIndicatorView and a UILabel. You can then position these two elements side by side or one above the other, depending on your design requirements. The text can be updated dynamically as the state of the activity changes.
How can I use the UIActivityIndicatorView in a UIButton?
The UIButton class in iOS does not directly support the inclusion of a UIActivityIndicatorView. However, you can achieve this by creating a custom UIButton subclass. In your custom button, you can add a UIActivityIndicatorView as a subview and control its visibility and animation state based on the button’s state.
What are the best practices for using progress indicators in iOS?
Progress indicators should be used sparingly and only for tasks that require a significant amount of time to complete. They should provide a clear indication of progress and should not be used to indicate indeterminate states. It’s also important to ensure that the user can continue interacting with your app while the progress indicator is visible.
How can I handle errors or exceptions when using a UIActivityIndicatorView?
When using a UIActivityIndicatorView, it’s important to handle any errors or exceptions that may occur during the operation that the activity indicator is tracking. This can be done by using a try-catch block in your code. If an error occurs, you can stop the activity indicator and display an appropriate error message to the user.
How can I test the UIActivityIndicatorView in my app?
Testing the UIActivityIndicatorView in your app can be done using the XCTest framework provided by Apple. You can write unit tests to verify that the activity indicator starts and stops as expected, and that it’s visible or hidden at the appropriate times.
Can I use the UIActivityIndicatorView in a SwiftUI app?
Yes, you can use the UIActivityIndicatorView in a SwiftUI app by creating a UIViewRepresentable wrapper for it. This allows you to use the activity indicator in your SwiftUI views and control its state using SwiftUI’s state management features.
How can I use the UIActivityIndicatorView to indicate network activity?
You can use the UIActivityIndicatorView to indicate network activity by starting the activity indicator when a network request begins, and stopping it when the request completes. This provides a visual indication to the user that a network operation is in progress.
Can I use the UIActivityIndicatorView in a UICollectionView or UITableView?
Yes, you can use the UIActivityIndicatorView in a UICollectionView or UITableView. You can add it as a subview of your cell’s contentView and control its visibility and animation state based on the data for each cell.
How can I use the UIActivityIndicatorView in a UIAlertController?
You can use the UIActivityIndicatorView in a UIAlertController by adding it as a subview of the alert controller’s view. You can then control its visibility and animation state based on the state of the alert.
Mal Curtis is a Kiwi polyglot software engineer currently focussing on Go and JavaScript. He’s the founder of transaction email management service Apostle.io, and is a Principal Engineer at Vend, where he helps make beautiful Point of Sale and Inventory Management software (yes, it can be beautiful). In the past he’s helped launch Learnable.com, and worked for SitePoint in Melbourne. In his spare time you’ll find him attempting geeky pursuits with varying levels of failure, such as quadcopters and sous vide cooking.