The Windows App Gallery and WebMatrix series of articles has so far focused on installation and development. Once you’ve built your website, the natural progression is to find a host, deploy it to the host’s server and build traffic to your website. It may come as a surprise to you, but all of this can be achieved without leaving the comfort of WebMatrix. This article will focus on these key aspects.
Before getting started, you should read the earlier articles in this series on WebMatrix and the Windows App Gallery.
Web Deploy
WebMatrix provides an option called Web Deploy, which makes it simple to deploy your website including your database and data.
Web Deploy runs on a server and gives you the ability to deploy websites locally or remotely. It is much more than just a process for copying files; you can also provision databases and populate the content, install and configure SSL certificates, configure IIS such as creating virtual directories and creating and configuring application pools, set file and folder permissions, install libraries into the Global Assembly Cache (GAC) and even register COM components.
Web Deploy also supports a .NET based provider API that gives you the ability to create custom deployment actions, so it’s a perfect fit for the enterprise. It’s part of an approach designed to make it easy to move painlessly from having an idea for a website to declaring it open for business.
To cover all the aspects of Web Deploy would be a series of articles in themselves. If you’d like to find out more about the exciting opportunities that are available to you when you’re using this, I recommend you go to the official IIS Web Deploy website and read more about it.
This article focuses on web developers using file transfer protocol (FTP) to deploy a WebMatrix website.
Hosting Service Providers
Before you can deploy your website, you need to find a web Hosting Service Provider. A web Hosting Service Provider is an internet hosting service that allows people to make their own website accessible via the World Wide Web. There are dozens of hosting companies, and each company offers hosting plans that have different features and pricing. The task of selecting one has been made easier by WebMatrix as it includes a range of approved providers, who also support the Web Deploy process that can automate most of the publishing process.
Publishing Databases
Publishing databases is easy through WebMatrix. If you’re using SQL Server Compact as your database, not only will the data in the database be published, but SQL Server Compact will be published too. This ensures your website will work even if SQL Server Compact isn’t installed on the web server. If your website uses SQL Server or a MySql database, WebMatrix will publish the database by creating scripts that will create all of your database objects such as tables, stored procedures and views. It will then insert all of your data into the database.
Finding and Creating a Web Host Account
To set up web hosting, follow these steps.
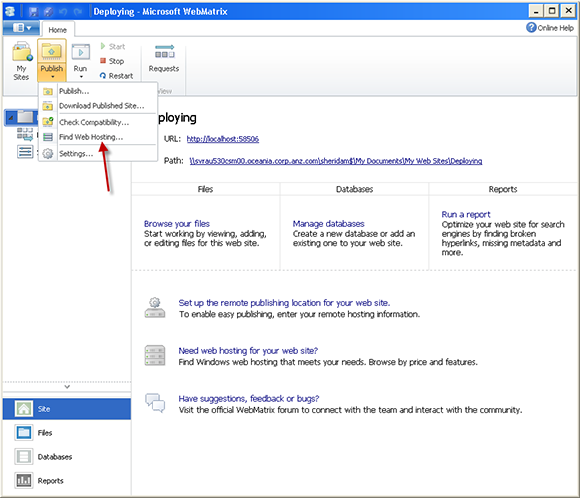
1. Open WebMatrix and in the Home tab, expand Publish and choose Find Web Hosting as Figure 1, “Find Web Hosting” shows.
Figure 1. Find Web Hosting
2. The Windows Web Hosting Gallery website will open. Figure 2, “Windows Web Hosting Gallery” shows how you can search through the list of providers to find the right hosting solution for your needs.
Figure 2. Windows Web Hosting Gallery

3. Once you’ve decided on a Hosting Service Provider, follow the directions provided by the Hosting Service Provider’s site to set up a new account.
After your account is set up, the Hosting Service Provider sends you an email that contains information you’ll need in order to publish your website. These values may vary from host to host, but the common values might look like this:
- Server:
your.provider.com - User Name:
your.username - Password:
password - Site Name:
yoursite.your.provider.com - Destination URL:
http:// yoursite .your.provider.com
If your account includes a SQL Server database, you’ll also receive information about how to connect to it from your website. Typically the database connection string will look like this:
User ID=user;Password=password;Initial Catalog=databaseName;Data Source=sql.hostThese values can be entered into WebMatrix which will allow you to publish your website to your host. Some hosting providers will send you a Publish Settings File, which is a file with the .publishsettings extension. This is an XML file you can use when you configure your website for publishing to the host provider. This saves you having to manually type in the data.
If your website connects to a database and you’re using Web Deploy, the file will also include the database connection strings.
Configuring Your Website for Publishing
The next step is to configure the website before publishing it to the web host.
Note: The steps outlined below show you how to publish your website using FTP, not Web Deploy.
1. Open WebMatrix and in the Home tab, expand Publish and choose Settings as Figure 3, “Web Hosting Settings” shows.
Figure 3. Web Hosting Settings

The Publishing Settings window appears. This is highlighted in Figure 4, “Publishing Settings”.
Figure 4. Publishing Settings
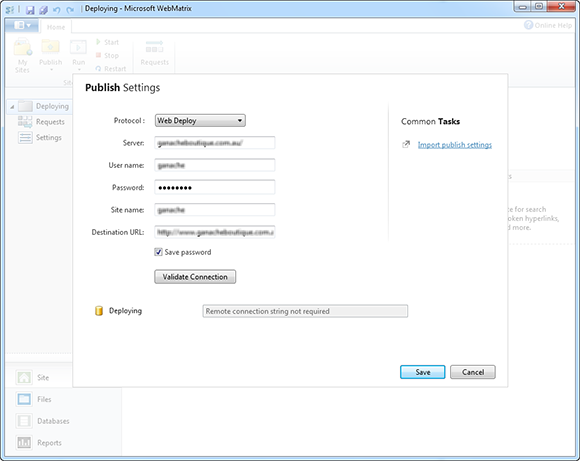
2. Having chosen FTP as the Protocol, enter the Server, User name, Password, Site name and Destination URL that has been provided to you from your Hosting Service Provider. Here’s a breakdown of what these values are:
a. Server—this is the service or server name provided by your Hosting Service Provider. This could look like ftp://server1.host.com.
b. User name and Password—the user credential provided by your Hosting Service Provider.
c. Destination URL—the URL to your website. The Hypertext Transfer Protocol (HTTP) prefix is optional. You can enter http://www.yourwebsite.com or www.yourwebsite.com/wiki.
d. Site path—This is an optional value that points to the folder where you will publish files to.
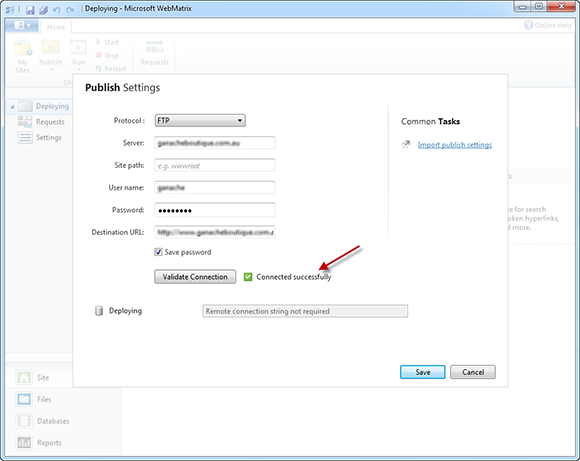
3. To avoid having to re-type the password for each deployment, you can select Save Password to avoid doing this.
4. Click Validate Connection to verify WebMatrix is able to connect to your Hosting Service Provider. This is highlighted in Figure 6, “Validating the Connection”.
Figure 6. Validating the Connection
Note: FTP does not support all types of databases. Microsoft SQL Compact databases will be transferred as files. Microsoft SQL Server and MySQL databases will not be transferred using FTP. These will either need to be scripted separately or deployed using Web Deploy.
Publishing
The last piece of the puzzle is to publish the website. Once again this is easily achieved through WebMatrix. Before publishing any files, WebMatrix collates the files that will be published so you can make changes if required. Follow these steps to publish the website to your hosting provider.
1. Open WebMatrix and in the Home tab, expand Publish and choose Publish. The Publish Compatibility window appears. Publish Compatibility will find out what components your site depends on, and then check if they are available on the web Hosting Service Provider. For example, if your site uses ASP.NET 4.0, then Publish Compatibility will verify that Host Service Provider supports this framework. Figure 7, “Publish Compatibility” shows if your Hosting Service Provider supports what’s available on this screen.
Figure 7. Publishing Compatibility
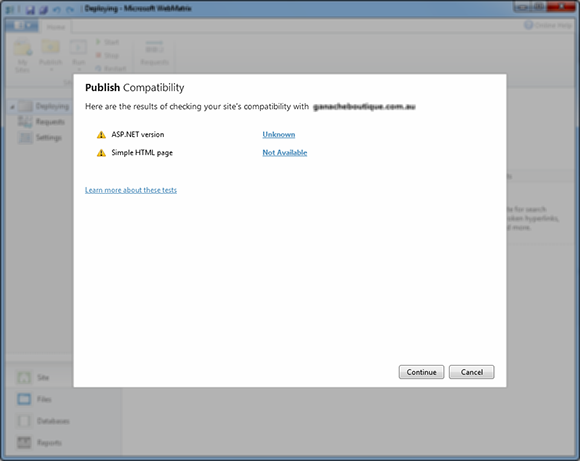
Click Continue to continue the process.
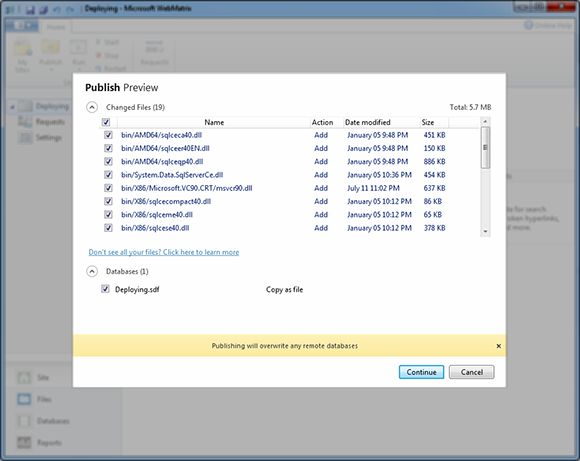
2. The next screen is the Publish Preview screen, which can be seen in Figure 8, “Publish Preview”.
Figure 8. Publish Preview
Using this screen, you can modify any files if required. To prevent a file being published, clear the check box under Changed Files. Any file that has a clear check box won’t be published. It is vitally important to remember if you do deploy a database, and it already exists on the Hosting Service Provider, the existing database will be overwritten.
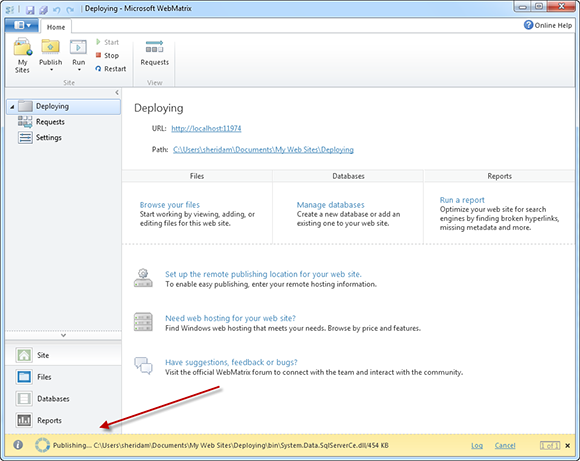
3. Once you’ve made your decision on what files to publish, click Continue. WebMatrix will now publish all of the files behind the scenes, which means you can continue working in WebMatrix while still publishing. It will display the progress in the navigation bar in the bottom of the screen. This can be seen in Figure 9, “Publishing Status”.
Figure 9. Publishing Status
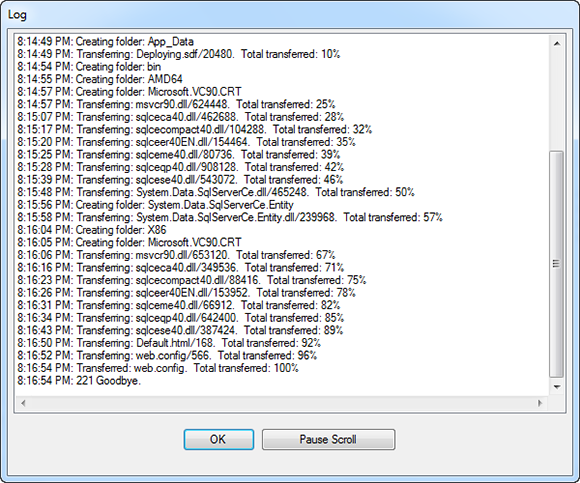
At any time you can click Log in the navigation bar to view the publishing log up to whichever step the publishing process has reached. Figure 10, “Publishing Log” depicts this screen.
Figure 10.Publishing Log
All the steps above show you how to host and publish your website. Once it’s live, it’s time to drive traffic to it. You do this by making your website visible to search engines such as Google, Bing and Yahoo. Part of this process is made easier thanks to Reports in WebMatrix.
Reports
The WebMatrix Reports feature can help you generate traffic to your website by Search Engine Optimization (SEO) analysis and makes suggestions on how to fix potential problems. SEO in a nutshell is the process of improving your website’s visibility in search engines. This analysis is critical if you want to build incoming traffic. If you search ranking improves, so will the traffic.
Creating a Report
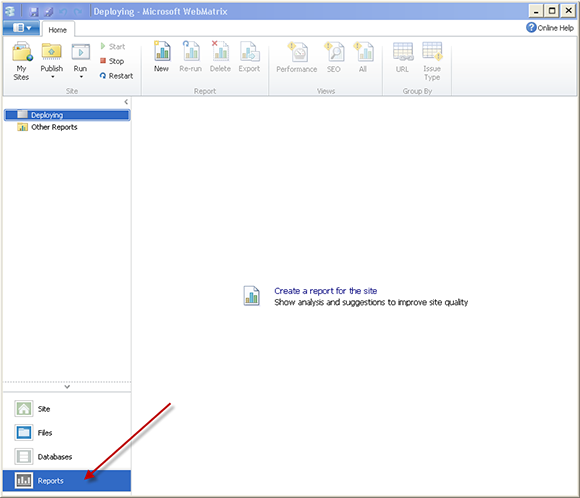
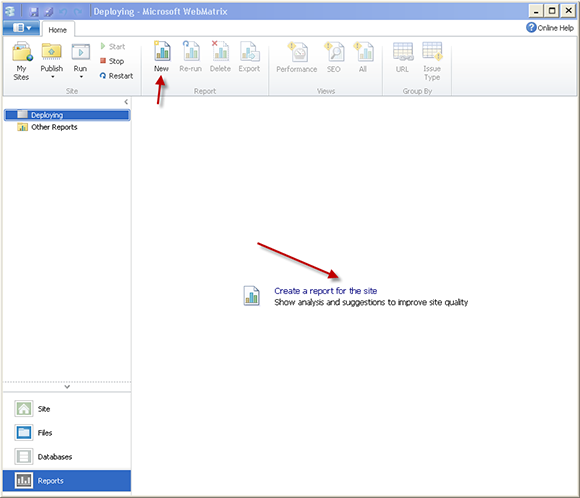
To start, open an existing website in WebMatrix then click Reports in the workspace. Figure 11 “WebMatrix Reports” points out exactly where this is.
Figure 11.WebMatrix Reports
Next either click Create a report for the site or New from the menu, as shown in Figure 12, “Creating a Report”.
Figure 12. Creating a Report
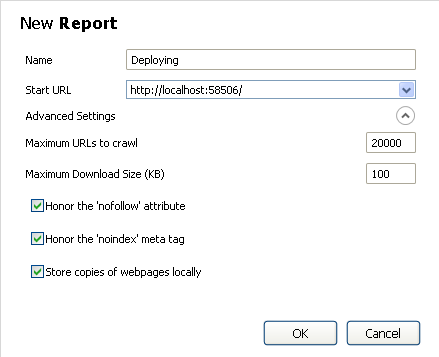
This displays the New Report dialog box. This dialog box is highlighted in Figure 13, “New Report”.
Figure 13. New Report

Type the name you want for the report and the full URL of the page the analysis should start from. If you omit the page, the analysis will begin from the default document in your website. Reports aren’t limited to the current website. They can be run against any website. To do this select Other Reports from the navigation tab and click New in the home tab. The steps are identical to those previously described.
Clicking Advanced Settings allows you to set options for the analysis, including the maximum URLs to crawl as well as the maximum page download size. These will be vitally important if you have a website with a large number of pages. Figure 14, “Advanced Results” displays the options.
Figure 14. Advanced Results
Click OK to begin the analysis. WebMatrix will crawl through your website, mimicking what a search engine would, and record any issues it finds. The results can be seen in Figure 15, “Report Results”.
Figure 15. Report Results
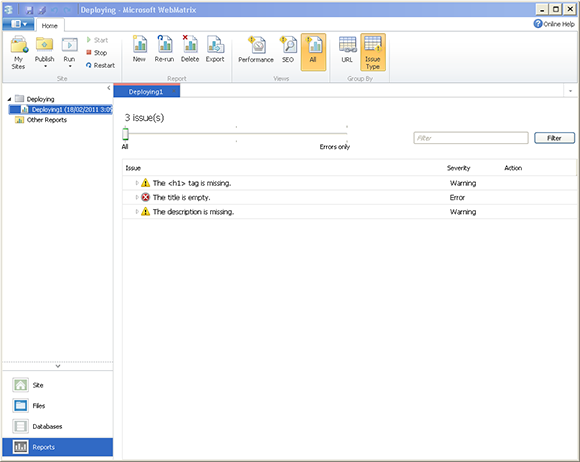
If there are any issues found, they’ll be grouped into an Information, Warning or Error category. The information can be filtered by adjusting the issues slide, so if you’re only interested in errors, slide it to Errors only. This can be seen in Figure 16, “Filtering Errors”.
Figure 16. Filtering Errors

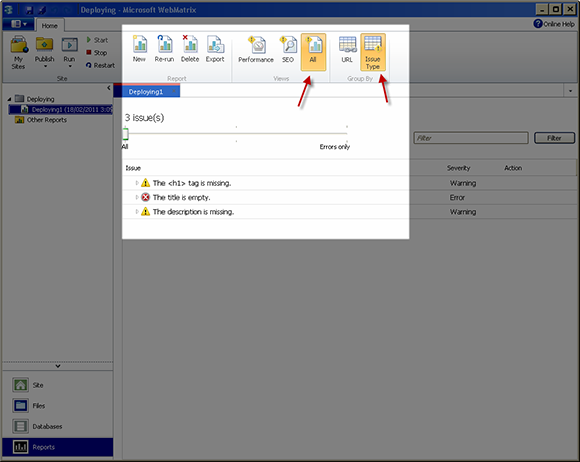
You can also filter errors from the menu. Selecting All and Issue Type displays each issue by its category. The result is displayed in Figure 17, “Issues by Category”.
Figure 17. Issues by Category
Selecting All and Performance groups each page in your website and displays load times. This helps you identify pages that are taking longer to load compared to others. The performance results are shown in Figure 18, “Performance Results”.
Figure 18. Performance Results

The information can be filtered by adjusting the timing slide, so if you’re only interested in high load pages, slide it to the higher load time. This can be seen in Figure 19, “Filtering performance results”.
Figure 19. Filtering Performance Results

To find out more information on each issue, click on the issue. This will expand the issue and give you a detailed description of the problem, and a recommendation on how to fix it. This is depicted in Figure 20, “Expanding the Issue”.
Figure 20, Expanding the Issue
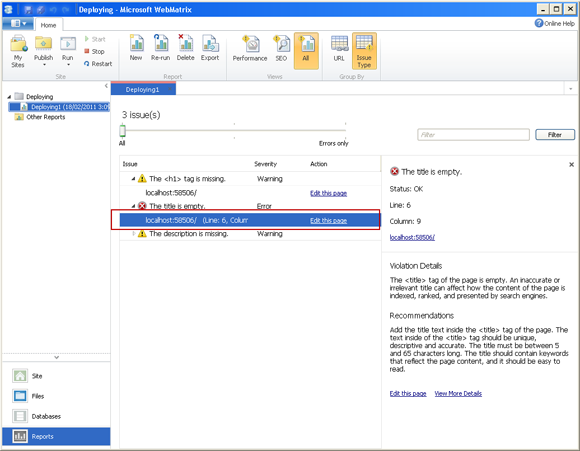
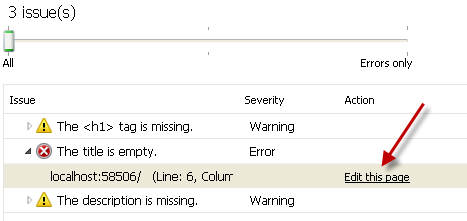
WebMatrix outlines details about the issues and a recommended fix for the problem. When you’re ready to address the issue, click Edit this page, as shown in Figure 21, “Addressing SEO Issues”.
Figure 21. Addressing SEO Issues
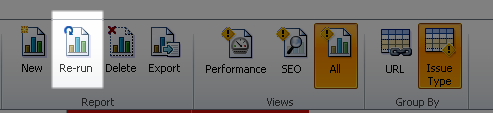
This opens the page and allows you to edit it at will. Once the issue has been addressed, click Re-run to generate the report again. This is illustrated in Figure 22, “Re-running Reports”.
Figure 22. Re-running Reports
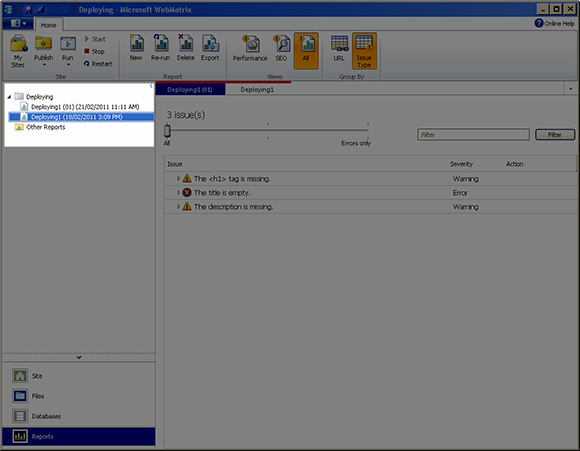
WebMatrix saves all the reports into individual items. These items give you the ability to view the results of each report. The items are available in the Reports Workspace. This is depicted in Figure 23, “View Report Results”.
Figure 23. View Report Results
Where To Go From Here
The next step to drive traffic to your site would be to look at how the major search engines implement crawling, searching and indexing websites. Each search engine has different rules they apply, so if you want to get noticed, read into what they look for. The major search engines are:
• Bing Webmaster Tools
• Google Webmaster Central
• Yahoo Site Explorer
Summary
As you saw in this article, WebMatrix has simplified the process of finding a web Hosting Service Provider as well as the publishing process. Publishing has always been a pain point for web developers, but it looks like this is a thing of the past—even more so if you use Web Deploy.
You’ve also seen how WebMatrix will generate reports that can help to make your website more SEO friendly, drive more traffic to your website, and improve your page ranking.
All in all, Microsoft is breaking new ground with WebMatrix providing complex and sophisticated ASP.NET based web design, development and publishing functionality in a tool that is easy to use and highly configurable. It will undoubtedly appeal to many developers.
Let’s finish up by seeing how much you picked up from the article. Come and take the short quiz.
The article sequence:
- Web App Gallery, Part 1
- Finding the Right CMS with Web App Gallery
- Building Dynamic Websites with WebMatrix
- Hosting, Publishing and Generating Traffic with WebMatrix
This tutorial has been made possible by the support of Microsoft. In cooperation with Microsoft and independently written by SitePoint, we strive to work together to develop the content that’s most useful and relevant to you.
 Malcolm Sheridan
Malcolm Sheridan is a Microsoft awarded MVP in ASP.NET, ASPInsider, Telerik Insider and a regular presenter at conferences and user groups throughout Australia and New Zealand. Follow him on twitter @malcolmsheridan.